Announcement

Collapse
No announcement yet.

Help please!

Collapse
X
 
  • Filter
  • Time
  • Show
Clear All
new posts

    Help please!

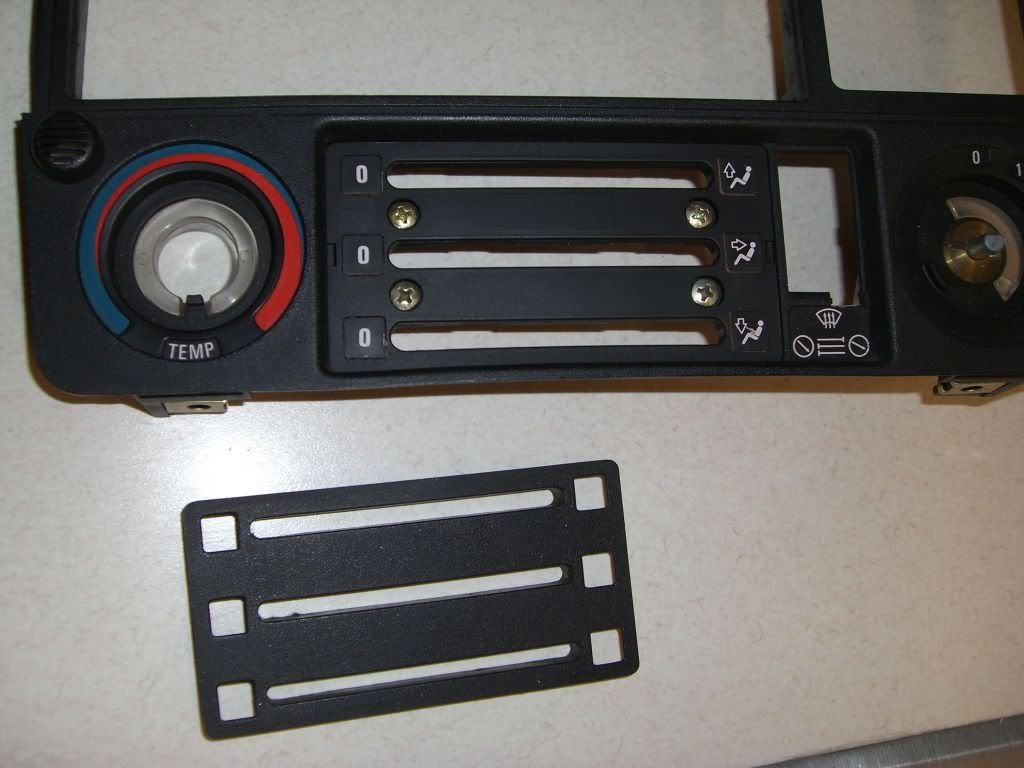
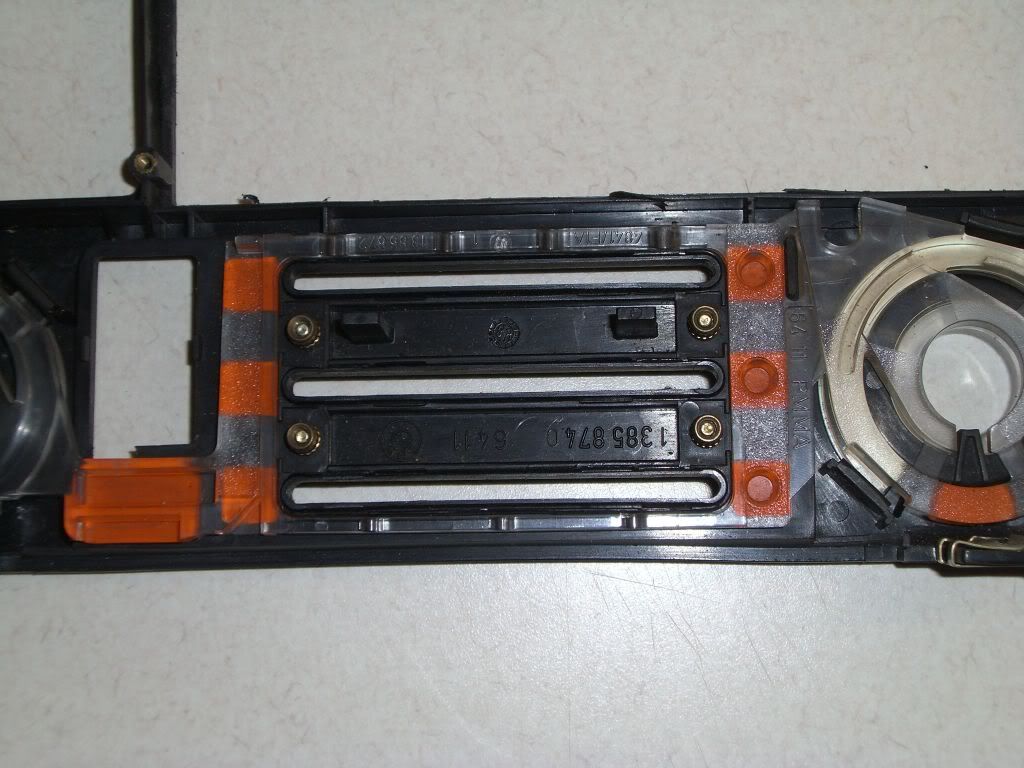
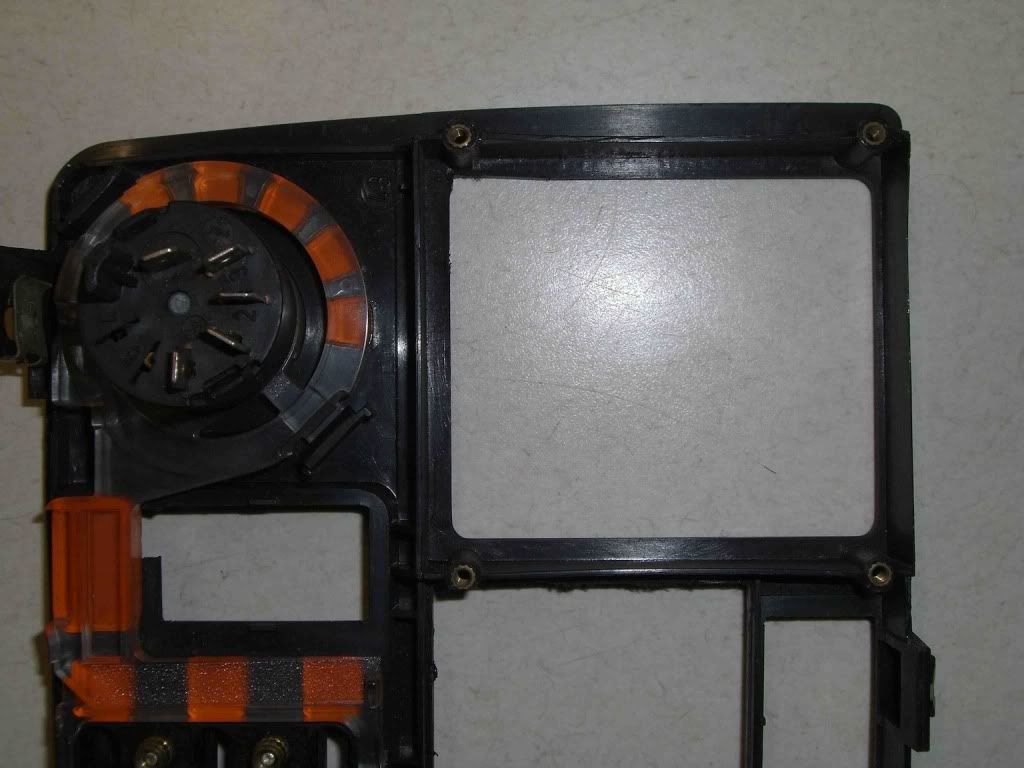
    Im trying to take the radio/HVAC panel out to replace the computer with an analog clock. On another forum, a poster said to remove the heat and fan knobs, then remove the lower panel. Problem is, there is no lower panel, and the sliders are all in the same piece. In other words, the entire panel is one piece. How do I go about removing this correctly? It is a 1987 325ic.

    Note; I found the two screws on the underside, and it will pull out about a half inch from the bottom, but the sliders seem to be catching...which is obvious as Im sure there are cables and/or some kind of linkage connected to them.

    Thanks!


    #2
    I've 'read' many posts, but without pics, it's hard to get a good visual. Well I have now repaired both my lights in each on me e30's. Here is my official write up and most importantly pictures! This version is the short cut (read: time saving) version versus complete removal of the front panel/fas

    Comment


      #3
      To get the panel out you remove the radio, pop out the switches above the radio, and disconnect same. Pull the knobs and slider buttons off the HVAC panel and pop the cover under the sliders off. Remove the four screws under the slider panel, the two screws that come up from underneath the panel surround and the two screws from the top of the panel that were covered by the switches.

      Hint, getting the bottom screws back in is easier if you remove the center console.
      The car makes it possible, but the driver makes it happen.
      Jim Levie, Huntsville, AL

      Comment


        #4
        Originally posted by jlevie View Post
        ...Pull the knobs and slider buttons off the HVAC panel and pop the cover under the sliders off.
        You lost me here...

        Pulling the knobs accomplishes nothing...its all the same piece, and the shafts are still in place.

        And what "cover" are to referencing?

        I guess Im missing something.

        Comment


          #5
          Under the slider buttons is a trim panel that covers the screws that attach the HVAC mechanism to the dash panel. It pulls straight out and once those screws are removed the dash panel is free of the HVAC stuff.

          Oh yeah, there is a threaded bushing under the fan speed knob that has to be removed.
          The car makes it possible, but the driver makes it happen.
          Jim Levie, Huntsville, AL

          Comment


            #6
            Are you saying these two (red and yellow Xs) panels are separate?

            Comment


              #7
              You don't need to do any of that to change out the OBC with the clock.

              Two screws can be accessed through the stereo slot if you remove the sleeve.
              The other two can be accessed if you go through the left side of the glovebox and remove the upper trim panel.

              You will need a tiny phillips and flexy fingers.
              Suspension tips here...
              http://www.r3vlimited.com/board/album.php?albumid=757

              sigpic

              Comment


                #8
                Originally posted by Gasturbine View Post
                Are you saying these two (red and yellow Xs) panels are separate?

                Yes. When the part marked with the red X is removed you'll see four screws.
                The car makes it possible, but the driver makes it happen.
                Jim Levie, Huntsville, AL

                Comment


                  #9
                  remove the panel from radio side pop out the switches above the radio, and disconnect same then next step is Pull the knobs and slider buttons off the HVAC panel and pop the cover under the sliders off.
                  4x4 lift kits

                  Comment


                    #10
                    Maybe pics will help.


                    Here you can see the panel cover removed and the four screws underneath.


                    And here it is from the back.

                    Comment


                      #11
                      Here is a pic of the four brass threaded inserts that hold the OBC/clock in place.

                      Comment

                      Working...
                      X