The 5 Year Restoration - E30 M3 Reborn

Collapse
X
 
  • Time
  • Show
"door"
Clear All
new posts
  • CurrusDei
    Mod Crazy
    • Mar 2014
    • 673

    #16
    2.5 Years In... M3 Build Thread...PAINT COMPLETE!

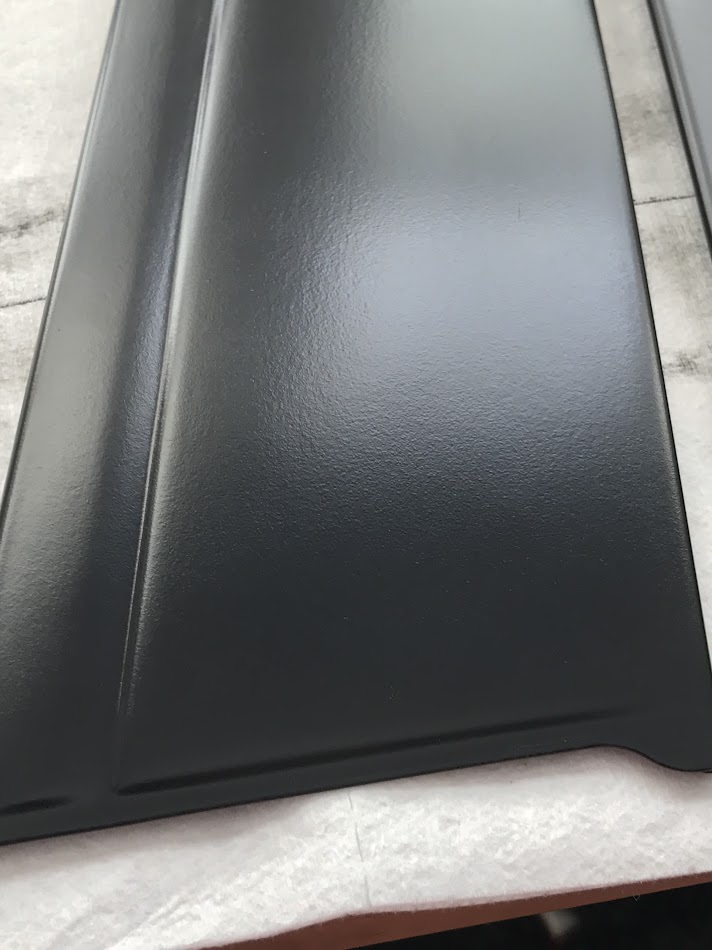
    New trunk trim and rivets!


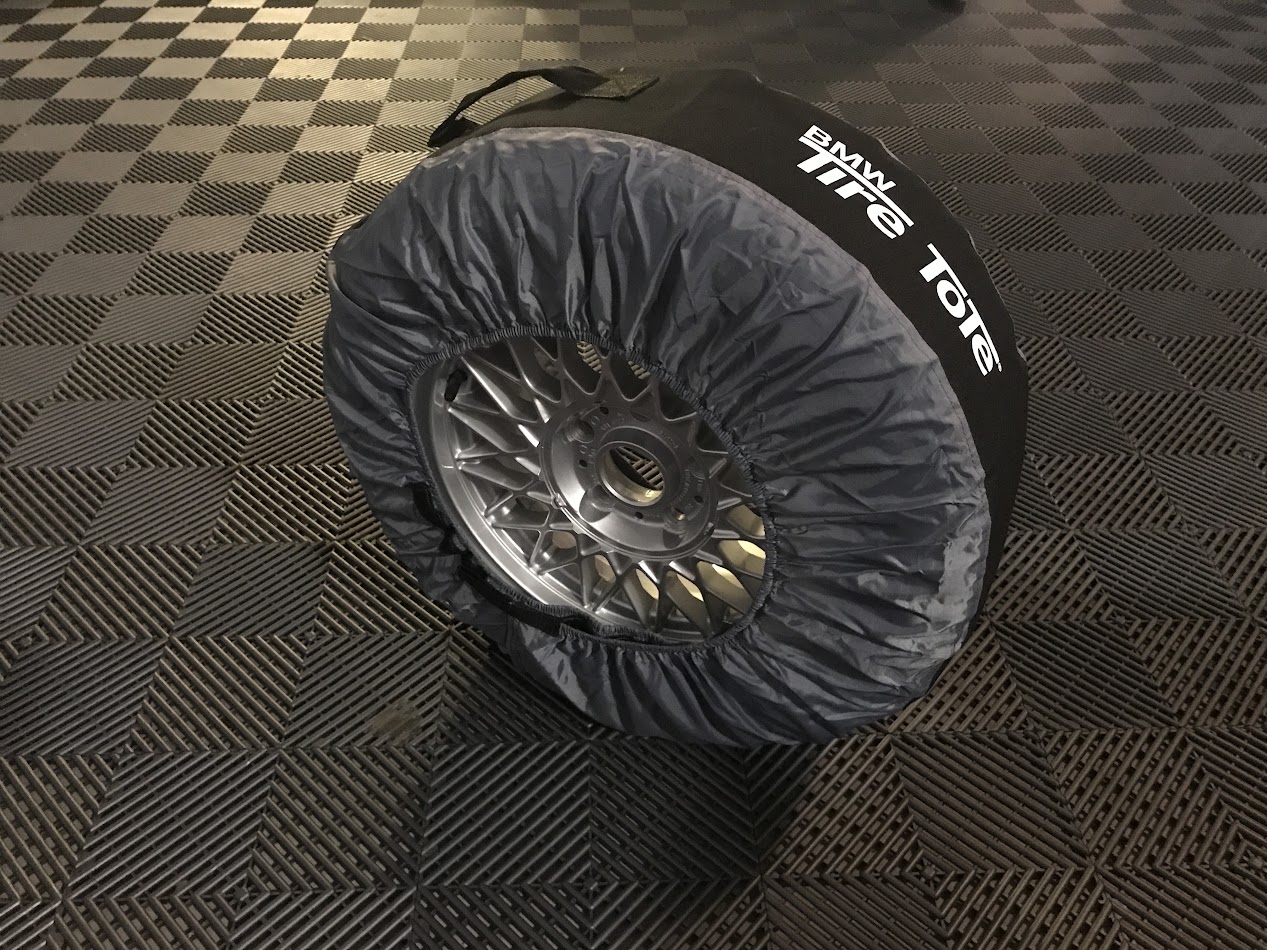
    Bought the tire tote (in the bag in the tire well) to keep my spare in, keep it from marring the paint job

    Door handle mechanisms

    Raw


    Plated


    Chromated


    Sent from my iPhone using Tapatalk
    _______________________________________________
    5 Year M3 Build, In Progress
    RMT200 Retrofit

    Comment

    • CurrusDei
      Mod Crazy
      • Mar 2014
      • 673

      #17
      2.5 Years In... M3 Build Thread...PAINT COMPLETE!

      Ha, thanks! A lot of this work happens at night - good way to wind down.

      Tonight's unwinding - driver door handle installed...

      Reminder pic from the disassembly, How all this goes back together...


      Shiny shiny


      Going back in!


      Sent from my iPhone using Tapatalk
      _______________________________________________
      5 Year M3 Build, In Progress
      RMT200 Retrofit

      Comment

      • CurrusDei
        Mod Crazy
        • Mar 2014
        • 673

        #18
        Door work!

        Some rubber bits that keep the metal mechanisms from contacting each other or the painted interior of the door...

        These little guys had to come from Germany and were $6 each. They're the size of a pencil eraser.


        Replaced these spacers as well.


        New weather stripping (installed the rear lower tracks as well, not pictured)


        Window gears back in place. This thing is like a contortionist. It can get into so many positions it took a minute to figure out the right one again.


        Passenger door also has its handle on now and both door strikers are well aligned so they open smoothly.

        Fuel tank access covers back on. Large one got a new gasket as it was only in good shape. Small one gasket was in great shape, put back.


        Sent from my iPhone using Tapatalk
        _______________________________________________
        5 Year M3 Build, In Progress
        RMT200 Retrofit

        Comment

        • CurrusDei
          Mod Crazy
          • Mar 2014
          • 673

          #19
          Too long since my last update. Parts are going steadily back on the car, noticing fewer boxes and more walking around room in the garage.

          Rear weather strips in


          All side trim is on. I was surprised by how poor the paint job was on the parts from BMW - every trim piece that came had to be repainted or returned.

          BMW's paint had rippling, pits, and other imperfections:


          My repaint (Wurth Trim Black):


          Reminder from disassembly


          New clips, new adhesives. Used a heavy duty 3m doublestick adhesive and JB WaterWeld (the putty - it smells awful at first when you mix it together, but is very effective)


          Rear windows have yet to be adjusted in the pic above. The front goes on as is, and then you adjust the rear to align.

          Top trim on driver door


          Lower trim on


          After doing one side, my observation was that the lower trim piece was really hard to get on over the rear trim on the door B pillar. On the passenger side i did things slightly differently.

          First, I aligned and installed the lower trim piece, fully pushing down the rear section, but not the front. This let me then install the B pillar trim piece (which goes behind the lower trim piece and under the top trim. Lastly, i installed the top trim piece - which is aligned in the rear. I clipped on the back of it, then left the rest unattached so that i could flex the front part of the top trim (the part that goes down in front of the side view mirror). With all this aligned I pressed in the fop trim, then pressed down on the bottom trim piece


          Little spoiler alert in that one :)
          _______________________________________________
          5 Year M3 Build, In Progress
          RMT200 Retrofit

          Comment

          • CurrusDei
            Mod Crazy
            • Mar 2014
            • 673

            #20
            Thanks for the kind words guys. I'm on vacation this week, so time to bring this thread current...

            Wiring Install.

            You saw the wiring removal and labeling. I was somewhat surprised that the reinstall was MUCH easier than the removal. This was because I took a lot of pictures, was very careful with labeling, and significantly improved the tape wrap coverage vs before when the tape was disintegrated and dry rotted.

            Replacement fuse box labels. These took a LONG time. Took millimeter measurements, and had to figure out what was written on my old ones. They weren't in awesome shape...


            I couldnt figure out the logo in the upper right. I even called owners of very low mileage cars, and did research for who printed BMW's fuse box circuit boards in the 80s. No luck, until I was rooting around in the garage for something else, and came across this guy in a pile of junk that came off the car - none of which has been thrown away, for instances like this.


            BINGO.


            Kroschu. Logo found.


            Final production:


            On


            Heading back in. Had to borrow a blanket to keep from scratching up the side - much more the white glove treatment going back together


            Driver footwell relays


            Taking time to get the harness secured and neat. Wont be complete until I put the dash back in, but this is still a huge improvement over the scattered mess i had when i started.


            Doors wiring cleaned up nicely


            Speaker Wire


            Replacement door tumbler - much better


            time for door lock actuators - had to cut new adhesive circles to cover the openings. Had some good 3m clearbra material on hand.


            Wired. The rest of the wiring runs low (see the zip ties - thats the factory method), and the wires that run up go through a couple of clips.


            Back to the floor, passenger side.


            and from the driver's side


            glamour shots


            Front


            Back


            Carpet going in


            Shaping foam back in


            Last edited by CurrusDei; 06-11-2017, 07:59 AM.
            _______________________________________________
            5 Year M3 Build, In Progress
            RMT200 Retrofit

            Comment

            • CurrusDei
              Mod Crazy
              • Mar 2014
              • 673

              #21
              Originally posted by bradnic
              Ok you need a vacation


              The wiring install is still missing the new fuse box cover i have, but its not going on until finishing touches. Dont want to risk scratching/breaking it while installing other motor stuff.

              Gas tank bump stop (this was missing when i got the car)


              Underbody trim (bday present from sis - yeh im hard to shop for)


              some slight sagging in the rear bumper plastic - probably standard for age and fittament in the 80s. my new bumpers do this sometimes.


              Some of the floor drain plugs were a little beat. One in particular wouldnt stay in, so I upgraded them all to the new style which has a heat melt seal around the edge. Heat gun on them for 5 seconds, press down, and done.


              Trunk time


              no metal on metal please - cut a foam gasket to go around the edge


              Wires wires wires wires


              Upholstery (also, diaper boxes make good hardware storage)


              Put this guy on the top of the spare tire wheel post so the carpet could go back in. It sits a little high, might be able to adjust or I might go to the post cap that isnt also a center cap wrench.


              Rear bulkhead cover. Mine was a little worn, so i had it covered in the same vinyl that the forward headliner is made of. Looks a lot better than the cheap paper material it had before


              Scoring for plugs. The red spots were on the front as well - not sure how that happened.


              People who call oil "black gold" havent seen the pricing on these boys. OEM door weather strip...


              Speeaking of birthday presents....

              I bought these thinking they were likely going NLA. Then i learned BMW has over 600 in stock in Germany. Guess they know what they have and are trying to keep them to M3 models because pricing is


              Didnt put these on yet, just laid down for pics. Will go on with finishing touches (roundel, badges, etc)

              _______________________________________________
              5 Year M3 Build, In Progress
              RMT200 Retrofit

              Comment

              • CurrusDei
                Mod Crazy
                • Mar 2014
                • 673

                #22
                The seats were done by Marietta Auto Trim - they are very far from glossy. Actually contrasts significantly with the door cards.

                _______________________________________________
                5 Year M3 Build, In Progress
                RMT200 Retrofit

                Comment

                • CurrusDei
                  Mod Crazy
                  • Mar 2014
                  • 673

                  #23
                  Originally posted by iliad
                  Incredible work!
                  Just read through the whole thread.
                  Hope to see this beauty at The Vintage this year!
                  ;D


                  I'm running full speed to finish her up. Been getting a lot of boxes lately. I spent my free time this weekend with degreaser and a pressure washer cleaning off the underside. Very dirty job, but i decided i couldnt leave the underside dirty when the rest of the car was so clean. I'm using an engine degreaser gel, and just got a short handle for my pressure washer. Thankfully temps this weekend will be warm so i can finish that part up and start the driveshaft/heat shielding work

                  Remaining to be installed
                  • Headlights (have)
                  • Brakes (in mail this week)
                  • Gauge restoration (going to Bavrest right after the motor starts up - hopefully this weekend if the brakes come in)
                  • Drive shaft (have)
                  • Front/Rear Glass (have)
                  • Heat shielding/underbody trim (have)
                  • Rear bumper trim behind wheels (in paint)
                  • Midsection (in mail)
                  • Evo 3 muffler (in mail)
                  • AC system (last parts arriving today)
                  • Bumper (complete, just need to mount)
                  • Evo Bumper and Hood seals (have)
                  • A few remaining factory decals (have)
                  • Spare wheel/tire (need)
                  • Dash/wiring (have, testing electrics before installing)
                  • M3 door seals (still off because of electrical testing)
                  • Door film (in mail - off for electrical testing)
                  • New Switches (in mail)
                  • E36 hand brake cover (in mail)
                  • Steering fluid (trans fluid, diff fluid, coolant are in)
                  • Badges
                  • A few other things im sure I'm forgetting


                  Will post update soon
                  Last edited by CurrusDei; 03-06-2019, 08:08 AM.
                  _______________________________________________
                  5 Year M3 Build, In Progress
                  RMT200 Retrofit

                  Comment

                  • CurrusDei
                    Mod Crazy
                    • Mar 2014
                    • 673

                    #24
                    Lot going on. Working on the car whenever i have a free minute so no time to post updates. Pics will follow once i have the car off to the glass, exhaust, ac, other guys, but quickly:

                    Car is registered for the Vintage. It starts on my birthday this year, so that had to be my finish line.

                    All AC hardware installed (specialty shop will have to charge and make the connections at the compressor work, may require some hose customization). Everything is new except one line that was NLA, and I had it cleaned by a specialty AC shop

                    Dash in
                    Radio/controls in
                    All electricals work - everything. no shorts or other gremlins to chase
                    New signal stalk, refreshed cruise control and wiper stalk
                    New sunroof motor in (works)
                    Gauges restored by BavRest and installed
                    center console in
                    Shifter cover in
                    Door vapor barrier in
                    Door cards in
                    ///M Door sill covers in
                    B pillar covers in
                    engine wiring covers in
                    New fuse box cover in
                    Euro elipsoid smileys in with new euro connectors(4 bulb high beams function, city lights wired)
                    Front grilles (all 3) in
                    Front sway bar in
                    New Bosch battery with OEM vent in
                    New drive shaft center support bearing installed
                    New drive shaft guide bushing installed (this was a pain)


                    To do

                    Rear reflectors: should arrive tonight, putting in this evening hopefully

                    Rear sway bar: in this evening hopefully

                    Drive shaft: rear half is in. I bought the wrong size guibo, new one gets here tomorrow. Drive shaft should be done tomorrow night, then bolt up the front control arm lollipops and it should spend its first night on its own tires in about half a decade.

                    Glass: Have all the glass and found an expert shop to do it (they have done several E30 M3 restorations). The big glass guys all didn't want to touch it, and most hemmed and hawed about how the glass doesnt need to be glued in, they've done 5,000 of them so they know...blah blah. My only response was that there arent even 5k of these in the U.S. Anyways I'm hoping to get it to the glass shop late this week - open header, no windshield drive should be interesting

                    Underbody shields: I did some work with degreaser and a pressure sprayer to clean up the underside. Looking better. Will install heat shields tomorrow probably.

                    Hubs: Torque to spec when on ground, install lock nuts, center caps

                    Exhaust: Evo III muffler and VSR center in hand - going to have a really great welder put them on. I'll post some of his work once he confirms his availability, its weldporn level work. Contrast that to my old exhaust's welds, one of which has about a 1cm long stick weld section standing up out of it. Good metaphor for this whole process

                    Spare: Extra spare wheel should be here by tomorrow, getting it refurbished and putting on a new tire

                    Sunroof: waiting on two little rivets from Germany, then it will all go together. the rivets my upholstery shop used were too tall and wouldn't fit in the track. Putting the rivets in myself by hand, then it should all go together

                    Bumper: put it on

                    Body: Fine tune adjustment of hood/trunk/rear window to get even gaps. Install Evo hood gaskets

                    Ceramic/Film: Still considering here. There are some seriously talented ceramic coating and paint protection film guys in the area that I'm thinking about having do their "armored car" package on the car to protect it. Still undecided

                    My fingernails are pretty much always dirty these days. Also, fewer boxes of parts on the shelves. On the home stretch.
                    _______________________________________________
                    5 Year M3 Build, In Progress
                    RMT200 Retrofit

                    Comment

                    • CurrusDei
                      Mod Crazy
                      • Mar 2014
                      • 673

                      #25
                      Cutting new moisture barriers. i kept the old ones to trace and ordered new material from BMW


                      Front stripes


                      door sills


                      _______________________________________________
                      5 Year M3 Build, In Progress
                      RMT200 Retrofit

                      Comment

                      • CurrusDei
                        Mod Crazy
                        • Mar 2014
                        • 673

                        #26
                        More interior


                        This is a cool piece of the car. Prior owners left their names on the back of a door panel. We all wrote our names on the other side of the panel as well (not pictured)


                        New cigarette lighter element and plug


                        Radio trim and climate controls. While i liked the flush mount panel I made earlier, the modifications warped the top line of the face plate so that it didnt sit flush against the dash. I opted to get a new face plate and just have the radio stick out a bit, which the original ones did anyways.


                        Whoa that looks like a car...


                        So i really dont like the plastic handle that comes on the M3's hand brake. I dont like it enough that i ordered an e36 hand brake, and used a torch to heat it up until i could pull off the leather handle, put it on my e30 hand brake, and junk the rest of the now warped e36 handbrake


                        a zip tie wasnt enough to hold on the brake handle boot, so i tightened a clamp down very hard to compress the leather and plastic to make a groove for the cable tie to hold onto


                        Took off a couple days later. Looks good. Still didnt work


                        Right now its on there with a metal clamp under the leather boot. Thinking about alternatives. The stitch pattern between the leather boot and handle do match exactly.

                        _______________________________________________
                        5 Year M3 Build, In Progress
                        RMT200 Retrofit

                        Comment

                        • CurrusDei
                          Mod Crazy
                          • Mar 2014
                          • 673

                          #27
                          Back home – side skirts going on


                          Dark tinted rear reflectors to go with the euro front with no reflectors


                          Still fiddling with that damn sunroof. Worst part of the build. My interior guy used a huge rivet to attach the connector arms that hold on the cloth cover. Wouldn’t fit into the track, so I had to drill them out and order some of these guys from Germany – they’re tiny.


                          Leather working kit off amazon, BFH, and there you go


                          Driver side door stickers


                          Evo hood seal in on undamaged side


                          It is time.
                          Went on with the undertray attached, slid in perfectly. I installed the front gasket afterward.


                          I’m not one for “eyeballing it”


                          ….and I also apparently forgot to take a pic of it when I put the badge on.
                          [photo coming later]

                          Alright, here she is 99% done….

                          _______________________________________________
                          5 Year M3 Build, In Progress
                          RMT200 Retrofit

                          Comment

                          Working...