
test 2
-
-
Cutting new moisture barriers. i kept the old ones to trace and ordered new material from BMW
Front stripes
door sills
Comment
-
my replacement dash cracked in storage (store these things on their faces, or upside down, not sitting uprright. it puts pressurte on the thin edge that faces the windshield and will crack it). so heres dash number 3 getting the insulation transfer, clean ac vents, and wiring looms.
replacing old, deteriorated foam tape
Comment
-
AC Lines Going in. As of this writing the AC still isnt done because im finding that the new style bracket, while it fits on the engine, doesnt position the larger fitting on the compressor (which receives the larger, low side line from the expansion valve) high enough for the line to clear the frame rail so that it wont rub on the body. Also the new style bracket only mounts the top of the compressor with a single bracket, which is not strong enough to keep the compressor pulley square with the drive pulley when tensioned. As a result, the compressor pulley angles slightly and freys the edges of the drive belt.
TLDR: I'm going back to the old style bracket and having my factory compressor rebuilt.
Anyway, the lines:
This set runs under the passenger side of the dash and is the only set of lines that werent replaced with new (theyre NLA). I foundthe nicest used set i could and had them professionally cleaned out by an AC shop
and re-insulated the low side line
All new o-rings from BMW
I used PAG 100 oil to soak the o-rings and used mineral oil from an AC shop to lube the threads so they dont seize up. everything went together smoothly, but some of the lines are in tight spaces so wrench clearance is minimal. Just takes patience
New expansion valve I've had waiting for years
This is a tight fit
Oh yeah and dont forget to put the cover on the lines before you install them, so you dont have to undo the whole thing and slide the cover over. This wasnt my favorite part of the project
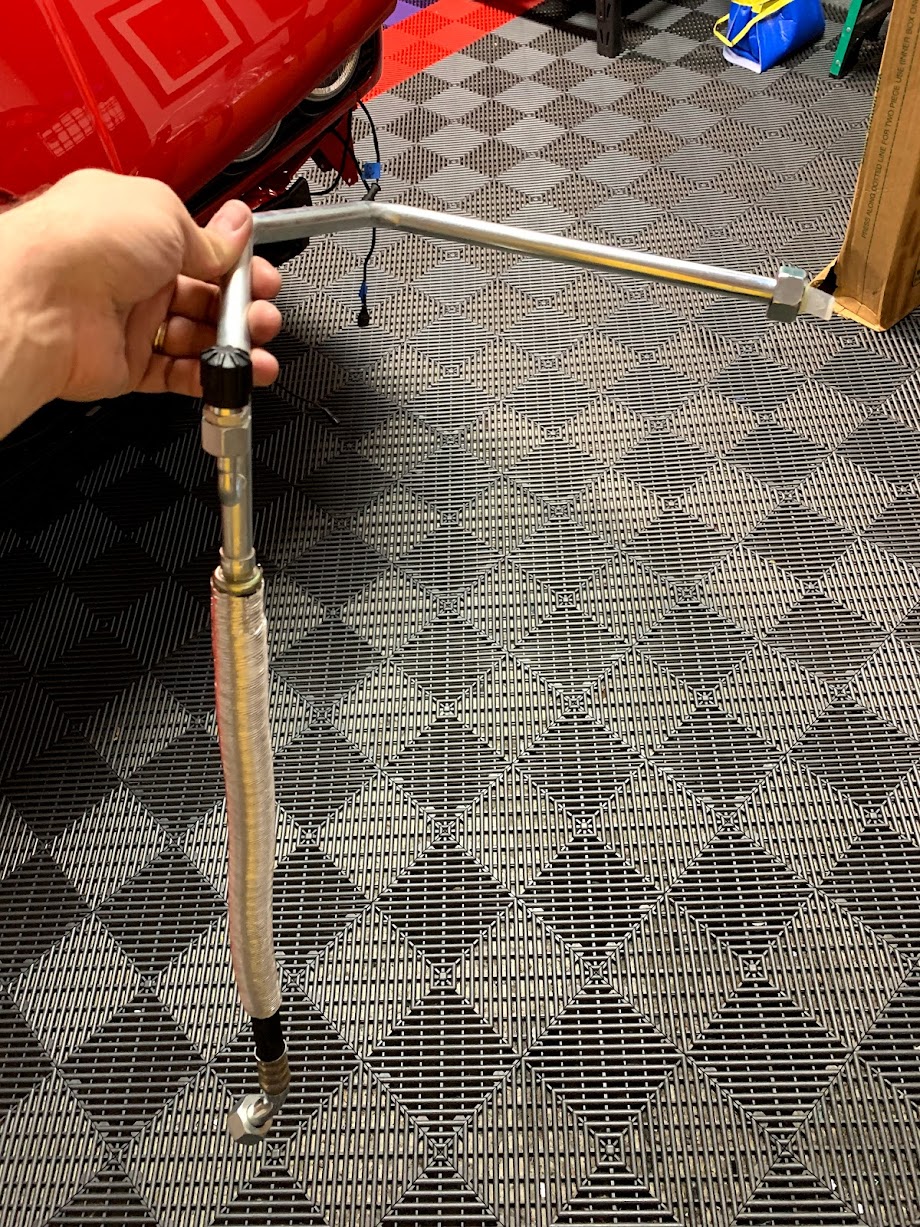
New R134a low side line
in place. sits higher than the old low side line, which follows the lower edge of the shock tower
new high side line (connects drier to expansion valve). Its the gold line running just under the hood seal.
Comment
-
Recall I upgraded to a parallel flow condensor, but the line placement remains the same upper port on the Condensor receives the line from the compressor
Lower condensor port receives the line that goes to the drier
passenger side wired
driver side wired
Glove box roof was a little scuffed for my taste and replacements are cheap. Transferred the insulation
I'll have to get some pics of this, guess i forgot to snap one, but i put the glove box in and found yet another NLA part (the glovebox light switch) that i had to buy on ebay from someone who still had one
[pictures to come]Comment
-
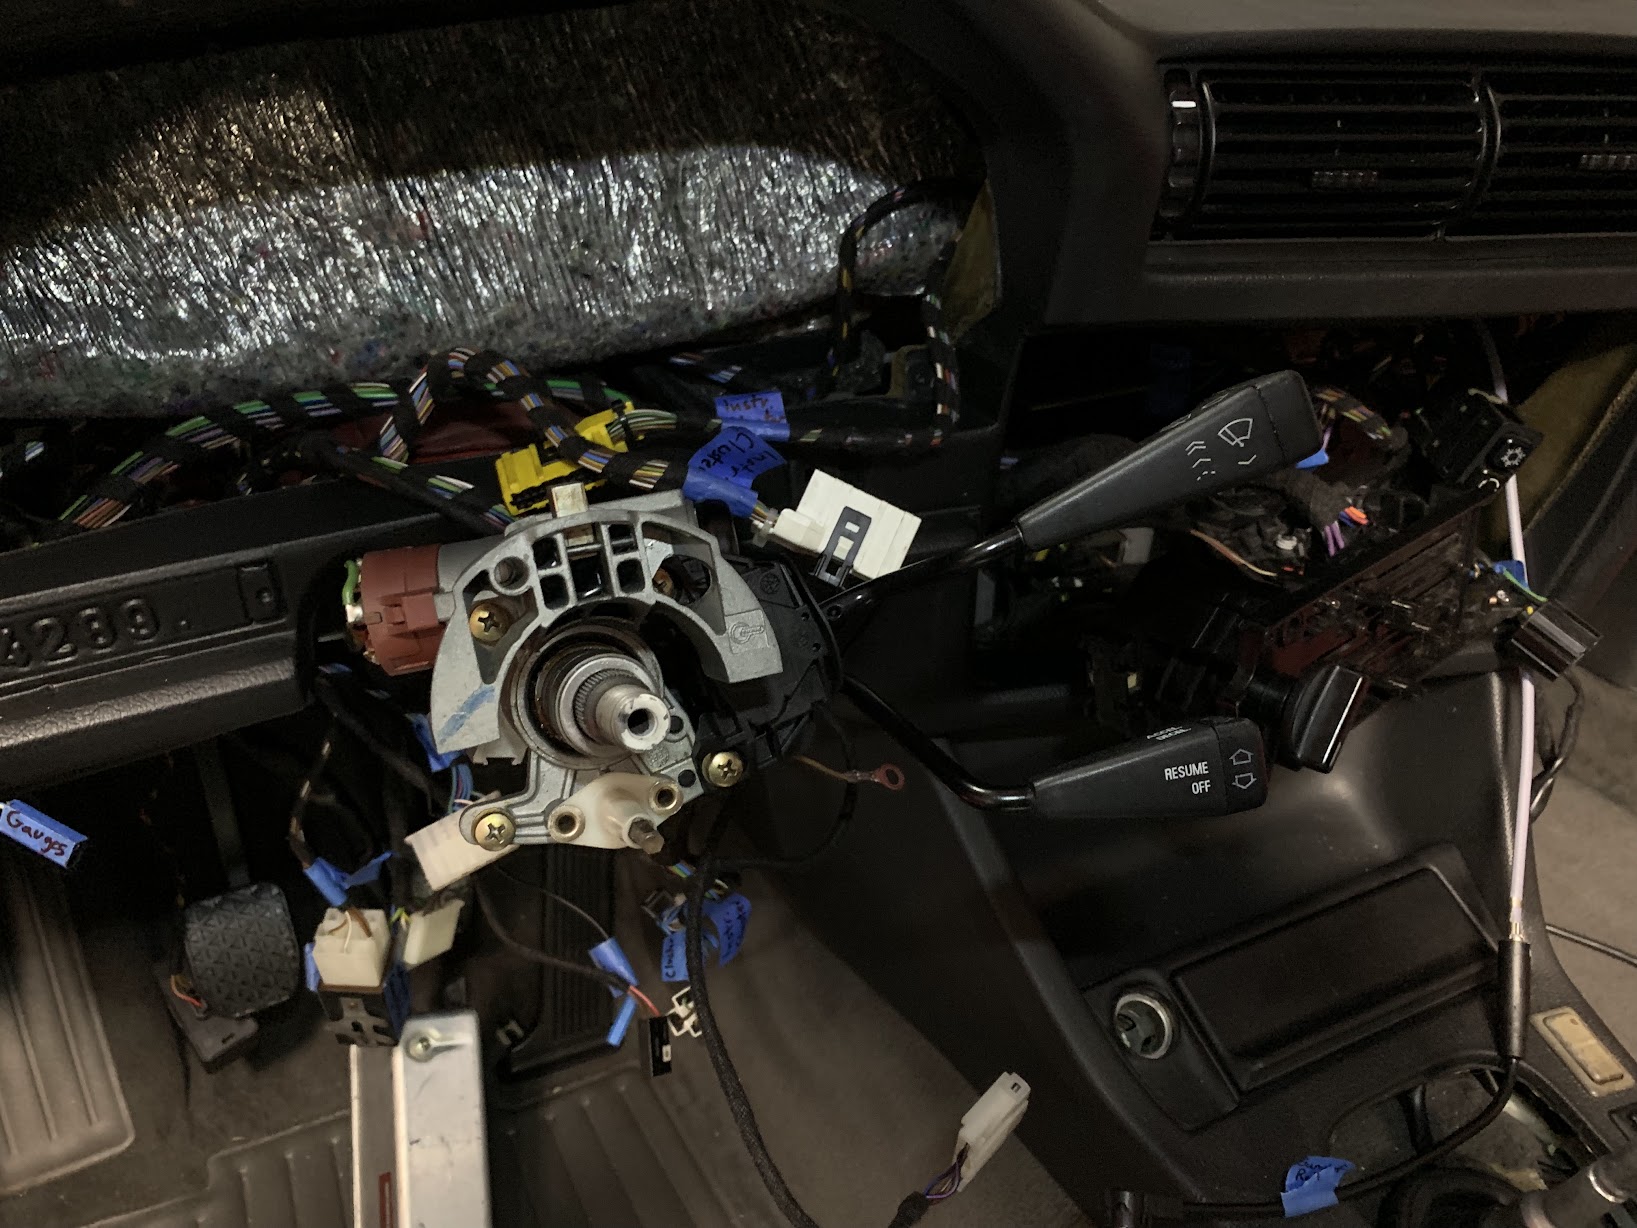
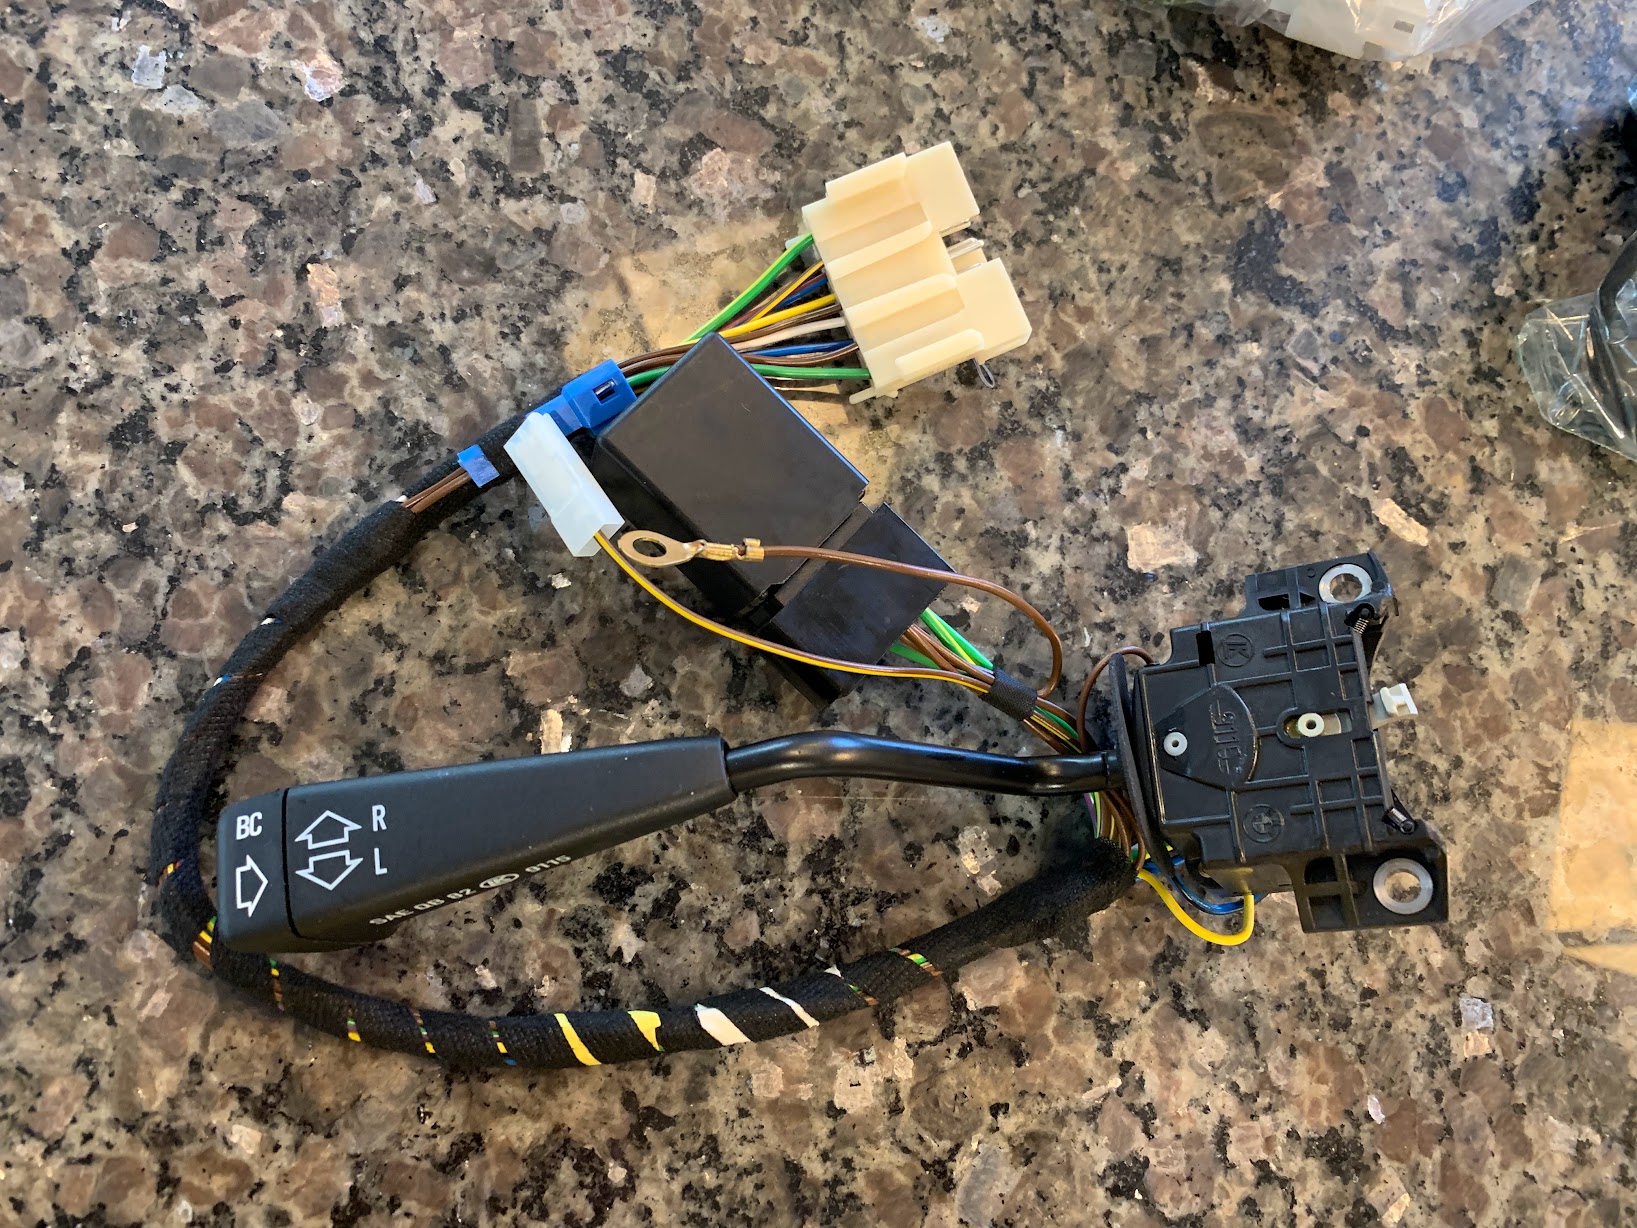
Stalks being re-wired
My old turn signal stalk was faded and worn out. The non-airbag turn signal stalks are twice as expensive as the airbag car turn signal stalks. Since my car was made late enough to have airbag provision wiring but no airbag, i tried the airbag car switch. Works perfectly. Wouldnt be surprised if it worked for older build dates as well but try at your own risk. I had to re-wrap the wires on it, even new from BMW the wires were sticky so it go the same treatment as the rest of the wiring - cleaned and re-tesa taped.
Top half of steering column cover on
Bottom half
Driver side foot well buttoned up
Comment
-
More interior
This is a cool piece of the car. Prior owners left their names on the back of a door panel. We all wrote our names on the other side of the panel as well (not pictured)
New cigarette lighter element and plug
Radio trim and climate controls. While i liked the flush mount panel I made earlier, the modifications warped the top line of the face plate so that it didnt sit flush against the dash. I opted to get a new face plate and just have the radio stick out a bit, which the original ones did anyways.
Whoa that looks like a car...
So i really dont like the plastic handle that comes on the M3's hand brake. I dont like it enough that i ordered an e36 hand brake, and used a torch to heat it up until i could pull off the leather handle, put it on my e30 hand brake, and junk the rest of the now warped e36 handbrake
a zip tie wasnt enough to hold on the brake handle boot, so i tightened a clamp down very hard to compress the leather and plastic to make a groove for the cable tie to hold onto
Took off a couple days later. Looks good. Still didnt work
Right now its on there with a metal clamp under the leather boot. Thinking about alternatives. The stitch pattern between the leather boot and handle do match exactly.
Comment
-
boot clean
Cleaning up the top of the airbox. I removed the clips that fasten the two halves together because i found freshly zinc'd gold ones
Not sure if the film on here was just due to age or if it was cosmoline of what, but my steam cleaner was able to blast it off (see the beninnings of this around the BOSCH logo)
more blasting and cleaning. this felt like trying to detail a waffle
old vibration dampening mounts removed (they came off easily with a strap wrench)
New ones on.
Airbox on. I'll post pics of the gold closing clamps later
Other end of the car, i was missing some fittings
filled
fitted
Comment
-
Have you considered an oetiker clamp for the parking brake handle ?Lorin

Originally posted by slammin.e28Comment
-
I have, but i'd have to take it apart to get it in place (wouldnt fit over the brake handle and im not about to take that thing off the brake lever). worth a try when i get the car back in a couple weeksOriginally posted by LJ851 View PostComment
-
I saw pics of the smashed fender on the M3 at Vintage, but didn’t realize that was yours... I’m sorry but I’m sure at this point it’s just one more thing on the listSimon
Current Cars:
-1999 996.1 911 4/98 3.8L 6-Speed, 21st Century Beetle

Make R3V Great Again -2020Comment
-
new fuse box lid.note that the new one has the clip on the top, which had broken off the old one
The new cover would not fit down over the fuse box far enough for the clip to snap into place. this is probably due to the fuse box changing shape slightly overr the years with engine heat cycles. i didnt realize how tight the clearance is with the hood insulation,k so i left the fuse box slightly ajar when i drove to get my exhaust put on. Bad idea. The hood insulation scuffed up the fuse box cover, necesitating a replacement
This time I used screws on both sides of the cover where the provisions are. I tightened them carefully so that I didnt crack anything, and found that the gasket in the cover compressed enough with the screws that the plastic clip did pop down into place after the screws were installed
Driveshaft time (if that guibo looks too big its because it is. accidentally ordered the wrong one. had to get the correct one, which is smaller
New driveshaft decal
Half together
This guy was a pain. Output shaft centering sleeve. Its a press fit in, and its one of those "while you're in there" items that I knew i should replace. Getting it out was a challenge. The bentley calls for filling the cavity behind the bushing as well as the inner diameter with grease, then inserting a specific size metal punch that is the exact same diameter as the inner diameter of the bushing, inmto the bushing. amd striking it with a hammer, which sould use the hydraulic pressure from the grease to push the bearing out. As you might guess, i didnt have the punch, and even if i did, i think my bearing was done enough that the grease would have gotten through rather than pushing the bearin out.
So, i tried heat. I tried a jerry rigged puller. I tried picks. Ultimately it became a precision hacksaw operation after i burned out the rest of the bearing. I took the blade off the hacksaw, and slowly cut through the outer wall of the bushing on the top and bottom. when i had cut enough to relieve the press fit tension, it fell right out. Not a spec of damage to the drive shaft. Pressing the new one in took about 15 seconds
New
Guibo on
Ready
Compared to removal this thing went back together like a well oiled rifle. Getting 30 years of gunk out probably helped there
I'll try to remember to get a pic of the guibo mounted to the back of the trans
{photo coming}Comment
-
Thanks. Yeh, one i wish wasnt there, but nothing i can do about it. Going with a new genuine bmw fender from Germany and will keep the old one for wall art/optional future repair.Originally posted by 2mAn View Post
For those of you who didnt see, I took the car to an AC shop to get my new system working. Left it there to head to work. An hour later got a call from a guy saying he “scratched” it
...wiith the back side of a utility truck .Thankfully no damage under the fender or in the engine bay, and I already had the front bumper off. Replacing the fender and respray of the hood should get it back to amazing shape. Still, doesn’t feel great to deal with at the end of a 5 year restoration effort.
It wasn’t the shop’s fault, just a random guy driving in the parking lot, and he filed a police report and gave me his insurance info. The claim has been made and the repair is underway. Im going to have to talk to his insurance co about diminished value though. Went from being a no accident car to one with an accident on its record.Comment
-
Front and rear sways. These were a pain.
Front - bushings were dry here. I found the key was to get them lubed so I could repositiion things as needed.
new brackets on
Getting these on was a fight. It helped to have some extra fasteners around. I fashioned a setup where i was able to gradually lift the rear of the mount into place using a long threaded piece with washers and two nuts at the top to hold the threaded rod stationary while i tightened the nut bewlow the bracket, bringing it up the rod until the gap was closed.
Then i brought out the vise grips to hold the bracket to the subframe while i installed the hardware
I used some little brass tabs as buffers to keep the finish from being marred
Hardware in
AFter that mess the end links are a cakewalk. fasteners on both ends.They werent torqued down here, but everythin is now fully torqued and marked to indicate the same
I'd like to say the rear was easier, but it wasnt. it was more of a contortionist act trying to get that bar over the diff and to its mounting points. disconnecting the rear driver's side shock helped, but it was a lot of fiddling to get it to go through. Finally it did, and I realized I wasnt happy with the dirt on the underside of the car. That got addressed later - no pics yet, but its close to spotless under there now
Now these lollipops were the worst. Maybe my expectations were just off because i pulled the old ones off by hand and thought the new ones woyld go on as easily. Wrong. I am just realizing i dont have pics of them installed - not surprised given how frustrating it was. I'll add more pics later, but heres the home-depot/autozone bushing presser tool i fabbed up that got the job done
Comment
-
"replacing old, deteriorated foam tape" for center air vent
Is this foam tape OEM? Can You throw Part No.Comment


Comment