
For my first post here, I figure I better make it a good one!
I have been an e30 fan for a while now, and I bought my first one, a 1989 convertible, a few years back. I have been searching ever since for a late model 325is, 5-speed, in red or white. Well those don’t come up very often locally, and after about 3 years I found a car I could not pass up on. It was in excellent condition once you saw past a few blemishes. It was covered in 21 years of door dings, 246K miles, had window tint that had failed and begun to peel and bubble, the head gasket was leaking, and the paint was cooked on the mirrors and the front valence. However, the rest of the paint was good, the interior was pristine other than a cracked dash, and it started and ran great.
I found a receipt in the glove box for a best BMW shop in town. The previous owner took it in for an $86 oil change…ouch. I went over to the shop with the VIN to see if they had records, and they had records of all maintenance going back to 2003. They knew the owner; I guess she owns a restaurant here. When I get the car all done, I think I might stop by for lunch and introduce myself. I believe she might have been the original owner of the car. That would make me the second owner on both my e30s!
Got it home and started on projects immediately. I had the old tint removed, and I like the “fishbowl” look, so I did not re-tint. Next was a trip to the local auto paint store to get some color matched acrylic urethane. A couple of coats (and a few hours of labor) later, I had the mirrors and front valence re-sprayed and looking good. The vents for the front brake calipers looked good, so I did not spray them…only to find out they were a couple of shades darker when I reinstalled them. Damn!
I kept pushing forward, tackling the head gasket next. I had never done anything this extensive with a car engine, but thanks to the Bently manual, it was very doable. It took me about 4 nights after work and a weekend to get a new gasket in, timing belt, coolant flush, and a few other things.
As winter approached, I wanted a winter project. The car needed a serious refresh of the suspension. The rear shocks were shot, and there were all sorts of noises and vibrations when driving. Not to mention it cornered like a truck. This was not acceptable! I began reading about suspension setups, what to replace, etc. I decided on what is probably the most common suspension upgrade: H&R Sport Springs, Bilstein Sport Shocks, and Suspension Techniques front and rear swaybars. I also decided to replace a few other “wear” parts while I was in there. I had a terrible vibration under load. Went away when the clutch went in. After researching online, I figured it was the flex-disc or perhaps the center support bearing. They were getting replaced too.
I took a TON of pictures throughout the project, I think there are 340 posted below (feel free to count!) I was really inspired by Simon S’ post here: http://www.r3vlimited.com/board/showthread.php?t=159148 . I think that’s the quality of work we can all aspire too (at least me, anyways).
So I began. Started jacking the car up first

I removed the lock rings and loosened the rear axle nut before jacking up the rear of the car.

Removed and loosened

I decided to use my Harbor Freight breaker bar while loosening the axle nuts…fail.

I also removed the interior carpet to get to the rear shock mount while the back of the car was on the ground. Any idea what this mass of wires is for???


<
The rear shock mounts had probably seen better days. I added that to my list to replace while I was there.
<
Next I began removing the exhaust. The exhaust was replaced a few months before I bought it, and I hate the single pipe.
<
Began unbolting
<
<
The exhaust hanger looked like crap…added to the list to replace
<
Rear exhaust section removed.
<
I noticed at this point that one of the CV boots was toast, and the rest were not far from behind…added to the list.
<
Here is the car up on jack stands. I do have jack stands behind the stack of wood blocks up front. The wood blocks were just a backup. I have this fear of being crushed under a car for days until someone finds me. I figured a little redundancy wouldn’t hurt.
<
<
<
Messing around with the camera, I kind of like this one
<
Front exhaust section removed…finally.
<
I started to build a small pile of parts
<
Found a great place to store the rear seat for a few weeks.
<
I began work on the rear of the car, it seemed like it would be easier. Unbolted the strut at the bottom. You can see another shot CV boot in this picture.
<
<
Removed the nuts on top. I did not take out the carpet completely, just pushed it out of the way. That did not give me much room for a ratchet, so the air ratchet really made the job easy
<
Passenger side strut removed
<
And began a box of old parts
<
The shock tower needed some cleanup
<
Driver’s side strut removed
<
<
I am starting to like this thing!
<
Now work began on the driveshaft
<
The center support bearing looked descent, but it was going regardless
<
<
Found this label on the driveshaft, thought it was picture worthy.
<
I did not have a long enough wrench to break the nuts free between the driveshaft and the differential. Luckily I had an allen the same size as the nuts and improvised with a ratchet for more leverage. Not pretty, but it worked.
<
Driveshaft out! Note the vibration dampener. That was getting thrown out.
<
The CSB looked good, not the cause of my vibrations I was experiencing.
<
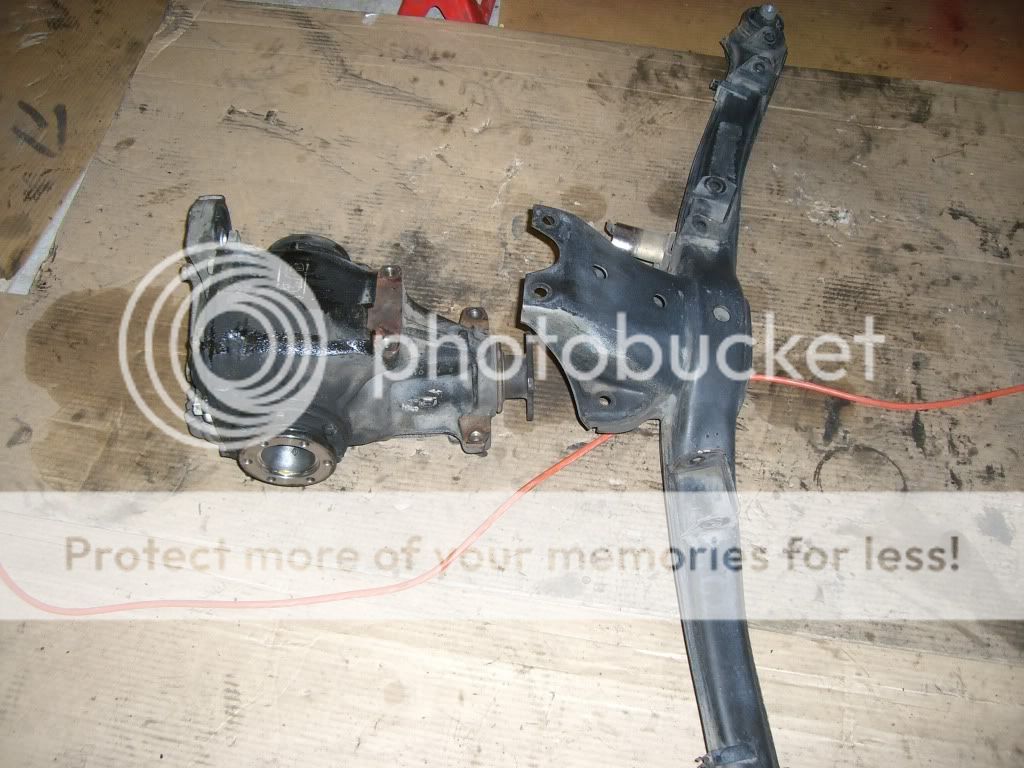
The differential with the driveshaft removed.
<
Next I began on removing the shift linkage
<
<
After battling with the bitch clip for 20 minutes or so, I gave up and went inside to drink beer. I’ll finish the rest of the linkage removal another day.
<
Started to build a pile of parts to get put back on.
<
I decided to go back to the rear wheels and continue work there. Removed the brake calipers and rotors.
<
<
Driver’s side spring removed
<
And passengers out too
<
At some point in the project I decided to replace the subframe bushings, trailing arm bushings, and control arm bushings. The car needed it. I didn’t want a nice new suspension with crappy worn out bushings. I unbolted the brake hoses, e-brake cables, and ABS sensors, and now was ready to drop the subframe. The driver’s side came right off of the car, but the passenger’s side was a real pain. I tried everything I could think of. I had to dig the head of the bolt out in the passenger cabin to spray PB Blaster in there to let it release.
<
The bolt is under that painted bubble looking spot. This is a pic of the driver’s side
<
I was able to knock the bolt into the cabin, but the subframe still would not release. After lots of banging, hammering, prying, drilling, and copious swearing, it let go. Note all the rubber chunks on the ground from drilling the center of the bushing out.
<
Subframe free!
<
Looked a little different now!
<
Began disassembly. I’m lazy, air tools help make it easy.
<
<
<
I had a couple of stickers arrive in the mail. Figure I need to show my support. I could not decide on red or white, so I bought both.
<
Next project was removing the axles from the hubs. One side popped out easily, the other, well, not so much. I broke 2 Harbor Freight jaw pullers. I hate their stuff, I don’t know why I bought anything from them.
<
I ended up filling the hub with PB Blaster and setting it upright to sit for a day or two.
<
Next project was removing the trailing arm bushings. I tried using the method listed http://www.firstfives.org/faq/traili...shing_faq.html which involves using pipe caps and a threaded rod to push out the old bushings and in the new bushings. The threaded rod did not hold up. I was kind of on a roll at breaking tools by this point.
<
So I switched gears and went to removing the differential mount bushing. A hacksaw and various hammers were required.
<
<
I went back to the trailing arm bushings, determined not to give up. I was successful with a 3 jaw puller. It took time, and lots of dish soap as lube when pushing in the new bushings.
<
<
Here is a comparison of old vs. new. Note that the orientation of the two is incorrect, I should have rotated one 180 degrees before taking the picture.
<
Now to the subframe bushings. I drilled the rubber some more, until I broke a bit. Changed bits and continued drilling.
<
Finally got one out. Yea, totally murdered it!
<
I had to use a hacksaw to cut through the metal sleeve on the outside of the bearing to get it out. On one side of the subframe I cut a little too deep. It’s not really that bad, the picture makes it worse. I thought I might do that ahead of time, that’s why I cut toward the subframe where it would have extra support from the cross piece welded on to the circle.
<
The parts pile continued to grow.
<
Now I began on the front of the car.
<
I got the first strut assembly out with little fuss.
<
<
However, being my first experience with pickle fork, I killed the tie-rod end rubber boot. Another part added to the list.
<
Looking at the control arm boots on the other side, I didn’t feel too bad about destroying the tie rod end.
<
<
The other tie rod wasn’t perfect either
<
I decided new tie rod ends and control arms would be added to the list. I think this is the point were I started ignoring the fact I had a budget and began ordering like mad. Since I was going to replace the control arm, why waste time with a pickle fork when you have a big hammer? Pretty sure I’m not getting a nut back onto that!
<
It was during removal of the driver’ side strut assembly I noticed whoever replaced the brakes last should be shot. Rather than using a brake pad sensor, they just shorted the two wires and put a crimp on them. This is a good reminder to me of why I always do brakes myself.
<
<
A few misc pictures of the car
<
<
<
A couple of misc. engine pics…Oooh, clean
<
<
Started disassembly of one of the strut assemblies
<
I was struggling to hold the strut assembly with one hand and removing the large nut holding the strut in with the other. I got the great idea to bolt the hub to the wheel so I could stand on it and get more leverage. Worked great. Used this method on assembly too.
<
And disassembled
<
This was a surprise to me, Bilstein HD’s were installed up front.
<
Then went to work removing the control arms. The control arm bushing “lollipop” can be seen in this picture
<
Where the lollipop mounts to the frame
<
Control arm removed!
<
I think the control arm bushings have seen better days! Glad these are getting replaced. I decided to upgrade to the M3 bushings to get a little extra castor in the wheels.
<
<
We had some nice winter weather, so I took some time to get the basket weaves cleaned up while they were off of the car.
<
Here is the car with everything removed. I kind of stood back at this point and went WOW, I hope I can get it all put back!
<
It’s hard to tell from this picture, but I noticed my brake lines had some good cracks in them. I figured I would add them to the list of parts to order.
<
My box of used parts was starting to grow.
<
I finally got around to working on the shift linkage again. Started by lowering the back of the transmission an inch or two to get access to the bitch clip.
<
I struggled with it for a while, and finally took a long flat blade screwdriver and forced it up under the clip and wiggled from side to side and forced on it, and finally it released.
<
<
Shift linkage removed!
<
<
It really seemed like I bounced around a lot on projects, and I did. I decided to work on pushing the one axle out of the rear hub that was not able to do earlier. After trying PB Blaster and lots of heat, I ended up standing on in and using a big hammer to smack it out. I had to hit it pretty darn hard, but it eventually gave.
<
<
Now some maintenance to the driveshaft. I disassembled it and replaced the center support bearing
<
<
After I got the CSB installed I was looking at the U-joints. The center one was like butter, real smooth. Then I looked at the rear joint by the differential, and it was frozen. I could barely move it one way, and it would not move at all the other. Crap. I spent an evening researching driveshafts and found out you can’t really service the driveshafts and have to order a remanufactured one. I called up Driveline Service of Portland, and they had one in the mail to me that afternoon. Cost was about $375 after core cost.
Now it was time to push in the subframe bushings. I decided to use a similar method to my original failed attempt to replace the trailing arm bushings. I followed the instructions (more or less) that are posted here: http://www.unofficialbmw.com/e30/sus...val_guide.html
With the aid of LOTS of dish soap to lube it up, it worked great. I had pushed both bushings into place in probably 20 minutes.
<
<
<
We had another nice day, so I took a little time to do a real quick cleanup of some parts. Not trying to make them spotless, just clean some road grime off of them. On a side note, I had not found a single spot of rust on the entire car. Getting parts cleaned up confirmed that it really was a rust free car.
Before:
<
After Cleaning:
<
<
I was shopping around online and discovered that I could buy remanufactured CV axles from Autozone for cheap. I decided that would be easier than trying to clean and replace the CV boots on my old CV’s. Here are the new axles
<
In order to replace the differential mount bushing, I had to take the rear cover off. I just changed the fluid a few month's ago, so I did not want to dump it out. I screwed the input shaft flange to a 2x6 so it would sit upright. Worked pretty good.
<
<
The back cover removed. Everytime I see this picture I keep thinking of a drugged up guy going “dude, that’s LSD” haha.
<
Covered the back with some plastic wrap and sealed with electricians tape to keep and dirt or grime out.
<
Tucked away in the corner.
<
I tried pushing in the bushing myself, and I was afraid I was going to break the metal ring. I decided to try and find a shop to do it for me. First step, sealing off the back so they don’t get grease and grime smeared all over the inside.
<
Next, some indexing marks with whiteout to ensure proper orientation.
<
I called around a bunch of shops, and most could not do it. One quoted me $50! Yikes! I thought that seemed like a rip off, so I kept calling. I finally found a driveline ship in town that did it for $30. The guy was great, he was telling me about his buddy who has a 200 ton press and how flat it can crush beer cans.
<
With the bushing installed, time to clean off the old gasket and put the rear cover back on.
<
<
Gasket in place
<
Installed and torque down.
<
With the rear gasket installed, it was time to replace the leaky output shaft seals. Note my poor-man’s seal driver. It worked, but it did not look pretty.
<
<
<
Back to storage again
<
The parts pile at this point
<
Took some time to clean off the workbench. Remember, the key to a happy life is a clean garage (having full of BMW’s helps too!)
<
Going with my idea of fixing stuff while I am there, I decided to rebuild the brakes. Since I am replacing the brake lines, I cut one in half and used compressed air to push out the piston. A 5 gallon paint mixing stick kept it from shooting across the garage.
<
Inside of a rear caliper…gross. I wonder when it was bled last.
<
The piston
<
One of the bleed screw ports was corroded over. A small screw bit was used to knock out the crud and clean it up.
<
The rear calipers
<
Piston getting cleaned up
<
Getting prepared to push out another piston
<
One of the front pistons. It amazes me that these things have enough force to stop the car.
<
I had some rust on the pistons (only rust I found on the entire car). Used the dremel to clean it up. Here is a before and after.
<
Since I had the brake calipers apart, I decided to use the opportunity to clean them up and paint them. I started the process with an ultrasonic cleaner. I use it to clean gun parts and rifle brass I use for reloading and it works great. I hoped it would do the same on the calipers. Here is a rear caliper in the cleaner.
<
After a few cycles it removed all of the grime and grease, leaving just brake dust to remove.
<
<
I left the cleaner to do its business on the other parts, and moved onto my fog lights. Like most, my lenses were in bad shape and needed replacement. I bought some polycarbonate replacement lenses
<
Started by removing the old glass. It broke much easier than I had expected.
<
After the old lenses were removed and the housings were cleaned up, I glued in the new polycarbonate lenses with black silicone. I made the decision to paint the backside of the lenses where they were they were off to the side of the light, that way you would not be able to look through and see anything behind. Figure it would be a cleaner look. However, the paint caused the lenses to crack. I’m not sure why this happened, and I was not too happy about it. But they are still solid enough that I don’t think it will be a problem.
<
I received some more parts. Got the new driveshaft, tie rod ends, control arms, brake lines, oil pan gasket, and some other stuff.
<
<
<
Isn’t there supposed to be a dust cover over the bearing? I think they forgot to install that.
<
Here is the new flex-disc ready to be installed
<
Since I was there, I decided to replace the tranny mounts too. I should have done this when I had the transmission lowered to remove the bitch clip…but I didn’t. So back under the car, lowered the tranny, and put in the new mounts.
<
Torqued one of the nuts down a little too tight…damn. Added another mount on the next parts order.
<
Replacing the tie-rod ends. The pipe wrench was a hack way to keep the rest of the tie rod from rotating on me.
<
New tie-rod end installed
<
OK, finally back to the brake calipers. They are all grease free from the ultrasonic cleaner. I used various wire brushes to get the brake dust off. Starting to look better!
<
<
Before and after shot:
<
I wore a mask while doing this, I’m not sure if brake dust is hazardous or not. If anything, it prevents having black boogers.
<
More work with the wire brush
<
<
And a noticeably dirtier face mask!
<
Once everything was cleaned, I put it all back into the ultrasonic cleaner for a final cleaning and degrease. After the ultrasonic treatment, they got a final scrubbing with mineral spirits, and they were ready to paint.
All sensitive areas got taped off, and wire was added to hang them for drying. The Bently manual made a nice pad to keep me from scratching the table too much.
<
The front calipers did not really have a good surface to attach tape to in order to mask off the piston chamber. I cleaned off and reinstalled the old rubber boot and used it to attach the tape. Worked really good.
<
And after three coats of high temp primer
<
<
After the paint gassed off in the garage for a while, I brought them in to speed the drying process.
<
As long as I had the ultrasonic cleaner out, I cleaned some more parts.
<
<
Didn’t quite fit all the way!
<
Removed the old rubber bushing to prepare for the UUC Derling bushing I ordered.
<
And with the new bushings installed
<
Got another order of parts today…FUN PARTS!
<
<
I pretty much dropped every other project and began work installing the sway bars. I started on the rear.
<
Getting the bolts in was tricky. A c-clamp aided in squeezing the busing so I could get the bolt threaded. I have the factory mounts now, but I plan on upgrading to Ireland Engineering’s beefed up rear swaybar mounts soon.
<
Assembling the rear links
<
Bushing installed on the front swaybar. I made sure to grease up the inside of the bushing with grease that was included in the kit.
<
Front swaybar installed.
<
I had a problem at this point with the front install. The aftermarket bracket uses one of the subframe bolts to hold it in place. Well the bolts only had about ¼ inch of thread contact with the nut on the car frame before the swaybar was installed. With the mount now in place, the old bolts were too short. I needed longer bolts. If I am going to do it, I am doing it right. I drove all around town looking for grade 10.9 bolts, but no one in town carries them. Not even the industrial supply houses. I picked up a pair of 8.8 bolts to get it back together so I could continue, and then ordered some 10.9’s from Fastenal.
<
Here are the new bolts installed, they are on the mount just right of the black swaybar bushing
<
Another round of parts came today. It’s like Christmas in my garage! Brake caliper rebuild kits and Turner’s Repair Shop rear shock tower mounts and rear swaybar reinforcements for the trailing arms. Other misc. parts too.
<
Next step was getting the subframe and differential bolted together, and then installing the assembly back on the car.
<
<
<
I noticed a large “S” stenciled onto the top of the differential, probably signifying it’s an LSD.
<
I got a new toy too! I hosted Christmas this year, and my father brought his old 150 ft/lb Craftsman torque wrench with him on the trek over the mountains. It’s probably 30 years old, and built like a tank.
<
Used a floor jack to lift the subframe/diff into place. That damn diff is heavy!
<
And bolted down
<
In the process of removing the subframe, I banged like hell on the bolt that comes down from inside the cabin. To keep from messing up the threads and to prevent the bolt from releasing on impact and flying through the cabin, I left the nut in place. Well, I messed up the nut a little instead, rounding over the edges enough where I could not get a socket onto it. A minute with the dremel cleaned up the edges, and I was back in business.
<
Received yet another package today.
<
New brake rotors, pads, and sensors. I had not originally planned on replacing the brakes as there was a lot of life left in the pads, but the old rotors were rusty and gross. I couldn’t allow myself to put them back on the car. I found these for $167.20 shipped from BMA Parts with a BMWCCA discount! I wish the brakes on my Volkswagen were that cheap.
<
Switched gears and decided to push in the M3 control arm bushings. Tools required: 2 blocks of wood, and big ass hammer.
<
<
<
I decided to install the new remanufactured CV axles into the rear hubs. First on took some work to get it in, but it went.
<
Installed the second one, and I could not get the nut threaded on. After some swearing and removing the CV axle, I examined the threads. Someone collapsed the threads pretty good with a hammer, and it was never noticed when they were rebuilt. Fail Autozone.
<
I called them up, and they were real good about getting another one on order. However, being the genius I was, I realized that I did not want to install the CV axles until after I welded on the Turner swaybar reinforcements. Crap. I was too lazy to push out the first axle, so I left it. Cleaned up the weld area first.
<
<
I threw the trailing arms into the trunk, and off to a friend’s for some welding. I built him a custom rifle a few months earlier, so I did not feel bad calling in a favor to get it welded. Yea, that’s not coming off anytime soon!
<
<
The second one…still smoking
<
Done and ready for install on the car
<
After letting the primer on the brake calipers cure for about a week, it was ready for a few top coats. I choose to use Cast Iron Gray high temp engine enamel from Rustolium. I have seen others use it, and it looks great. I really wanted the look of a clean just-off-the-factory-floor caliper, not some Honda Civic wanna-be red caliper.
<
<
Another small box came today, some new front swaybar links. I think I was at about twice my original budget at this point. For what I had spent buying the car and the projects afterwards, I could have bought a nice e36 by this point…but why? I’d rather have the e30.
<
Swaybar links installed, but not tightened down, that would come later.
<
Finally opened up one of the Bilstein boxes. Time to install the front shocks. I used the same method as earlier, I bolted the hub to a wheel and stood on it to get enough torque. I think it was 100 ft/lbs. The people I bought the shocks from were nice enough to include the Bilstein tool to tighten them up. I didn’t take a picture of mine, but this is what it looks like.
<
<
After the paint had dried for a few days, it was back to the brake calipers. The rear kits came in the box below. Yea, need I saw more?
<
The rears went together really easily
<
<
<
Soaking the seals in a little brake fluid helped everything to slide into place. But keep that brake fluid off the paint! It will take it off! I had to do a little touch-up later.
<
The front calipers (Girlings) were a little more tricky. Getting the seal in wasn’t a problem, but the dust boot was tricky. I tried pushing the caliper in, then seating the dust boot around it and under the lip in the caliper body, but no dice.
<
<
Since my family was still in town for the holidays, I grabbed my father for a second pair of hands. I removed the piston, installed the dust boot and pulled it open as much as I could. My dad took the piston and worked it through the dust boot opening I was trying to make. We got it on the second try, maybe took us a minute and a half. The second one went on the first try, probably 15 second of trying. I don’t have any pictures of the process, we ran out of free hands.
<
A little Loctite on the carrier bolts should keep everything nice and tight.
<
A little grease on the guide pins before install
<
<
And torqued to spec
<
Complete calipers, except for some pads.
<
<
If you can’t tell Girling from ATE calipers, this should make it pretty apparent.
<
How about a group shot? I love how they turned out. I think they look fantastic. I probably had 12-15 hours of labor into them at this point between disassembly, cleaning, more cleaning, final cleaning, then a little more cleaning, primer, paint, and assembly.
<
Got a new toy today, an old school Ingersoll Rand impact wrench.
<
Took some time to assemble the rear shock assemblies.
<
<
<
<
<
After a coat of rubberized undercoating on the welds had dried, it was time to install the trailing arms. Paint cans worked great as an extra set of arms to hold everything up.
<
<
After the trailing arms were in place, I used the floor jack to compress the rear spring so I could bolt the shock into place.
<
<
<
E-brake reassembled and the new rotor installed
<
Started on the other side…more paint cans
<
<
Passenger side complete
<
<
Next step was bolting the CV axles back onto the differential output shaft flanges.
<
<
All bolts installed and torque on the passenger side
<
The driver’s side was a little trickier. When it was remanufactured, they did not get one of the metal caps lined up correctly, so I could not get the bolts trough the holes. I used a drill to open up the bolt holes. Not much fun when you are lying on your back.
<
Getting torque to spec
<
While I was under the car, I took a piece of wire and used it as a safety wire to keep the speed sensor from backing out of the differential
<
<
Next step, the brake calipers.
<
I had to push the piston back a little further with one of the calipers
<
<
<
<
Another box of goodies arrived today.
<
Tranny oil, rubber window gasket, and the rubber shift boot thingy for around the shift rod.
<
After staring at the rubber boot for a while, and looking on RealOEM, I could not figure out what that plastic ring was for. You can’t tell from the picture, but there is a second ring that is tight around the boot, then connects to the big ring you see. I finally said heck with it and cut it off. The old one did not have it, and it worked fine…other than being in 3 pieces when I removed it!
<
Time to replace the tranny fluid. Someone in the past used a set of pliers to loosen the fill bolt on the side of the tranny…terrible.
<
<
Fluid level was good! It took a few seconds for a drip to build up
<
Looks like my transmission has a booger!
<
Pulled the drain plug. The color was not at all what I had expected. It seemed frothy too.
<
The magnet was doing its job. It got a good cleaning before reinstalled.
<
Redline fluid going back in
<
<
My new shift rod arrived today. It’s the Z4 2.8L rod. Should make a nice reduction in throw.
<
Compared to the old shift rod. I am not sure, but the old rod really looks like an IX shift rod. Not sure what it’s doing in an IS.
<
It’s hard to tell from this picture, but BMW get a fail for the worst weld I have probably ever seen. Oh well.
<
Installed with a new plastic bushing
<
A dab of grease should help everything slide real nice
<
Installed back up in the car with the new rubber boot I ordered.
<
Before I locked down the bitch clip I made sure I had everything correct, I did not want to battle with that damn thing again.
<
New washers
<
The shaft was too short with the yellow washer on it, so I had to remove it in order to get the clip on.
<
Done
<
New height with the shift knob installed. On a side note, I hate this shift knob, a leather ZHP knob is on the way!
<
<
Another box of parts. I think I have hit just about every major supplier by this point.
<
New front upper shock mounts, screwdriver for the factory tool kit (only part missing), and new lock rings for the axle nuts.
<
Picture of the screwdrivers. For reference, the one of the left is the original 22 year old one from my convertible, and the middle one is the replacement. I guess they changed the color. On the right is the screwdriver that was in the tool kit when I bought the car. It got thrown out.
<
And my grade 10.9 bolts I ordered from Fastenal came in. I swapped them into the front subframe.
<
Time to build the front struts.
<
Back to Autozone for their spring compressor. The guy told me not to use air tools because they will strip out the threads. Whatever, didn’t stop me from using them anyways.
<
<
<
Don’t forget about the little dust shield for the bearings on the shock mount
<
<
Here are the bearings
<
Putting it back on the car
<
Swaybar link tightened down. I used to do a lot of flying a few years back, and I remember that with planes any bolts are always installed with the nut on the back, that way if the nut were to work itself loose, the force of the air on the bolt head would hold it in place rather than push it out. I decided it would not hurt to use the same method here. I figure it’s a good habit to develop, whether it’s a plane, boat, car, etc.
Wrong way
<
Right way
<
Tightening the control arm to the subframe was a pain. I pushed the control arm up tight into the subframe so that the tapered base of the bolt would seat into the subframe and hold and not rotate when I tightened the nut.
<
Here is the base of the bolt that I am pushing in.
<
Passenger side wasn’t too bad to tighten.
<
Driver’s side was a bitch, you can see the nut on top of the subframe in this picture
<
It’s under the steering linkage, so no room for a ratchet. Had to do it the old fashioned way with an open end wrench. I never noticed until looking at this picture that my steering rack is leaking.
<
All done! New rotor installed too.
<
Front caliper back on
<
<
Other side
<
Brake pad sensor wired in
<
<
Time to start bleeding the brakes. I have the do-it-yourself kit, and it works pretty good.
<
I like to spill a lot, so rags were my friend when I was topping off the brake fluid reservoir.
<
Now back under the car to install the new driveshaft. I set the back of it on the subframe hole by the differential, and the front went on the output shaft from the tranny. I installed the bolts to hold the center of the shaft in while I tightened the two ends down. Note that the bolts are not tight in this picture, I did a better job than this at centering the support.
<
Driveshaft bolts through the flange and nuts getting installed.
<
The tranny side was next
<
With the driveshaft done, the heat shields were reinstalled and the exhaust put back. On one of the rear hubs I had banged a little too hard and deformed the metal at one point. A little cleanup with the dremel got it back to spec and allowed me to fit the wheel back on.
<
<
Wheel installed
<
The rotors look great! I just need to upgrade my wheels
<
<
Picked up a set of shock tower reinforcement plates.
<
<
Well I guess they don’t go on top of the towers. Crap. I should have bought the Ireland Engineering ones. Oh well, live and learn.
<
<
Got to show my support
<
<
Finally got around to painting the brake vents. Started off with some sanding
<
<
For such small parts the paint gun would be overkill. Time to dust off the airbrush.
<
Mixed and ready to shoot
<
After the first couple of coats dried for a few days, I sanded again, and sprayed a final coat.
<
While I was waiting for paint to dry, I started cleaning my tools with the ultrasonic cleaner. That thing works great, they look brand new.
Starting off
<
The pile grows…
<
…and grows
<
Pulled the car out of the garage and decided to replace the rubber window trim piece I bought. The guy who pushed the dents out of the car tore the hell out of the old one. You can see where he tore the rubber.
<
<
New piece installed
<
A few pics of the car
<
<
All and all, one hell of a fun project. First trip was to the tire store to get an alignment. My front tires looked like duck feet! The fronts were way far out. It’s been a blast to drive around the past few days. I have other projects planned for the future, but I need a spending break at this point. I was surprised that the H&R sport springs were not as stiff as I had expected. In hind sight, I might have sprung (pun intended) for the Ireland Engineering stage III springs.
One part I cannot find for the life of me is this door lock trim piece
<
It’s not labeled on RealOEM, and the dealership did not have a part number for it either. They said I would have to order a whole door card. Well our salvage yards really suck around here, so no luck there either. If anyone has an extra lying around (come on part hoarders, I know you are out there!) PM me and we can figure something out.
Back to the wheels. I have a serious man-crush on Raxe’s car, and I LOVE the style 73 wheels on a red car.
<
My problem, I have no plans on doing a 5-lug swap. For the people out there with wheel adapters, have you had any problems? It’s not a track car, and I’m not going to autocross (not with Style 73 wheels anyways), so are they alright for around town use? I ran the math, and I think the Style 73’s will fit perfect with about a 20-25mm adapter. They are 17x7 offset 43. Long story short, anyone have a set of Style 73’s they want to sell?
This was my first experience with a car suspension and driveline, and everything pretty much went as expected. Glad to be done though.
I have been an e30 fan for a while now, and I bought my first one, a 1989 convertible, a few years back. I have been searching ever since for a late model 325is, 5-speed, in red or white. Well those don’t come up very often locally, and after about 3 years I found a car I could not pass up on. It was in excellent condition once you saw past a few blemishes. It was covered in 21 years of door dings, 246K miles, had window tint that had failed and begun to peel and bubble, the head gasket was leaking, and the paint was cooked on the mirrors and the front valence. However, the rest of the paint was good, the interior was pristine other than a cracked dash, and it started and ran great.
I found a receipt in the glove box for a best BMW shop in town. The previous owner took it in for an $86 oil change…ouch. I went over to the shop with the VIN to see if they had records, and they had records of all maintenance going back to 2003. They knew the owner; I guess she owns a restaurant here. When I get the car all done, I think I might stop by for lunch and introduce myself. I believe she might have been the original owner of the car. That would make me the second owner on both my e30s!
Got it home and started on projects immediately. I had the old tint removed, and I like the “fishbowl” look, so I did not re-tint. Next was a trip to the local auto paint store to get some color matched acrylic urethane. A couple of coats (and a few hours of labor) later, I had the mirrors and front valence re-sprayed and looking good. The vents for the front brake calipers looked good, so I did not spray them…only to find out they were a couple of shades darker when I reinstalled them. Damn!
I kept pushing forward, tackling the head gasket next. I had never done anything this extensive with a car engine, but thanks to the Bently manual, it was very doable. It took me about 4 nights after work and a weekend to get a new gasket in, timing belt, coolant flush, and a few other things.
As winter approached, I wanted a winter project. The car needed a serious refresh of the suspension. The rear shocks were shot, and there were all sorts of noises and vibrations when driving. Not to mention it cornered like a truck. This was not acceptable! I began reading about suspension setups, what to replace, etc. I decided on what is probably the most common suspension upgrade: H&R Sport Springs, Bilstein Sport Shocks, and Suspension Techniques front and rear swaybars. I also decided to replace a few other “wear” parts while I was in there. I had a terrible vibration under load. Went away when the clutch went in. After researching online, I figured it was the flex-disc or perhaps the center support bearing. They were getting replaced too.
I took a TON of pictures throughout the project, I think there are 340 posted below (feel free to count!) I was really inspired by Simon S’ post here: http://www.r3vlimited.com/board/showthread.php?t=159148 . I think that’s the quality of work we can all aspire too (at least me, anyways).
So I began. Started jacking the car up first
I removed the lock rings and loosened the rear axle nut before jacking up the rear of the car.
Removed and loosened
I decided to use my Harbor Freight breaker bar while loosening the axle nuts…fail.
I also removed the interior carpet to get to the rear shock mount while the back of the car was on the ground. Any idea what this mass of wires is for???
<
The rear shock mounts had probably seen better days. I added that to my list to replace while I was there.
<
Next I began removing the exhaust. The exhaust was replaced a few months before I bought it, and I hate the single pipe.
<
Began unbolting
<
<
The exhaust hanger looked like crap…added to the list to replace
<
Rear exhaust section removed.
<
I noticed at this point that one of the CV boots was toast, and the rest were not far from behind…added to the list.
<
Here is the car up on jack stands. I do have jack stands behind the stack of wood blocks up front. The wood blocks were just a backup. I have this fear of being crushed under a car for days until someone finds me. I figured a little redundancy wouldn’t hurt.
<
<
<
Messing around with the camera, I kind of like this one
<
Front exhaust section removed…finally.
<
I started to build a small pile of parts
<
Found a great place to store the rear seat for a few weeks.
<
I began work on the rear of the car, it seemed like it would be easier. Unbolted the strut at the bottom. You can see another shot CV boot in this picture.
<
<
Removed the nuts on top. I did not take out the carpet completely, just pushed it out of the way. That did not give me much room for a ratchet, so the air ratchet really made the job easy
<
Passenger side strut removed
<
And began a box of old parts
<
The shock tower needed some cleanup
<
Driver’s side strut removed
<
<
I am starting to like this thing!
<
Now work began on the driveshaft
<
The center support bearing looked descent, but it was going regardless
<
<
Found this label on the driveshaft, thought it was picture worthy.
<
I did not have a long enough wrench to break the nuts free between the driveshaft and the differential. Luckily I had an allen the same size as the nuts and improvised with a ratchet for more leverage. Not pretty, but it worked.
<
Driveshaft out! Note the vibration dampener. That was getting thrown out.
<
The CSB looked good, not the cause of my vibrations I was experiencing.
<
The differential with the driveshaft removed.
<
Next I began on removing the shift linkage
<
<
After battling with the bitch clip for 20 minutes or so, I gave up and went inside to drink beer. I’ll finish the rest of the linkage removal another day.
<
Started to build a pile of parts to get put back on.
<
I decided to go back to the rear wheels and continue work there. Removed the brake calipers and rotors.
<
<
Driver’s side spring removed
<
And passengers out too
<
At some point in the project I decided to replace the subframe bushings, trailing arm bushings, and control arm bushings. The car needed it. I didn’t want a nice new suspension with crappy worn out bushings. I unbolted the brake hoses, e-brake cables, and ABS sensors, and now was ready to drop the subframe. The driver’s side came right off of the car, but the passenger’s side was a real pain. I tried everything I could think of. I had to dig the head of the bolt out in the passenger cabin to spray PB Blaster in there to let it release.
<
The bolt is under that painted bubble looking spot. This is a pic of the driver’s side
<
I was able to knock the bolt into the cabin, but the subframe still would not release. After lots of banging, hammering, prying, drilling, and copious swearing, it let go. Note all the rubber chunks on the ground from drilling the center of the bushing out.
<
Subframe free!
<
Looked a little different now!
<
Began disassembly. I’m lazy, air tools help make it easy.
<
<
<
I had a couple of stickers arrive in the mail. Figure I need to show my support. I could not decide on red or white, so I bought both.
<
Next project was removing the axles from the hubs. One side popped out easily, the other, well, not so much. I broke 2 Harbor Freight jaw pullers. I hate their stuff, I don’t know why I bought anything from them.
<
I ended up filling the hub with PB Blaster and setting it upright to sit for a day or two.
<
Next project was removing the trailing arm bushings. I tried using the method listed http://www.firstfives.org/faq/traili...shing_faq.html which involves using pipe caps and a threaded rod to push out the old bushings and in the new bushings. The threaded rod did not hold up. I was kind of on a roll at breaking tools by this point.
<
So I switched gears and went to removing the differential mount bushing. A hacksaw and various hammers were required.
<
<
I went back to the trailing arm bushings, determined not to give up. I was successful with a 3 jaw puller. It took time, and lots of dish soap as lube when pushing in the new bushings.
<
<
Here is a comparison of old vs. new. Note that the orientation of the two is incorrect, I should have rotated one 180 degrees before taking the picture.
<
Now to the subframe bushings. I drilled the rubber some more, until I broke a bit. Changed bits and continued drilling.
<
Finally got one out. Yea, totally murdered it!
<
I had to use a hacksaw to cut through the metal sleeve on the outside of the bearing to get it out. On one side of the subframe I cut a little too deep. It’s not really that bad, the picture makes it worse. I thought I might do that ahead of time, that’s why I cut toward the subframe where it would have extra support from the cross piece welded on to the circle.
<
The parts pile continued to grow.
<
Now I began on the front of the car.
<
I got the first strut assembly out with little fuss.
<
<
However, being my first experience with pickle fork, I killed the tie-rod end rubber boot. Another part added to the list.
<
Looking at the control arm boots on the other side, I didn’t feel too bad about destroying the tie rod end.
<
<
The other tie rod wasn’t perfect either
<
I decided new tie rod ends and control arms would be added to the list. I think this is the point were I started ignoring the fact I had a budget and began ordering like mad. Since I was going to replace the control arm, why waste time with a pickle fork when you have a big hammer? Pretty sure I’m not getting a nut back onto that!
<
It was during removal of the driver’ side strut assembly I noticed whoever replaced the brakes last should be shot. Rather than using a brake pad sensor, they just shorted the two wires and put a crimp on them. This is a good reminder to me of why I always do brakes myself.
<
<
A few misc pictures of the car
<
<
<
A couple of misc. engine pics…Oooh, clean
<
<
Started disassembly of one of the strut assemblies
<
I was struggling to hold the strut assembly with one hand and removing the large nut holding the strut in with the other. I got the great idea to bolt the hub to the wheel so I could stand on it and get more leverage. Worked great. Used this method on assembly too.
<
And disassembled
<
This was a surprise to me, Bilstein HD’s were installed up front.
<
Then went to work removing the control arms. The control arm bushing “lollipop” can be seen in this picture
<
Where the lollipop mounts to the frame
<
Control arm removed!
<
I think the control arm bushings have seen better days! Glad these are getting replaced. I decided to upgrade to the M3 bushings to get a little extra castor in the wheels.
<
<
We had some nice winter weather, so I took some time to get the basket weaves cleaned up while they were off of the car.
<
Here is the car with everything removed. I kind of stood back at this point and went WOW, I hope I can get it all put back!
<
It’s hard to tell from this picture, but I noticed my brake lines had some good cracks in them. I figured I would add them to the list of parts to order.
<
My box of used parts was starting to grow.
<
I finally got around to working on the shift linkage again. Started by lowering the back of the transmission an inch or two to get access to the bitch clip.
<
I struggled with it for a while, and finally took a long flat blade screwdriver and forced it up under the clip and wiggled from side to side and forced on it, and finally it released.
<
<
Shift linkage removed!
<
<
It really seemed like I bounced around a lot on projects, and I did. I decided to work on pushing the one axle out of the rear hub that was not able to do earlier. After trying PB Blaster and lots of heat, I ended up standing on in and using a big hammer to smack it out. I had to hit it pretty darn hard, but it eventually gave.
<
<
Now some maintenance to the driveshaft. I disassembled it and replaced the center support bearing
<
<
After I got the CSB installed I was looking at the U-joints. The center one was like butter, real smooth. Then I looked at the rear joint by the differential, and it was frozen. I could barely move it one way, and it would not move at all the other. Crap. I spent an evening researching driveshafts and found out you can’t really service the driveshafts and have to order a remanufactured one. I called up Driveline Service of Portland, and they had one in the mail to me that afternoon. Cost was about $375 after core cost.
Now it was time to push in the subframe bushings. I decided to use a similar method to my original failed attempt to replace the trailing arm bushings. I followed the instructions (more or less) that are posted here: http://www.unofficialbmw.com/e30/sus...val_guide.html
With the aid of LOTS of dish soap to lube it up, it worked great. I had pushed both bushings into place in probably 20 minutes.
<
<
<
We had another nice day, so I took a little time to do a real quick cleanup of some parts. Not trying to make them spotless, just clean some road grime off of them. On a side note, I had not found a single spot of rust on the entire car. Getting parts cleaned up confirmed that it really was a rust free car.
Before:
<
After Cleaning:
<
<
I was shopping around online and discovered that I could buy remanufactured CV axles from Autozone for cheap. I decided that would be easier than trying to clean and replace the CV boots on my old CV’s. Here are the new axles
<
In order to replace the differential mount bushing, I had to take the rear cover off. I just changed the fluid a few month's ago, so I did not want to dump it out. I screwed the input shaft flange to a 2x6 so it would sit upright. Worked pretty good.
<
<
The back cover removed. Everytime I see this picture I keep thinking of a drugged up guy going “dude, that’s LSD” haha.
<
Covered the back with some plastic wrap and sealed with electricians tape to keep and dirt or grime out.
<
Tucked away in the corner.
<
I tried pushing in the bushing myself, and I was afraid I was going to break the metal ring. I decided to try and find a shop to do it for me. First step, sealing off the back so they don’t get grease and grime smeared all over the inside.
<
Next, some indexing marks with whiteout to ensure proper orientation.
<
I called around a bunch of shops, and most could not do it. One quoted me $50! Yikes! I thought that seemed like a rip off, so I kept calling. I finally found a driveline ship in town that did it for $30. The guy was great, he was telling me about his buddy who has a 200 ton press and how flat it can crush beer cans.
<
With the bushing installed, time to clean off the old gasket and put the rear cover back on.
<
<
Gasket in place
<
Installed and torque down.
<
With the rear gasket installed, it was time to replace the leaky output shaft seals. Note my poor-man’s seal driver. It worked, but it did not look pretty.
<
<
<
Back to storage again
<
The parts pile at this point
<
Took some time to clean off the workbench. Remember, the key to a happy life is a clean garage (having full of BMW’s helps too!)
<
Going with my idea of fixing stuff while I am there, I decided to rebuild the brakes. Since I am replacing the brake lines, I cut one in half and used compressed air to push out the piston. A 5 gallon paint mixing stick kept it from shooting across the garage.
<
Inside of a rear caliper…gross. I wonder when it was bled last.
<
The piston
<
One of the bleed screw ports was corroded over. A small screw bit was used to knock out the crud and clean it up.
<
The rear calipers
<
Piston getting cleaned up
<
Getting prepared to push out another piston
<
One of the front pistons. It amazes me that these things have enough force to stop the car.
<
I had some rust on the pistons (only rust I found on the entire car). Used the dremel to clean it up. Here is a before and after.
<
Since I had the brake calipers apart, I decided to use the opportunity to clean them up and paint them. I started the process with an ultrasonic cleaner. I use it to clean gun parts and rifle brass I use for reloading and it works great. I hoped it would do the same on the calipers. Here is a rear caliper in the cleaner.
<
After a few cycles it removed all of the grime and grease, leaving just brake dust to remove.
<
<
I left the cleaner to do its business on the other parts, and moved onto my fog lights. Like most, my lenses were in bad shape and needed replacement. I bought some polycarbonate replacement lenses
<
Started by removing the old glass. It broke much easier than I had expected.
<
After the old lenses were removed and the housings were cleaned up, I glued in the new polycarbonate lenses with black silicone. I made the decision to paint the backside of the lenses where they were they were off to the side of the light, that way you would not be able to look through and see anything behind. Figure it would be a cleaner look. However, the paint caused the lenses to crack. I’m not sure why this happened, and I was not too happy about it. But they are still solid enough that I don’t think it will be a problem.
<
I received some more parts. Got the new driveshaft, tie rod ends, control arms, brake lines, oil pan gasket, and some other stuff.
<
<
<
Isn’t there supposed to be a dust cover over the bearing? I think they forgot to install that.
<
Here is the new flex-disc ready to be installed
<
Since I was there, I decided to replace the tranny mounts too. I should have done this when I had the transmission lowered to remove the bitch clip…but I didn’t. So back under the car, lowered the tranny, and put in the new mounts.
<
Torqued one of the nuts down a little too tight…damn. Added another mount on the next parts order.
<
Replacing the tie-rod ends. The pipe wrench was a hack way to keep the rest of the tie rod from rotating on me.
<
New tie-rod end installed
<
OK, finally back to the brake calipers. They are all grease free from the ultrasonic cleaner. I used various wire brushes to get the brake dust off. Starting to look better!
<
<
Before and after shot:
<
I wore a mask while doing this, I’m not sure if brake dust is hazardous or not. If anything, it prevents having black boogers.
<
More work with the wire brush
<
<
And a noticeably dirtier face mask!
<
Once everything was cleaned, I put it all back into the ultrasonic cleaner for a final cleaning and degrease. After the ultrasonic treatment, they got a final scrubbing with mineral spirits, and they were ready to paint.
All sensitive areas got taped off, and wire was added to hang them for drying. The Bently manual made a nice pad to keep me from scratching the table too much.
<
The front calipers did not really have a good surface to attach tape to in order to mask off the piston chamber. I cleaned off and reinstalled the old rubber boot and used it to attach the tape. Worked really good.
<
And after three coats of high temp primer
<
<
After the paint gassed off in the garage for a while, I brought them in to speed the drying process.
<
As long as I had the ultrasonic cleaner out, I cleaned some more parts.
<
<
Didn’t quite fit all the way!
<
Removed the old rubber bushing to prepare for the UUC Derling bushing I ordered.
<
And with the new bushings installed
<
Got another order of parts today…FUN PARTS!
<
<
I pretty much dropped every other project and began work installing the sway bars. I started on the rear.
<
Getting the bolts in was tricky. A c-clamp aided in squeezing the busing so I could get the bolt threaded. I have the factory mounts now, but I plan on upgrading to Ireland Engineering’s beefed up rear swaybar mounts soon.
<
Assembling the rear links
<
Bushing installed on the front swaybar. I made sure to grease up the inside of the bushing with grease that was included in the kit.
<
Front swaybar installed.
<
I had a problem at this point with the front install. The aftermarket bracket uses one of the subframe bolts to hold it in place. Well the bolts only had about ¼ inch of thread contact with the nut on the car frame before the swaybar was installed. With the mount now in place, the old bolts were too short. I needed longer bolts. If I am going to do it, I am doing it right. I drove all around town looking for grade 10.9 bolts, but no one in town carries them. Not even the industrial supply houses. I picked up a pair of 8.8 bolts to get it back together so I could continue, and then ordered some 10.9’s from Fastenal.
<
Here are the new bolts installed, they are on the mount just right of the black swaybar bushing
<
Another round of parts came today. It’s like Christmas in my garage! Brake caliper rebuild kits and Turner’s Repair Shop rear shock tower mounts and rear swaybar reinforcements for the trailing arms. Other misc. parts too.
<
Next step was getting the subframe and differential bolted together, and then installing the assembly back on the car.
<
<
<
I noticed a large “S” stenciled onto the top of the differential, probably signifying it’s an LSD.
<
I got a new toy too! I hosted Christmas this year, and my father brought his old 150 ft/lb Craftsman torque wrench with him on the trek over the mountains. It’s probably 30 years old, and built like a tank.
<
Used a floor jack to lift the subframe/diff into place. That damn diff is heavy!
<
And bolted down
<
In the process of removing the subframe, I banged like hell on the bolt that comes down from inside the cabin. To keep from messing up the threads and to prevent the bolt from releasing on impact and flying through the cabin, I left the nut in place. Well, I messed up the nut a little instead, rounding over the edges enough where I could not get a socket onto it. A minute with the dremel cleaned up the edges, and I was back in business.
<
Received yet another package today.
<
New brake rotors, pads, and sensors. I had not originally planned on replacing the brakes as there was a lot of life left in the pads, but the old rotors were rusty and gross. I couldn’t allow myself to put them back on the car. I found these for $167.20 shipped from BMA Parts with a BMWCCA discount! I wish the brakes on my Volkswagen were that cheap.
<
Switched gears and decided to push in the M3 control arm bushings. Tools required: 2 blocks of wood, and big ass hammer.
<
<
<
I decided to install the new remanufactured CV axles into the rear hubs. First on took some work to get it in, but it went.
<
Installed the second one, and I could not get the nut threaded on. After some swearing and removing the CV axle, I examined the threads. Someone collapsed the threads pretty good with a hammer, and it was never noticed when they were rebuilt. Fail Autozone.
<
I called them up, and they were real good about getting another one on order. However, being the genius I was, I realized that I did not want to install the CV axles until after I welded on the Turner swaybar reinforcements. Crap. I was too lazy to push out the first axle, so I left it. Cleaned up the weld area first.
<
<
I threw the trailing arms into the trunk, and off to a friend’s for some welding. I built him a custom rifle a few months earlier, so I did not feel bad calling in a favor to get it welded. Yea, that’s not coming off anytime soon!
<
<
The second one…still smoking
<
Done and ready for install on the car
<
After letting the primer on the brake calipers cure for about a week, it was ready for a few top coats. I choose to use Cast Iron Gray high temp engine enamel from Rustolium. I have seen others use it, and it looks great. I really wanted the look of a clean just-off-the-factory-floor caliper, not some Honda Civic wanna-be red caliper.
<
<
Another small box came today, some new front swaybar links. I think I was at about twice my original budget at this point. For what I had spent buying the car and the projects afterwards, I could have bought a nice e36 by this point…but why? I’d rather have the e30.
<
Swaybar links installed, but not tightened down, that would come later.
<
Finally opened up one of the Bilstein boxes. Time to install the front shocks. I used the same method as earlier, I bolted the hub to a wheel and stood on it to get enough torque. I think it was 100 ft/lbs. The people I bought the shocks from were nice enough to include the Bilstein tool to tighten them up. I didn’t take a picture of mine, but this is what it looks like.
<
<
After the paint had dried for a few days, it was back to the brake calipers. The rear kits came in the box below. Yea, need I saw more?
<
The rears went together really easily
<
<
<
Soaking the seals in a little brake fluid helped everything to slide into place. But keep that brake fluid off the paint! It will take it off! I had to do a little touch-up later.
<
The front calipers (Girlings) were a little more tricky. Getting the seal in wasn’t a problem, but the dust boot was tricky. I tried pushing the caliper in, then seating the dust boot around it and under the lip in the caliper body, but no dice.
<
<
Since my family was still in town for the holidays, I grabbed my father for a second pair of hands. I removed the piston, installed the dust boot and pulled it open as much as I could. My dad took the piston and worked it through the dust boot opening I was trying to make. We got it on the second try, maybe took us a minute and a half. The second one went on the first try, probably 15 second of trying. I don’t have any pictures of the process, we ran out of free hands.
<
A little Loctite on the carrier bolts should keep everything nice and tight.
<
A little grease on the guide pins before install
<
<
And torqued to spec
<
Complete calipers, except for some pads.
<
<
If you can’t tell Girling from ATE calipers, this should make it pretty apparent.
<
How about a group shot? I love how they turned out. I think they look fantastic. I probably had 12-15 hours of labor into them at this point between disassembly, cleaning, more cleaning, final cleaning, then a little more cleaning, primer, paint, and assembly.
<
Got a new toy today, an old school Ingersoll Rand impact wrench.
<
Took some time to assemble the rear shock assemblies.
<
<
<
<
<
After a coat of rubberized undercoating on the welds had dried, it was time to install the trailing arms. Paint cans worked great as an extra set of arms to hold everything up.
<
<
After the trailing arms were in place, I used the floor jack to compress the rear spring so I could bolt the shock into place.
<
<
<
E-brake reassembled and the new rotor installed
<
Started on the other side…more paint cans
<
<
Passenger side complete
<
<
Next step was bolting the CV axles back onto the differential output shaft flanges.
<
<
All bolts installed and torque on the passenger side
<
The driver’s side was a little trickier. When it was remanufactured, they did not get one of the metal caps lined up correctly, so I could not get the bolts trough the holes. I used a drill to open up the bolt holes. Not much fun when you are lying on your back.
<
Getting torque to spec
<
While I was under the car, I took a piece of wire and used it as a safety wire to keep the speed sensor from backing out of the differential
<
<
Next step, the brake calipers.
<
I had to push the piston back a little further with one of the calipers
<
<
<
<
Another box of goodies arrived today.
<
Tranny oil, rubber window gasket, and the rubber shift boot thingy for around the shift rod.
<
After staring at the rubber boot for a while, and looking on RealOEM, I could not figure out what that plastic ring was for. You can’t tell from the picture, but there is a second ring that is tight around the boot, then connects to the big ring you see. I finally said heck with it and cut it off. The old one did not have it, and it worked fine…other than being in 3 pieces when I removed it!
<
Time to replace the tranny fluid. Someone in the past used a set of pliers to loosen the fill bolt on the side of the tranny…terrible.
<
<
Fluid level was good! It took a few seconds for a drip to build up
<
Looks like my transmission has a booger!
<
Pulled the drain plug. The color was not at all what I had expected. It seemed frothy too.
<
The magnet was doing its job. It got a good cleaning before reinstalled.
<
Redline fluid going back in
<
<
My new shift rod arrived today. It’s the Z4 2.8L rod. Should make a nice reduction in throw.
<
Compared to the old shift rod. I am not sure, but the old rod really looks like an IX shift rod. Not sure what it’s doing in an IS.
<
It’s hard to tell from this picture, but BMW get a fail for the worst weld I have probably ever seen. Oh well.
<
Installed with a new plastic bushing
<
A dab of grease should help everything slide real nice
<
Installed back up in the car with the new rubber boot I ordered.
<
Before I locked down the bitch clip I made sure I had everything correct, I did not want to battle with that damn thing again.
<
New washers
<
The shaft was too short with the yellow washer on it, so I had to remove it in order to get the clip on.
<
Done
<
New height with the shift knob installed. On a side note, I hate this shift knob, a leather ZHP knob is on the way!
<
<
Another box of parts. I think I have hit just about every major supplier by this point.
<
New front upper shock mounts, screwdriver for the factory tool kit (only part missing), and new lock rings for the axle nuts.
<
Picture of the screwdrivers. For reference, the one of the left is the original 22 year old one from my convertible, and the middle one is the replacement. I guess they changed the color. On the right is the screwdriver that was in the tool kit when I bought the car. It got thrown out.
<
And my grade 10.9 bolts I ordered from Fastenal came in. I swapped them into the front subframe.
<
Time to build the front struts.
<
Back to Autozone for their spring compressor. The guy told me not to use air tools because they will strip out the threads. Whatever, didn’t stop me from using them anyways.
<
<
<
Don’t forget about the little dust shield for the bearings on the shock mount
<
<
Here are the bearings
<
Putting it back on the car
<
Swaybar link tightened down. I used to do a lot of flying a few years back, and I remember that with planes any bolts are always installed with the nut on the back, that way if the nut were to work itself loose, the force of the air on the bolt head would hold it in place rather than push it out. I decided it would not hurt to use the same method here. I figure it’s a good habit to develop, whether it’s a plane, boat, car, etc.
Wrong way
<
Right way
<
Tightening the control arm to the subframe was a pain. I pushed the control arm up tight into the subframe so that the tapered base of the bolt would seat into the subframe and hold and not rotate when I tightened the nut.
<
Here is the base of the bolt that I am pushing in.
<
Passenger side wasn’t too bad to tighten.
<
Driver’s side was a bitch, you can see the nut on top of the subframe in this picture
<
It’s under the steering linkage, so no room for a ratchet. Had to do it the old fashioned way with an open end wrench. I never noticed until looking at this picture that my steering rack is leaking.
<
All done! New rotor installed too.
<
Front caliper back on
<
<
Other side
<
Brake pad sensor wired in
<
<
Time to start bleeding the brakes. I have the do-it-yourself kit, and it works pretty good.
<
I like to spill a lot, so rags were my friend when I was topping off the brake fluid reservoir.
<
Now back under the car to install the new driveshaft. I set the back of it on the subframe hole by the differential, and the front went on the output shaft from the tranny. I installed the bolts to hold the center of the shaft in while I tightened the two ends down. Note that the bolts are not tight in this picture, I did a better job than this at centering the support.
<
Driveshaft bolts through the flange and nuts getting installed.
<
The tranny side was next
<
With the driveshaft done, the heat shields were reinstalled and the exhaust put back. On one of the rear hubs I had banged a little too hard and deformed the metal at one point. A little cleanup with the dremel got it back to spec and allowed me to fit the wheel back on.
<
<
Wheel installed
<
The rotors look great! I just need to upgrade my wheels
<
<
Picked up a set of shock tower reinforcement plates.
<
<
Well I guess they don’t go on top of the towers. Crap. I should have bought the Ireland Engineering ones. Oh well, live and learn.
<
<
Got to show my support
<
<
Finally got around to painting the brake vents. Started off with some sanding
<
<
For such small parts the paint gun would be overkill. Time to dust off the airbrush.
<
Mixed and ready to shoot
<
After the first couple of coats dried for a few days, I sanded again, and sprayed a final coat.
<
While I was waiting for paint to dry, I started cleaning my tools with the ultrasonic cleaner. That thing works great, they look brand new.
Starting off
<
The pile grows…
<
…and grows
<
Pulled the car out of the garage and decided to replace the rubber window trim piece I bought. The guy who pushed the dents out of the car tore the hell out of the old one. You can see where he tore the rubber.
<
<
New piece installed
<
A few pics of the car
<
<
All and all, one hell of a fun project. First trip was to the tire store to get an alignment. My front tires looked like duck feet! The fronts were way far out. It’s been a blast to drive around the past few days. I have other projects planned for the future, but I need a spending break at this point. I was surprised that the H&R sport springs were not as stiff as I had expected. In hind sight, I might have sprung (pun intended) for the Ireland Engineering stage III springs.
One part I cannot find for the life of me is this door lock trim piece
<
It’s not labeled on RealOEM, and the dealership did not have a part number for it either. They said I would have to order a whole door card. Well our salvage yards really suck around here, so no luck there either. If anyone has an extra lying around (come on part hoarders, I know you are out there!) PM me and we can figure something out.
Back to the wheels. I have a serious man-crush on Raxe’s car, and I LOVE the style 73 wheels on a red car.
<
My problem, I have no plans on doing a 5-lug swap. For the people out there with wheel adapters, have you had any problems? It’s not a track car, and I’m not going to autocross (not with Style 73 wheels anyways), so are they alright for around town use? I ran the math, and I think the Style 73’s will fit perfect with about a 20-25mm adapter. They are 17x7 offset 43. Long story short, anyone have a set of Style 73’s they want to sell?
This was my first experience with a car suspension and driveline, and everything pretty much went as expected. Glad to be done though.


Comment