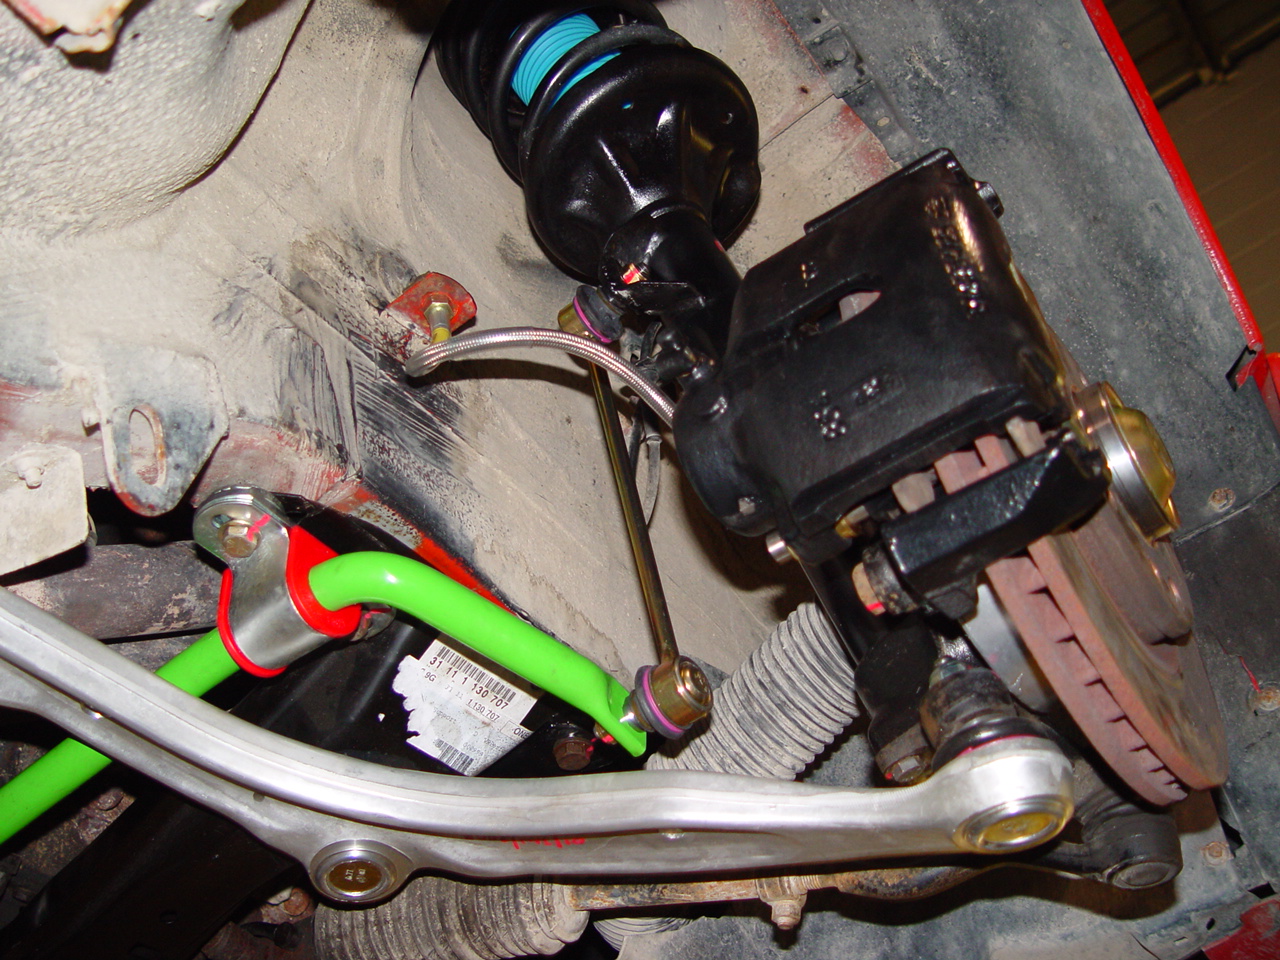
IE Sway bar reinforcement tabs

Collapse
X
 
  • Time
  • Show
Clear All
new posts

  • mr.vang
    replied
    Originally posted by SkiFree
    Washers aren't included because the strongest way to approach it is to hammer in the tab. If people want them iI'll throw them in, but I don't advocate installing them this way.
    Ahh, I see. Thanks for clearing things up. I'll be getting a set soon.

    Leave a comment:


  • SkiFree
    replied
    Washers aren't included because the strongest way to approach it is to hammer in the tab. If people want them iI'll throw them in, but I don't advocate installing them this way.

    Leave a comment:


  • digger
    replied
    found this via google

    Leave a comment:


  • KIRIEIW
    replied
    IE Sway bar reinforcement tabs

    Originally posted by mr.vang
    Are those washers provided with the kit?

    The ones sandwiched right here weren't surprisingly, I had some laying around. I used 2. Person above gave me that idea, thanks for the idea!

    Leave a comment:


  • mr.vang
    replied
    Are those washers provided with the kit?

    Leave a comment:


  • KIRIEIW
    replied
    IE Sway bar reinforcement tabs

    Thanks guys, got them in along with some new sway bar links. Also drilled out the tab holes just enough for the new hardware to fit.

    Last edited by KIRIEIW; 05-21-2014, 05:59 PM.

    Leave a comment:


  • clint-o-matic
    replied
    So glad to see this thread. I'll be installing mine this weekend.

    Leave a comment:


  • Earendil
    replied
    I used two washers to bridge the gap. Nothing needs bending or grinding if you do that. Over a year and 5 track days, and there is no noticeable bending or fatigue in the tabs. I check it before each track day though, if that tells you how much I actually trust it ;)


    I know, the bolt has not been tightened yet in this picture.

    Leave a comment:


  • KIRIEIW
    replied
    Thanks that helps a lot. I was under the impression it had to sit flat against the subframe but seeing that pic helped.

    Leave a comment:


  • JGood
    replied
    That bolt needs to go through the subframe and the plate, not be sandwiched between the subframe and plate. If the hole in the subframe isn't big enough, just make it bigger.

    Here's a similar setup, that uses a spacer instead of a double-layer plate:

    Leave a comment:


  • KIRIEIW
    replied
    Originally posted by HybridNz
    Will photo mine when I get home tonight. (2 hours)
    Sweet!! Also if you could explain what you had to do to get it to bolt right up would be great
    Last edited by KIRIEIW; 05-20-2014, 09:27 PM.

    Leave a comment:


  • mr.vang
    replied
    I'm also interested how this ie reinforcement fit.

    Leave a comment:


  • HybridNz
    replied
    Will photo mine when I get home tonight. (2 hours)

    Leave a comment:


  • KIRIEIW
    replied
    Originally posted by jlevie
    The bolt on the right is upside down. It must go through the tab and the ear of the subframe.
    I do know the stock bolt went the other way with the nut on the top, but the hardware provided with the kit is to big to even fit threw the stock sub frame tab hole, and when you take it out of the packaging the bolt it like how it is now.

    I need a pic guys

    Leave a comment:


  • jlevie
    replied
    The bolt on the right is upside down. It must go through the tab and the ear of the subframe.

    Leave a comment:

Working...