Announcement

Collapse
No announcement yet.

The Welding Thread

Collapse
X
 
  • Filter
  • Time
  • Show
Clear All
new posts

    Braze joints can actually be very strong, but it will always be only as strong as the filler material. Usually the material itself will tear as apposed to the bond coming apart. Key thing is getting the steel hot enough to melt the filler instead of the torch just melting filler onto the steel.

    My dad built a 3-wheeled off road mini bike using nothing but brazing. That was in the 70's and it's still around, not a single joint failed.

    Comment


      Originally posted by jalopi View Post
      i mean, i got the steel to the point where it was puddling (acetylene torch), even then is it still pretty much the same as a solder joint?


      thanks for the tip, i assumed you could single pass with 240V welders
      Well all depends on prep....


      Yeah .250 is A LOT of metal to break down and bond in 1 pass, hell my welders do 3/16's in at minimum 2 passes generally 3 including a reinforcing cover pass....... with SMAW
      Originally posted by Fusion
      If a car is the epitome of freedom, than an electric car is house arrest with your wife titty fucking your next door neighbor.
      The American Republic will endure until the day Congress discovers that it can bribe the public with the public's money. -Alexis de Tocqueville


      The Desire to Save Humanity is Always a False Front for the Urge to Rule it- H. L. Mencken

      Necessity is the plea for every infringement of human freedom. It is the argument of tyrants.
      William Pitt-

      Comment


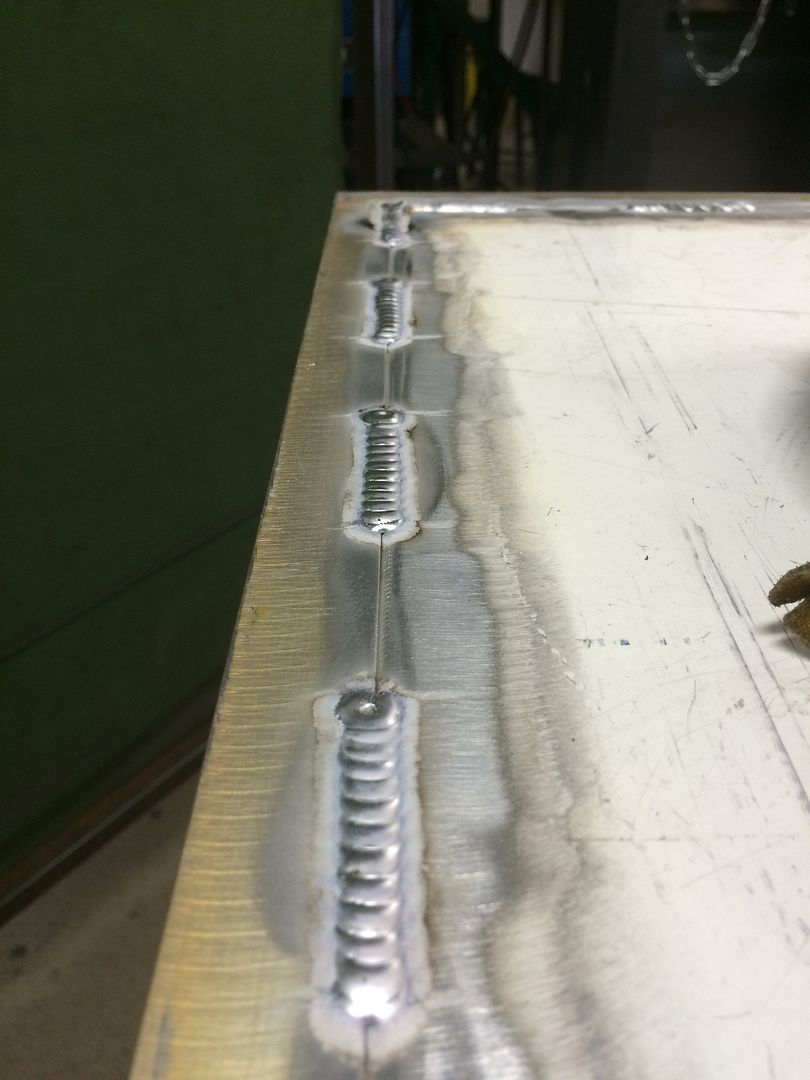
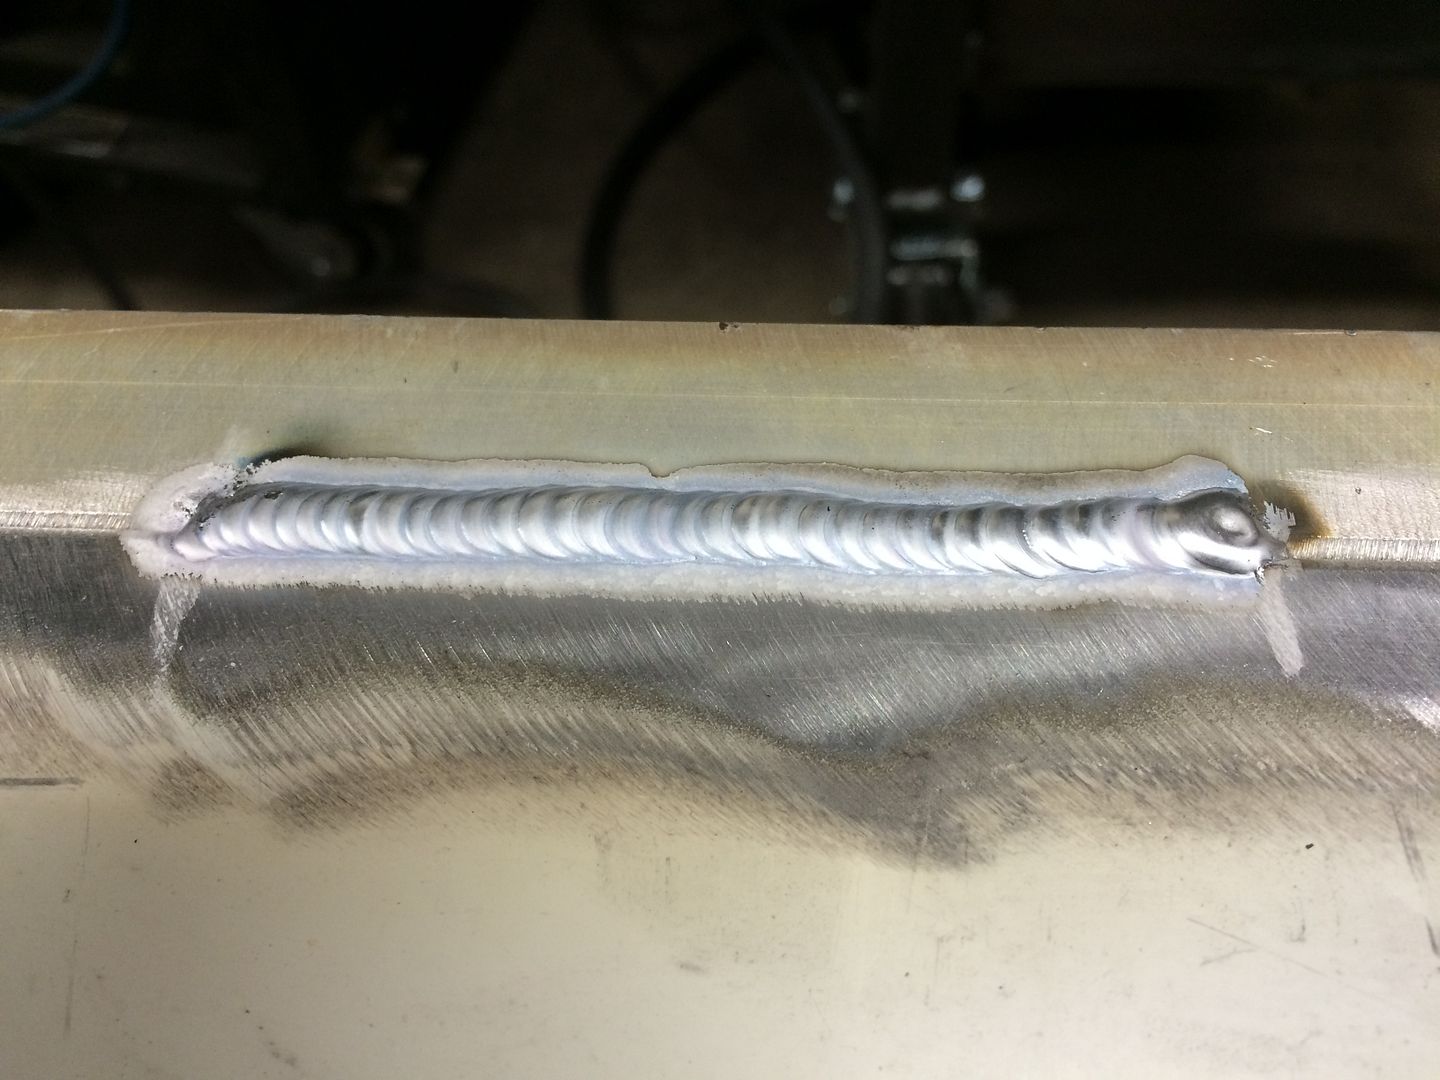
        Finally got the machine set right to lay decent beads on 1/4" aluminum...


        Still haven't been happy with the tungsten. I've found a steeper angle on the tip causes it to blow out less. It's a grey 1/8" rod, gas lens, 215 amps with the balance turned more negative than positive to try and get the heat off the top. Still globs up to one side.


        Freshly sharpened


        After the first pass


        Sent from my iPhone using Tapatalk
        My E30 v1.0 | v2.0 | v3.0 | My E28 |My E34 | My feedback

        Comment


          with aluminum you normally use reverse polarity a/c, continuous high frequency. the tip is supposed to ball up.

          when i welded aluminum in a shop setting, we would hold the torch against a metal table and stomp the pedal for a few seconds to get the ball on the tip before we started our welds.

          also, i was taught that its best to sharpen your tungsten so the grind lines are parallel with the length of the rod.


          i guess there are people here that have welded more aluminum than i have that can chime in with more advice.
          sigpic
          Gigitty Gigitty!!!!

          88 cabrio becoming alpina b6 3.5s transplanted s62
          92 Mtech 2 cabrio alpinweiss 770 code
          88 325ix coupe manual lachsilber/cardinal
          88 325ix coupe manual diamondschwartz/natur
          87 e30 m3 for parts lachsilber/cardinal(serial number 7)
          12 135i M sport cabrio grey/black

          Comment


            The tungsten needs to be sharpened to a tip, with the cone being more or less symmetrical. I roll the tungsten between my fingers, against a bench grinder. It should come to a point like a pencil. To ball the tungsten, set the machine to DCEP and slowly press the pedal until it balls up to where you want it. Too hot too fast and you'll burn the electrode.

            Comment


              Originally posted by AndrewBird View Post
              Braze joints can actually be very strong, but it will always be only as strong as the filler material. Usually the material itself will tear as apposed to the bond coming apart. Key thing is getting the steel hot enough to melt the filler instead of the torch just melting filler onto the steel.

              My dad built a 3-wheeled off road mini bike using nothing but brazing. That was in the 70's and it's still around, not a single joint failed.
              I 200% back this up, I got to meet a local at his Triumph/Norton shop and he ONLY does braze joints. He does flat track and off road with them, he said it was all in the prep and HOW you apply the filler. Heat steel and melt filler rod.
              ~ Puch Cafe. ~ Do business? feedback ~ Check out my leather company ~

              Instagram: @BWeissLeather

              Current cars:
              ~ '87 325 M30B35 swap
              ~ '87 535
              ~ 01 540 Msport 6spd
              ~ '06 X5 4.8is

              Comment


                Originally posted by Eric View Post
                Still haven't been happy with the tungsten. I've found a steeper angle on the tip causes it to blow out less. It's a grey 1/8" rod, gas lens, 215 amps with the balance turned more negative than positive to try and get the heat off the top. Still globs up to one side.
                You're still running too cold... 260A is about where you should be at. Running more DCEN is good, but you need your amps right, and you actually can run a sharpened tungsten instead of balling.

                Otherwise, it looks good. Are you adding any helium? Or straight argon?
                sigpic

                A man chooses, a slave obeys... Would you kindly?

                Comment


                  I did some stainless work earlier this week...

                  IMG_0347 by Los Pantelones!, on Flickr

                  IMG_0344 by Los Pantelones!, on Flickr

                  IMG_0345 by Los Pantelones!, on Flickr

                  IMG_0343 by Los Pantelones!, on Flickr

                  I got one little booger in this inside Aluminum foil was not as good as thought it would be...

                  IMG_0348 by Los Pantelones!, on Flickr

                  And speaking of brazing, I put three inch long tacks and then brazed the rest of my flex pipe. The damn thing was so janky on the edges, and I didn't want to deal with melting all the layers...

                  IMG_0346 by Los Pantelones!, on Flickr

                  IMG_0351 by Los Pantelones!, on Flickr
                  sigpic

                  A man chooses, a slave obeys... Would you kindly?

                  Comment


                    Originally posted by AndrewBird View Post
                    Braze joints can actually be very strong, but it will always be only as strong as the filler material. Usually the material itself will tear as apposed to the bond coming apart. Key thing is getting the steel hot enough to melt the filler instead of the torch just melting filler onto the steel.

                    My dad built a 3-wheeled off road mini bike using nothing but brazing. That was in the 70's and it's still around, not a single joint failed.
                    Formula Ford chassis (small dia tube frames) are all brazed so they can be easily repaired , i know the fellow that builds new FF chassis from scratch on a jig and repairs/supports several FF in PNW series. his brazing is amazing (lots and lots of practice)they never break at the braze joint.
                    Angus
                    88 E30M3 X2
                    89 325IX
                    92 R100GS/PD
                    :)

                    Comment


                      Your E30 is brazed.
                      My E30 v1.0 | v2.0 | v3.0 | My E28 |My E34 | My feedback

                      Comment


                        Originally posted by Eric View Post
                        Finally got the machine set right to lay decent beads on 1/4" aluminum...


                        Still haven't been happy with the tungsten. I've found a steeper angle on the tip causes it to blow out less. It's a grey 1/8" rod, gas lens, 215 amps with the balance turned more negative than positive to try and get the heat off the top. Still globs up to one side.


                        Freshly sharpened


                        After the first pass


                        Sent from my iPhone using Tapatalk
                        Not sure what grey us without looking it up but I use 2% lanthinated. Also, a great way to sharpen your tungsten, stick it in a cordless drill and fire it up against a bench grinder. you'll get a very nice even point with all your grooves running parallel with the rod. I didn't see anything about pulsing so I'm guessing you're pedal pulsing. Looks good, just slow up and really ease off the pedal when you're finishing a run so you don't get those big finish craters on your final dimes.

                        Originally posted by pantelones View Post
                        You're still running too cold... 260A is about where you should be at. Running more DCEN is good, but you need your amps right, and you actually can run a sharpened tungsten instead of balling.

                        Otherwise, it looks good. Are you adding any helium? Or straight argon?
                        It looks like he's beveling the material, 260amps is overkill. With a bit of preheating and bevel I have done 1/4" with my Lincoln 175 in small stints and get full penetration without an issue.
                        sigpic

                        Rebellion Forge Custom Fabrication

                        1988 325is - TrackRat in progress

                        Instagram @rebellionforge

                        Comment


                          Originally posted by IronFreak View Post
                          Not sure what grey us without looking it up but I use 2% lanthinated. Also, a great way to sharpen your tungsten, stick it in a cordless drill and fire it up against a bench grinder. you'll get a very nice even point with all your grooves running parallel with the rod. I didn't see anything about pulsing so I'm guessing you're pedal pulsing. Looks good, just slow up and really ease off the pedal when you're finishing a run so you don't get those big finish craters on your final dimes.


                          It looks like he's beveling the material, 260amps is overkill. With a bit of preheating and bevel I have done 1/4" with my Lincoln 175 in small stints and get full penetration without an issue.
                          When I slowly let up on the pedal, I was getting centerline cracks pretty bad. I'm shoving a ton of rod in at the end and letting up on the pedal watching the puddle shrink down as I go. I'd love to have no craters, but I'd take craters over centerline cracking! I'm about to do some more on this project, So I'll work on the ending some more.

                          No Pulsing, just throttle control myself. I tried pulsing, but I'm not used to it, so I decided to just stick with what I know. I have scrap from this project so I might practice pulsing when this is finished. I had it up to 250 amps and it was just wrecking my 1/8" tungsten. with the bevel, 215 amps feels like a happy place.
                          My E30 v1.0 | v2.0 | v3.0 | My E28 |My E34 | My feedback

                          Comment


                            I sharpen the tungsten and let it ball up to desired size on scrap. Then I tend to weave aluminum, or double pass it. It always leaks on me when doing the dimes :(
                            john@m20guru.com
                            Links:
                            Transaction feedback: Here, here and here. Thanks :D

                            Comment


                              Did a quick project today at the Ft. Carson auto hobby shop. They have a little lincoln 175 buzz box and a shelf with a bunch of un-labeled filler rod.

                              I think I was using R45 rod, but got tons and tons of contamination. At one point I could see a flakey goopey substance being pushed out of the puddle... really weird. When I would dip, it would flake up and move forward a bit. This last little project just confirms that I want/need a home machine with all my own rod/materials. Jumping in on whatever is available is a good skill to learn, but I want to practice, practice, practice.

                              Anyways, some pictars.

                              coil overs by ericandshovin, on Flickr

                              DSC_5377 by ericandshovin, on Flickr

                              finished product... you can clearly see when the puddle was flowing nicely, and when it was mad and spitting.
                              perch by ericandshovin, on Flickr
                              My E30 v1.0 | v2.0 | v3.0 | My E28 |My E34 | My feedback

                              Comment


                                That's interesting, I wonder what the mystery filler was......I'm also wondering if you shouldn't do a cover pass with at none-mystery filler metal haha!
                                sigpic

                                Rebellion Forge Custom Fabrication

                                1988 325is - TrackRat in progress

                                Instagram @rebellionforge

                                Comment

                                Working...
                                X