

Hello,
Up to this point I haven't posted much in this forum so I think now may be a good time. Before I received this car, I had cosmetically restored a Del Sol. Well I got tired of that car and got an offer on a project that I always wanted to do. So on my birthday, I traded my trusty del sol, for this...
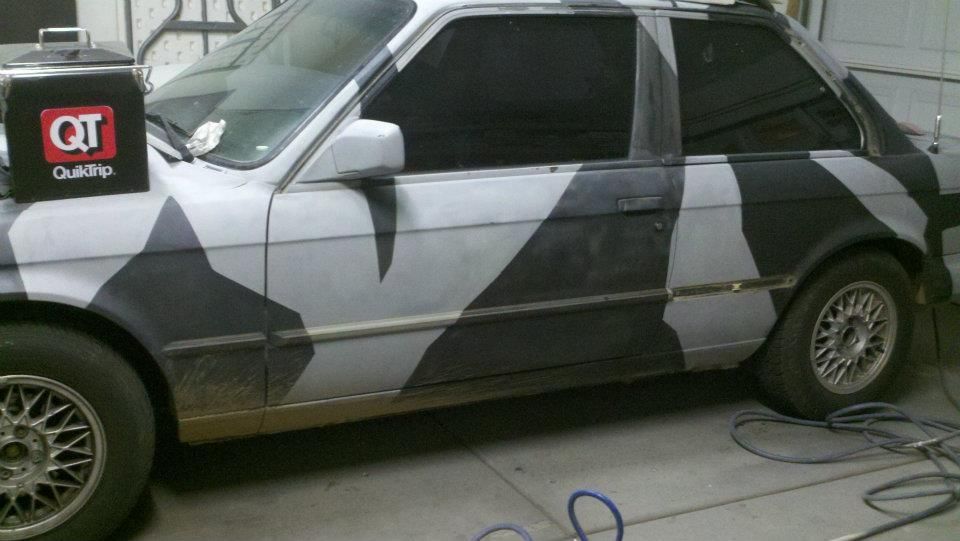
A 1987 bmw 325is. Obviously ugly and 1st gear was shot, but the engine felt strong and the interior was well kept for its age.
This wasnt going to be my daily, so I was able to actually take some time on getting things ready.
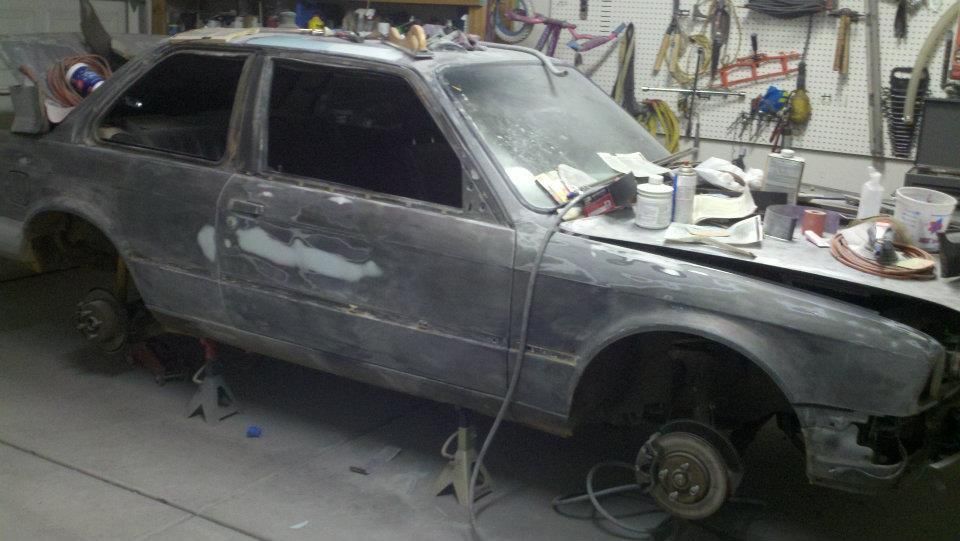
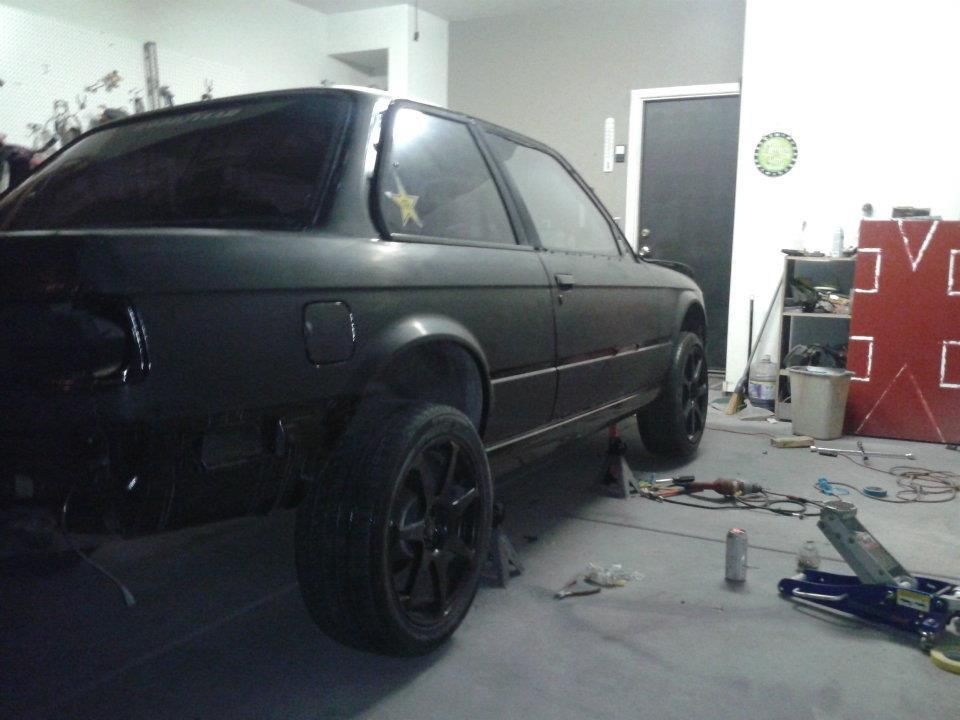
First batch of tasks on hand were to sand off ALL the improperly applied rattle can primer, weld a hole in the trunk for an antenna, and complete some minor body work. After sanding off the primer, I realized that the car was resprayed with a heavy early 90s metallic that had not only been poorly prepped, but was dead on all the horizontal panels. So I had to take all of those panels down to bare metal.
So after HOURS of sanding and the body work complete, here is a checkpoint pic.
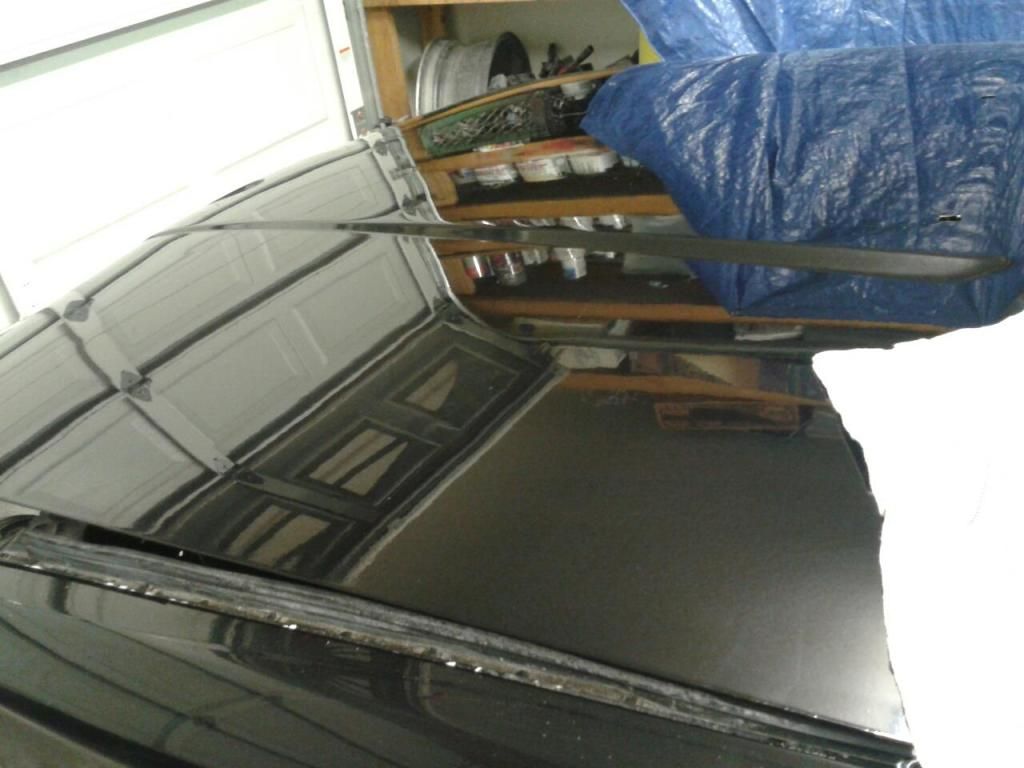
Of course, after all that sanding, body work ect, it needed a full high fill primer spray.
At this point, I was tired of doing body work since its what I do at work. So it looked like this for a few weeks. During that time I got intouch with my mechanic side and replaced the busted transmission for the one that was supplied in the trade. After this, I gained a second wind to get this car on the road. This pic is after spraying the guide coat
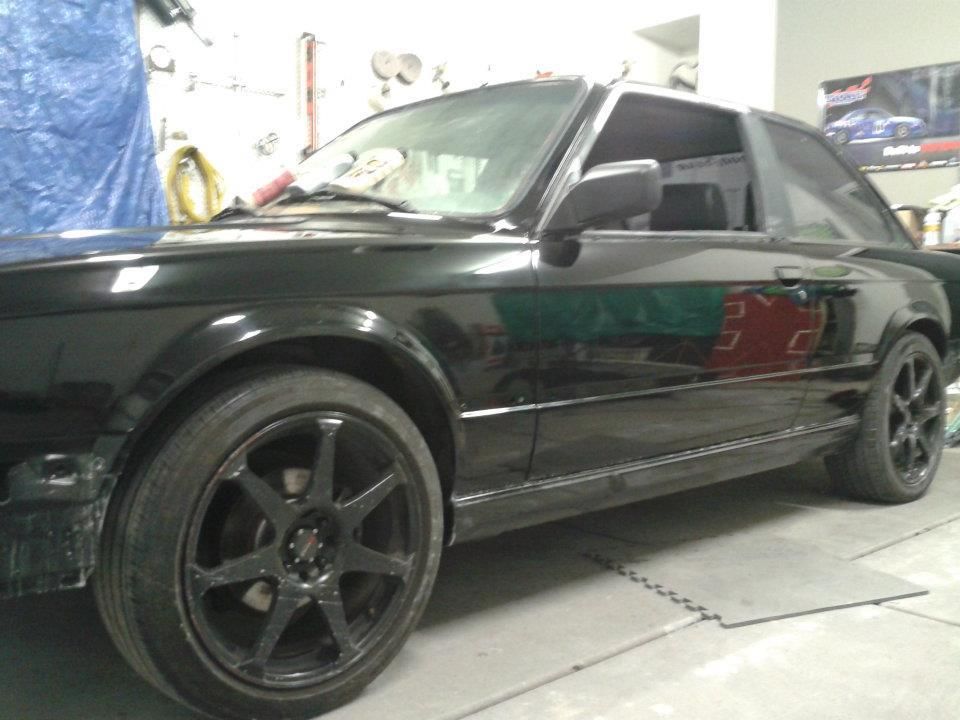
I sanded all of it flat, then became impatient, so sprayed a single stage black
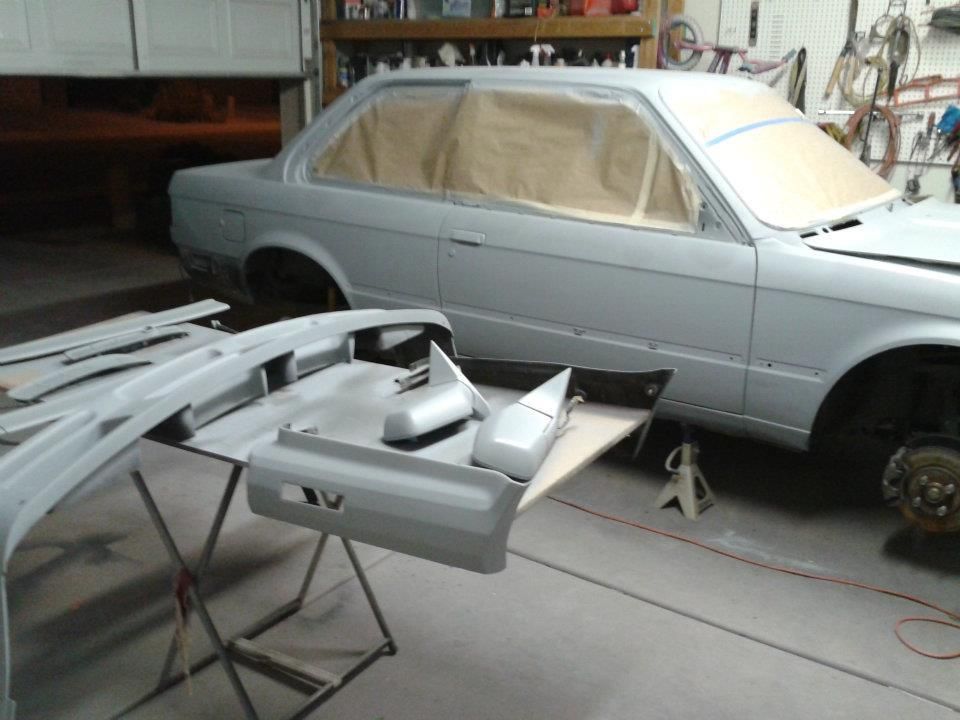
Now it may not look bad in the picture, but it wasnt up to par (dry area run). So this ended up being a base coat for the eventual clear. that means it had to be sanded again. This pic also includes the mounting of the junkyard custom Taurus side skirts.
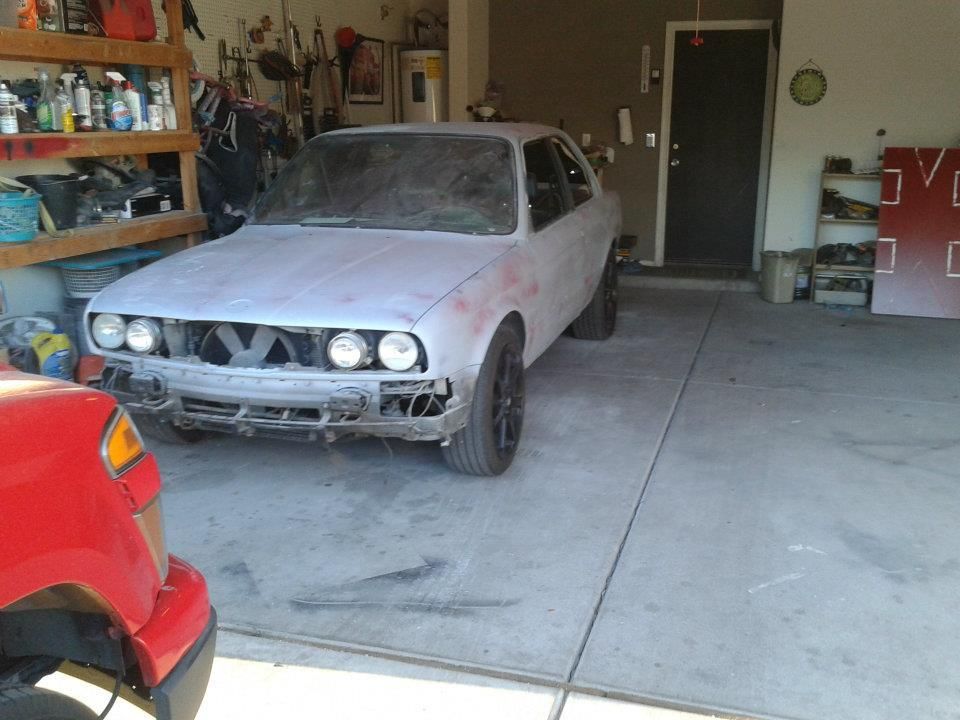
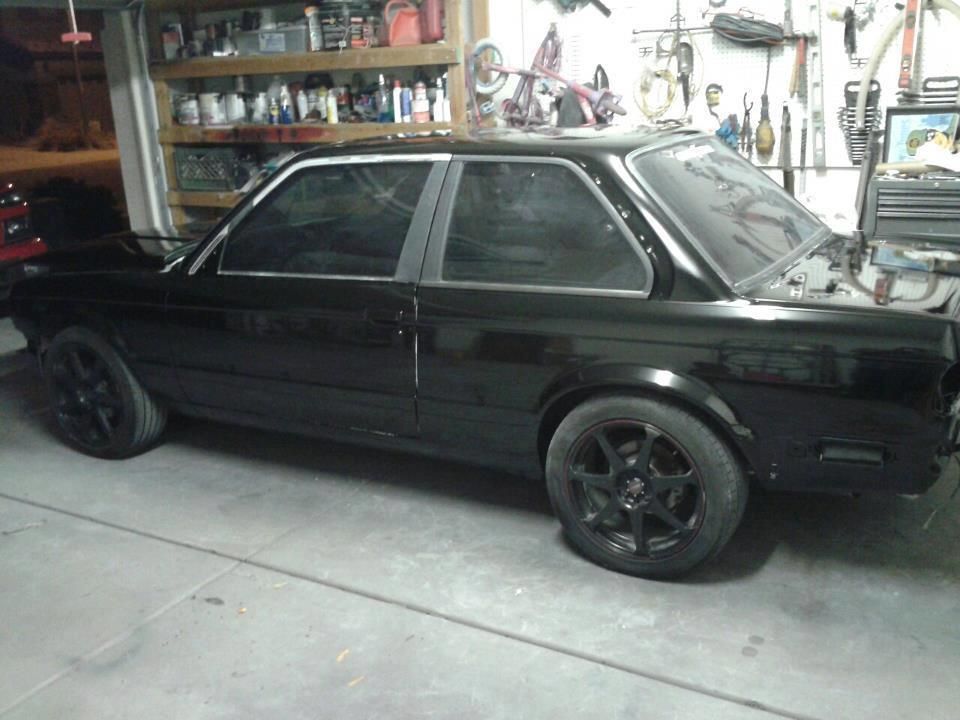
After fitting the skirts, and finishing up the trim pieces, the car was spot sprayed and then clear coated. After wetsanding some orange peel i began to buff it with some cheap compound (i need to invest in better materials.)But this is the result
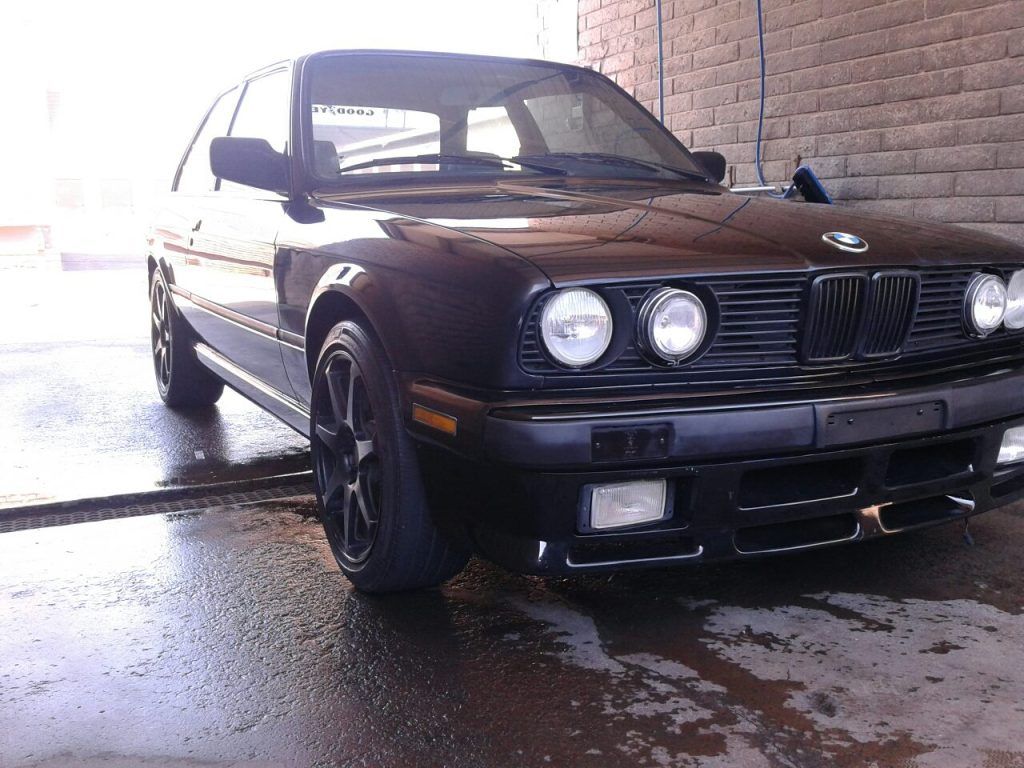
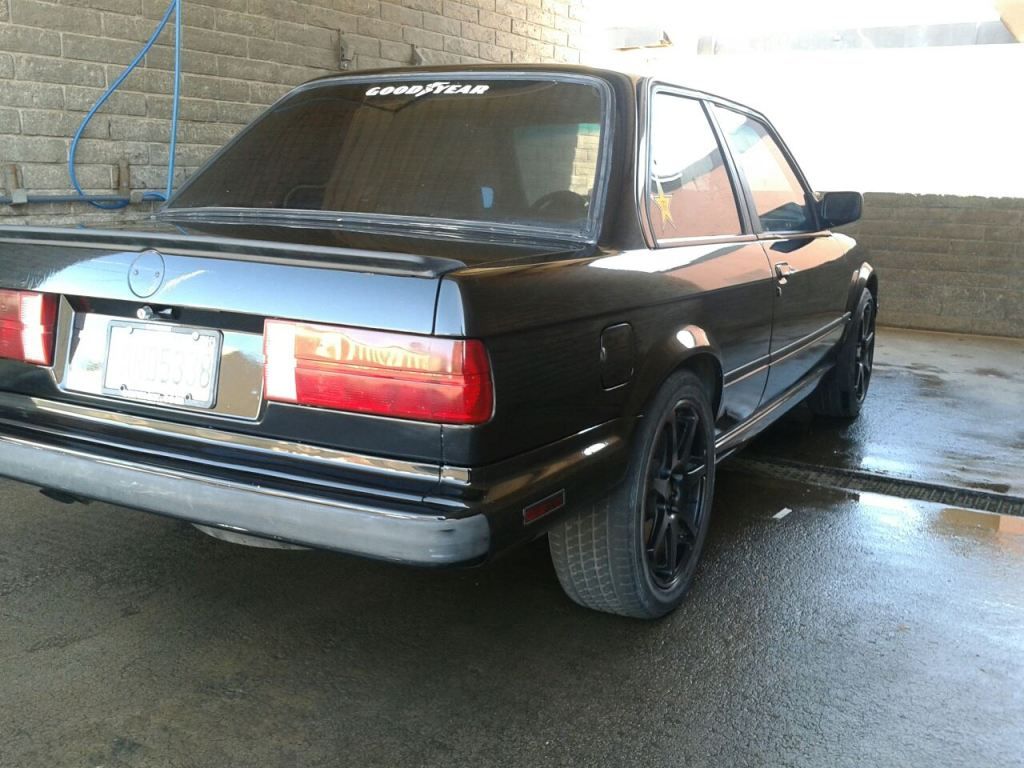
After wetsanding and buffing 90% of the car, I reassembled all the trim pieces. I needed to take it on its first official drive and car wash, so here are the pics.
There are some things I still want to do to it, but at this point ive decided to go back to school. (aka i will be broke)
A shit ton of work has been put into this car (95% just me) and all of it was done in my garage; most with a 21 gal compressor. (buddy brought over his 30 gal to lay down clear)
I started working on this car in late December, and ive been driving it for around 3 weeks or so. Hope this was an entertaining read, so get out there and do some work to your builds!
Up to this point I haven't posted much in this forum so I think now may be a good time. Before I received this car, I had cosmetically restored a Del Sol. Well I got tired of that car and got an offer on a project that I always wanted to do. So on my birthday, I traded my trusty del sol, for this...
A 1987 bmw 325is. Obviously ugly and 1st gear was shot, but the engine felt strong and the interior was well kept for its age.
This wasnt going to be my daily, so I was able to actually take some time on getting things ready.
First batch of tasks on hand were to sand off ALL the improperly applied rattle can primer, weld a hole in the trunk for an antenna, and complete some minor body work. After sanding off the primer, I realized that the car was resprayed with a heavy early 90s metallic that had not only been poorly prepped, but was dead on all the horizontal panels. So I had to take all of those panels down to bare metal.
So after HOURS of sanding and the body work complete, here is a checkpoint pic.
Of course, after all that sanding, body work ect, it needed a full high fill primer spray.
At this point, I was tired of doing body work since its what I do at work. So it looked like this for a few weeks. During that time I got intouch with my mechanic side and replaced the busted transmission for the one that was supplied in the trade. After this, I gained a second wind to get this car on the road. This pic is after spraying the guide coat
I sanded all of it flat, then became impatient, so sprayed a single stage black
Now it may not look bad in the picture, but it wasnt up to par (dry area run). So this ended up being a base coat for the eventual clear. that means it had to be sanded again. This pic also includes the mounting of the junkyard custom Taurus side skirts.
After fitting the skirts, and finishing up the trim pieces, the car was spot sprayed and then clear coated. After wetsanding some orange peel i began to buff it with some cheap compound (i need to invest in better materials.)But this is the result
After wetsanding and buffing 90% of the car, I reassembled all the trim pieces. I needed to take it on its first official drive and car wash, so here are the pics.
There are some things I still want to do to it, but at this point ive decided to go back to school. (aka i will be broke)
A shit ton of work has been put into this car (95% just me) and all of it was done in my garage; most with a 21 gal compressor. (buddy brought over his 30 gal to lay down clear)
I started working on this car in late December, and ive been driving it for around 3 weeks or so. Hope this was an entertaining read, so get out there and do some work to your builds!


Comment