Announcement

Collapse
No announcement yet.

Just Bought My First E30

Collapse
X
 
  • Filter
  • Time
  • Show
Clear All
new posts

    #31
    Dyed the Interior

    I had a three-day weekend open, so I decided to tackle dying the interior. The original tan color was nice, but the leather stained really easily and the carpet looked like it came from a fraternity house basement.

    Before:


    Then I pulled everything out, except for the carpet; that got dyed in place. I also took the rear deck and speakers apart to dye them.


    I cleaned the carpet before dyeing, though it looks better in this picture than in reality.


    Then I got to dying. Thank goodness for my garage heater; it was between 20°F and 34°F all weekend.


    I had to get creative to get under the strap on the rear seat armrest.
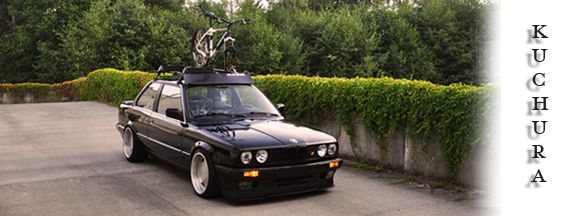


    Final Result:


    1987 325e Commuter Project Blog

    1967 1600 Project Blog: www.TX02.blogspot.com

    Comment


      #32
      Parts Order

      Just got a few boxes from Blunttech.com. This is going to be fun.

      1987 325e Commuter Project Blog

      1967 1600 Project Blog: www.TX02.blogspot.com

      Comment


        #33
        jeez, that interior dye seems like a tremendous headache - both in fumes and labor, how long does that take start to finish? Granted, it's a labor of love but I'm not sure I'd get my seats flowers anytime soon.

        91 318i | 87 535iS

        Comment


          #34
          Welcome to the world of E30s, Clay. Nice work with the documentation! We had our '85 325e for 17 years of happy motoring.

          John

          Comment


            #35
            looks like your staying busy!! i like the progress!!

            1988 325is S50 in-progress.
            http://www.facebook.com/E30LocalCrew
            Few pictures:
            http://www.r3vlimited.com/board/showthread.php?t=255061

            Comment


              #36
              Nice!
              sigpic

              Comment


                #37
                Originally posted by ScHpAnKy View Post
                jeez, that interior dye seems like a tremendous headache - both in fumes and labor, how long does that take start to finish? Granted, it's a labor of love but I'm not sure I'd get my seats flowers anytime soon.
                Took me about a day (8-10 hours, maybe). It's really only as difficult as removing and replacing all the interior parts. I didn't remove the carpet, but you could if you wanted. I really only needed to remove a few more trim panels to get it out.

                Anyway, if you want to do it, just make sure that you have a place to spray them that is between 60°F and 90°F. It only takes about an hour to dry, though you may need multiple coats.

                1987 325e Commuter Project Blog

                1967 1600 Project Blog: www.TX02.blogspot.com

                Comment


                  #38
                  I am always afraid it will rub off on clothes in heat or if it gets wet. Have you had any issues with it? Can you use it on the console and other "plastic?" pieces?

                  Comment


                    #39
                    Hey, you're near me!

                    Good progress so far, and if you see a Black DB 325is, wave!
                    1987 325is, S50B30US, Kamei side skirts, Zender Spoiler.
                    MT2 Wheel, 95 M3 Rack, Condor Speed Shop knob, UUC SSK w/ DSSR, Billy Sports/GE Coilovers, KAMotors CAI.


                    Originally posted by MclubSport
                    Why you have a badge on wheel ? You do not know what car you have? But if you have a mustache, you know better where is your mouth?

                    Horrible with responding to PMs, I'm so sorry.

                    Comment


                      #40
                      Nice car & nice progress! I'm feeling it

                      Comment


                        #41
                        Originally posted by rcsoundn1 View Post
                        I am always afraid it will rub off on clothes in heat or if it gets wet. Have you had any issues with it? Can you use it on the console and other "plastic?" pieces?
                        Plastic, vinyl, whatever. Sometimes, you have to recoat, but no, it doesn't rub off at all. It's kind of amazing for just being a spray. The alternative is to use a regular dye, but that would be a lot more involved.

                        EDIT: The Duplicolor dye/coating won't rub off on your clothes, but it can be rubbed off with time. The occasional touch-up is required for door panels and such. This could be avoided with thicker/more coats when originally applied.

                        Also, as it turns out, my seats are leather. The Duplicolor spray isn't meant for leather, so I am seeing some original color coming through in the cracks. To properly change the color of leather, you need to use leather dye (which is easy to use and relatively inexpensive).
                        Last edited by ClayW; 04-17-2013, 07:55 AM.
                        1987 325e Commuter Project Blog

                        1967 1600 Project Blog: www.TX02.blogspot.com

                        Comment


                          #42
                          Installed Blunttech Short Shift Kit

                          In my parts mega order, I included a short shift kit from Blunttech.com. I wanted to tighten the shifter up a bit and improve the throw, but, since the car is a daily driver that my wife and I share, I didn't want to get too aggressive with the shifter or bushings. Blunt's kit fit the bill.


                          So, here is where I started:


                          After removing the exhaust, heat shield and driveshaft, I gazed upon this oily mess:


                          After a little preliminary cleaning:


                          Removed the shifter carrier:


                          Then I replaced the transmission output seal and the shift selector rod seal.


                          Removed the old carrier bushing and replaced with new. If I repeated this effort, I might have gone with a delrin bushing, but the new, OEM rubber is nice and tight.


                          Comarison of the new Z3 1.9 shifter and the original E30 shifter:


                          Shifter carrier and associated parts installed:


                          While the center support bearing looked new and was pliable, the guibo was in need of replacement:


                          I also removed the driveshaft balancer/dampener.


                          Installed with new transmission mounts:


                          Also replaced a broken exhaust hanger.


                          The cherry on top of this project is the ZHP shift knob. It feels like a new(er) car.

                          1987 325e Commuter Project Blog

                          1967 1600 Project Blog: www.TX02.blogspot.com

                          Comment


                            #43
                            I started on the suspension this weekend. By Sunday night, I had shocks ans springs installed on all four corners and the rear got new subframe and trailing arm bushings. I have new tie rods ends, control arm bushings and control arms for the front, but those will have to wait until next weekend. The shock and spring combination is a "Bilstein Tuned Suspension" kit.

                            So I started by grinding my jackstands to slot into the frame rail/edge.


                            We yanked out the rear subframe and found some seriously worn shocks paired up with the car's original springs.


                            As strange as it seems, the rear shock mounts looked fairly new, though they were installed incorrectly atop prehistoric shocks.

                            We burned out the subframe bushings and used a homemade puller to remove and replace the trailing arm bushings.


                            Then we bolted the whole thing back up into the car. I'll get to that differential alter.


                            After realizing that I didn't have time to replace the tie rods, control arms and control arm bushings up front, but also couldn't drive around for a week with only the rear lowered, we decided to get the shocks, springs and upper shock mounts in the car. I'll get to the rest of it next weekend if the wife doesn't kick me out of the house.

                            So, here we go: New Bilstein shocks and springs all the way around. I also threw in E90 drop hats for a little more rake.


                            Before:


                            After:


                            I also swapped in a new shift boot from Fuzz Fabrics.


                            Last edited by ClayW; 02-24-2013, 10:43 AM.
                            1987 325e Commuter Project Blog

                            1967 1600 Project Blog: www.TX02.blogspot.com

                            Comment


                              #44
                              Rebuilt M50 Injectors Installed

                              I bought a set of rebuilt M50 fuel injectors (p/n 0280150415) from Dima. The M50 injectors apparently have identical resistance values and flowrates to M20 injectors. The difference is that while the M20 injectors have a single pintle, the M50 injectors have four pintles, allowing for better atomization.

                              I began by removing the valve cover for access.


                              Then I unplugged the injector harness from the driver's side and unscrewed the connector from the bracket.


                              Then I unplugged the two engine temp sensors.


                              Then I pulled out the injector harness.


                              Then I removed the fuel lines and removed the fuel fail with the old injectors attached. Here is what they looked like when I removed them:


                              I suspect that these have a few more miles on them than BMW intended.

                              Here are the rebuilt M50 injectors.


                              Installed on the fuel rail with a little oil for lubrication:


                              Installed on the manifold:


                              Injector harness reinstalled:


                              And, lastly, the valve cover gets reinstalled and all teh connections are buttoned up.


                              The M20 seems to be running more smoothly now. I'll report any change in fuel mileage.
                              1987 325e Commuter Project Blog

                              1967 1600 Project Blog: www.TX02.blogspot.com

                              Comment


                                #45
                                Does the antenna bolt on directly to the bracket of the original?


                                Originally posted by StereoInstaller1
                                My expectation is an immediate 5 speed swap. Autos suck more than a 50 year old whore.

                                Comment

                                Working...
                                X