
Ah ok I heard you can make the regular one work somehow. Any pics of how you did that?
-
84 325e Burgundrot S52 M Tech 1.
Your signature picture has been removed since it contained the Photobucket "upgrade your account" image.
http://www.r3vlimited.com/board/showthread.php?t=250109 -
Looks perfect.
Love the wheel and tire sizing - we forget how perfect these things were back when 15in was considered big.2011 1M Alpine white/black
1996 Civic white/black
1988 M3 lachs/blackComment
-
Great car! Does it share the garage with the M3 and Mtech2 then? If so, I think you just hit the Trifecta of e30 ownership!Comment
-
It would if I didn't have a 2 car garage. Currently making arrangements to keep the M3 elsewhere. I'm probably older than the typical r3v demographic so I have had time on my side in building this collection. I have been driving and toying with E30s exclusively since 1992 and I still own my 1st 325.Comment
-
Welcome to the Mtech 1 club!
That makes 3 known M-tech 1 tribute cars in NJ!!- Frank
'87 325ic M-Tech 1 For Sale!
http://r3vlimited.com/board/showthread.php?t=407503
Build Thread http://www.r3vlimited.com/board/showthread.php?t=229347Comment
-
Never seen this car in person, would remember, looks amazing.sigpic
New website releasing soon www.gutenparts.com Guten Parts + Service | Facebook | Twitter
____________________________________
Levent
%20levent@gutenparts.com
____________________________________
Ladies:
1998 E36 m3/4/5 1988 325i 1989 325iTComment
-
84 325e Burgundrot S52 M Tech 1.
Your signature picture has been removed since it contained the Photobucket "upgrade your account" image.
http://www.r3vlimited.com/board/showthread.php?t=250109Comment
-
I'll see if I can find the spare end cap.
I'm thinking it is technically a replica or 'tribute' car unless it was delivered as a MTechnic 1. That said, I'm not sure whether the MTechnic 1 was originally available as a dealer installed option, factory installed or both. Anyone know? In either case, I don't think any US s/n cars were sold as MTech 1 so even though it is built with OEM parts, it is still a replica or tribute... Still just as much win though, so semantics as far as I'm concerned.Comment
-
Comment
-
Beautiful car and I love those wheels; I'm looking to get some Ronal LS too. Are you running 225/45 or 205/50 size tires?(OO[][]OO)
'91 318is
'04 M3 6 Spd
'17 Tacoma TRD Sport
'92 325iC (Sold)
'05 330i ZHP (Sold)
'01 325it (Sold)
'98 318ti (Sold)
'06 330CI ZHP (Sold)
'03 330CI (Traded-in)
'76 2002 (Sold)
'91 318is (Sold)Comment
-
I'm actually running 205/55 Kuhmo Ecsta 4X. A little tall, but the overall diameter is very close (slightly smaller) than the factory 14" wheel/tire combo. This car gets daily use so the extra rubber is appreciated with the conditions of our roads right now in NJ. 205/55 15 is also the factory size on the E30 M3.Comment
-
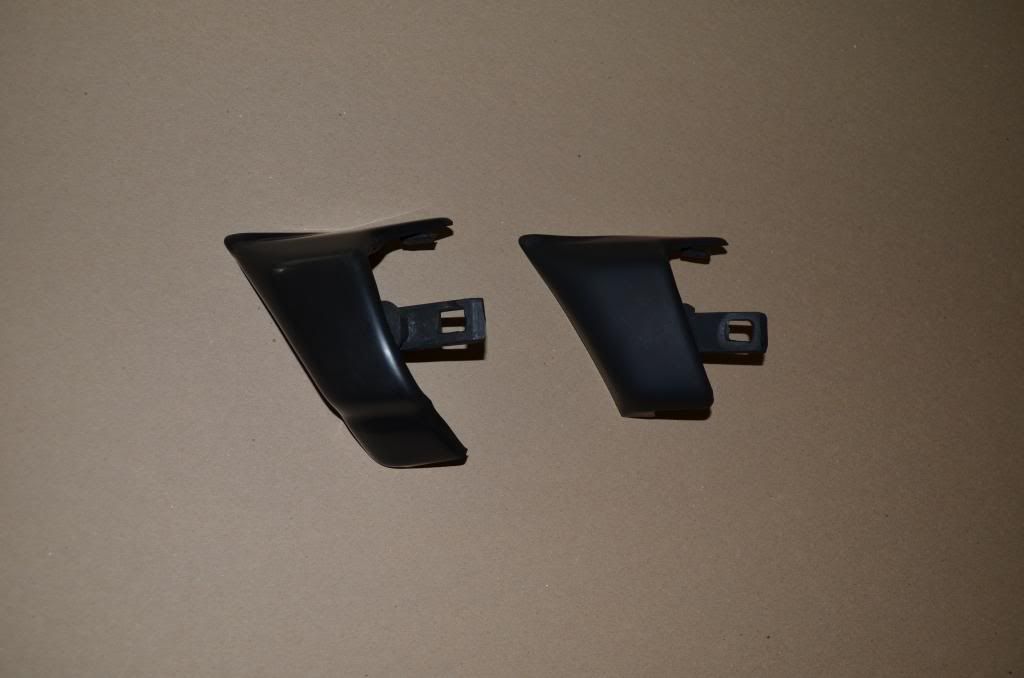
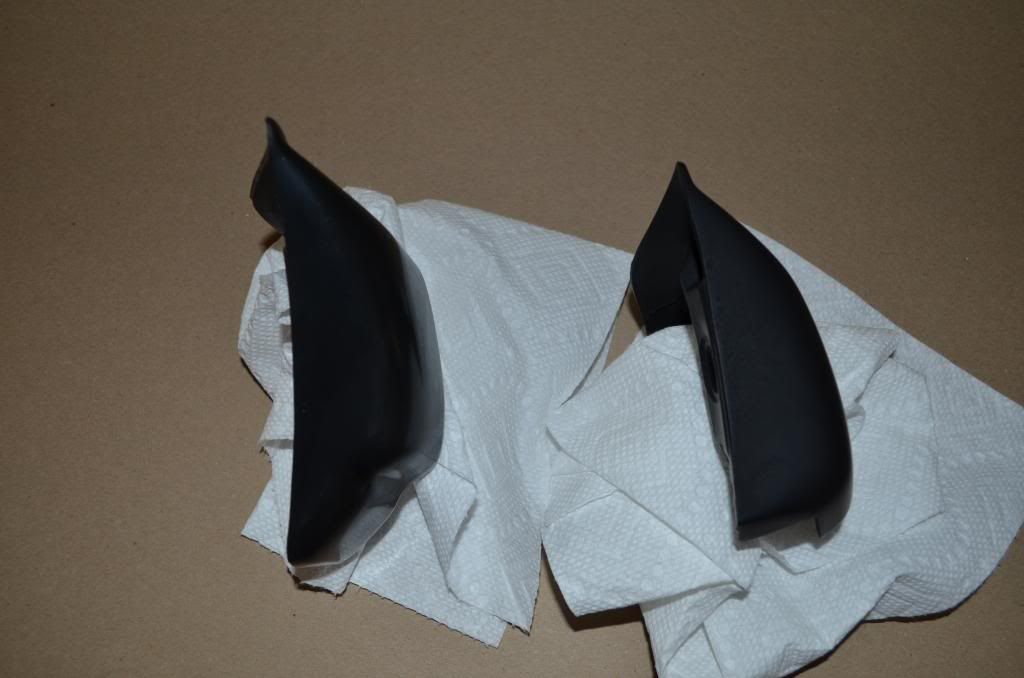
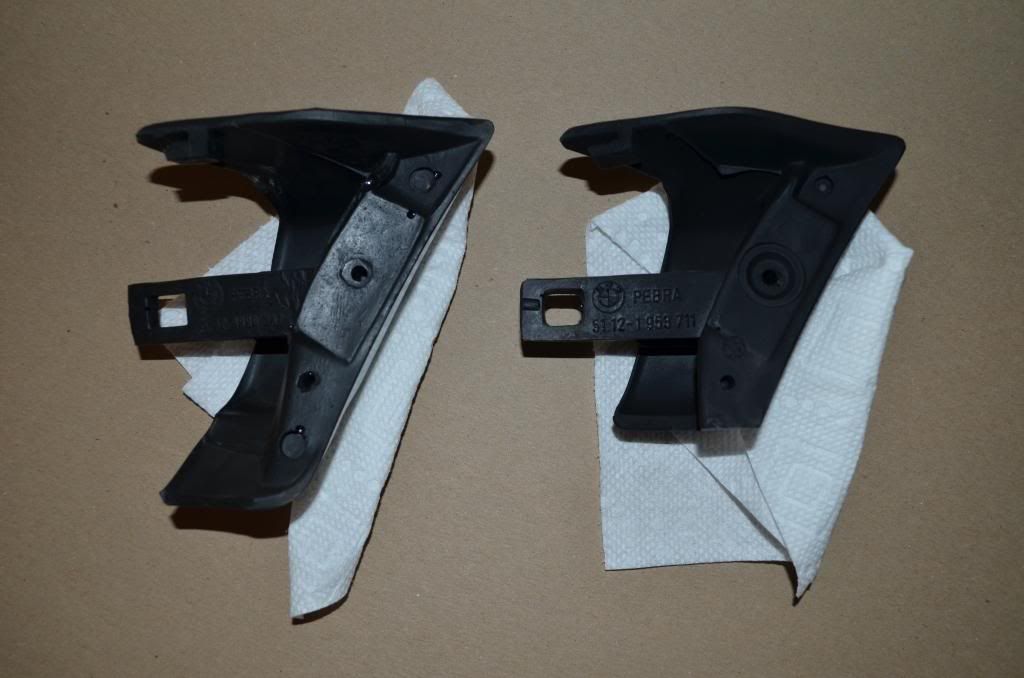
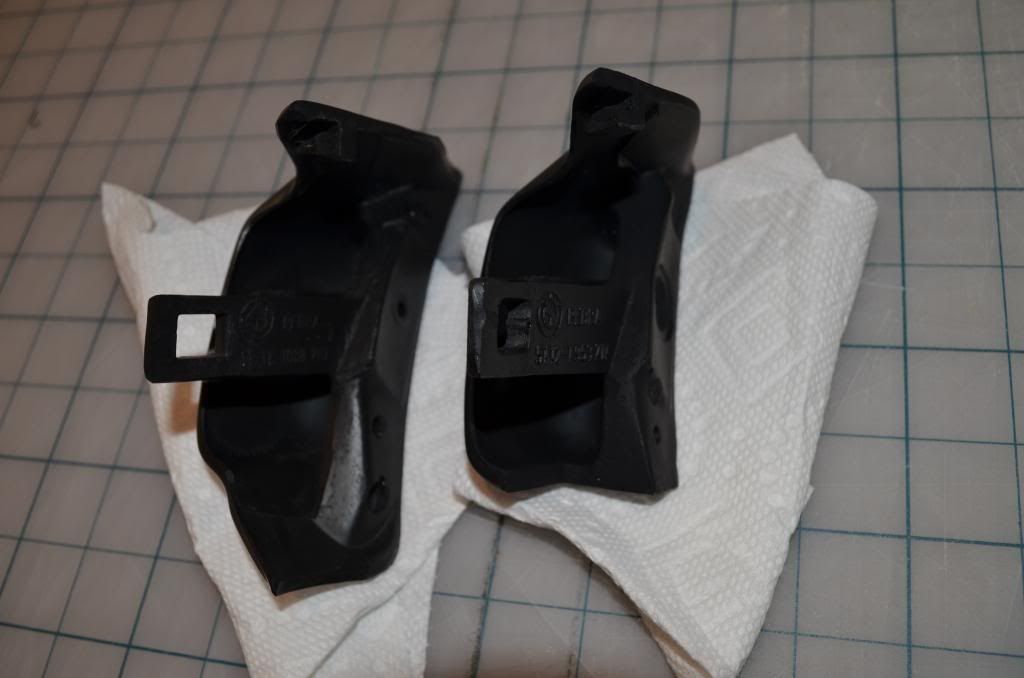
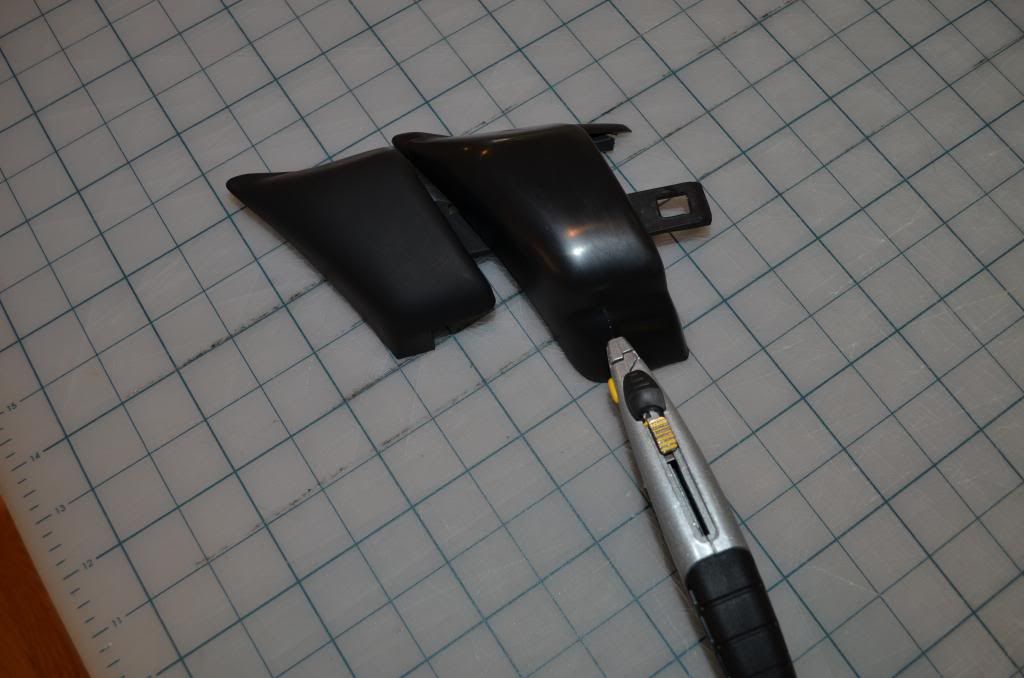
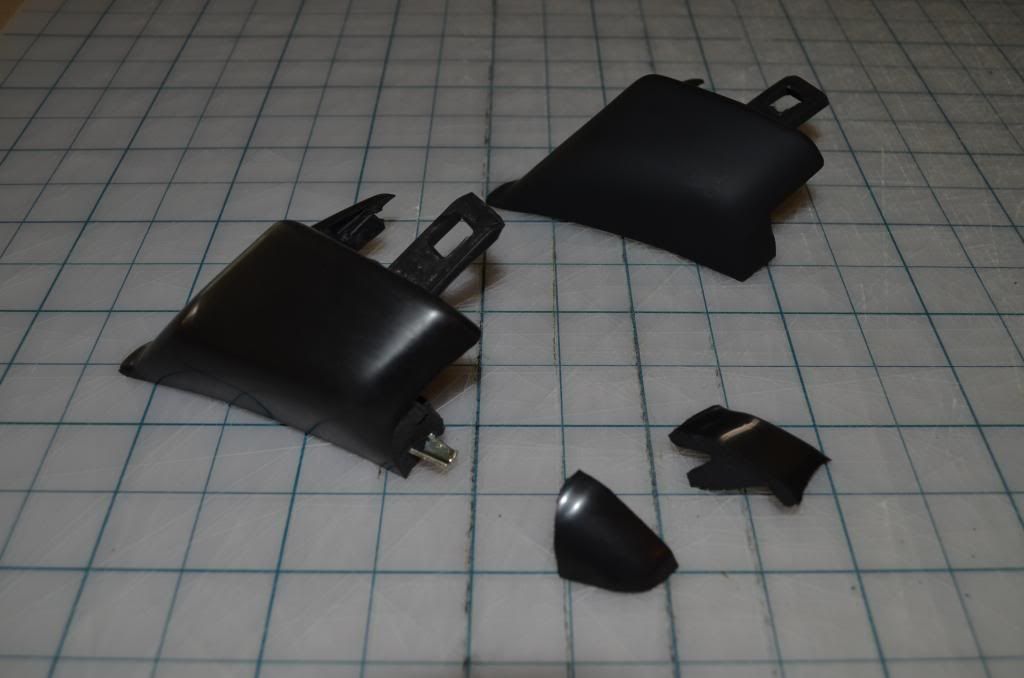
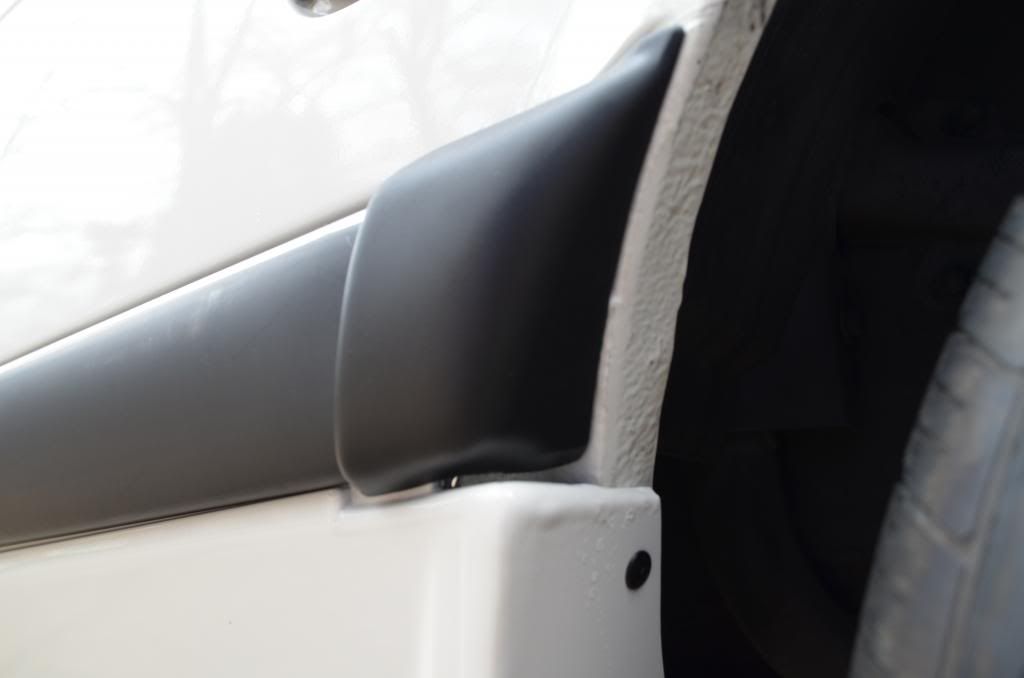
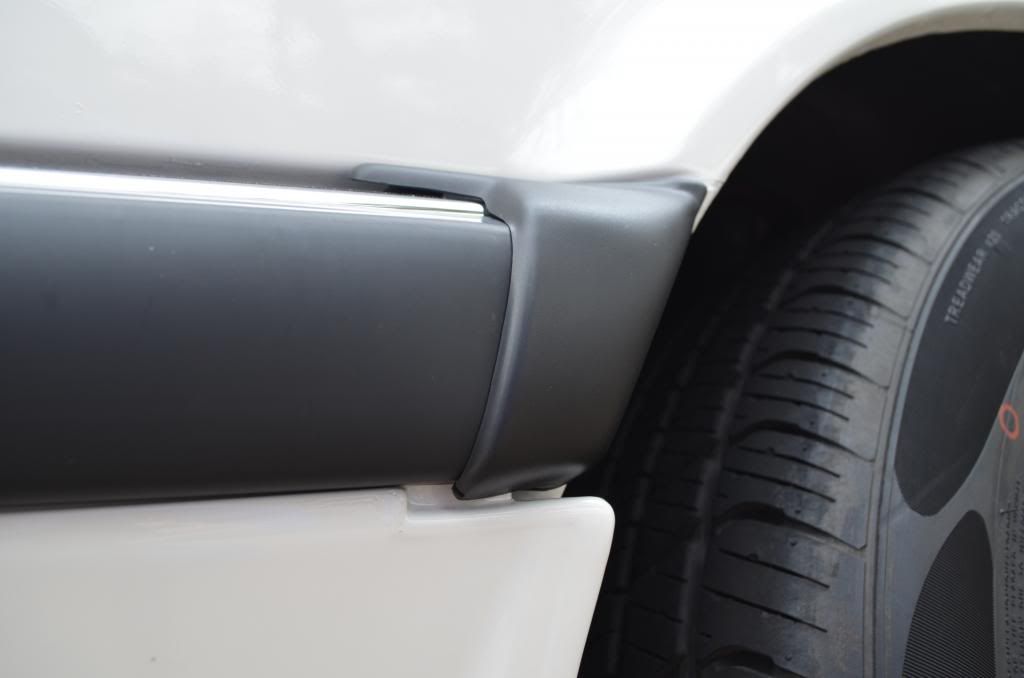
I did not take any in-progress pics of modifying the standard right rear euro bumper cap to the MTech 1 bumper cap for the car. I also checked and I don't have a spare right cap, but I did have a spare left rear cap. For photo purposes, I did the same thing to the left side cap so you can see how easy it is. I may want to post this in the DIY forum, but here is the answer to your question. The following images show the standard and MTech caps next to one another, then show the modification steps. Lastly, I show a couple of close-ups of the modified right rear cap installed on my car. There are 2 main differences between the 2 caps. First, the standard euro bumper cap rubber and internal steel spine extends down farther and would interfere with the MTech1 rear valance. Second, the standard euro cap has a smoother/glossier finish. The MTech 1 cap is more matte black. After I performed the modification below and ground away the protruding spine, we smoothed the lower edge, filled in over the end of the spine with panelbond. Probably don't need to be so precise with finishing the underside because it isn't really visible after installation anyway.
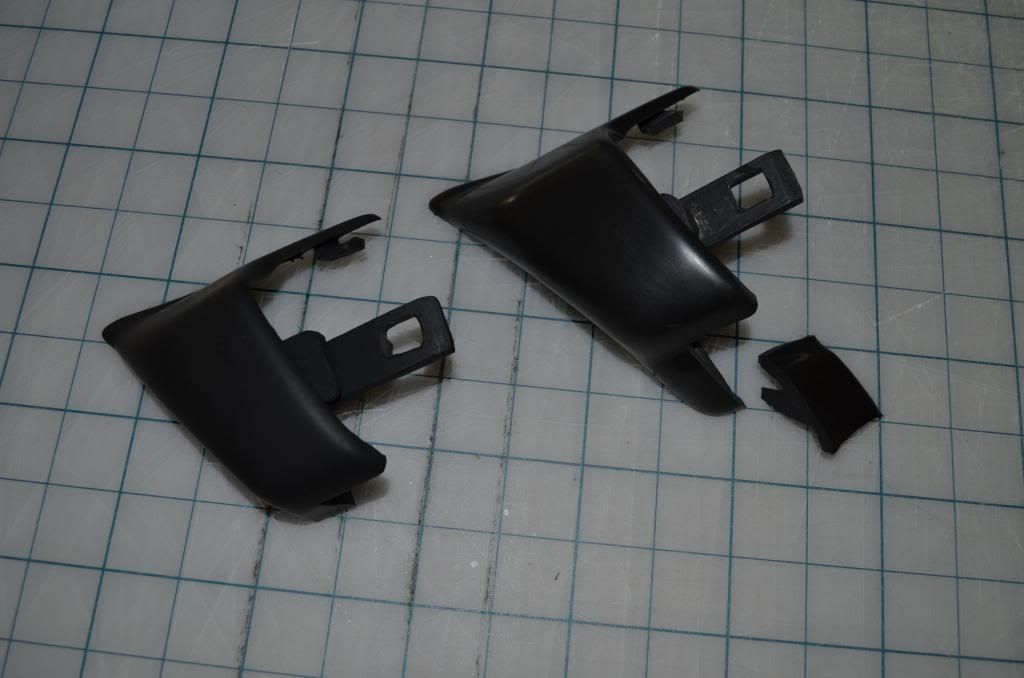
UPDATE: Also note that there is a groove on the MT1 cap between the tongue that slips into the end of the rubber bump strip and the tab that mounts to the bumper. You can see the groove in photo 2 below. This portion of rubber on the standard euro end cap is flush with the end of the tongue and needs to be carved out so that the edge if the valance can ride in the groove.
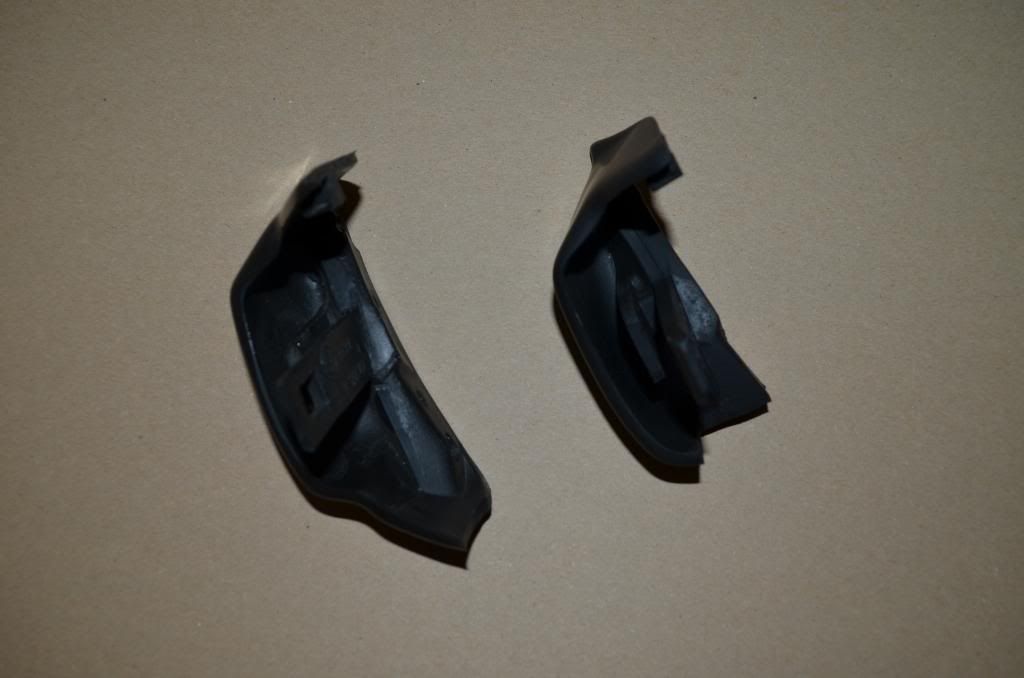
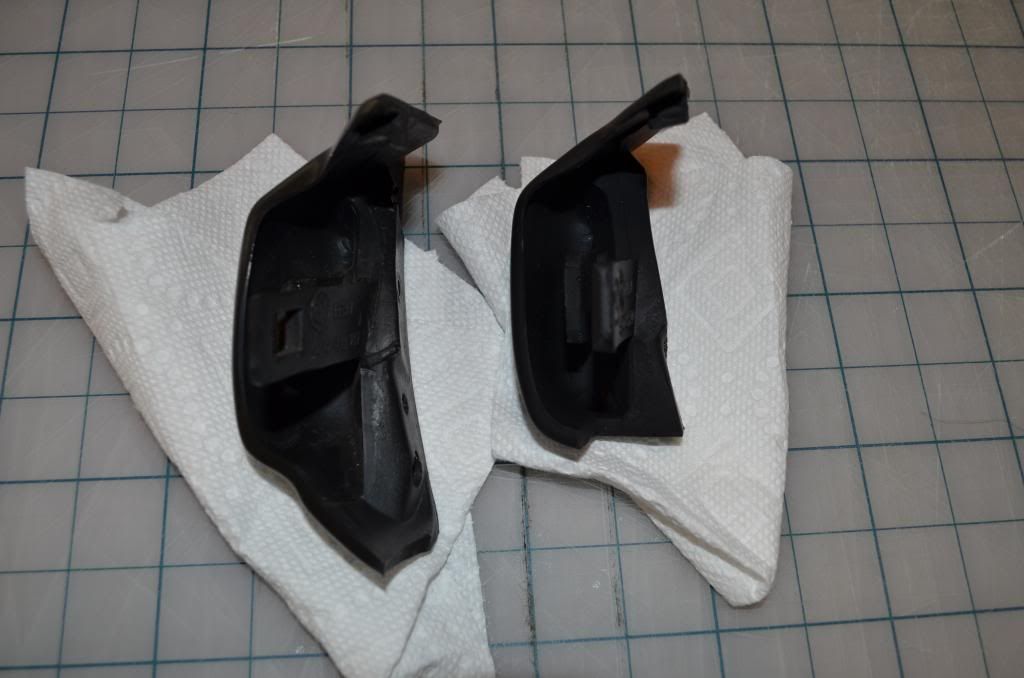
Here is the first cut:
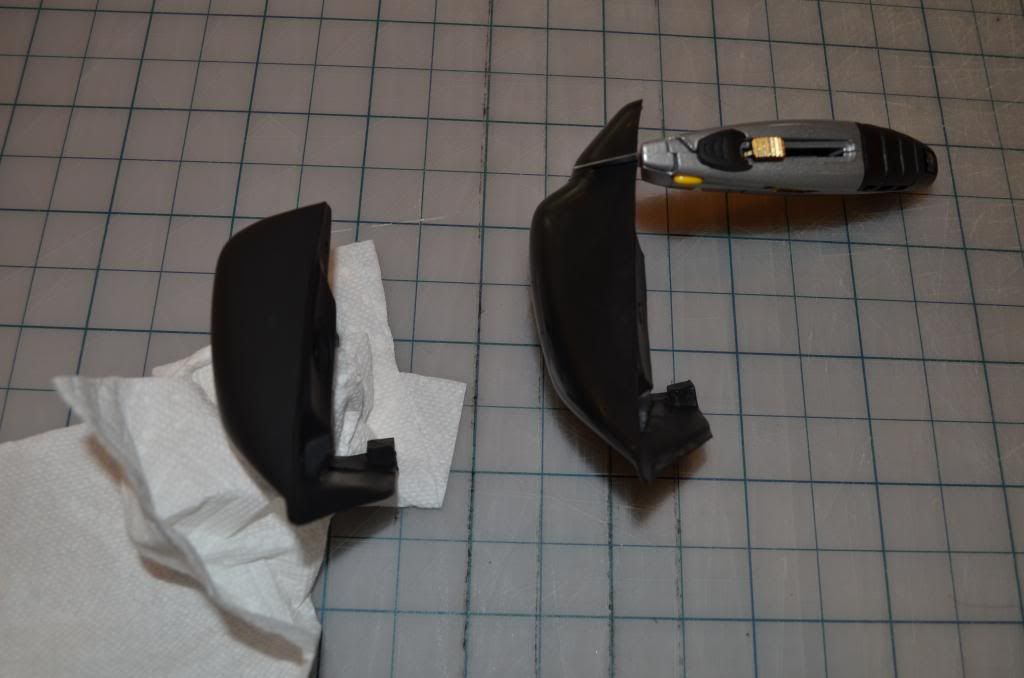
Here is the second cut:
Here is the 3rd cut. This is the cut where you cut around the perimeter of the steel spine and then pull off the rubber end:
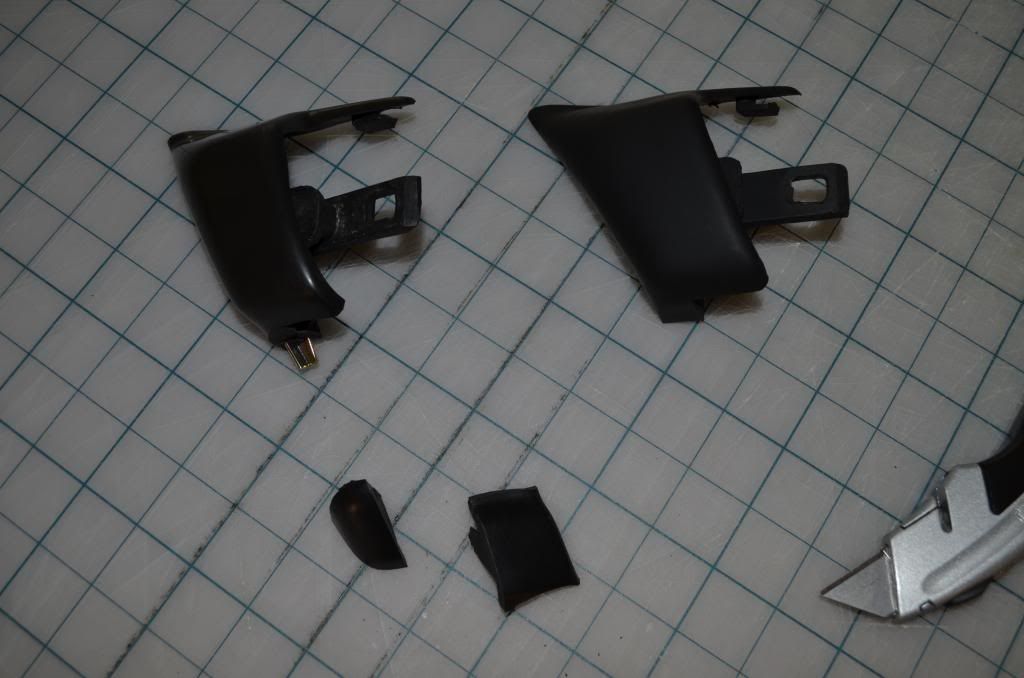
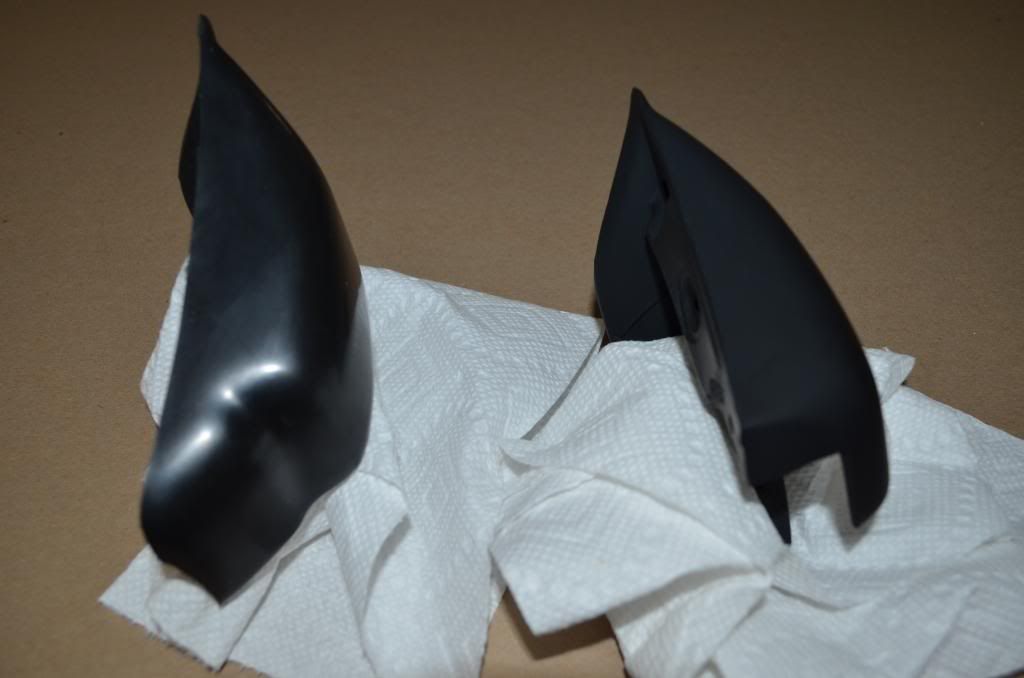
Here are shots of the right rear modified cap on the car:
Comment
-
-


Comment