
July 24th, 2014
Hello and welcome to the build thread of my 1986 325es, Franky Frank.
Disclaimer: There will be many photos and lots of context, this is for my own personal records as well. I’ve always wanted to do this, I will try to keep it entertaining. Enjoy.
-Sam
First I will start with a bit of back story and explanation for those that aren’t 100% up to queue with either my previous car, or cars and e30’s in general, because yes this will be linked to a few others I know who don’t obsess over this stuff like us R3v’ers do.
Follow this link for that full back story on my previous E30 with many photos, videos, etc:
In short:
In July of 2011 I aquired a 1990 BMW 325is, soon to be named, “Marky Mark,” for the good vibrations the car gave me. The car was an amazing entry into the BMW and european world, teaching me much about car control and simple mechanics in working on the car.
Two years, many autocrosses, a curb, thousands of photos, and many more thousands of dollars in maintenance passed and I found myself in Utah with a decision to be made, it was either going to eventually be time to throw more money into this car for maintenance/refurbishment, and/or upgrades like coilovers, etc, or to sell it for a good price and start spending money on a different car, starting over.
Long story short, May of 2014 rolled around and at just short of three years of ownership, Marky Mark was sold for $4,100.


You didn’t think I had no plans to replace him did you? You must be on dog food.
Rewind all the way back to late 2013. A friend of mine, Josh, had a tired old 1986 325eS that he was trying to unload as he had just gotten into a 5-speed e46 wagon. I had previously shown the car to another R3vless friend, Derick, who was interested in getting into the e30 game. And boy is he in now, some of you may know who he is by now because of his beautiful convertible, Frosty.

Derick and Frosty on flickr.
Maybe it was a good thing he didn’t go for the ‘eS’. Yes, yes it is, because then I wouldn’t have this built thread, and I wouldn’t have a blue sport interior.
Over the course of many months I would check in with Josh to make sure the car hadn’t sold yet, because I said would buy it once spring came around and after I sold Marky Mark. I managed to keep a grasp on the car over 7 months and from 1,000 miles away, and the plan was set: Sell Marky Mark by the end of May, get Josh $1500, get the car in for basic service in prep for the thousand mile journey to Utah, be stoked, fly home, and drive yet another e30 away from the only state it had since called home.

The, then yet to be named, new guy waiting up at my South Dakota home, post purchase.

These are photos I made my little brother take of the car for me to see after I bought it. Yes I had not seen the car in 9 months before buying it. Shouts to little brah Keith for the pics.
Going from a modified 325is to a stock, less powerful, and shabby 325es was interesting. Almost everyone I talked with questioned why I would get rid of the car that has treated me so well, and was already in good condition, for something in not near as good of condition and especially an earlier model that has the big early model, “diving board,” bumpers.
After arriving in South Dakota and getting aquainted:


“I want a fresh start. I want something to do, and I want to be the one to do it. The last one already had it’s work done to it, it didn’t need anything else to be it’s own personified car. I want to make a car my own from scratch (stock),” proclaimed Sam as he raised his eyebrow and dropped his word on the testy friend.
Diving boards need love too.
So here we are half way through 2014, in Utah with a frowning 1986 BMW 325es.


Cracked up spoiler from Marky Mark I had previously traded Josh for.


I have been slowly compiling parts in preparation for an all out motivated few weeks of installation in my free time. Did I mention I got a job at a local BMW dealer here in Utah? That has certainly helped on the OEM parts buying side of things. I’m currently in sales with terrible hours, but will be moving back to detail hopefully by the end of July (downgrade, no? “Not if you’re not selling cars it’s not,” said Sam’s paycheck). With the position switch I will be pushing for earlier hours, getting off in the late afternoon or late evening, leaving many hours of daylight left. Now that I won’t have to smell great when getting to work, I will also be buying a bicycle as I live only a couple miles from the dealership, making the need to put my car back together for a ride to work unnecessary. What a life, did I mention I’m single and kid-less?
So now for the build parts of the build thread.
Thus far I have:
Had my SoDak shop replace some of the basics, timing and accessory belts, water pump, crank seal, shotty throttle cable. I insisted doing the valve cover gasket myself, I wasn’t in the mood to pay $100 some dollars for a shop to do that. Cleaned up the engine bay in the process of doing that too. Was also going to do the fuel filter, still on the to do list, because have you seen where they put it on these models? [flips table]
Passengers window motor was dead, I sourced a used one via R3v and fixed that. My poor friend Will toughed the whole 1000 trip with me to Utah in an air condition-less car with only my window down, and no radio…

I tore out the already nonfunctional radio ambitiously, the face of the dash was similar to my previous e30, the wiring was not. Currently have a hole there, I believe all I’ll have to do is run new wire to the front speakers, one of those cases for those familiar with e30 radio installs.
Stripped away any rust ridden spots on the rocker panels, minor hole in the bottom of the passengers fender, and a slightly bigger hole in the joint of the rocker near the front, under the drivers door. Cleaned it up and treated it with rust eater as best I could and repainted over it with truck bed liner. You may notice, I painted higher than the normal black rocker paint. I went up to the slight notch in the body line and even up into each door sill. There was some minor rust forming and creeping up into each sill, so I tread and covered it. This made a huge aesthetic difference.
Replaced the rubber grommet for my antenna.
Named it Franky Frank. Based upon another favorite actor and doppelganger of mine, Jason Statham. In, “Death Race,” he plays a racer named, “Frankenstein.” In “Transporter,” he plays a driver named, “Frank Martin.” I’m saving “Paul Walker,” for my future M3.
Other things that are still broken or need attention:

Tear in drivers seat bolster.


Dash cracks.

No front lip.

Exhaust sagging like an E36’s glove box.

Hood rust.
I have compiled many parts for future install, including:
As far as other suspension work I’m still looking into camber plates and sways.

Parts stash in my kitchen, bachelor life.


Parts, stashed.
I do already have wheels, both the rolling on and steering with kind, but I must leave some surprises there, I’ve gotta keep you scrolling. Hint: you can either look at this thread a little closer, or dig into my previous posts to figure out the “rims” (wheels). The steering wheel you really have to be in my clique to know.
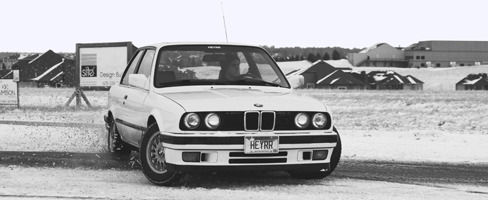
I believe that’s the majority of it, aside from one final detail. I had always had a small fancy for diving board cars, because it was what I wasn’t used to seeing. This is the photo that sparked the full on idea of my dive into the big bumper early model. (Yes these are the smaller metal euro bumpers, but it’s an early model, chill) I found it on Tumblr with very little information on it and couldn’t find anything elsewhere on the internet. In a commenters caption it was stated that this was a “Pre-M3 E30 DTM car.” It makes enough sense, but I know nothing for certain, if any of you know what’s up, do comment. Photo:

My set goal for install coming up is to have this pieced together by the end of August, as my homies here are planning on traveling down to San Diego for Big SoCal Euro August 30th, and I’d love to have it done with stage one of rebuilding/refreshing and ready by then.
Let’s get to work.

(Please excuse my childish ways, I used to listen to punk rock)
Hello and welcome to the build thread of my 1986 325es, Franky Frank.
Disclaimer: There will be many photos and lots of context, this is for my own personal records as well. I’ve always wanted to do this, I will try to keep it entertaining. Enjoy.
-Sam
First I will start with a bit of back story and explanation for those that aren’t 100% up to queue with either my previous car, or cars and e30’s in general, because yes this will be linked to a few others I know who don’t obsess over this stuff like us R3v’ers do.
Follow this link for that full back story on my previous E30 with many photos, videos, etc:

In short:
In July of 2011 I aquired a 1990 BMW 325is, soon to be named, “Marky Mark,” for the good vibrations the car gave me. The car was an amazing entry into the BMW and european world, teaching me much about car control and simple mechanics in working on the car.
Two years, many autocrosses, a curb, thousands of photos, and many more thousands of dollars in maintenance passed and I found myself in Utah with a decision to be made, it was either going to eventually be time to throw more money into this car for maintenance/refurbishment, and/or upgrades like coilovers, etc, or to sell it for a good price and start spending money on a different car, starting over.
Long story short, May of 2014 rolled around and at just short of three years of ownership, Marky Mark was sold for $4,100.
You didn’t think I had no plans to replace him did you? You must be on dog food.
Rewind all the way back to late 2013. A friend of mine, Josh, had a tired old 1986 325eS that he was trying to unload as he had just gotten into a 5-speed e46 wagon. I had previously shown the car to another R3vless friend, Derick, who was interested in getting into the e30 game. And boy is he in now, some of you may know who he is by now because of his beautiful convertible, Frosty.
Derick and Frosty on flickr.
Maybe it was a good thing he didn’t go for the ‘eS’. Yes, yes it is, because then I wouldn’t have this built thread, and I wouldn’t have a blue sport interior.
Over the course of many months I would check in with Josh to make sure the car hadn’t sold yet, because I said would buy it once spring came around and after I sold Marky Mark. I managed to keep a grasp on the car over 7 months and from 1,000 miles away, and the plan was set: Sell Marky Mark by the end of May, get Josh $1500, get the car in for basic service in prep for the thousand mile journey to Utah, be stoked, fly home, and drive yet another e30 away from the only state it had since called home.
The, then yet to be named, new guy waiting up at my South Dakota home, post purchase.
These are photos I made my little brother take of the car for me to see after I bought it. Yes I had not seen the car in 9 months before buying it. Shouts to little brah Keith for the pics.
Going from a modified 325is to a stock, less powerful, and shabby 325es was interesting. Almost everyone I talked with questioned why I would get rid of the car that has treated me so well, and was already in good condition, for something in not near as good of condition and especially an earlier model that has the big early model, “diving board,” bumpers.
After arriving in South Dakota and getting aquainted:
“I want a fresh start. I want something to do, and I want to be the one to do it. The last one already had it’s work done to it, it didn’t need anything else to be it’s own personified car. I want to make a car my own from scratch (stock),” proclaimed Sam as he raised his eyebrow and dropped his word on the testy friend.
Diving boards need love too.
So here we are half way through 2014, in Utah with a frowning 1986 BMW 325es.
Cracked up spoiler from Marky Mark I had previously traded Josh for.
I have been slowly compiling parts in preparation for an all out motivated few weeks of installation in my free time. Did I mention I got a job at a local BMW dealer here in Utah? That has certainly helped on the OEM parts buying side of things. I’m currently in sales with terrible hours, but will be moving back to detail hopefully by the end of July (downgrade, no? “Not if you’re not selling cars it’s not,” said Sam’s paycheck). With the position switch I will be pushing for earlier hours, getting off in the late afternoon or late evening, leaving many hours of daylight left. Now that I won’t have to smell great when getting to work, I will also be buying a bicycle as I live only a couple miles from the dealership, making the need to put my car back together for a ride to work unnecessary. What a life, did I mention I’m single and kid-less?
So now for the build parts of the build thread.
Thus far I have:
Had my SoDak shop replace some of the basics, timing and accessory belts, water pump, crank seal, shotty throttle cable. I insisted doing the valve cover gasket myself, I wasn’t in the mood to pay $100 some dollars for a shop to do that. Cleaned up the engine bay in the process of doing that too. Was also going to do the fuel filter, still on the to do list, because have you seen where they put it on these models? [flips table]
Passengers window motor was dead, I sourced a used one via R3v and fixed that. My poor friend Will toughed the whole 1000 trip with me to Utah in an air condition-less car with only my window down, and no radio…
I tore out the already nonfunctional radio ambitiously, the face of the dash was similar to my previous e30, the wiring was not. Currently have a hole there, I believe all I’ll have to do is run new wire to the front speakers, one of those cases for those familiar with e30 radio installs.
Stripped away any rust ridden spots on the rocker panels, minor hole in the bottom of the passengers fender, and a slightly bigger hole in the joint of the rocker near the front, under the drivers door. Cleaned it up and treated it with rust eater as best I could and repainted over it with truck bed liner. You may notice, I painted higher than the normal black rocker paint. I went up to the slight notch in the body line and even up into each door sill. There was some minor rust forming and creeping up into each sill, so I tread and covered it. This made a huge aesthetic difference.
Replaced the rubber grommet for my antenna.
Named it Franky Frank. Based upon another favorite actor and doppelganger of mine, Jason Statham. In, “Death Race,” he plays a racer named, “Frankenstein.” In “Transporter,” he plays a driver named, “Frank Martin.” I’m saving “Paul Walker,” for my future M3.
Other things that are still broken or need attention:
- A/C
- Seats have the broken tab, unstable-backs-around-turns syndrome
- Passengers seat pull lever doesn’t work, seat won’t pivot for back seat access
- Fan commonly squeaked, then one day there was a thud within the dash, and a burning plastic smell, now on the highest fan setting it growls at me. Still need to diagnose this.
- Cracks in the dash
- Cracks in the coloring of all the seats, needing conditioning and re-dying. The only tear in any of the leather is on one of the side bolsters of the drivers seat. Very good considering the age of the car and the general condition of the car.
- Essentially everything suspension and bushings. My stock CAB’s are almost non-existent and provide fun front end wobble upon turning sharply. It’s all stock anyway, must go.
- Came with no front lip, I have the OEM replacement bought.
- Two weeks after passing emissions, the pipe running into my muffler corroded enough to finally start giving way, which is now completely detached, but hanging on the hangers still. Gangster lean. I’ll maybe make an exhaust video for it, slow, loud crappy cars are humorous.
- The hood had rust bubbles on the front of it, presumably from rock chips over time. I chipped all the paint away from those cancerous areas, treated them with rust eater, and for now have it covered with a hood brah. Planning on sourcing a different Alpine 1 colored hood for replacement.
- Bits of rust here and there, still need a clay bar, cut/buff, and waxing too.
Tear in drivers seat bolster.
Dash cracks.
No front lip.
Exhaust sagging like an E36’s glove box.
Hood rust.
I have compiled many parts for future install, including:
- Bilstein HD shocks with H&R race springs, shouts to my bud Tanner
- New strut housings to replace my currently rusty breaded chicken looking ones, will also be nice to prepare this outside of the car, shouts to Corbin
- Oem control arms
- Oem sway end links and tie rod ends
- M3 offset rubber CABs
- Poly rear subframe and trailing arm bushings from Ireland Engineering
- Weld on camber/toe adjusters, and rear shock mounts from Ireland Engineering
- Working on getting a new rear subframe, again for breaded chicken and prep outside of the car reasons
- Rear trailing arms for that subframe, shouts again to Corbin
- Many miscellaneous parts for the dash and fixing of the seats.
- Rx7 brakes, an impulsive buy, way ahead of necessity.
As far as other suspension work I’m still looking into camber plates and sways.
Parts stash in my kitchen, bachelor life.
Parts, stashed.
I do already have wheels, both the rolling on and steering with kind, but I must leave some surprises there, I’ve gotta keep you scrolling. Hint: you can either look at this thread a little closer, or dig into my previous posts to figure out the “rims” (wheels). The steering wheel you really have to be in my clique to know.
I believe that’s the majority of it, aside from one final detail. I had always had a small fancy for diving board cars, because it was what I wasn’t used to seeing. This is the photo that sparked the full on idea of my dive into the big bumper early model. (Yes these are the smaller metal euro bumpers, but it’s an early model, chill) I found it on Tumblr with very little information on it and couldn’t find anything elsewhere on the internet. In a commenters caption it was stated that this was a “Pre-M3 E30 DTM car.” It makes enough sense, but I know nothing for certain, if any of you know what’s up, do comment. Photo:
My set goal for install coming up is to have this pieced together by the end of August, as my homies here are planning on traveling down to San Diego for Big SoCal Euro August 30th, and I’d love to have it done with stage one of rebuilding/refreshing and ready by then.
Let’s get to work.
(Please excuse my childish ways, I used to listen to punk rock)


Comment