
Great work so far
-
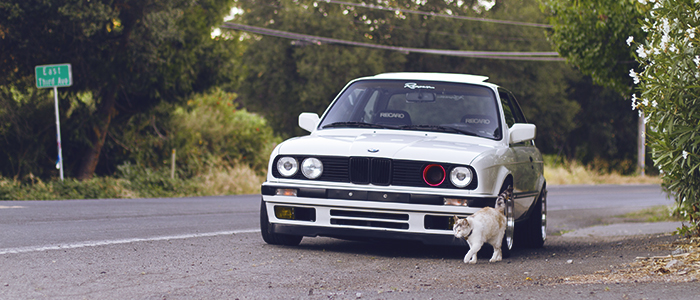
'90 Alpine White M3
OEM Hella Smoked Euro Smileys | OEM Headlamp Washers | Startec Tail Lights |
EVO III Undertray | EVO III Front Lip | '92 DTM CF Gurney Flap | Recaro N'Joys |
Ground Control Coilovers | OZ Futuras
DD: '97 Alpine White M3/4/5 -
Looks great man, very crafty and creative. The e30 looks great too man, can't wait to see it at the Treasure Island meetComment
-
Thanks! I'm up north a bit In the Napa valley. The weather is a bit cooler and the people a little snobbier haha!
I'm not quite sure yet. My next steps would be to flock the dash, so I may just flock the center console as well. If not, I might just remove the vinyl from the center console and go for a smoothed out look, or just find another vinyl to replace the old one. Anyone have any ideas?
Thank you, sir!
Thank you! If you see me or my car say hello! I don't bite! haha
I'm sure all of us e30 guys will be in their own section of the lot.

Check out my Alpine's DEAD build thread http://www.r3vlimited.com/board/showthread.php?t=348571
E36 M3 Build thread http://www.m3forum.net/m3forum/showthread.php?t=597637Comment
-
Weekend adventures! She needs a wash...

Check out my Alpine's DEAD build thread http://www.r3vlimited.com/board/showthread.php?t=348571
E36 M3 Build thread http://www.m3forum.net/m3forum/showthread.php?t=597637Comment
-
-
-
Went out to cars and coffee SF with some buddies!

It was awesome to see some cars and I got some ideas. I want an mtech 2 lower valence with my original bumper, and am now debating between a renown wheel or a suede small diameter mtech 2 wheel. If anyone has either of these! (Any color, replica or the real deal, and as for the wheel it can be worn since I'll have it rewrapped.
Later I got home and my turner chip came in the mail. Installed it and noticed some decent gains from the butt dyno. Definitely feel more mid-range torque and more power.
Removing the glovebox, ecu cover, and ecu


Opening it up and installing the chip!


Check out my Alpine's DEAD build thread http://www.r3vlimited.com/board/showthread.php?t=348571
E36 M3 Build thread http://www.m3forum.net/m3forum/showthread.php?t=597637Comment
-
Thanks guys!!!
Check out my Alpine's DEAD build thread http://www.r3vlimited.com/board/showthread.php?t=348571
E36 M3 Build thread http://www.m3forum.net/m3forum/showthread.php?t=597637Comment
-
Nice broComment
-
Hello! White late model coupe from the bay
Sorry for being out of touch guys, I've been pretty busy with an internship and school! I've been accepted into A few universities including my number one choice so I'm pretty excited for the future!
Sorry for any autocorrect issues and iphone pics, bare with me I'm posting from mobile since that's easier than send myself all the images, re-sizing them, and posting them. (Lol lazy)
Recently I've done quite a bit though. I FINALLY GOT MY SEATS!!!

3 whole months of waiting. I purchased the massive lee brackets about a month ago and the install was. Well. A little tougher than I was hoping for, but the quality is amazing. I opted for adapters for the passenger side to retain the sliders, while for the driver side I went with a floor mount for that extra inch or two of low needed to fit my 6'2 body and my big ass head lol. (Not really that big I just like a low seating position) haha!
First problem was that the floor mount holes were slightly too close together, (redneck voice) or is that them bee em dublew engineers made their damn seat bolts wrong so that them brackets don't fit?
Anyway, 2 minutes with a dremel and that problem was fixed.


Then I tore the sliders off of the old passenger seat. And figured out where all the bolts went.
I bolted the passenger seat in and found that it was off by quite a bit. Pulled out the seat and played with all the washers I had with no luck. I then retried and loosened all the bolts to do a loose fit. It worked! But I wasn't able to get to all of the bolts. So the seat came out again. They time I torqued everything except the seat and it fit perfectly! Tightening the seat down was a major paint in the butt, but I did it!
As for the driver side I ran into the issue that the bolts for the brackets and the floor mounts were in the exact same spot for my seating position. So I had to do the same process but this time hold the Seet half way off the carpet and bolt in the floor bolts before I set it down all the way. Getting to the seat bolts (that hold the seat to the rails) was an absolute joke. My hands almost didn't even fit under the seat it's so low, but with the help of a ratcheting box wrench I was able to finally get it in. Over all since the time I open the box and vacuumed the seats till the test drive, it took 5 hours or so. Way way way too long for a seat install. I feel like an idiot! Now that I've been driving it for a little while I'm noticing that I need to be siting further back in the driver seat. So I'll probably spend another hour readjusting that :(. Anyway they're in and super comfortable! I was worrying about them being too tight buy I fit in pretty well! If I could change anything I would maybe slightly widen the shouler area, but other than that they're perfect! I'm hoping to have them professionally cleaned in the next few weeks.

I still have been looking to fix that leak of mine to prevent the rear footwell from soaking up, so I went ahead and ordered a new door deal (replica found under the group buy thread for $80! Better than $300 for oem! The install was fairly easy, but it took a toll on my hand removing the door sill. I seriously don't even know how that happened -__-.


Good as new!
Later I found that it wasn't the actual answer to my problem, but may have been a contributing factor. I washed the car that night to head out to meet on the bay the next day and found water inside the seal on the bottom.
What could it be? Hmm well what's in between my door and the sill, the vapor seal of course! I pulled the door panel to find that it in fact had a bunch of loose openings on the bottom from when the previous owner rebuilt the passenger door lock.

Some new plastic and silicone sealant later I fixed that problem :).

Recently I decided to make my trunk super euro and do the hardwood floors, so I got out some 3 ply birch that I had from my old skateboard building days and traced the floor carpet out as a base for the hardwood. Temporarily driving around with that in my trunk until I find some flooring!


Also just today, I purchased a new sub and rear speakers! I found that I need to replace the rear coaxials but have the wiring for the tweeters and the front mids are new. Got the amp from my friend David for a steal of a price and now I'm bumpin'! I still need the front tweeters, and to install my old deck from the subaru, but it already sounds SO much better.


Temporary sub and amp wiring until I get my trunk situated.

By now my update is being short and consice, sorry getting tired of typing all of this from my phone :/
Found a new plug that fits and looks better for the antenna!

Last but not least, Lower seat means more sun in my eyes, so I made a banner from some white vinyl. It's actually a little off since I was doing it myself on a windy day, so I'll have to redo it once I have some time and a buddy can help me. (Ignore the ricer single windshield wiper. I wanna be a dtm cool kid but cant see spending 300 for the mono wiper kit when it doesn't rain in California anyway haha!

She's getting there :)
Last edited by Toodaloo; 03-25-2015, 05:59 AM.
Check out my Alpine's DEAD build thread http://www.r3vlimited.com/board/showthread.php?t=348571
E36 M3 Build thread http://www.m3forum.net/m3forum/showthread.php?t=597637Comment
-
-
Check out my Alpine's DEAD build thread http://www.r3vlimited.com/board/showthread.php?t=348571
E36 M3 Build thread http://www.m3forum.net/m3forum/showthread.php?t=597637Comment
-
Your car is looking great... Time to start working on mine soon I think.1989 325i Cabriolet Auto
1990 325i Coupe Auto (sold)
1987 325i Cabriolet Manual (sold)
1989 325i Cabriolet Auto (sold)
1991 325i Coupe Auto (sold)
1991 325i Cabriolet Manual (sold)
1991 325i Coupe Auto (sold)
1990 325i Sedan Auto (sold)
1984 318i Coupe Auto (sold)Comment
-
Looks nice. I too came from a subaru, still have a suby but daily my e30. Going to steal a couple of ideas from your car. Nice workComment
-
Looking good Andrei!
Sent from my iPhone using TapatalkComment


Comment