If this is your first visit, be sure to
check out the FAQ by clicking the
link above. You may have to register
before you can post: click the register link above to proceed. To start viewing messages,
select the forum that you want to visit from the selection below.
Officially started installing turbo bits and moving toward bewst dreams. It's nice to actually be working on it instead of thinking about it now
First I installed some Deka 60lb/hr injectors (Thanks e30austin!):
Then I installed some colder plugs, specifically NGK BPR7ES gapped to .025":
Added some plug boots for good measure:
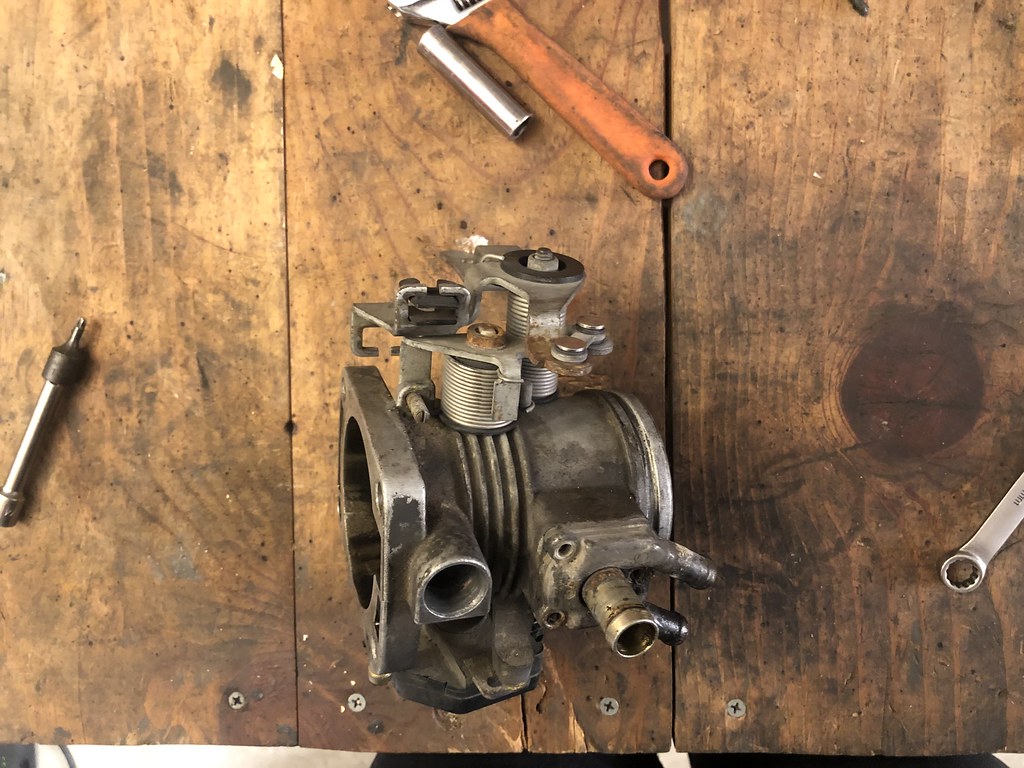
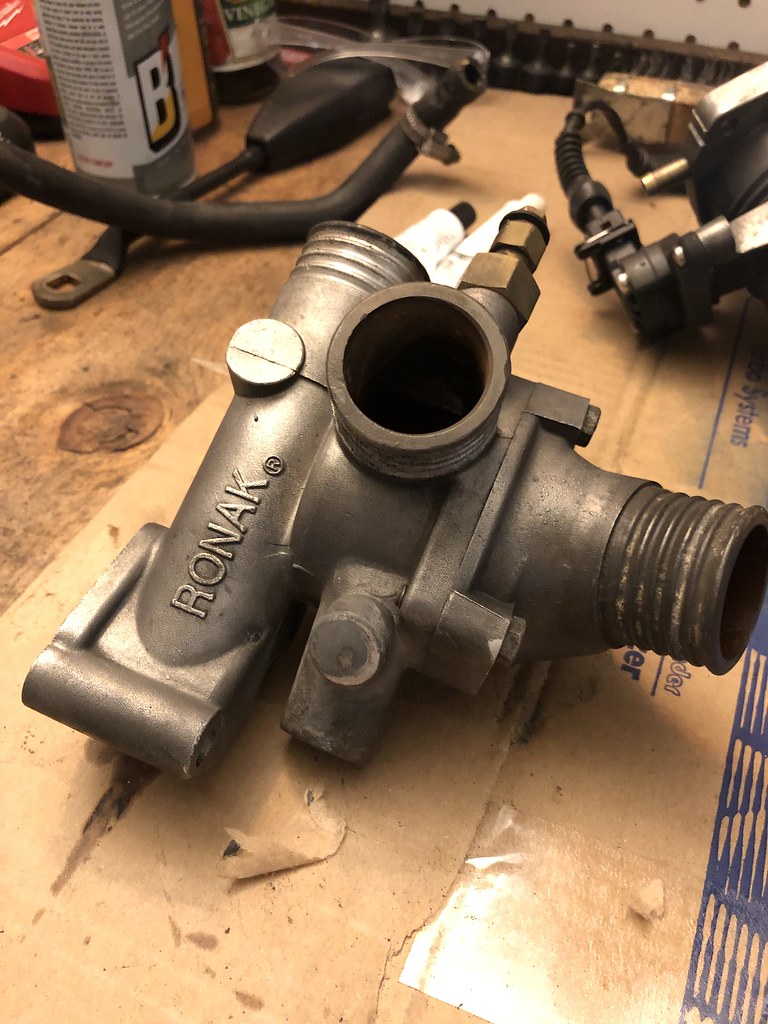
Next I yanked off the throttle body:
and tugged on its nipple:
Plugged the crank case breather and throttle body heater with this sweet little CNC'd plate from THE DUDE ABIDES
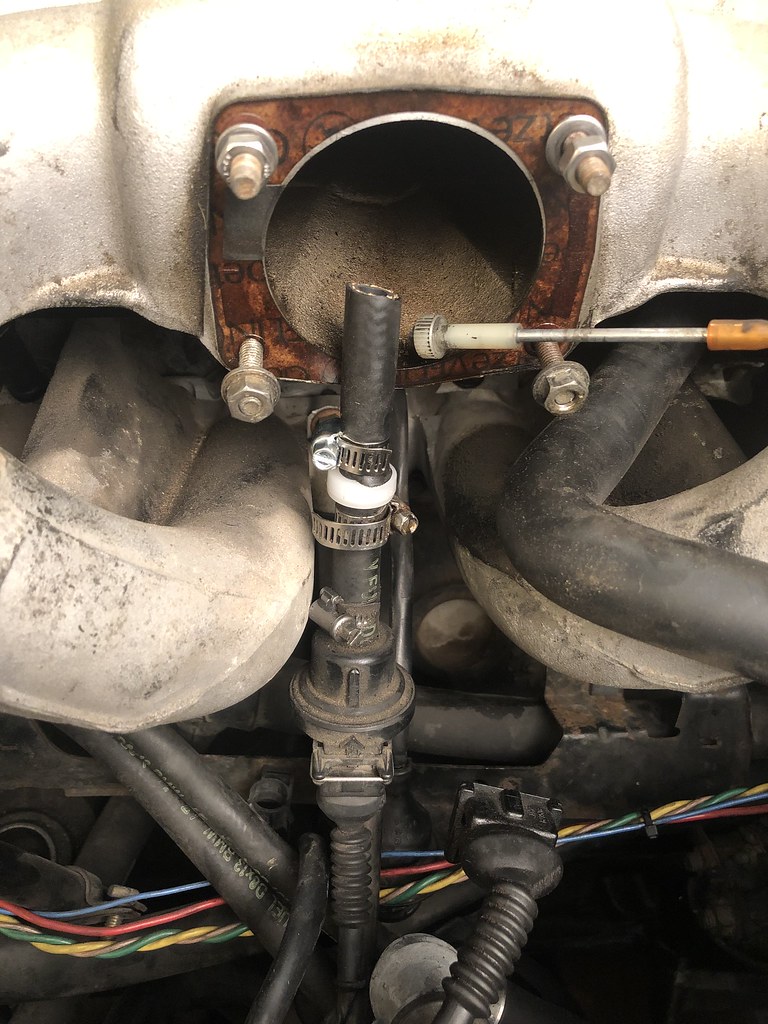
Installed an E36 variable TPS with 3D printed mount (Squared Motorwerks) and an extension to whisper to the Megasquirt:
To continue with the throttle body heater delete, I removed the thermostat housing and plugged the connecting coolant bung with some JB Weld:
Moving on I plugged the block coolant nipple with... you guessed it, JB Weld! I don't love this solution as much, but I was having a hard time finding a suitable bolt to plug it locally.
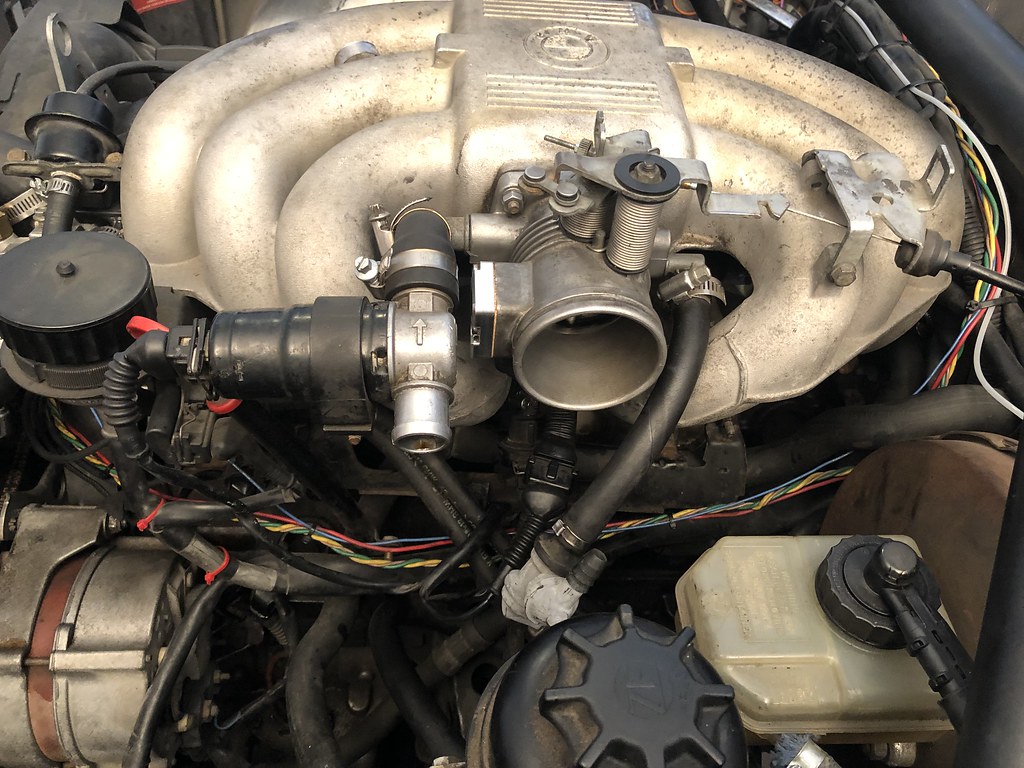
Before reinstalling the throttle body I added a check valve to prevent boost from pressurizing the charcoal canister and potentially the gas tank:
Throttle body reinstalled:
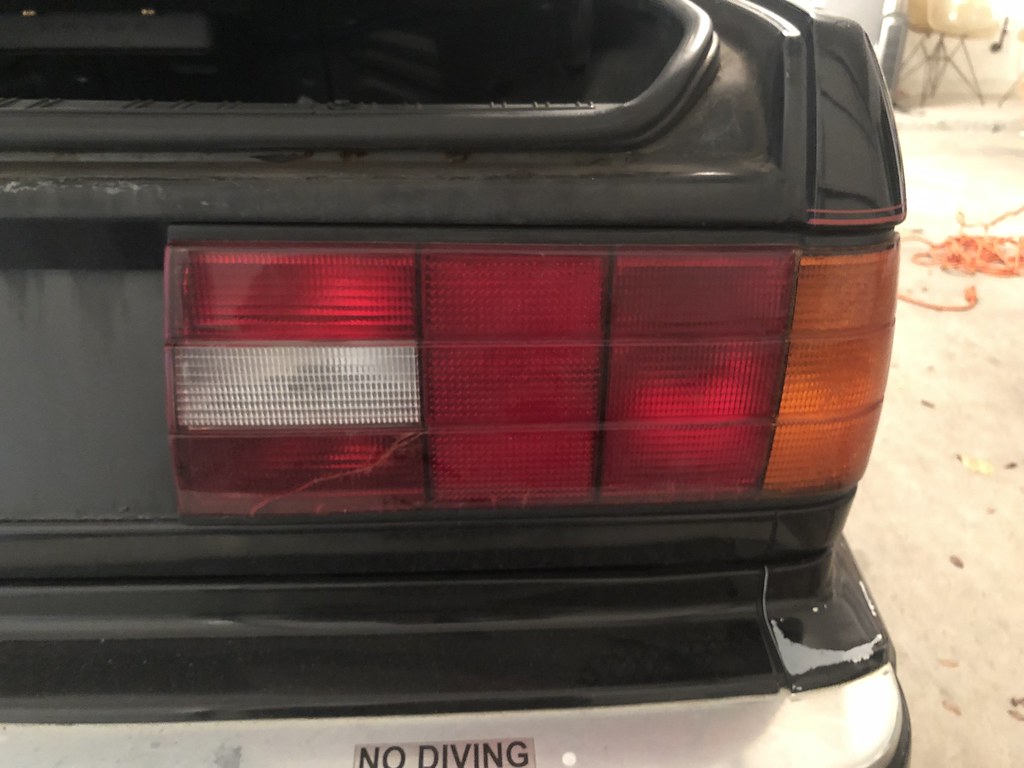
Then I took a break to enhance the aesthetics of this fine machine. Cracked tail light:
Clean tail light:
Test fitted the turbski and the manifold:
and off they went for ceramic coating:
While the turbo bits were off getting coated, I installed two M22x1.5 to -10AN adapters in the oil filter housing for an aftermarket oil cooler and tapped a provision for a -4AN to 1/4 NPT turbo oil feed into the banjo bolt. I went with tapping the banjo bolt over using the oil filter sandwich plate for the oil feed because it's a filtered source and others have lost their turbos using the sandwich plate / oil pressure switch as feed sources.
Installed the freshly coated manifold, lots of room for AC bits which I'm hoping to keep.
Tossed in the new BW invisa turbo 9000:
But then I got serious and actually installed and clocked the turbo:
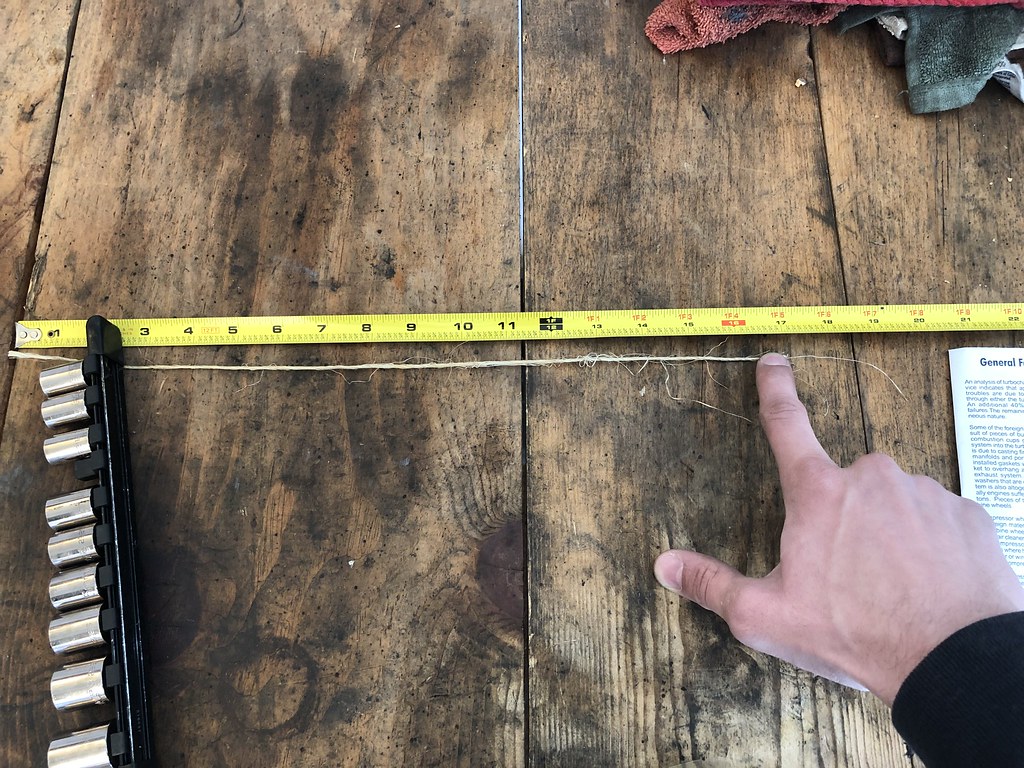
Made some measurements for my oil feed and oil drain with some twine I had laying around lol
Lastly, I installed this sweet distribution block from Stim Tech to provide vacuum sources / boost readings for the megasquirt, boost controller, fuel pressure regulator, and blow off valve. I recently stumbled into Stim Tech searching for a clean way to handle the vacuum lines and they have a lot of innovative projects going on for the E30 platform. Surprised I haven't seen them around R3v!
anddddd that's where I am at so far. Plan is to pull the front end next and get some measurements for a reasonably sized intercooler.
Hey man it was nice meeting you and GoldE the other night!
This is a bad ass thread dude, and just got very serious with that nicely executed turbo drop!
Reading through this is like reliving my first e30 in 2009. Same knuckle busting driveway bullshit, but it was in MA so everything was rusted to death.
Lets grab a beer sometime, I'd love to check out the turbo project or go rip around when I get my coupe on the road.
Good to meet you as well! The parts went to a good home
Thanks man! I just hope the internet is right about how stout the M20 is. Hoping my modest power goals will keep it together.
Hahah, I surprise myself at the progress I made in a driveway going back through the thread. If I had to deal with rust and the north east cold I'm not sure things would have turned out the same.
Beer sounds great! I have a couple other car dudes I grab beers and grub with around Austin, I'll let ya know next time we get together.
Hey man it was nice meeting you and GoldE the other night!
This is a bad ass thread dude, and just got very serious with that nicely executed turbo drop!
Reading through this is like reliving my first e30 in 2009. Same knuckle busting driveway bullshit, but it was in MA so everything was rusted to death.
Lets grab a beer sometime, I'd love to check out the turbo project or go rip around when I get my coupe on the road.
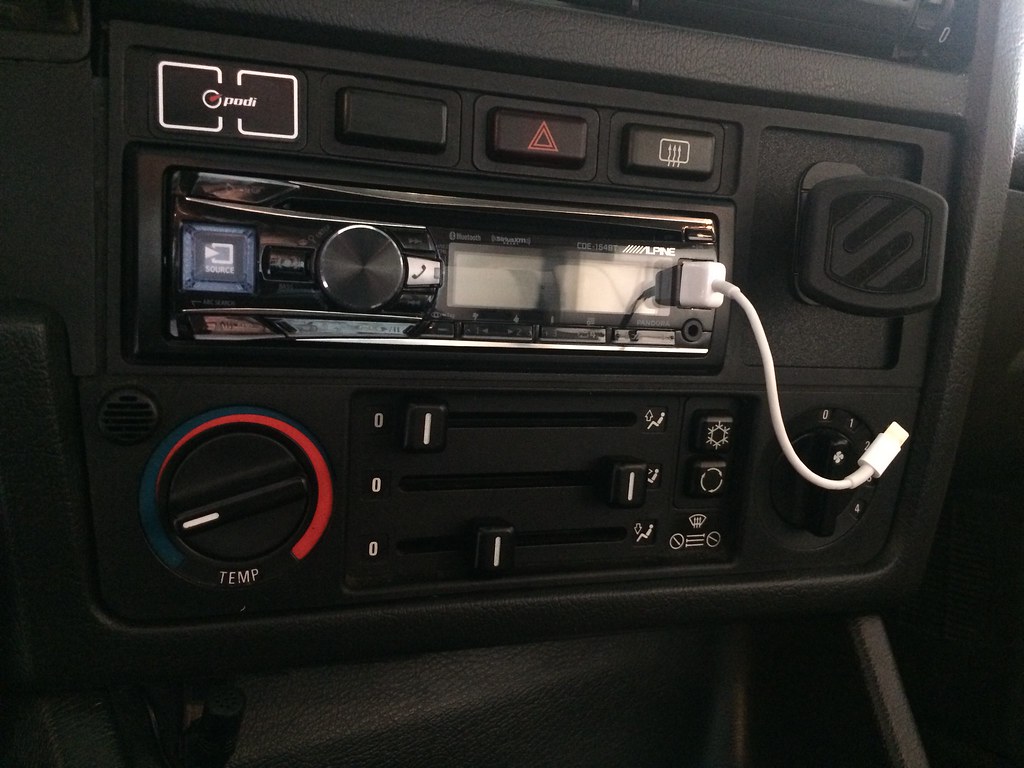
I don't know anything. What are the podi buttons all about? Awesome build. excited for the turbo.
That little podi panel below the gauge is a controller. So it allows me to setup alerts for oil pressure, coolant temp, oil temp, etc. and let's you adjust brightness and things. For me it's pretty much a set and forget though now that I've gone through it.
Awesome update! I ran boost gauge mounts/setups like that on my Subarus, which was actually a factory option.
Thanks! That's pretty cool, a friend's swapped 2.5 RS has similarly mounted gauges but I didn't realize that was a factory option too.I was hoping for something a little more discreet but for the price point this is checking all the boxes at the moment.
Originally posted by Albie325
Damn that's genius. I had to resort to using a dab of super glue on the bolt shoulders in order to get the nuts started when I did my swap. It's a wonder no one has started making something like this and listing for sale, if only I had a welder...
Also, congrats on the new garage and the Bronzit! Looks like it'll be a sweet setup.
Right?? Only a matter of time until we see it tacked onto garagistics offerings. With all the janky issues I've come across with this car, this is the first time I've been impressed with someone's past ingenuity.
Thanks!! I'm real excited about the garage space, I end up spending nearly as much time down there as I do in the apartment.
Originally posted by paynemw
Can you tell me a bit more about where you got the flat pannel for the OBC/Clock and where you got magnet piece? One reason why I didn't buy the racegerman phone mount was it's lack of orientation.
Sure! I'm coming up short finding the blank I originally purchased on Ebay, but check this link out. I think that looks a lot cleaner than the metal blank I installed actually. If that blank is like mine, the original OBC screws (nuts?) should hold it in place nicely.
For the phone mount I went with a Scosche adjustable mount like this one. It's lasted through two Texas summers now and the adhesive is still stickin'.
Can you tell me a bit more about where you got the flat pannel for the OBC/Clock and where you got magnet piece? One reason why I didn't buy the racegerman phone mount was it's lack of orientation.
I assume the clutch has been replaced at least once in the cars past life because I found these gems for the starter bolts. I was pretty skeptical of what else I was going to find after seeing those bolts, but after finishing the job I decided that was a pretty clever hack to get the starter bolts tightened. I ended up reusing them even!
Damn that's genius. I had to resort to using a dab of super glue on the bolt shoulders in order to get the nuts started when I did my swap. It's a wonder no one has started making something like this and listing for sale, if only I had a welder...
Also, congrats on the new garage and the Bronzit! Looks like it'll be a sweet setup.
Jumping right into it, I picked up a new daily! This one has a bit of history within our friend group since Kid8 and I put a ton of work (arguably too much work) into it before selling it a year or so ago. Surfing Craigslist six months after the sale I recognized the car and the new owner offered me a deal I couldn't refuse. A short chat later I was driving home with another E30 to add to the collection...
Back when Kid8 picked it up, it was a single owner unmolested car that was very clean aside from some burnt up clear coat. It came with an autotragic so Kid8 and I got to learn the art of manual swapping and we serviced just about everything we could think of. I swear the transmission in GoldE is the best G260 I've ever felt, absolutely no slop in any gear. I've replaced all the bushings and added a DSSR to the black car and it still doesn't hold a candle to it.
It's pretty cool getting to experience a mostly stock E30, the only OEM+ upgrades GoldE has received is an E36 steering rack and a Z3 / E36 vert antenna. Here it is in all her bronzit four door glory:
If anyone is interested in GoldE's rehab, here's the thread for that:
Continuing with more big news, I moved into a garage apartment with a two car garage! I enjoyed the wrenching challenge of taking on projects that had no business being tackled in a driveway, but it is so nice to put a project down and come right back where you left off. Also not being paranoid something is going to be stolen is a nice touch.
Packing up the workhorse for the move:
The happy chariot gang and bonus Fit!
The new place has a pretty great deck out back so a picnic table was a must:
With the upstairs tackled, I got to finally setup my man cave and prep it for some real projects
Which brings me to my first project! Transmission overhaul and heavy duty clutch install.
I can't remember how many times I've had the exhaust and driveshaft out of this car, so I let doggo knock it out this time. I provided thumbs when needed.
With some creative extension combinations I managed to get the trans out:
I assume the clutch has been replaced at least once in the cars past life because I found these gems for the starter bolts. I was pretty skeptical of what else I was going to find after seeing those bolts, but after finishing the job I decided that was a pretty clever hack to get the starter bolts tightened. I ended up reusing them even!
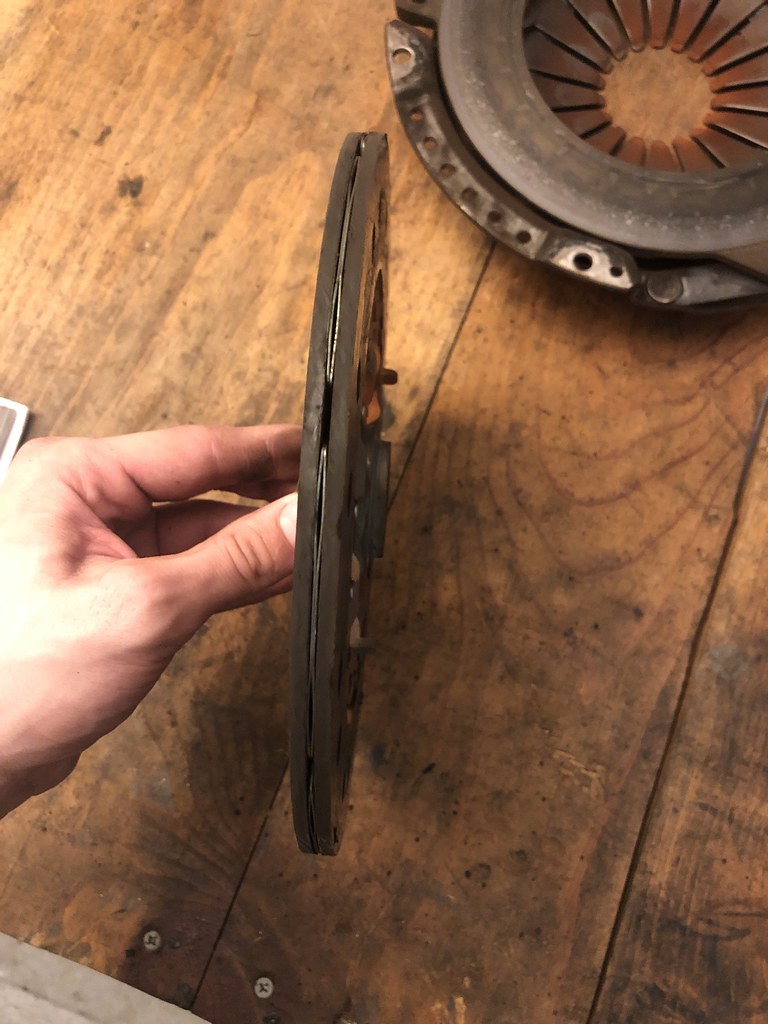
I was a little disappointed to see how much clutch life I still had on this unknown mile clutch. It had at least 40k miles on it from me and how ever many miles were put on it 10+ years ago:
I suppose the hidden message here is that I drive a manual pretty okay at least. Check the clutch meat!
Moving right along and pulling out the flywheel, I checked the minimum thickness per the Bentley which was 32mm. Womp womp, flywheel was already at the minimum thickness.
I then spent three weeks trying to find an M20 single mass flywheel in my area that could be machined down, until I chatted with the owner of flamingo automotive - a vintage European car shop in my neighborhood. Joe recommended running it as is with a quick a clean up since the flywheel looked healthy despite being at the minimum thickness.
With as much racing experience and knowledge of these old machines as Joe has I decided to take his word for it and had it "resurfaced" with a scouring pad:
Next, I began servicing and generally cleaning up the transmission.
I installed a new detent ball cap since the internet claims they warp and leak...
Looks like the internet is always right, it warped and leaked:
Installed some cheap trans cups for my E21 bushings (Thanks dude8383!):
Replaced trans input shaft seal with Loctite 574 (Thanks Ryan!) and slapped a brass pivot pin in:
The old pin was getting seriously nubbed. I nearly went with a new oem pin but was advised not to since I was increasing the clamping force with the new clutch.
Trans ready to go back in! Put a new garagistic clutch line and a new slave cylinder on as well. Note the fresh detent cap too:
Replaced the RMS, had a hell of a time getting the old seal out of the housing. Turns out I just need Kid8 to intimidate it out of its housing:
"Resurfaced" flywheel installed with new bolts:
Clutch masters FX350 clutch / pressure plate with new pressure plate bolts! Tightened to spec of course.
After bleeding the slave cylinder I was back on the ground and ready to roll.
I've done just under 500 break in miles which clutch masters recommends normal stop and go driving. Overall I am very happy that I went with a clutch masters clutch, the engagement force is exactly the same as stock, with a slightly snappier grab point. If I don't give it enough gas while taking off in first I've noticed a mild clutch shudder, but that's about it. I'm feeling pretty used to it at this point and dropping those buttery smooth shifts again ;)
During the flywheel debacle I decided to stay productive and install a Bosch -30 -> 20 psi mechanical boost gauge. Install was pretty straight forward, although I didn't love drilling a mounting hole through the top of the steering wheel column. To route the boost line I reused the grommet that was previously intended for the airbag module wiring.
Also installed a Bosch boost gauge and I ran the line through the old air bag module wire grommet:
Installed, although I need to wire the gauge light up yet.
I dig the look, and that should pretty much conclude my cockpit gauging. If I ever paint the dials red in the cluster I think that will pull everything together pretty nicely.
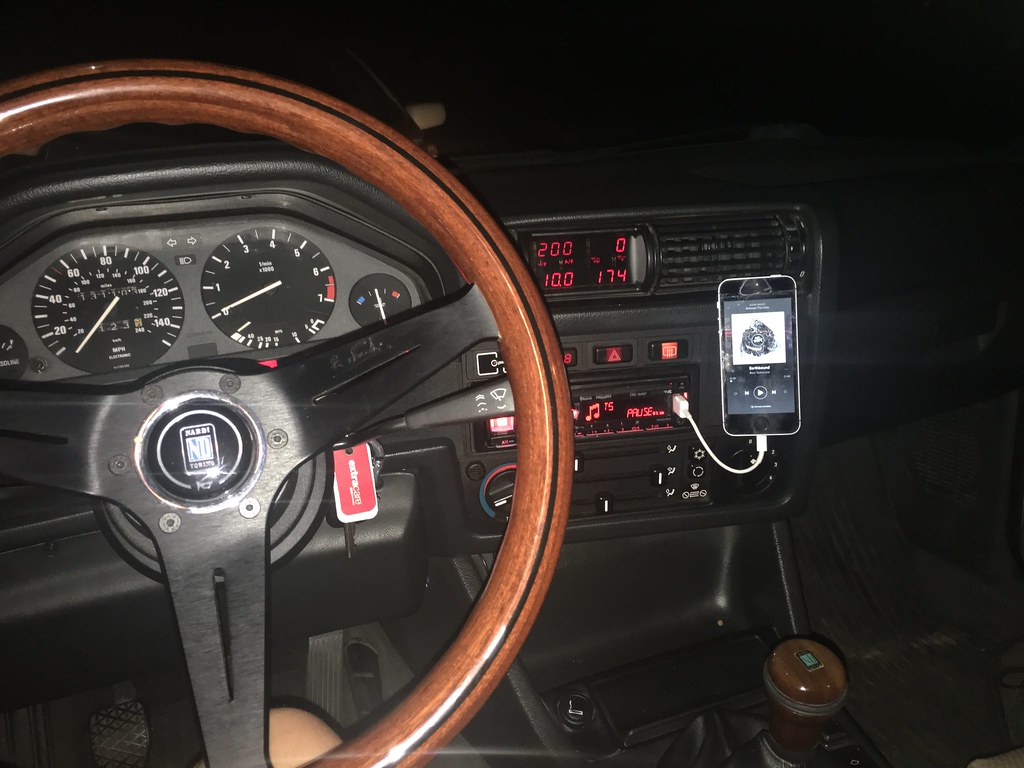
Now with that, I'm just going to plop these here...
Dang, I'll have to remember that trick Next time I have a fussy grommet. I spent ages trying to get the junk yard one out in one piece. I fiddled with the broken one for about 29 minutes before going "it's broken anyways" and snipping the old one in half haha
Sent from my Moto Z3 Play using Tapatalk
You can use spit if you're in a pinch too :p
Originally posted by 2mAn
I just threw away a decent shower curtain... I knew it had some use, but I was tired of hearing my wife ask me about it so I threw it away.
Nice to see the car just chugging along
Hey man, you can't beat that shower curtain mildew resistance. It's top notch ;)
It hasn't let me down yet, I've got a place with a garage lined up in August so I'm hoping to make it a tad less reliable...

 It's getting exciting!


Leave a comment: