

Subscribed!
-

AUTOMOTIVE PHOTOGRAPHY │ JASONTBARKER.COM -
The Interior 1...
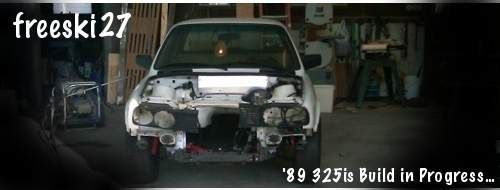
So, the idea with this car is to do a full interior. Although its primary purpose is going to be autox/track; I love a really nice race style interior. The plan is standard e30 dash and center console pieces, sparco fighter seats, 4pt roll bar/cage, black carpet, back seat filler, etc. So, to start it off, I had to clean out the shell.
Here are some photos of what we are starting with:


Hmmm… where to start? Well really, anything was possible with a blank canvas like this. I figured with all this open space it was best to put down carpet first. I knew I wanted a black carpet, but as you all know, BMW never made one… of course. So, instead of buying a capped up one and dyeing it or painting it; lucky for me, I had some left over high quality black carpet from my last boat project. Laying a non pre-moulded carpet is a little bit difficult but isn’t impossible, and in the end you have true black carpet. I used a 3M super duty spray adhesive, and began by adhering the center of the carpet to the center console area. From there you have to do your best to mould the carpet to the shape of the floor as best you can. Most likely it wont come out perfect; however, I personally think that I looks and feels 100 times better than a painted oem carpet. Note: I threw in a few of the interior pieces as a mock up to see how it fits together.
Here are a few shots of the interior after laying in the carpet:


-From here I bolted down the majority of the dash and center console hardware. With that done, I began work on my “Back Seat Filler”. Since I was going to be installing a roll cage and fixed racing seats, I figured a rear seat would be a waste of money and added weight. However, I did want my interior to be presentable (for all the ladies … who will probably leave me because I spend all my time on the car). So in replacement to the rear seat I figured I would just throw a piece of ply wood back there and cover it with the same carpet. I cut up piece of scrap 1/4″ ply that I had laying around and put it in the back. And then I realized that I was going crazy. I wasn’t taking shortcuts anywhere else, why would I put a giant piece of plywood in the middle of the car? So… being a boat guy, I figured I’d try to get a bit creative with a bit of fiberglass. I wanted to give it a back seat look; however, a bit of curvature and contour to make it obvious that it was not built to be sat on… The piece will be moulded, then removed and reenforced. Then reinstalled to mould the edges to make it a precise fit. From there it will be covered with a small headliner type of foam and a black material (possibly carpet). When I can finally afford the roll cage; it will then have two square holes cut in the sides where the tubing passes through, and the halon fire system that I have will be mounted in the center.
-Before anything, I covered the entire back area with plastic to make sure that I wouldn’t be sticking the mould to the metal, or getting resin all over my new carpet. To obtain the shape of the mould I stapled an old bed sheet to a strip of wood and paced both ends of the wood through holes on the C-pillars. From here I cut a slightly oversized strip of wood and wedged it between the fenders (placing it over the sheet). Then I found a cardboard roll (sort of like a giant paper towel roll) that fit just about perfectly at the base; stapled the sheet to that, and pulled it tight to the floor. The photos make it far easier to see.


From here, I prepared to lay fiberglass. I used a high quality epoxy resin so that it would be very strong, this way I could use less material and in turn make it lighter. So, with the sheet pulled tight so that it will support the fiberglass I cut a large section off of a large roll that we had here in the shop and laid it onto the sheet. I then used another piece of wood propped against the sunroof crank to put more flex in the piece of wood running transversely across the car. This was done to give the mould a bit more curvature. With that done, I began to coat the fiberglass with the epoxy resin. Saturate the entire area as best as you can, and keep away from the edges; they will be more precisely shaped later on.
Here are some pictures of the entire process:


Here are the photos from the following weekend after the resin had plenty of time to cure:


Well, more on the back seat filler next time in “The Interior 2…” but for now we’ll move on.
-So, next I took a trip down to the local “joann’s Fabric” to pick up some black ultra suede. It just so happened that the night that I decided to go was 50% off all fabrics! So I decided on the spot that I was buying an extra 2 yards to do a suede headliner . More on the headliner later, but first I wanted to tackle making some rear quarter panels so that I can finish shaping the back seat filler. I had originally considered buying carbon panels but figured that making some suede ones would be inexpensive and give a softer feel to the interior… more real car like. So first I taped some plastic into the rear quarter area and cut it to the shape. With that done, I taped the plastic to some 1/4″ plywood and used a jig saw to cut it out. I test fitted the first panel; it fit great, so I traced the shape onto the board and cut out another one. From there, I fit the two panels back into the car and trimmed the tops until they looked flush to the bottom of the rear windows.
Here are some photos of the panels:


From here a began work on how I planned to fasten them down. Since I was going for a pretty racy look, I had no problem just putting some bolts and washers right through them. So I drilled 3 holes in each panel right into the existing holes for the plastic clips. I then used a tap to give the existing holes a bit of thread so that the bolts would thread straight into them.
Here are some photos of the process:


So, now with the boards all ready, it was time to upholster them. I started by covering the boards with some thin headliner foam. I cut a piece slightly larger than the panel and used spray adhesive to adhere the two together, and then trimmed off the edges. From there, I went on to covering the panels in the ultra suede that I had gotten.
Here are some pictures of the rest of the process:


Thanks for reading guys,
-NobleComment
-
I'm a bit behind on my post, so while i spend some time catching up here are some photos of the car at the end of the "the interior 1..." weekend (11/14-11/15). Hope you guys like them!


Thanks guys!
-NobleComment
-
Wow! Subscribed. Are you having the common E36 suspension problem where the front wheels are sitting too far back in the well? Just curious. Great work!!!Reminiscing...Comment
-
-
Thanks! Yeah, they do sit to far back. I was going to look into some corrections for that... I think I might need to get e36 control arms to fix that? (assuming they are bigger...). That is the only way that I can really think of to get the wheel to rake further forward. Any ideas anyone?Comment
-
Yes, generally you're supposed to use E36 arms with E36 suspension swaps.
Car is looking good, nice work!Comment
-
Did you do anything to the suede to prevent it from fading? I know I covered something with black suede from Jo-Anns a while ago and it only took a couple months to fade to a light grey.Comment
-
This is a great read! Top work, mate!Pork Hunt Motorsport
eBay is like the summit racing catalog for today's special Olympics crowdComment
-
Comment
-
Comment
-
are you only using a rattle can?I got a fender roller now! LMK if you need me to roll your fenders or want to rent the tool from me locally.
Paypal: vdang5@gmail.com
Delta Auto Care
2875-C Towerview Road
Herndon, VA
703.435.1375
My Feedback Thread: Evil_TwinComment
-
-
subscribed,.. love this so far,.., more pics! now!Comment
-
Nice text, but I can't see the pics. Is it me, or did the host die?Comment


Comment