
iwantyourcar
-
-
-
-
made some aluminum side mounts at work.
made a big purchase.
fuck yes this is actually happening
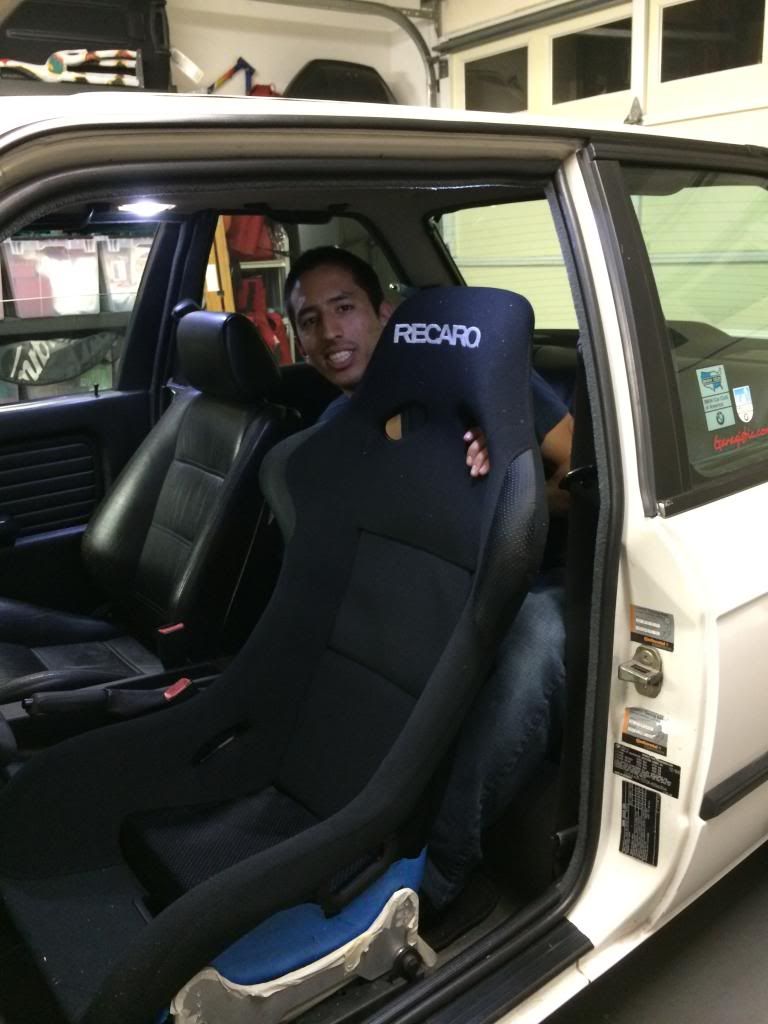
barely fits, needs some adjusting
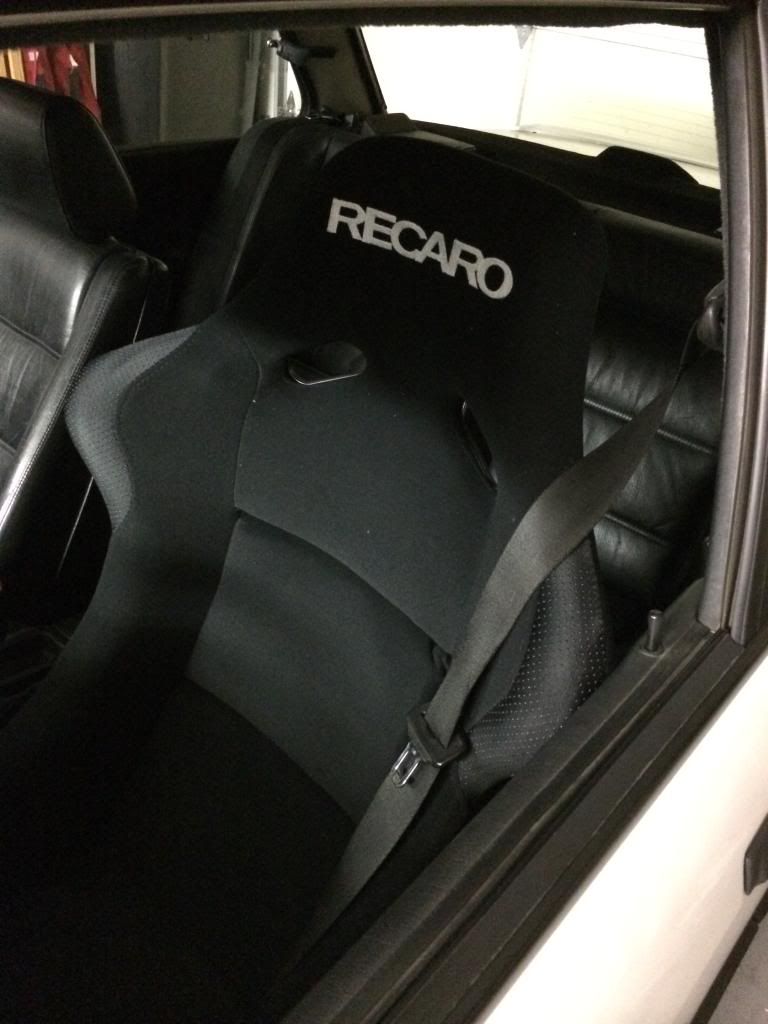
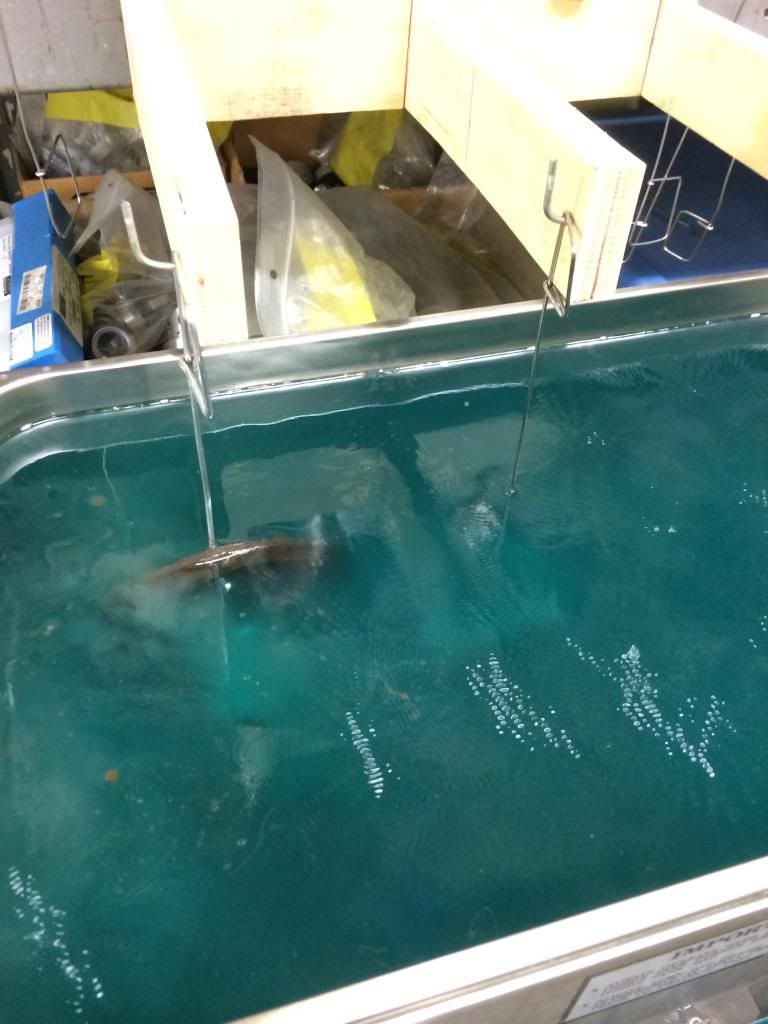
both installed
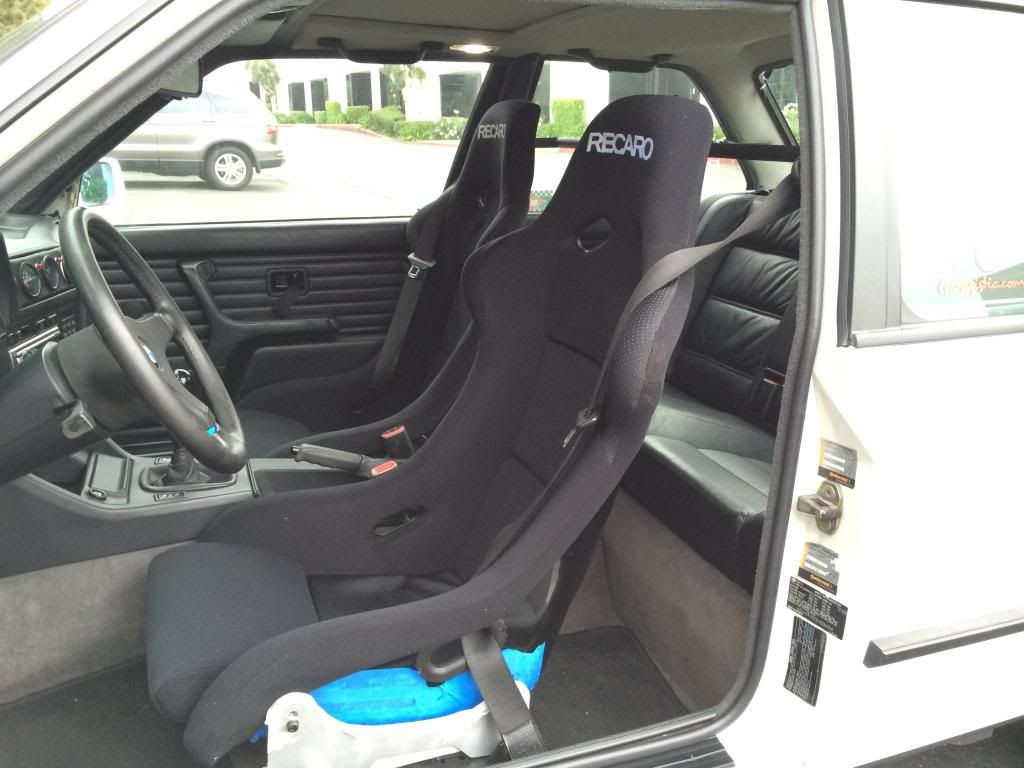
the cockpit view
Comment
-
Nice. Are those Pole Positions or SPGs?
I have an SPG in my S2k and would really like to get one for the e30.
Are you on custom rails/sliders or fixed mount position? I haven't really looked into what's needed as far as mounts, rails, sliders...Comment
-
Originally posted by Bullwings View Post
recaro SPG im using e30 sliders they have been slightly modifed and i made my own side mountsComment
-
Big update.
Thanks to Richard at Michelangelo's
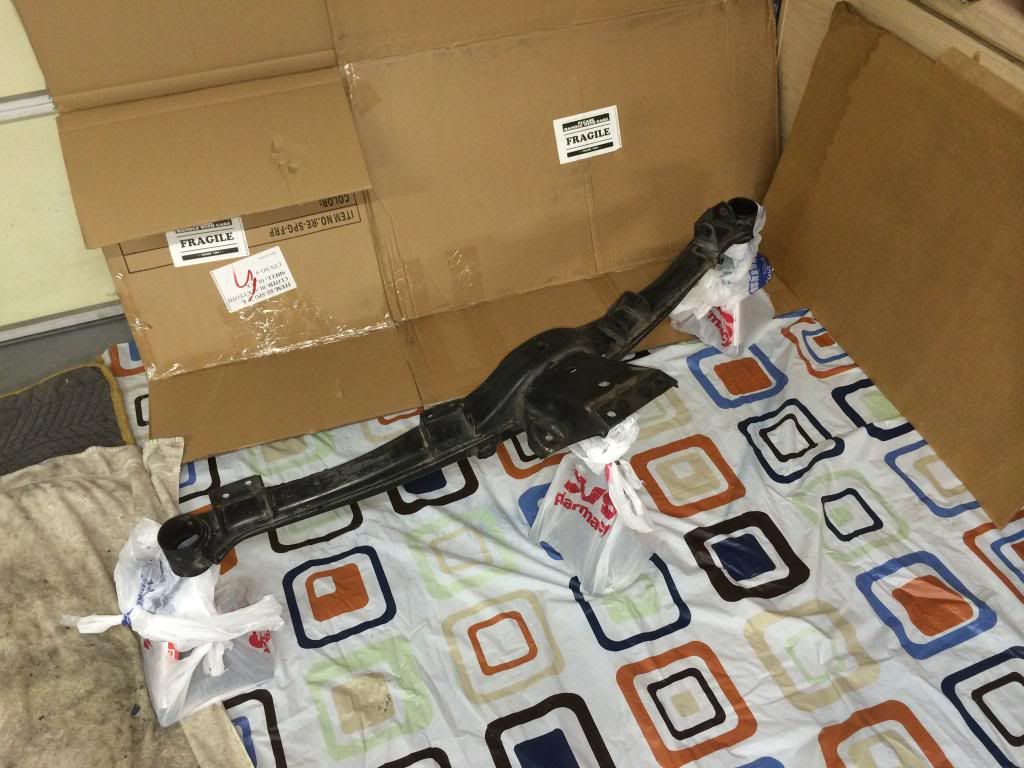
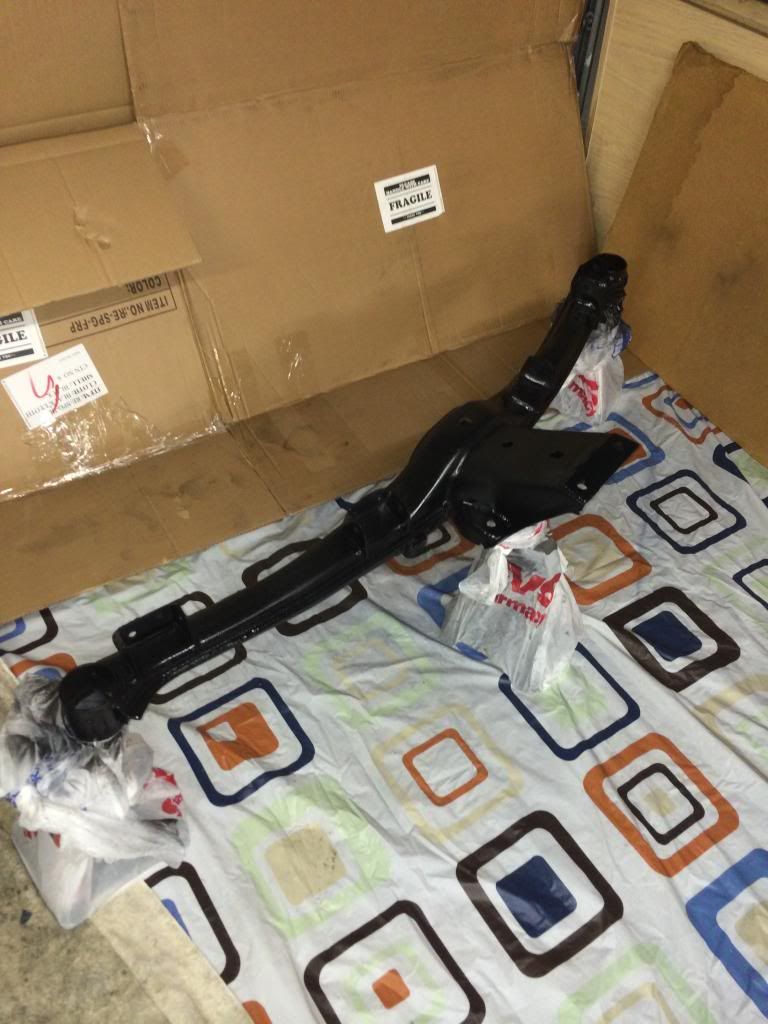
I got a good condition straight e30 325i rear subframe.
I wanted to
Press the old bushings out
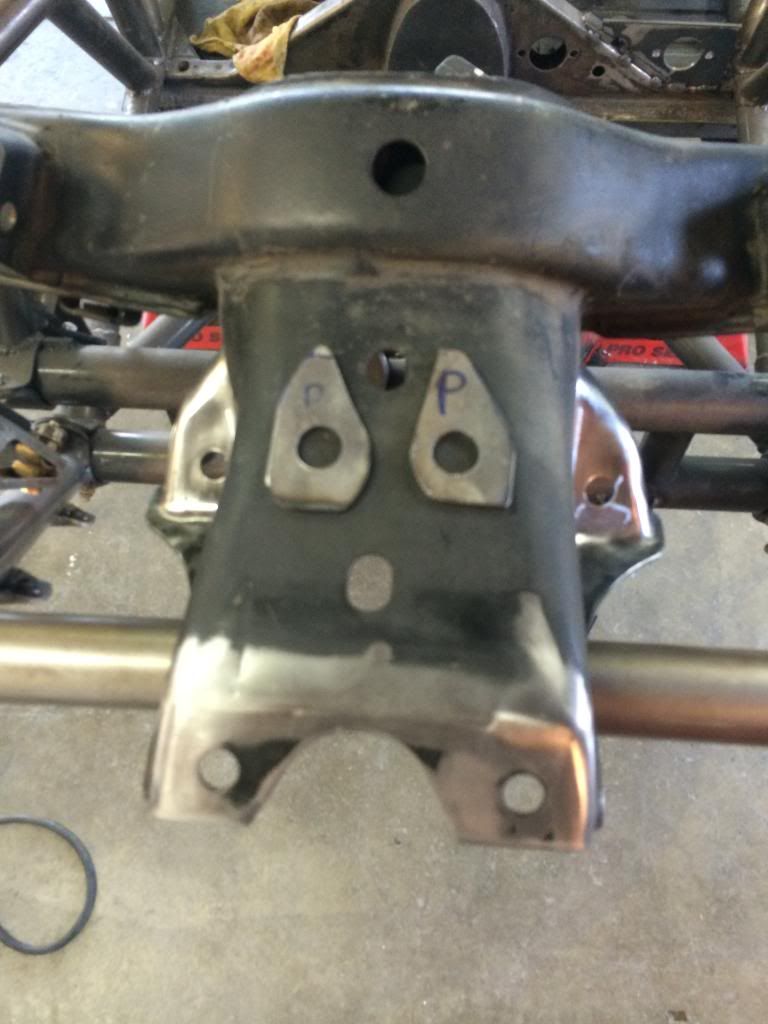
make my own gussets for the subframe,
weld them on,
paint everything
And have a complete rear subframe prepped and ready to swap in to minimize down time.
I freaking love this tool. It made taking out the old bushings so easy.
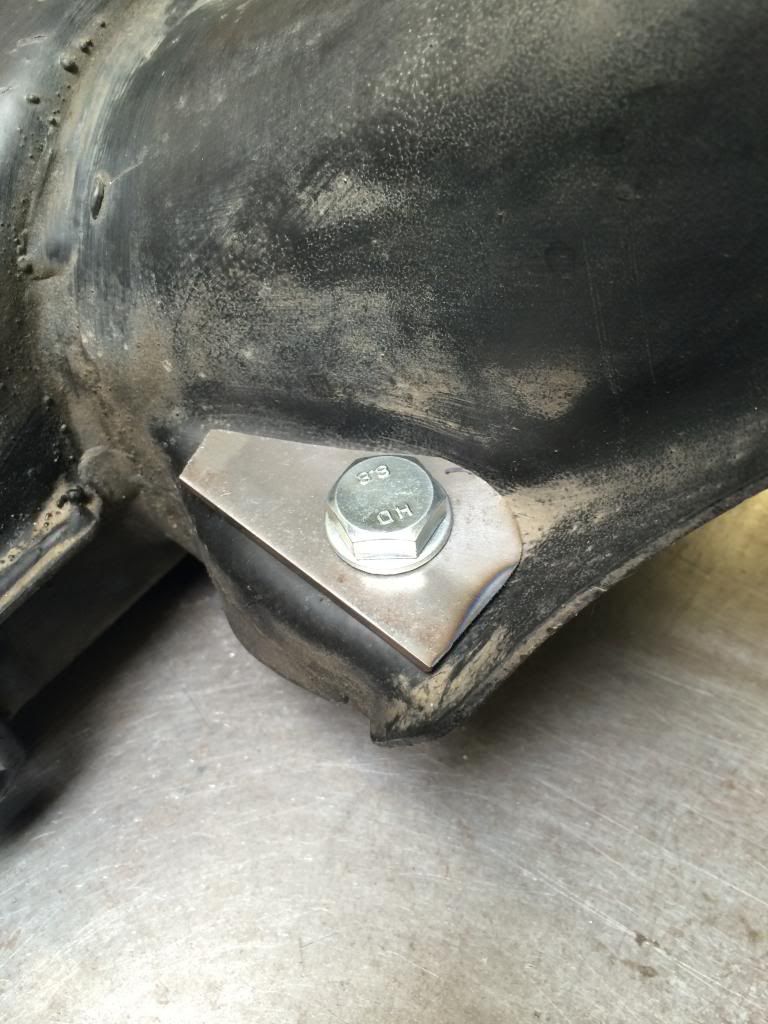
I made these gussets out of 1/8inch plate steel
Paint stripped off and ready to weld.
Welding.
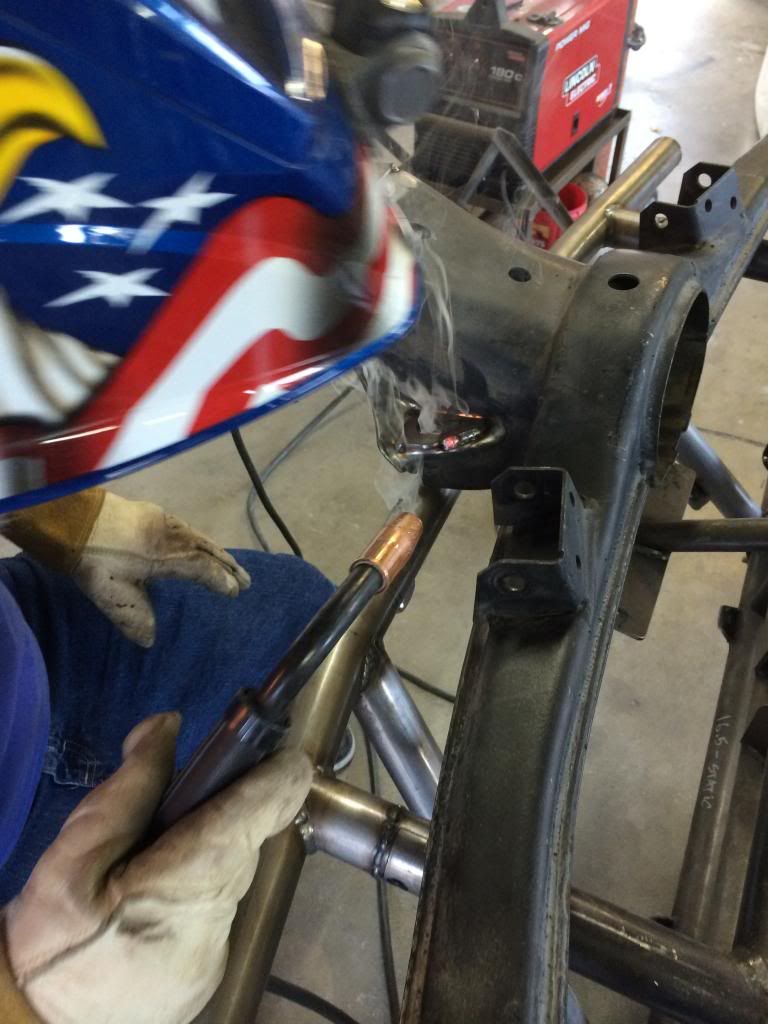
All welded up ready for r3v criticism
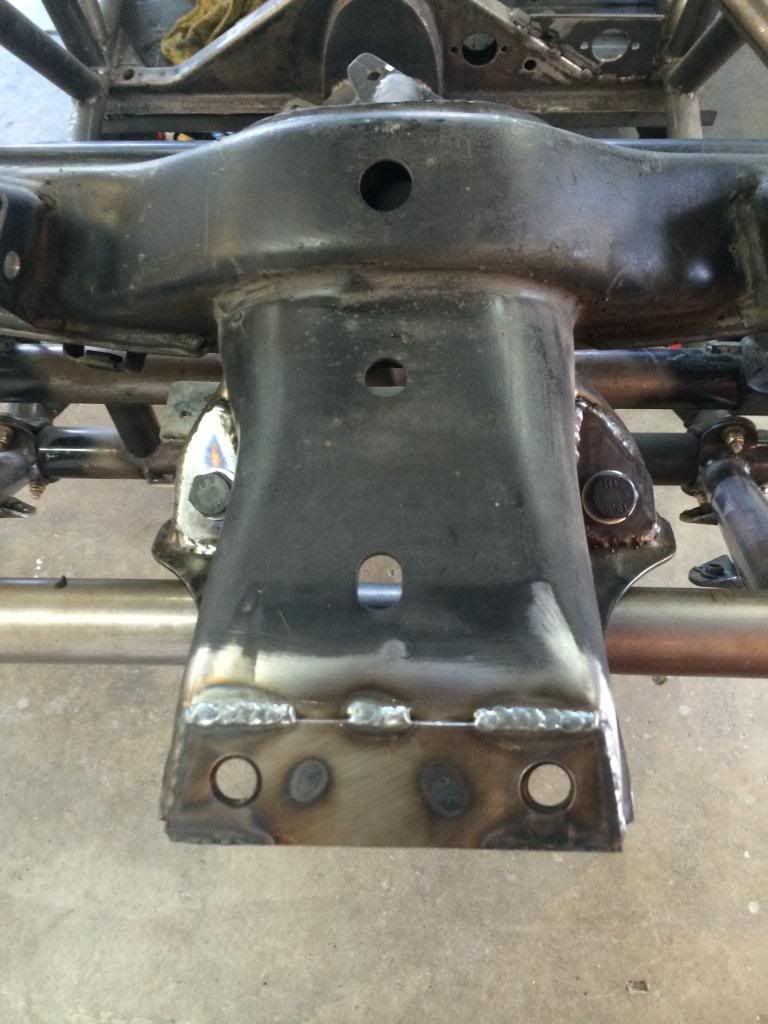
Stitch welded the top piece
The Holes in each gusset are larger then the hole in the subframe to help with aligning the diff to the subframe in the future.
Make shift paint booth in the garage. Large pieces of cardboard to catch some overspray. An old shower curtain to lay on the floor.
Jack stand covered with grocery bags
And a space heater to heat the garage up to cure it faster.
All done.
And a teaser of what's next.
Comment
-
Nice welds and paint booth.
Looking forward to seeing what comes next!Comment
-
Subscribed to this awesome build.How to remove, install or convert to pop out windows
http://www.r3vlimited.com/board/showthread.php?t=297611
Could be better, could be worse.Comment
-
Comment
-
Real nice Alex.
1991 325iS turbo

Comment
-
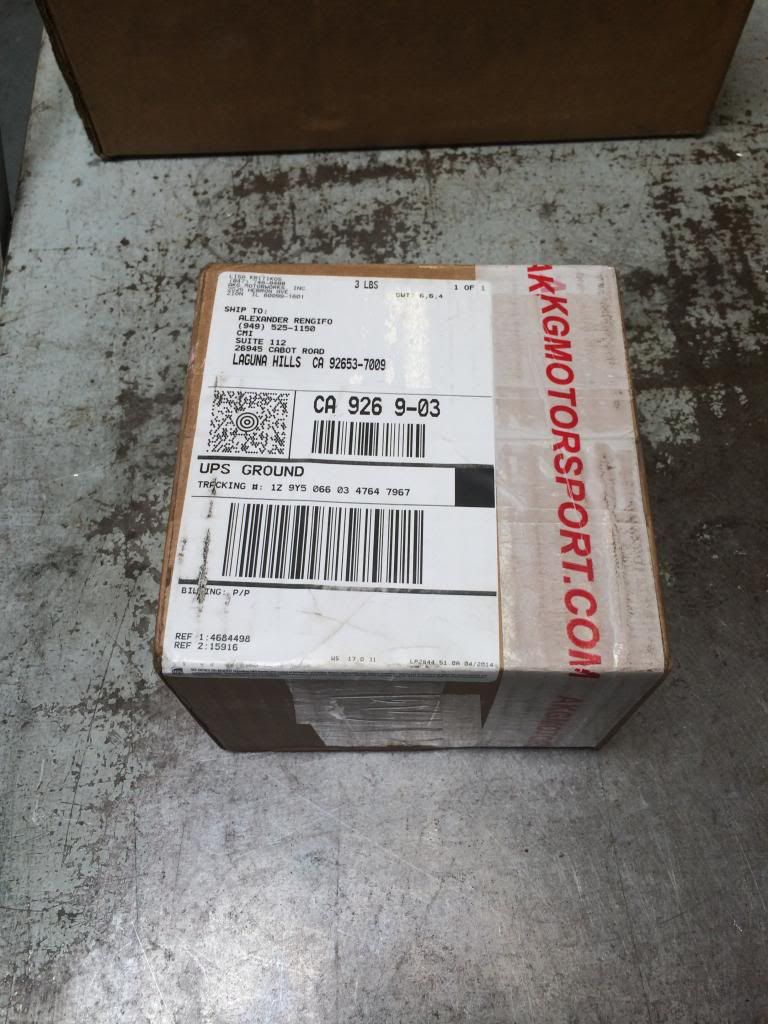
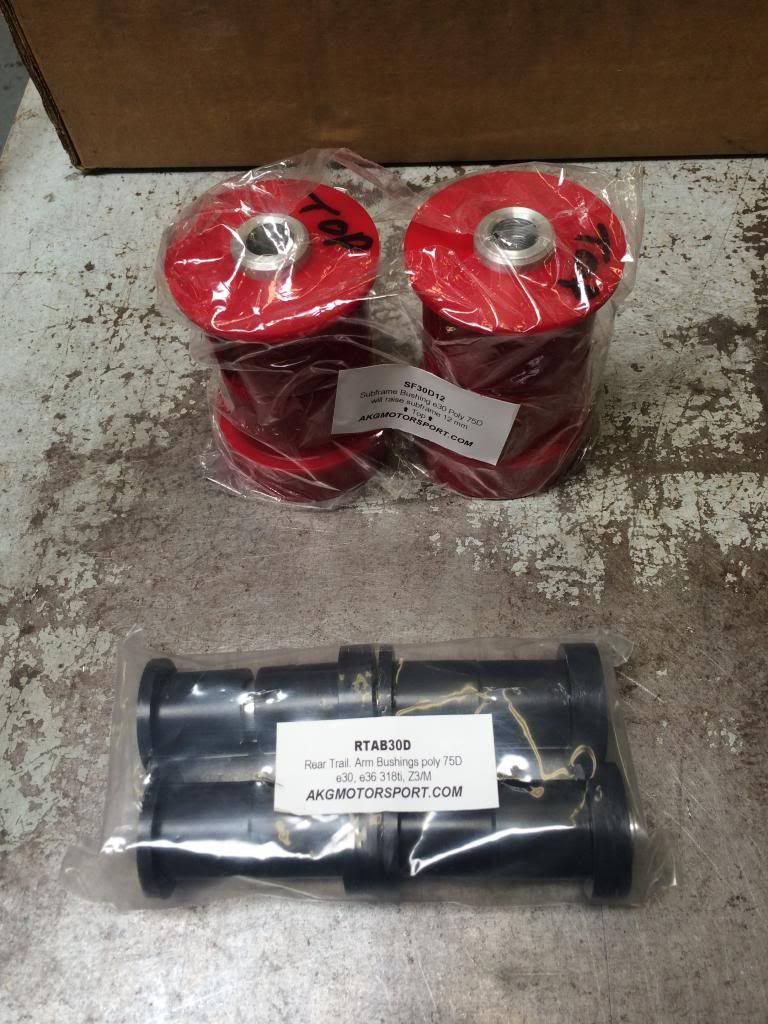
Lisa at akg set me up with rear subframe bushings and trailing arm bushings both in 75D polyurethane. Very hard material almost Delrin.
Comment
-
I have never worked on the rear subframe of an e30 period. Never helped someone out on one. Just read some diy's on it and dove in.
But ran into a problem right away. The locking plate for the rear axle nut had rusted it self onto the nut and was a challenge to pry it off. Chisels pb blaster and a propane torch got that sucker out.
Followed by another problem. I'm not the strongest built guy but I'm pretty strong. I could not break the axle nut free.
I took a 3 foot cheater bar on a foot long breaker bar with a short 1/2 drive extension and the 30mm socket. Supported by a jack stand and with the help of my brother to keep it from slipping off the nut.
When it finally broke free I thought I snapped the cheater bar because it made a huge CRACK! sound.
Nope just broke it loose.
Several hours later
Removed the exhaust
exhaust heat shield
Drive shaft
Axle bolts
Ebrake cables from inside
Abs wires
Diff speedometer wiring
Rear brake lines above the subframe
Rear shocks
And then we can finally support the rear end and begin to lower it.

It's out!! Water bottles ziptied to the body to keep the open brake lines from dripping brake fluid everywhere.
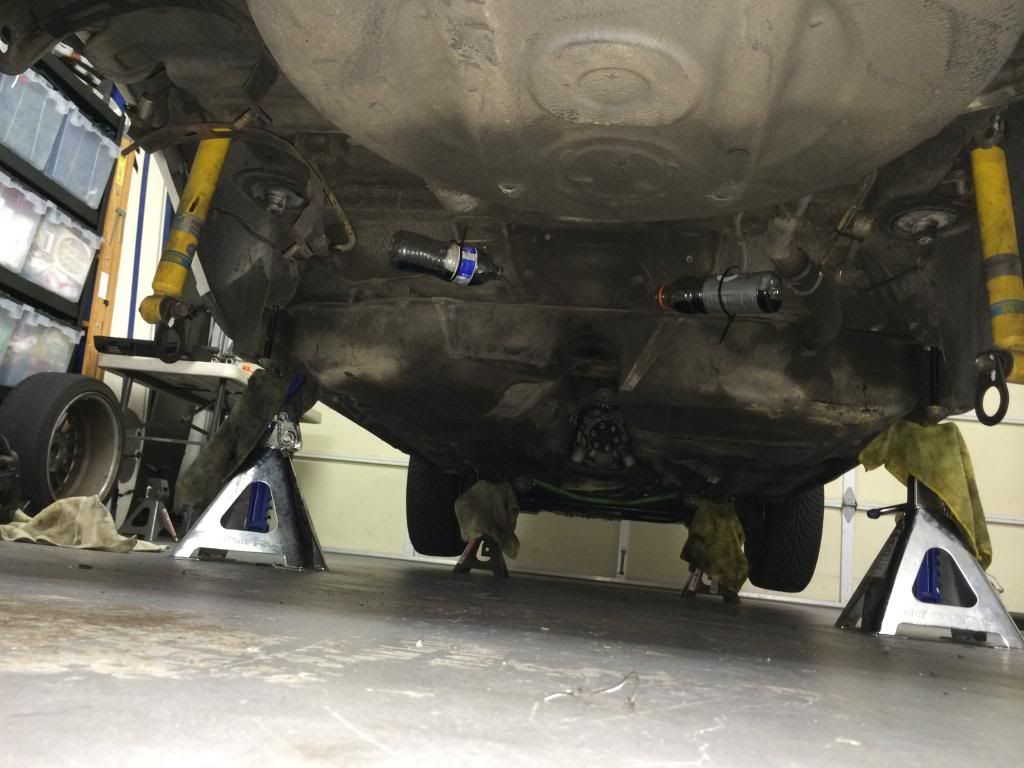
Working by yourself sucks sometimes. This sucker is freakin heavy.
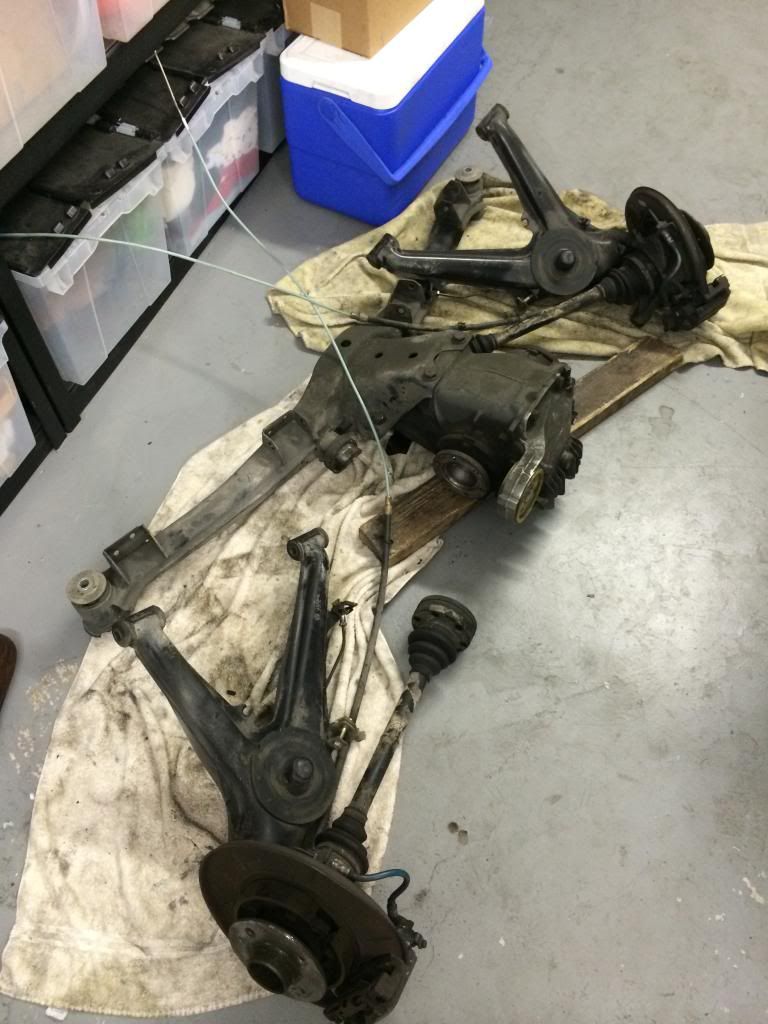
I laid out a furniture dolly, skateboard a floor jack and some towels and dragged it out from under the car.
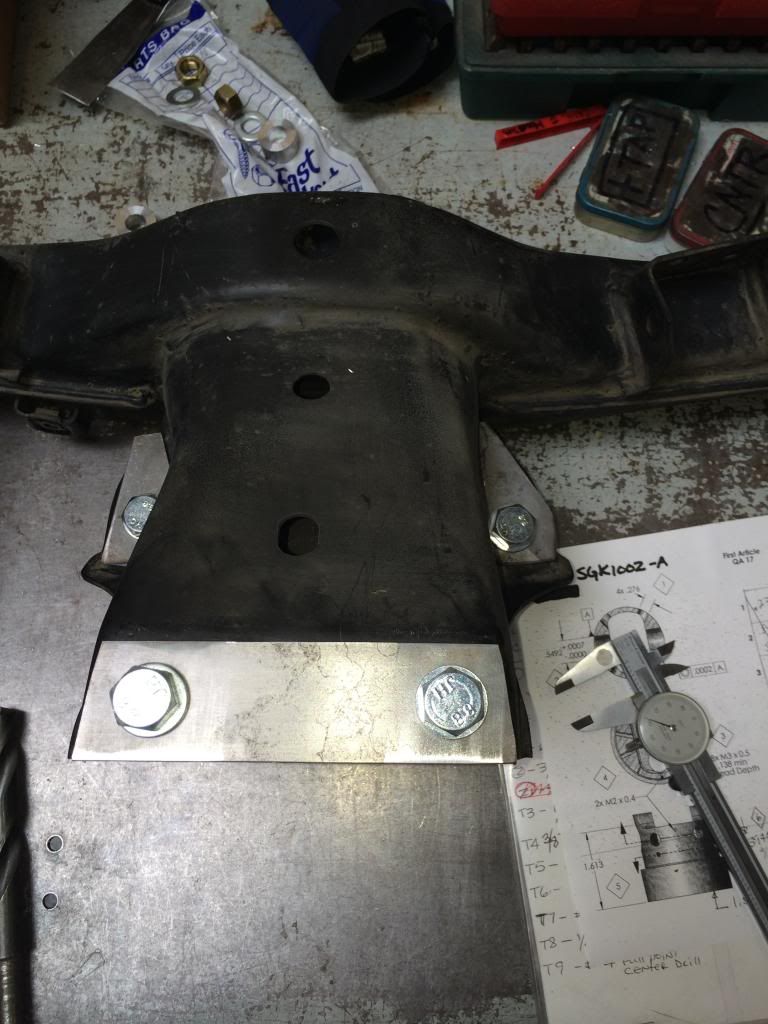
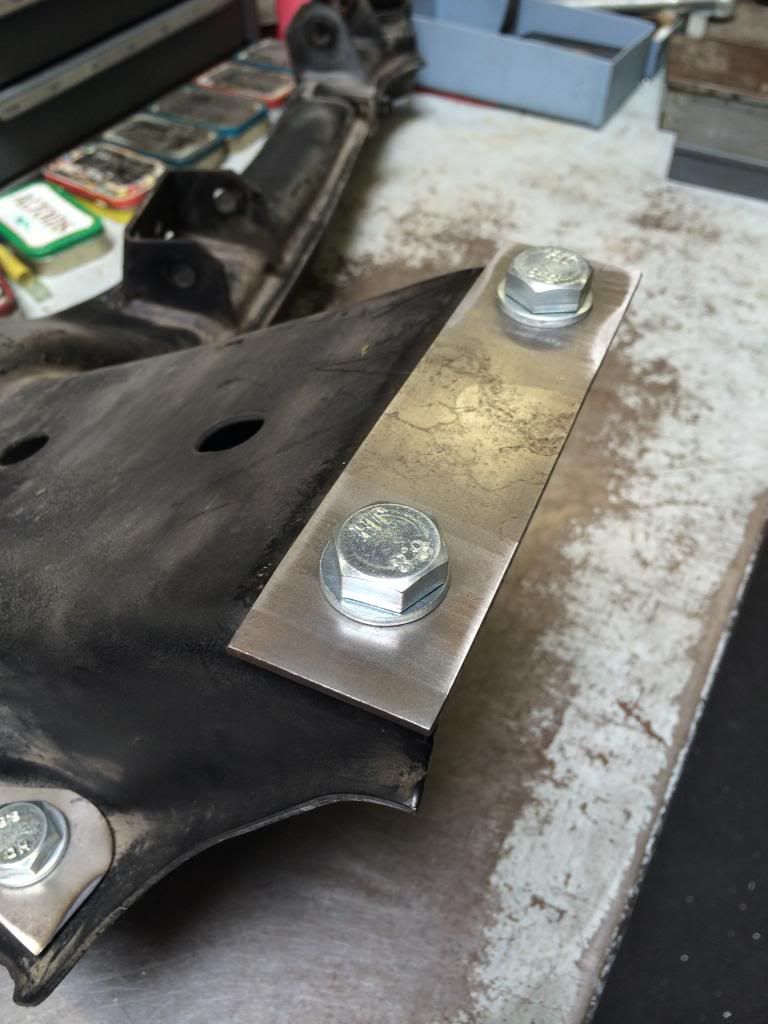
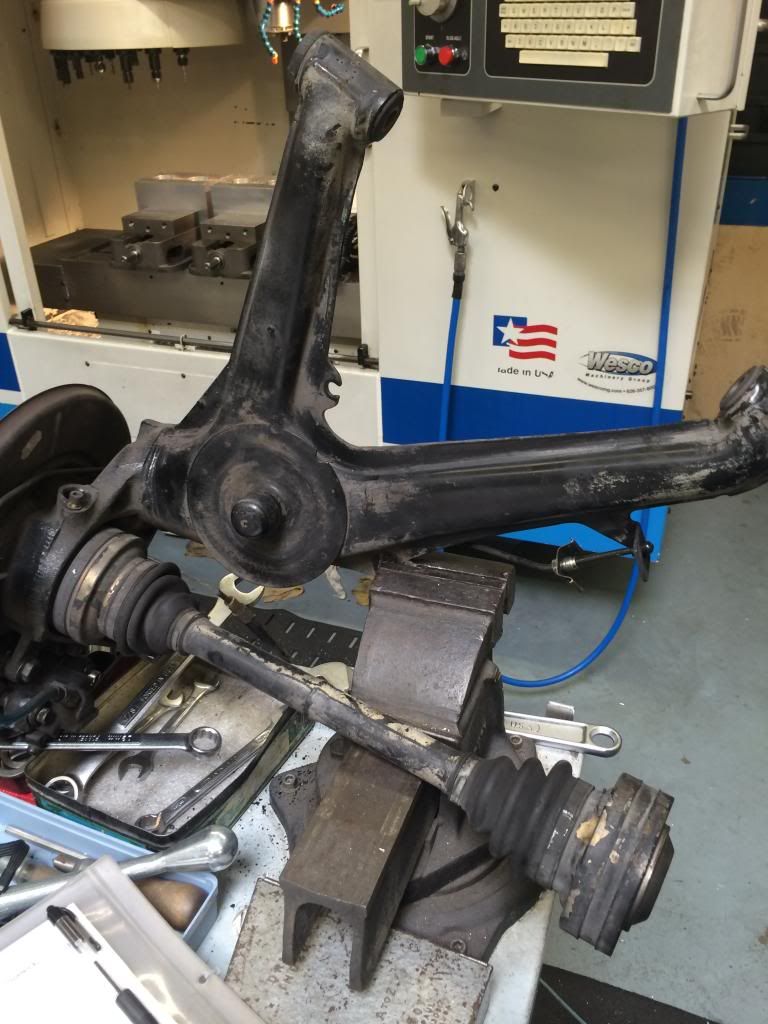
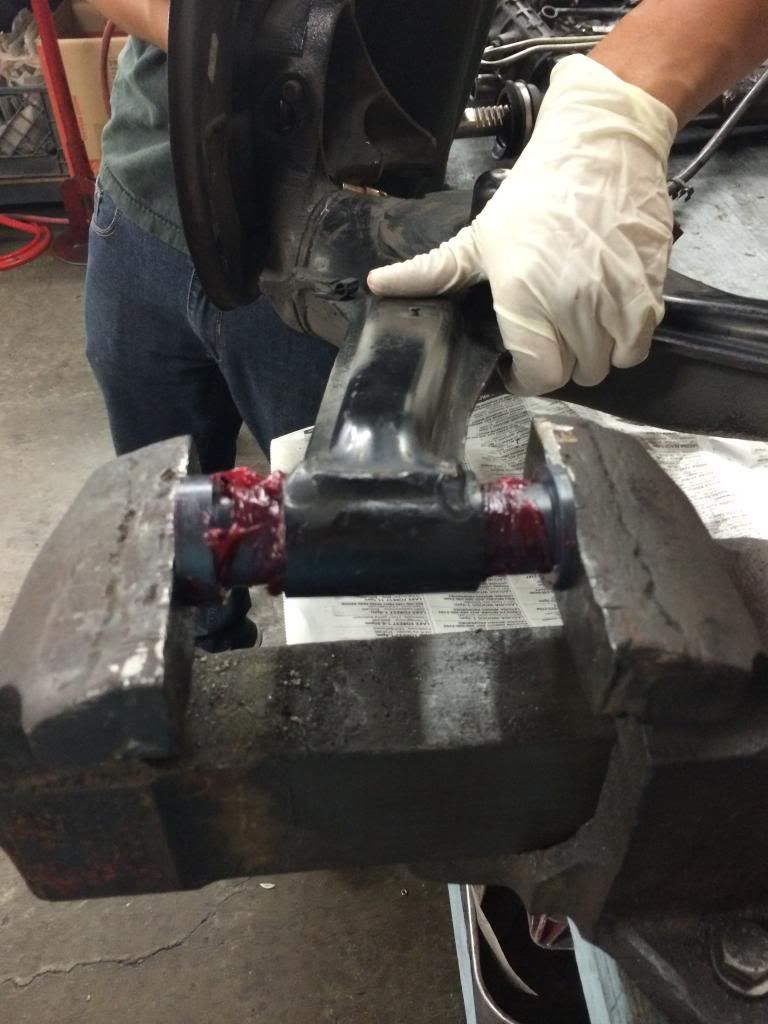
I don't have a bench vice at home so i took the trailing arms to work and bent the sway bar tab flat with a vice grip. Then hammer and dollied it flat and tried to get more flat by putting it in a bench vice.
The point of this is to make a flat gusset on top of the original sheet metal.
This might be the only picture I have of the gussets I made and welded for the trailing arm. I snap a better picture.
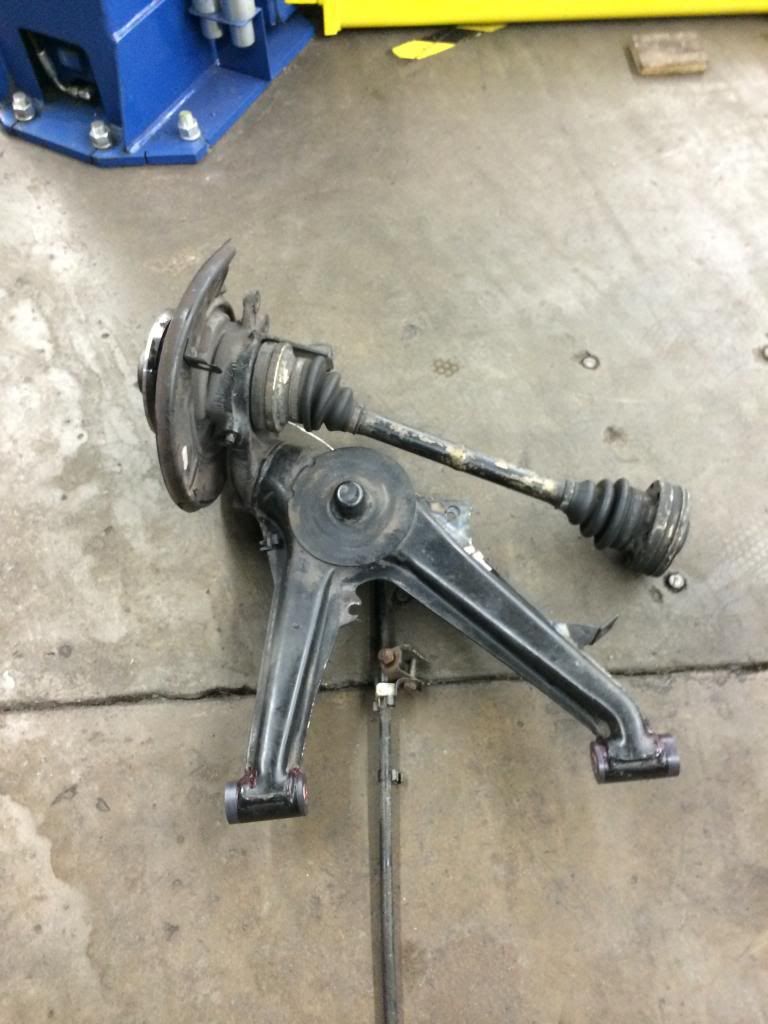
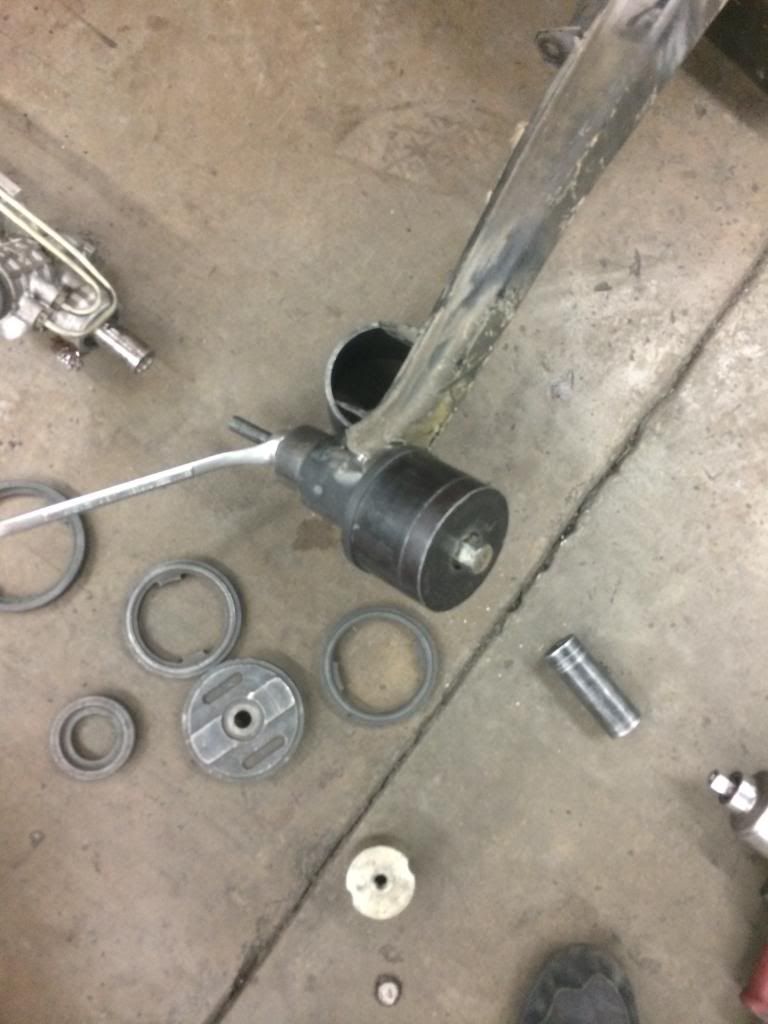
Went to Richards shop and borrow a tool from the brand KMAC to remove the trailing arm bushings. Soo easy with this tool and an impact gun.
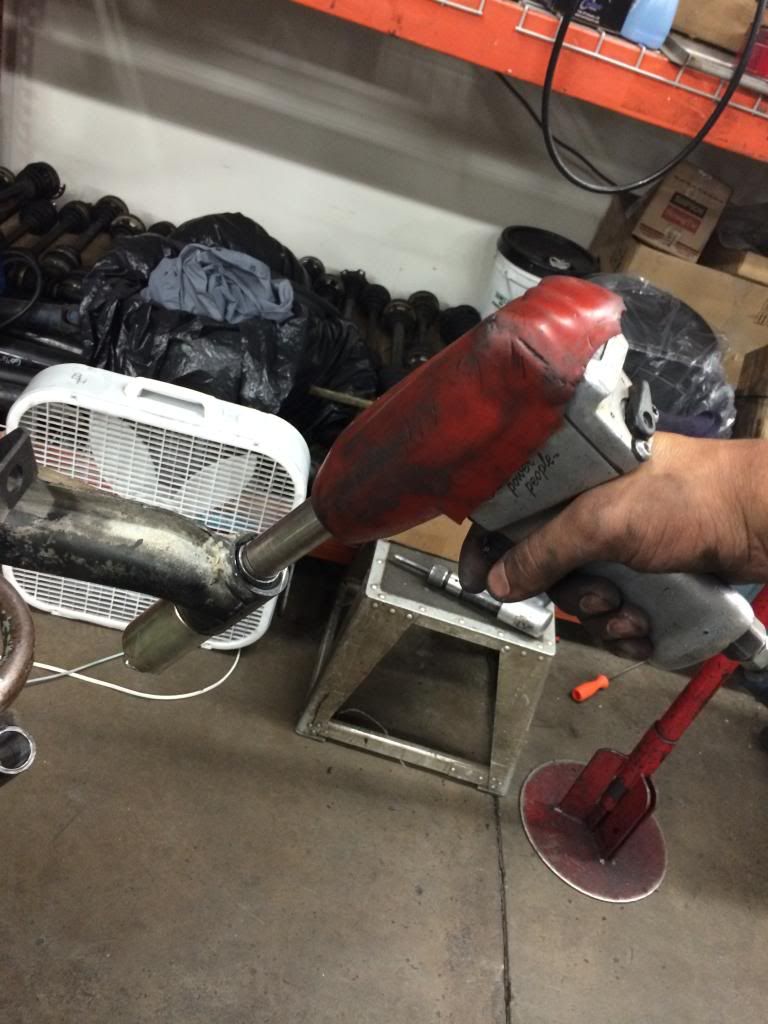
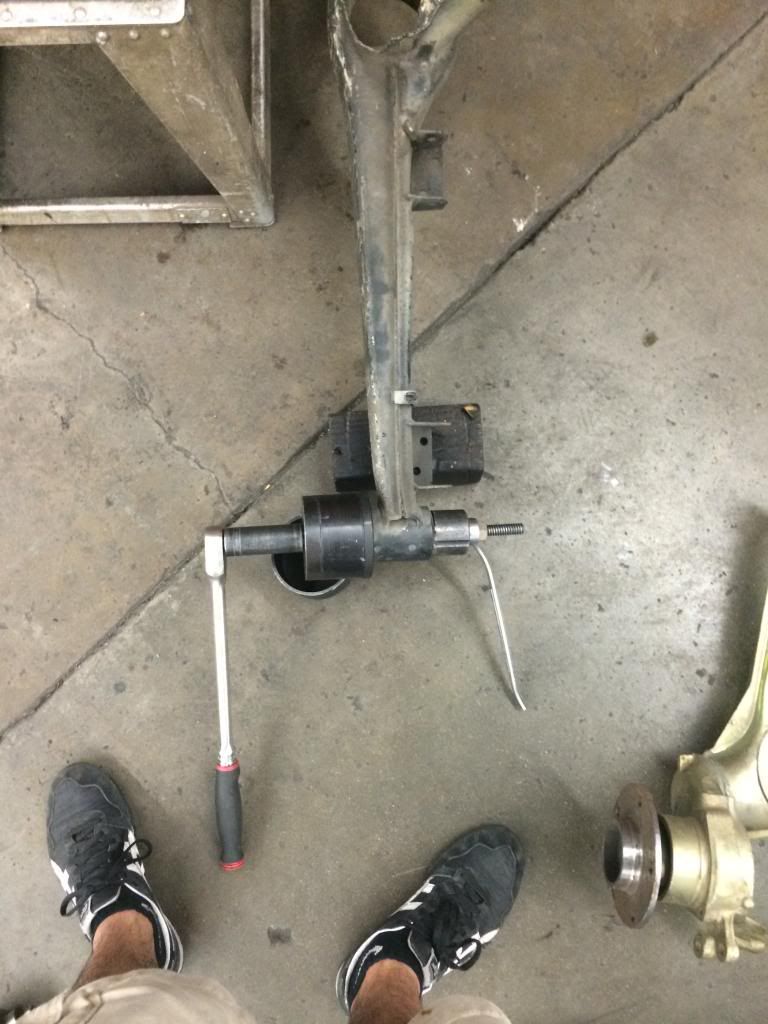
The axle spline was rusted and stuck to the hub spline and not even with the special BMW tool and an 3/8 drive impact gun.
I switched to 1/2 drive impact gun and greased the threads on the tool and it pushed the axle right out.
I have removed axles before by just tapping them out after removing the nut. I was shocked on how tight these were.
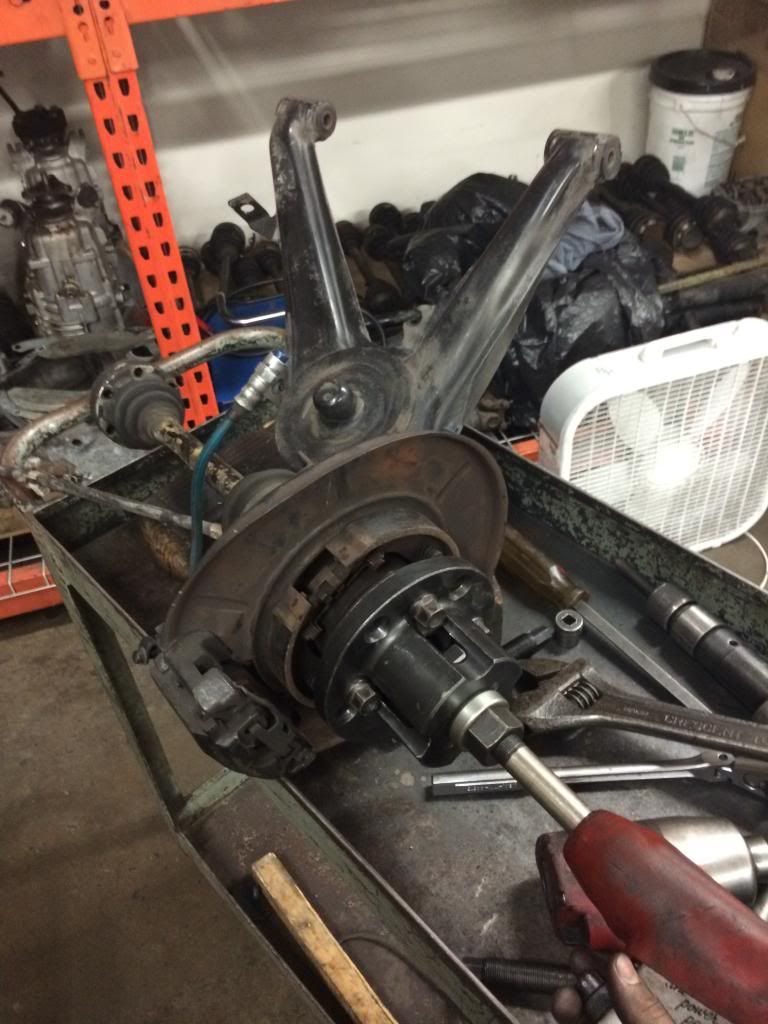
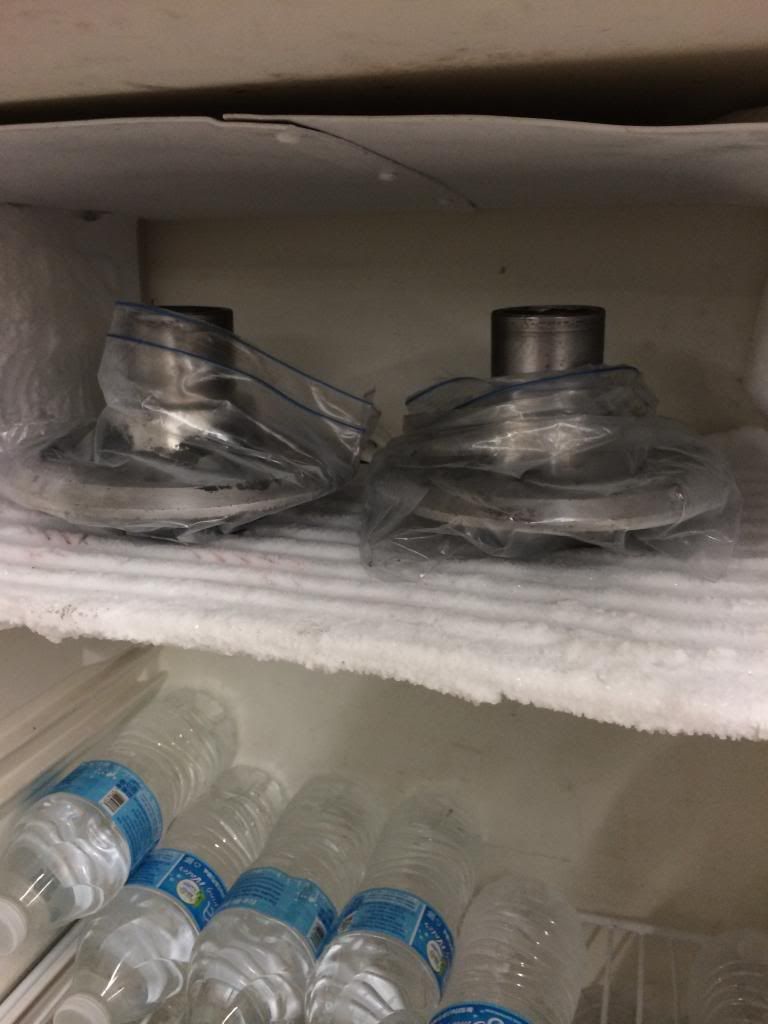
After removing the axles I removed the hubs and cleaned them.
First they sat in mineral spirits.
Followed by a very hot ultra sonic bath.
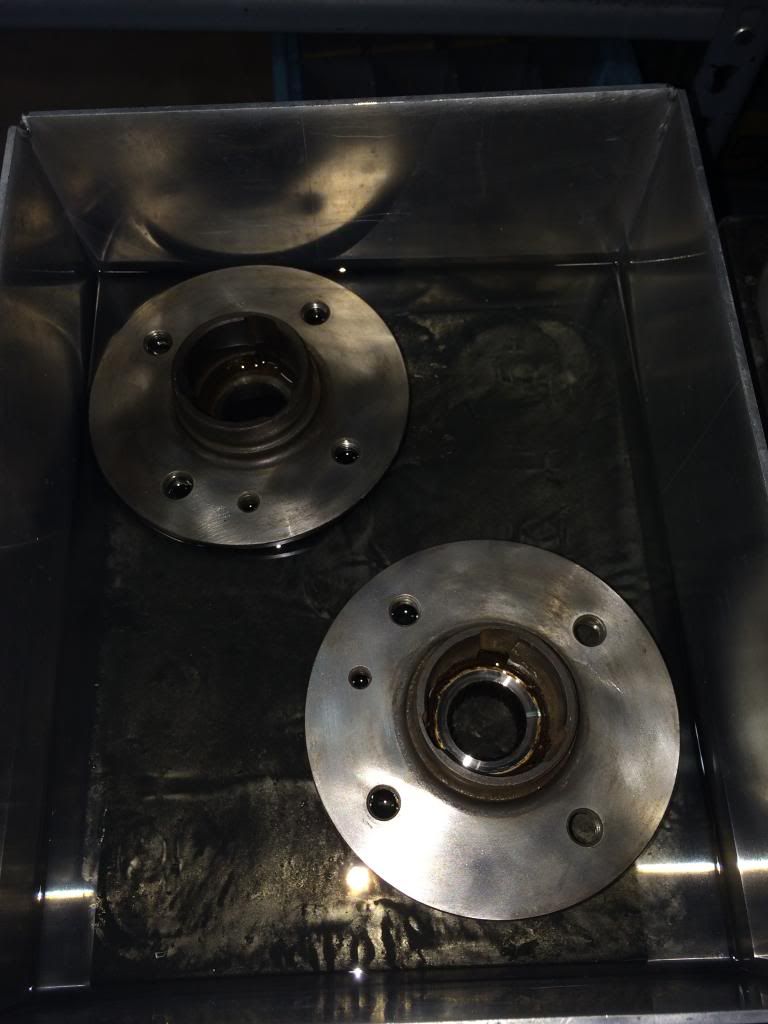
Then from really Hot they were immediately thrown in the freezer.
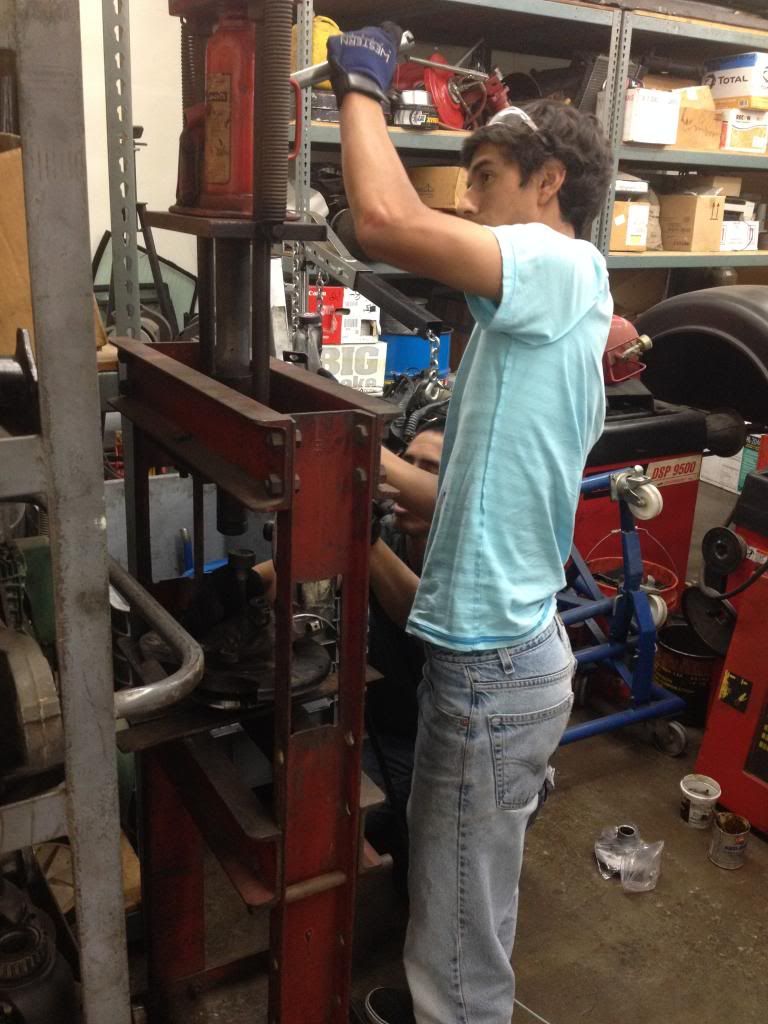
While the hubs got cold we pressed the new fag bearings into the trailing arm.
Luckily I have access to a press.
My brother in the blue shirt I'm in the black shirt and my buddy Tyler helping out and taking the picture.
When I ordered the bushings I asked what grease they recommend and AKG said nothing special generic wheel bearing grease is fine. So I bought a tub of this. I want a solid ride but not a squeaky ride.
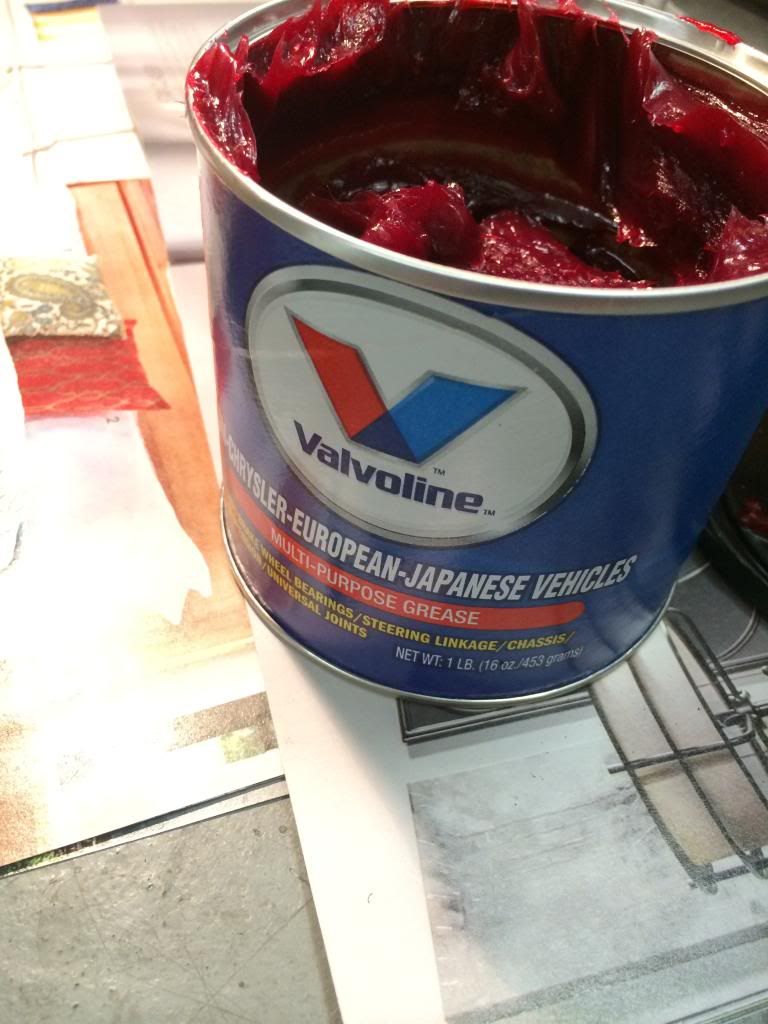
Akg's trailing arm bushings have really neat grooves for grease to get stuck on.
Cleaned up the diff I built last year and put some fresh redline fluid.

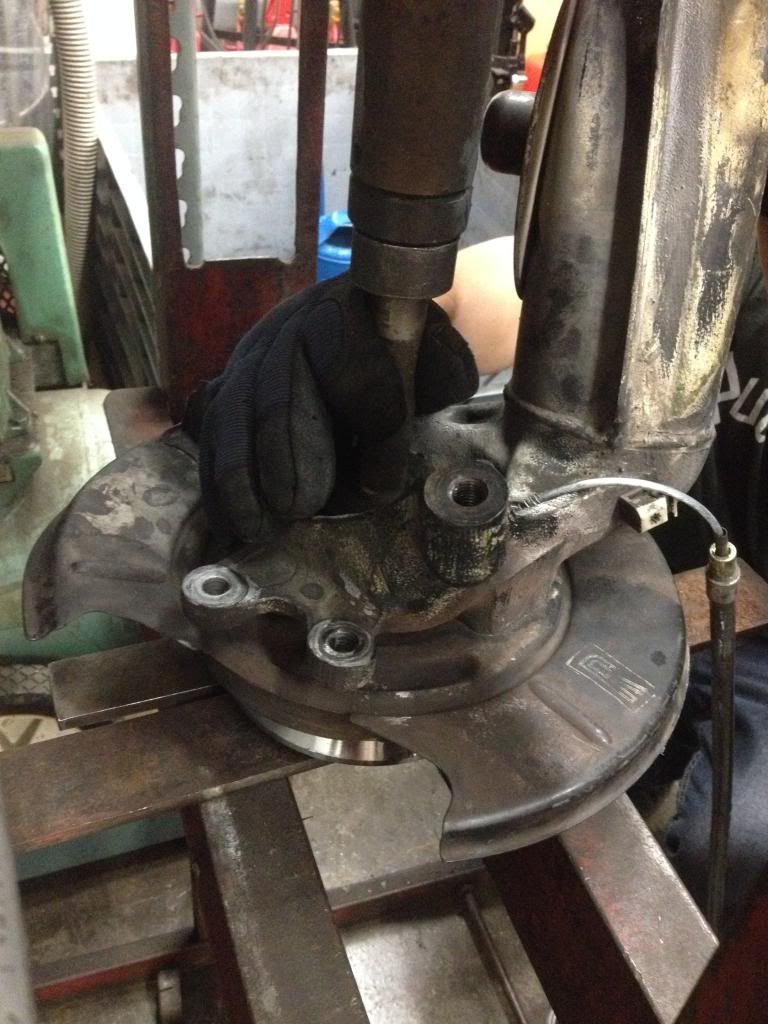
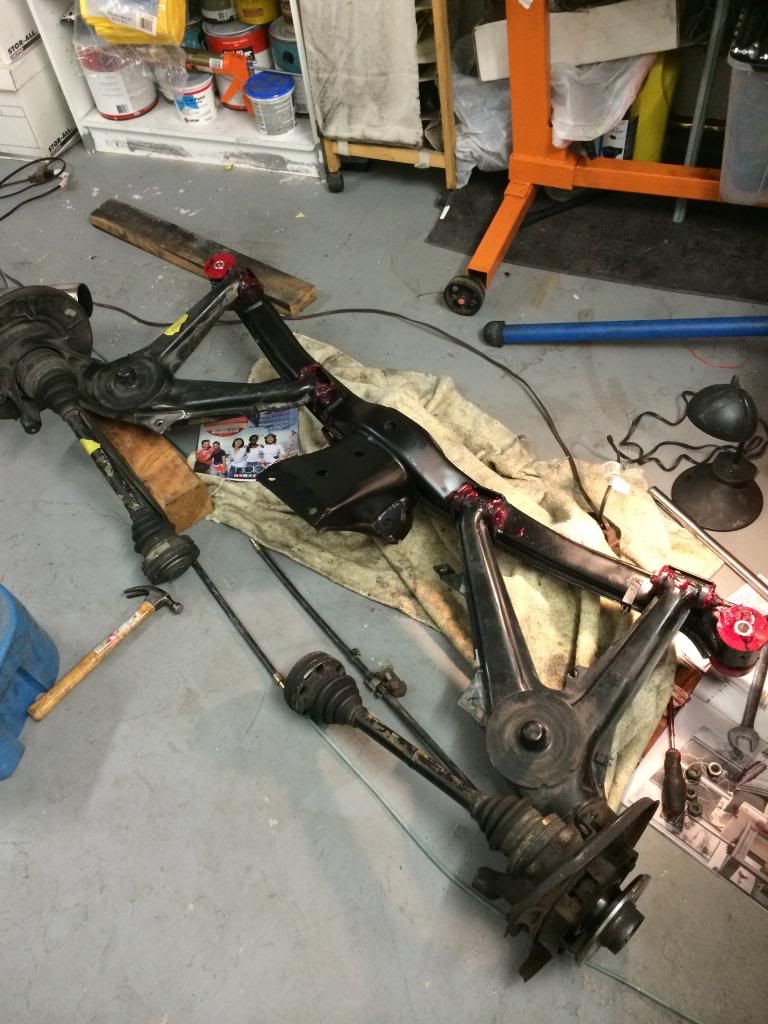
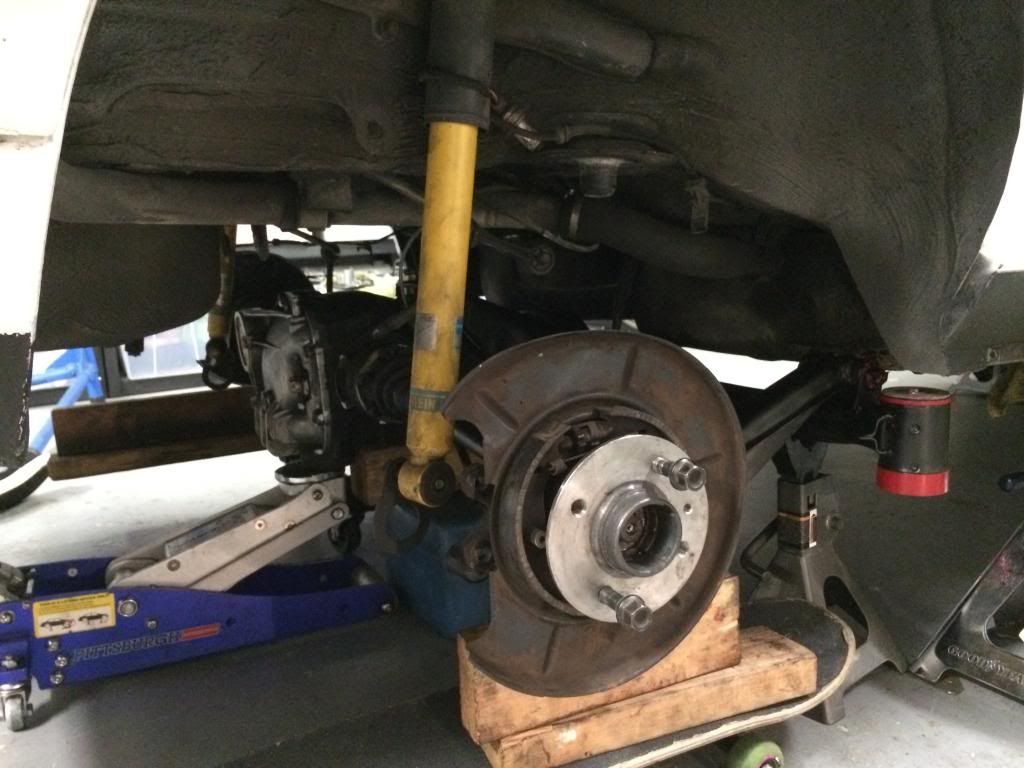
Starting to assemble the arms to the subframe. It needs a bit of paint on the arm where the gusset was welded. And the axles aren't looking sexy.
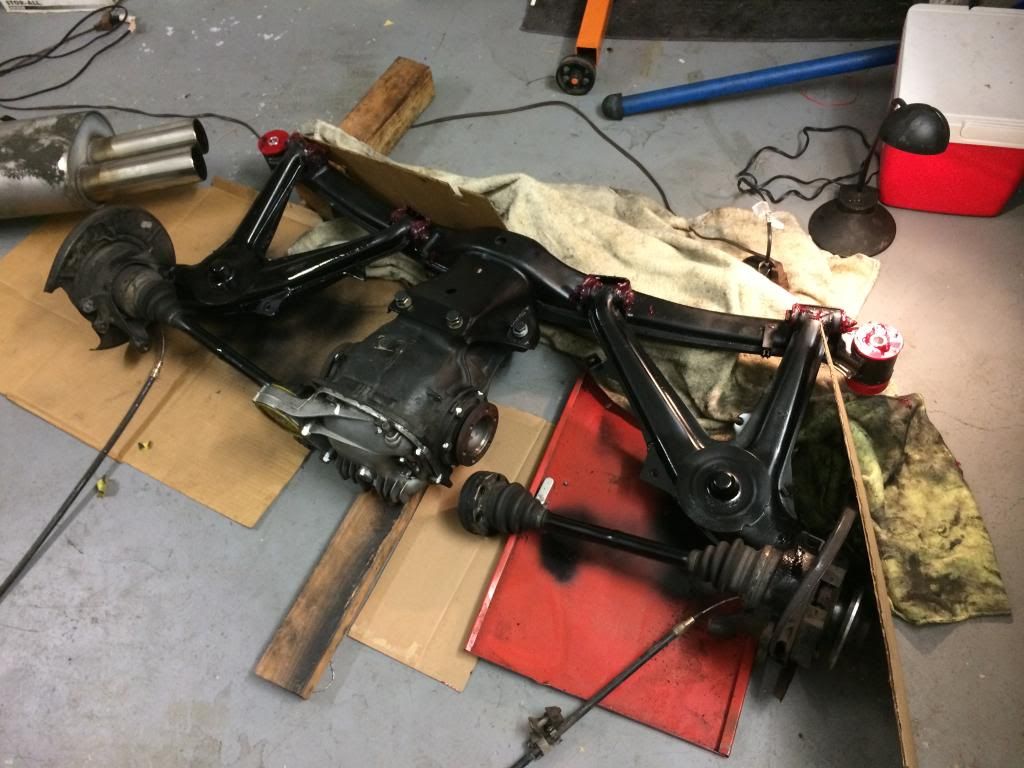
Everything sexy.
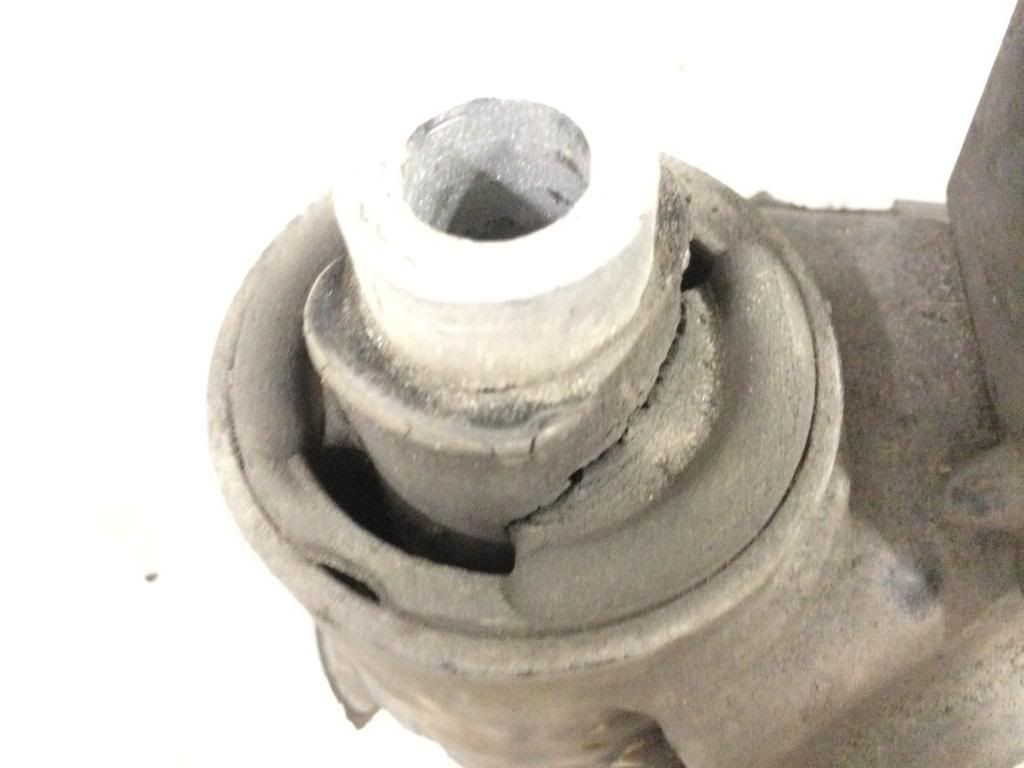
So happy to be finally doing this. My rear subframe bushings were shot. Both were like this.
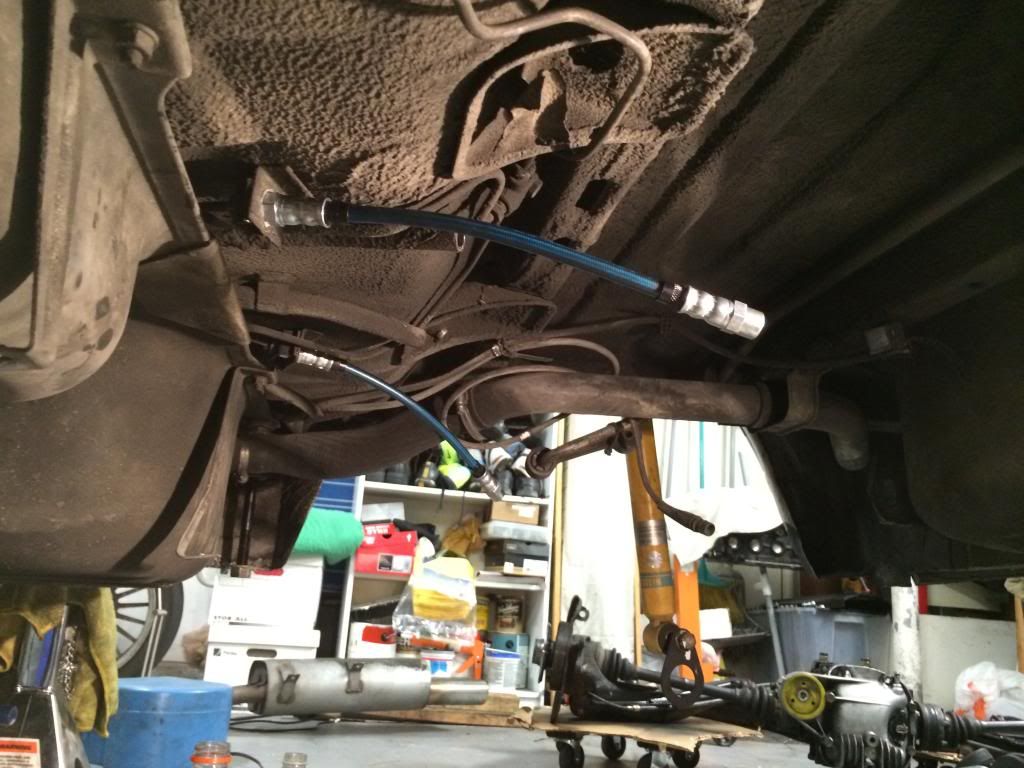
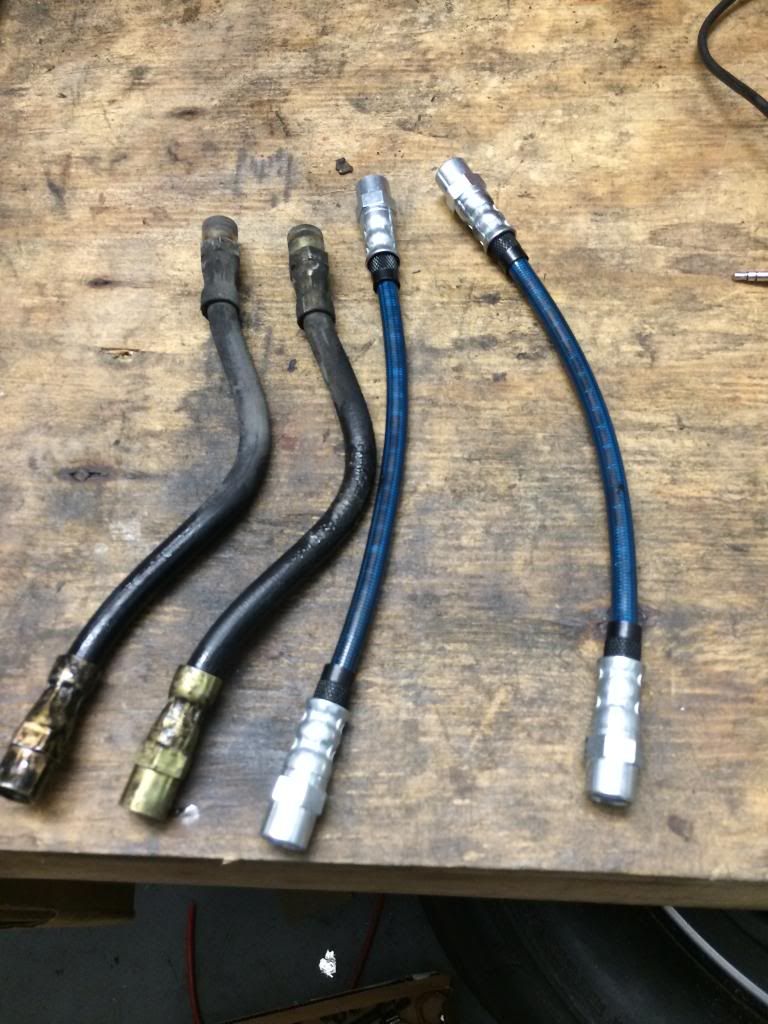
Last thing to do before installing the rebuilt rear end is to replace the rear brakes lines near the gas tank. I bought all new stainless lines in 2009 and have had these sitting brand new in a box since then and have never gotten around to installing them because of the tight space between the gas tank, heat shield, body and the subframe.
Natalie is Finally getting new lines
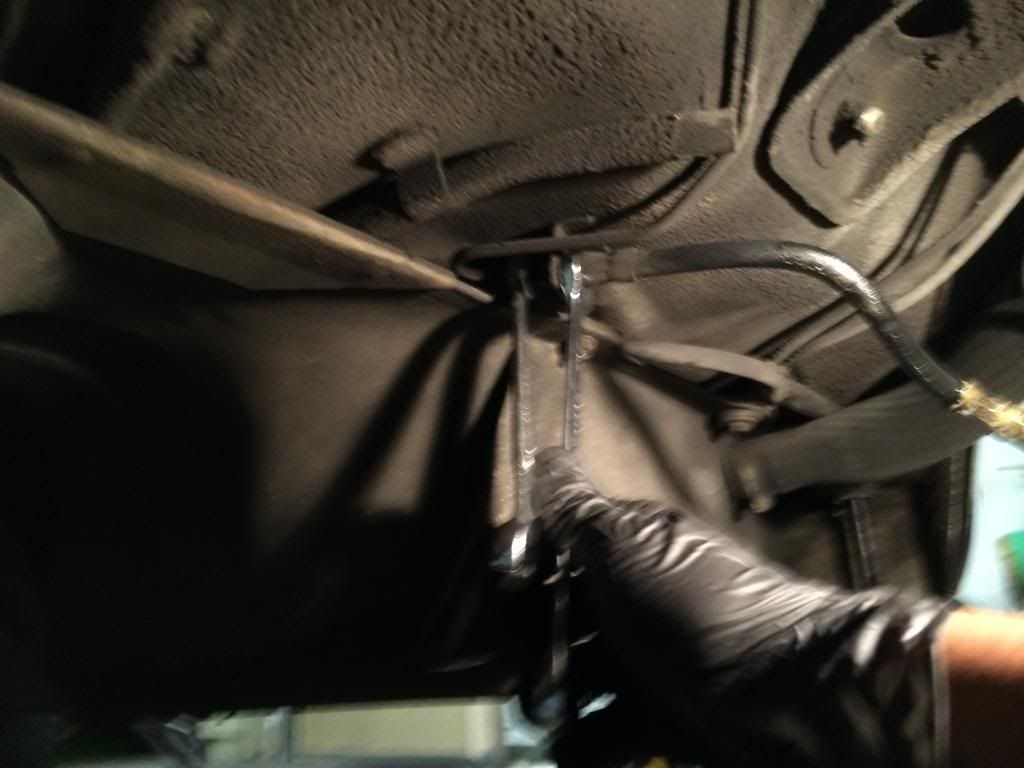
New bimmerworld stainless and Teflon coated brake lines.
Old vs new
And up she goes. This took me hours by myself.
If you are reading this. Get some friends to help you.
I only have one floor jack. So I ended up using a bottleneck jack from my parents car. I had the diff supported by the jack. And the subframe supported by jack stands. I would use the bottle jack and raise one side. Lift the jack stand then lift the other side. Little by little until it finally lined up.
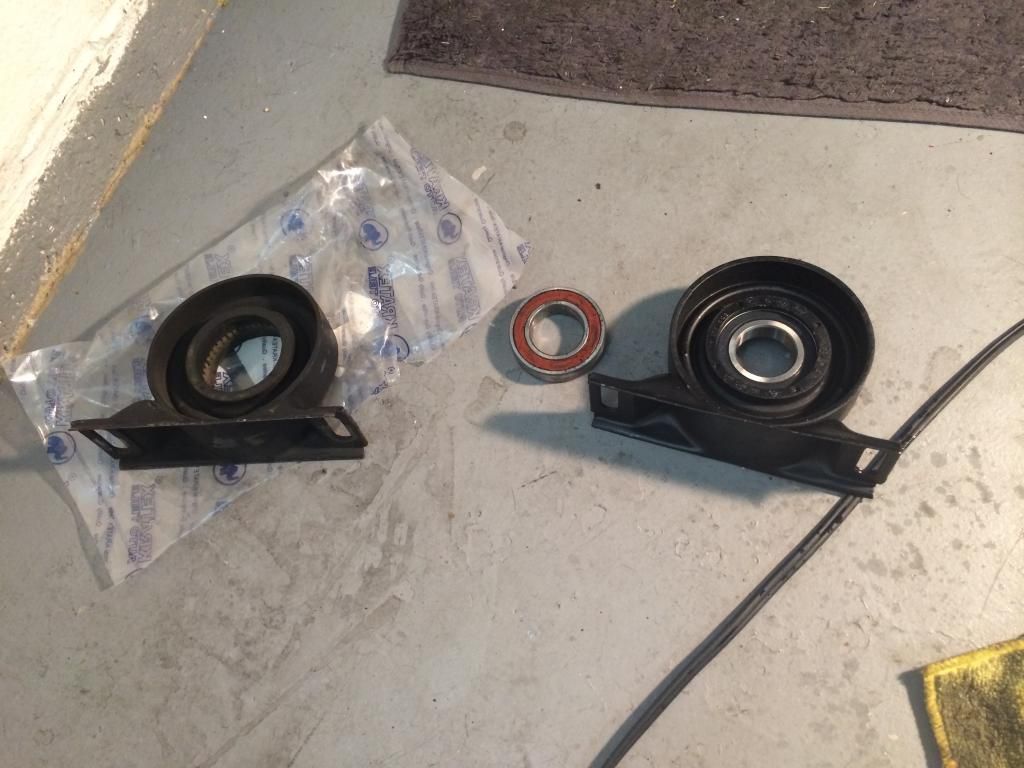
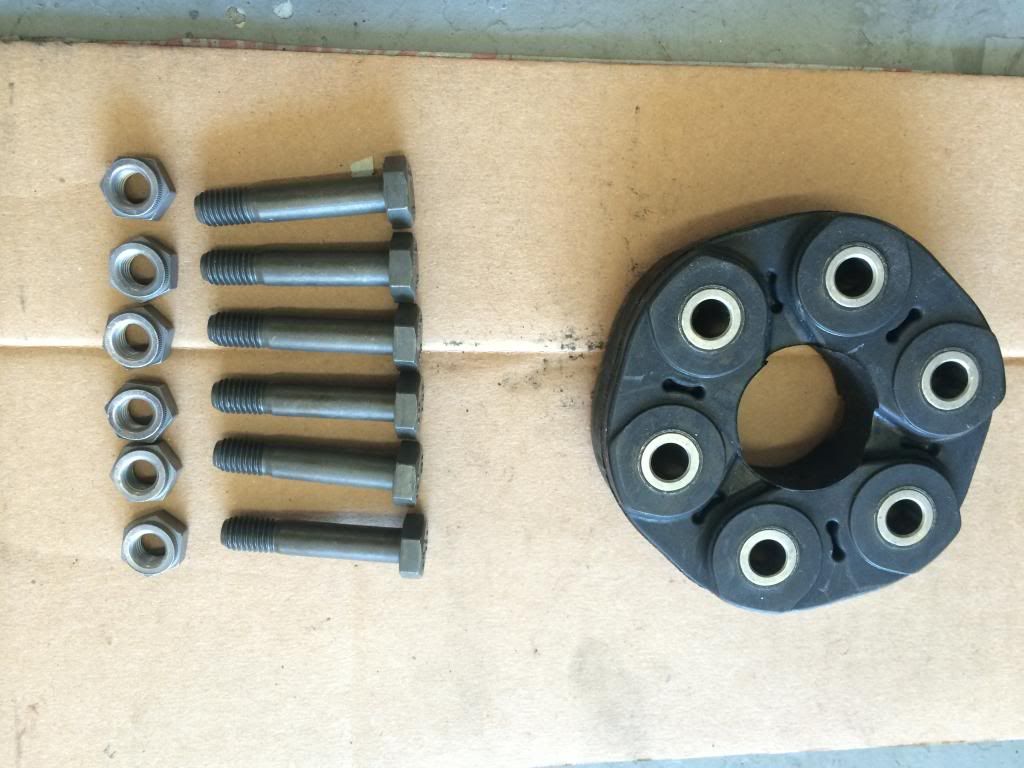
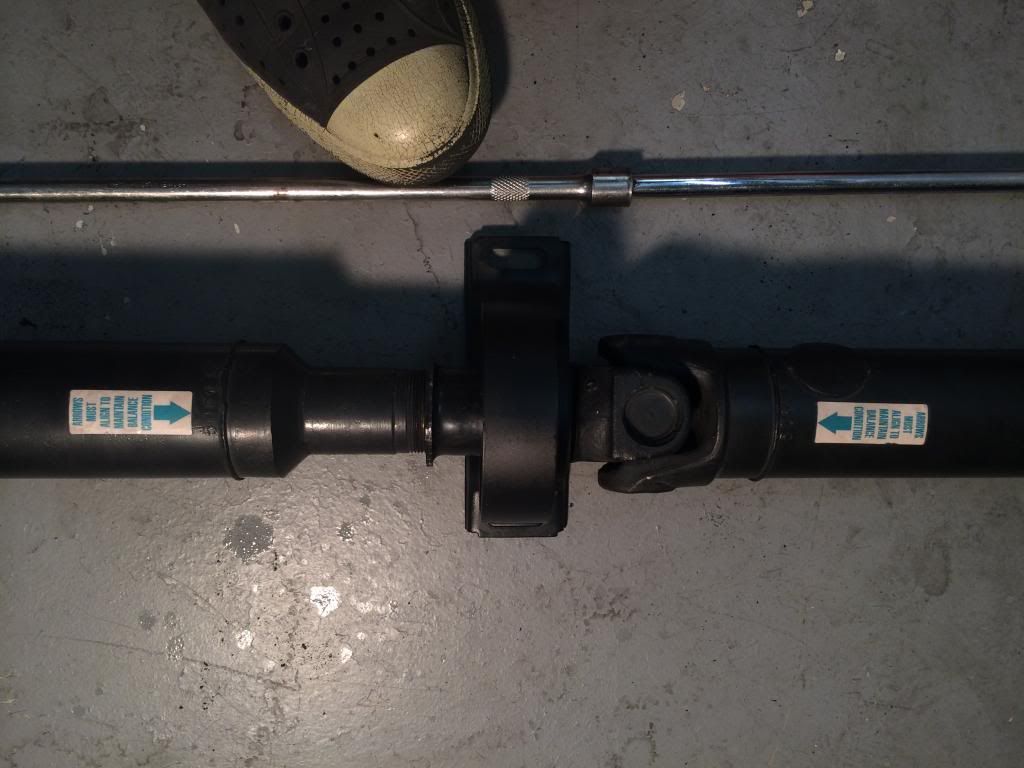
I bought a new center support bearing. And guibo.

Old vs new.
New guibo and all new BMW bolts and nuts
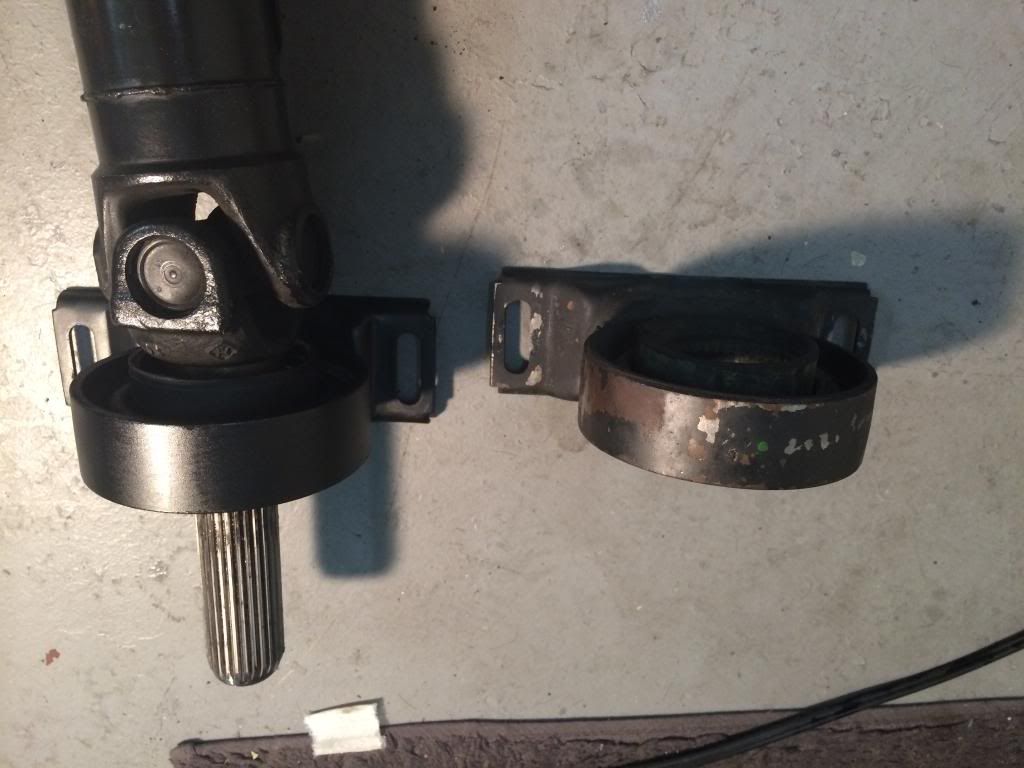
I rebuilt this driveshaft last year but for money reasons I didn't replace the guibo guibo bolts or the center support bearing. They are pretty expensive.
I'm glad everything is proper now with the driveshaft.
Almost done getting everything buttoned up.
Bled the brakes drive shaft installed. Exhaust installed.
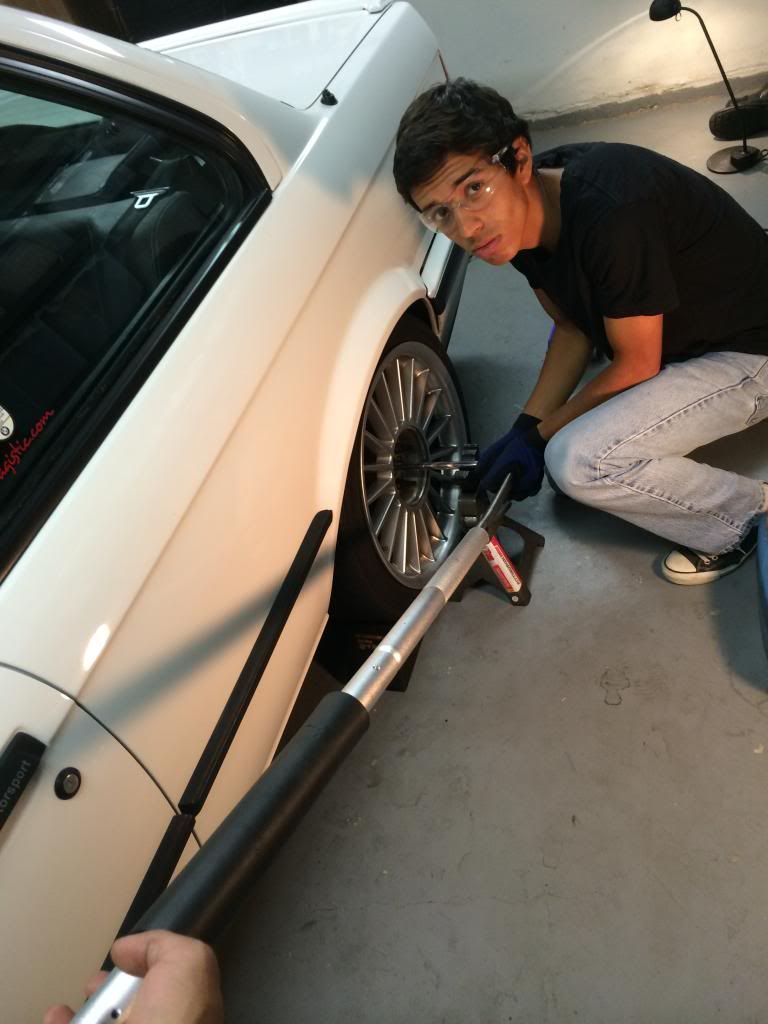
Using a jack stand to support the tool and torqued the axle nuts 200+ft lbs
(Can't remember the spec)
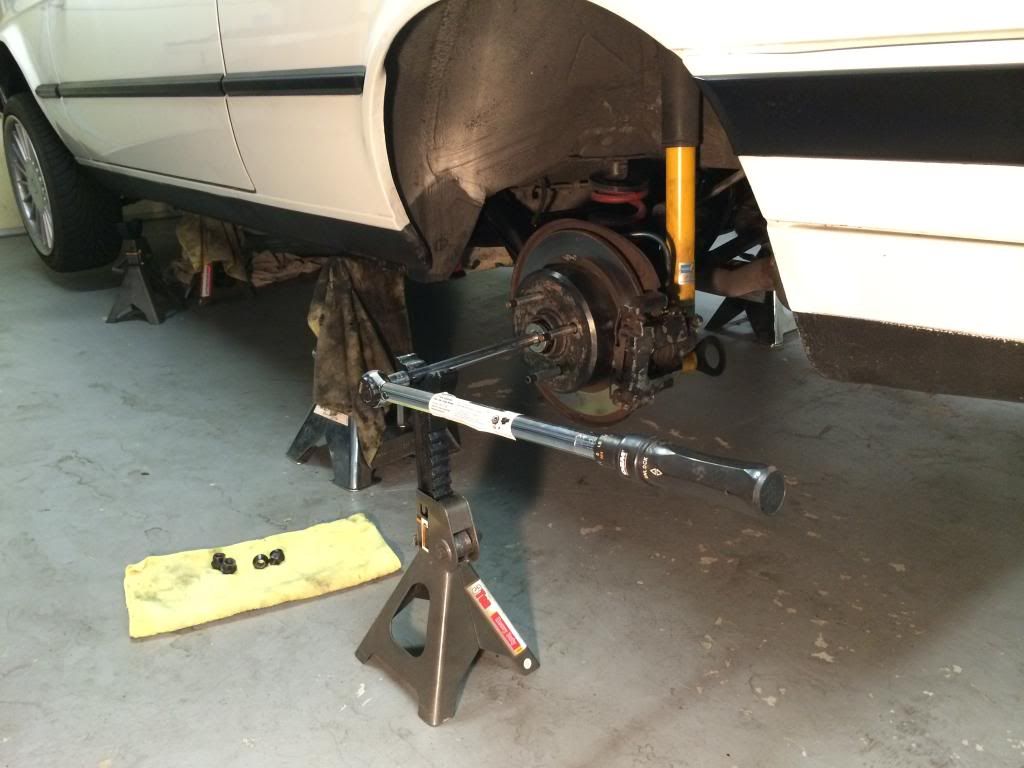
Finally done and back on the ground

Took her for a test drive and everything seems pretty solid no weird noisesComment
-
-
Damn those times are so much faster than what people were running on Saturday... crazySimon
Current Cars:
-1999 996.1 911 4/98 3.8L 6-Speed, 21st Century Beetle

Make R3V Great Again -2020Comment


Comment