
Link to the fog light dis-assemble diy? Btw great build!
-
-
Ask, and ye shall receive!
Thanks for the props!Comment
-
Hey guys...been a long time since I've updated. I haven't been doing much but just driving the car lately. I don't have much spare cash at the moment to mod, but I've greatly enjoyed the car in it's current form...I still plan on doing some big things later in the year, cash flow permitting. My update today is pretty interesting, though (I thought, anways).
My wife was driving the car around for most of the month, and she started telling me she was having a hard time getting it in gear. I took the car on a drive myself and barely made it home! The clutch wouldn't disengage and I couldn't get the car in gear. I knew I had to have an issue with hydraulics, the pedal didn't feel right and my clutch is pretty new.
I miraculously limped the car home and dove under the dash to find this:

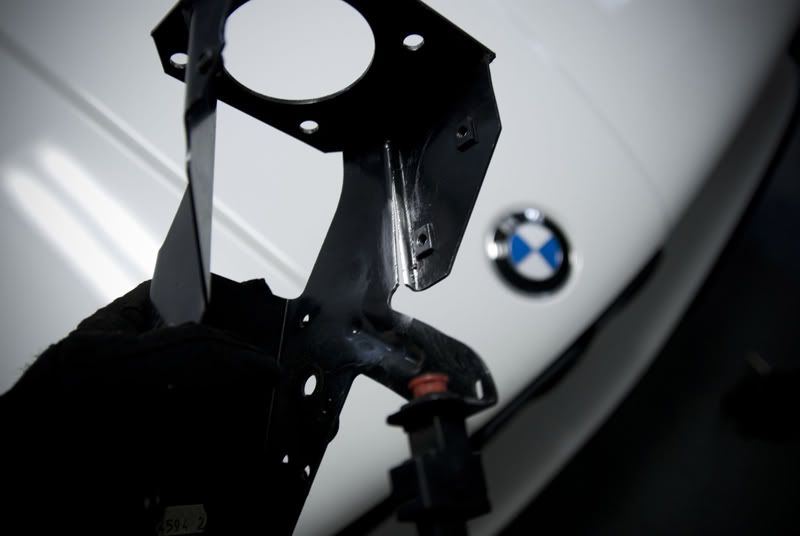
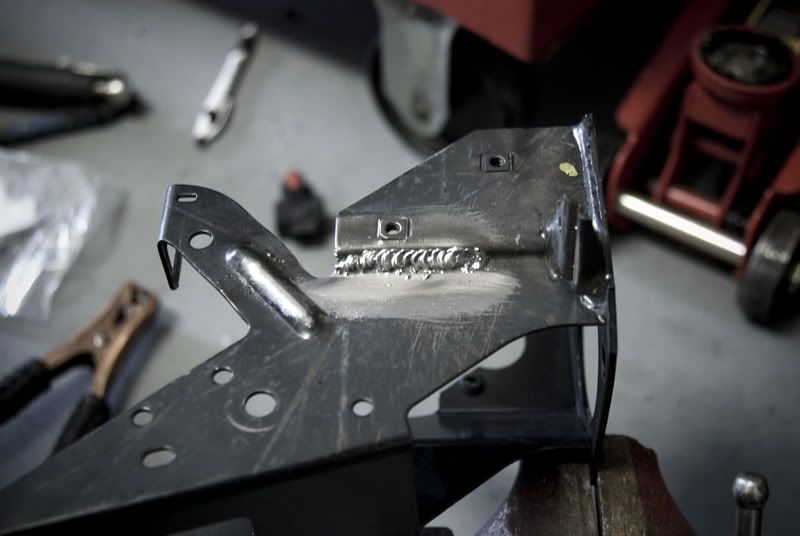
You can see in the picture the piston for the clutch MC isn't even aligned with the housing, therefore when pushing the pedal, not enough motion from the pedal was being translated into hydraulic action to operate the slave cylinder. But why is it all jacked up?? You can see where I circled in red, the pedal bracket sheared from however many 1000's of pedal strokes over the last 23 years and the continued pedal strokes since the crack have bent the MC out of normal position...finally it was enough to prevent proper operation of the clutch. So, I ordered up some replacement parts from Pelican.
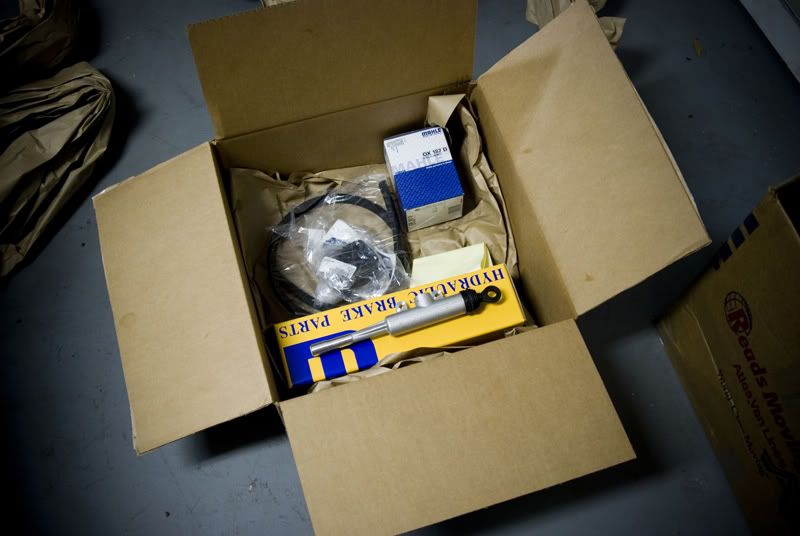
In no particular order, I got a new clutch MC, replacement braided supply hose, new pedal pads and stuff for an oil change.
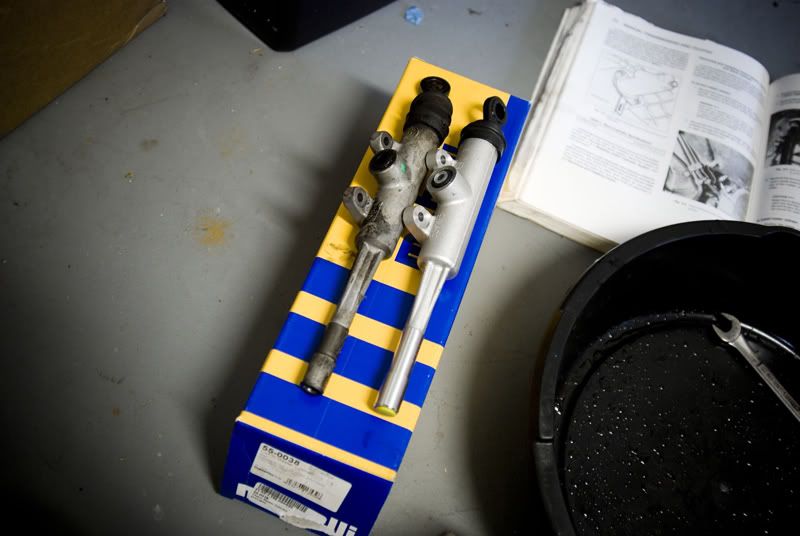
I then got to work extracting the old MC. This more or less was simple...just follow the Bentley. I avoided draining any fluid from the brake reservoir by just clamping off the supply hose with some vice grips, though. Here is the old vs. the new:
Next, I had to get the bracket out to give it a proper repair and guarantee reliable operation. This was a bit of an exercise in body contortion, but I got it done. Only 6 bolts hold it to the car, and then you need to remove the springs for the brake and gas pedal, as well as the long bolt the fixes both clutch and brake pedals to the assembly. Also, remove any electrical connections you need to successfully remove the part. After getting the bracket off, I wire-wheeled it to remove paint and some light rust to make it weld nicely.
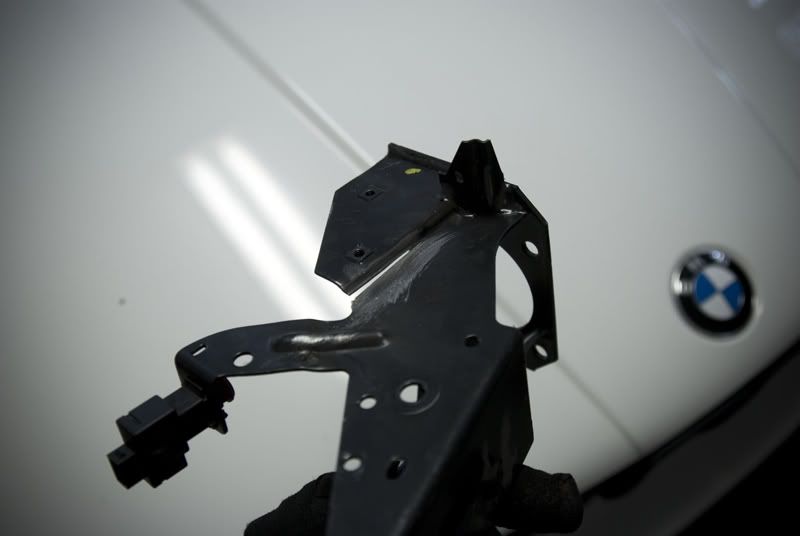
After that, I gently hammered the bracket back into proper position and welded her up! Welds came out a little cold at the feet, but they will definitely do. Not bad for my first time since I made my exhaust...more than a year I think now.
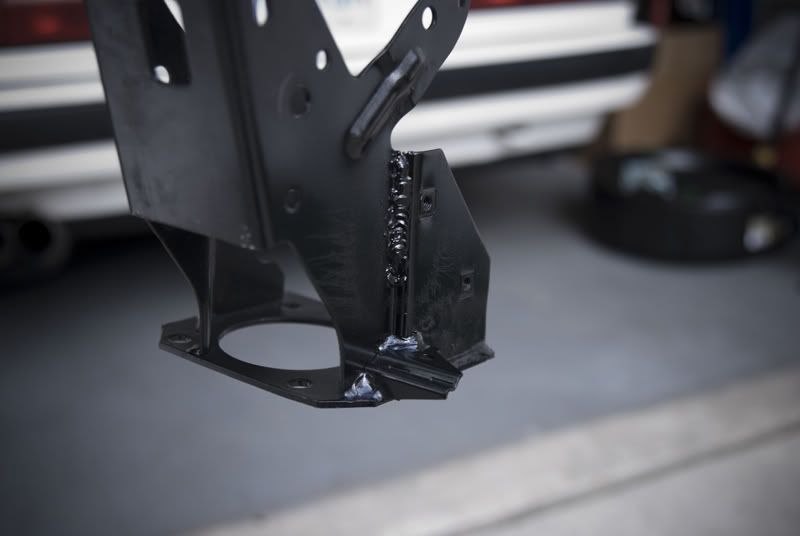
Finally, I painted over what I had stripped off and over the weld to keep corrosion away. Looks decent.
With that done, it was reverse of install...put everything back together. With the new MC installed, I connected the new fluid supply hose and let fluid into the MC. I pumped it a few times before connecting the slave to get fluid into the MC. I then hooked up the slave and hand-pumped the clutch pedal about 70 times to bleed the clutch. This was all that is required since the clutch system is self-bleeding. Much much easier than getting out a vac/power bleeder or needing a buddy.
She is back on the road and I think short of interior parts and body panels, that may be the last mechanical part that was original on the car...I expect to have super reliable driving for a few years to come!
Thanks for looking, I'll post more when I do my next project on the car!Comment
-
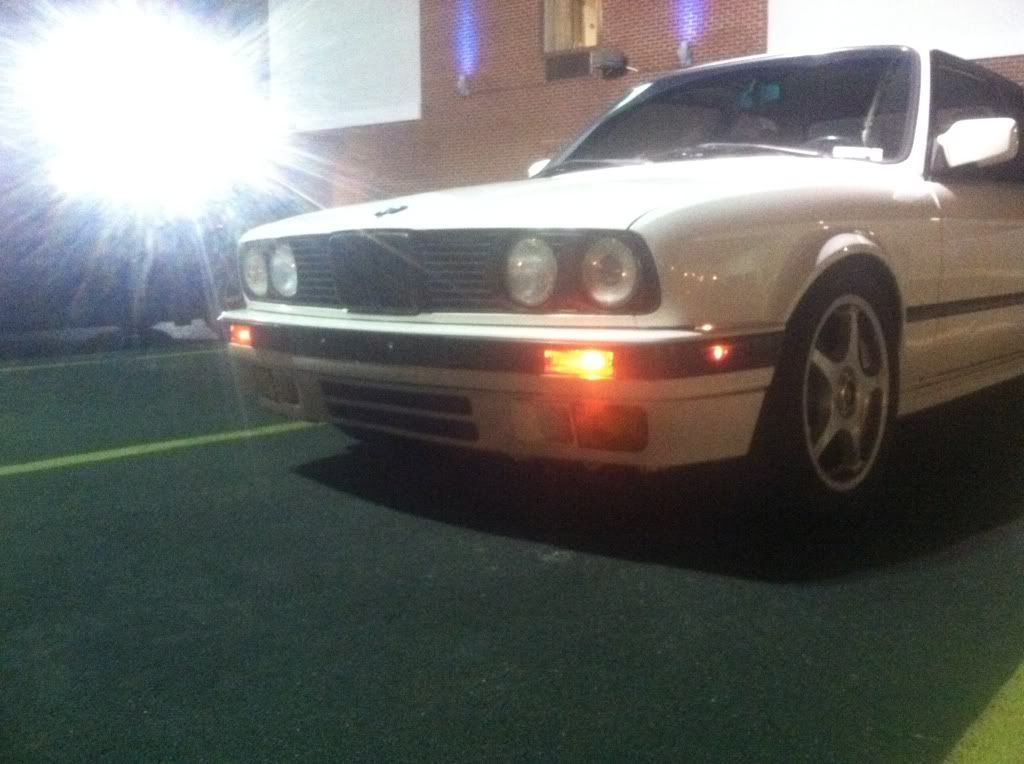
That's a nice looking car right there! Yes sir!Comment
-
Wow just read every page. Great build1989 M3
2008 135i 6spComment
-
Thanks guys, glad you could enjoy!Comment
-
This was a great read! I love the quirky/worn/that will do look of my e30 but dammmnnnn I would do some really really sick things to own this car!!!Comment
-
I had the same issue with my master cylinder an hour before I was supposed to go to San Diego for a the weekend, sucked lolAdventures of an E30Originally posted by e30lovComment
-
I can imagine that was pretty limiting to your travel plans, haha! Small non-picture update...I sold my e36 M3 so I'll have a little cash to throw at the e30. Most likely going to start a wheel-related project. Keep your eyes peeled!Originally posted by mRodiek View PostComment
-
wow, no idea how i missed this, clean build!Originally posted by Wh33lhopComment
-
^^^Thanks guys.
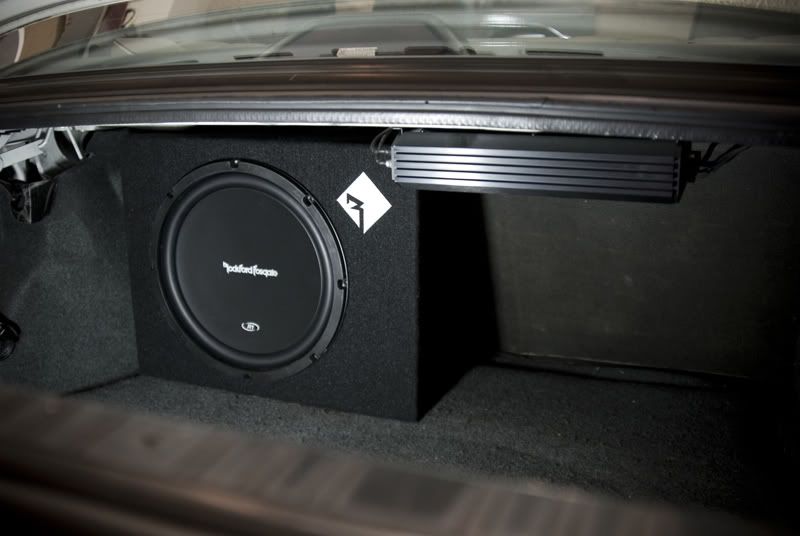
Got another little update. I finished all the stereo upgrades I will ever do unless one of the OEM speakers ever lets go. My system is comprised of an Alpine HU (CDA-105), a little Rockford Fosgate R150-2 2 channel amp and a single sealed Rockford Fosgate R1L-1X12 12" sub. It sounds AWESOME; I can't believe the 23 year old speakers sound as good as they do...all factory!
I've had the Alpine unit for quite a while and have always been happy with it. It works very well with the added Fosgate bits. I'm not going to win any SPL contests with the setup, obviously; BUT...the quality is amazing at all levels and the bass had enough oomph to let you know there's something there given the low cost of the entire system. All types of music sound great and my car doesn't sound like its going to rattle apart.
All in all, money well spent. You could replicate this for less than 350 brand new I'm pretty sure.
On with the pics:


Hopefully more updates soon after I get done moving to Mississippi! Stay tuned.Comment
-
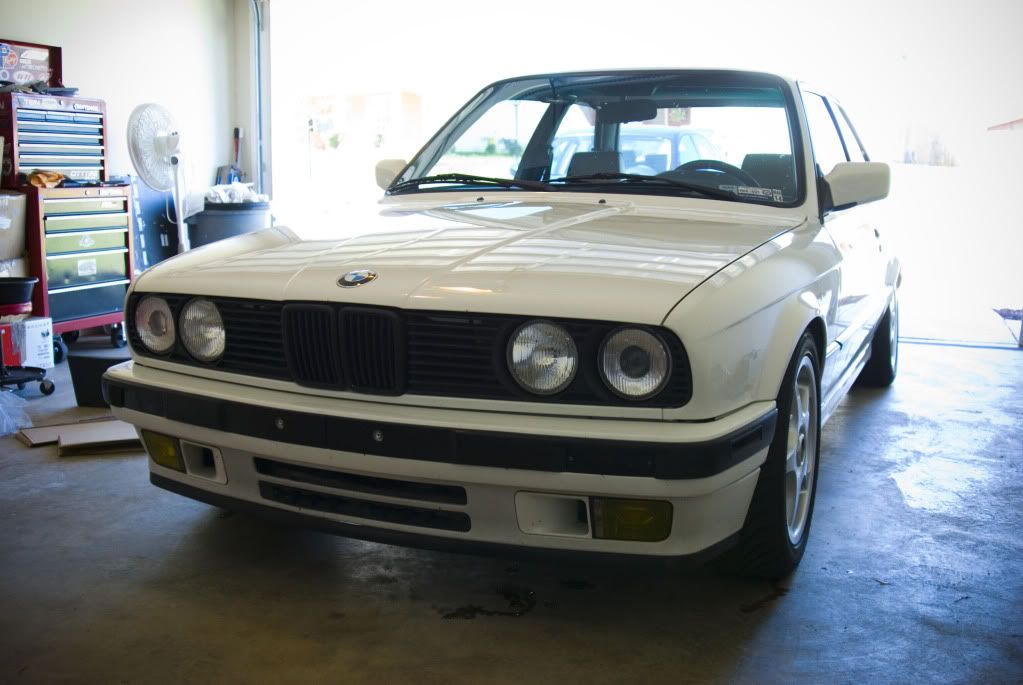
Bad update time...so I hit a rabbit going about 65. It ripped off my lip and dented up my lower valance. It was raining really hard as well as it was night time and didn't realize it took my lip until I got where I was going. You'll have to excuse the crappy cell pic, but this is what the car looks like now.
Small update for now, but I have big things coming for the car this month. Stay tuned!Comment
-
Hey guys...quick update for now. I'm knee-deep in e30 work this weekend and probably into next week/weekend. Got a lot to do, and as promised, I'll be posting several updates.
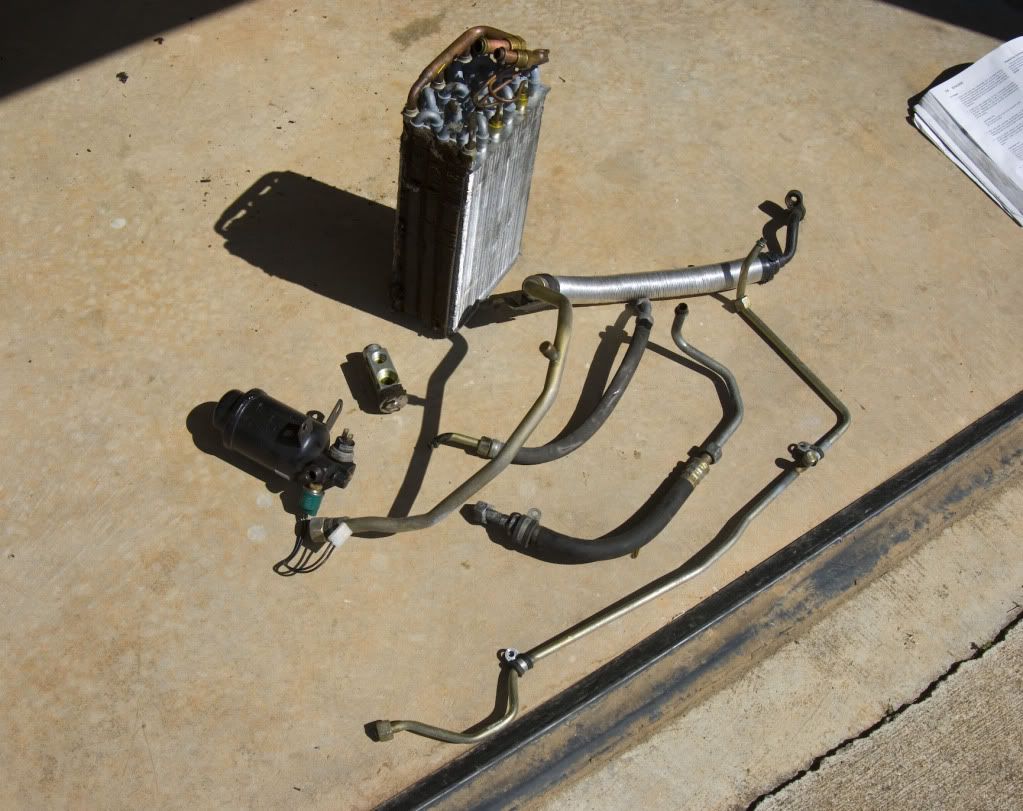
First, not quite as much 'FUN' per se, but I'm upgrading/refurbishing my AC system to finally get it working now that I daily this thing. My approach is to go R-134a and upgrade a few things to make it work well. I am using a parallel flow condenser, a r134 e36 compressor, new expansion valve rated for r134, new o-rings on every connection, retro fit high/low lines for r134 (obvious required) and clean/flush the lines and evap core.
Other things I am tackling this week are new front end goodies, repair leaky heater pipes/valve (not sure whats problematic yet) and build a new exhaust. AND one secret mod...it'll be good, I swear.
First, pics of the AC work...I am tearing it down currently in preparation for my parts to arrive on Monday/Tuesday. Here we go:
One last shot of the car looking this way...new things to come! In this shot, you can see I pulled out the valance from the dent made by the rabbit and I threw on the plastic lip for the time being.
All of my AC goodies removed and awaiting cleaning...not pictured, but I did remove the condenser and fan as well.
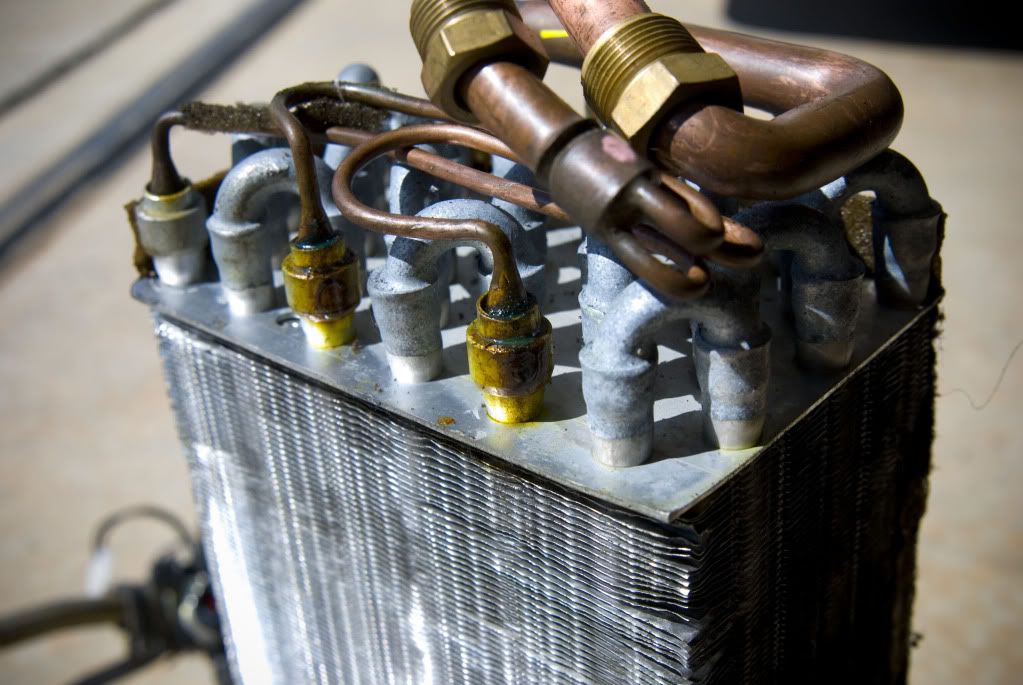
Here is a close up of my evaporator. I'm trying to figure out if the residue on the core is evident of a leak or if it's normal. Anyone know? I'll replace it while I'm at it to ensure success, but don't want to spend $100 unnecessarily.
Stay tuned for more!Comment
-
Update to my spring face-lift project...I am awaiting more AC components so I'll discuss that at a later time. I have been busy this week on other things, however.
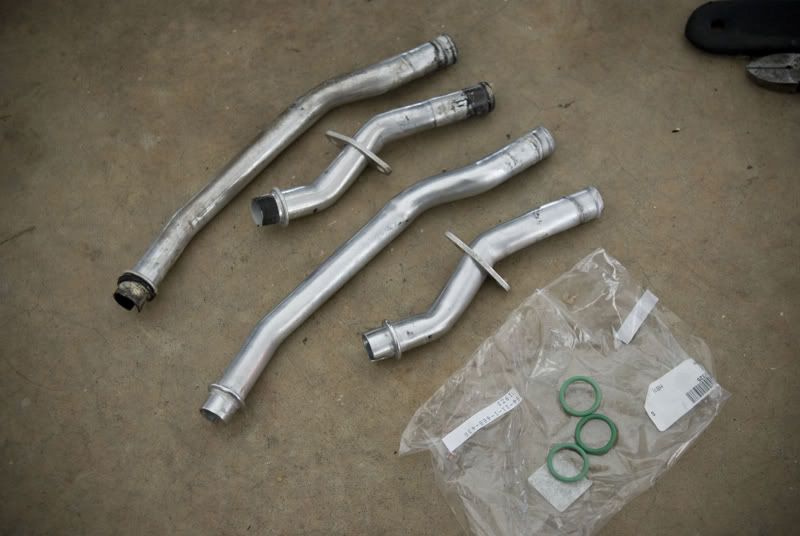
First item tackled this week; a coolant system repair. I've had a nagging coolant leak ever since I took possession of the car. I tracked it down to be somewhere on the two heater pipes or even the heater core itself. There was no way to be sure other than to disassemble and check due to the cramped nature of the area where the parts are. I still wasn't too sure of the exact leak when I took it all apart, except that the heater core was looking OK. By process of elimination, I opted to replace the three O-rings, the heater pipes, and the heater valve.
New (but used) and the old, removed heater pipes + new 'rings.
I think on the original M20, this would be a quick job. On a swapped car, this is a little more involved, haha!
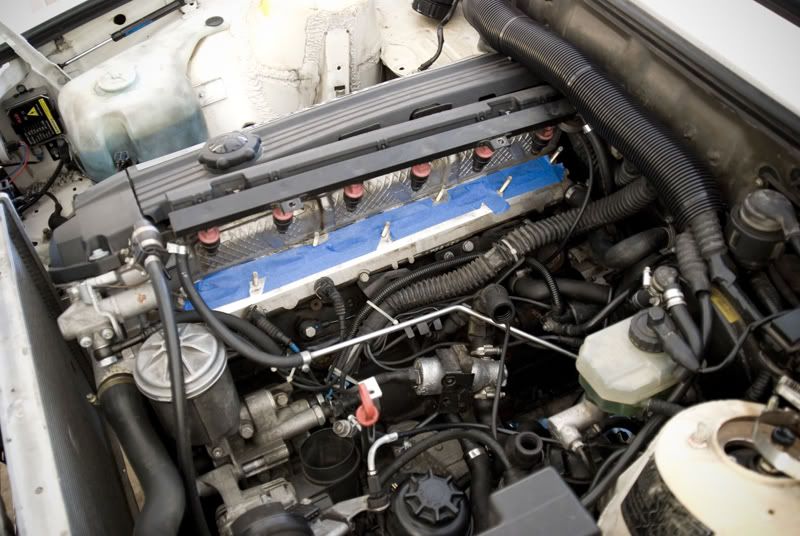
I'll spare the boring pictures, but I got the engine all buttoned back up and ran the car for a while and observed no leaking after reinstall of the new parts. Hopefully this is a solid fix...I am optimistic!
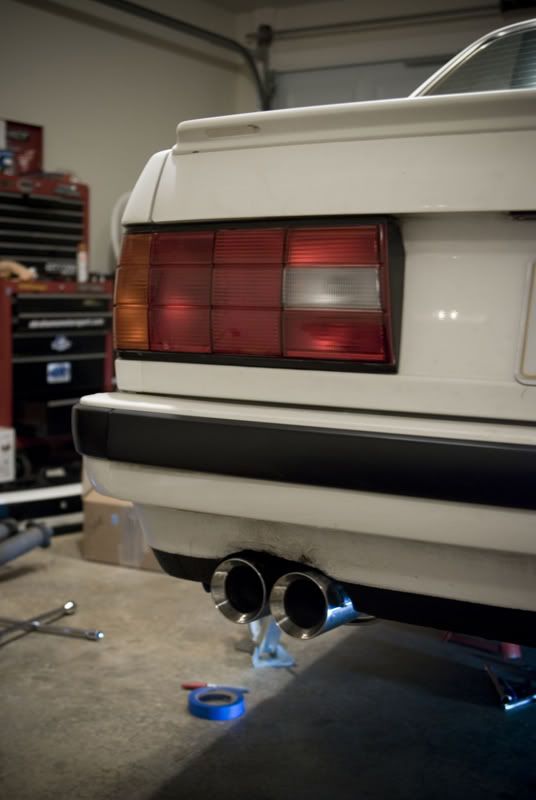
Next, as part of my spring overhaul, I wanted to change up my exhaust. Not that the stock e36 M3 muffler I had been running wasn't good, but I didn't look good to me. I thought the sound was OK, although quiet (even though modified)...I just didn't like it's physical appearance on my car. SO, after a little searching, it seems that a few guys on the board have been pretty happy with the Vibrant mufflers and resonators. I decided to give it a try:
Vibrant universal 2.5" muffler with dual 3.5" tips and Vibrant Ultra Quiet Resonator
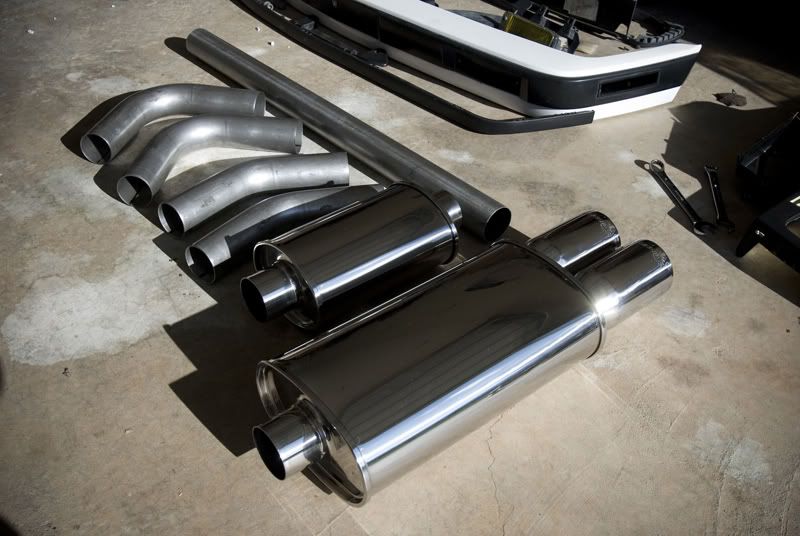
My goal was to keep the exhaust invisible other than the tips and have excellent ground clearance. The piping doesn't need to be straight or anything, I just want good sound and great fitment...not trying to break any HP records here. I also used 2.5" based on the idea of 'less than 300hp NA car = 2.5" exhaust'. Not sure where I got that, but ever since I've been working on cars, that has been more or less an unspoken rule. I also wanted to add a flex section in to give a little relief to the headers. Here are a few shots of the construction:
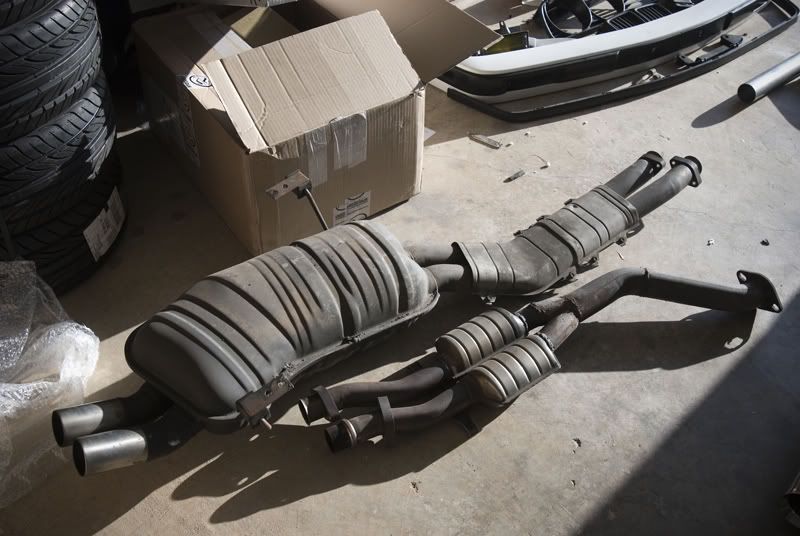
Out with the old:
Here is the addition of the flex section and new resonator
I did cannibalized the exhaust I removed to get hangars and the flange and well as a small segment of tube.
This is how the resonator fits in the tunnel, for anyone who may be curious
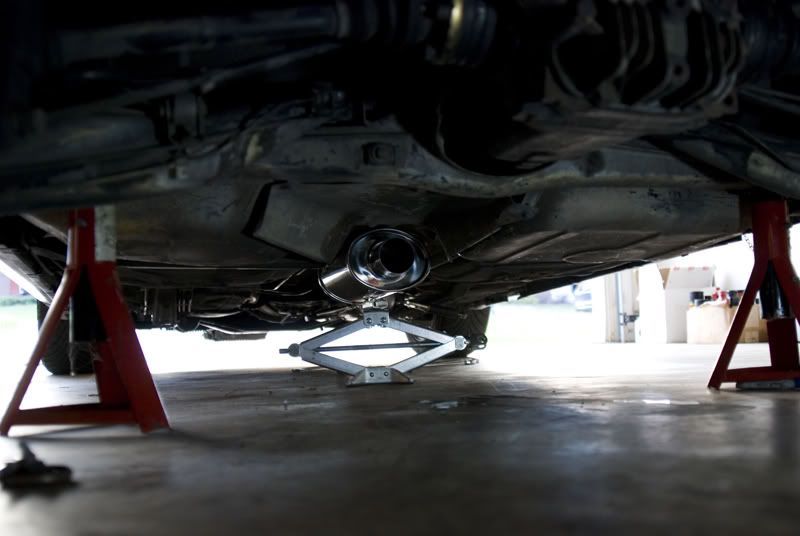
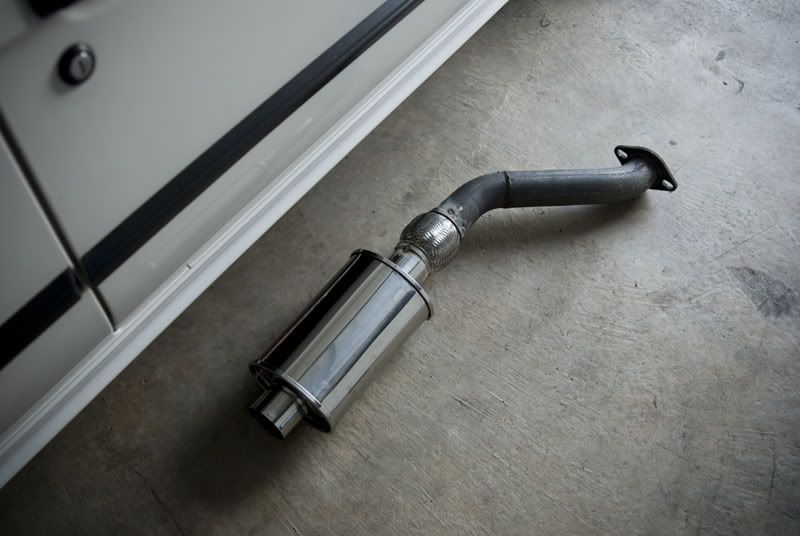
Hanging the new muffler...I love the new fitment!
More...
After building the resonator pipe and hanging the rear muffler, I connected the two by building the leg of pipe between! Like I said, not the straightest, and not the 'least # of bends' but it fits awesome!
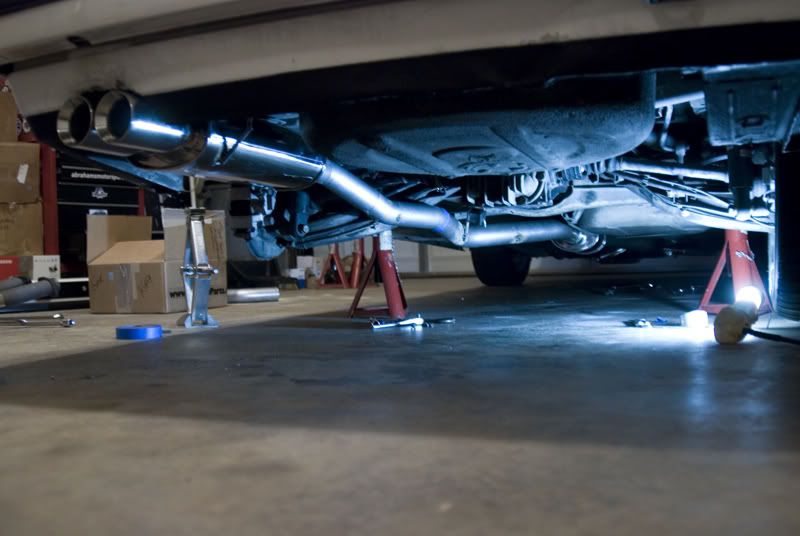
'Nother angle

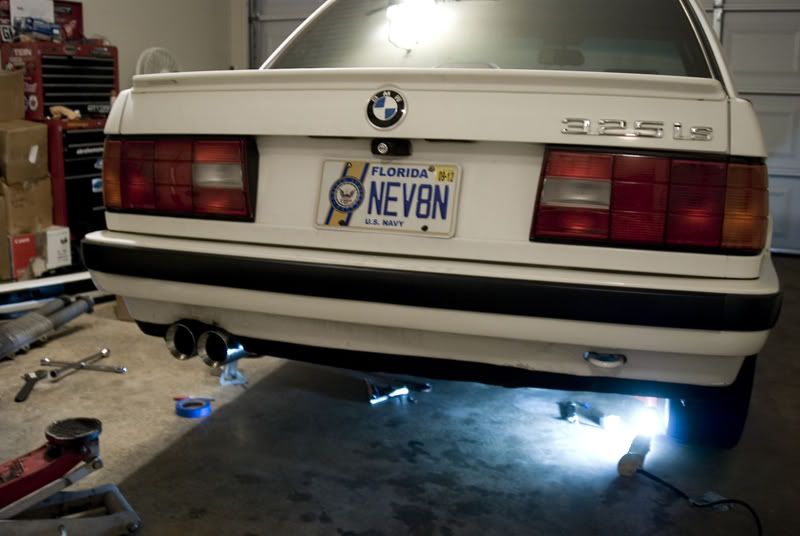
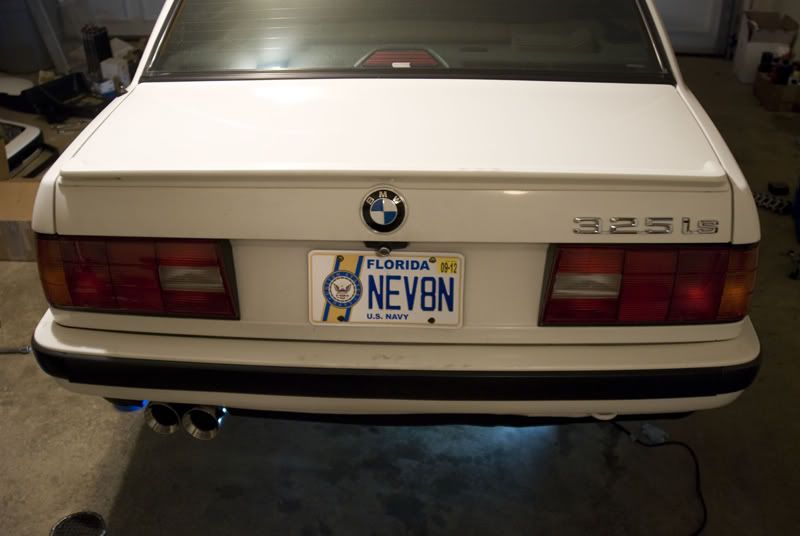
One more shot of the tips for good measure...I'm very excited about how it came together
I will post pics of the fully welded/painted version when I finish it tomorrow or Sunday.
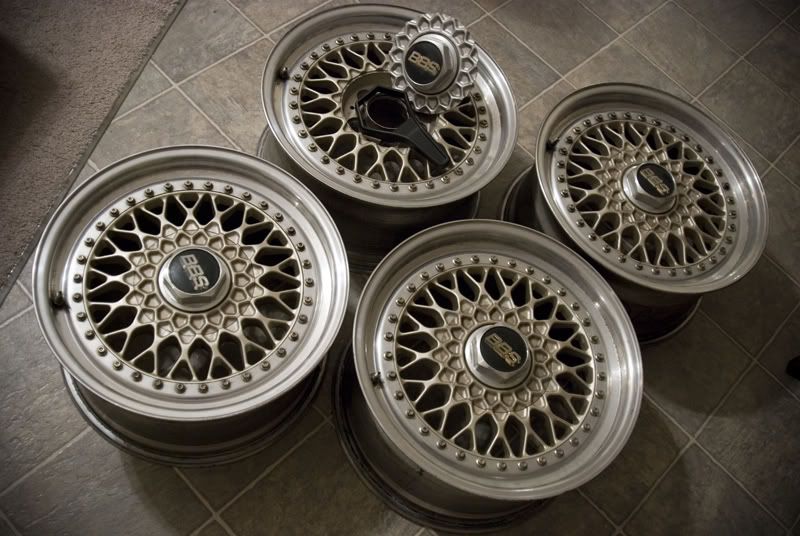
Also, one more teaser. My new shoes came in....got some decent plans for these!!!
Until next time!Comment
-
Nice! Love the RS's as well!
Comment

Comment