-
-
These 3 pics never made it into the original thread. I did this at the same time as the fog lights.
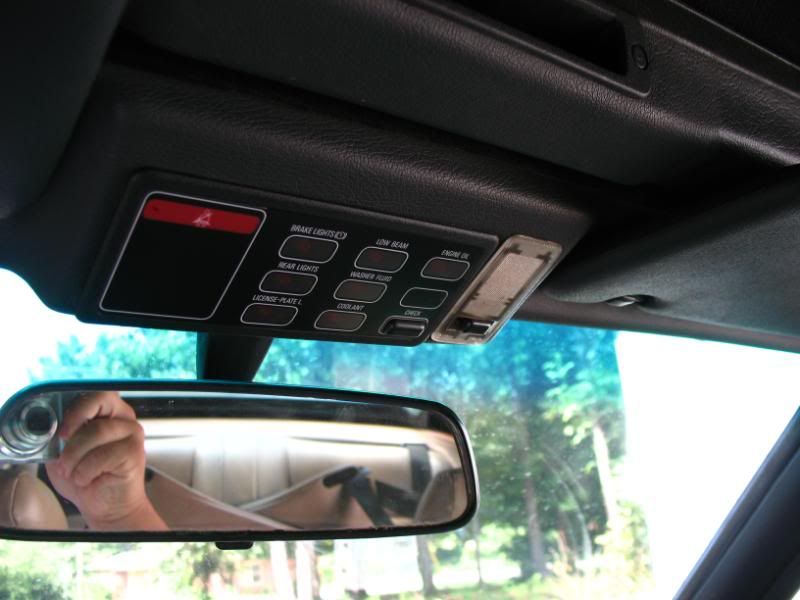
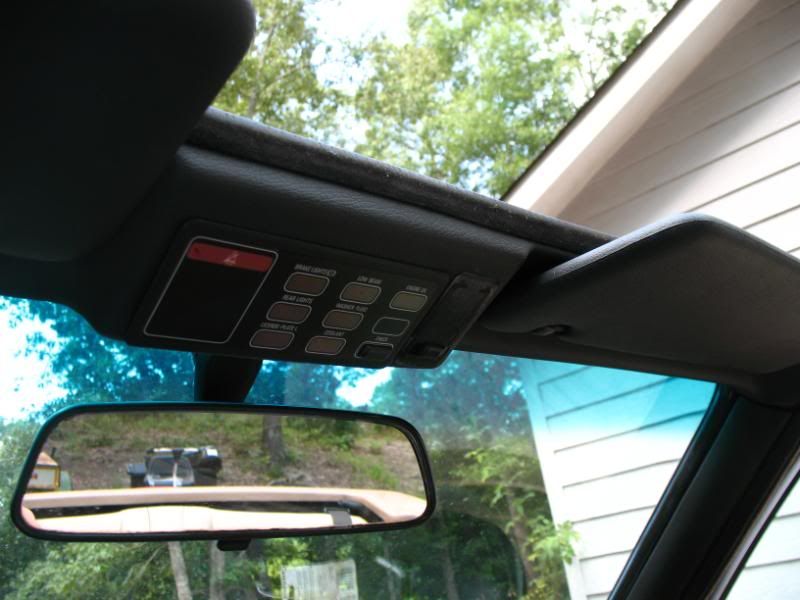
e30 convertibles have a lone interior lamp. At some point I would like to get a compass/temp rear view mirror with map lights.
To me, the white lens seemed to stick out just a bit too much
BAM!
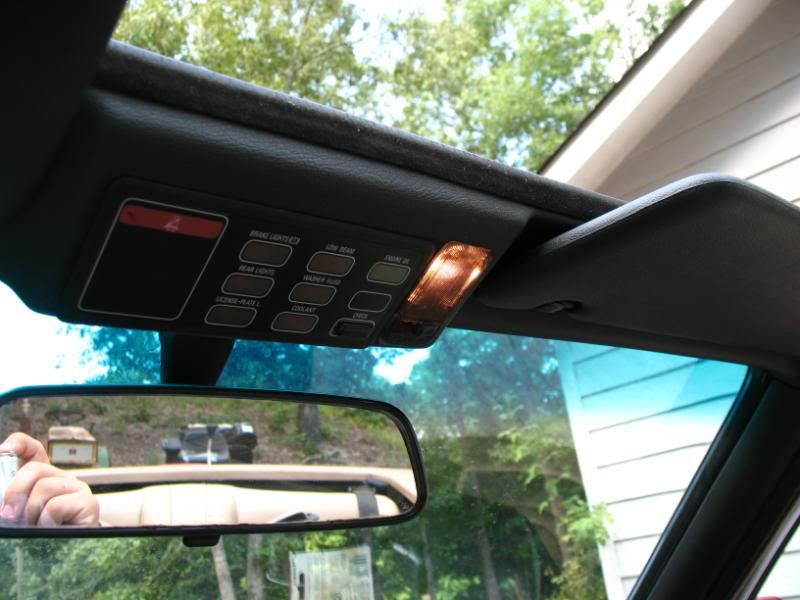
Surprised that even at night, it still gives off a good bit of light.
 ~Rick | 1990 325iC ~Noelle - Her build/cleanup thread http://r3vlimited.com/board/showthread.php?t=179507
Comment
-
-
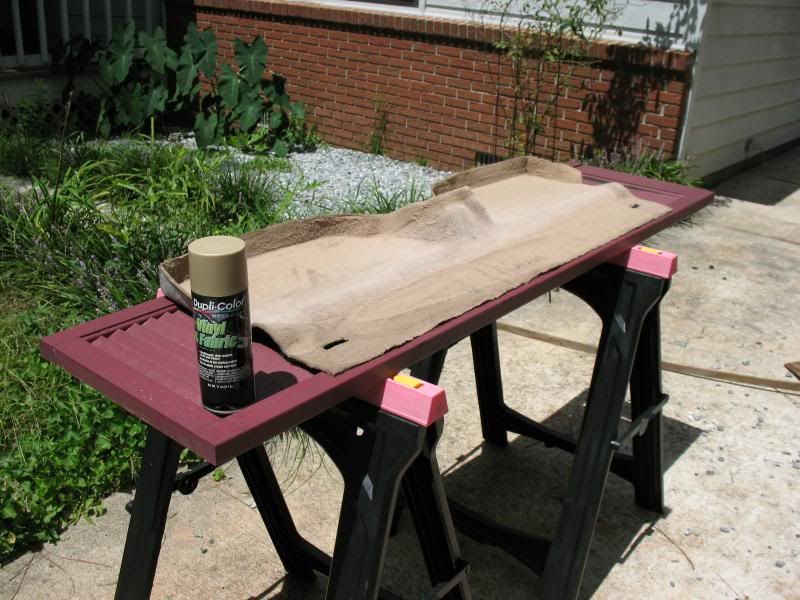
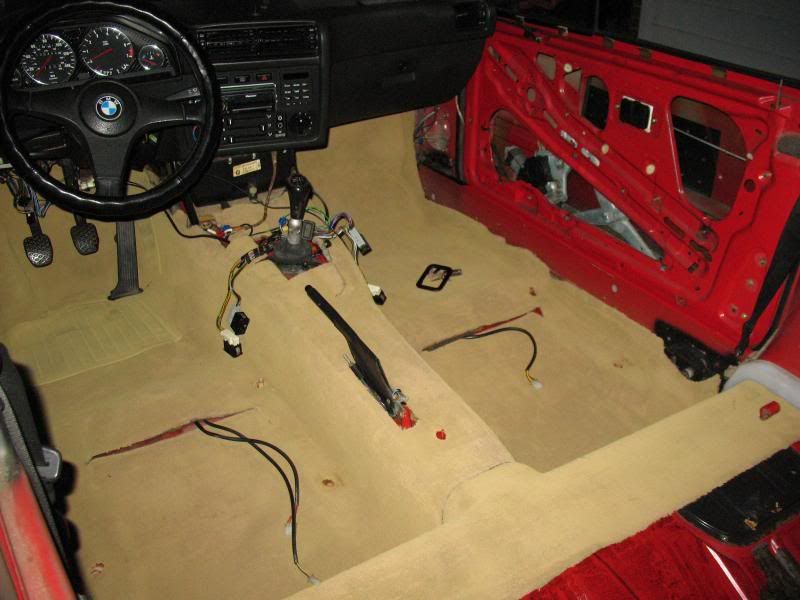
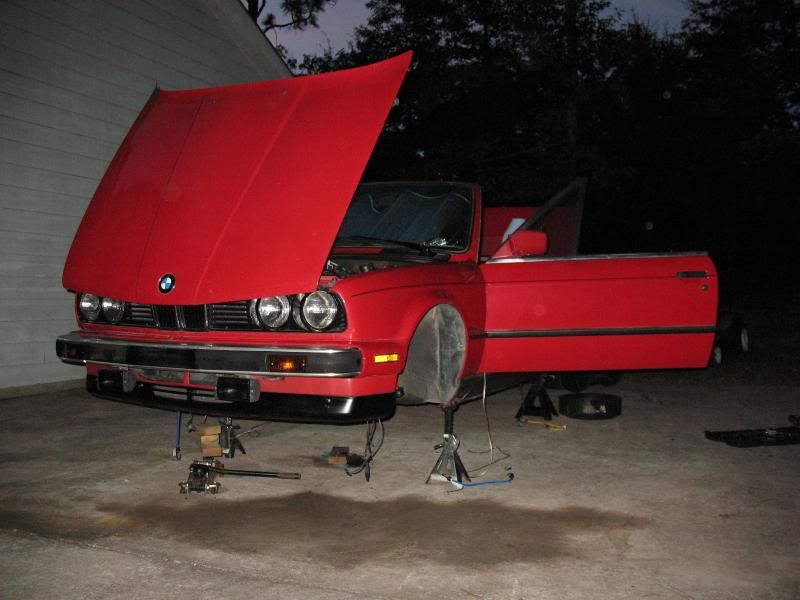
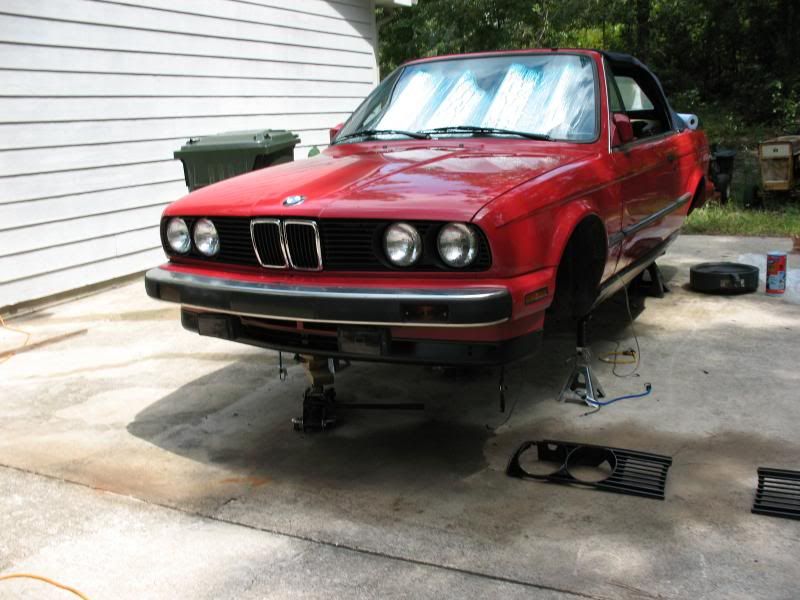
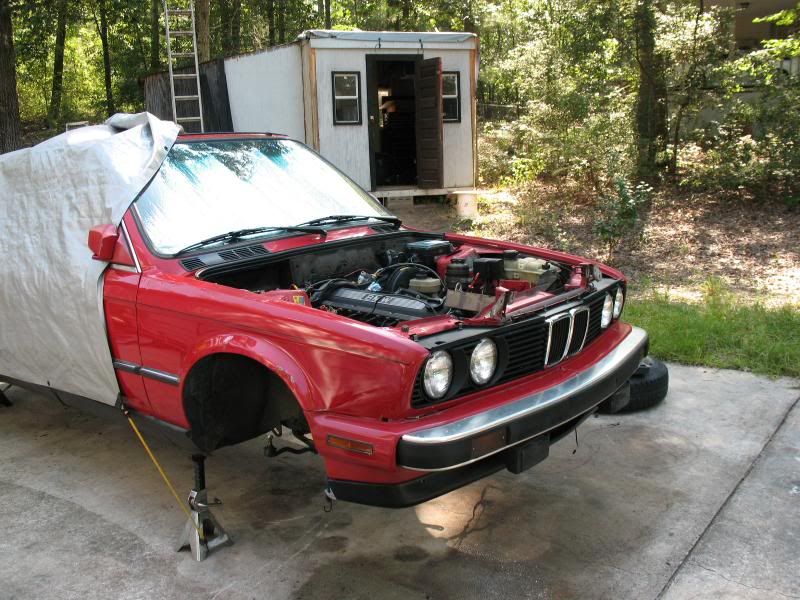
Here are some updates from the past week. Last night 2 packages consisting of $185 worth of parts arrived, and I have both Saturday and Sunday off, so I've got big plans for the car this weekend.
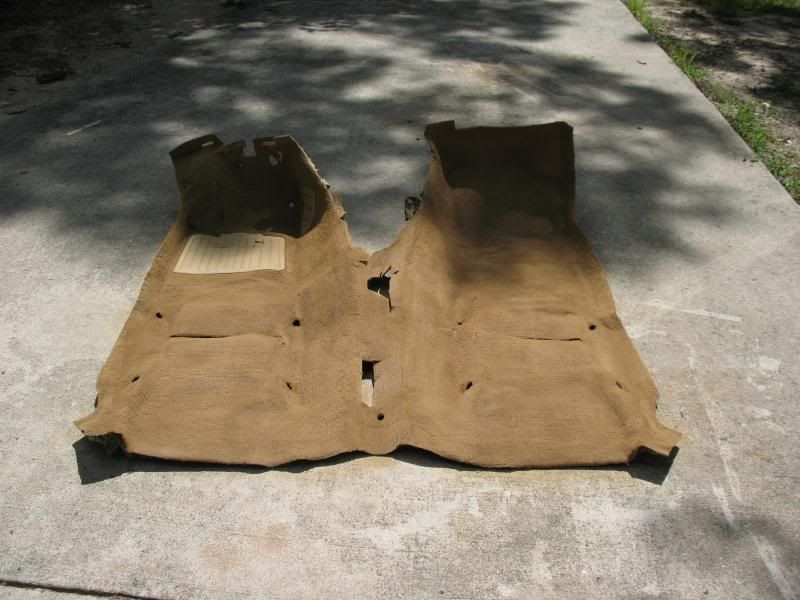
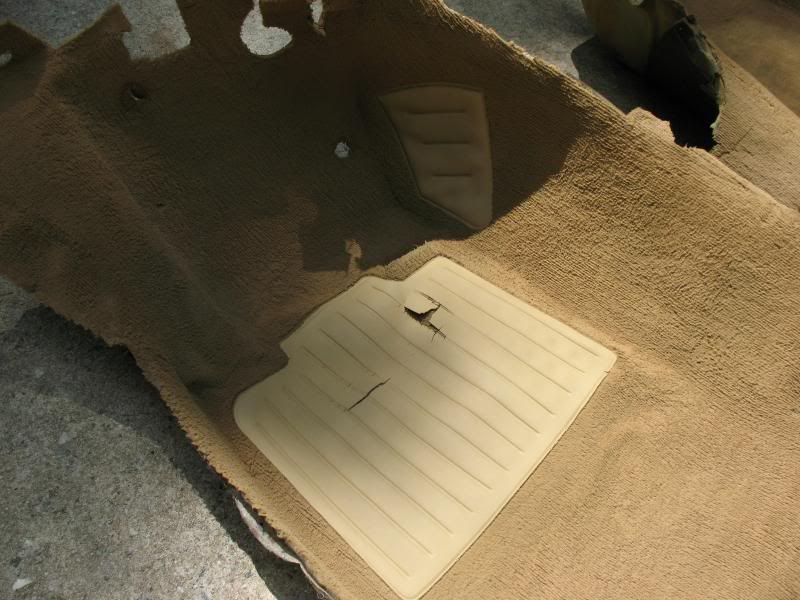
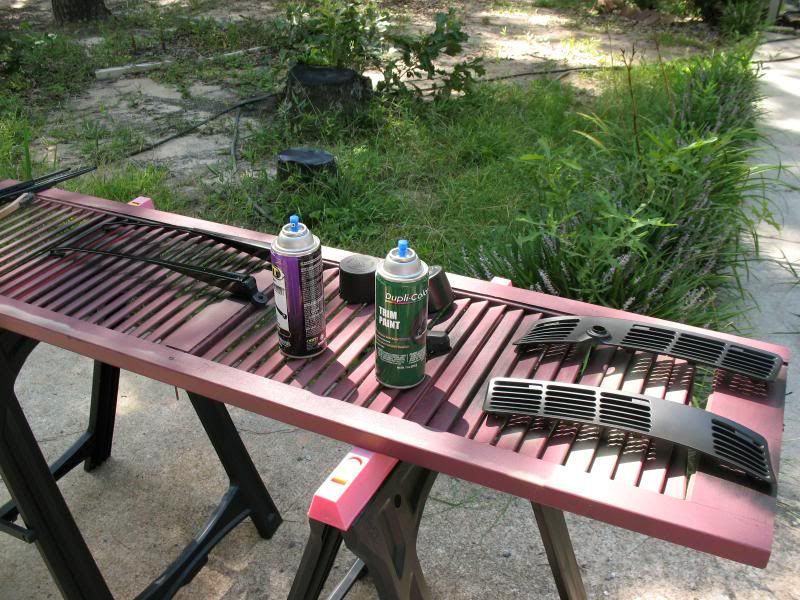
I let this thing dry outside for nearly 3 days
I was going to install the carpet as-is, but got to thinking how easy it would be to try painting it when it is out of the car...
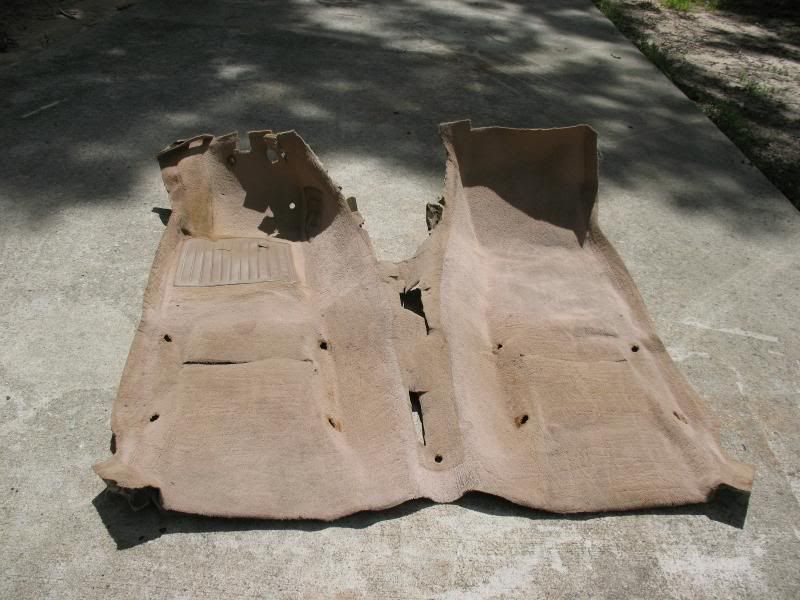
Before:
After:
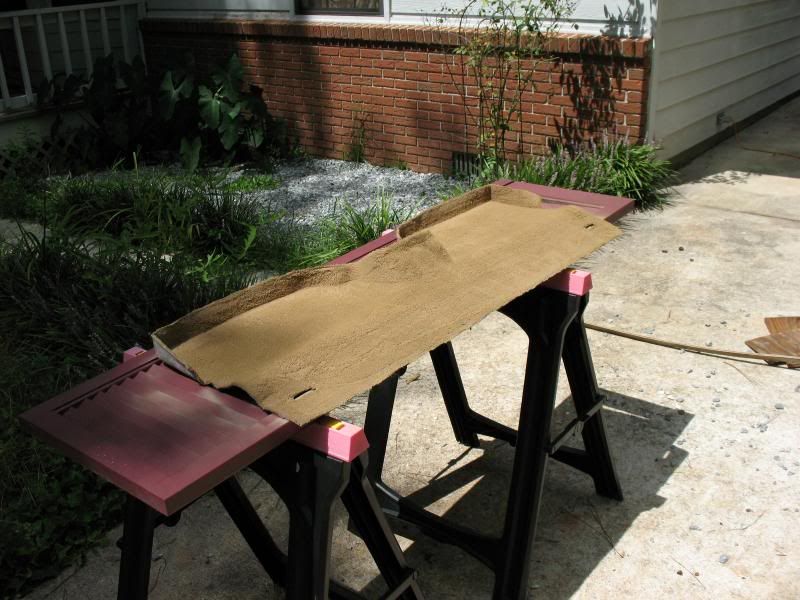
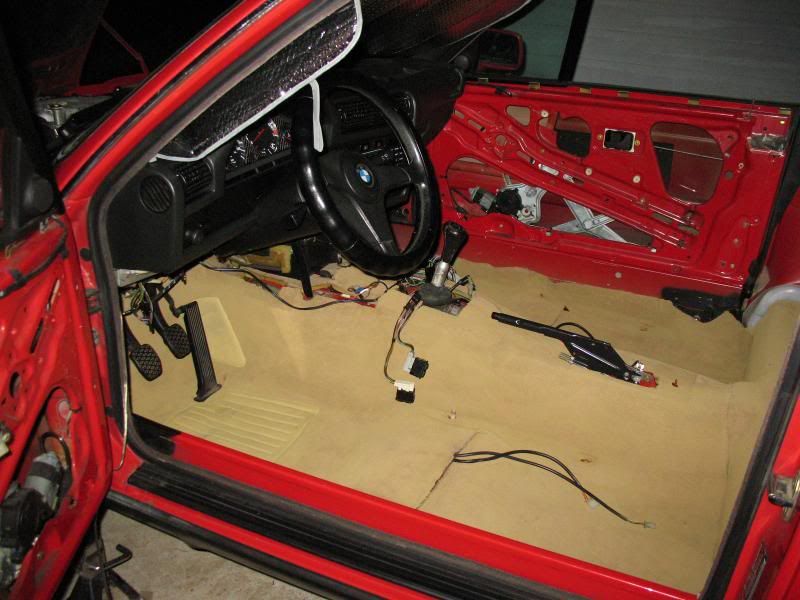
Carpet is clean and dry
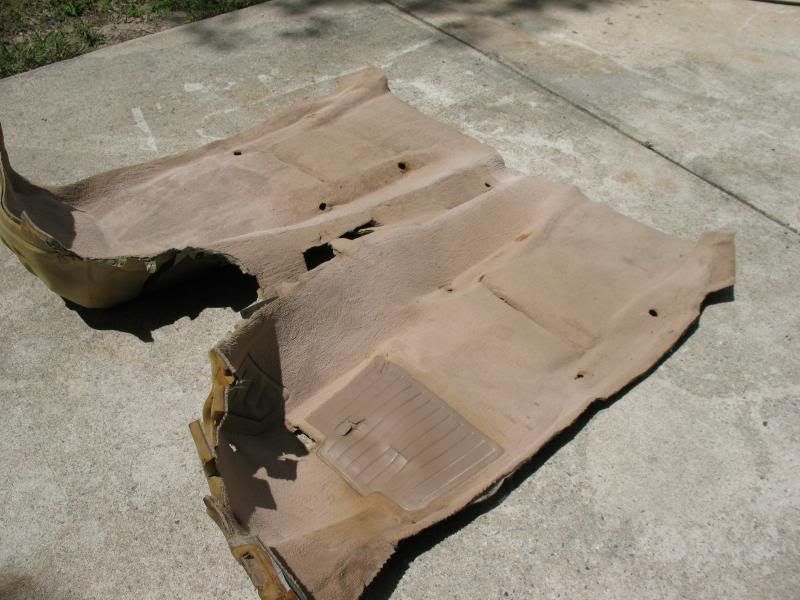
And painted...
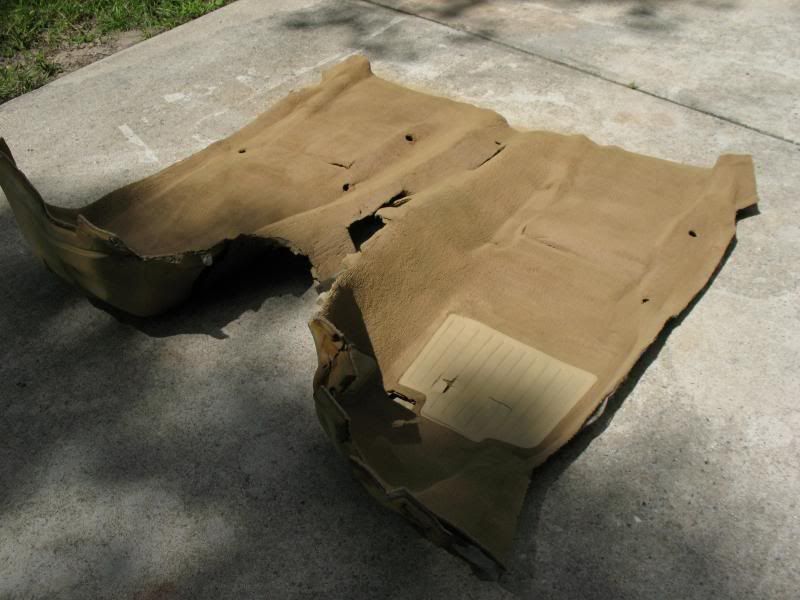
Since it is paint and not dye, it was kinda crusty, but I took my shoes off and walked barefoot on it for about 10mins which really lossened it up, feels about how it did before.
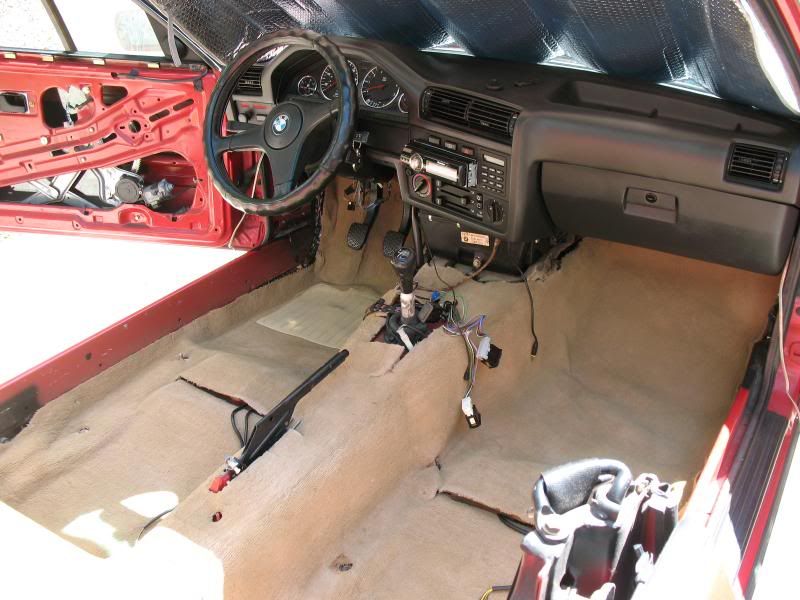
Installed:
Some pictures at night that show the color alot better:
So I decided to keep touching up little odds and ends on the car
While that was being painted and drying...
 ~Rick | 1990 325iC ~Noelle - Her build/cleanup thread http://r3vlimited.com/board/showthread.php?t=179507
Comment
-
Then while that was being paited and drying

I'm really happy with the Duplicolor trim paint. If sprayed properly, it comes out pretty good. My car had (what was once) "chrome" around the windsheild moulding. Later e30's got all black trim there, so I'll be replacing the windsheild trim with the later black version to improve the look.
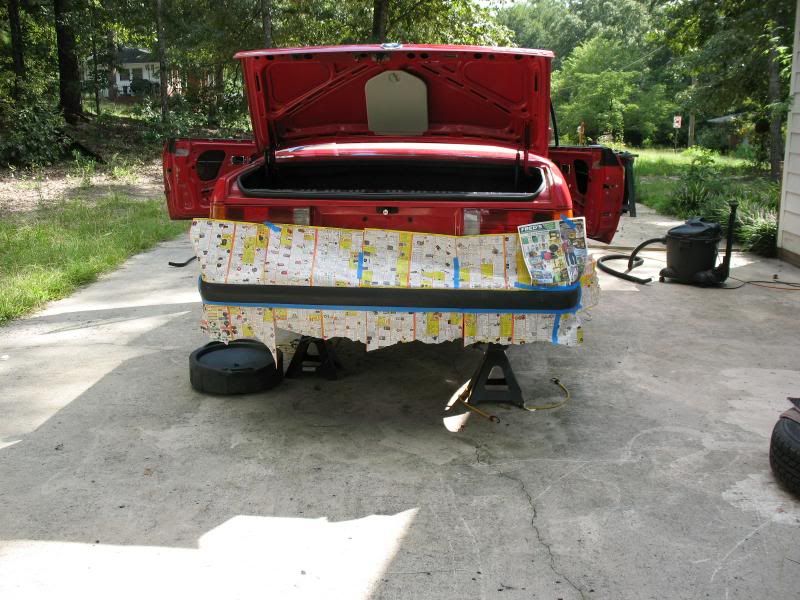
The back bumper rub strip came out decent
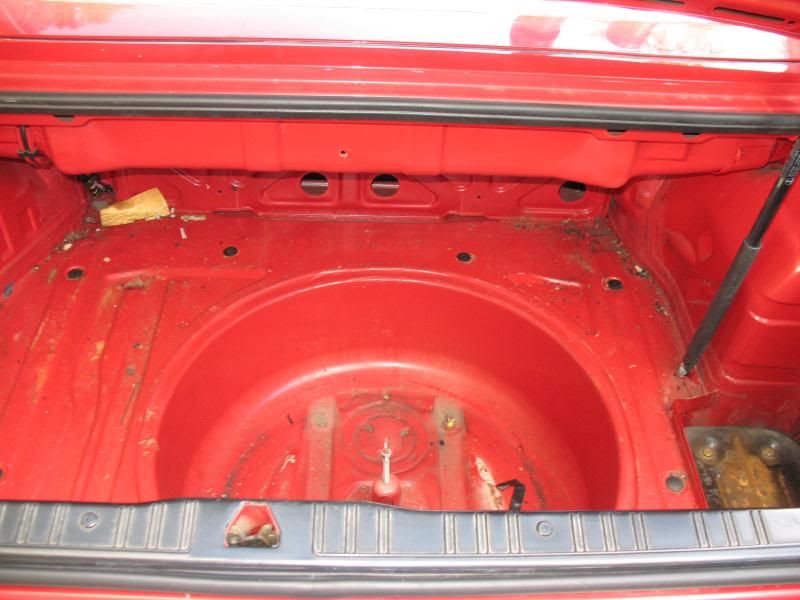
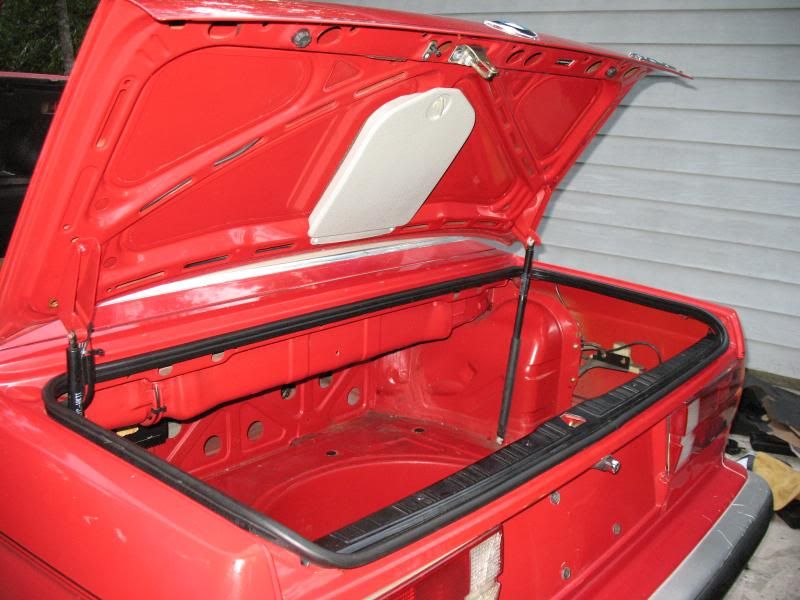
Then I decided to clean out the trunk, removed the carpet panels and since some had stains/mildew from the leaks, I pressured washed them all.

before shop vac cleaning
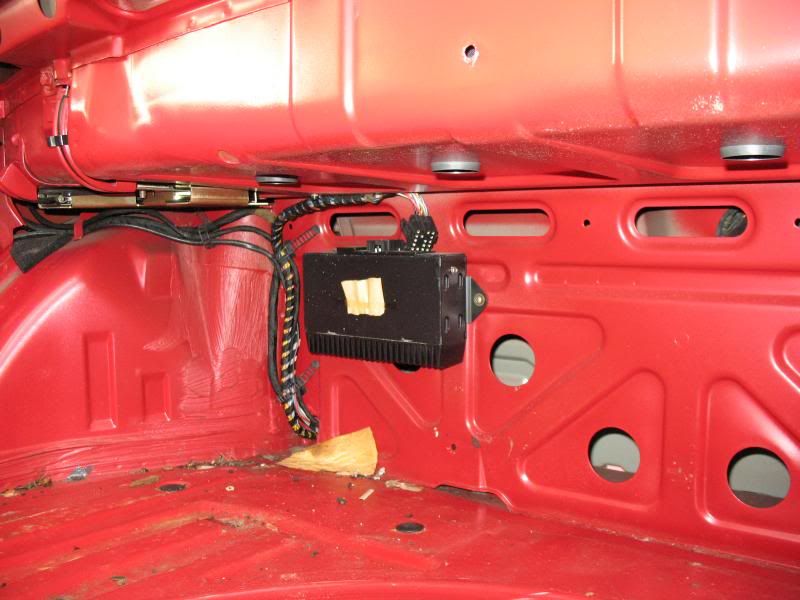
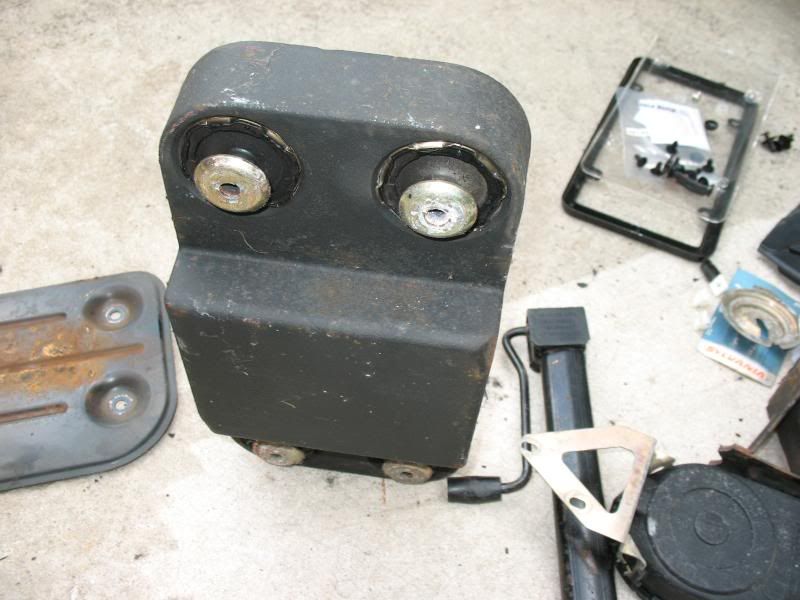
The factory amp for the 6-speaker premium sound system. I already disconnected and bypassed it when I installed the new headunit and rewired the speakers. Now I removed the amp and the wiring, and the car will be getting rewired again but for a 4ch amp and sub.
There is a wall for the trunk and one behind the rear seat, leaving a ecent sized area between the two that can not be accessed. I was thinking it would be a neat place to mount amps, but there is no way to get in there without cutting a hole.
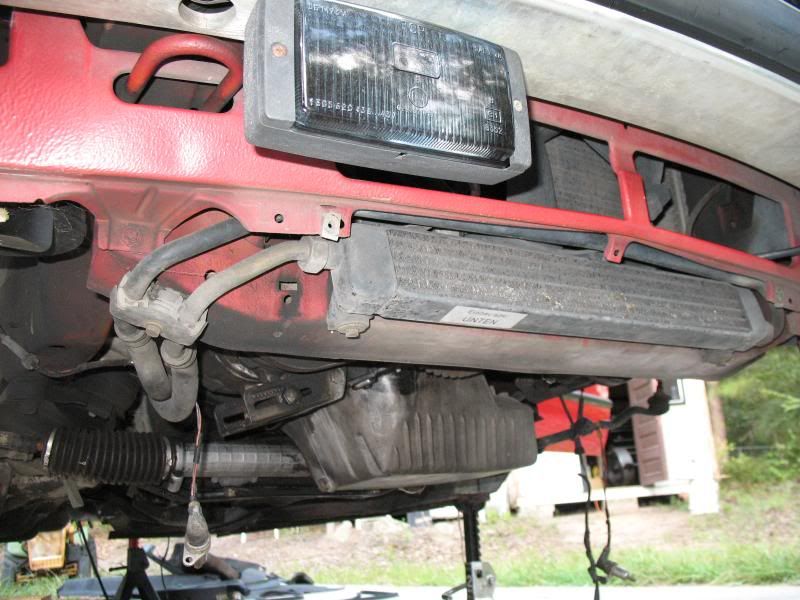
I also decided to remove the front lower spoiler. Factory engine oil cooler right thurr.
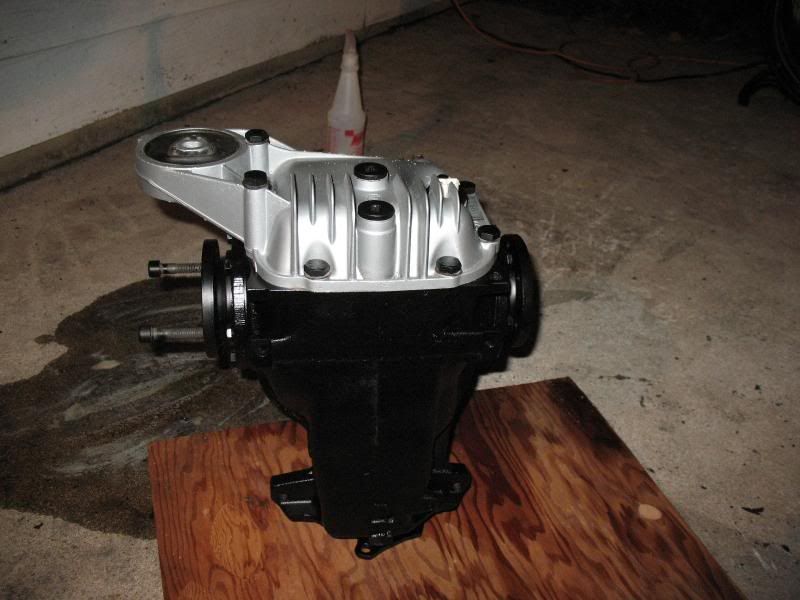
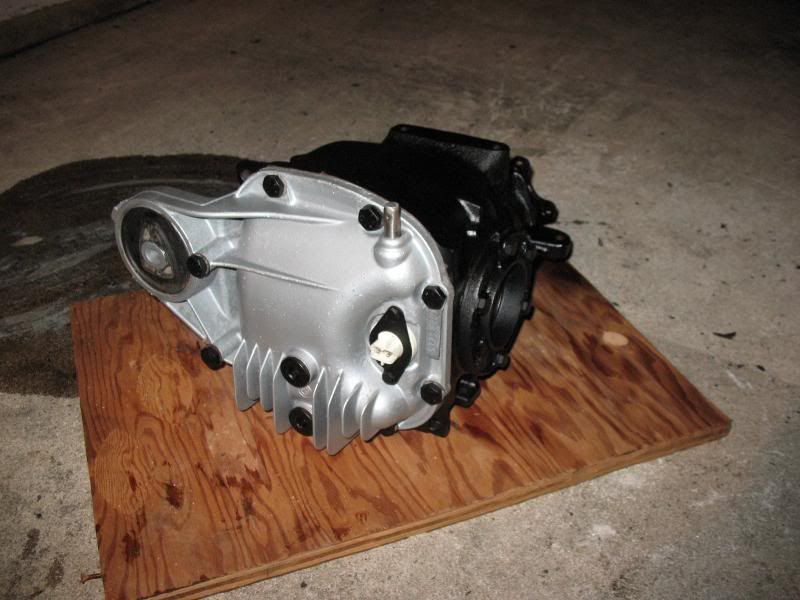
Now we arrive at some interesting German engineering....
non-convertible e30's have the battery mounted in the trunk. Better weight distrubution, plus it is better conditions for the battery to live in.
The convertible chassis was beefed up in various areas due to the missing roof. Because of this it weighs 152lbs more then a coupe/sedan. However, the battery is located in the front - in the engine bay.
What takes it's place is literally a 50lbs lead weight. BMW parts breakdown calls it a "vibration dampener" and once I saw it suspended on 4 rubber feet bolted down, it was easy to see.
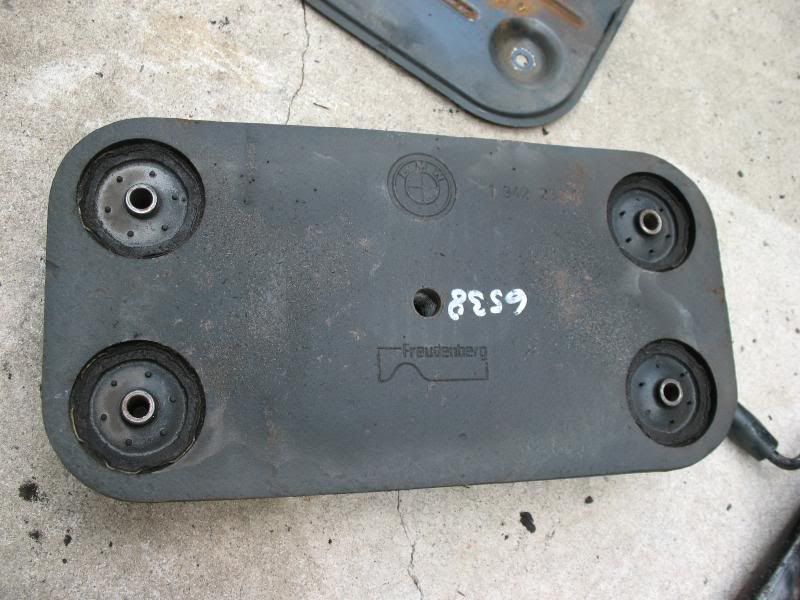
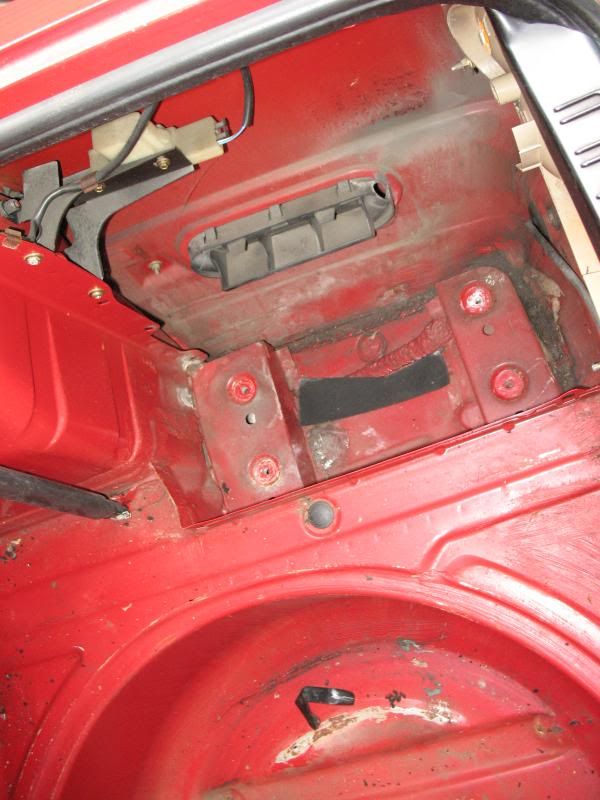
Apparently it is supposed to reduce shimmy within the chassis. I can understand how a suspended heavy mass will do that, but I question its actual benefit. 50lbs of dead weight is alot. I mean, this sucker is heavy. I could get a battery harness from a coupe/sedan and relocate my battery to the trunk. Not only would I be loosing 50lbs, but I would be relocating another 40-50 from the front, to the back, which would be really good.
I'm so close to leaving this thing out, but the only thing stopping me is knowing that BMW wouldn't do something like this - relocate the battery and add a 50lbs dead weight to a car made for handling, for no reason. Oh, and if you go to BMW and want a new chunk of lead, the cost? $600. Surely BMW must know something I don't - reasons to keep a $600 50lbs boat anchor bolted into the back of this car. That's the only thing keeping me from leaving it out.
Then I removed the trunk seal and cleaned the drains as well as the trunk lid, which was pretty nasty before
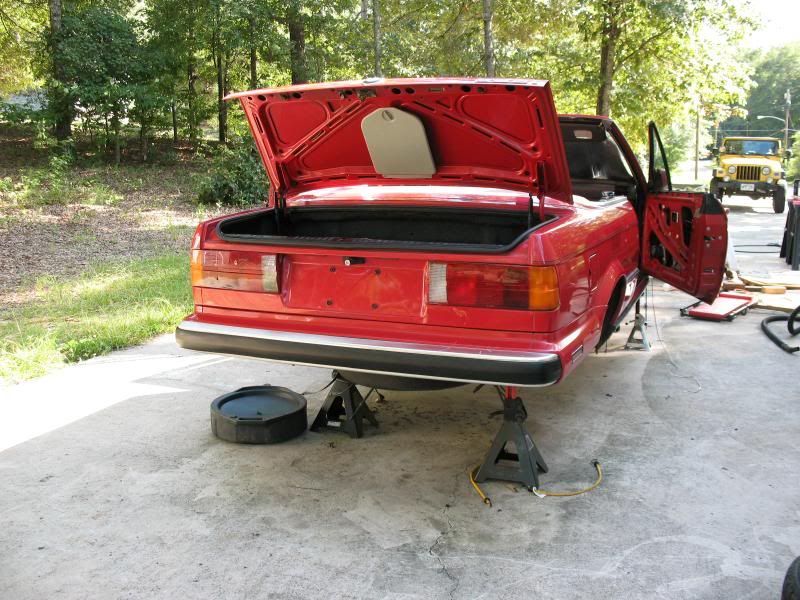
All done for now, the trunk carpet will be going back in
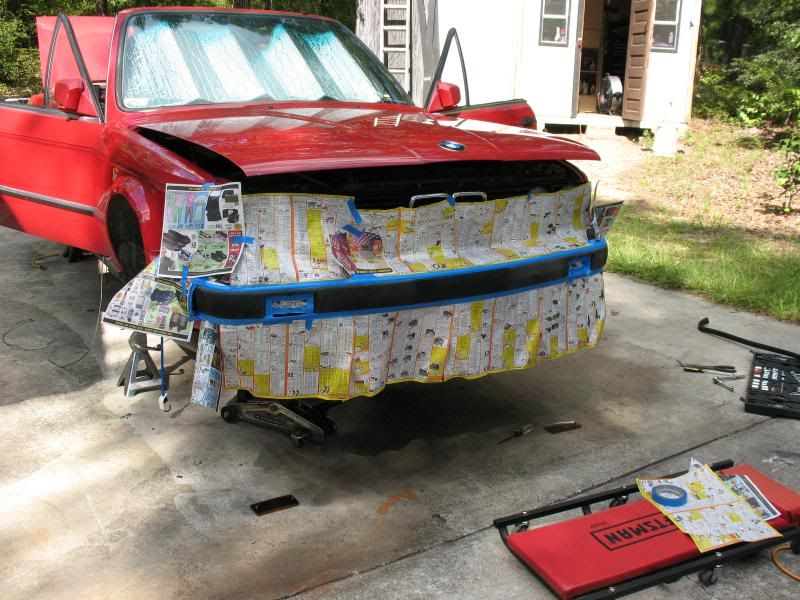
The airdam came out nice, but the front bumper rub strips didn't seem to take the paint very well. Ah well, it's better then it was and I'm not going for perfection, it can always be changed in the future.
Noelle says goodnight till next time...
 ~Rick | 1990 325iC ~Noelle - Her build/cleanup thread http://r3vlimited.com/board/showthread.php?t=179507
Comment
-
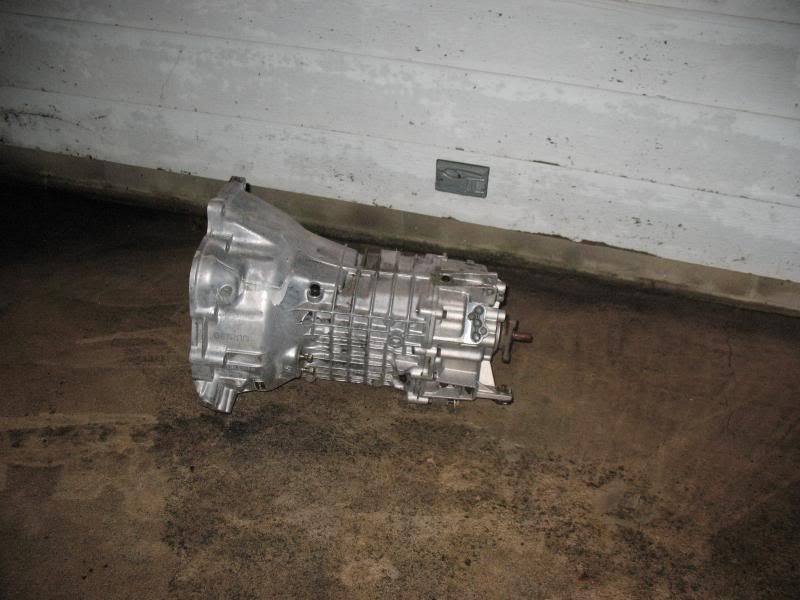
Sunday, Augest 15th Two seperate shipments of parts arrived that previous Thursday.
Package #1 - $110
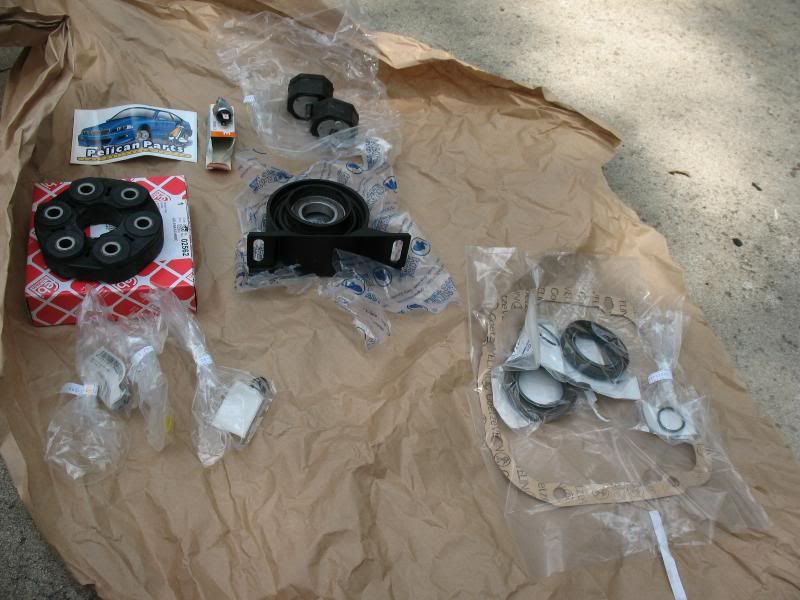
Center Support Bearing for the driveshaft, Guibo (connects transmission output flange to driveshaft), reverse switch, two transmission mounts, Diff cover gasket, two diff output seals, speedometer impulse seal, extra plastic washers/o-rings for shifter linkage.
Package #2 - $75
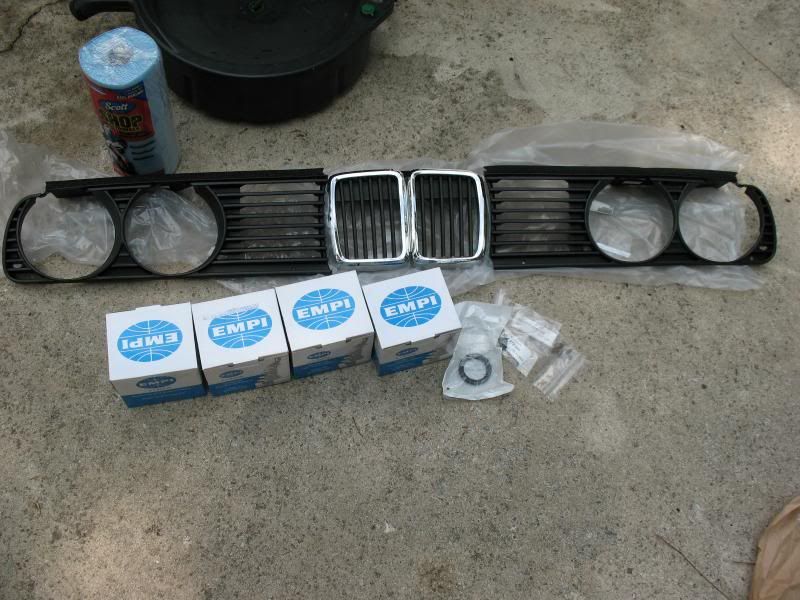
New (aftermarket, slight differences) left, center and right grilles. transmission selector shaft seal, transmission output shaft seal and four CV axle boot kits.
New grilles installed:
I then started to replace the transmission seals. The transmission was yet still oily from the past leaks, and I really don't like working on dirty stuff. I pulled out the pressure washer and washed the underside of the car - again.
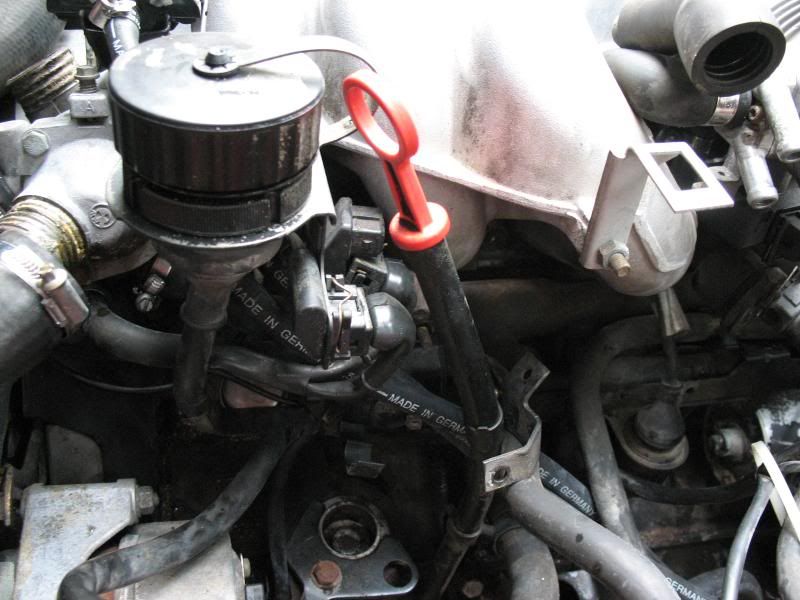
While waiting for most of it to dry, I decided to change the spark plug wires. I bought a new set, along with other stuff about a year ago. On the #6 plug wire there is an impulse pickup that tell the computer which of the two sets of injectors to open. If this wire fails, or a cheap set without it is used, the computer defaults and fires all injectors at the same time.
The routing of the impulse pickup was such that alot of stuff needed to come off to remove it. Looking back, I could have simply cut the old impulse wire and rerouted the new one, but atleast now I have a spare complete factory set of wires that still work ($150/set)
These were removed first:
To the left of the dipstick, under the round connector are two 3-wire connectors. The furthest one is the impulse sensor pickup.
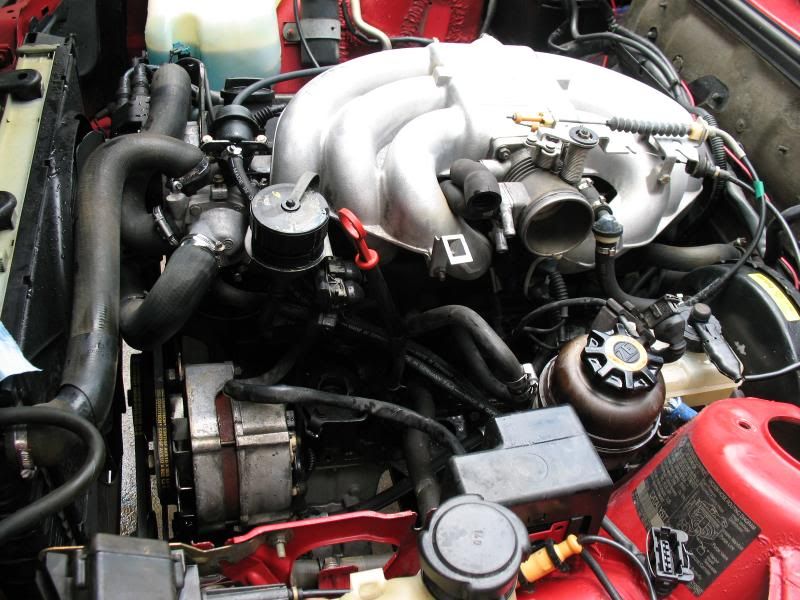
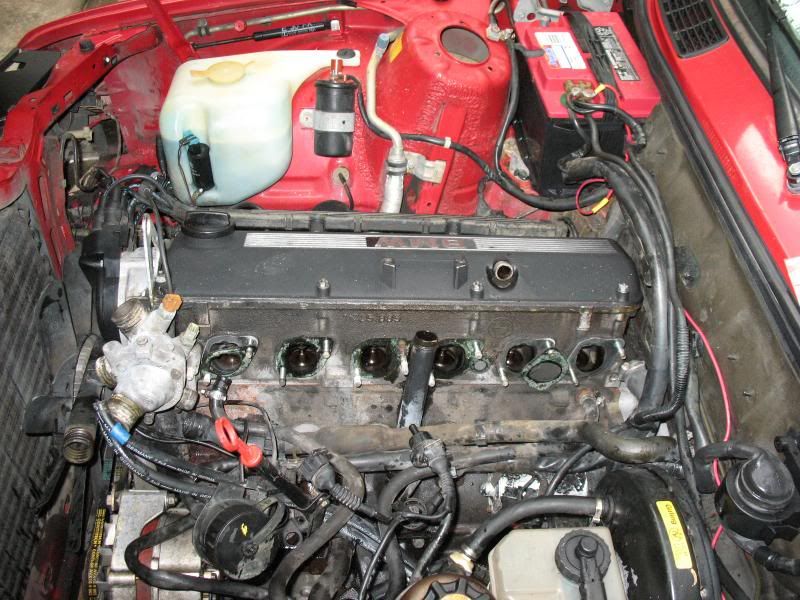
Looking deeper at it, it went behind various cooling system components. Up until this time I did not disconnect anything to do with the cooling system, nor drain the coolant. That was about the change.
When I went to remove the low coolant level sensor, the cover broke so I took this picture for reference to where the wires go, then unplugged the individual wires.
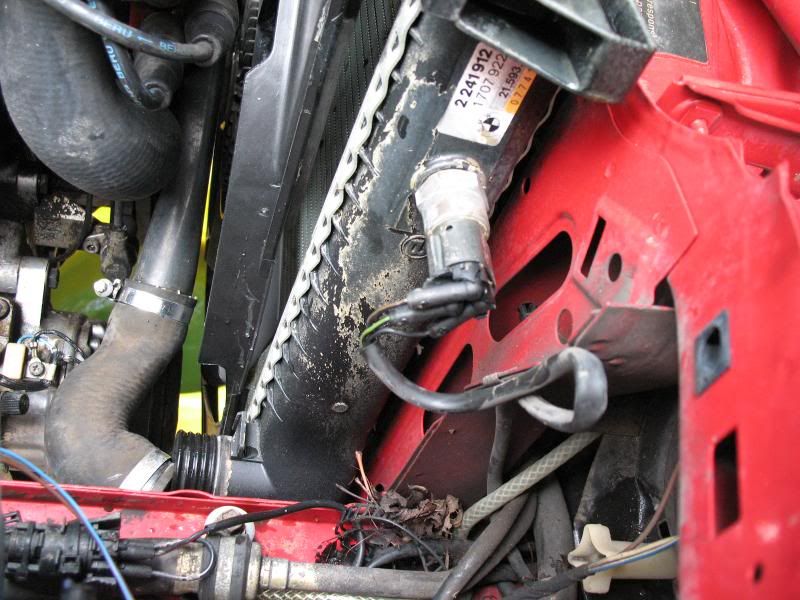
Then the radiator came out. Hmmm... appears as if the fan was making contact at some point, nothing appeared out of the norm though...
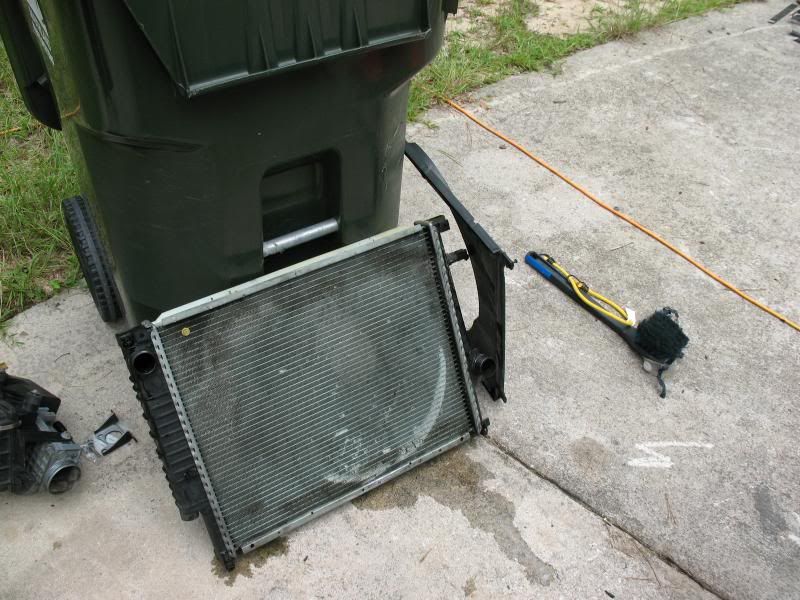
Now there is some more room to work on things
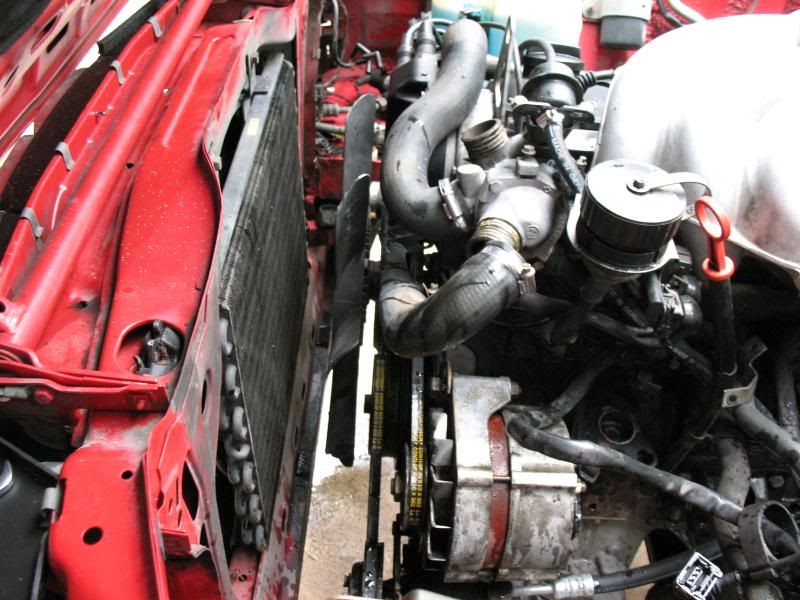
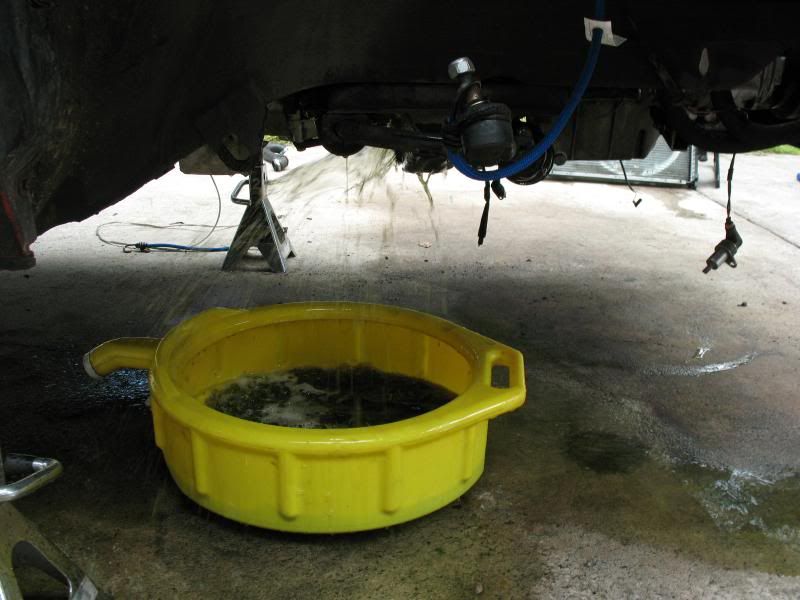
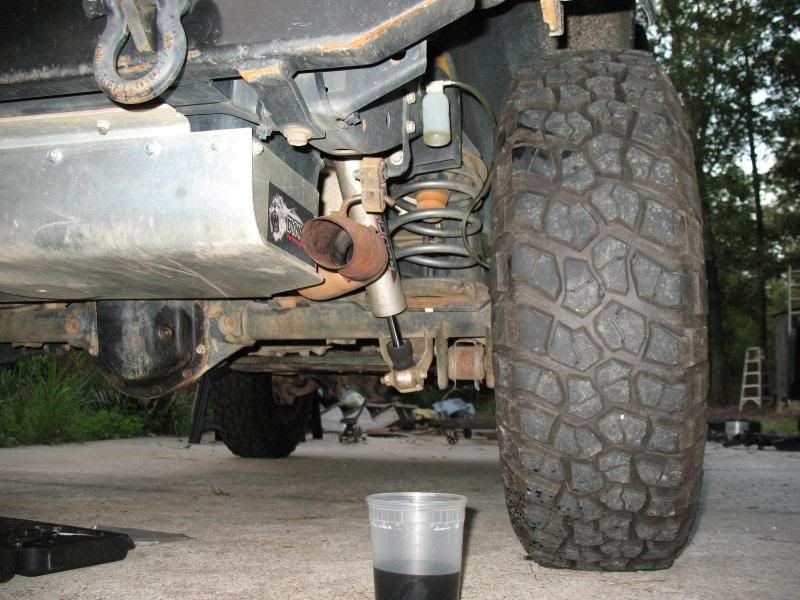
After draining the radiator and removing various hoses, I decided to drain the engine block via the coolant drain plug. It was difficult to contain the drainage.
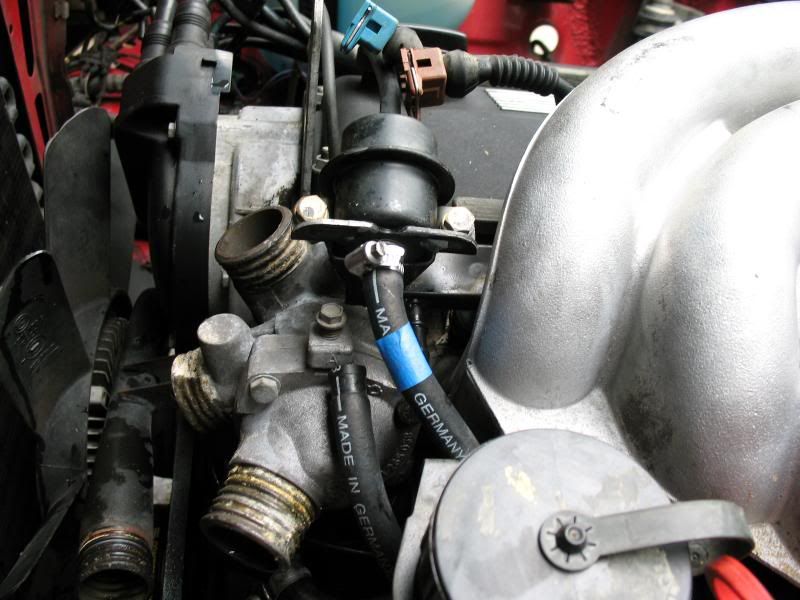
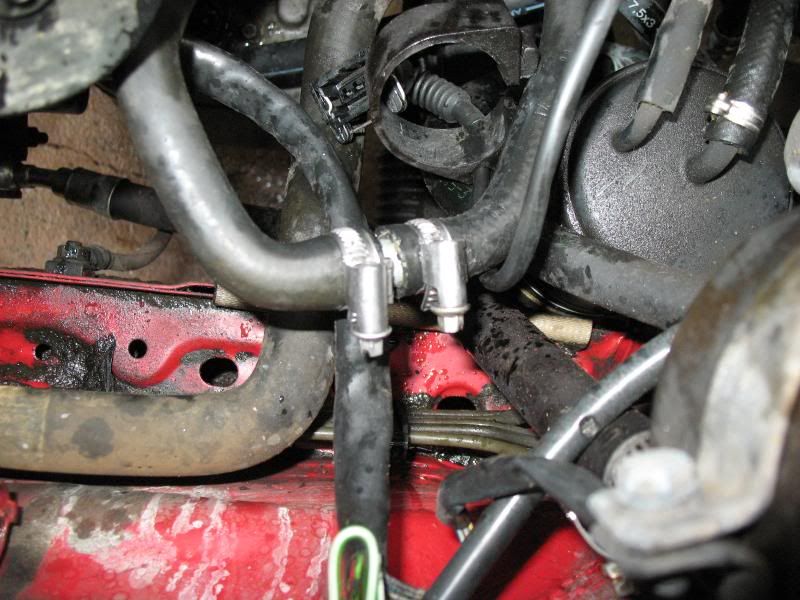
Yet still I can not remove the impulse pickup wire.... the thermostat housing needs to be removed. At this point I decided to just pull the intake manifold as it would make it much easier to perform more work on the engine and replacing stuff. The two fuel lines are easy to mix up so I put a piece of tape on the one going to the fuel pressure regulator. The wire between the engine hoist bracket and the unplugged blue connector is the impulse pickup - the reason why the intake manifold is now coming off.
 ~Rick | 1990 325iC ~Noelle - Her build/cleanup thread http://r3vlimited.com/board/showthread.php?t=179507
Comment
-
great build, great pictures, thanks for sharing.sigpic
New website releasing soon www.gutenparts.com Guten Parts + Service | Facebook | Twitter
____________________________________
Levent
%20levent@gutenparts.com
____________________________________
Ladies:
1998 E36 m3/4/5 1988 325i 1989 325iTComment
-
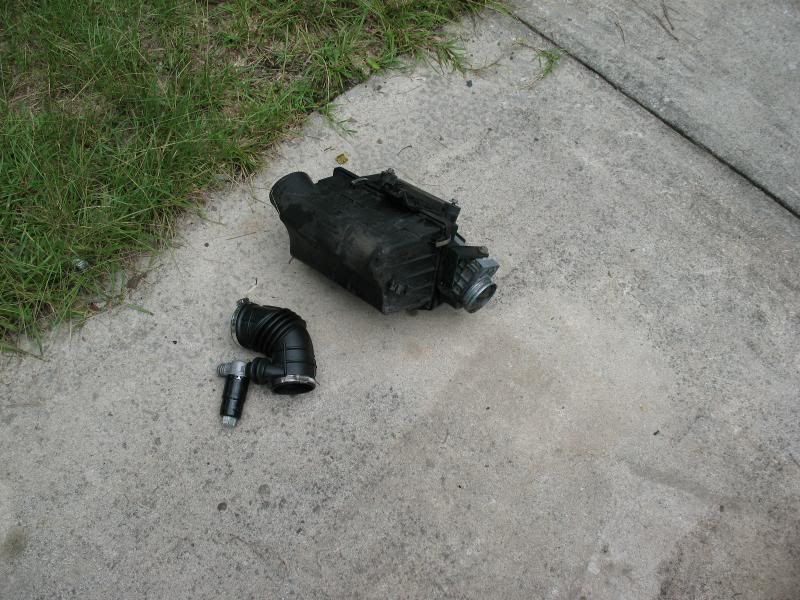
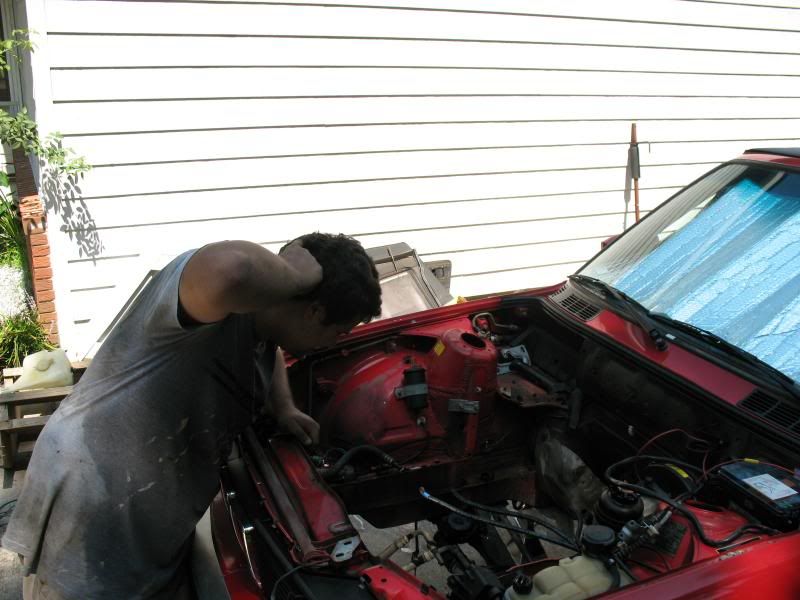
The intake manifold on the M20, while in the car is a fun task. When I thought I had everything unbolted, it didn't want to come off the engine. Turns out I missed a hidden nut. Before I realized that I tried beating on it with a rubber hammer (intake is aluminum) and finally brute force of pulling it off.
While yanking on it very hard, something happened that I did not allow myself to believe. I tired again, and it happened again. Finally I set up my digital camera on video mode to be a second set of eyes so that I could verify what I thought was actually happeneing:
The entire engine and transmission was lifting up as I attempted to pull the intake manifold off (that was still bolted at one location). The driverside motor mount was completely spilt in half. Unlike the motor mount on my '93 Cadillac DeVille that when failed, had a secondary metal to metal bracket to hold the engine, this simple rubber mount did not.
Remembering that BOTH transmission mounts were split in half also (transmission crossmember was installed int he video, but just for support). That means that out of the 4 engine/transmission mount locations, 3 were totally split in half, which no secondary feature. That explains why the fan was hitting the radiator. I then inspected the driver side engine mount, the only mount left, the one that is being pulled apart, not compressed and it was showing significant signs of splitting as well. I did some very crazy/foolish things in this car that, among other things, only had an engine and transmission bolted to the chassis at 25% of the locations. If that last mount gave out when driving, bad stuff would have happened.
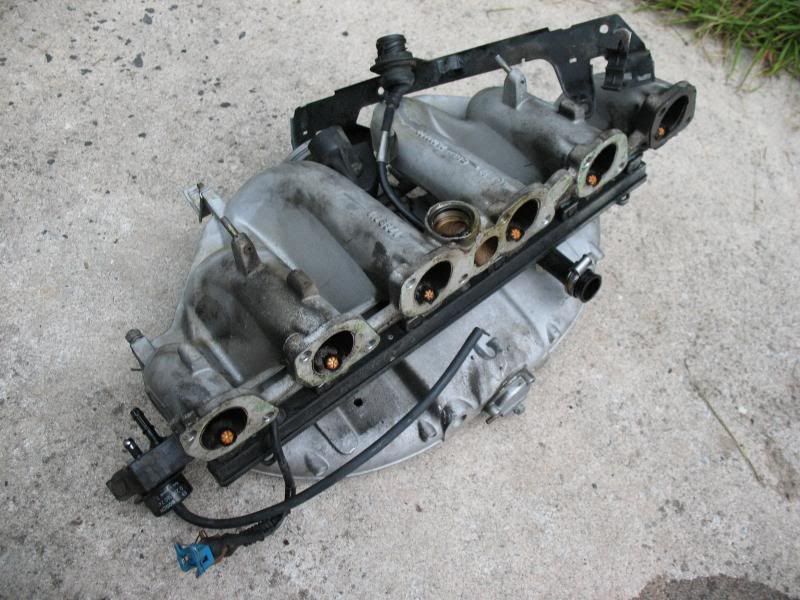
Once I removed the last nut holding the intake manifold on, it came off easily. This will be getting cleaned up and anything needing replaced will be. Injectors are going to be swapped out in place of higher flow as I'll be getting a chip to take advantage of it.
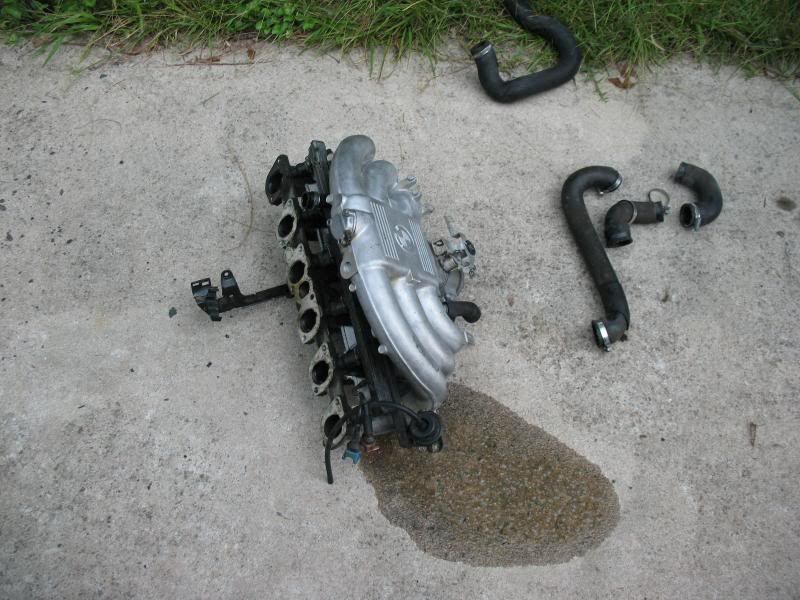
Every coolant hose will be getting replaced along with all other common wear items.
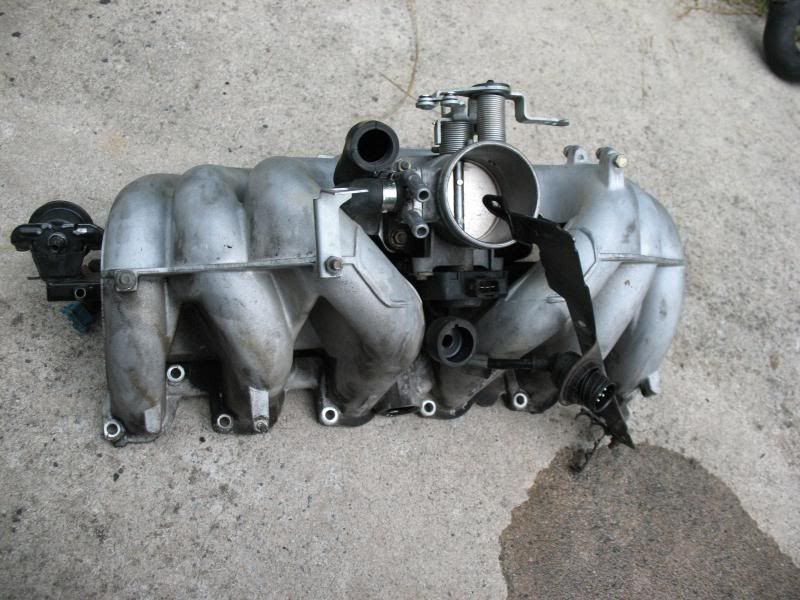
In the past, the throttle body heater plate cracked and was leaking coolant. For a quick fix I bypassed the TB heater and connected the two lines together. Now that it is all removed, I am going to be removing the throttle body heater completely, as well as capping off the two coolant line locations - less potential coolant leaks.
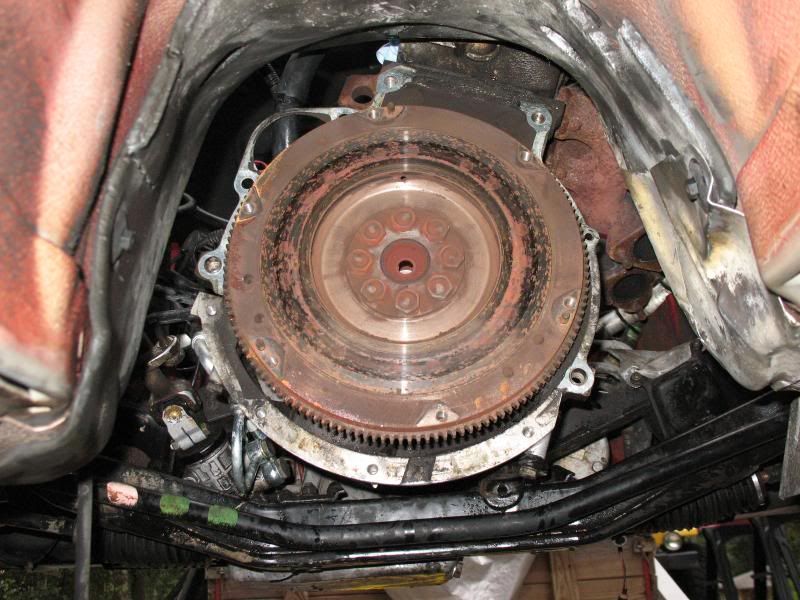
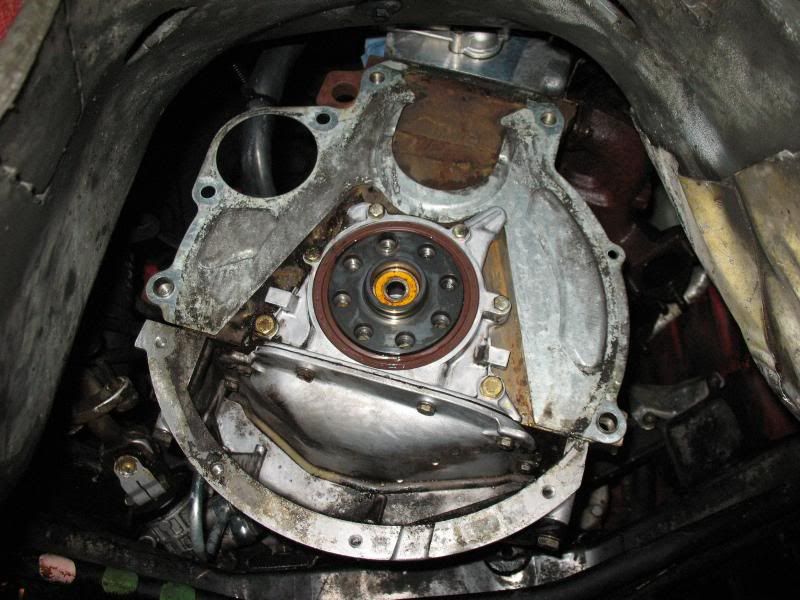
I then went under the car to continue replacing the seals as it was dry. But I couldn't help notice now that the intake manifold is removed, that I can easily see all the bolts holding the transmission to the engine.
See up to this point, there were two other main mechanical projects I was going to put on hold. The clutch of unknown age, but perfectly working condition was going to be left alone, along with the engine timing belt (was told it was "changed around 100k) water pump, and various upper and lower engine seals. Not that anything was leaking, but just preventative maintenace on a 20-year old car that will get the heck driven out of it once completed.
The plan was that "sometime next year" I would tear into the engine, and wait for the clutch to fail then I would replace it.... but I just couldn't help but see the car on jackstands for a long time, everything needed to be removed except for some bolts, and the thought of "while I'm in there...."
Screw it..... well, more like unscrew it.... "it" being the bolts that hold the transmission tot he engine.
It was the first time I removed a transmission/clutch by myself, so it was pretty cool. It also answered a few questions I previously had about the operation of a clutch system
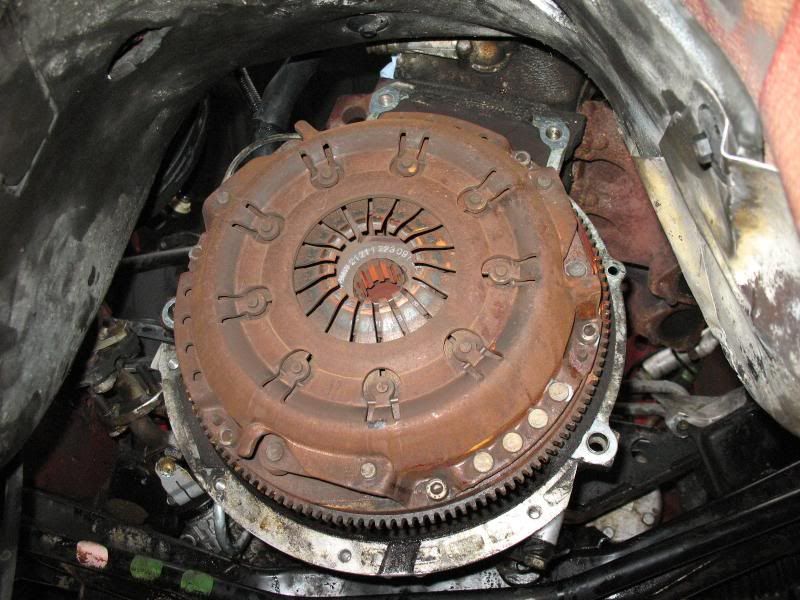
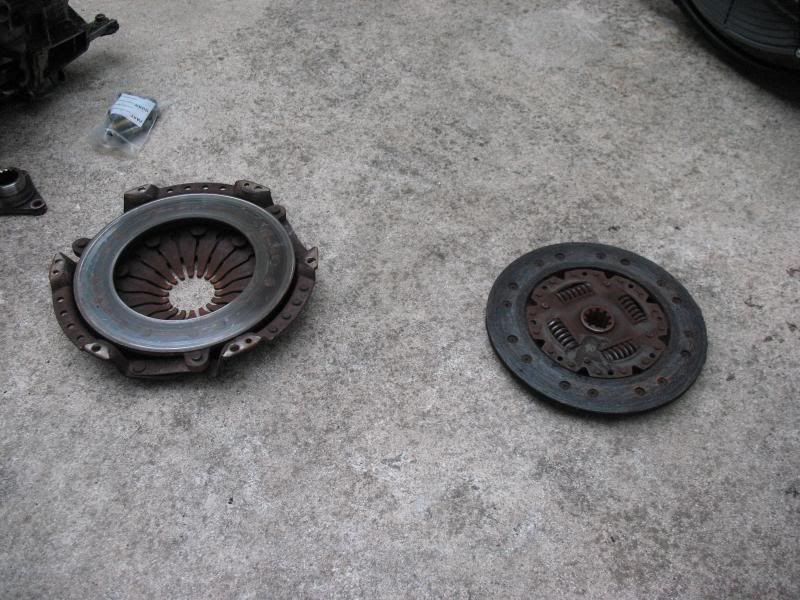
I saw an 89 date code, so it is the original clutch with 140k miles on it. Actually rather impressed as there was still life on it. I feel better now knowing that it'll be replaced when it goes back in.
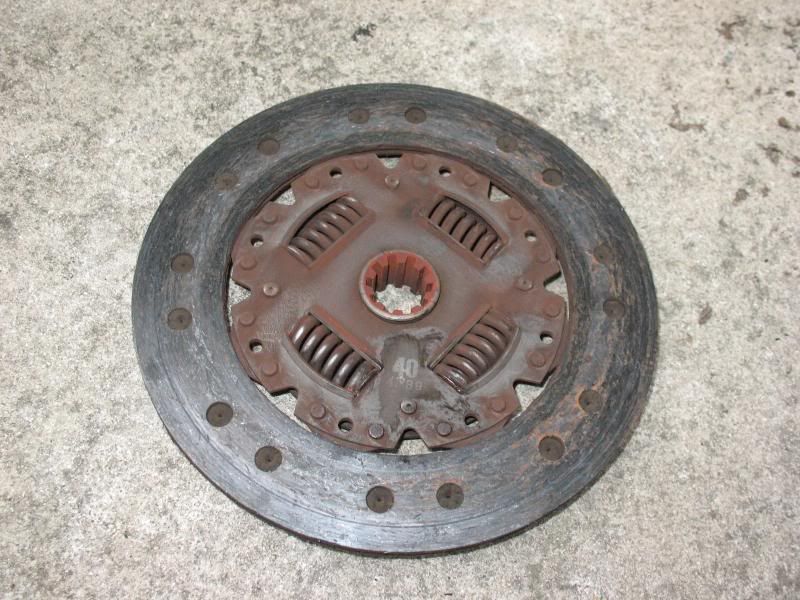
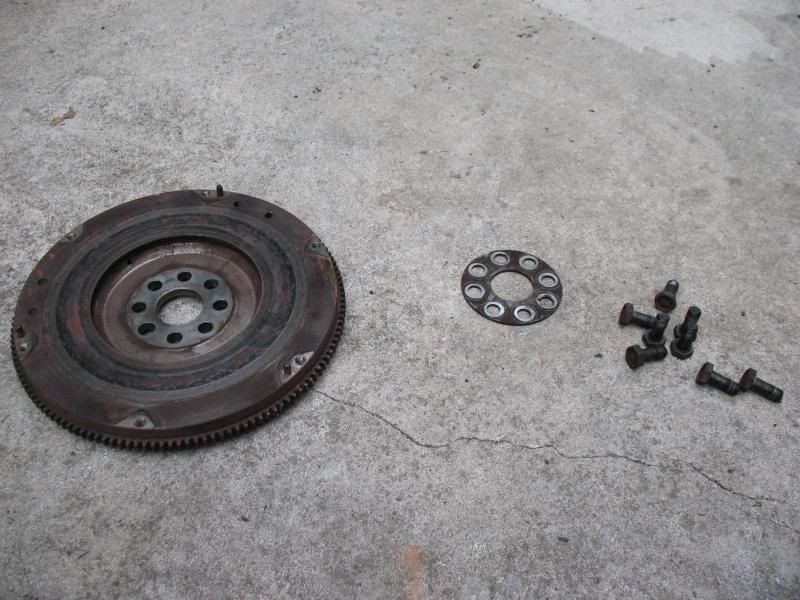
Flywheel will be getting resurfaced, maybe see about getting it lightened too
 Last edited by Night Wolf; 08-25-2010, 08:45 PM.~Rick | 1990 325iC ~Noelle - Her build/cleanup thread http://r3vlimited.com/board/showthread.php?t=179507
Comment
-
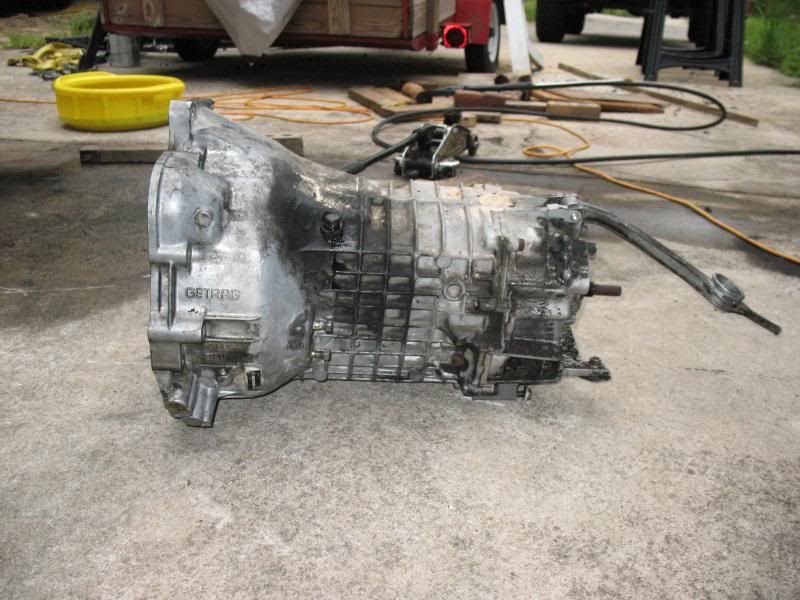
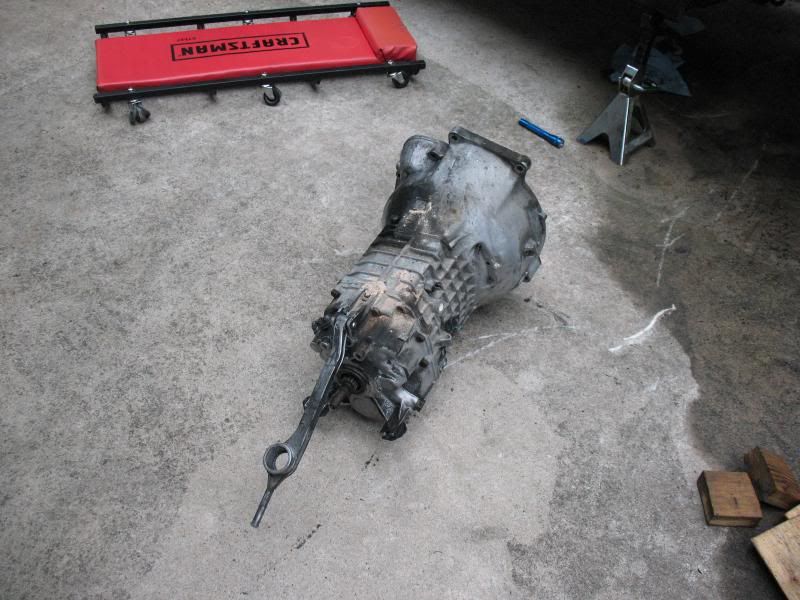
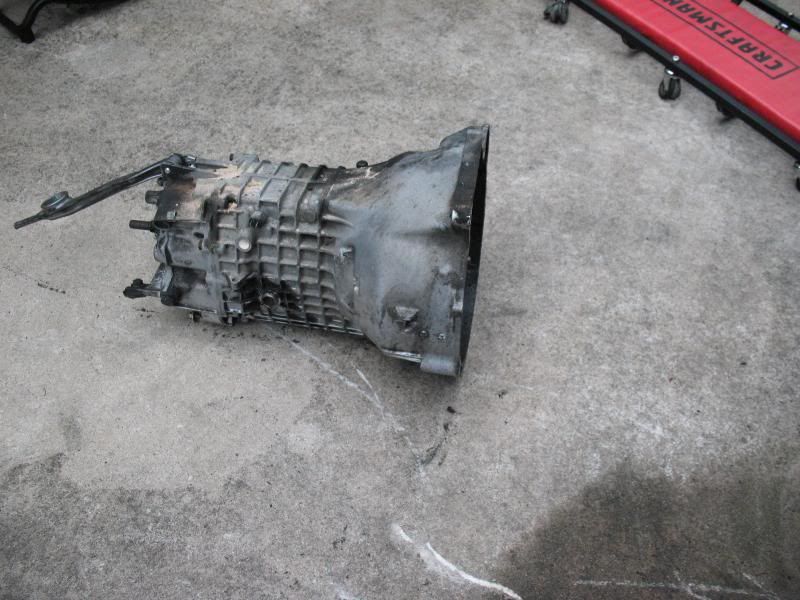
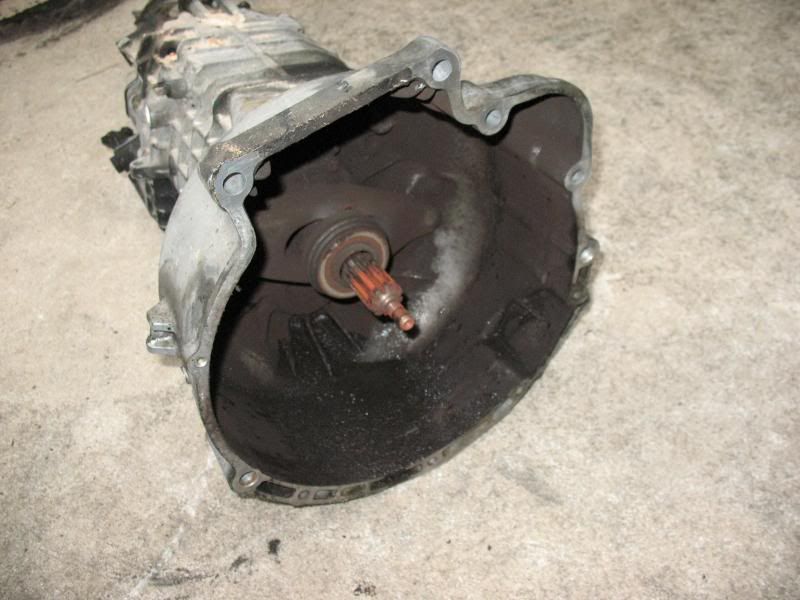
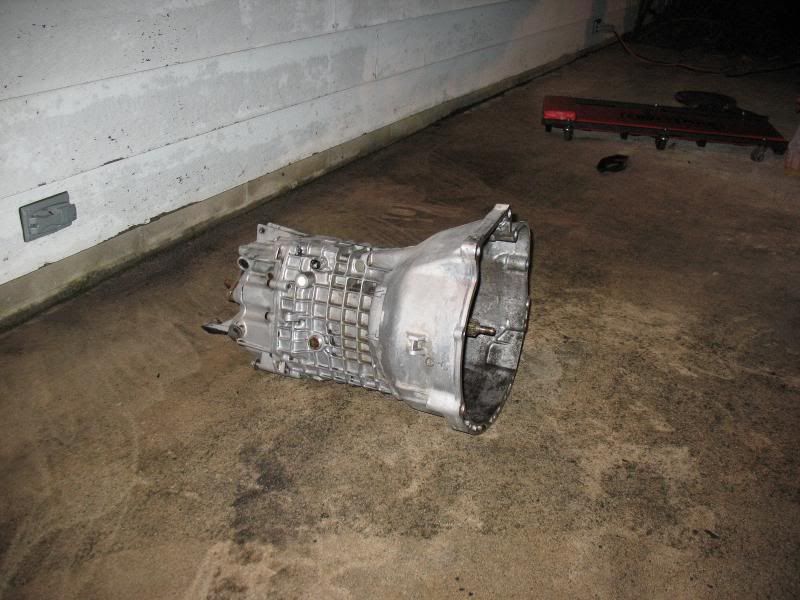
Now that the transmission was out, I could properly clean it - with the pressure washer.
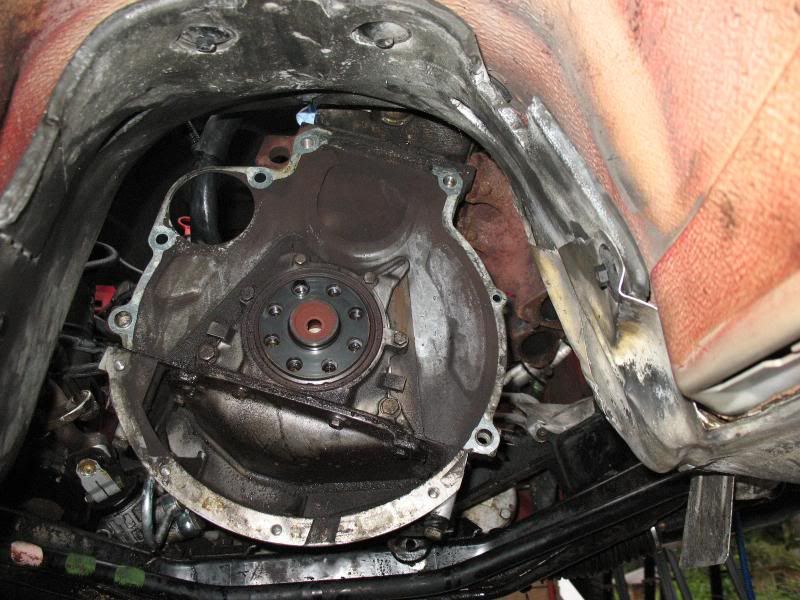
Now that it is removed, it is getting a new clutch kit, clutch release fork, pivot pin, and new input shaft seal. Trans should be good to go for a long time now.
Pressure washer made the rear of the engine clean in no time too
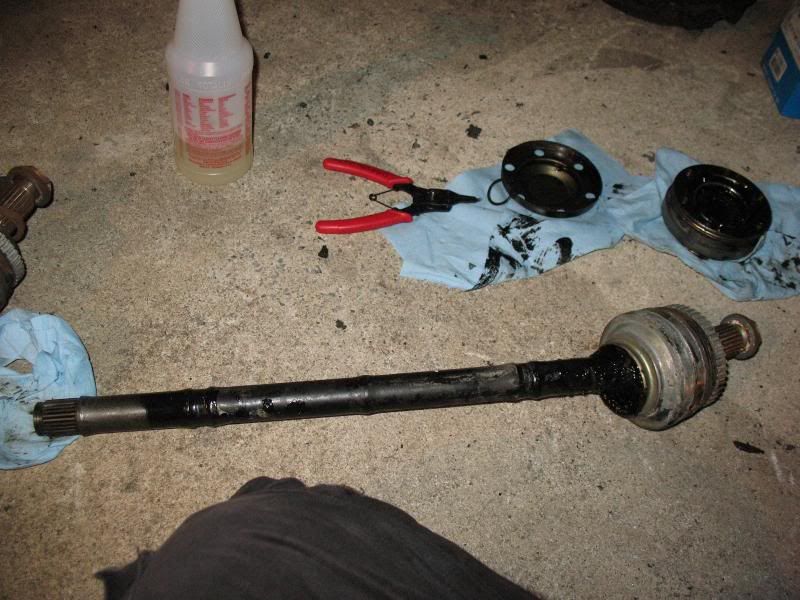
So then I pulled out both CV axles and got the boot kits together. It was my first time ever messing with CV axles, repacking them or replacing the boots, but it was straight forward.
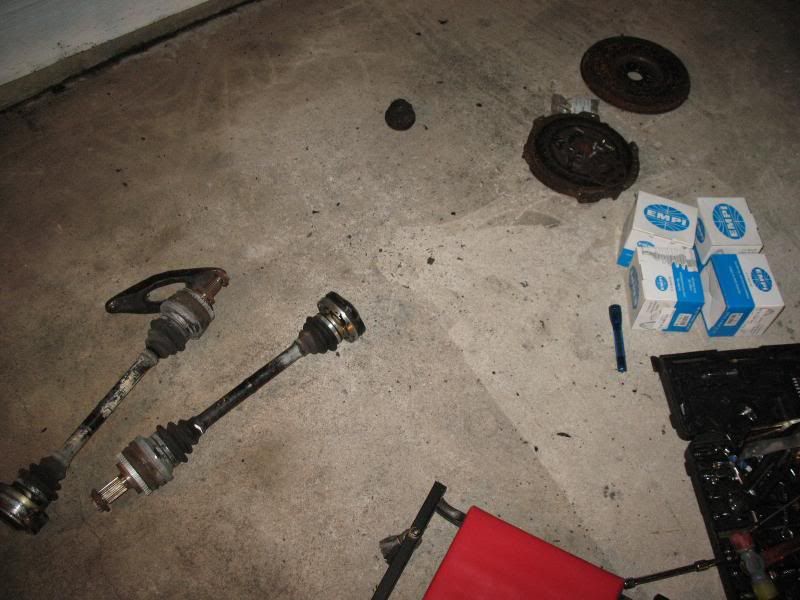
Tap the cap off, clean the grease out, remove the snap ring and the inner joint just slides right off
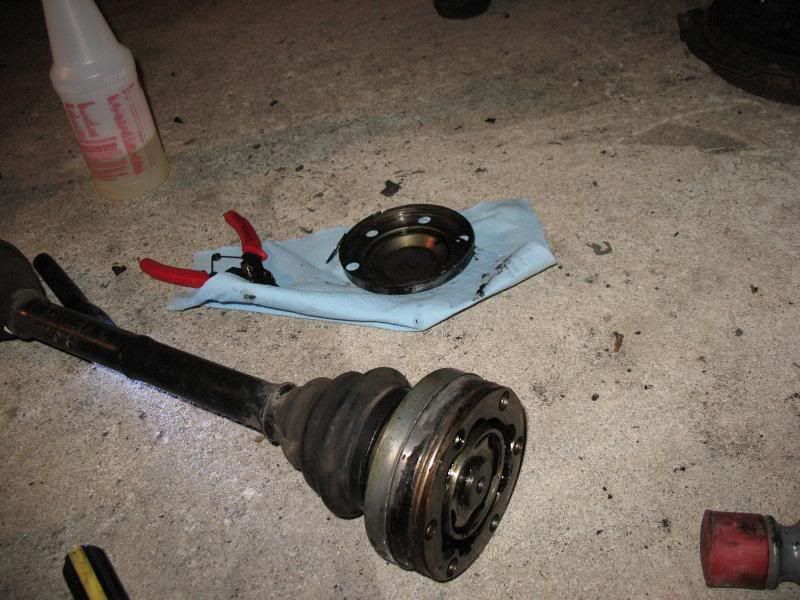
There is lots of grease in these things. The idea is to remove and clean as much of the old grease out as possible - without using chemicals. I used an entire roll of the shop towels between the two, but it's good to get as much of the old stuff out as you can.
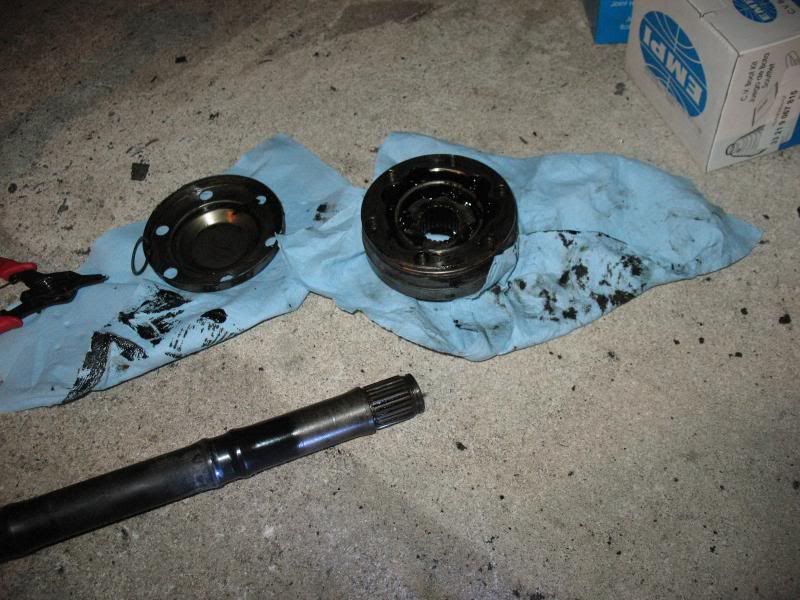
Once the inner joint is removed, the outter boot can now be slid off the shaft and new one slid on, grease the joint up, put the excess grease in the boot, slide the boot on all the way then clamp it down.
Freshened up and original
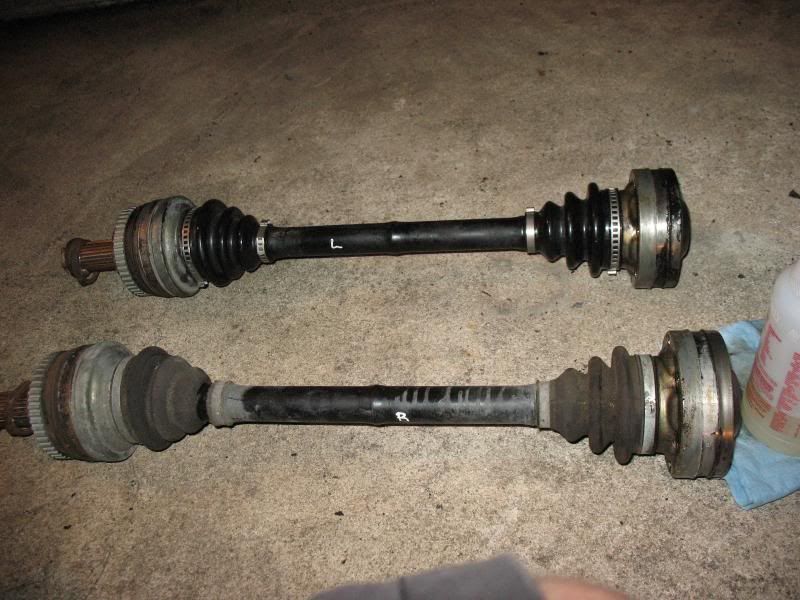
The new boots are made out of a longer lasting rubber. I shouldn't have to bother with these things for a long, long time now.

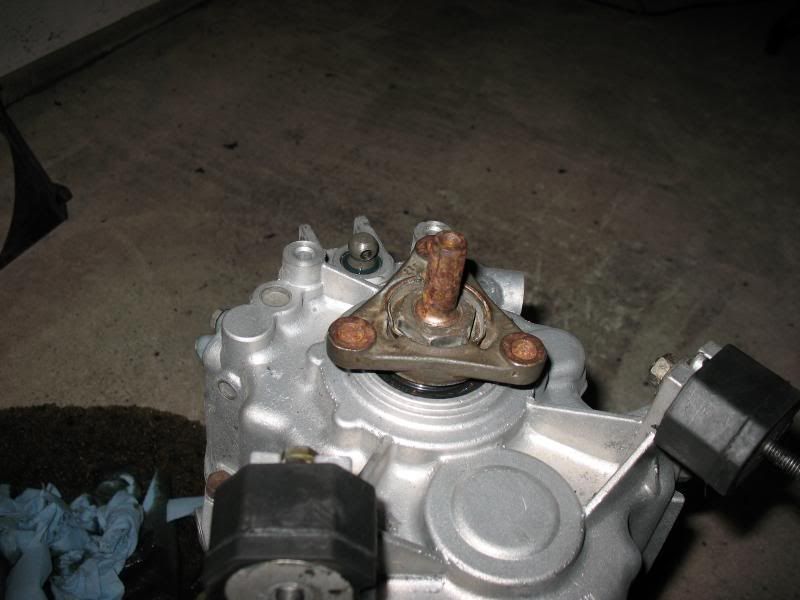
Then I moved on to the transmission. Replaced the selector shaft seal and output shaft seal, then installed the flange on the output shaft. BMW says to put loctite on the splines of the flange, which I did. All I had was red though and it was around midnight.... hopefully that flange dosen't have to come off for any reason again.... good thing is that it shouldn't leak. I put the new tranny mounts on too.
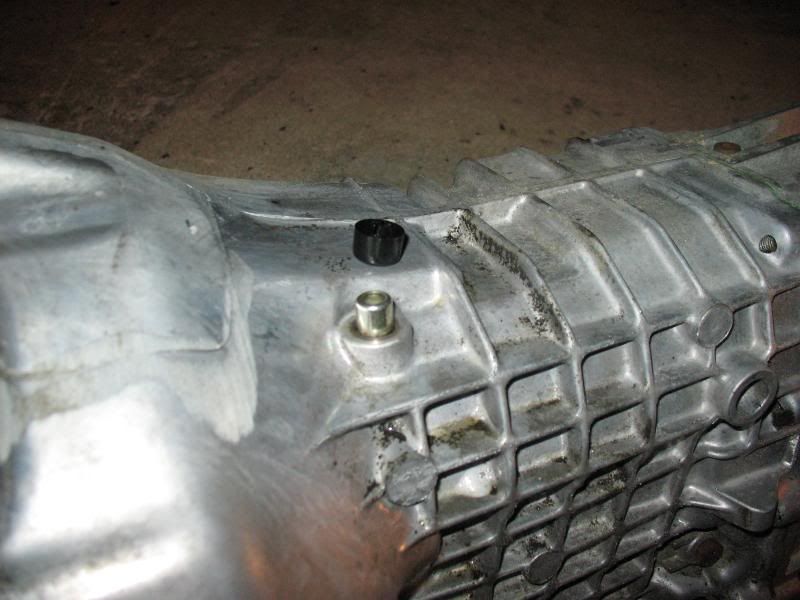
I removed the vent cap and cleaned the whole area out good to prevent the vent from possibly clogging up, which would cause the seals to leak.
and put the new reverse switch in
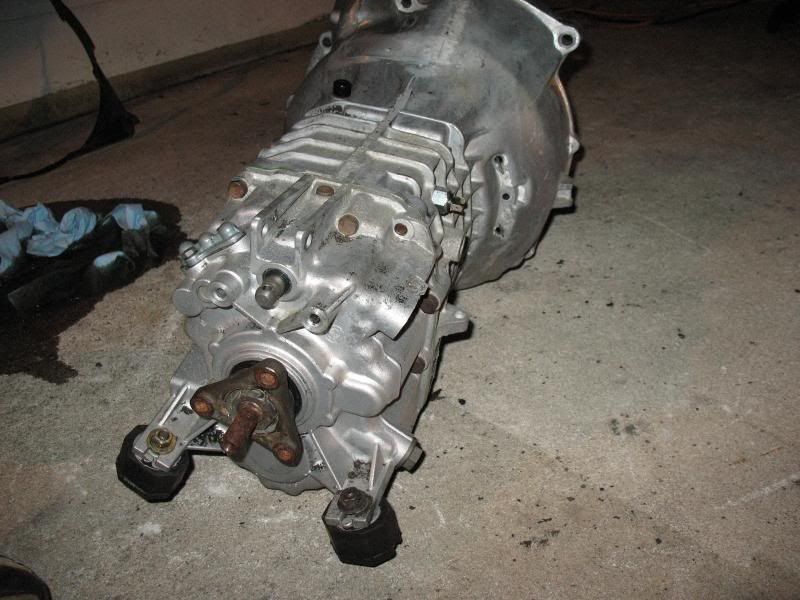
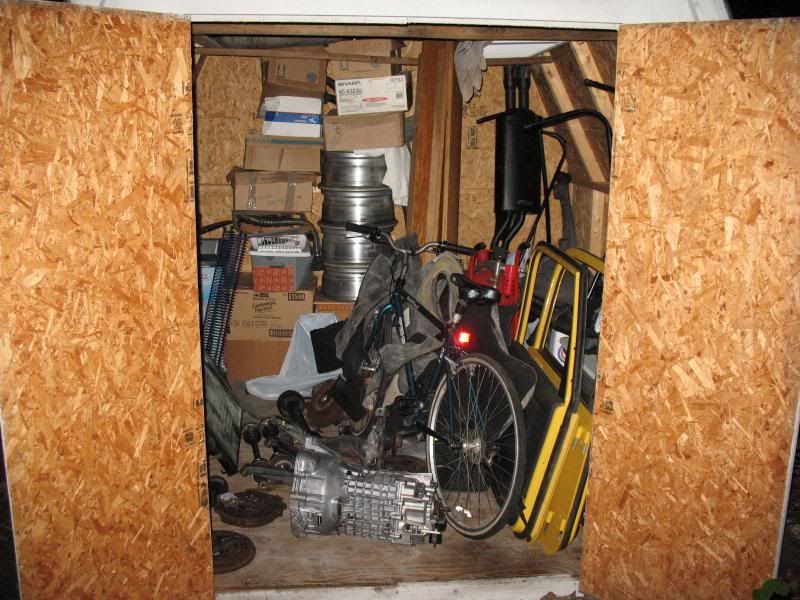
Then stored the trans away until it is further needed... starting to run out of storage room (outside of the house...)!
I then pulled the diff back out and replaced the speedo sensor seal, the diff cover gasket and tightened the diff cover up tight, then removed and started to replace the output seals. While trying to get the first one to seat, I poked a hole right through the metal of the seal with a screw driver, then it started to rain. I put everything away and ordered a new seal. Both seals will get installed when the new one arrives.
 ~Rick | 1990 325iC ~Noelle - Her build/cleanup thread http://r3vlimited.com/board/showthread.php?t=179507
Comment
-
That was all done on Sunday the 15th.
Fast forward a week to Sunday the 22nd
I really need to watch myself with "while I'm in there..." as I already removed the transmission...
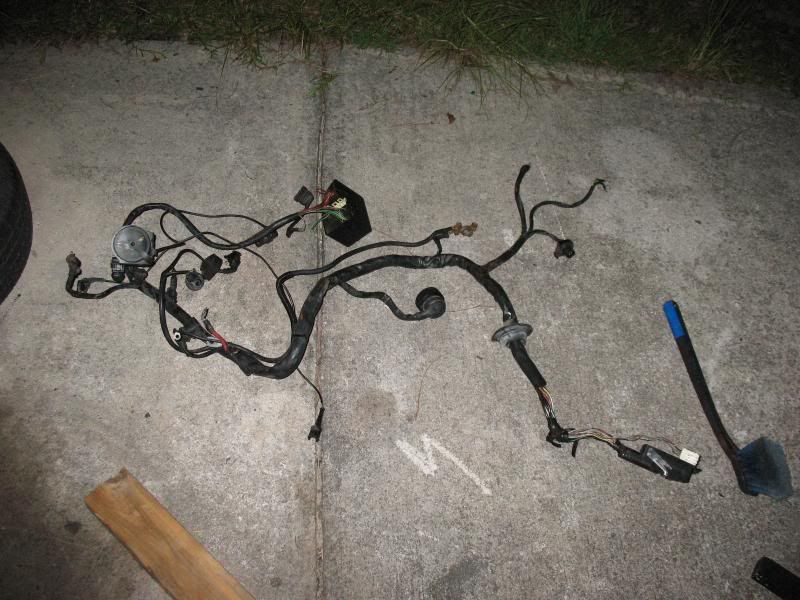
then I got to thinking - what is really left that would prevent the engine from coming out? No transmission, no cooling system, one broken motor mount... it was simple. All that was left was two hoses on the power steering pump, a grounding strap on the oil pan, (1) engine mount and the wiring - which is easy, BMW designed the harness to stay with the engine. Remove the main connector from the computer about the glove box and feed it through the fire wall.
So I'm looking at my engine, which is (this) >< close to coming out. I was thinking how sweet it would be to clean and detail the entire engine bay, as well as the entire engine. Going further, it would be so easy to work on and build the engine up outside the car, install the transmission outside the car and install the entire unit as an assembly.
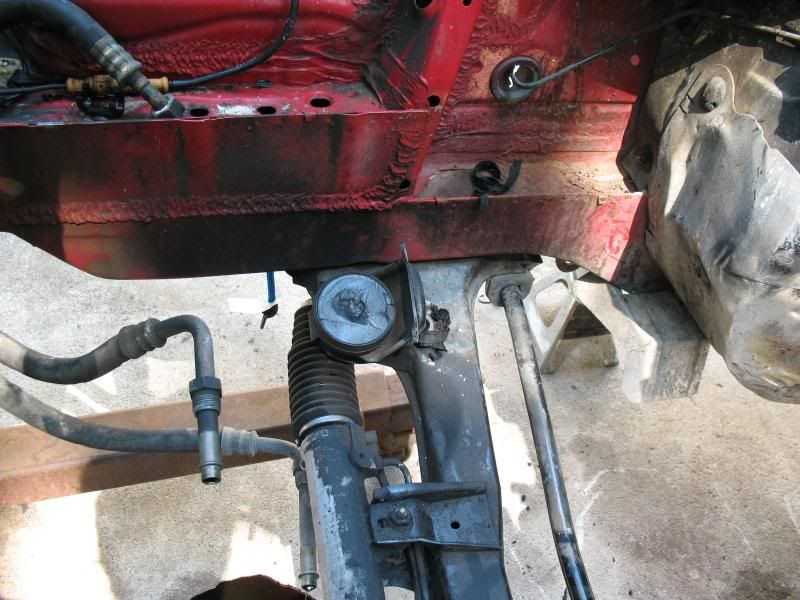
Oh and...... yup..... "while I'm in there...." the steering rack is oh so easy to get at. The stock e30 steering rack is 4.0 turns lock to lock, and it just so happens to be that an e36 steering rack will fit with minor modifications and is 3.2 turns lock to lock... I know, I really can't leave well enough alone...
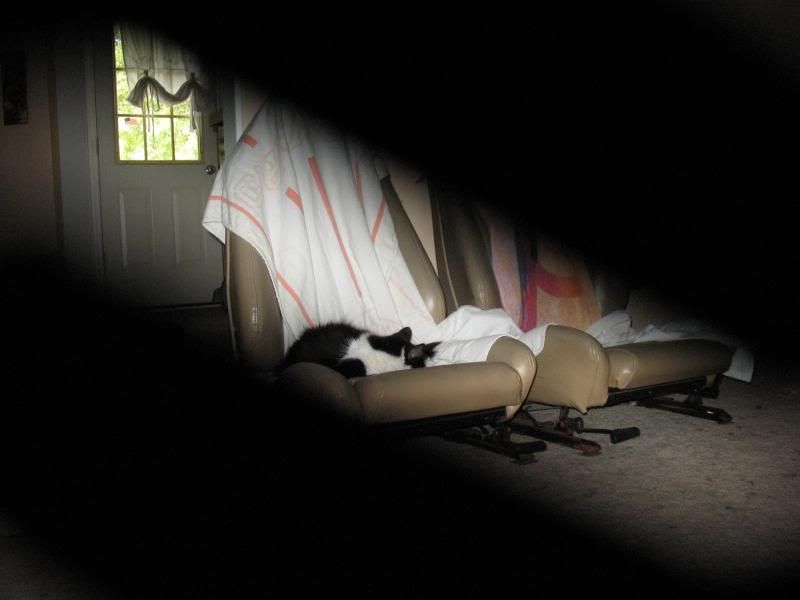
I went to turn on my camera (which is getting pretty beat up as time goes on) and the lens cover got stuck halfway. Naturally, I took a picture and it came out pretty cool. The cats, all 3 of them, are glued to these seats. Once I get all the useable parts from my spare set, I may make some sort of a base for them and leave them in the living room.... for the cats... and me, and guests (they are comfortable)
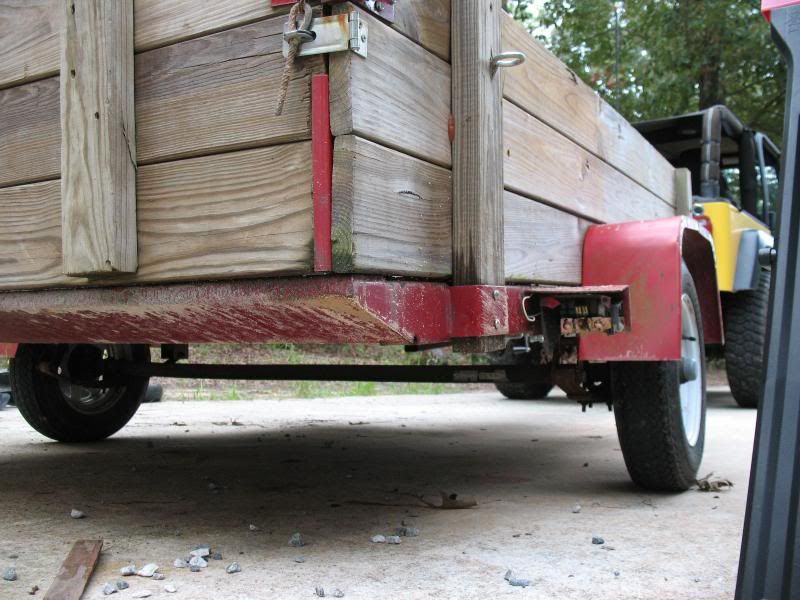
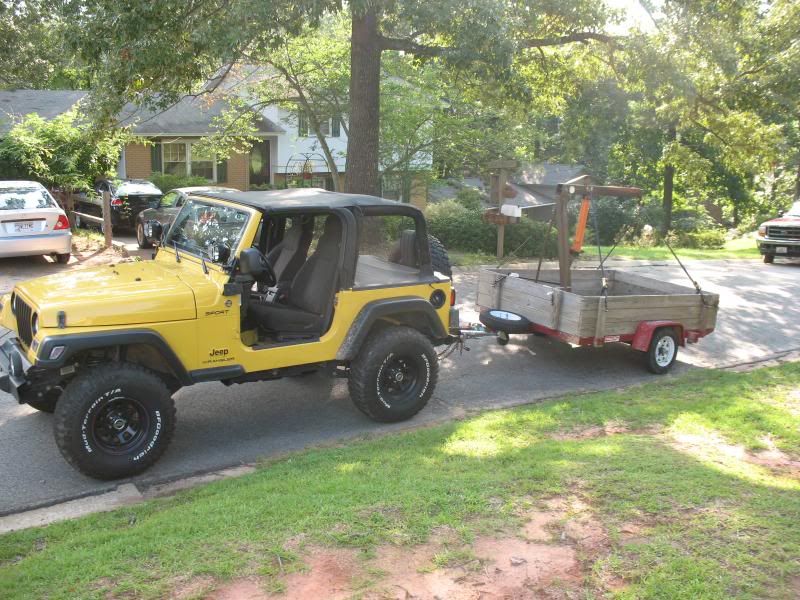
I have had a load of gravel in my trailer for over a month now. I was putting it around the house (along with reparing the front steps and staining the porch etc...) before the house was put on hold for the car. Needing to use the trailer ment I had to unload the gravel.
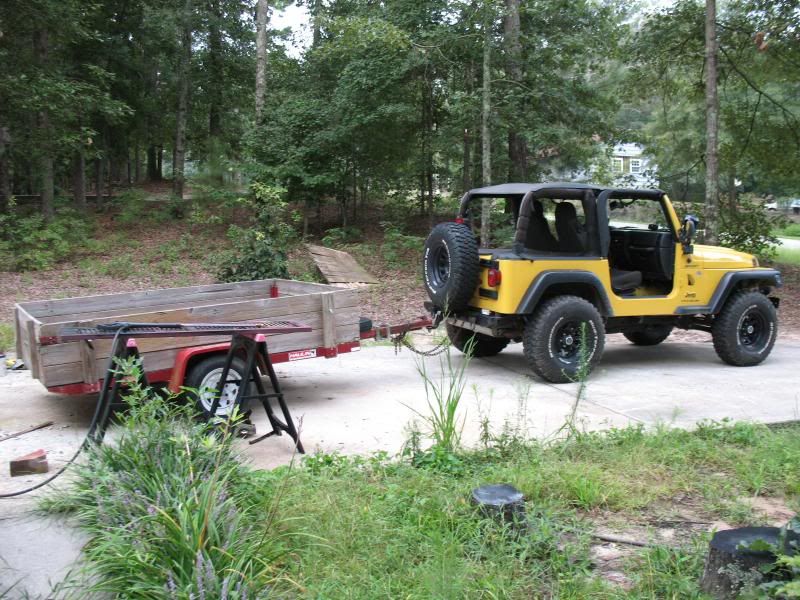
I unloaded the gravel late Saturday night, and while backing across my front yard to the spot I was going to unload the gravel, the trailer caught a small short tree stump. No more trailer lights - hand signaling is fun!
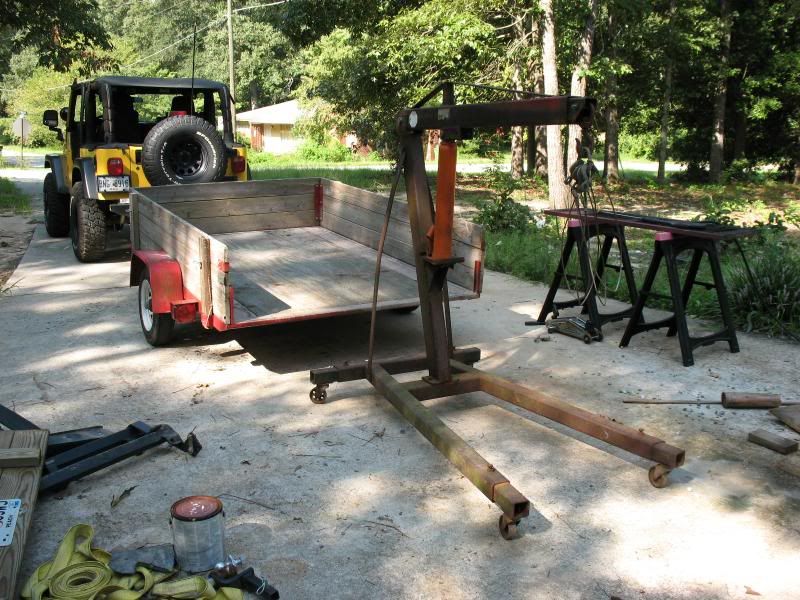
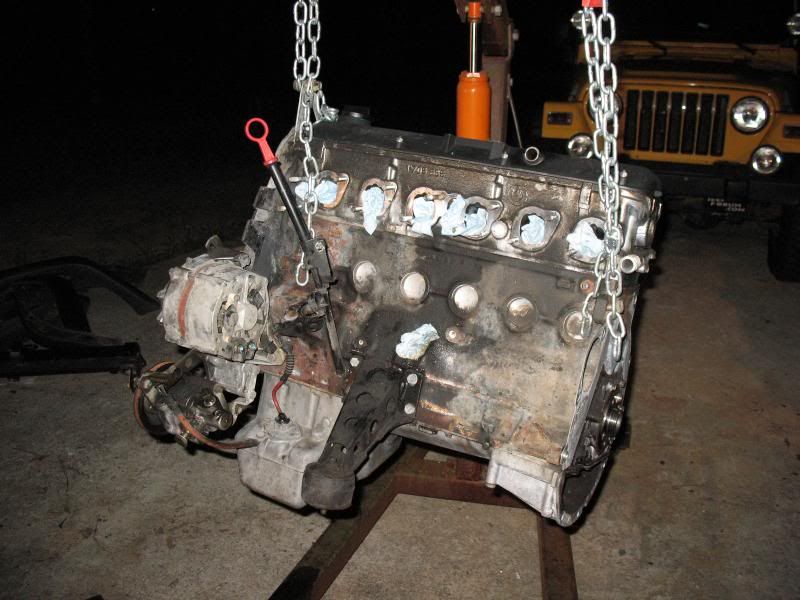
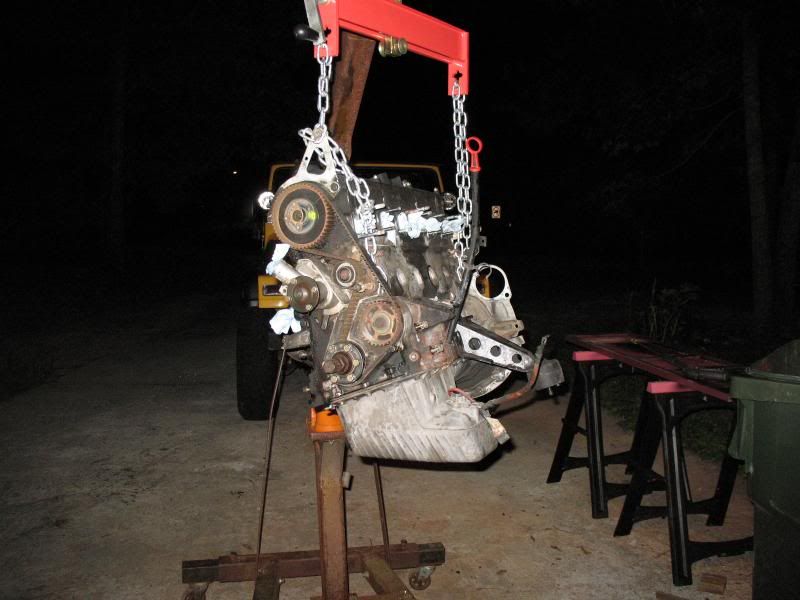
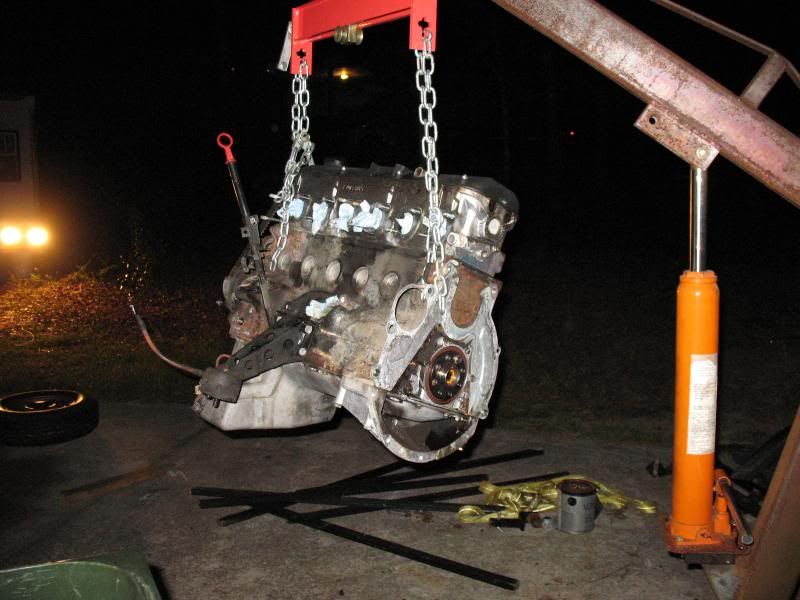
My buddy Ted got in contact with his father who happens to have an engine lift that wasn't being used...
BAM!
Then this was in the way:
Much better.
This is Ted. Naturally with an orange mohawk he does drugs (not). In the picture of jumping my Jeep the first time I took it wheelin, Ted was riding shotgun. That made Ted want to buy his own Jeep, which he did. Ted also has a modified NA Miata which is cool.
It should also be noted that WAYYYYY back over a year and a half ago, Ted was the dude that convinced me to spend a weekend to "replace the shocks" on my BMW as all 4 were blown. Yeah.... "just" replace the shocks.... sounds easy enough (what started this whole project) - Thanks Ted!
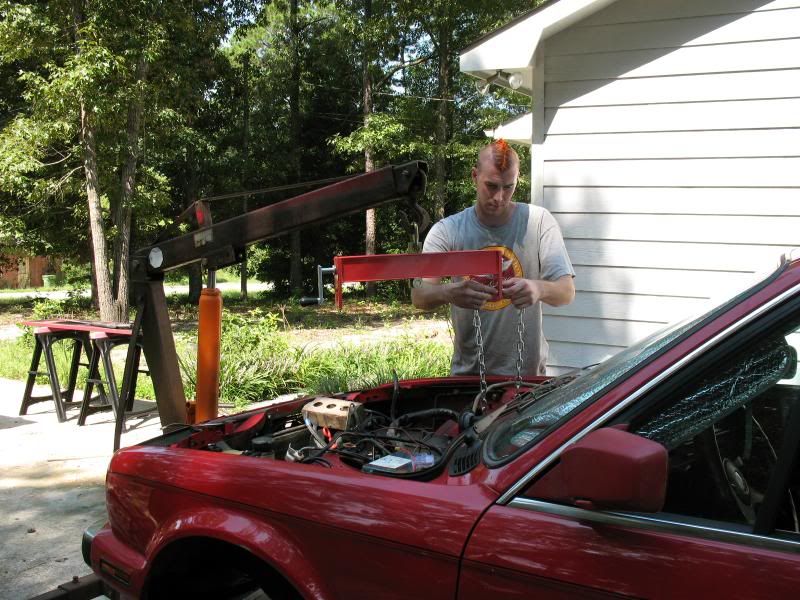
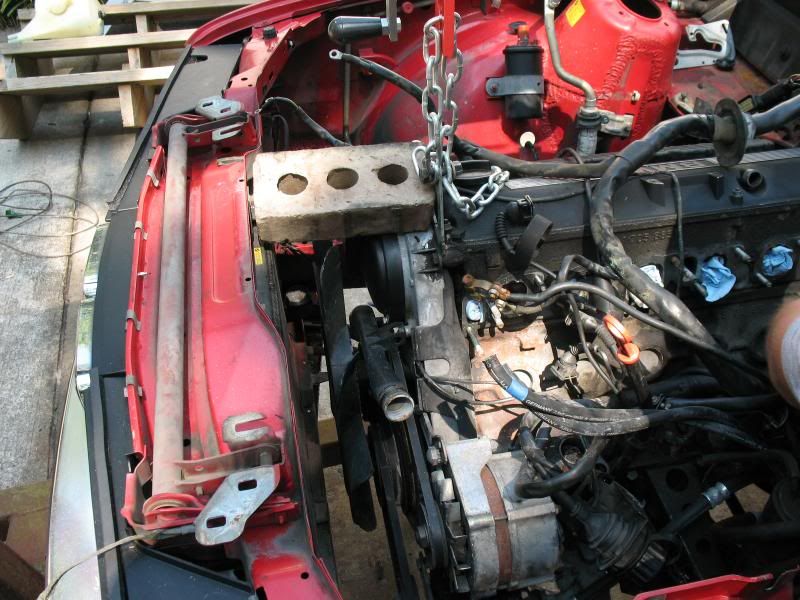
With the transmission removed, the engine wanted to tilt forward. Here is my kustom German-engineered engine stabilzation device that Ted laugh at
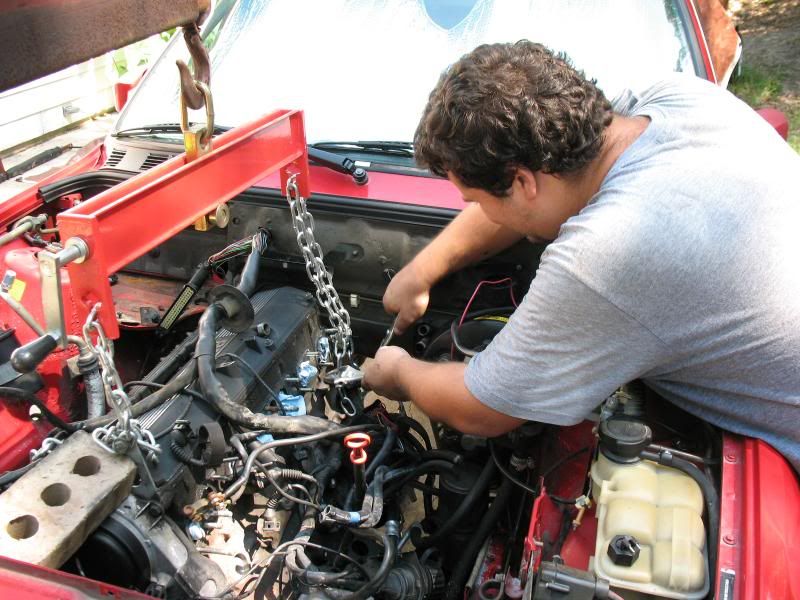
Here I am doing something other then taking pictures.
Half of the motor mount
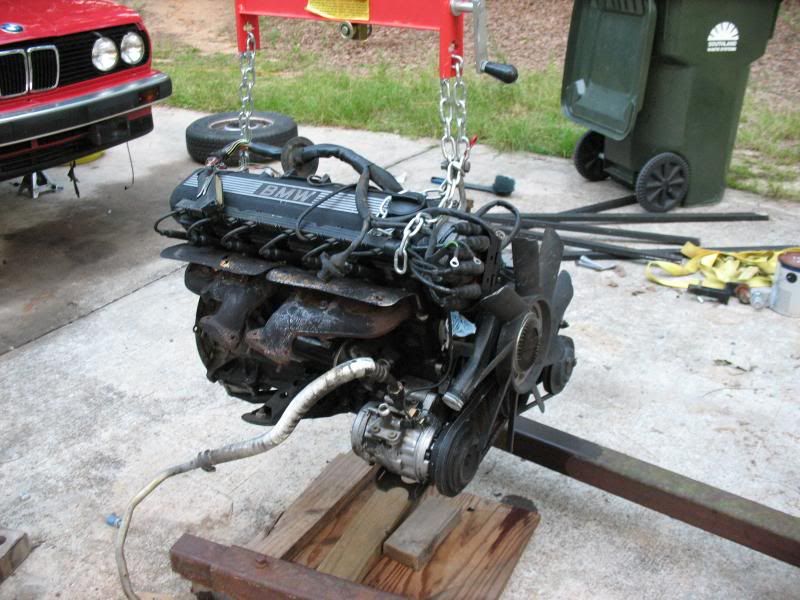
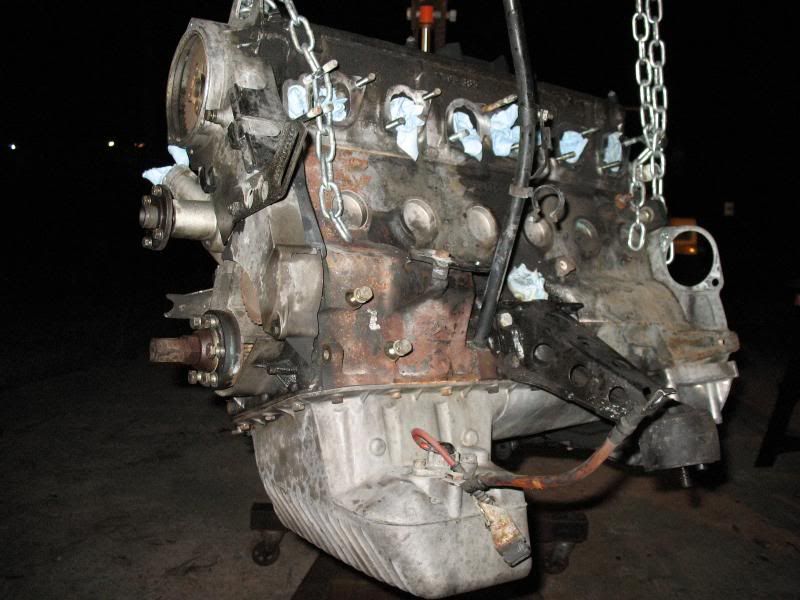
Of course we need the "engine above car" pic...
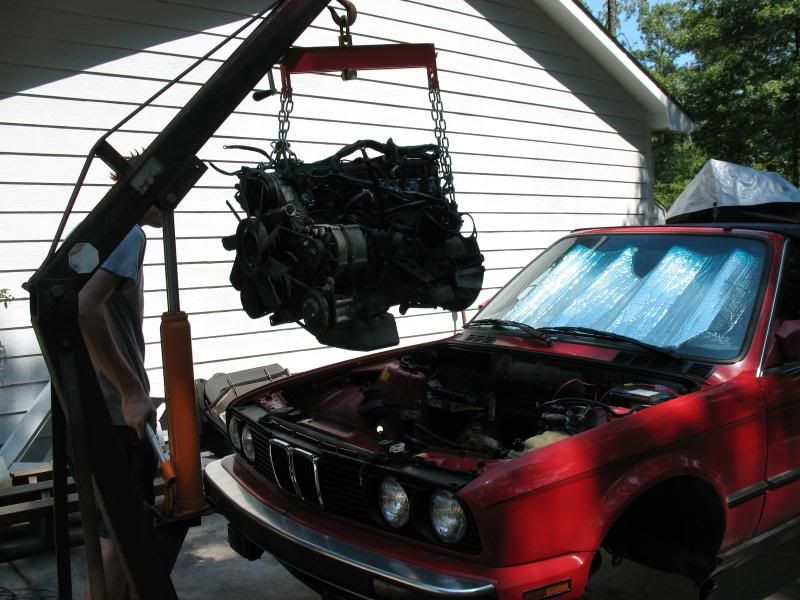
and, here she is in 21-year old, 140k mile glory. Yes, the thought of modifiing this engine, or doing an engine swap crossed my mind. What it came down to was that BMW got the "i" engine pretty darn right the first time. An engine swap will add cost/complexity and I was happy with the performance of this thing before all the updates.
With that said, and my goal of the car - a fun, reliable daily driver to put loads of miles on, the M20 stays. With 140k, it is just about broken in. I am drawing the line at the head - that is, the head is not coming off the block. Everything else is getting cleaned up, painted and repalced if it needs to be.
 ~Rick | 1990 325iC ~Noelle - Her build/cleanup thread http://r3vlimited.com/board/showthread.php?t=179507
Comment
-
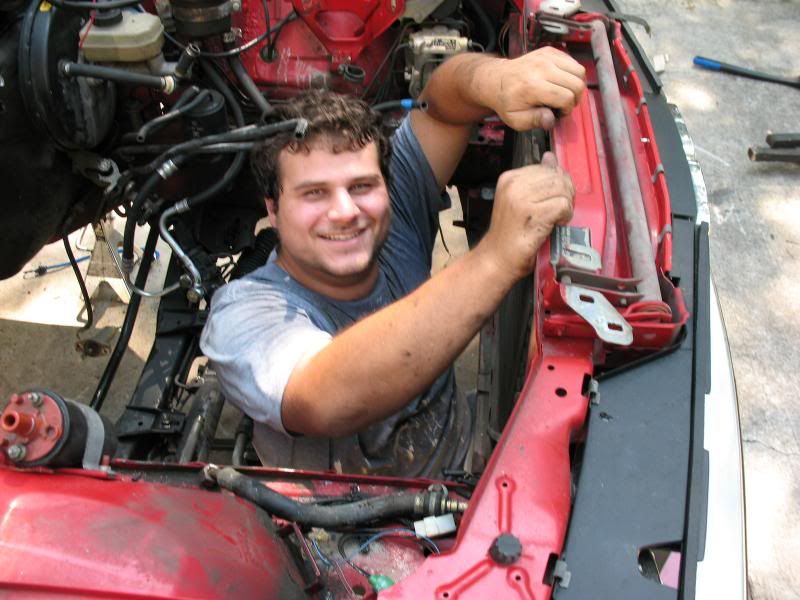
Then there was the host of dorky me pictures...


"Ah tink therrs sumthin wrong with ma starter..."
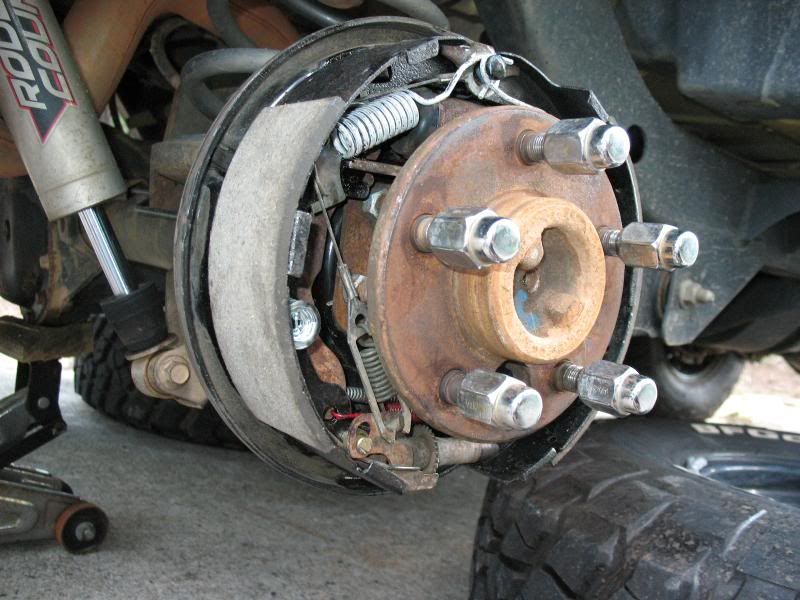
So among, well pretty much everything that has been put on hold because of the car, another thing would be the Jeep. The brakes have been getting progressively worse and worse, and towing the trailer really made it apparent that I need to do something about them.
Stock TJ brakes suck. The front calipers and rotors are too small even stock. Add larger tires and performance drops way down. Rear brakes on a TJ don't do much and there was an option of rear discs (added bling, easier and cheaper to replace, but NO added stopping performance) My Jeep has rear drums. My rear brakes have not been working properly for some time, as the parking brake did nothing at all. I would adjust them, they would work for a day and then go back to not working. All said and done, my Jeep's brakes moved to a level of being unsafe.
I could tell someone already replaced the front pads, which still have alot of life on them. When it is time to replace them I will get Centric rotors and EBC yellowstuff pads, which is the only upgrade worth doing on stock brakes. Other then that is a $1,000 big brake kit that completely replaces the [COLOR=blue! important][COLOR=blue! important]front [COLOR=blue! important]brakes[/COLOR][/COLOR][/COLOR] to a proper setup. That is on hold until things like the Jeep itself' are paid off.
The brake fluid also looked rather yucky, I bought it when it was 3.5yrs old with 40k miles. It has a build date of 6/05 and now has 83k miles, so the brake fluid was time to be changed. I also wanted to do something about the rear brakes/parking brake.
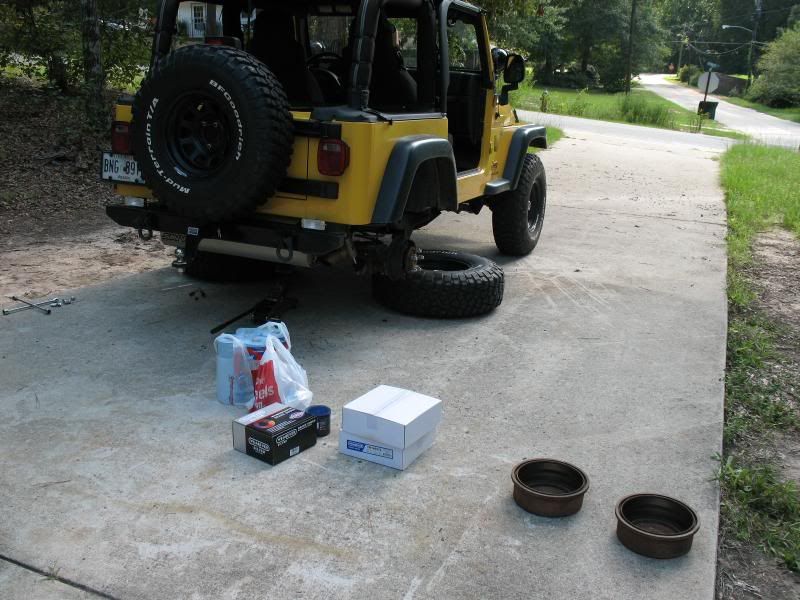
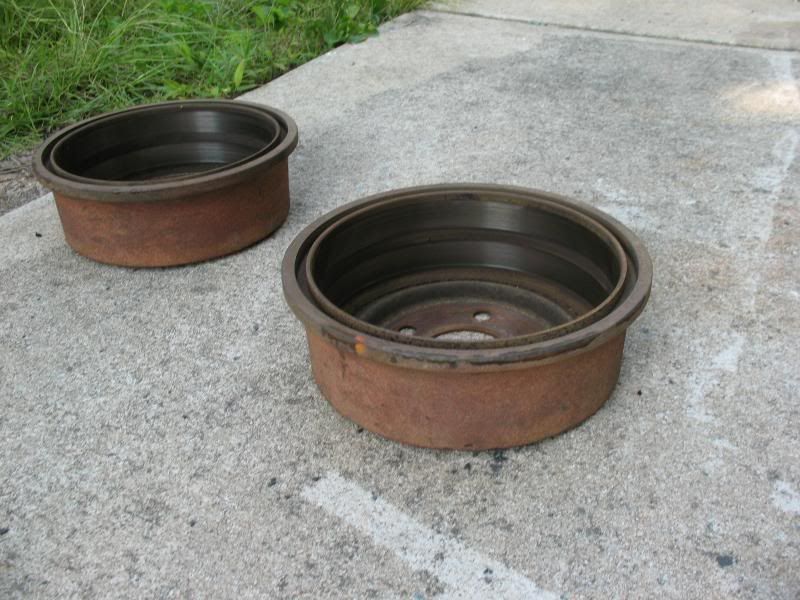
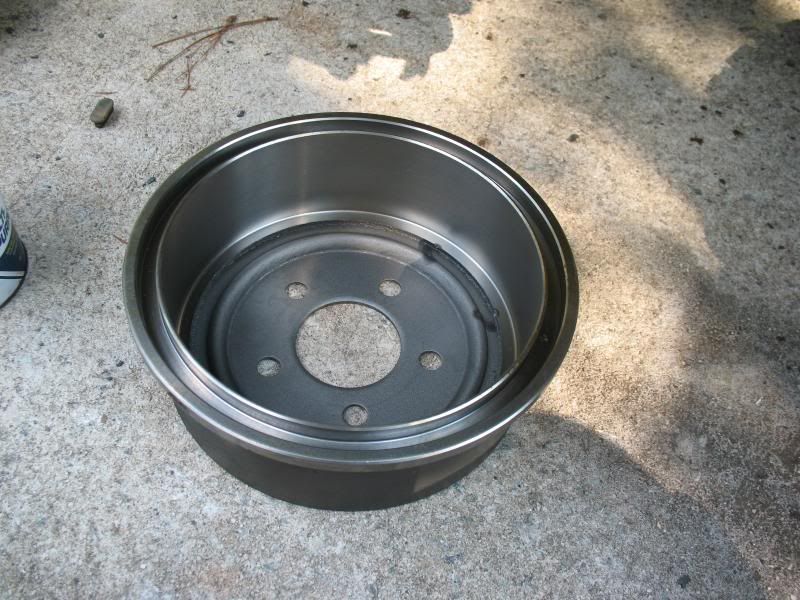
So $130 later and I was on my way to better stopping. I brought the old drums to get machined in which the parts guy looked at me and asked several times how old and many miles are on them, apparently they are way out of limits and not able to be resurfaced. Two new drums, new shoes and a new spring kit was among the parts bought.
Yes, drum brakes "work", and they have their place in a select few applications.... but on a [COLOR=blue! important][COLOR=blue! important]passenger [COLOR=blue! important]vehicle[/COLOR][/COLOR][/COLOR], they really need to be moth balled. Why a 2005 model year vehicle has drum brakes standard is beyond me. My 1994 Isuzu Amigo had 4-wheel disc standard. Way to go Chrysler.
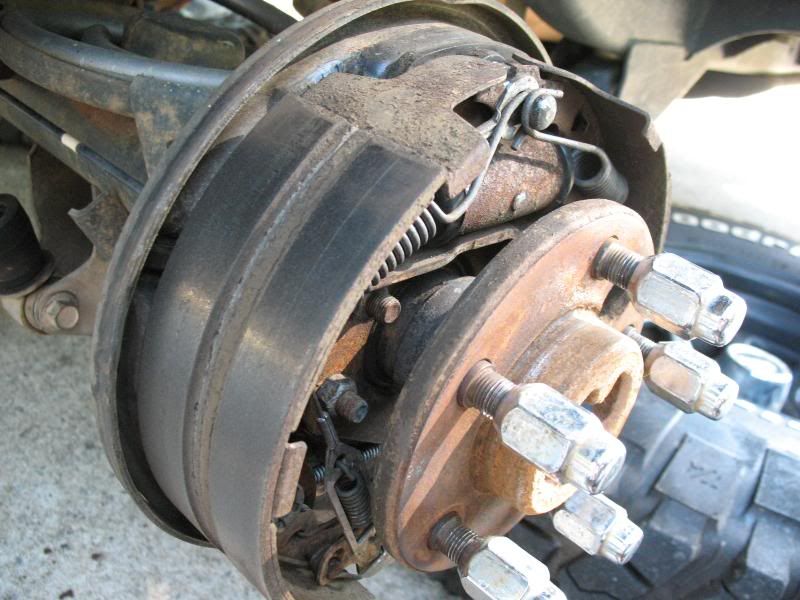
When I removed the drum I noticed something - apparently the rear brakes were changed once before.... and someone put them on backwards. The larger shoe is supposed to be facing forward.

I've never seen shoes with a groove down the center before.... no idea why it was there
But it did manage to totally screw up the drums. Normally I would just put new shoes in them and be done, but that was no possible the way the drums are worn. The spring kit (for both rear wheels) was $7 and the shoe set (for both wheels) was $15. This was going to be a cheap job, but then I had to spend an extra $90 on cast iron paper weights to do the job properly.
At this point I was really questioning why I don't just bother with a rear disc conversion. I came up with the conclusion that it would be about $300, which is better spent on the BMW right now, and, as much as drum brakes suck, they atleast to their job on the Jeep. It's all replaced now, I'll get my money out of them, then convert to rear discs sometime in the future.
mmmmmm newly installed crappy technology
$47/each.... bake in heat sucker! Wait.... thats what drums already do.....
Once that was all done, I siphoned as much old fluid out of the master cylinder resivor as I could using this
The old stuff was nasty
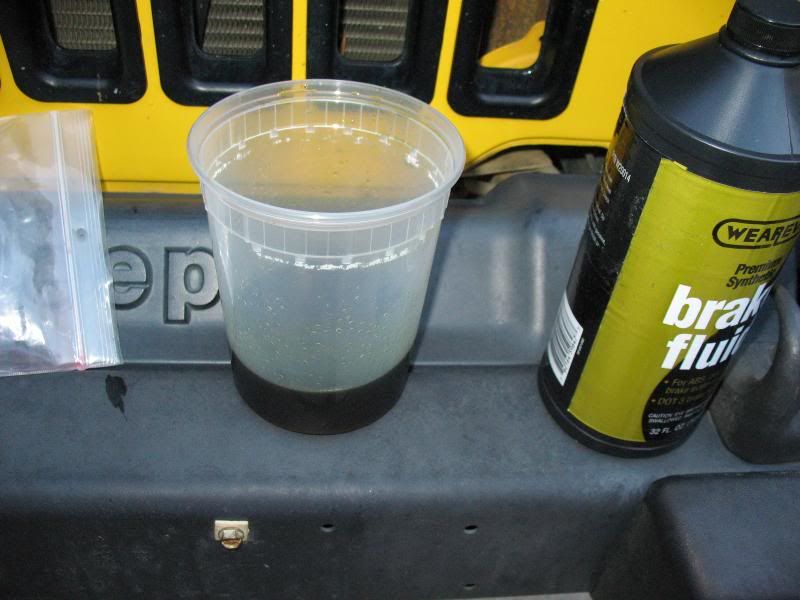
It was pretty obvious there was water mixed in with the fluid.
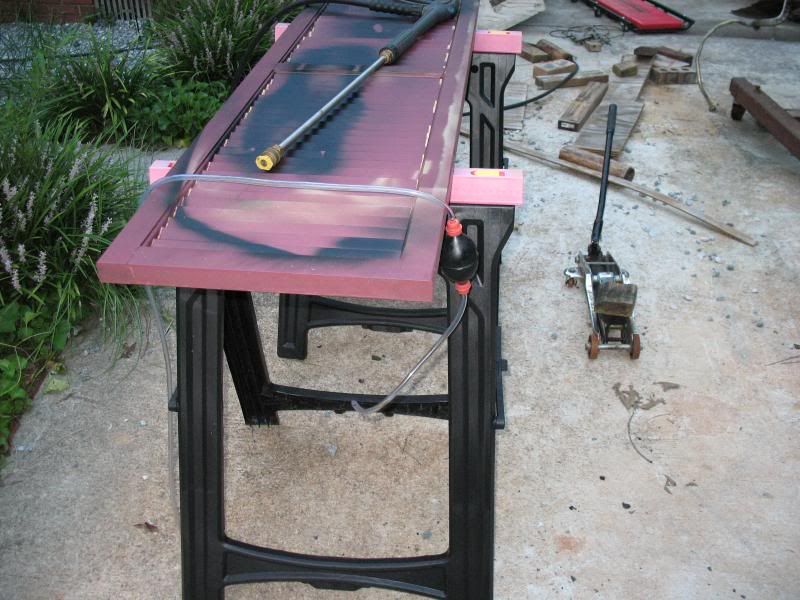
I then did an entire flush and bleed of the brake system. This cheap "one-man brake bleeder" made the job easy. Start at the wheel furthest from the master cylinder and work closer. I kept flushing until the old fluid was out and new fluid started to flow.
With all that being done - the TJ's brakes still suck. But atleast now they safely suck. They still will not lock up the grippy 33's, but atleast it feels like it'll actually stop. The rear brakes noticeably work. The pedal feels firmer and the brakes overall feel more even. Having a parking brake that actually works is nice too. It'll hold the Jeep in place when parked and slow it down pretty good when moving. Overall, I'm happy. It was much needed regular maintenace and also makes the Jeep much safer to drive.
Then it was time to go back to the BMW. I was having a hard time getting one of the A/C lines off the compressor, so I disconnected the line further up on the car. There was nothing at all in the lines. I'll probably replace whatever seals I can get to and see if it'll hold a charge when the car is back together.
 ~Rick | 1990 325iC ~Noelle - Her build/cleanup thread http://r3vlimited.com/board/showthread.php?t=179507
Comment
-
So first up was removing that line, and the spark plug wires..... the original reason why the intake manifold came off, which gave me the idea to remove the transmission, and finally the engine...
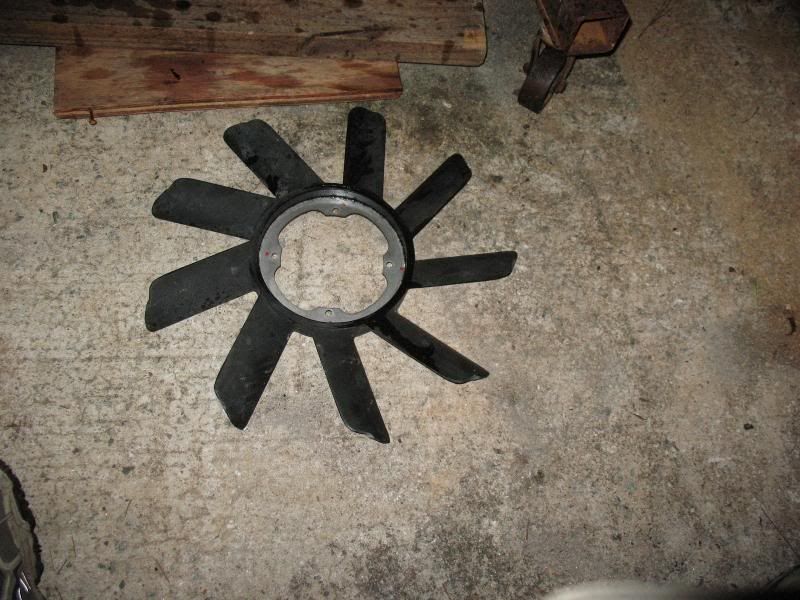
The edges of the fan blades are chewed up from contacting the [COLOR=blue! important][COLOR=blue! important]radiator[/COLOR][/COLOR], they are cheap enough though and a new fan and fan clutch will be added to future parts orders.
Then the distrubutor cap and rotor came off, they are brand new as I replaced them last year (when the car was on jackstands)
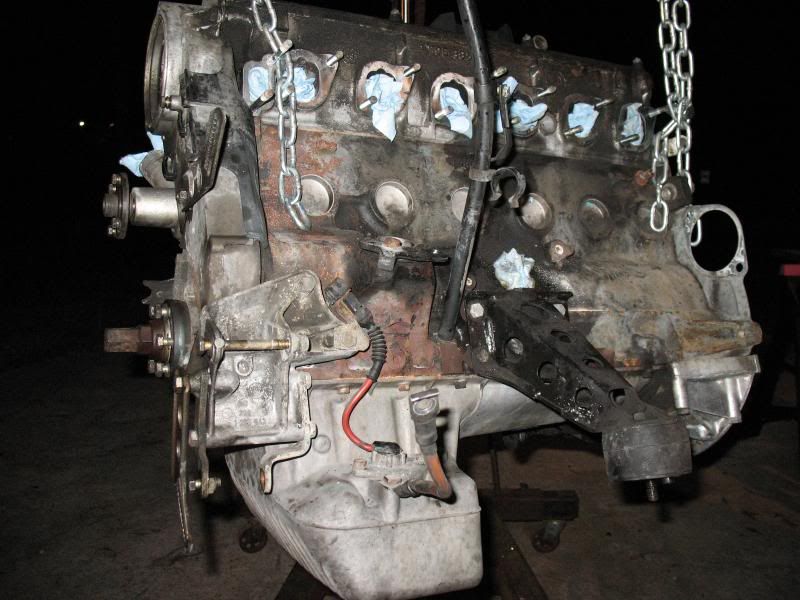
The wiring harness was getting in the way, so it was to be removed. BMW seems to be on a roll with pointless wire routing though as there was this single wire to a sensor routed not just behind the A/C compressor, but behind the bracket that holds the compressor to the engine.
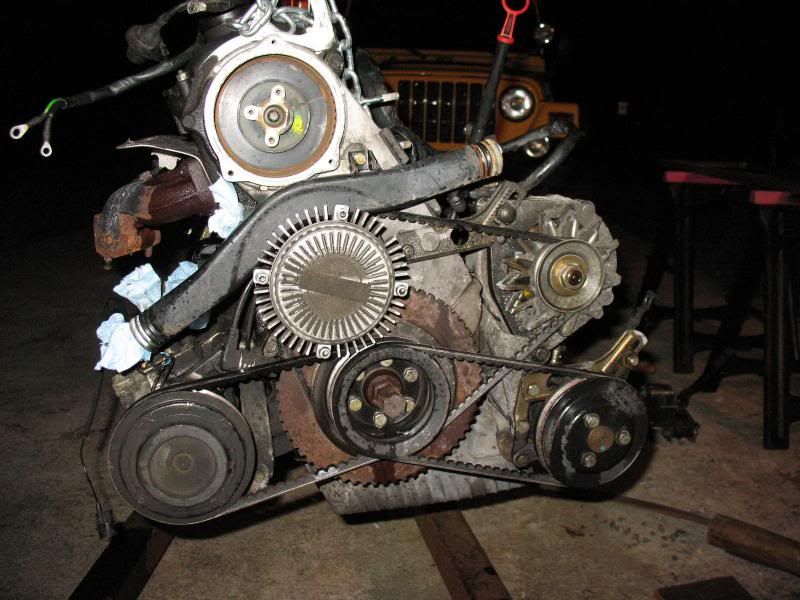
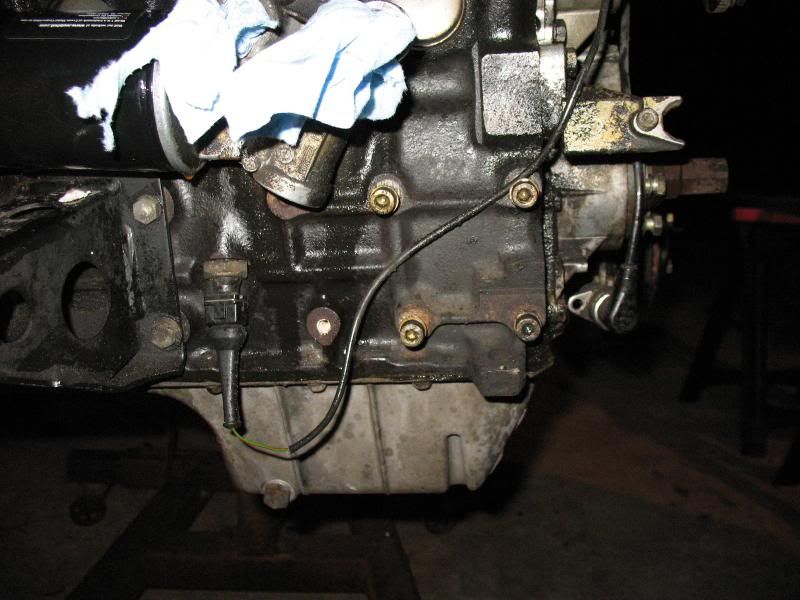
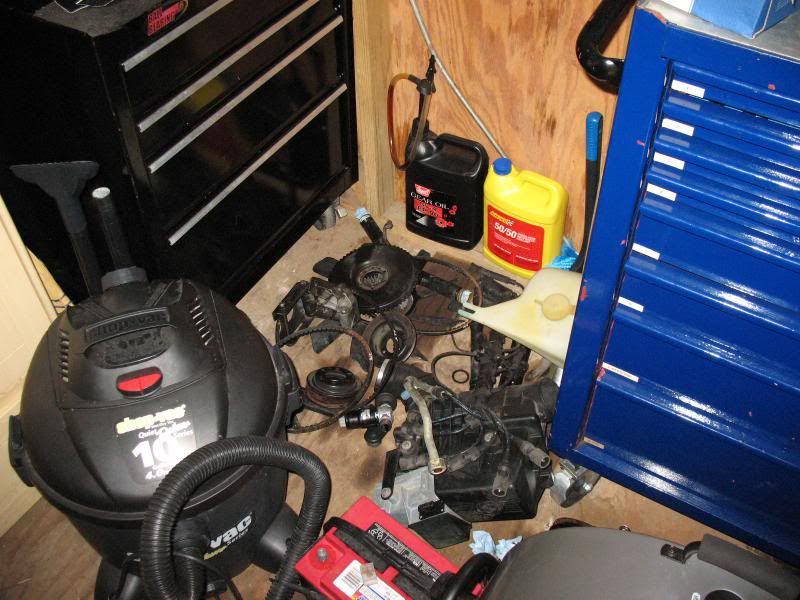
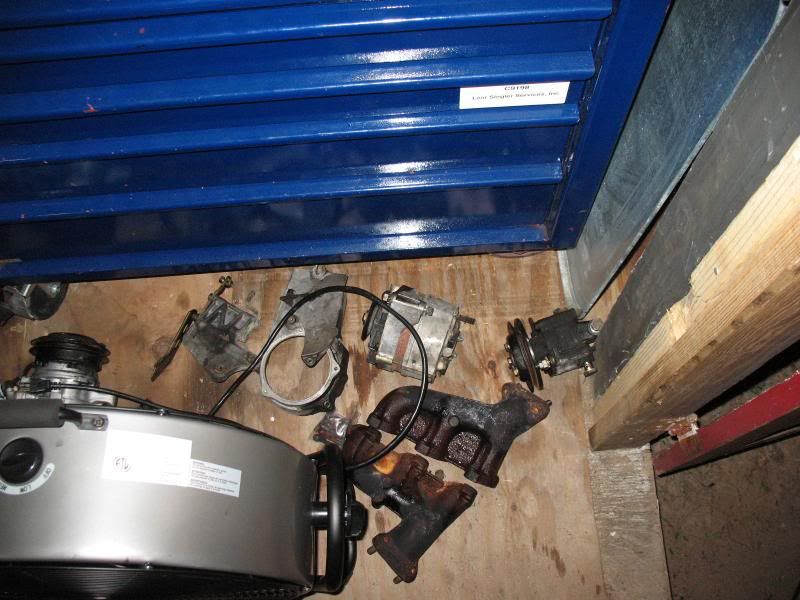
I also wanted to pull all the accessories from the engine and start stripping it down. Pretty much everything was getting removed for cleaning/painting/replacing except the head from the block, thats where I was stopping.
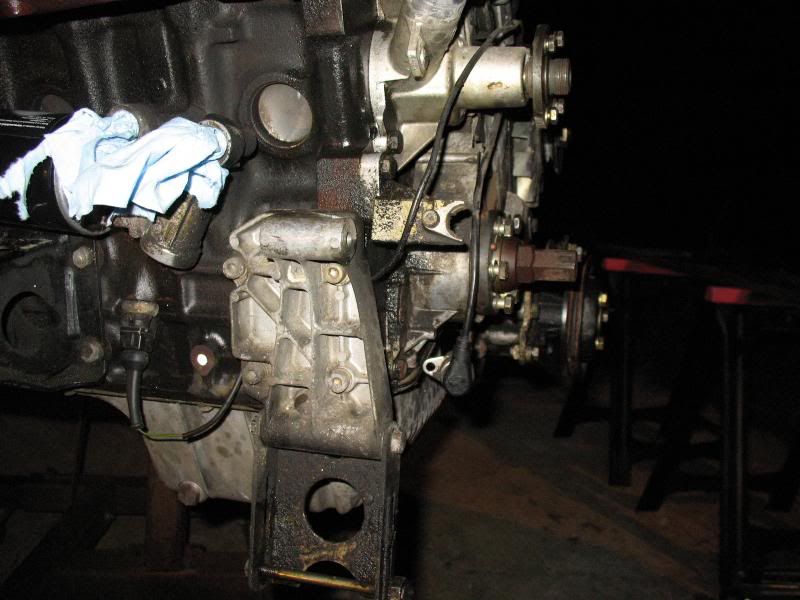
Then that bracket came off
FREEDOM!

Then these came off
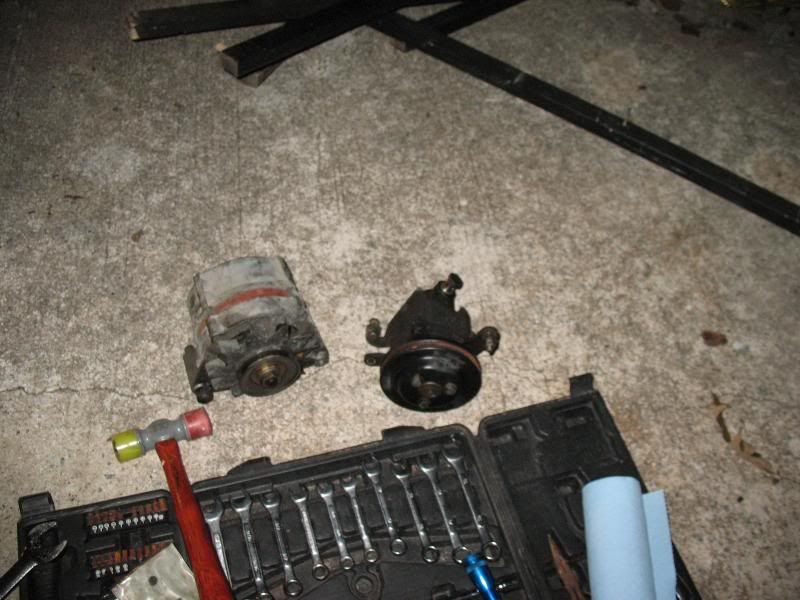
and their brackets
 ~Rick | 1990 325iC ~Noelle - Her build/cleanup thread http://r3vlimited.com/board/showthread.php?t=179507
Comment
-
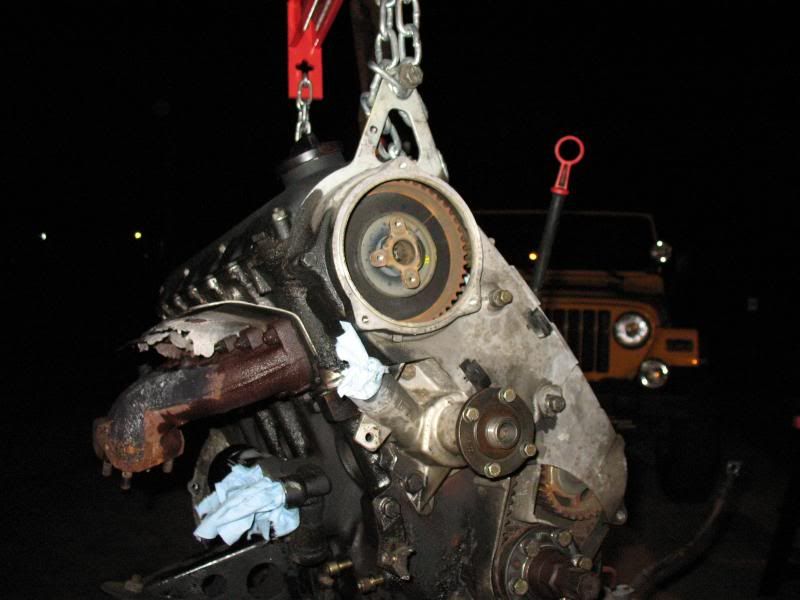
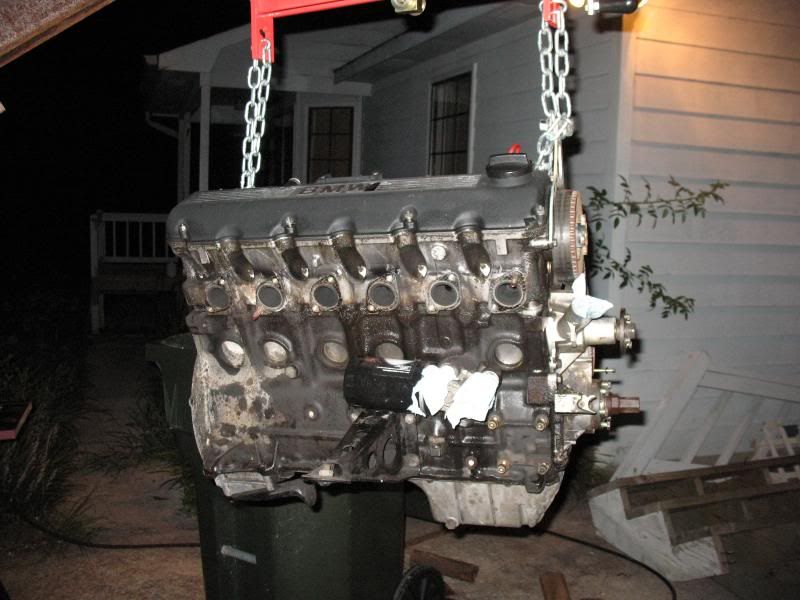
I had an engine stand, then gave it away as I no longer used it. I was going to buy another one, but then realized I just stripped the whole engine pretty easily, and I can do all the work I want to do on the engine with it on the hoist so I am no longer going to buy an engine stand.
But, I wanted to remove the timing belt covers and the upper screws are also used to holt the engine hoist bracket
So I had to do sum redneck engineerrrin
I then put the bracket back on so I would be able to use the hoist point again.
Timing belt was changed once before, the new belt has a BMW logo on it, so it was either changed at the dealer or someone used OEM parts, thats good.
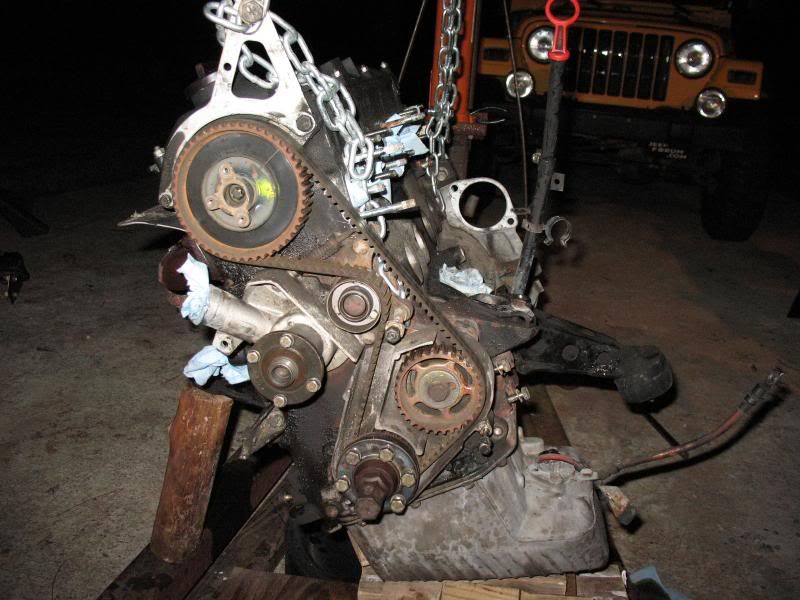
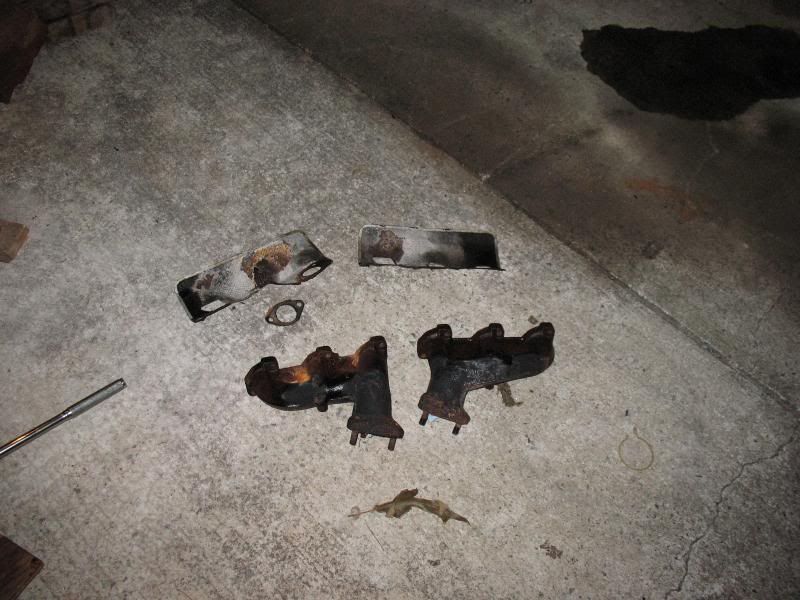
Then these came off. All but two studs pulled out instead of the nuts, I was planning on replacing the studs anyway. Unlike the M42 in the '91 318iC I had, the M20 does not have cool factory headers. I was thinking about getting some nice headers, moreso for looks. All my research led to the conclusion that the cheap headers are not worth it and enable to get any benefits I would need to spend $1,000 on a proper set of headers, then modify parts of the exhaust system to work with it. Even then, on an otherwise stock engine the stock exhaust manifolds flow well, so they are staying as they do their job well and reliably. They will be getting cleaned up and painted along with new exhaust gaskets/heat sheilds.
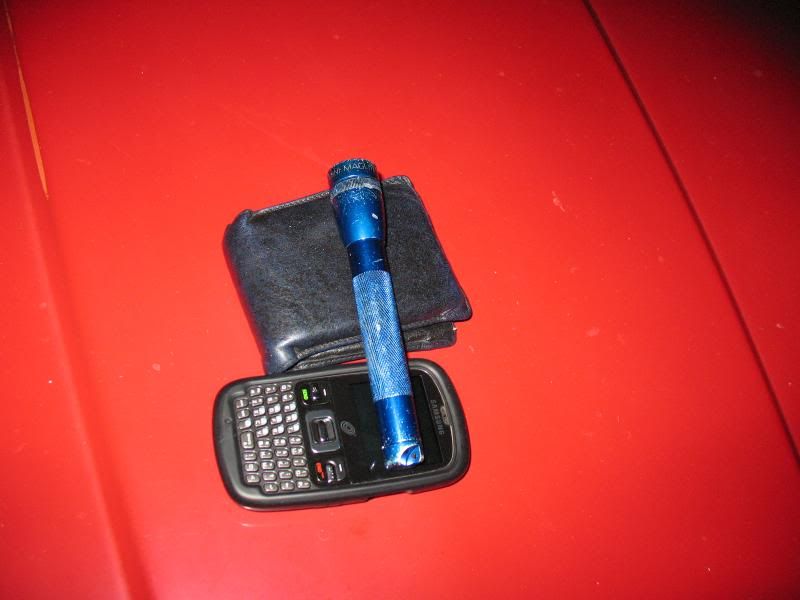
I will add that this mini maglite that has been converted from bulb to LED makes working at night much more possible.
I also gave up the BlackBerry and t-mobile. I miss the BlackBerry - a lot. But I was paying $90 for unlimited minutes/txt/(real) internet. I've been looking for ways to cut overall monthly expenses and the phone bill was a major one. I now have Straight Talk through Walmart (ehhh) which is only $45/month for unlimited minutes/txt/(basic)internet/unlimited calls to 411. It took a few months to finally make the switch, as I didn't want to give up the BlackBerry but cutting my phone bill in half - and saving $45/month made me do the switch.
I will say I am happy with Straight Talk. It is Verizon network (which sometimes drops calls in my house, something T-mobile didn't do) and no contract/no frills. $45/month period and unlimited use on the phone. The phone is rather basic, and coming from a smart phone it took alot of getting used to a "dumb" phone once again. The biggest let down is the internet. Nowhere near as capable and nice as internet on the BlackBerry. It's half the price though, so gotta give some things up.
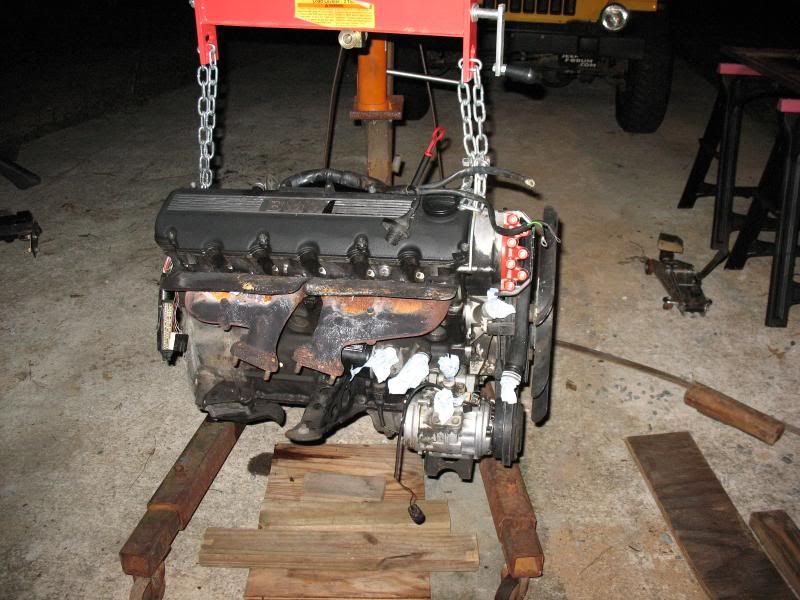
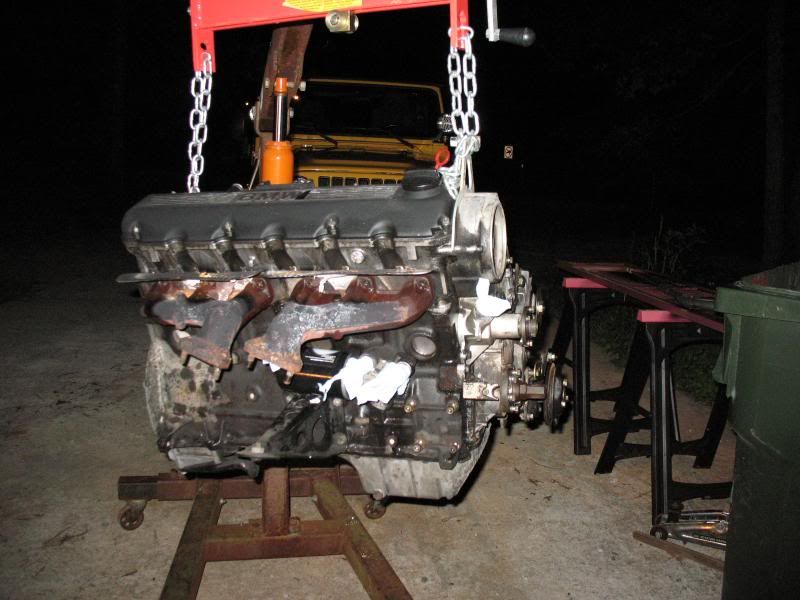
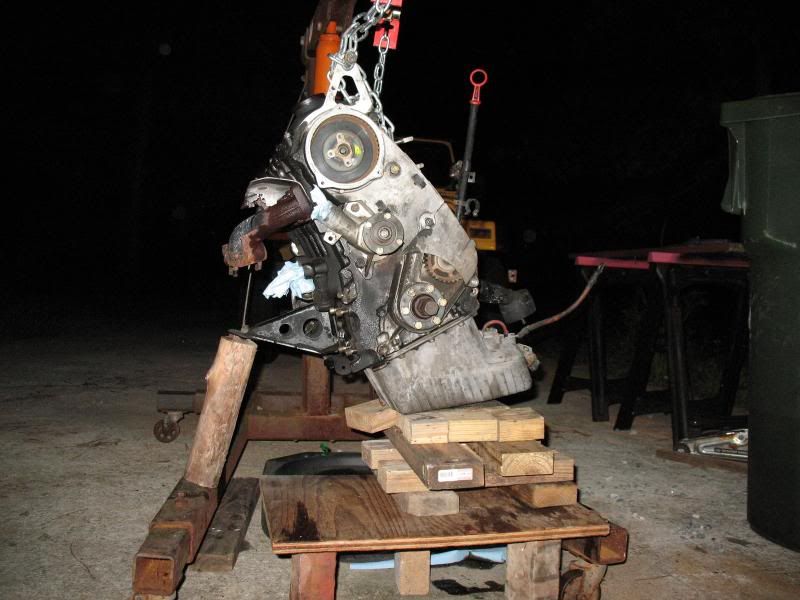
So here is the engine when I was done. The valve cover and oil pan will be coming off, but other then that, the engine is not getting taken apart much more. I'm excited to get it all cleaned up and painted nice.

As more and more parts come off, they are being stored. My small ugly shed-turned-workshop is starting to run out of room to store stuff....


The engine will be staying outside as there is nowhere else to put it. I used a spare tarp (well it was covering the Snapper and Cub Cadet) to cover the engine and borrowed hoist as we have been getting rain.
I ordered more parts, delrin shift carrier bushings to replace the new rubber bushing I put in. Also a set of 6 stainless steel braided brake lines which are on backorder.
Then later today another package arrives of about $175 worth of parts. Basically with these parts (and the backordered brake lines) I will be able to get the entire rear subframe back together, and back on the car - which is big because that is the first major sign of the car actually getting put together instead of taken apart. Also that rear subframe was a rather big step that first put me on hold for a few months, so it'll be a nice little victory to get it in and done.~Rick | 1990 325iC ~Noelle - Her build/cleanup thread http://r3vlimited.com/board/showthread.php?t=179507Comment
-
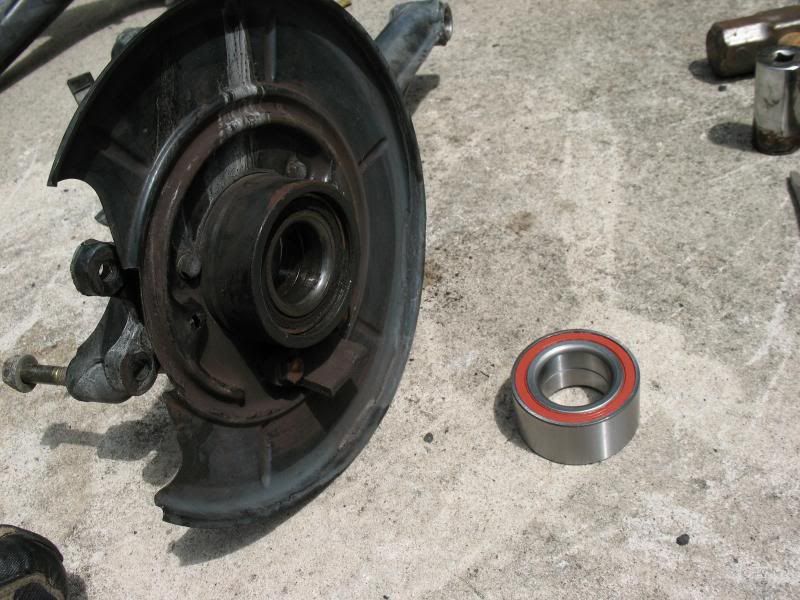
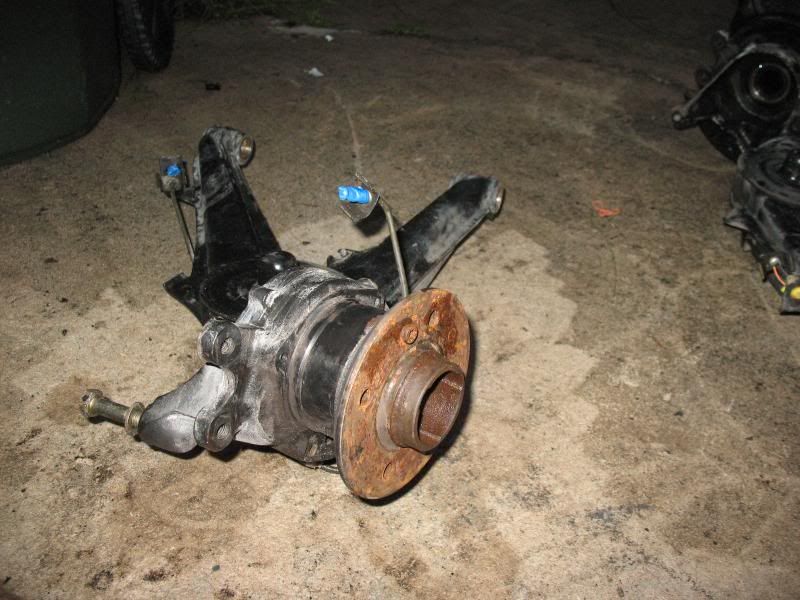
Sunday Augest 29th:
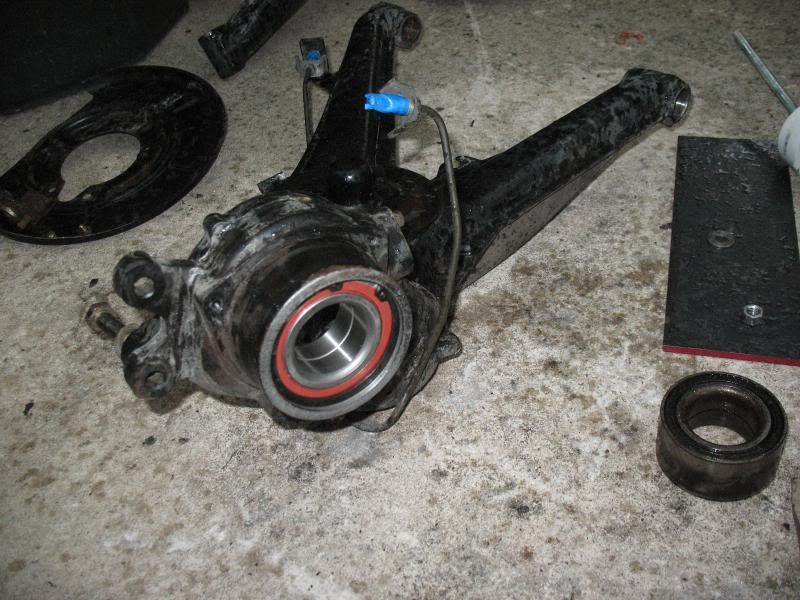
I got a later start then I wanted to. The plan was first to replace the rear wheel bearings then see how much time is left. This is said to be one of the more difficult e30 jobs that most reccomend taking to a shop. A shop would charge $400-$500 to do this job (from the start, on the car). The first one took me hours, as I was basically trying to figure out how to do it and then made a trip to Lowes.
This message is cat-approved

The following Thursday this package arrived. UPS was nice enough to crudely tape up the box they managed to rip in half. Nothing was missing.
~$135 worth of goodies. Two new parking brake cables, two new rear wheel bearings, front brake caliper rebuild kit, rear brake caliper rebuild kit and a new diff output seal to replace the one I messed up. I bought snap rings for the rear wheel bearings and new nuts for the axles, not realizing the wheel bearing kit already came with both, oh well.

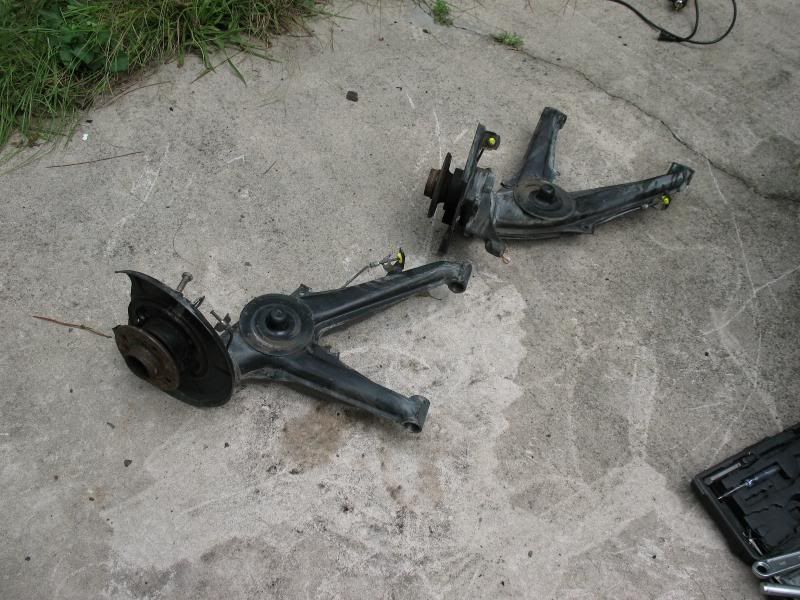
So I pulled out the trailing arms from the shed
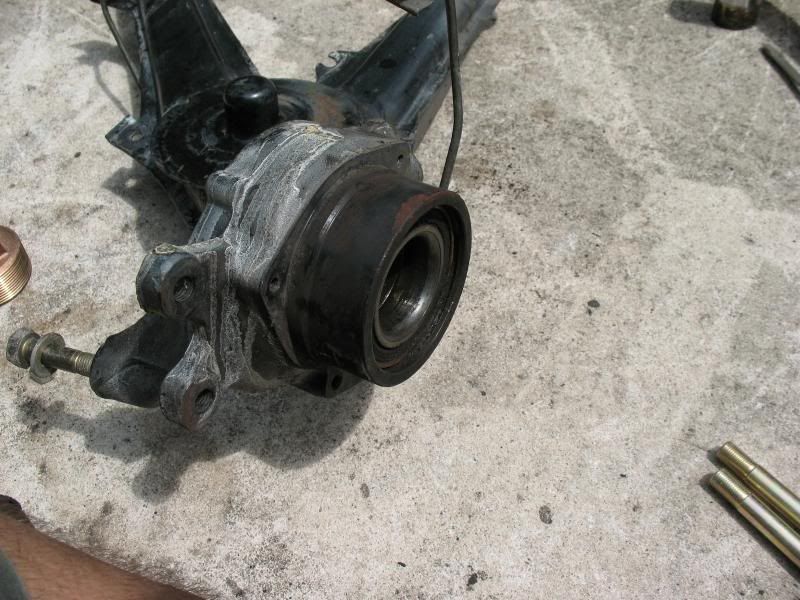
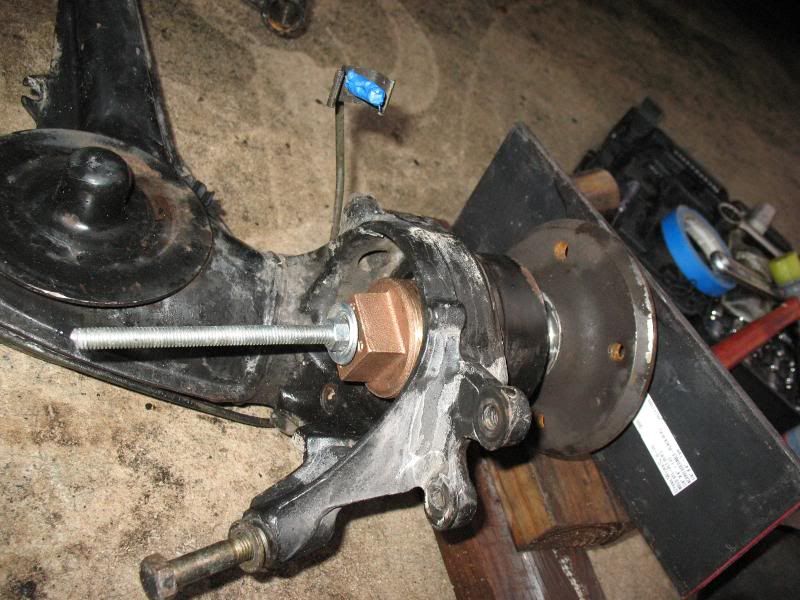
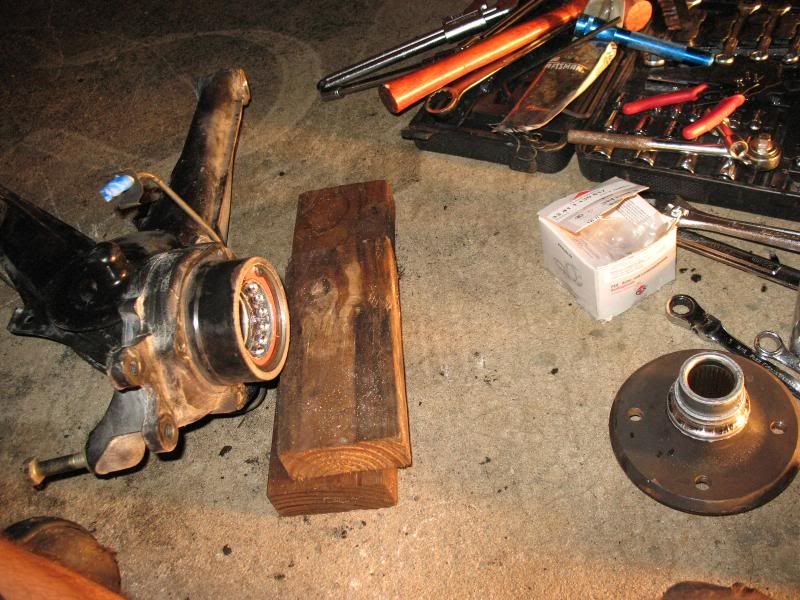
The first step was to remove the rear wheel hub from the wheel bearing. Some of your favorite penetrating oil helps
I then attemped to make a puller to remove the wheel hub, it was a crude design of various things laying around. All that did was twist up some various pieces of metal I was using.
Big hammers make things fun.
The socket fit over the hub, but not the bearing - when I went to town. I lucked out and neither of the inner races stuck to the hubs upon removeal, maybe do to the penetrating oil used.
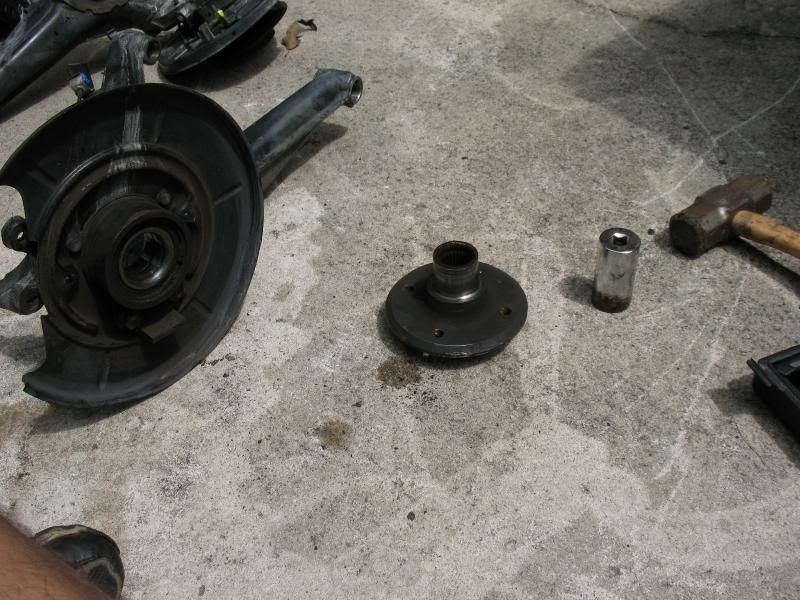
new bearing
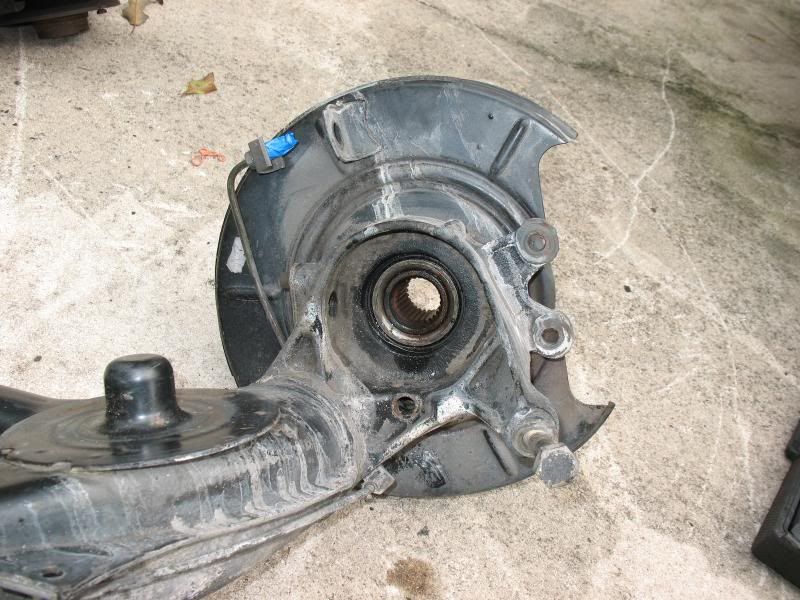
removed the disc backing plate, also the large snap ring that keeps the bearing in place.
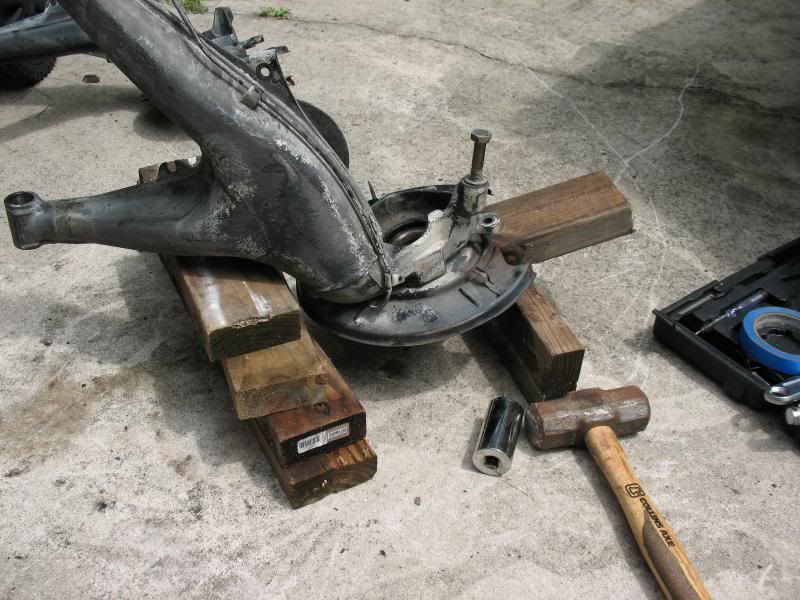
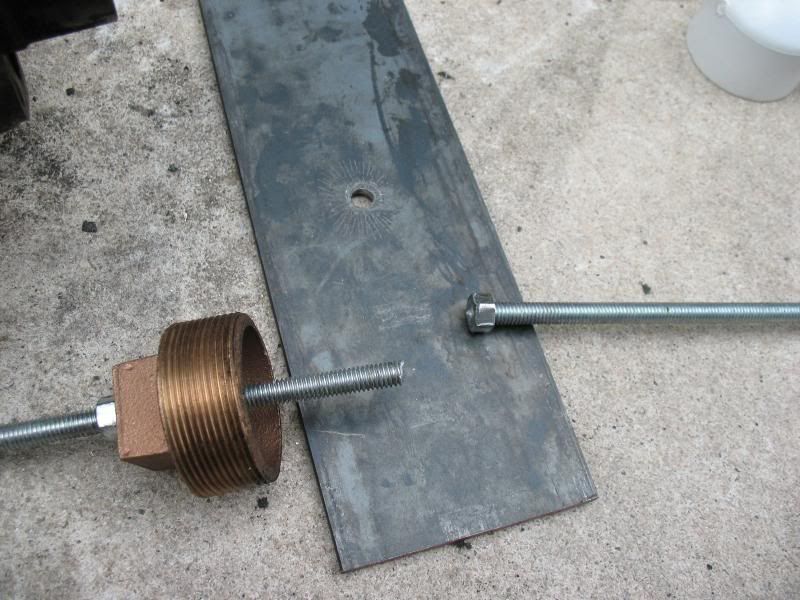
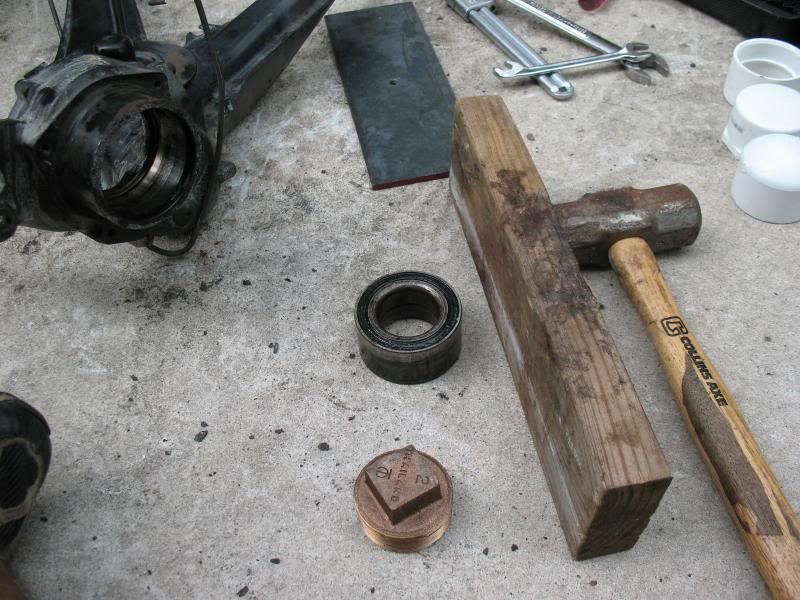
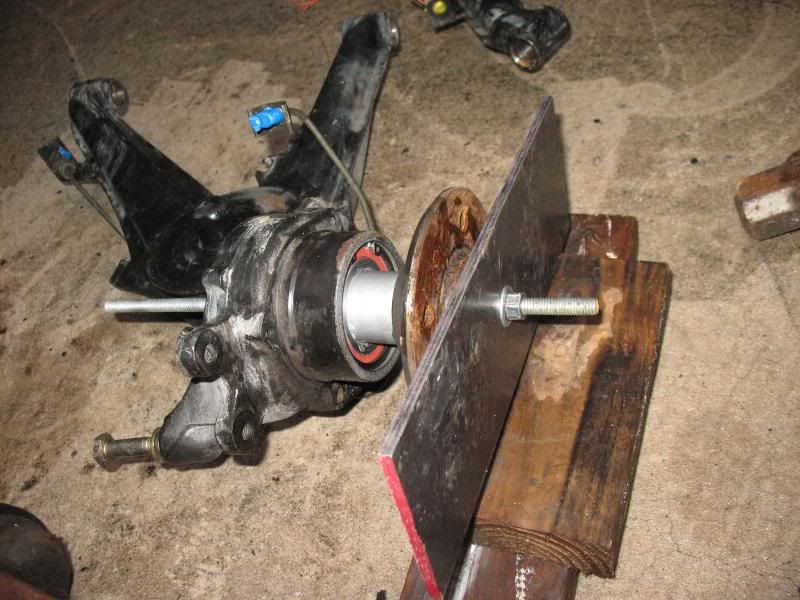
Then I went to lowes. I wanted to get a 2" galvinized pipe cap and was informed Lowes dosen't carry anything that large. I then looked around for other things I could use. I saw a bunch of PVC stuff so I figured I'd see how strong it is. I then went to the isle of raw steel and found a welding plate of sutible size and thickness for what I needed. This + a bottle of Gatorade came to about $21, I got $7 back from returning the stuff I didn't use.
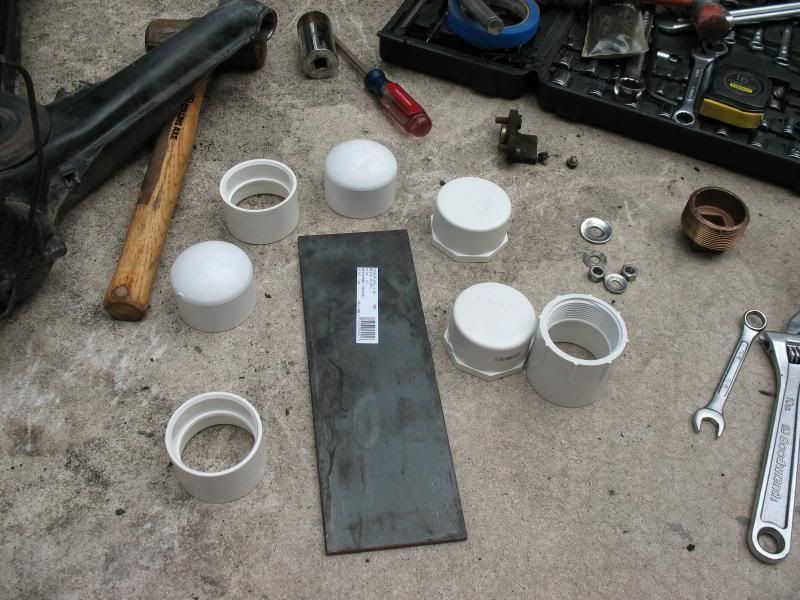
I had this pipe cap which fit inside the hole on the inside of the trailing arm and pressed against the inner race. The idea was to press out the old bearing.

The bearing didn't press out. I found the strength limits of 3/8" all-thread. Even the steel plate was showing signs of stress.
This 4lbs sledge has really came in handy working on this car quite a bit. I used that pipe cap which fit against the inner race then had some fun untill it came out.
I froze the new bearings in hopes they they may microscopically shrink
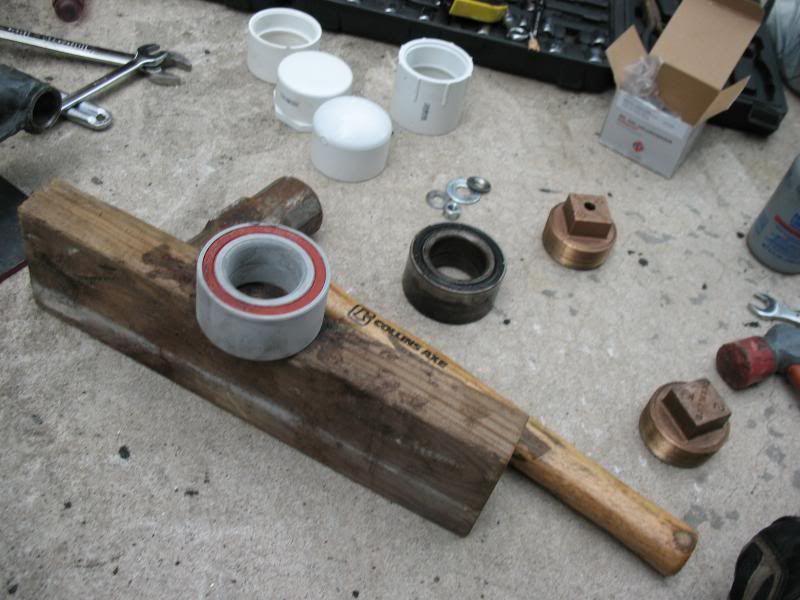
I then used one of the PVC caps, which fit on the outside of the inner trailing arm hole. I drilled a hole in the center of the steel plate. The wide plate actually came in handy as I was able to tighten it up, then hit each side of the plate witht he hammer, which got the bearing to slide in. I used the old bearing to ensure the new bearing was seated all the way. The inside of the trailing arm and outside of the new bearing were coated with anti-seize.
 ~Rick | 1990 325iC ~Noelle - Her build/cleanup thread http://r3vlimited.com/board/showthread.php?t=179507
Comment
-
I used a 1-1/4" socket which fit perfectly inside the wheel bearings. It was positioned between the new and old bearing to keep them inline.
Once the new bearing was lined up properly, it pressed in rather smoothly. A few times it was tightening up and not wanting to snap what was left of my 3/8" all-thread rod, I hit each side of the steel plate with the hammer a few times and it went in, then I went back to tightening it.
Then put the new snap ring in.
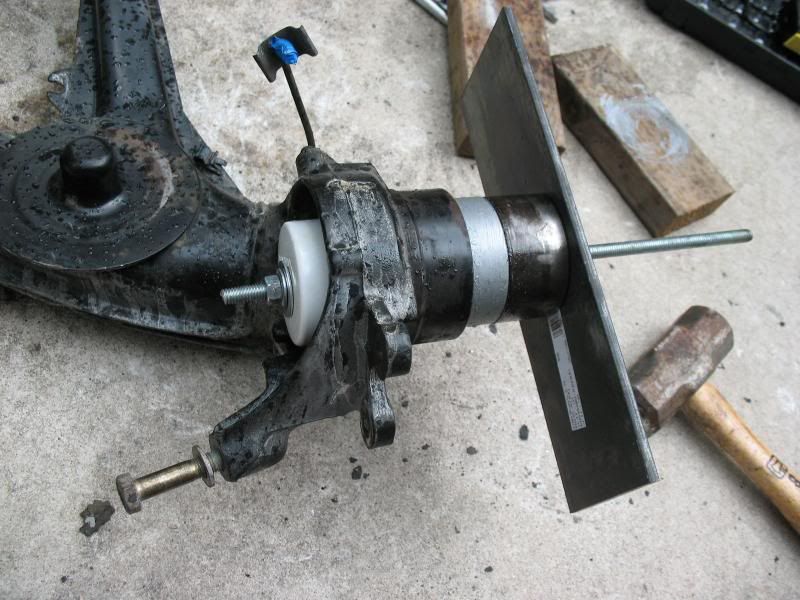
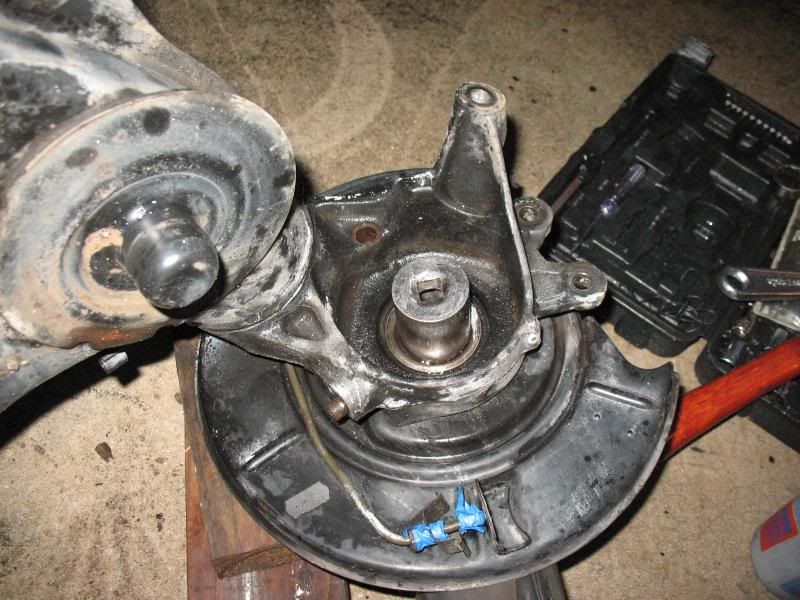
Then it was time to press on the hub. I applied anti-seize to the inside of the wheel bearing and shaft of the hub. The pipe cap that fit against the inner race was used as it prevents the inner race from falling out. Then the steel plate was used against the hub.
Hub in the wheel bearing
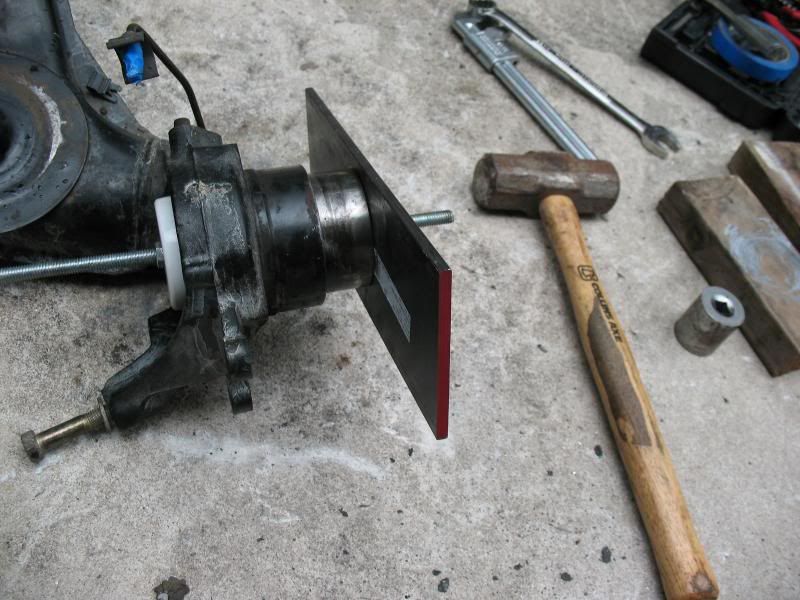
It was around that time that I realized I forgot to put the backing plate for the disc on. I first thought about leaving them off, but the parking brake cable uses it for support. Then I thought about cutting it and being able to put it on without removing the hub again. Finally I just decided to remove the hub. While hammering out the hub, it took half the inner race with it.
Then when I put it back and and attempted to seat it with the hammer, the other half of the inner race came out. I put the inner race back on and left the one on the hub, then pressed it all back together, shouldn't be a problem.
Then I moved to the other trailing arm. I first used a 30mm deepwell socket, but the 1-1/4" was a much better fit. It goes right against the hub, but not the inner race of the bearing and allows the hub to be hammered out.
I must say, I am very impressed with the strength of the PVC cap in this application. I was not expecting it to hold up - PVC FTW.
Trailing arms with new bearings in place. I was going to paint all the parts seperately, but then I just wanted to get it done. I will clean and paint these as a unit at some point
Here is a video comparing the new and old bearings. This is the bearing that was making a lot of noise, the other one was nearly quiet, either way if I was changing one, they were both getting repalced. Nice to know I won't have to worry about these things again.
I spent the better part of the day replacing those wheel bearings. Most of the time was spent figuring out how to remove/install the hubs and bearings, and making a trip to Lowes for supplies. Still, I wanted to get more done then -just- the wheel bearings.
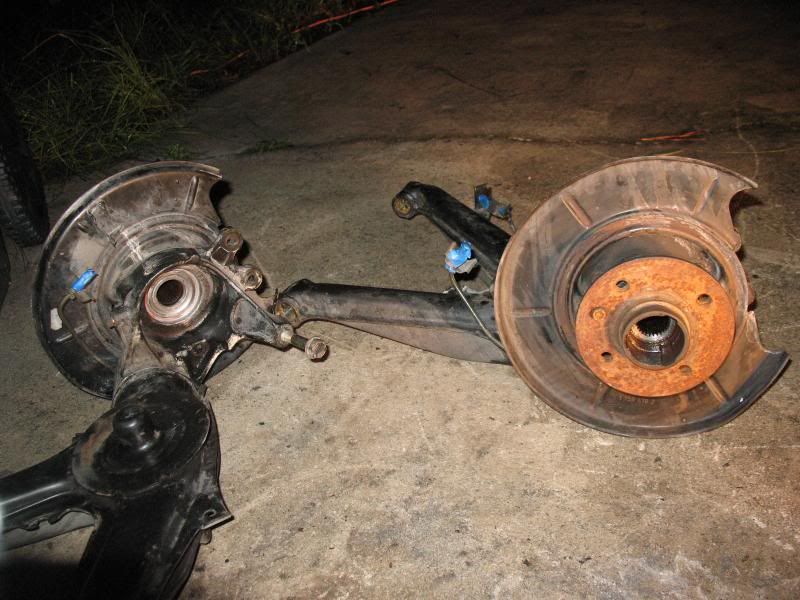
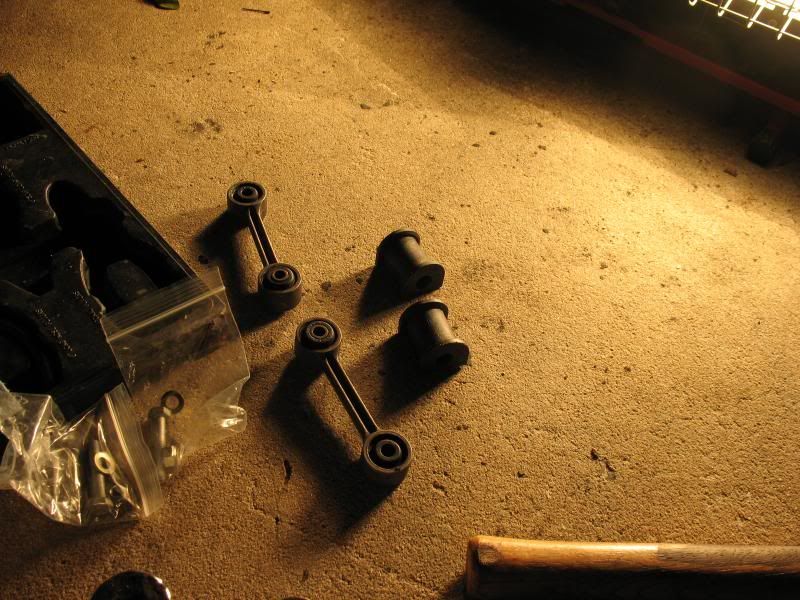
I ordered these things last year. new bushings for the rear sway bar as well as rear sway bar links. I later found out that unless the swaybar to chassis bushings are missing, they don't need to be replaced, but I already bought them.
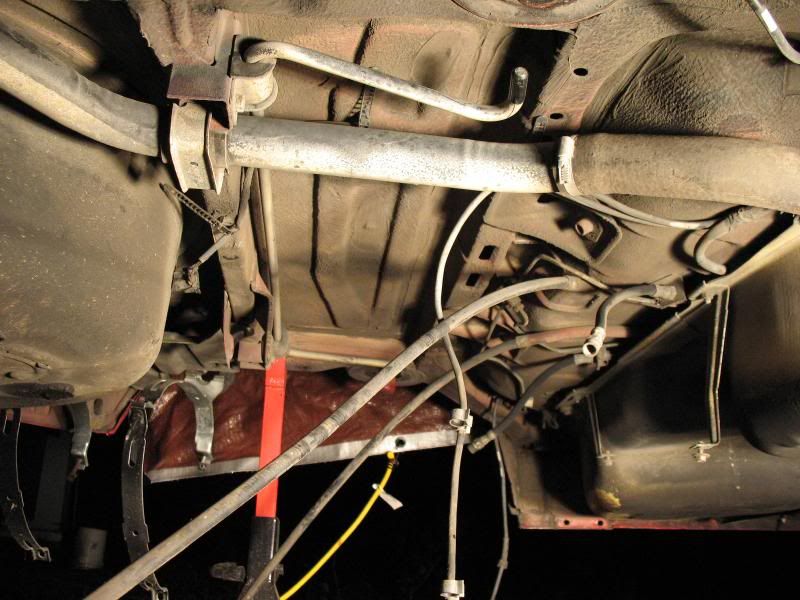
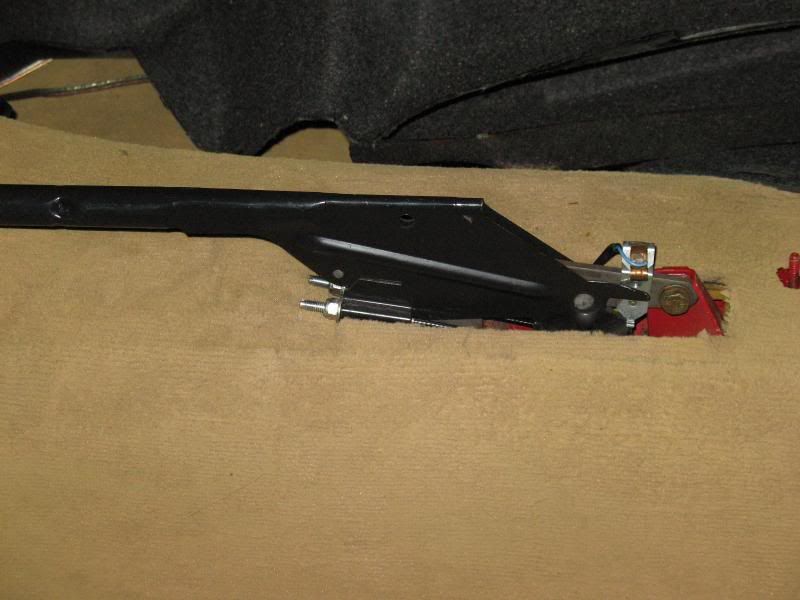
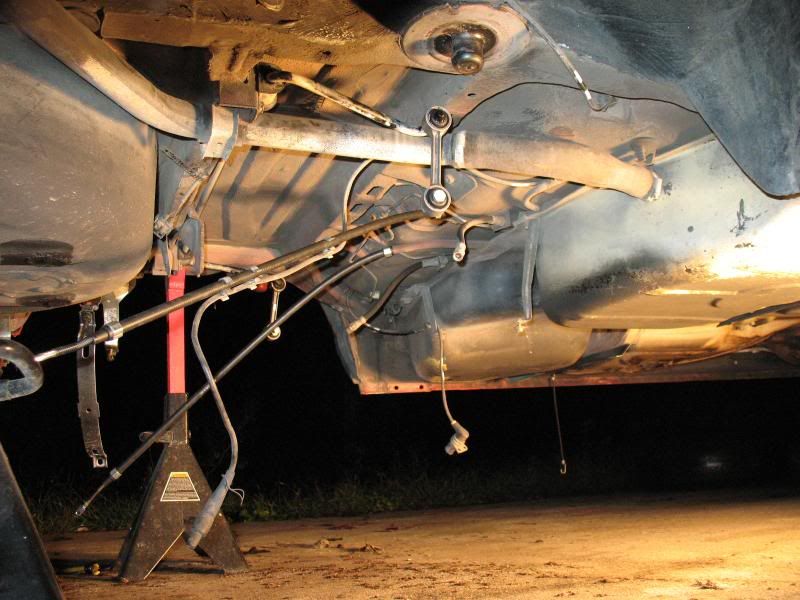
Here the old parking brake cable can be seen as well. It is a rather neat design as there are tubes that are part of the car the cable slides into. Each cable goes to the parking brake. Remove the nut at the parking brake handle and the cable just slides right out. The old inner rear rubber brake lines are still in place. Those are the ones difficult to get at when the rear subframe is installed. I ordered a set of stainless steel braided/coated lines from UUC but they are on back order.
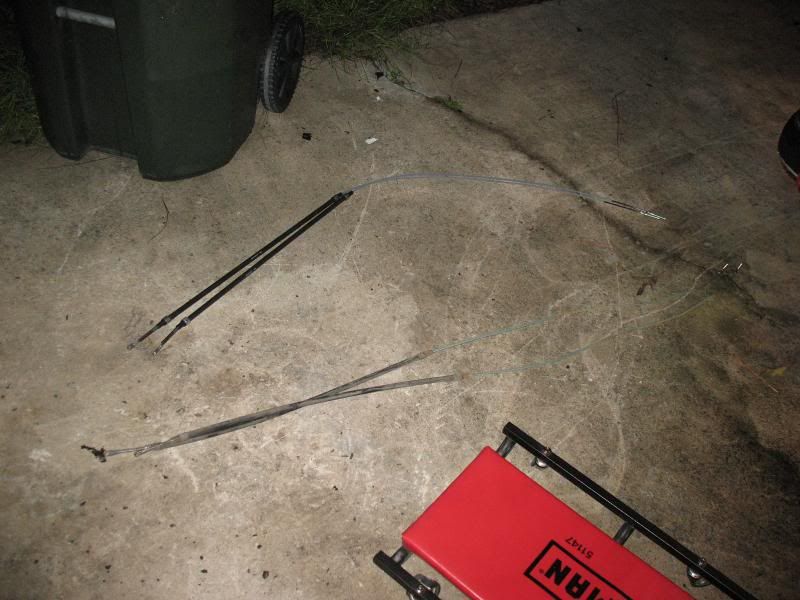
New vs old parking brake cables. The old ones were broke, but the parking brake didn't work before. I didn't want to start using the parking brake and have one brake, so they got repalced.
They come up through the floor and attach to the parking brake handle. Each cable (and thus left/right parking brake) can be adjusted seperately.
New sway bar bushings and links, and parking brake cables installed. Still waiting on new brake lines to arrive. Also when I was under the car I noticed the rubber hose going from the fuel filler to the tank. I didn't see that before and that will be getting added to the next order of parts.
Technically I can put all the components of the rear subframe together and install it now. I am going to wait until the brake lines arrive, as I also want to clean and paint the rest of the components up. Hopefully by the time that is all done, the brake lines will be here and the entire rear subframe can be installed as a unit. Other then shocks/springs, the rear subframe/driveline/suspension will be completed, which is a big step towards getting the car back on the road.~Rick | 1990 325iC ~Noelle - Her build/cleanup thread http://r3vlimited.com/board/showthread.php?t=179507Comment


Comment