
-
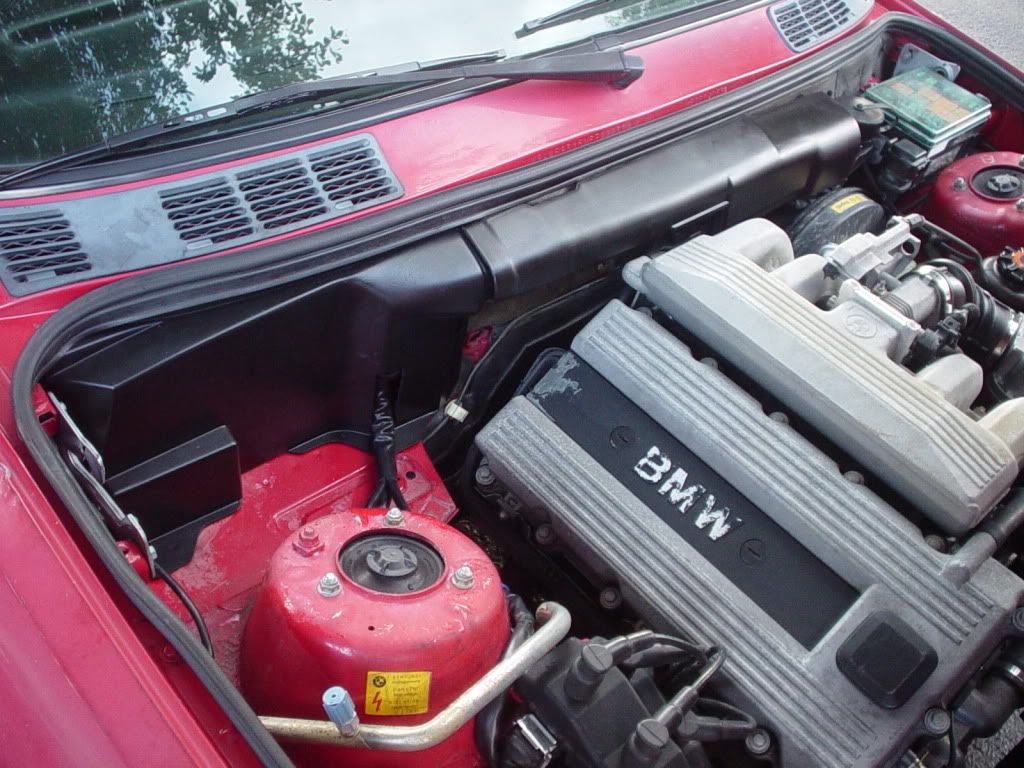
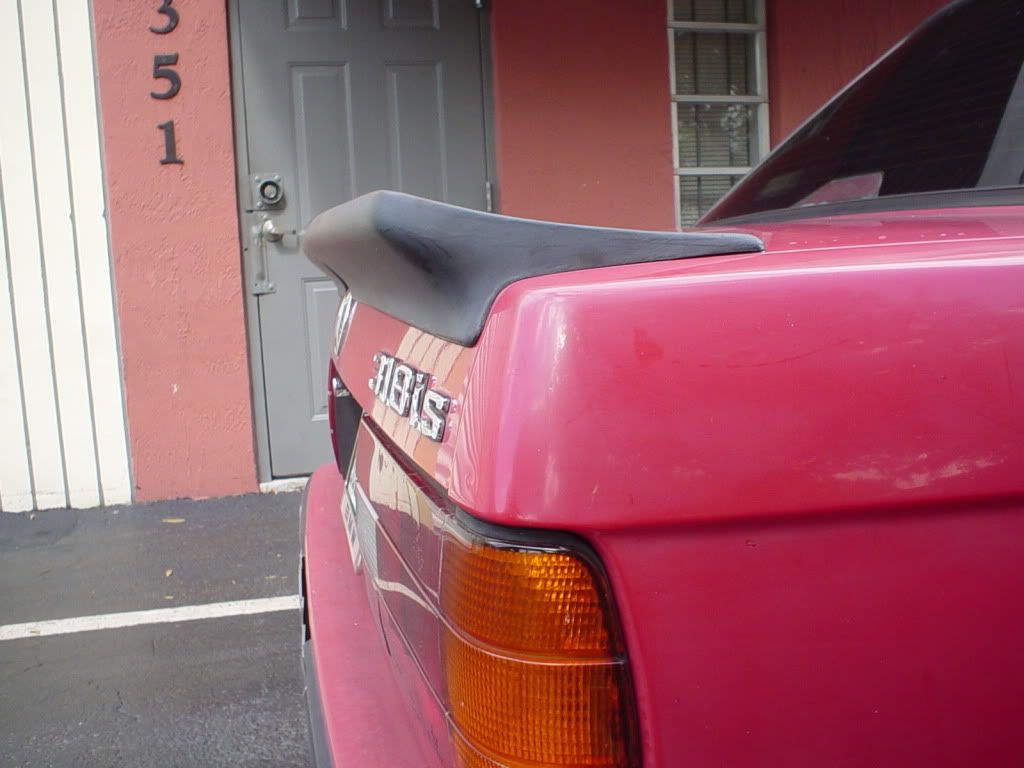
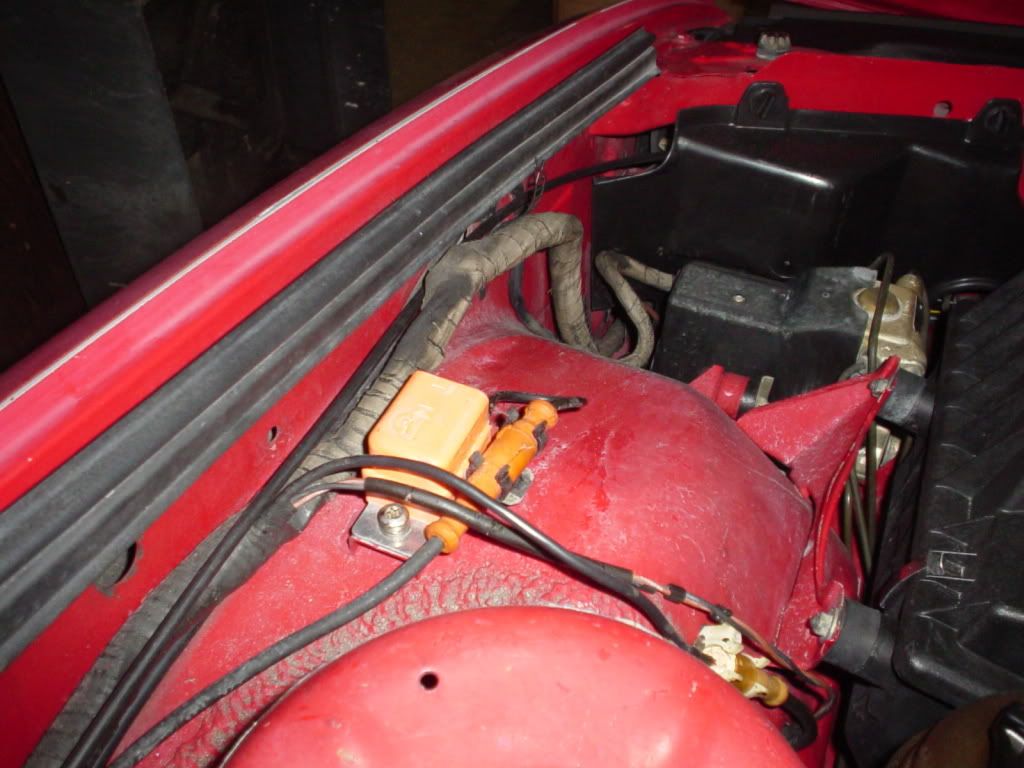
Got the new M3 cover plus the newly re-finished firewall cover installed. I had to cut a slit to allow the oxygen sensor, spark plug distribution wiring and a ground cable through the opening. Cleans up the engine bay nicely. Next will refinish the engine bay headlight covers while I wait for my OEM euro grills to arrive. Then will redo the grills plus black out the kidney grill.
-
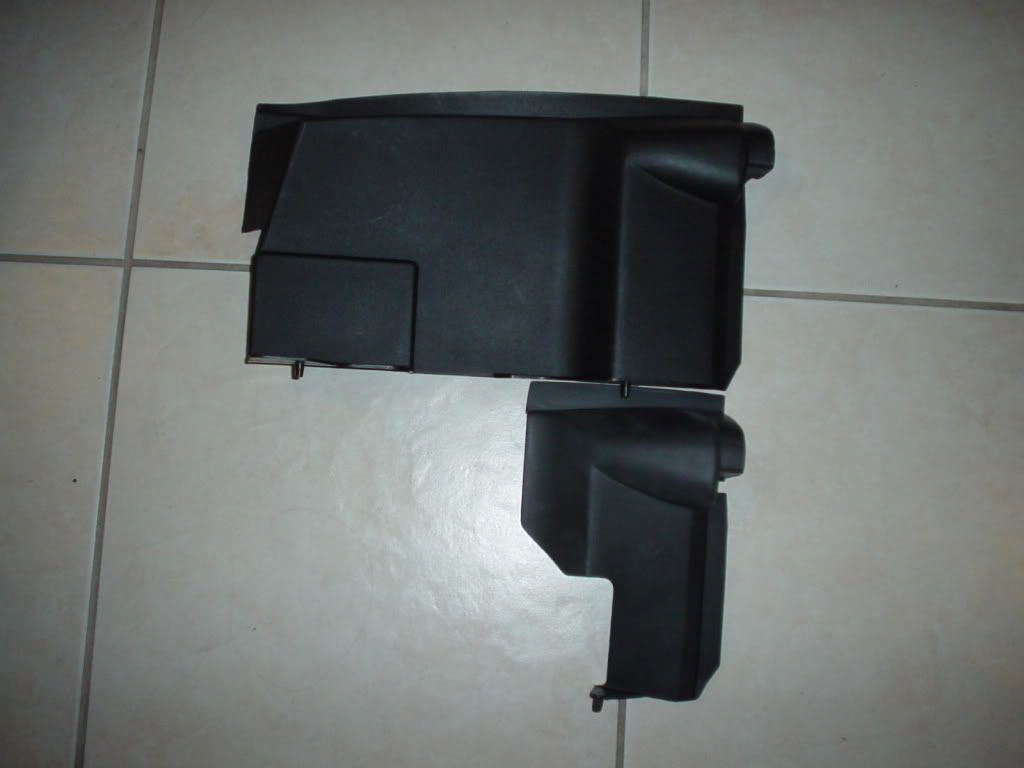
So on to my next addition / mini project. I wanted to start cleaning the moldings on the car, mostly engine plastic and light grills. So first wanted to start with the firewall cover. I purchased an e30 m3 cover and then compared it to the original, and noticed 2 things. First, I will need to cut a slit for the main harness cabling and 2, the orginal cover black paint is very faded. I bought some SEM trim paint and SEM soap for the prep work. I painted the original and it came out great. But it doesn't quit match the texure of the new pieces, so will do the new peice during the week after I cut the slit. On to the pictures.....
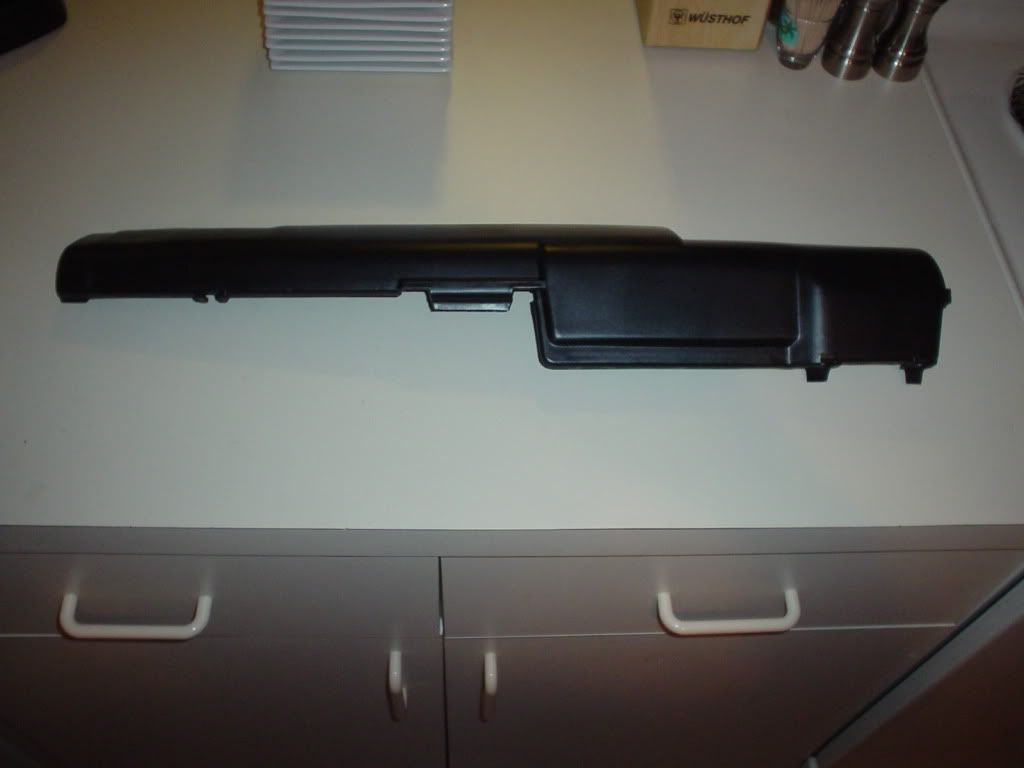
Here is the newly redone firewall piece, forgot to take before pic:
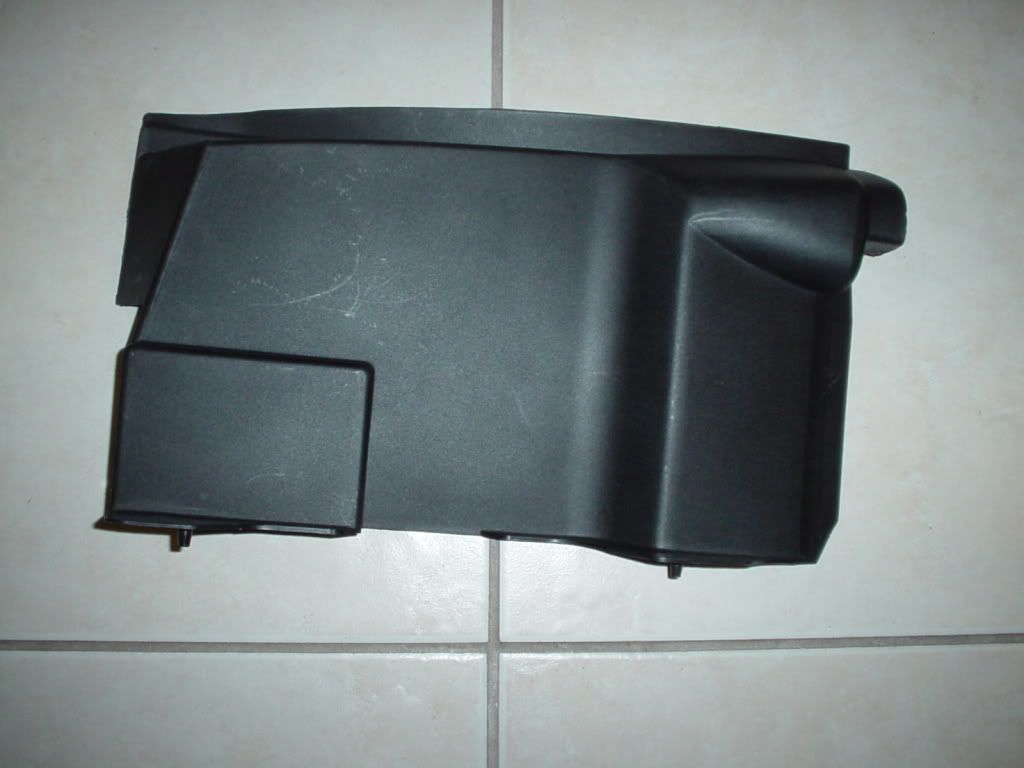
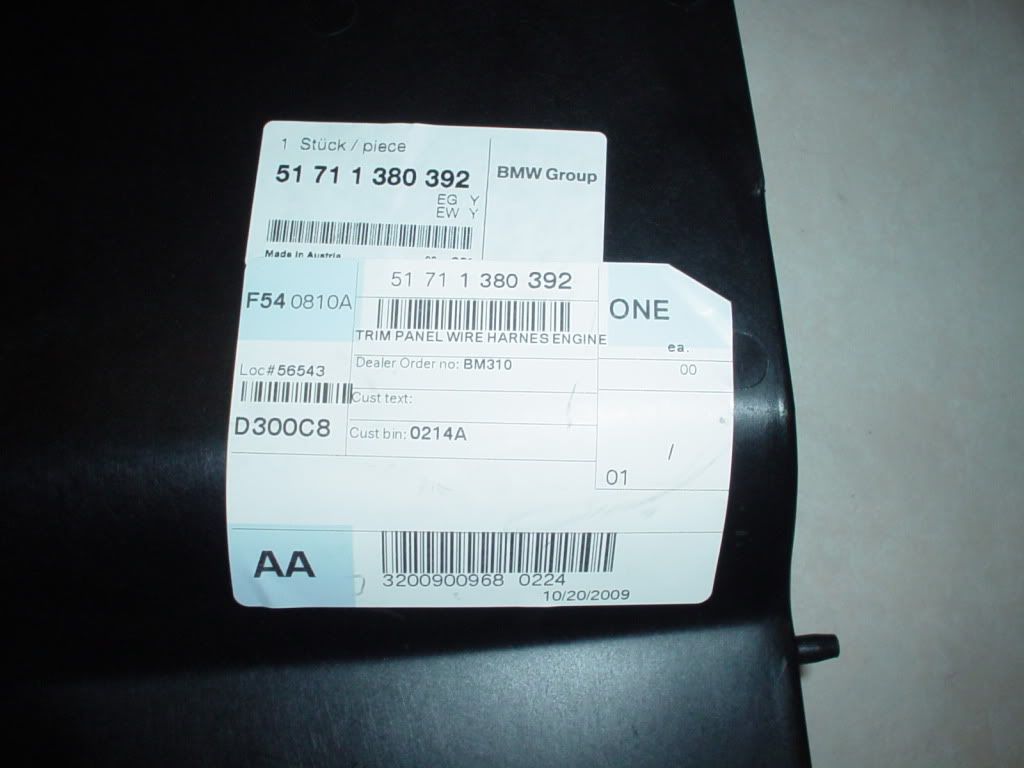
Here is the m3 cover piece and part number sticker:
Here are the old and new to show the difference and where the cut needs to be made.
I will take more pics of it fully installed in the engine bay later in the week. I need the paint to fully cure, 48 hrs, and do the same with the new piece.Leave a comment:
-
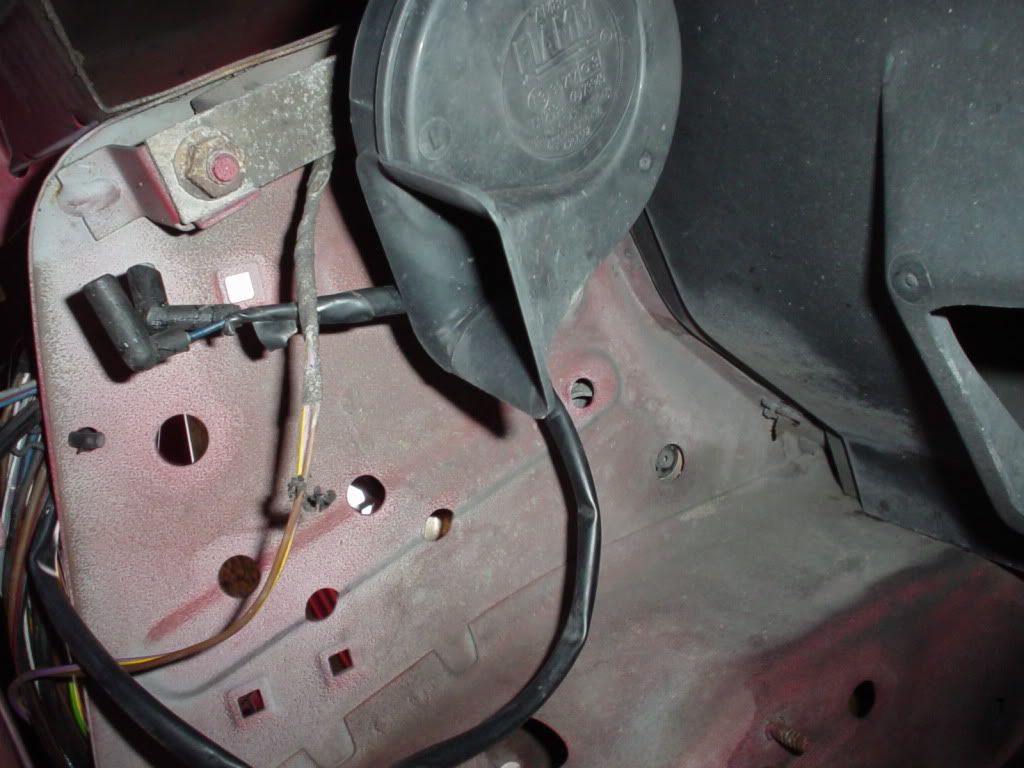
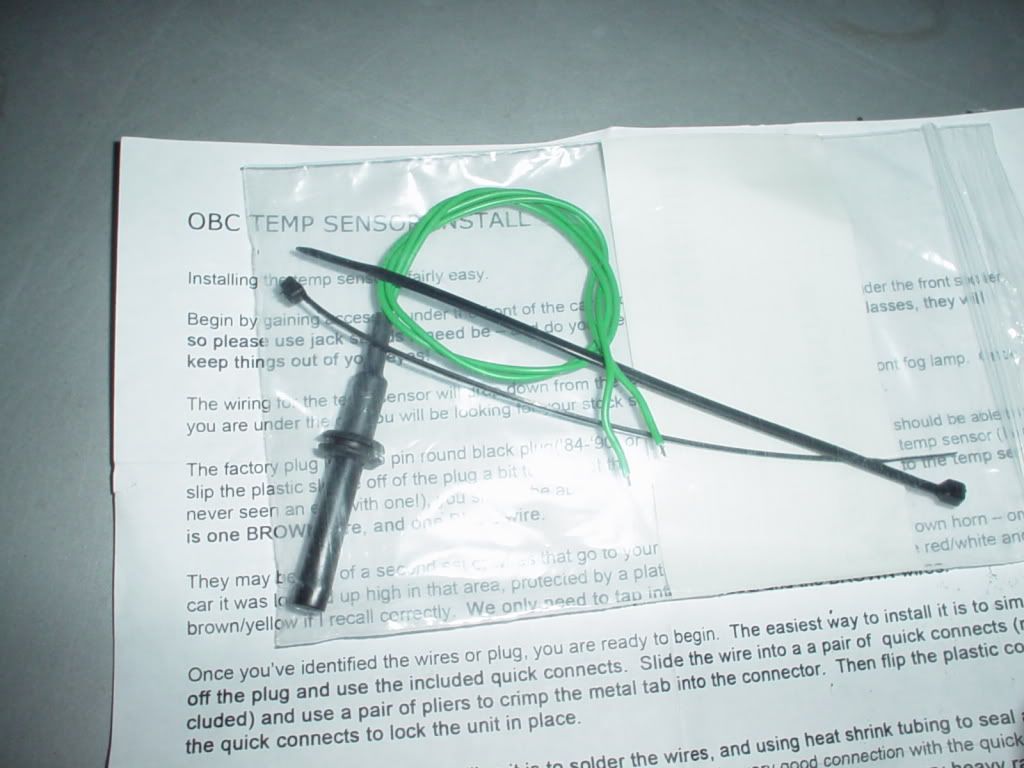
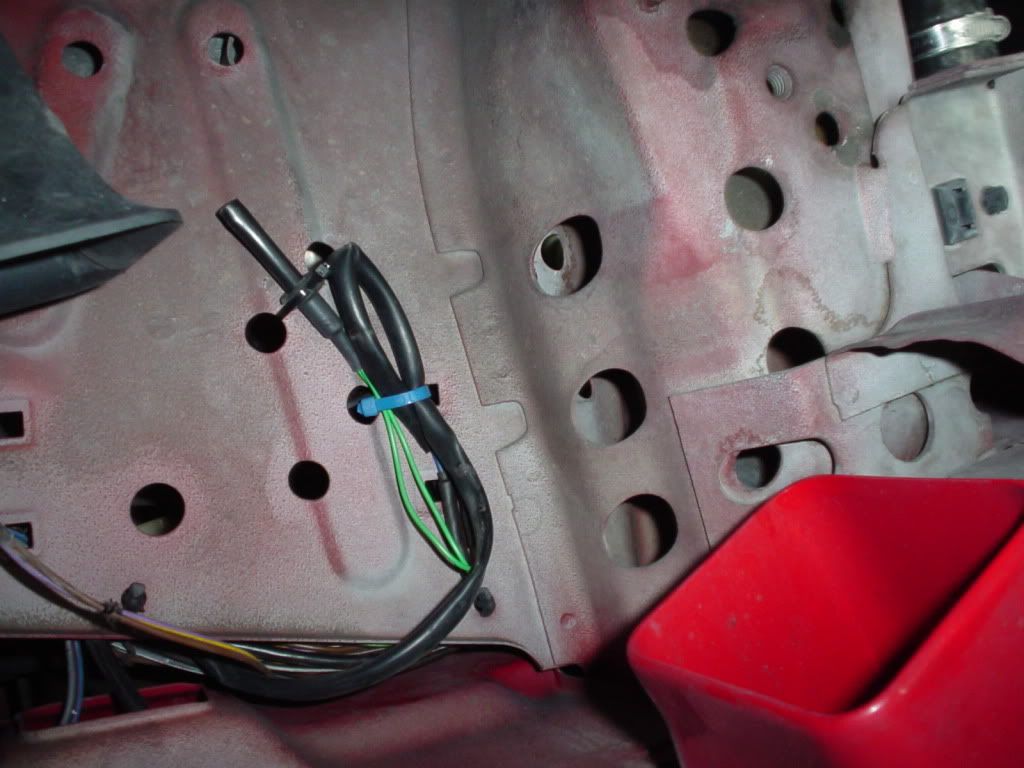
Just the other day I recieve one of those special made OBC temp sensor for the e30 designed by George Graves. He is on the e30 boards and sells them cheap with insturctions and all. Great craftmanship on the part. Since having my car, always had the -22F. Decided with the cold weather in Miami, I should see how cold it is outside.
Installed it today and it was a breeze. Hard part was finding the wires as they were coiled and tucked under the ABS pump. Also looks like they were cut and spliced in the past.
My car is missing the brake duct but I plan on getting it and then drilling a hole and installing the sensor with the grommet that came with it. Here are the pics:
Leave a comment:
-
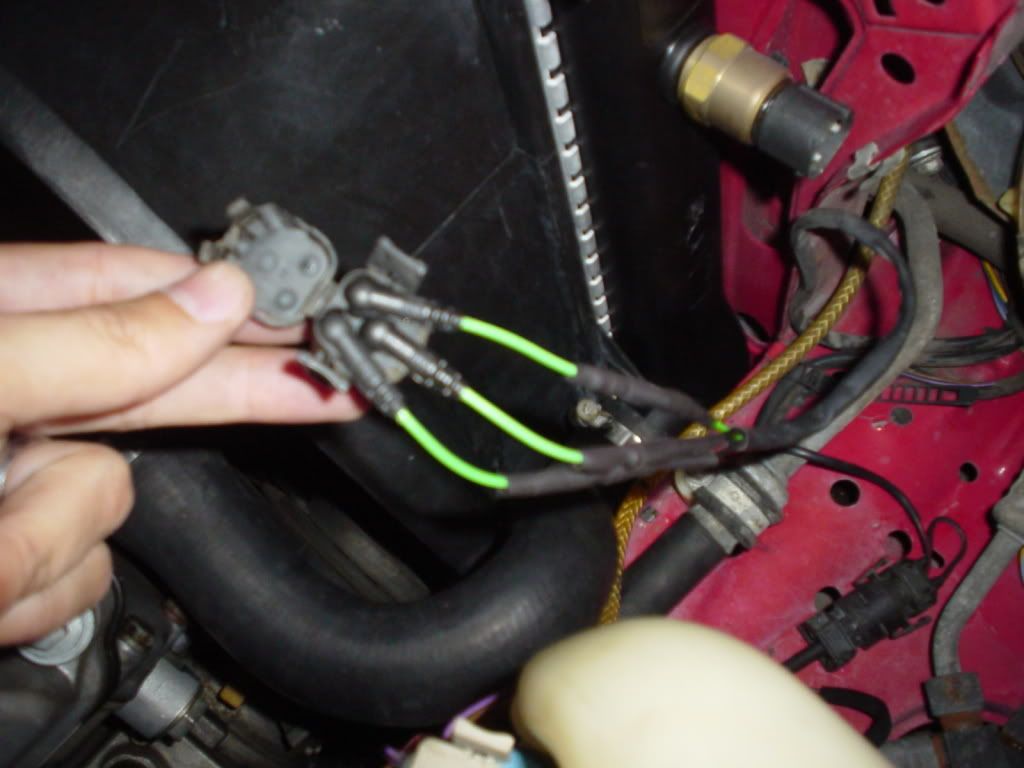
Finally got to fix a little electric wire issue. The radiator temp switch wire plug had the 3 connector plastic or rubber insulation completly cracked and gone for the most part. So not to worry about connections when summer comes, I got the replacement part from BMW and spliced them in. Here is a before and after. The wire only comes in the green so I had to leave a little of old wire exposed below to make it easier to find the color code for each wire.
Before: note the wire connector going into the housing, almost gone.

After:(sorry for blurry picture)
Leave a comment:
-
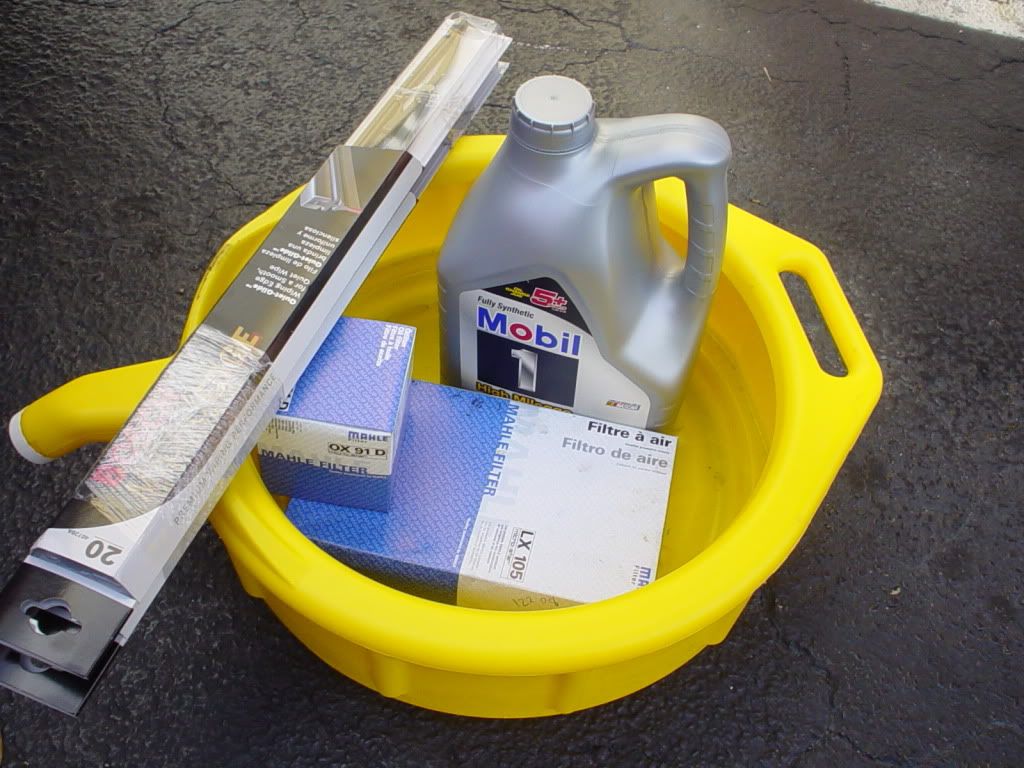
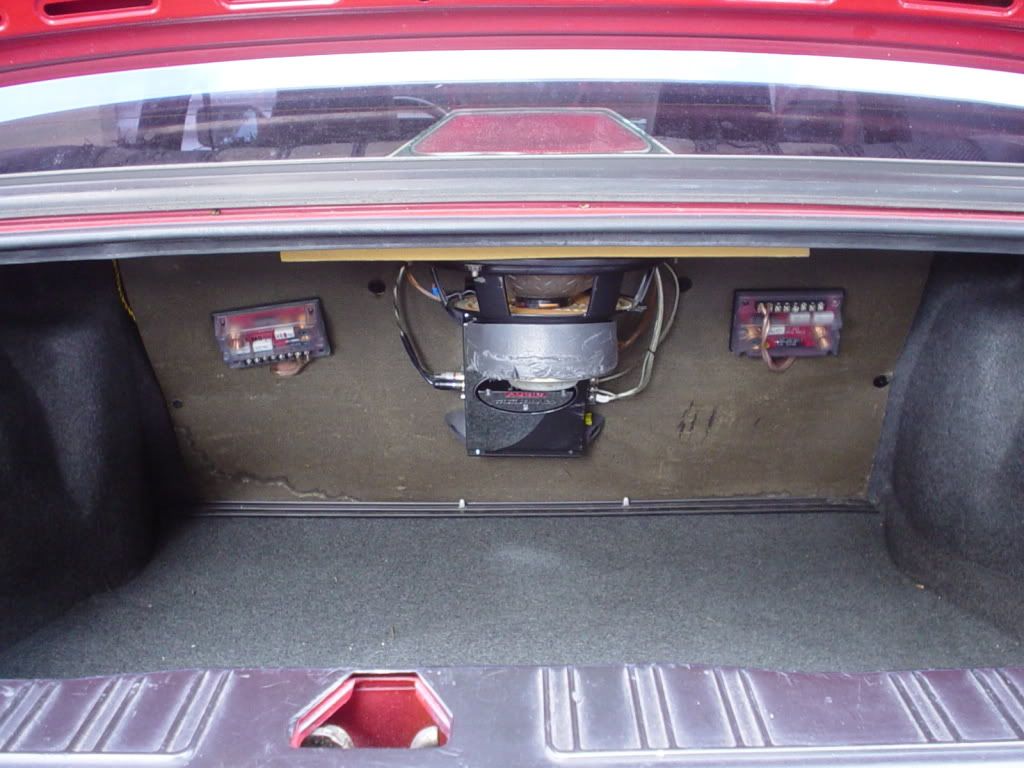
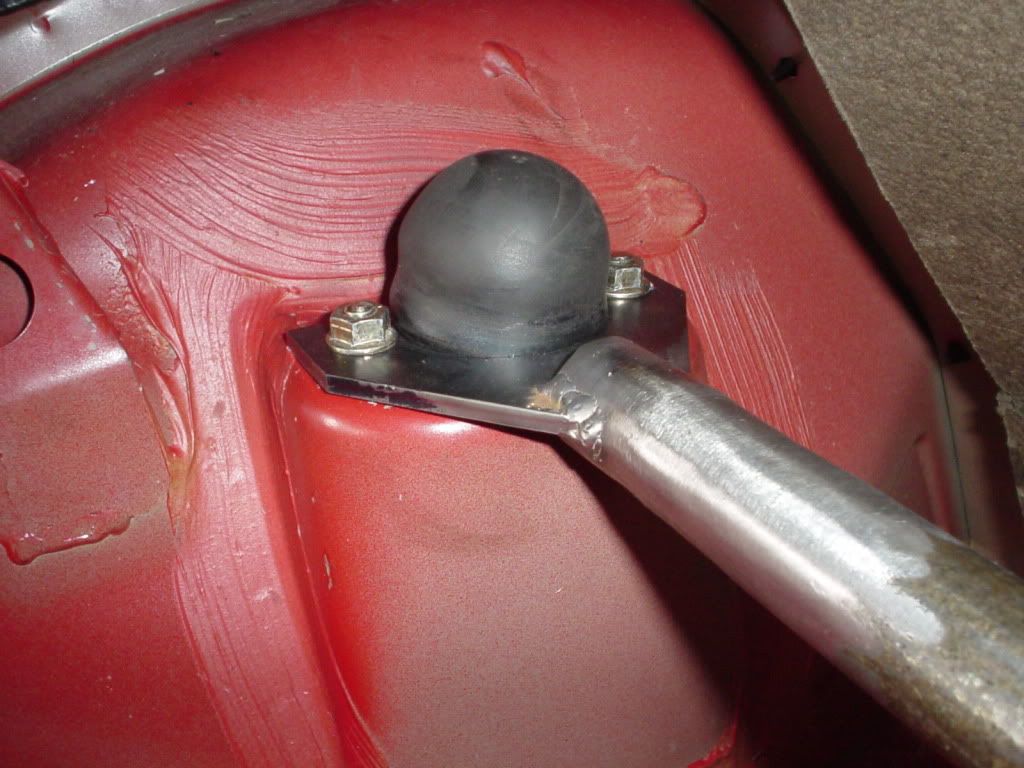
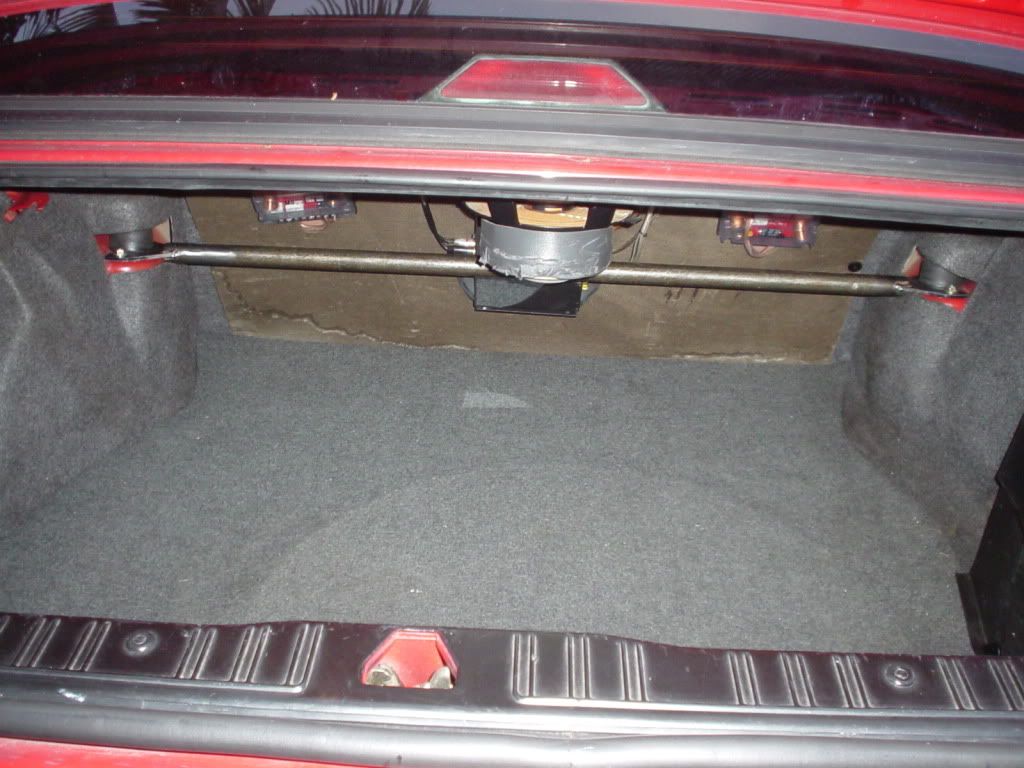
Today changed out a few filters and regular items. Also installed the rear strut bar from White325is. The bar makes it feel like the rear is all together and does not mess with 10" sub. Also adds some protection now for the rear amp. The magnet of the speaker as foam tape to cushion anything that hits it. I also sliced the carpet covers to allow the install of the bar and makes it easy to remove carpet side panels.
In the with the new:
Trunks without bar:
Closeup of one side mounted:
Trunk with bar installed:
Next is to get heat shrink tube to redo the factory radiator aux temp switch wiring.Leave a comment:
-
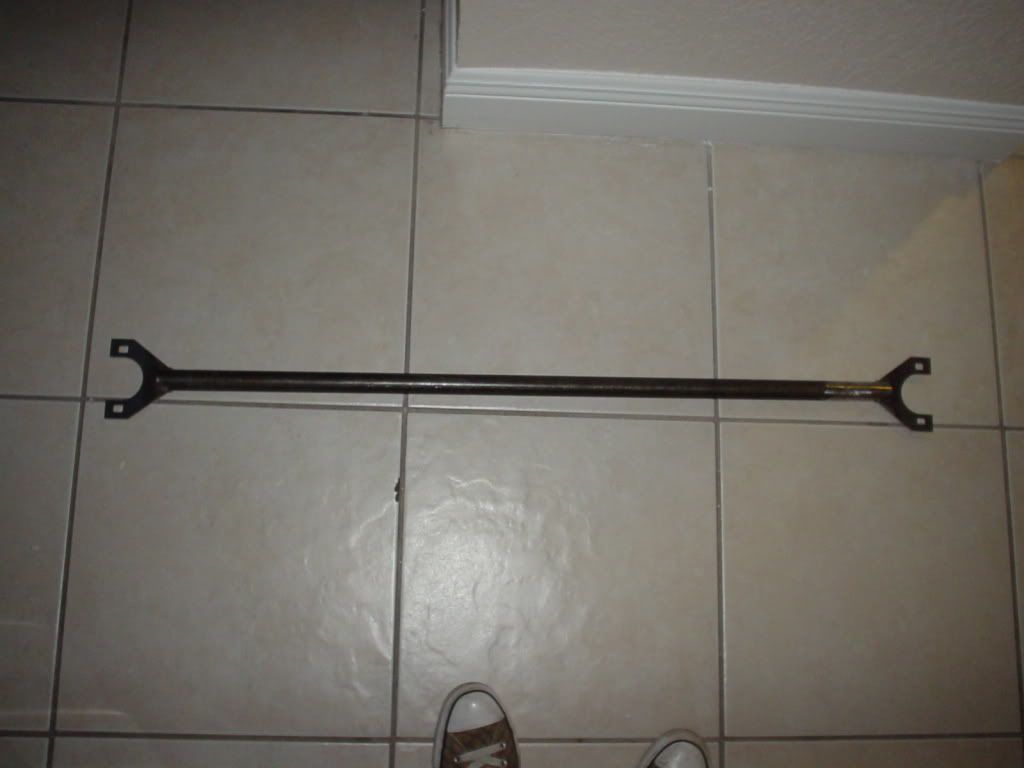
Got my new rear strut bar. Here is it by itself. Will install it it and when I paint my car, will paint it body color.
Leave a comment:
-
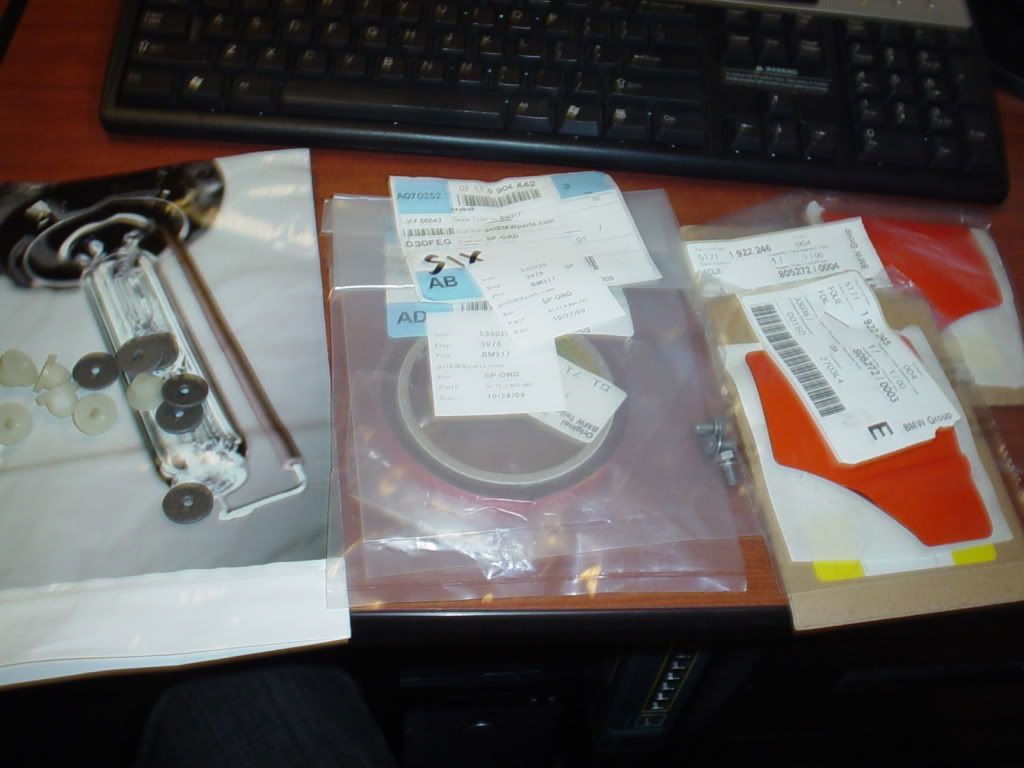
I just received my little shipment from Germany. OEM parts to reinstall mtech 1 spoiler. Included are new bolts, foam washers and plastic nuts. Also all the advesive tape from BMW. I will only install these items after I paint my care. I am working now on getting all the exterior items I need to paint it only once.
Leave a comment:
-
Last Monday, received my new acquisition, Mtech 1 rear spoiler. Only took 3 days to receive. Picked up Friday afternoon at my doorstep Monday morning from Europe, this past week. Paid real cheap compared to prices here in the US, $120 including shipping. Of course couldnt care on color since I will paint it eventually. So here is it installed. No rust on it. I want to sell the is spoiler to help to pay for this one. Rubber is gray but a good refresh should blacken it right up. Enough with details, here are pics....
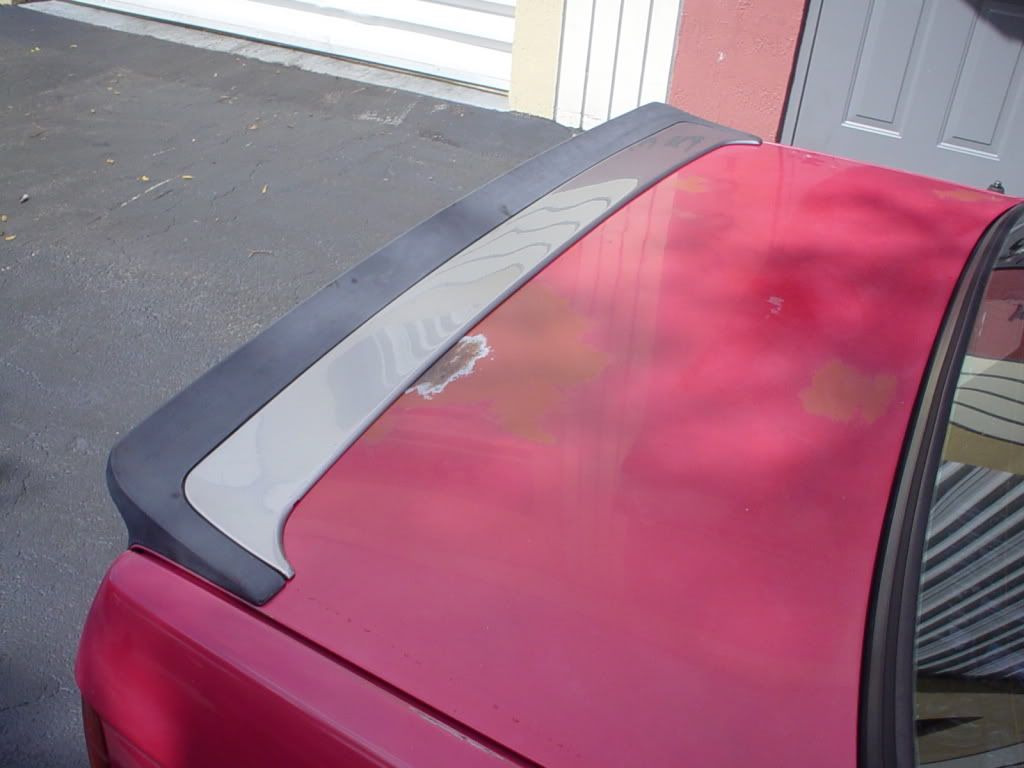
It bolts right up. I already ordered the factory adhesive strips and nuts so that after the paint job, everything is nice an new. Now figuring out what to do with rear apron. Not sure what options are there, besides mtech1 and 2. Might go with mtech1.Leave a comment:
-
Well the new one came in. Much better. Got it from europeanplates.com. They also have cool plates and after I paint my car, will get a new one from them.
Leave a comment:
-
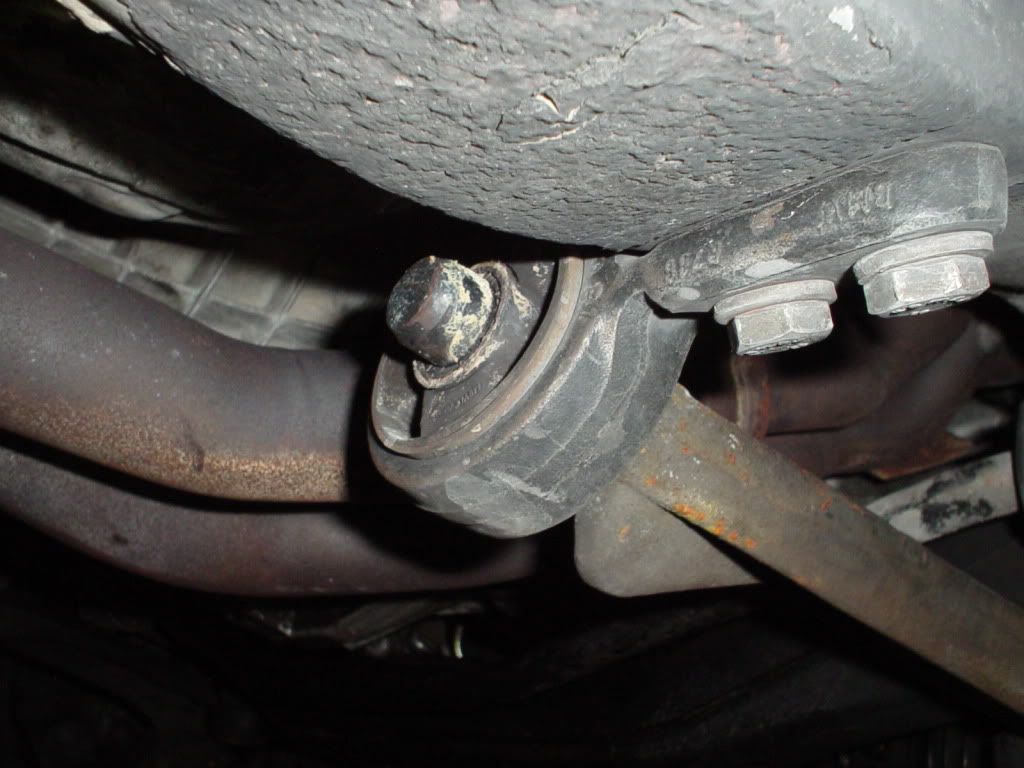
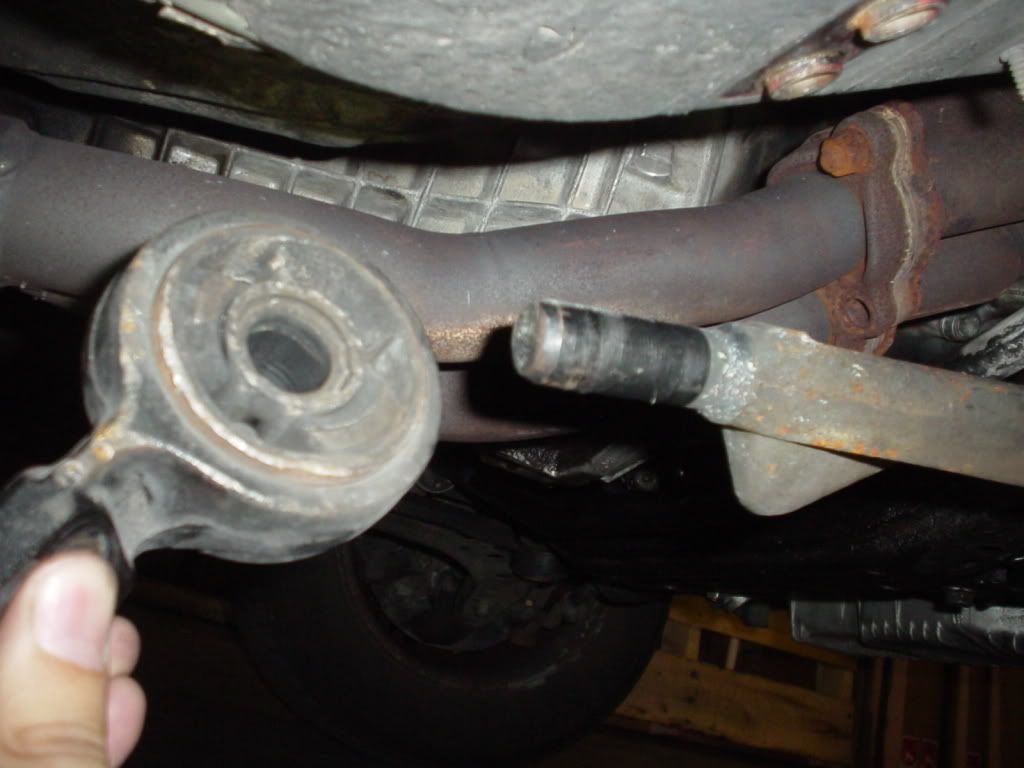
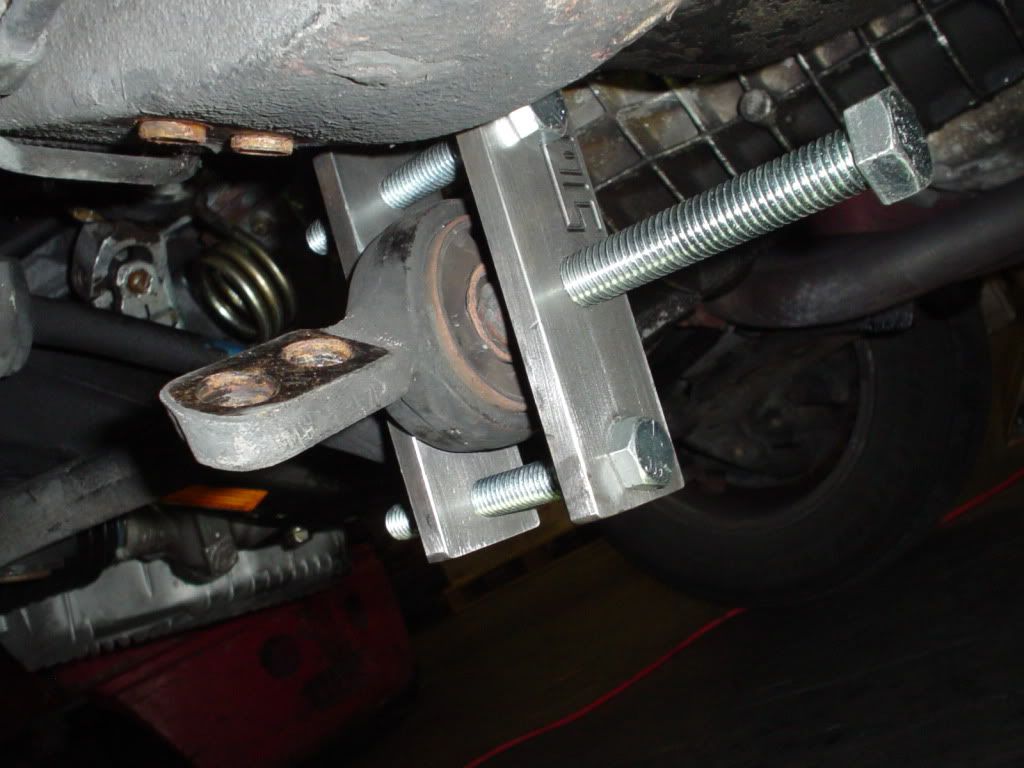
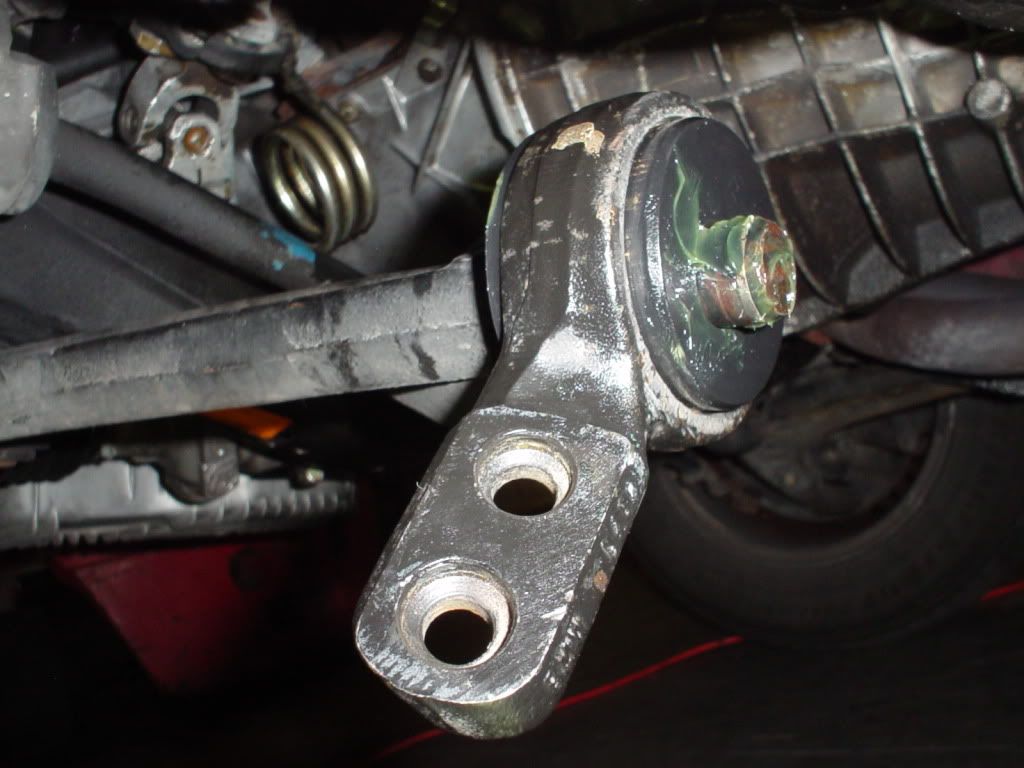
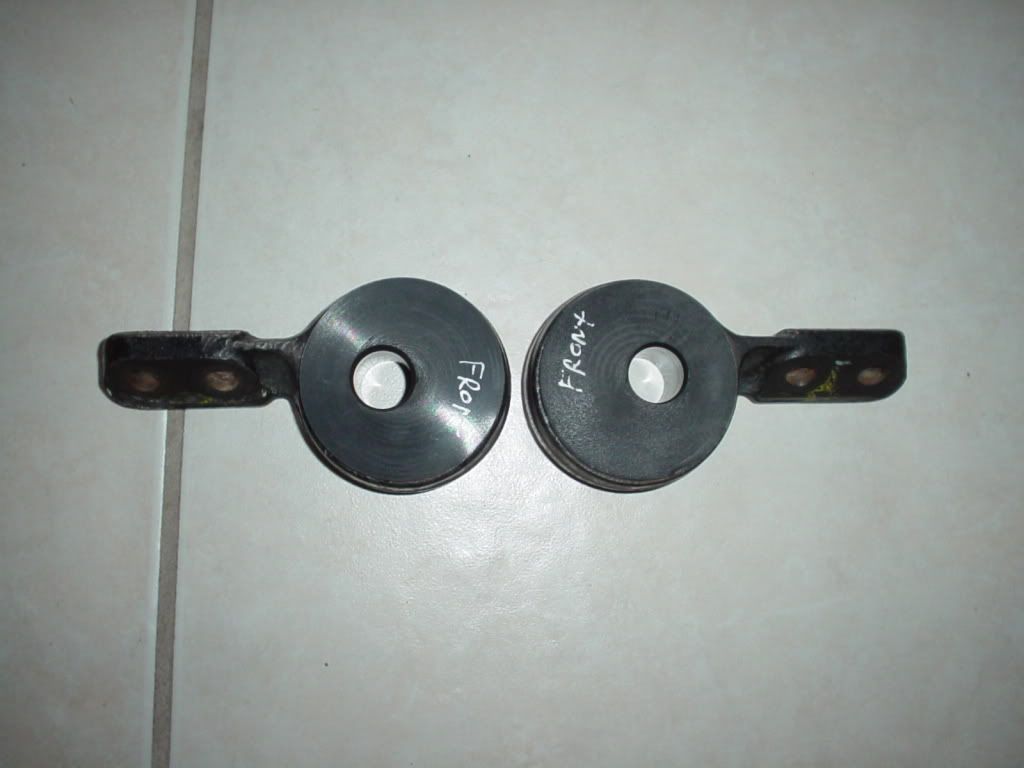
Today after work I continued to work on my car. The AKG m3 offset bushings were going in. I had bought a tool at a great discount price which help me remove the stock bushings. These stock bushings are about 3 years old as they were shot when I got the car from my sister. Also replace the control arms at that time.
What a difference these bushings make. Everything is tighter and the turning feels much better. Worth every penny when the stock ones are needed to be replaced. With my new engine mounts, the front of the car is so different.
I will be renting the tool out in the tool section of the e30 forums. If interested, let me know. Since these were the urethane ones, I was able to install them on the arm with just my strenghth and turning it a little.
Here are some pics:
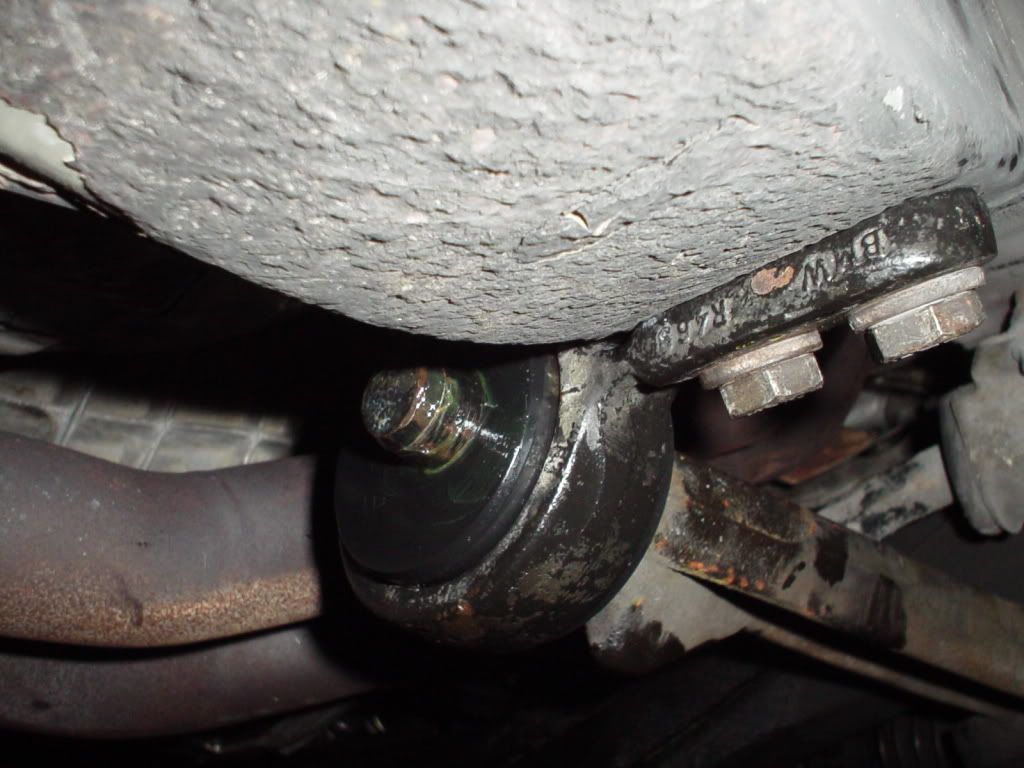
Passenger side - rubber bushing:
Removing pass side with tool:
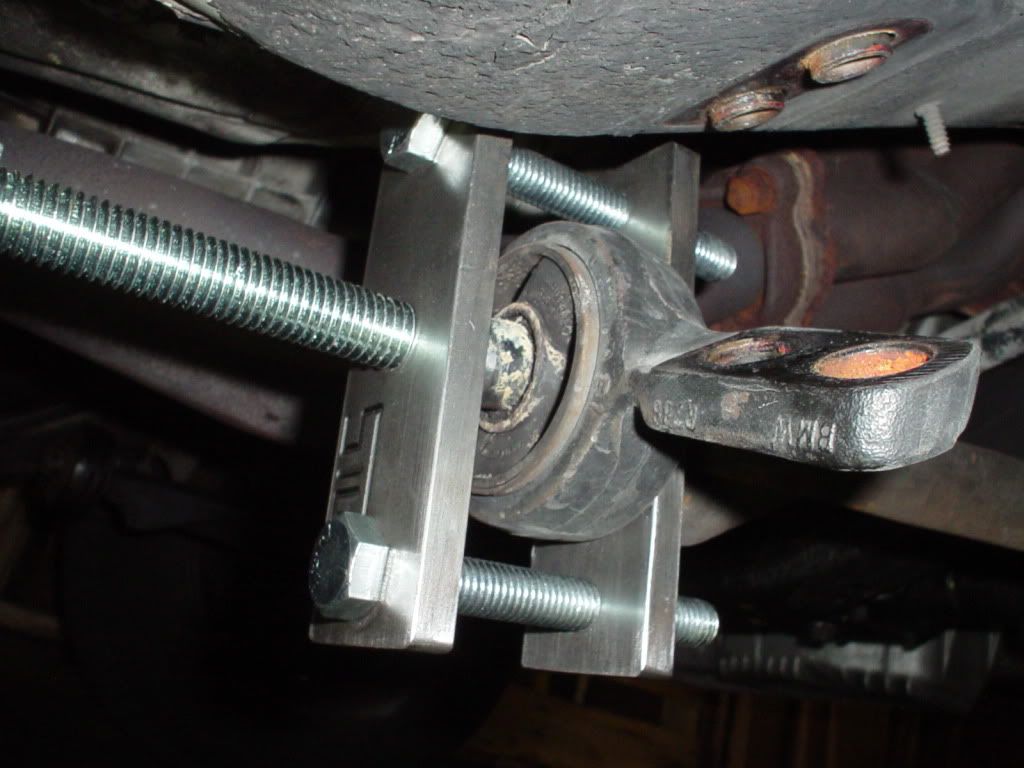
Like butter:
Back on with ATE plastilube to prevent squeaking - thanks Peerless
Driver side:
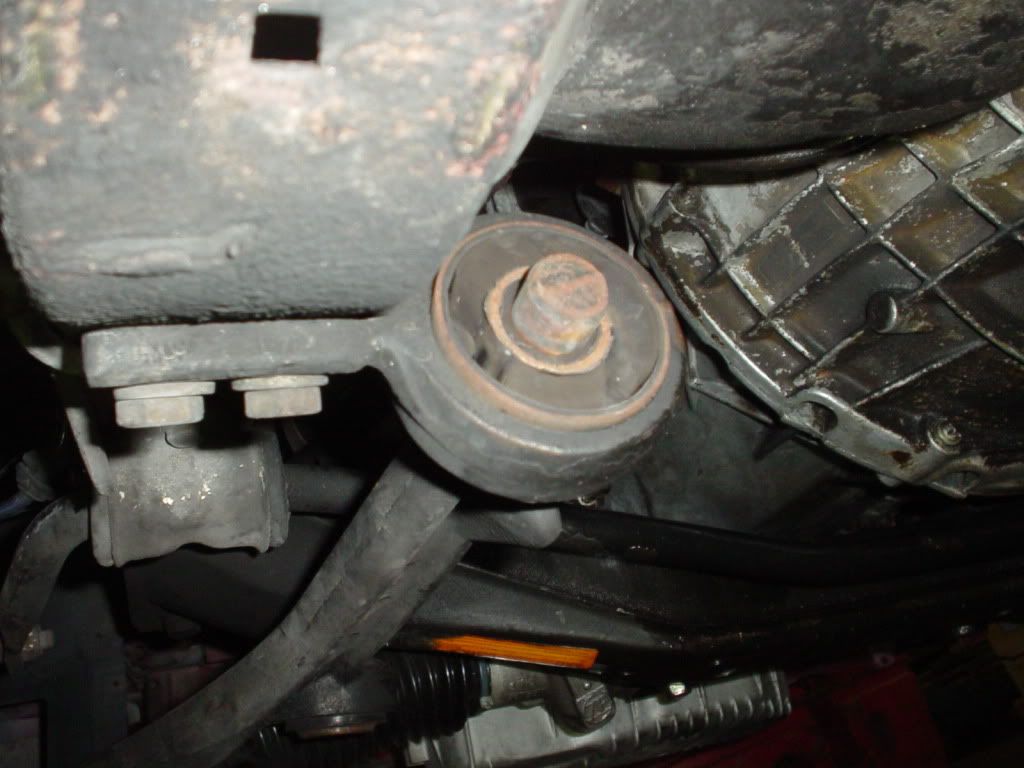
Removing driver side:
New one back one and lubed up:
Leave a comment:
-
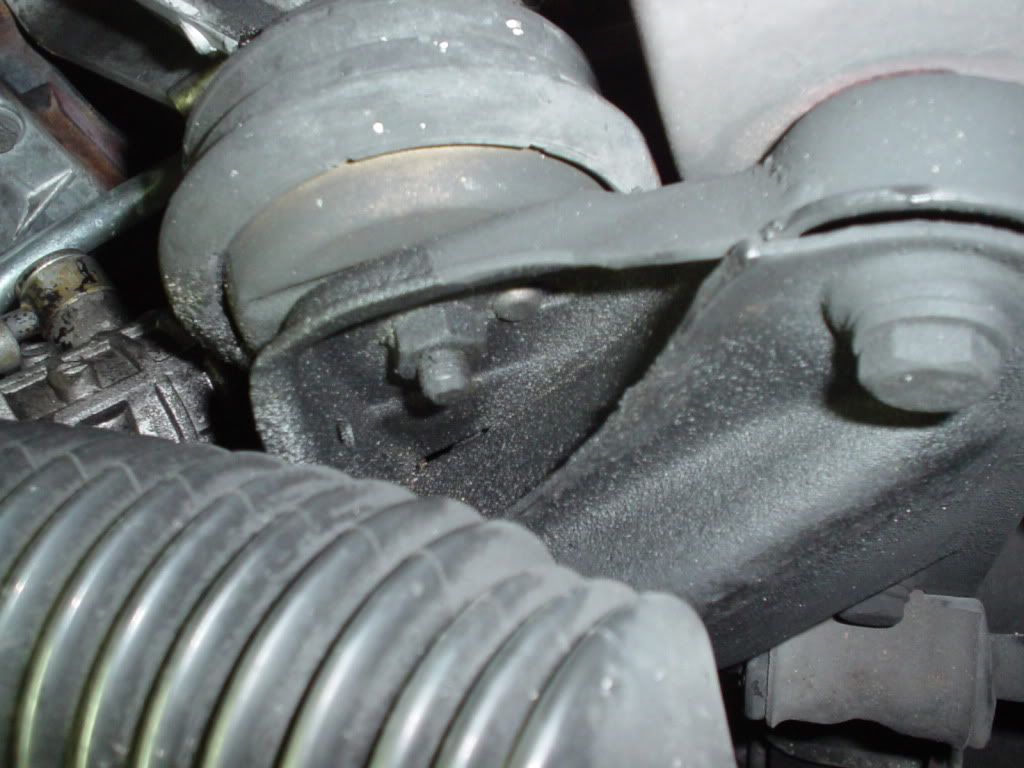
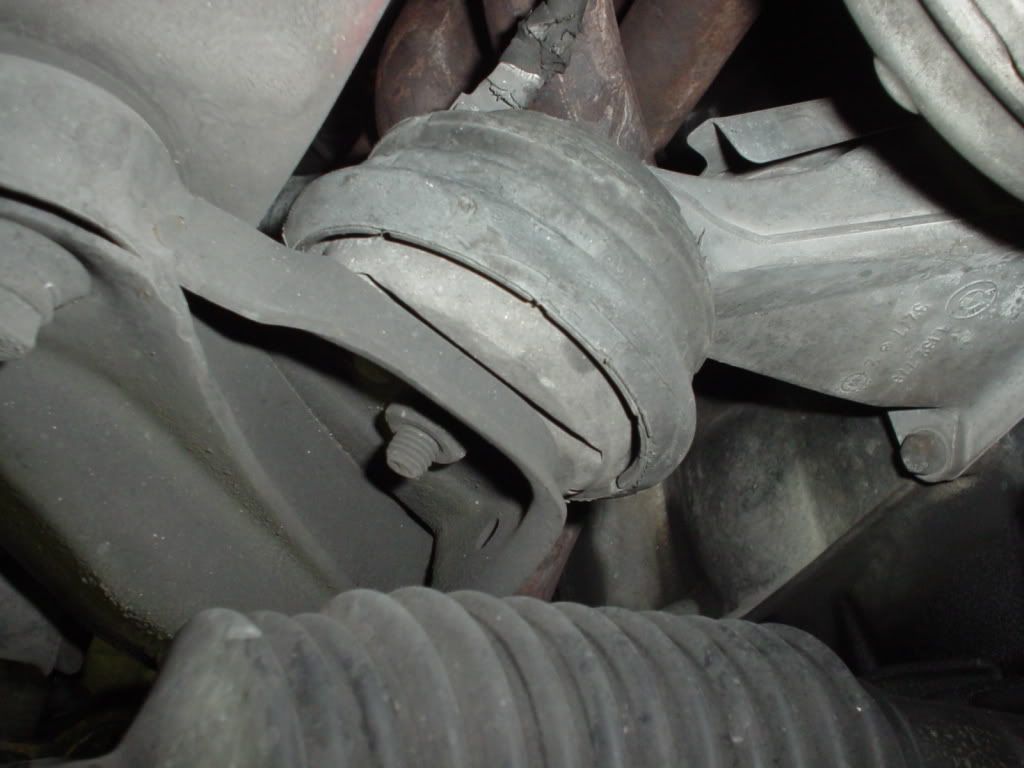
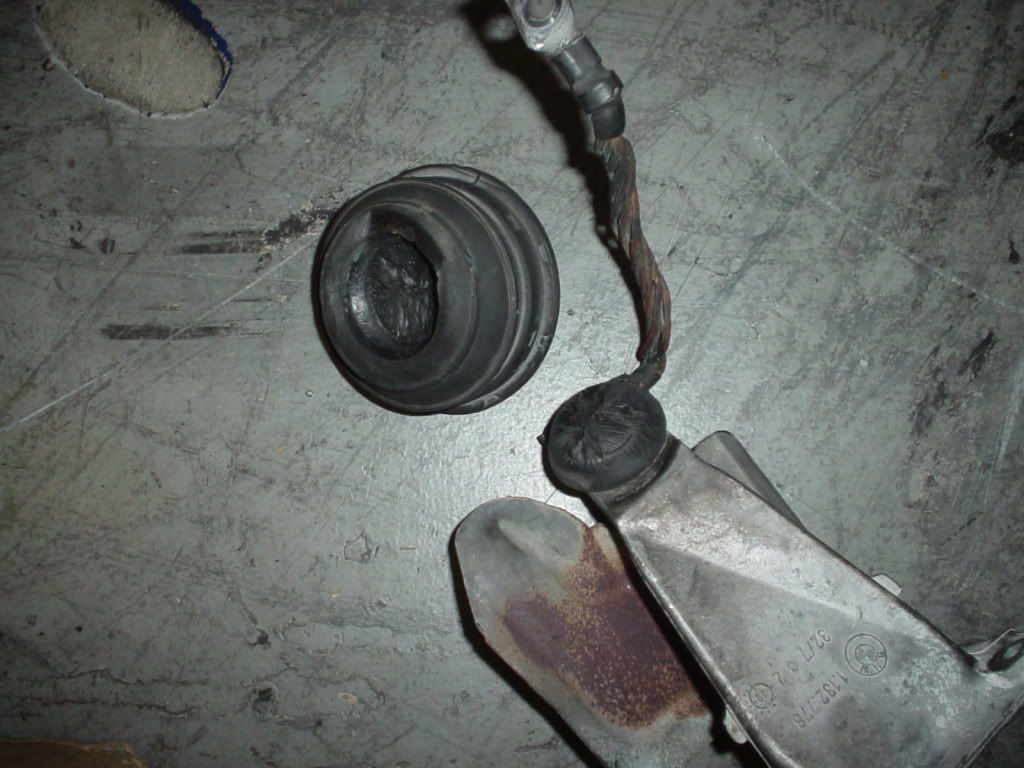
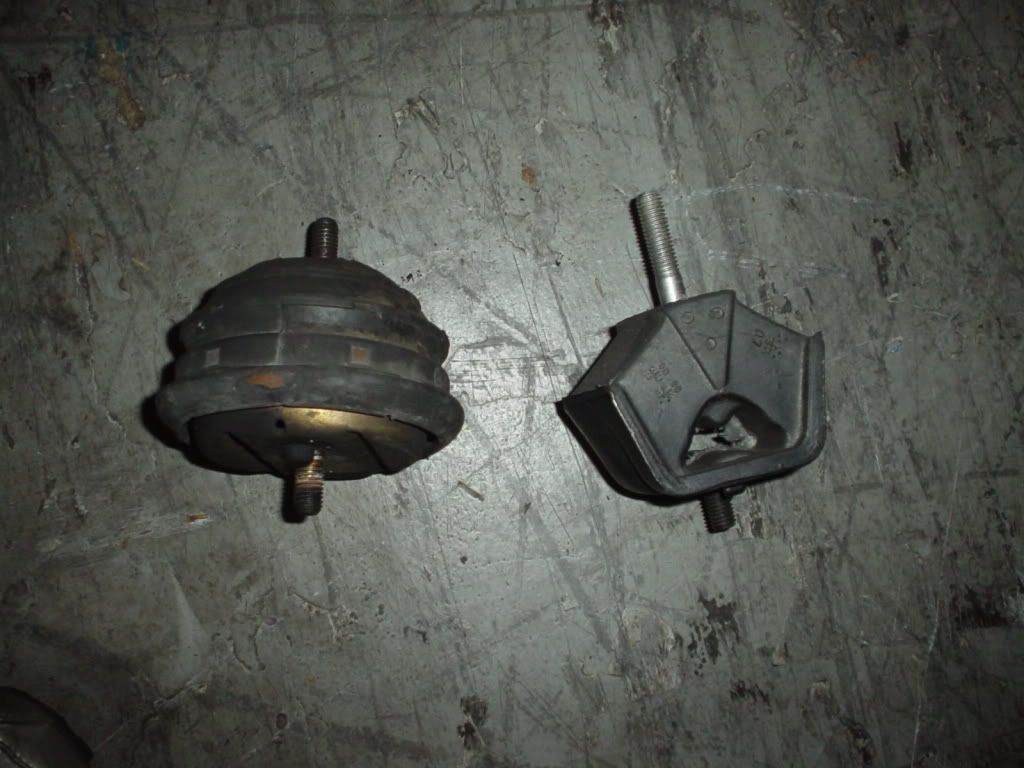
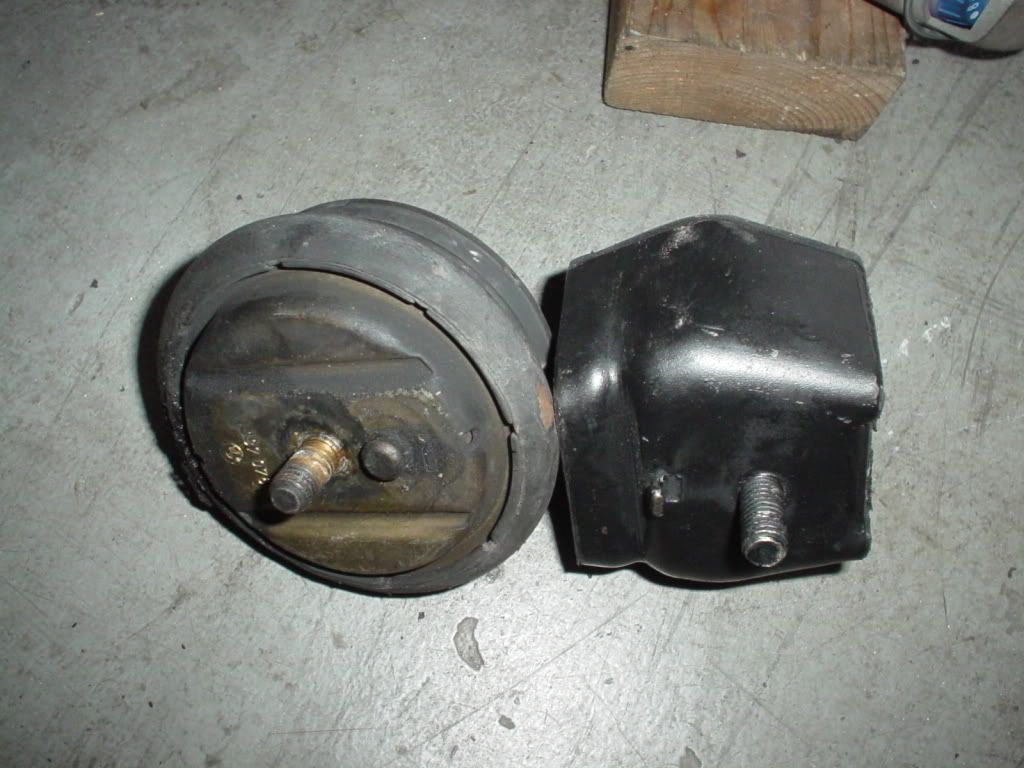
Today I replaced my engine mounts on my m42. I decided to go with the e28 535 mounts since I didnt want to pay ~200 for the stock ones since I will be doing an engine swap hopefully in a 1.5 years. People say that there is a little more vibration with them, which I agree, but with my old ones being in bad condition, mostly passenger side, the upgrade is better. Also being my car is lowered it is already a little stiff, so it doenst bother me. Also there engine feels more together, with better throttle response and shifting. Adding better tranny mounts should make it better. Here are some pics. One thing for those doing it, you will need spacers or thick washers on the top of the mount as the studs are longer and the threads stop before it gets to the mount. Other thing is to cut off the tab and orient the mount 180 degrees. I had a hard time with the passenger side and the nut would not come off. All the heat and the old age seized the nut out. I had to remove the block extension to get the bushing out. Then had to dremel the nut out.
Here are the pics:
Driver stock mount:
Passenger side mount:
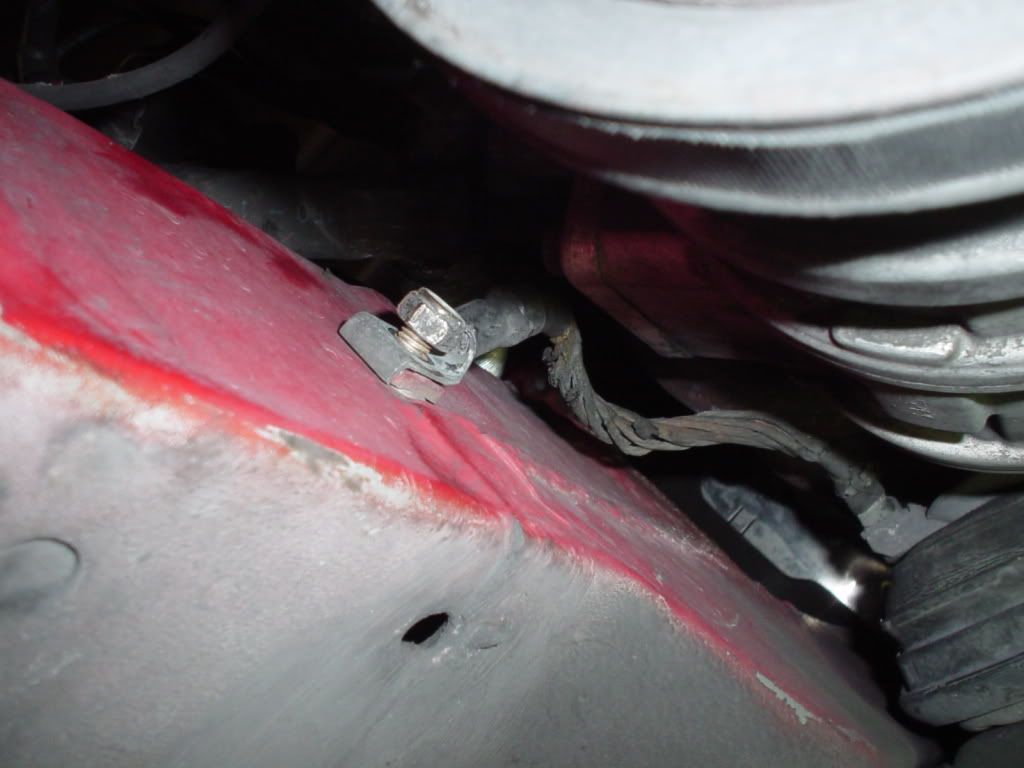
Removing ground cable:
Old passenger side after a easy twist:
Comapring new and old:
Underneath mounts, locking still needed to be remove with dremel:
New ones installed:
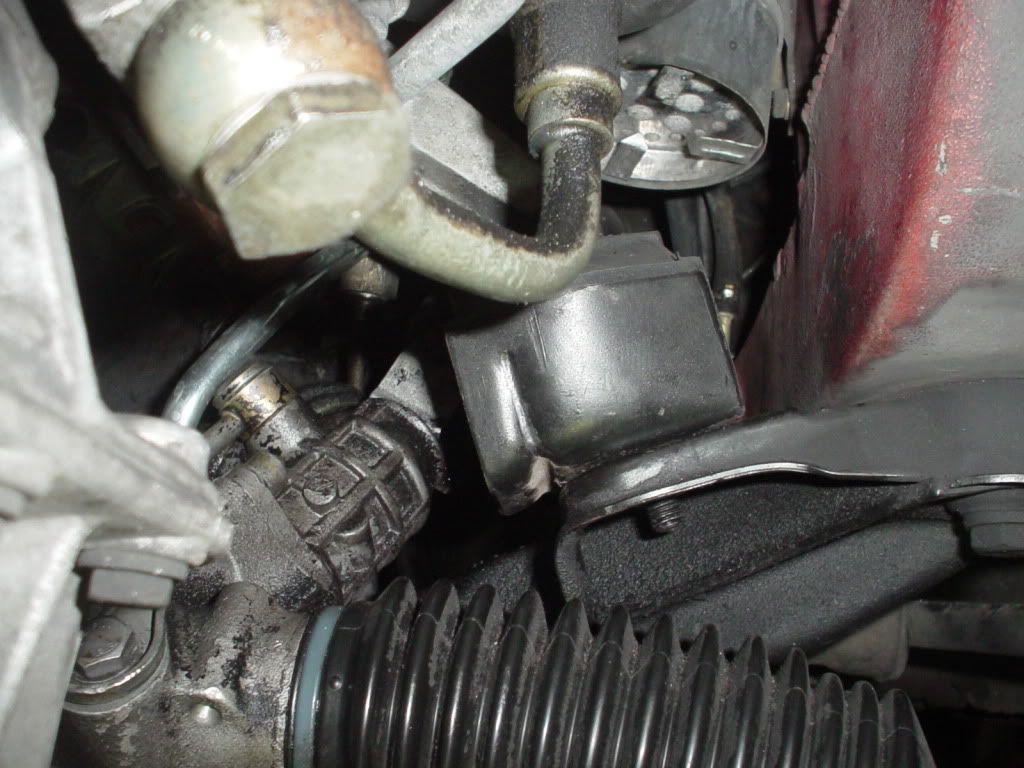
Passenger side with spacer:
Leave a comment:
-
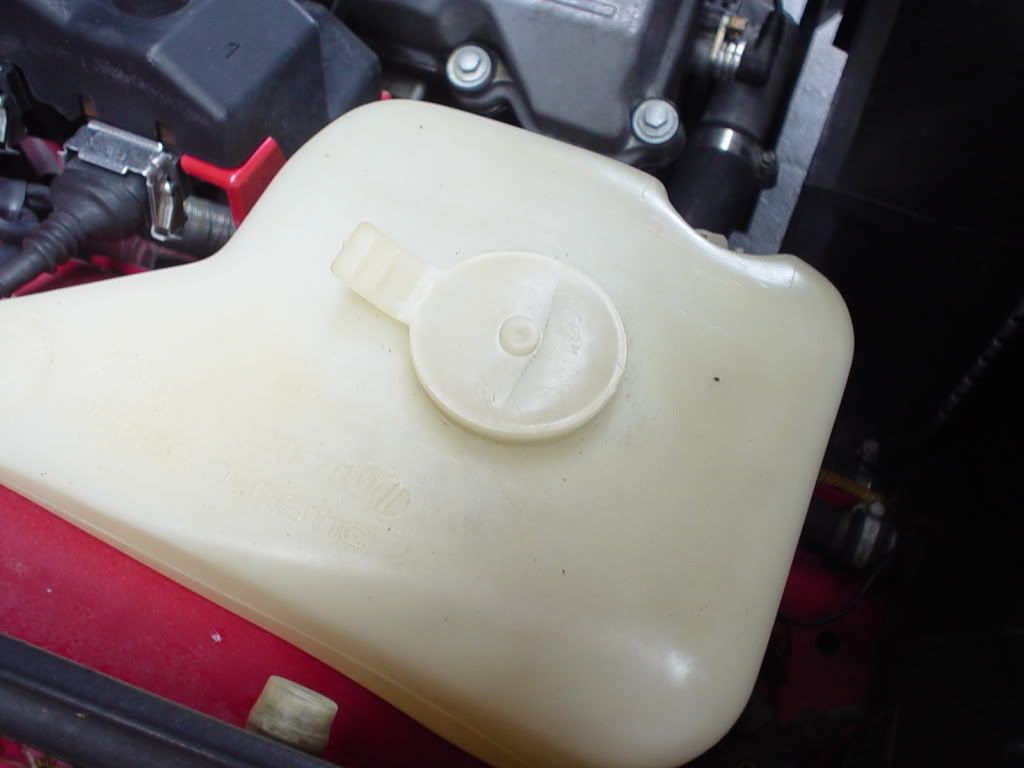
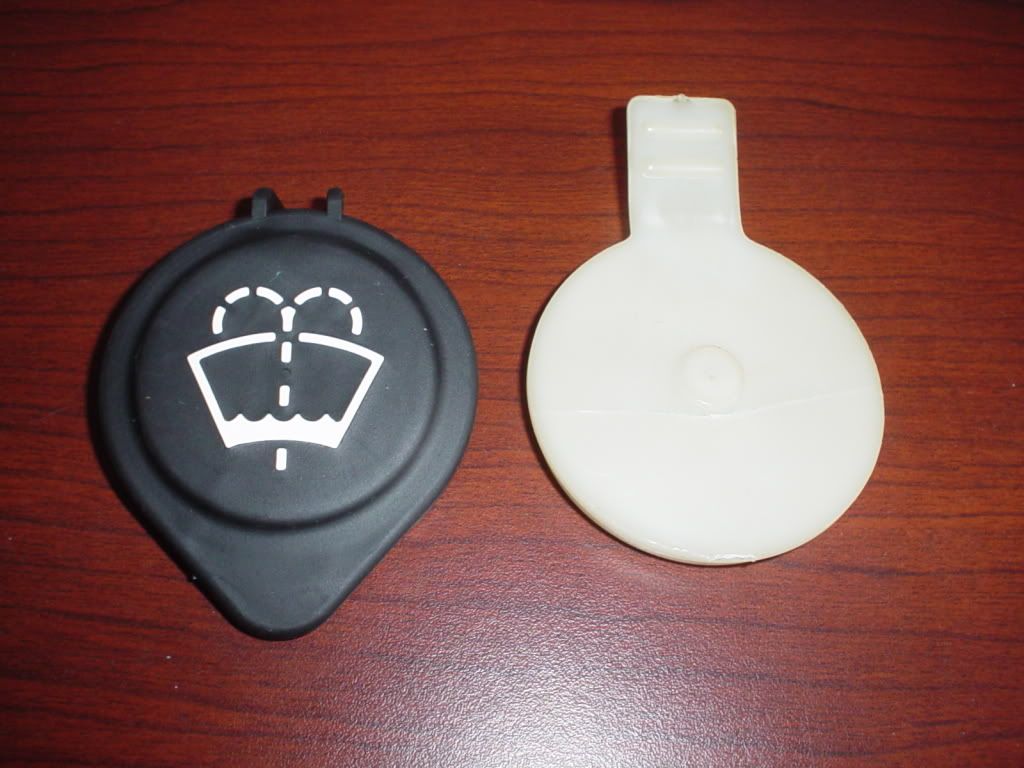
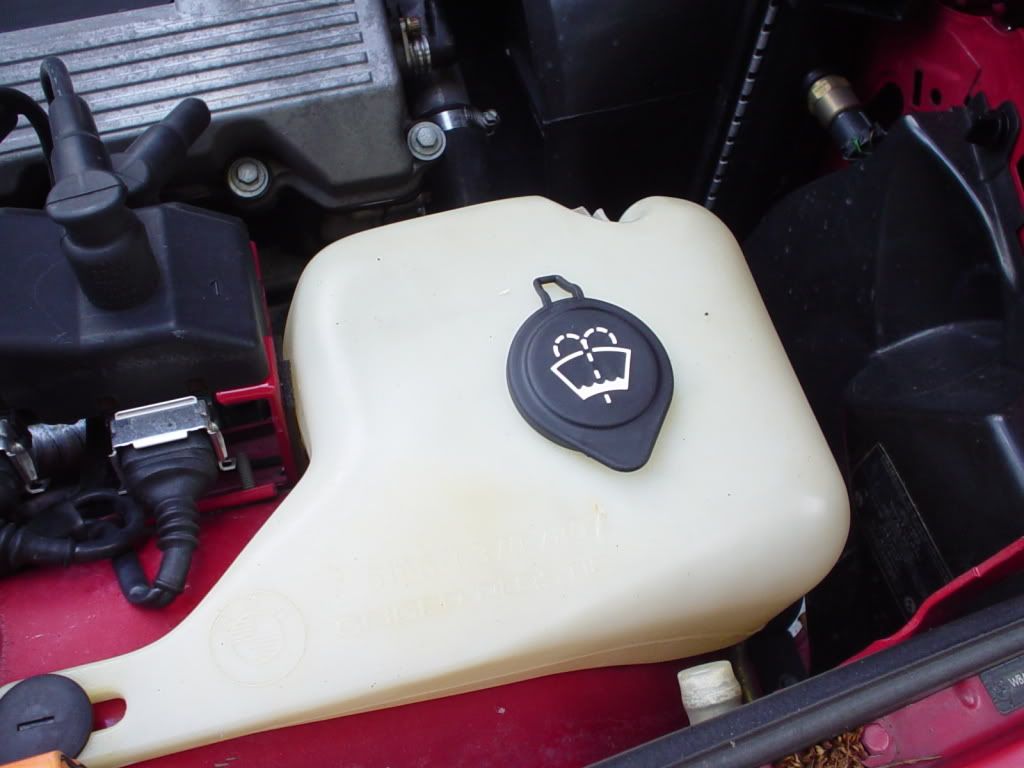
Got some more work in over the holiday weekend. Not exciting by more of regular maintenance in my opinion. First, my washer fluid system is not working. I am starting to go over all the faulty equipment. I just ordered new clear hose and while I wait, I installed the new modern OEM fluid reservoir cap. I know I need new hose and a screen for the reservoir so far.
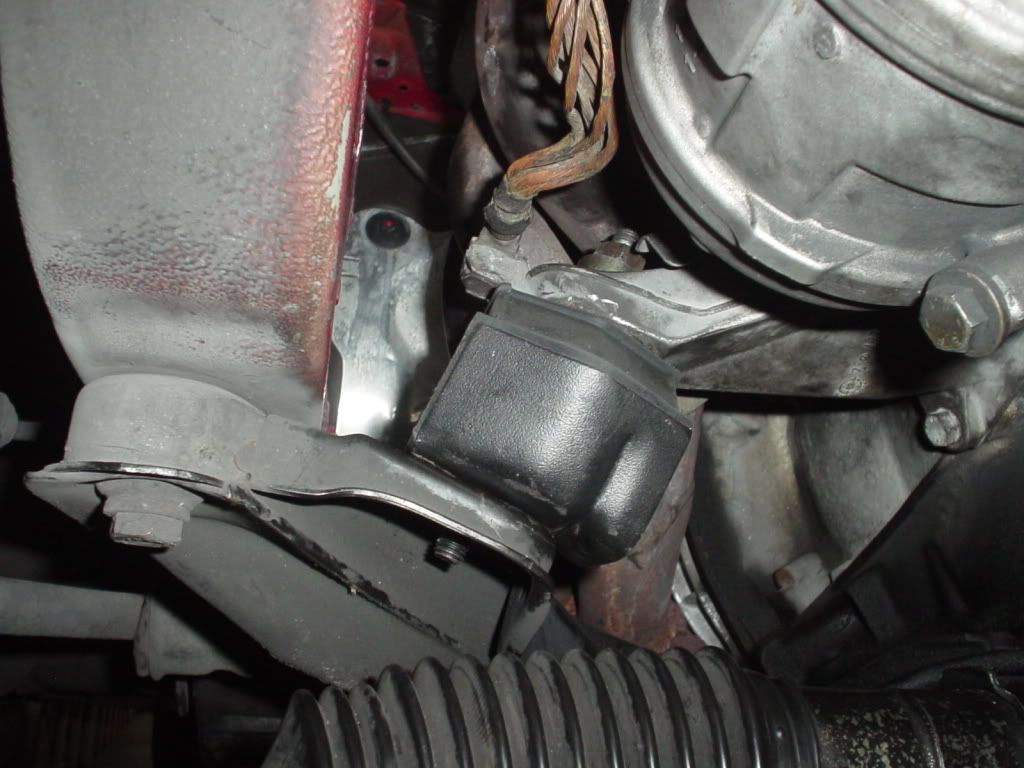
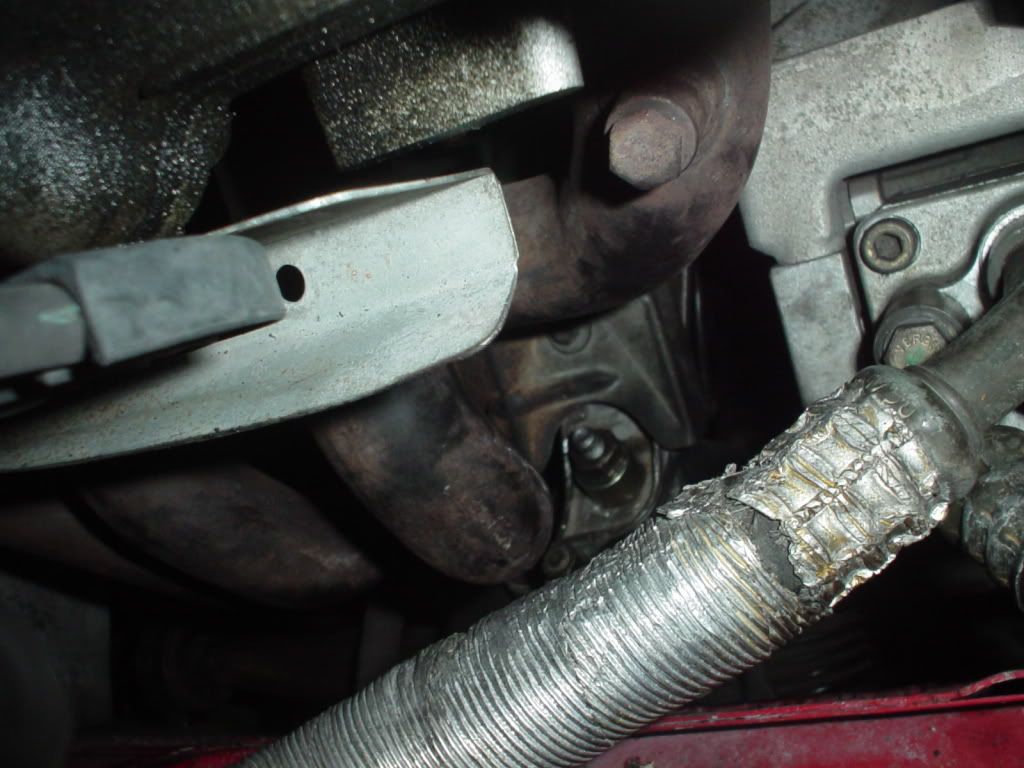
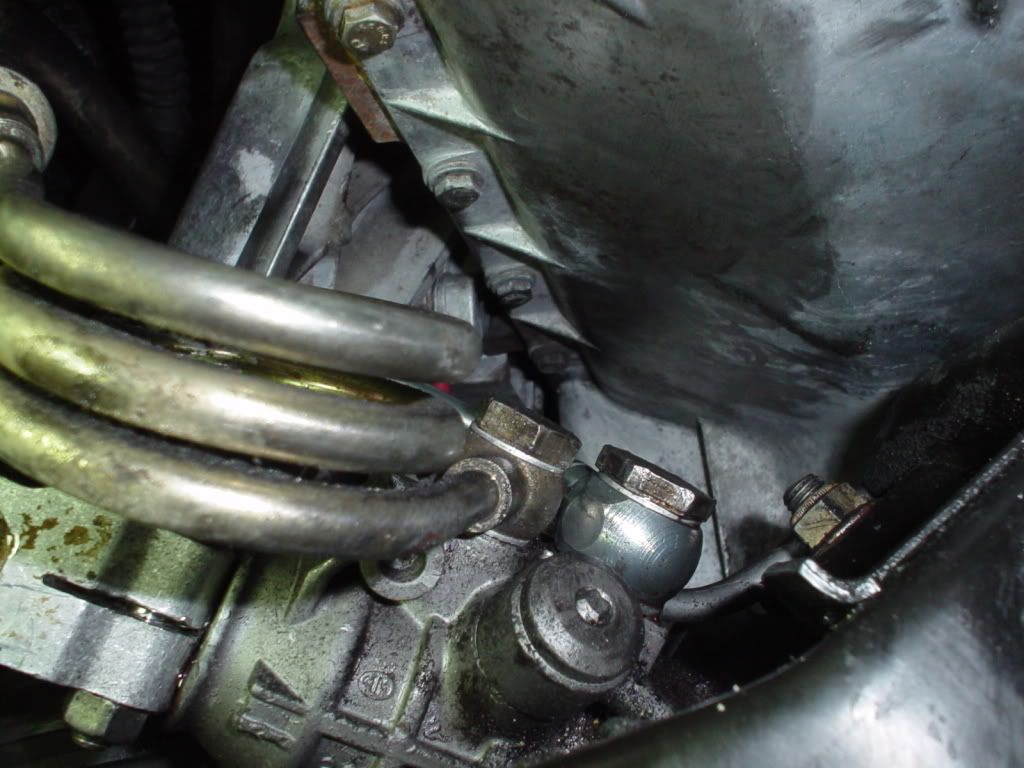
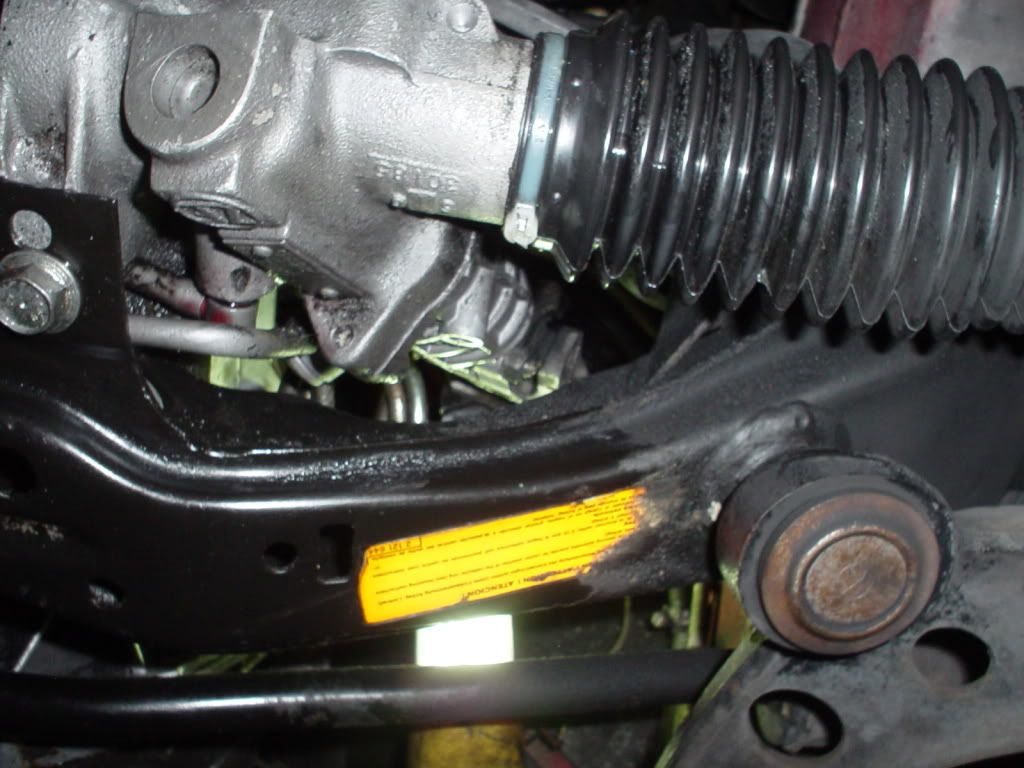
Other thing I did today was replace my leaking power steering fluid hose from reservoir to steering gear. My car had the older style, hose to pipe and using clamps. The current BMW part is a single piece with the hose crimped to the pipe. My hose was all cut up around the bottom clamp.
Here are some pictures. The last 2 are to compare the gunk the fluid leaves behind around the rack.
Tank with old cap. Cap has crack across it on the inside, but visible from the outside. New cap installed.
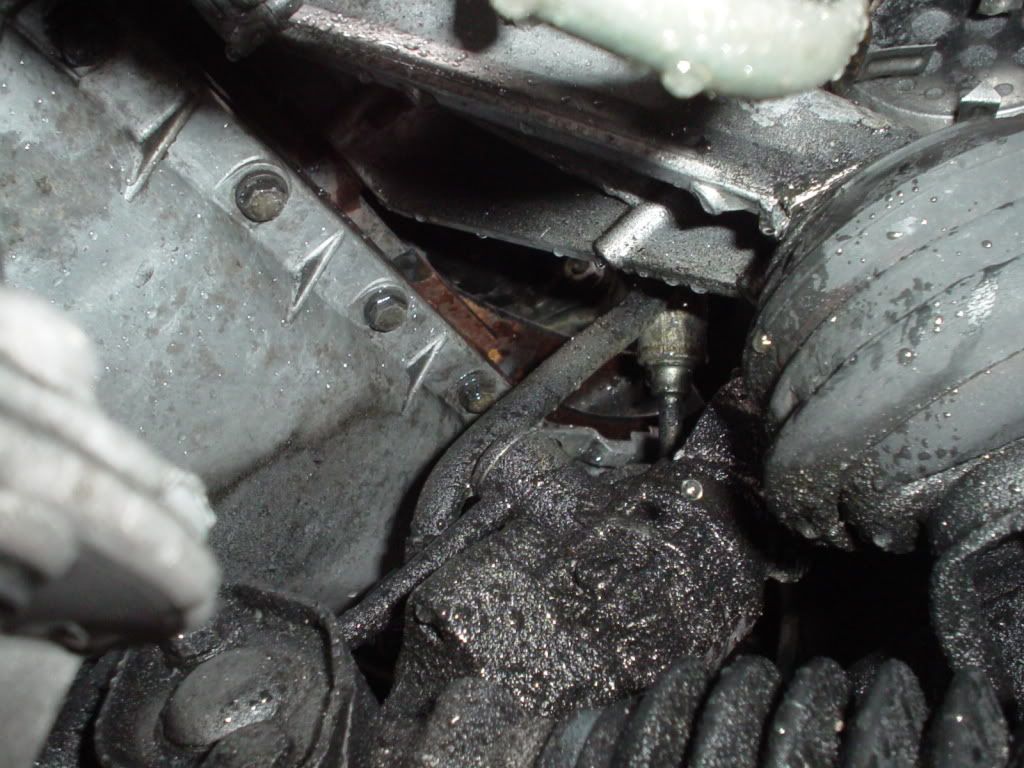
Here is the original hose just loosen and starting to drain.
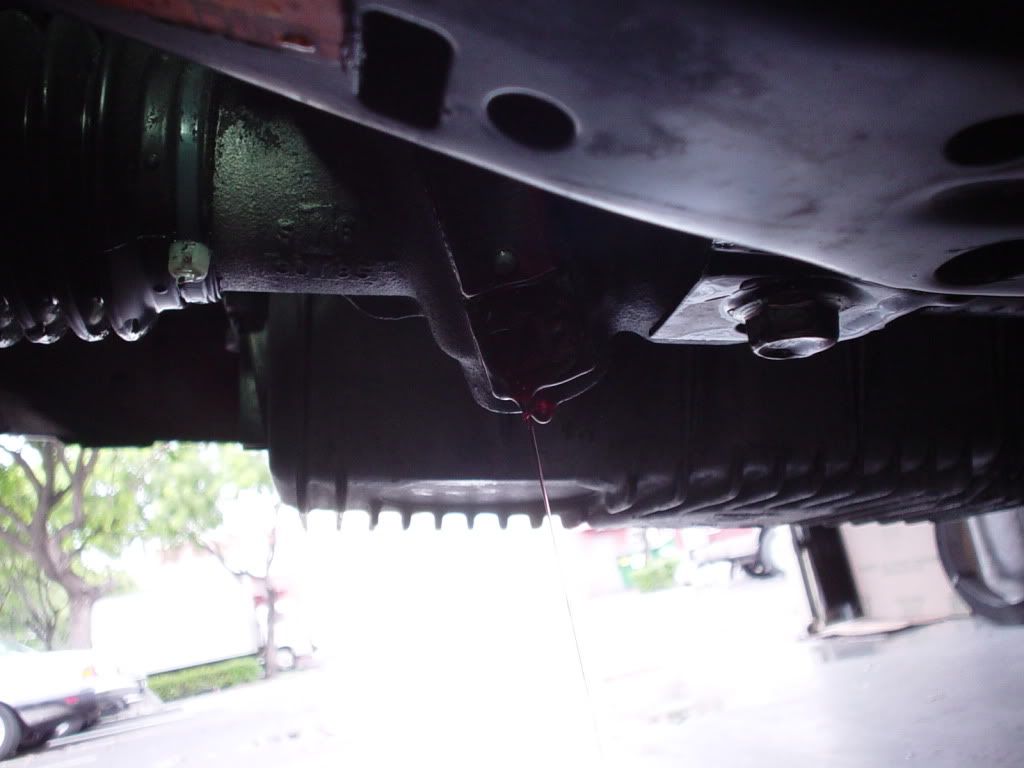
here she is bleeding (draining)
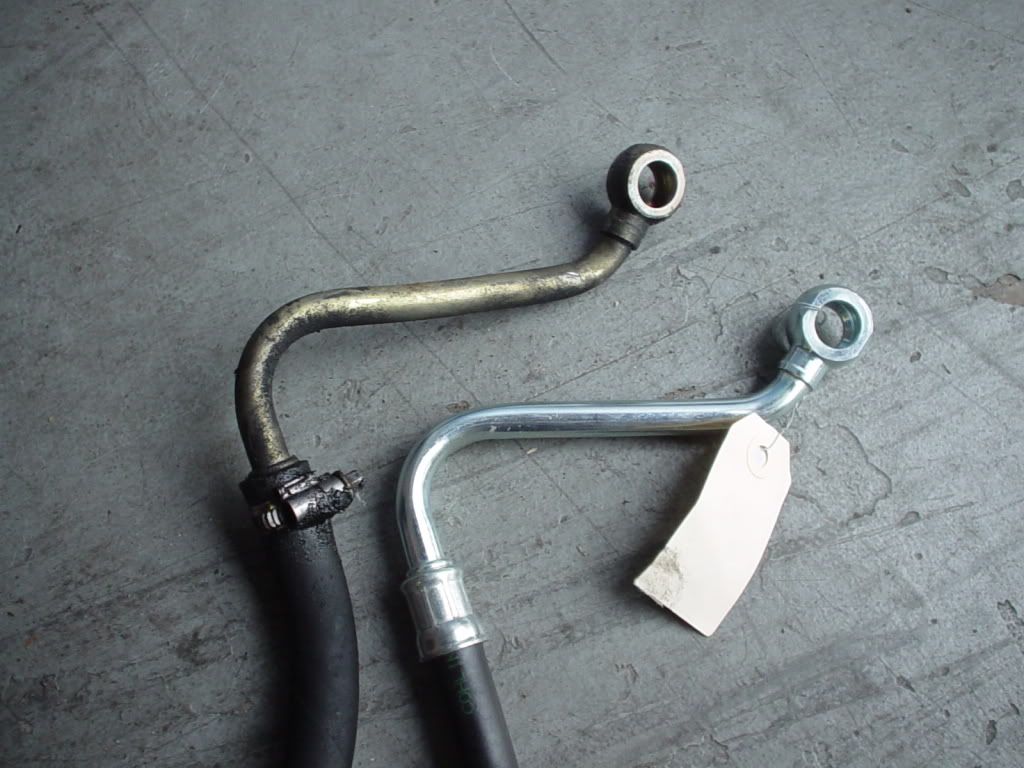
Comparing old with new, I used existing bolt but new washers
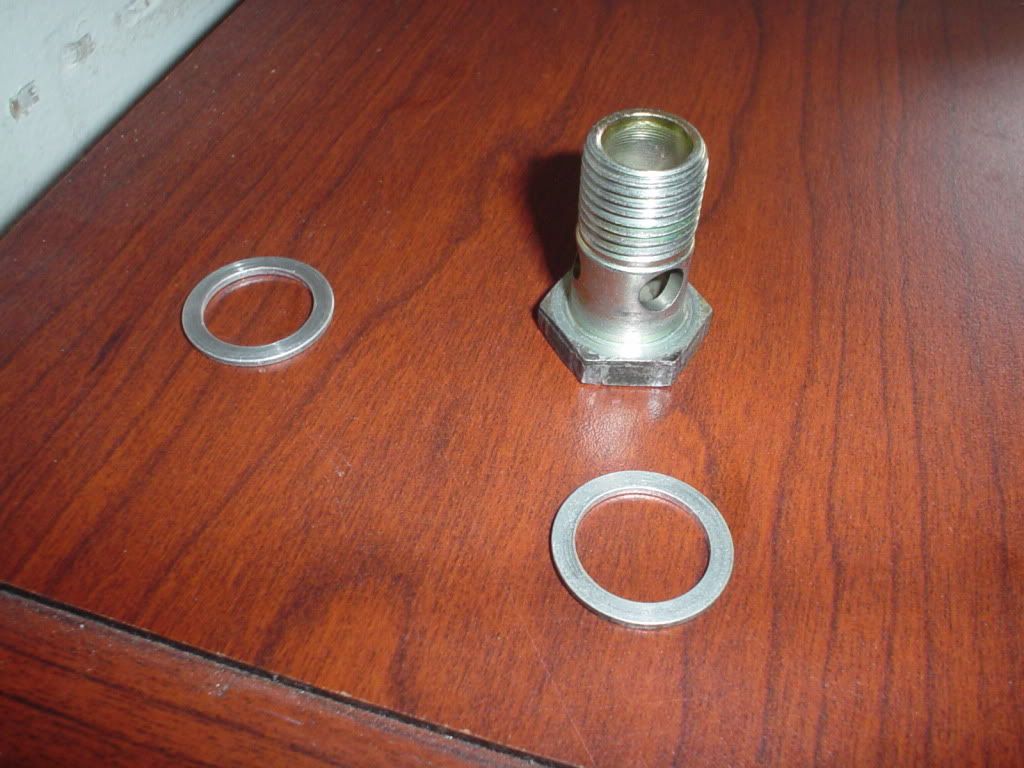
Cleaned the underside and here is new hose installed
Here is the difference in gunk build up, pic taken from front of car looking towards rear.
Leave a comment:
-
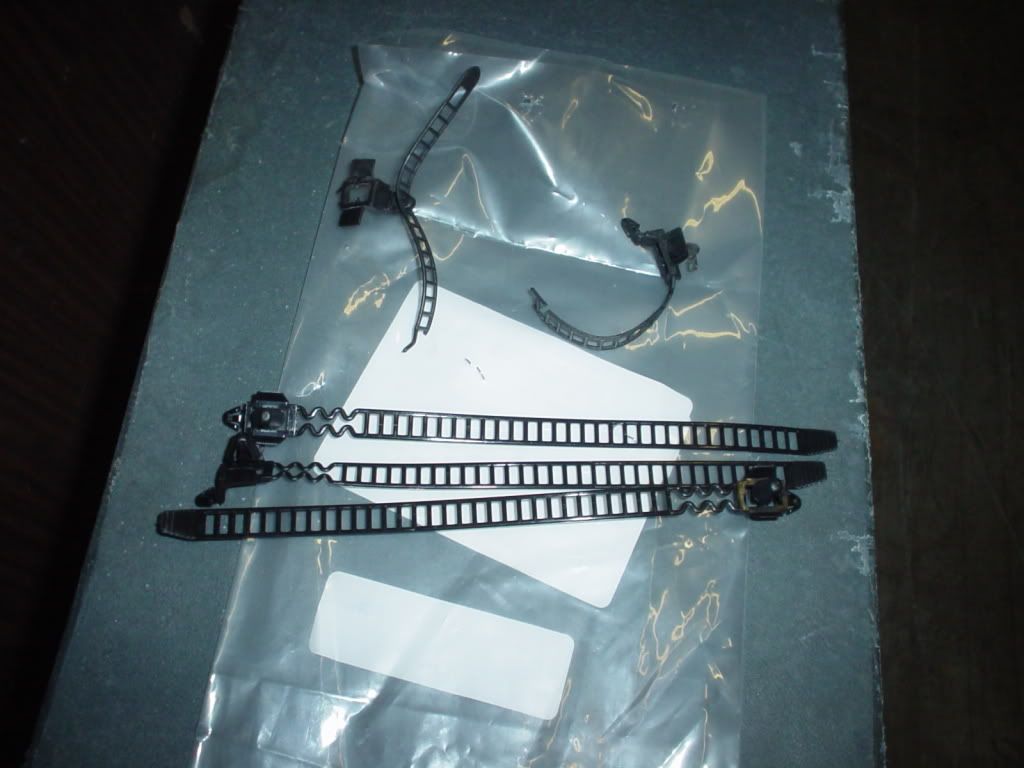
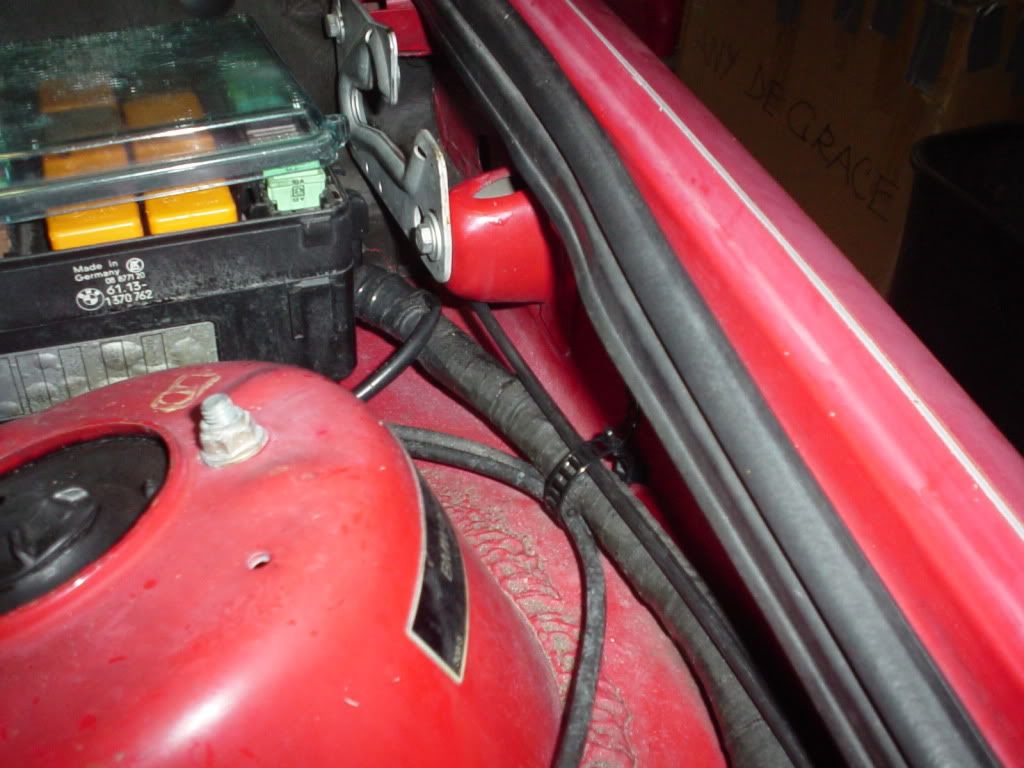
Have been busy with other stuff and luckily that car is just a daily driver with no issues. Just gas and go. I am starting to give more time to it. After changing my hood release cable becasue it snapped, the cable straps which hold the cable and other electrical cables snapped due to age and being brittle. After 3 attempts to get the right straps, I did. I installed them today. Next to is to replace a hose that is leaking power steering fluid, very annoying.
Here are 2 of the old ones and the 3 new ones. The old ones are short due to breakage.
Picturs before:
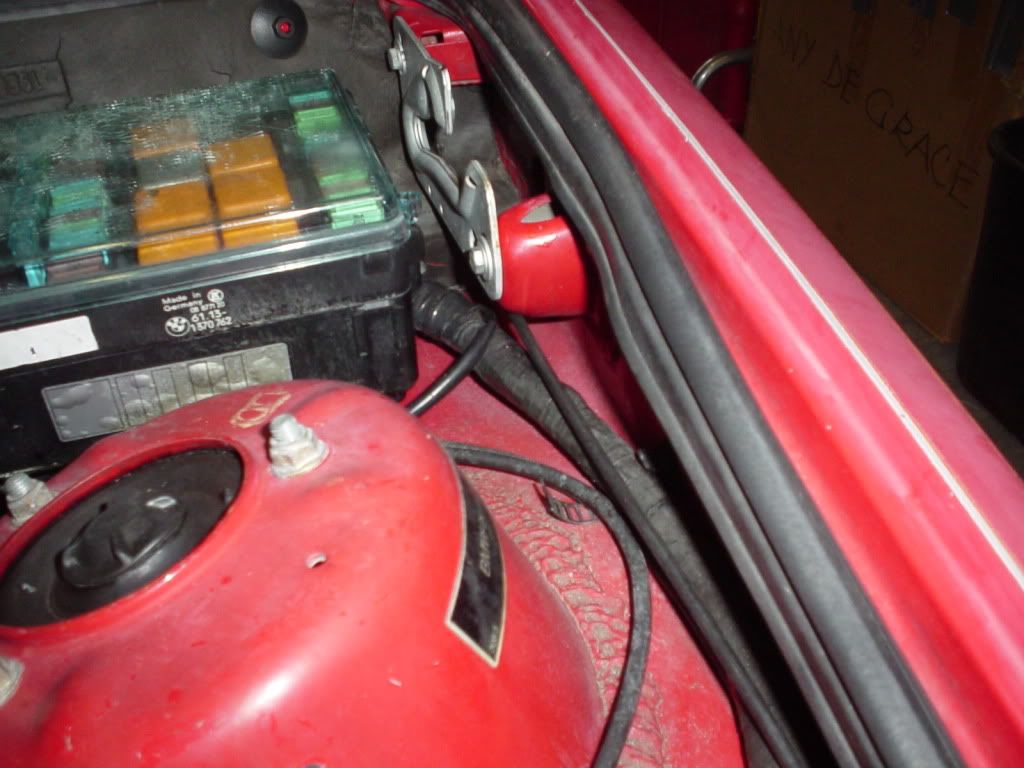
Pictures after:

Leave a comment:
-
Haven't done much to car lately, just oil change and gas. Starting to get back into the swing of things while I wait for some parts to continue the interior rebuild.
Currently my front bushings seem to be on their way out and they are squeaking and small thumping while driving at low speeds. So decided to start with my AKG upgrades, here is the first one, front CAB M3 offset (ready for install). Waiting on some ATE Plastilube to install them.
Leave a comment:
-
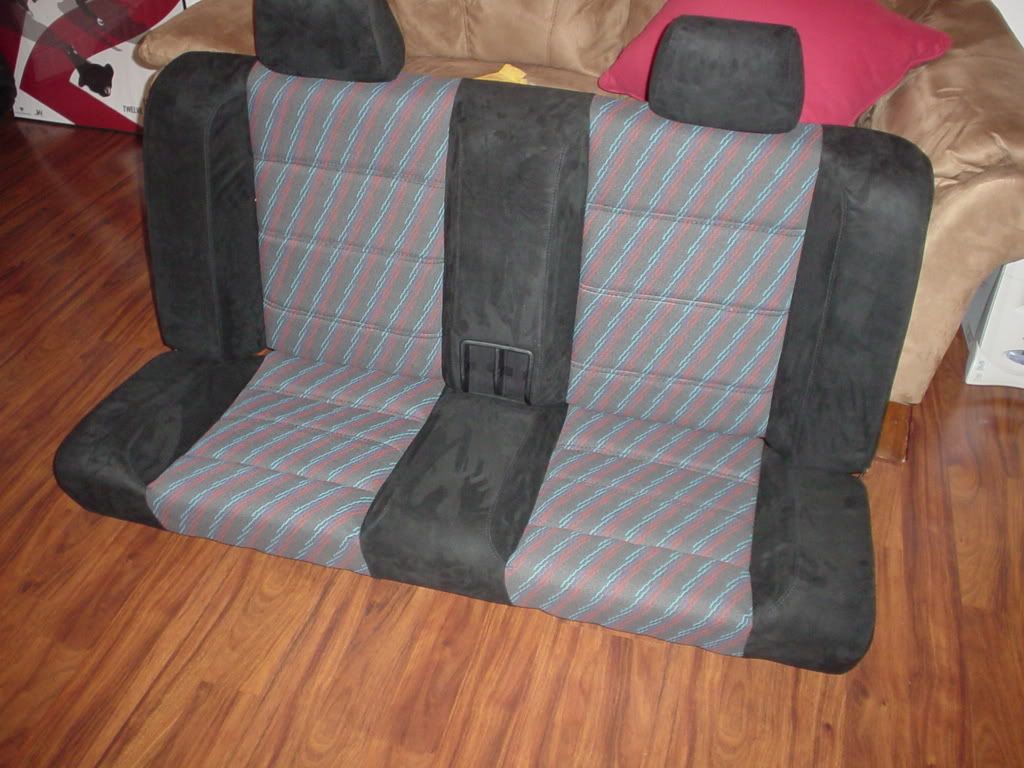
Finished the top part and very cool part....they originally came with the rear headrest which is going to be an added plus. Next it to pull the rear side panels and front seats to shampoo the carpets. Install everything the rear and then start on the front seats.
Here is the final pic....
Leave a comment:
Leave a comment: