If this is your first visit, be sure to
check out the FAQ by clicking the
link above. You may have to register
before you can post: click the register link above to proceed. To start viewing messages,
select the forum that you want to visit from the selection below.
Been spending all my extra time prepping and painting all the parts and pieces that still needed paint. I already have about 12-15 hours in the front bumper alone, as it was a Monet... looked good from a distance, but up close it was a train wreck. Lots of work on it. As of right now, everything except the bumpers is either based and cleared or at least base coated. I took some pics, but have not uploaded them yet. I'll try to get them up Friday night...
what is all this costing you? seems like getting a beat M3 and restoring it would have been cheaper.
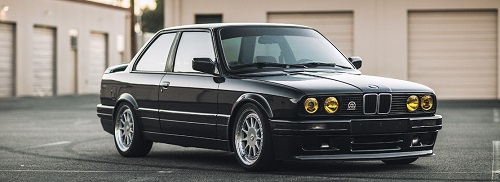
But where's the fun in that? I now have a basically brand new 25 year old E30, built exactly the way I want it, without bastardizing a genuine M3 in the process. Who cares what it costs, the fun is in the process... for me at least...
A roller E30 M3, sans drivetrain is still $5-6K. My roller E30 cost me $300... I'm still way ahead...
Yeah, I blew it... had dinner at the in-laws and by the time we got home and got the girls in bed it was 11 and I was wiped out and ready for bed myself... I'll get them up and take a few more tonight.
In other news, Justin(jgood) got his fired last night and posted a video, so you can watch that instead!
I did get the skirts and mirrors on the car before I left yesterday... now I have only the bumpers and the wing left to paint... finally...
Operation wet sand has commenced... I'll have updates in about a week, lol! I have done the passenger side and the tail light panel so far. That's taken about 4 hours, so figure another 6-8 to finish sanding then 2-4 to buff it out. I still have the bumpers and wing to finish prepping and then paint, but everything else is done. I'll be back soon...
Since I've not posted any fun updates lately, I'll play a little catch up with some pictures...
A previous owner of my front bumper created quite a mess when they decided to re-paint(at least twice) it at whatever point in time they did and left the striping tape on it, filled the gaps at the edges with filler and then painted right over the tape... ugh! I used a heat gun to peel the tape off the bumper and cleaned up the 25 year old residue and continued to prep it for paint. Too bad it set me back about 2 hours worth of time, but at least it came off...
A couple of shots of the wing and skirts in primer...
Most all of the accessories, some painted and cleared, others just base-coated, awaiting final assembly...
Quick shot of the interior coming along...
And my fuel filler solution to keep the factory location of the filler neck...
That's as many pics as I have uploaded to date, I'll get some more of the wet sanding aftermath later this week...
As far as the fuel filler setup goes, it's not completed, so I have not tested it. Not worried though, as there is ample fall from the filler neck to the tank and it's plenty big enough... 2.5" ID should be more than adequate compared to the OE hose and piping...
Comment