
nice, did you buy new half shafts? or remanu? looks like new
-
Renting my rear wheel bearing tool kit. SIR
http://i25.photobucket.com/albums/c5...ps6debf0b0.jpg
Your signature picture has been removed since it contained the Photobucket "upgrade your account" image. -
-
Just read through the whole build today, i love what i see. look forward to seeing more.View my build thread. http://www.r3vlimited.com/board/showthread.php?t=287724Comment
-
So I can't find the pics of the rear brake install at the moment. However I'll show what I did the past day!
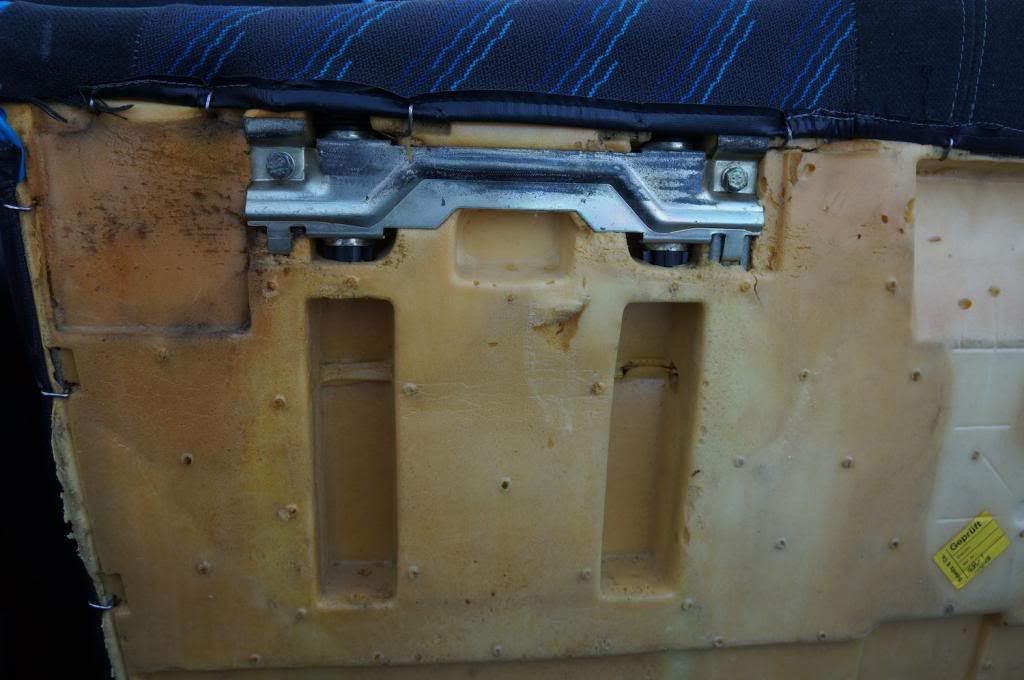
Cabrio Rear Headrest Install DIY!
Parts:
52209058393 -Install set X2
Rear Headrests!
Tools:
Long Philips screw driver or rod
Permanent Marker
Razor blade or X-acto knife
Largish drill bit
Lighter of some sort
I'm not detailing the bracket install as it's self explanatory.
This is what you will be starting with:
Get a really long screw driver or rod and insert it as so:
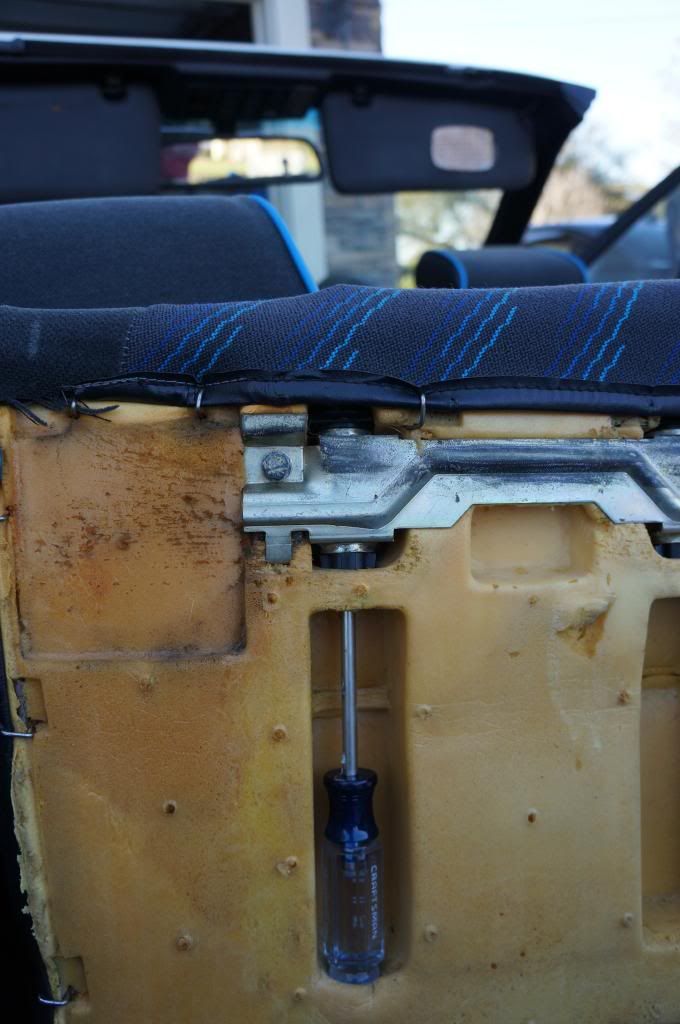
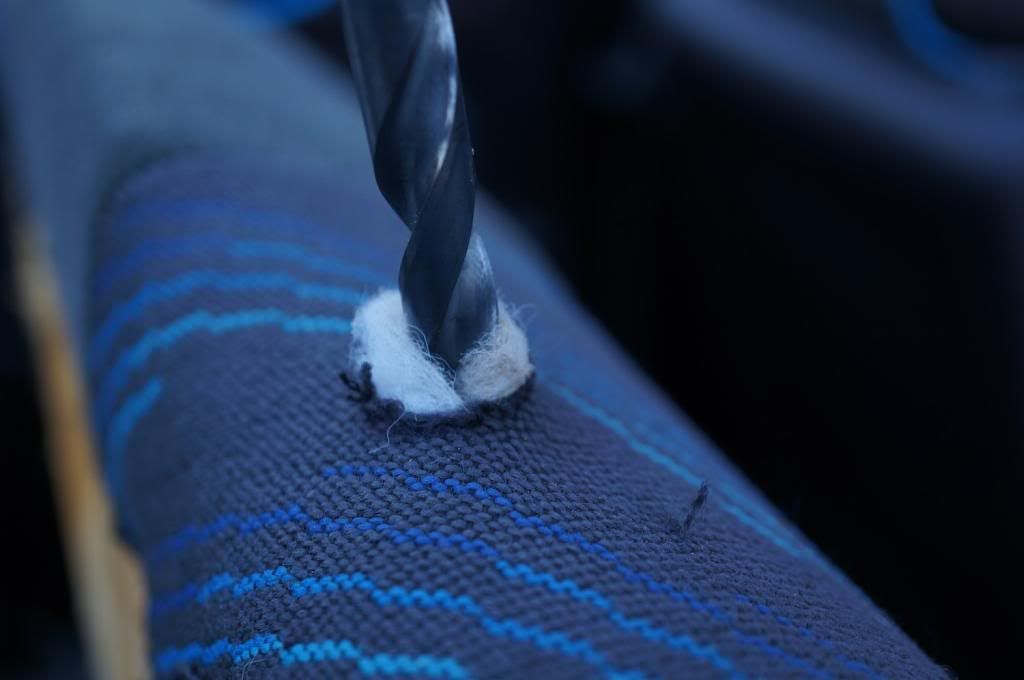
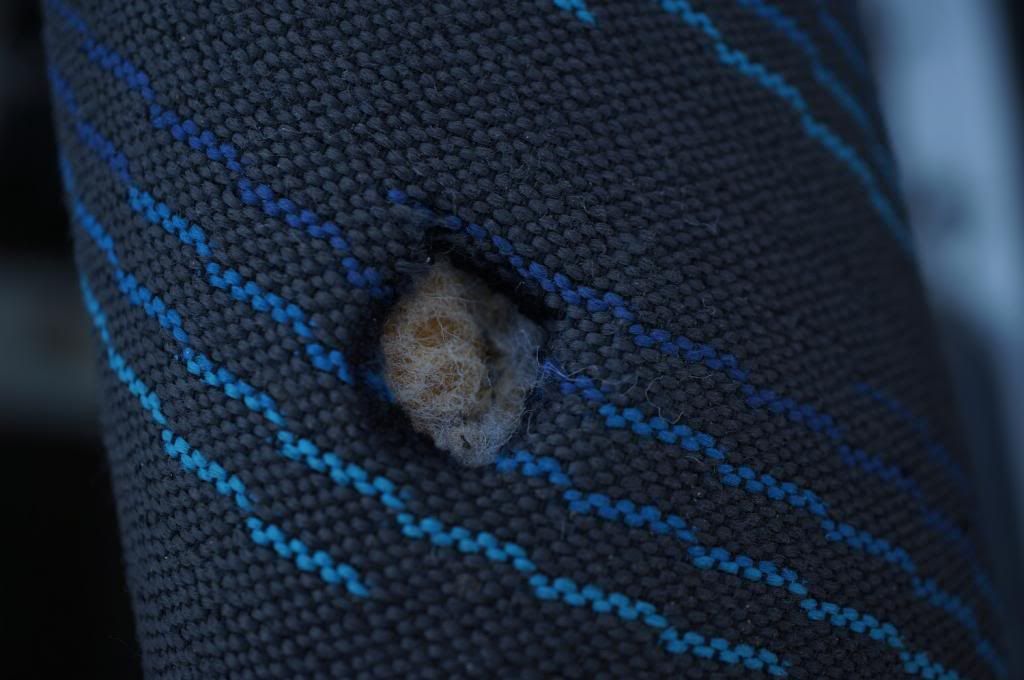
Note the little "mounds" that form. This is the center of what will be the hole in your seat. It's very important this is actually centered!:
Make marks of the center:
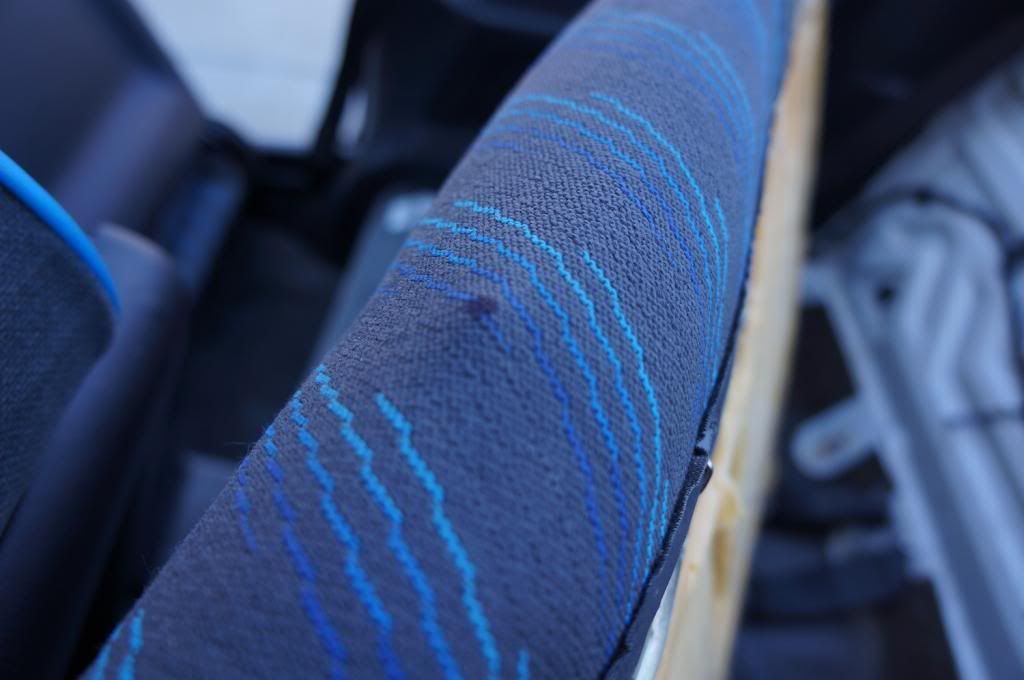
Then trace the inside perimeter of the bottom "cover" onto the seat and start cutting with the screw driver still poking the seat cover:

Next take your drill bit and remove some fluff. The goal is to remove some of the fuzz material that goes between the foam and the seat cover. Cut away the little that you pull up:
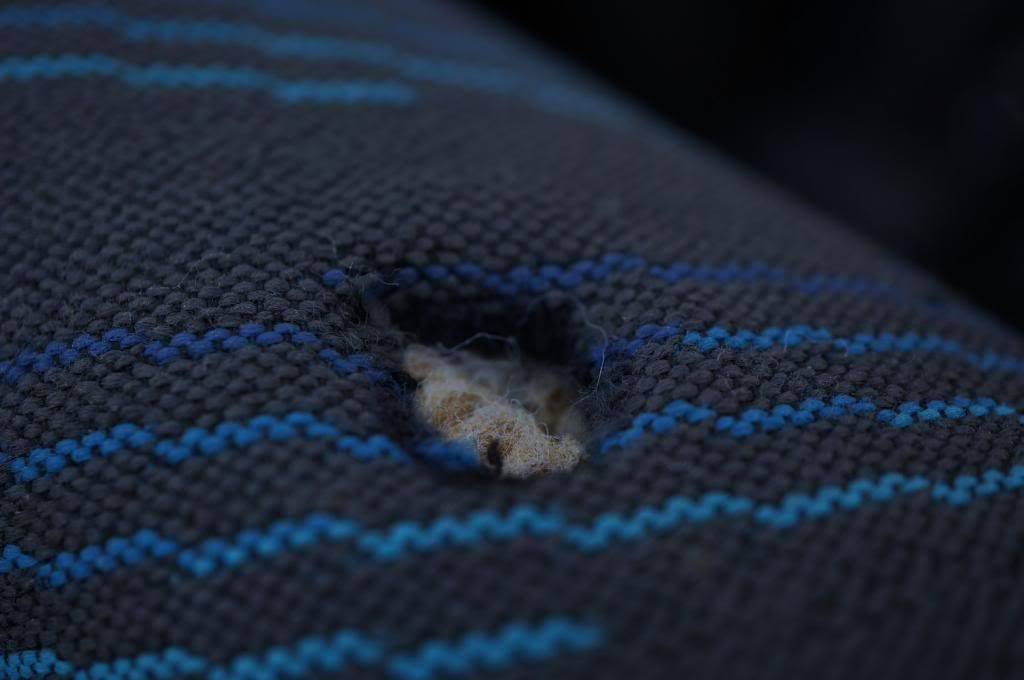
Cut two small slits slightly larger then the hole you made. Run them paralel with the back of the seat in the event you cut too far it won't show. ;)
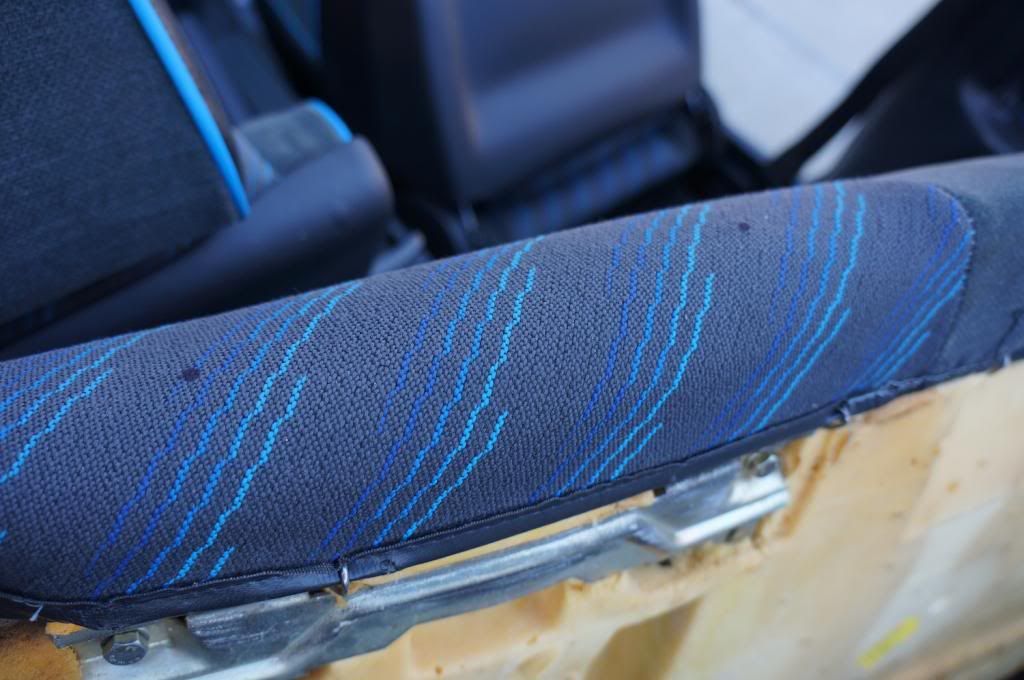
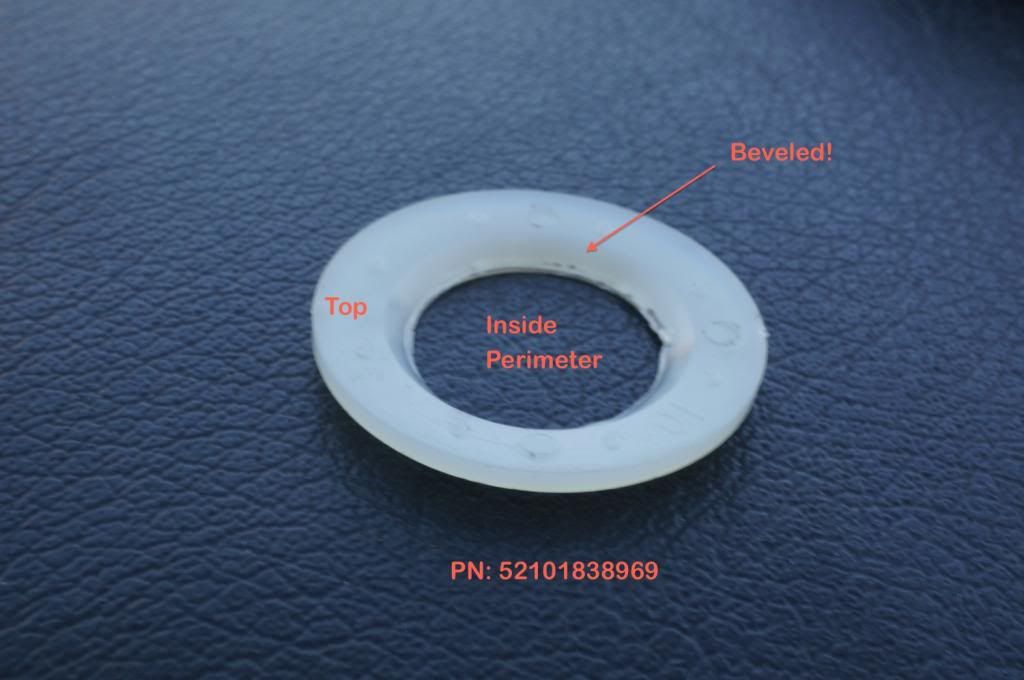
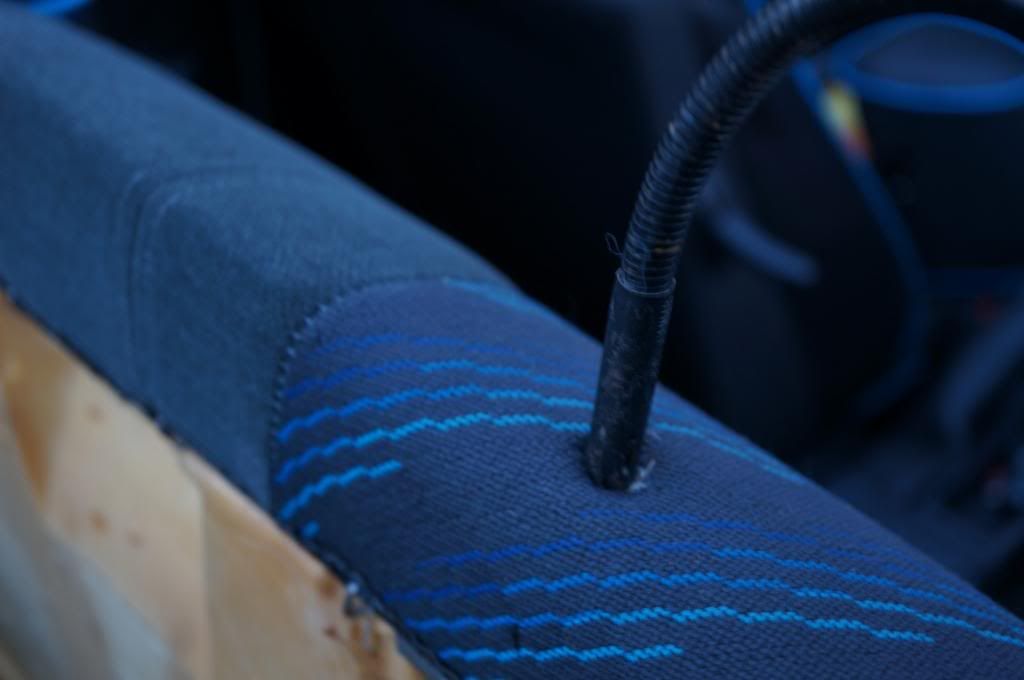
You're trying to be able to squeeze the bottom cover between the fabric and the foam. Make sure the beveled part is facing up. You should be able to "fold" it slightly to fit in the slit:
Fold the edges of the seat cover under and take a lighter to it to stop possible fraying:
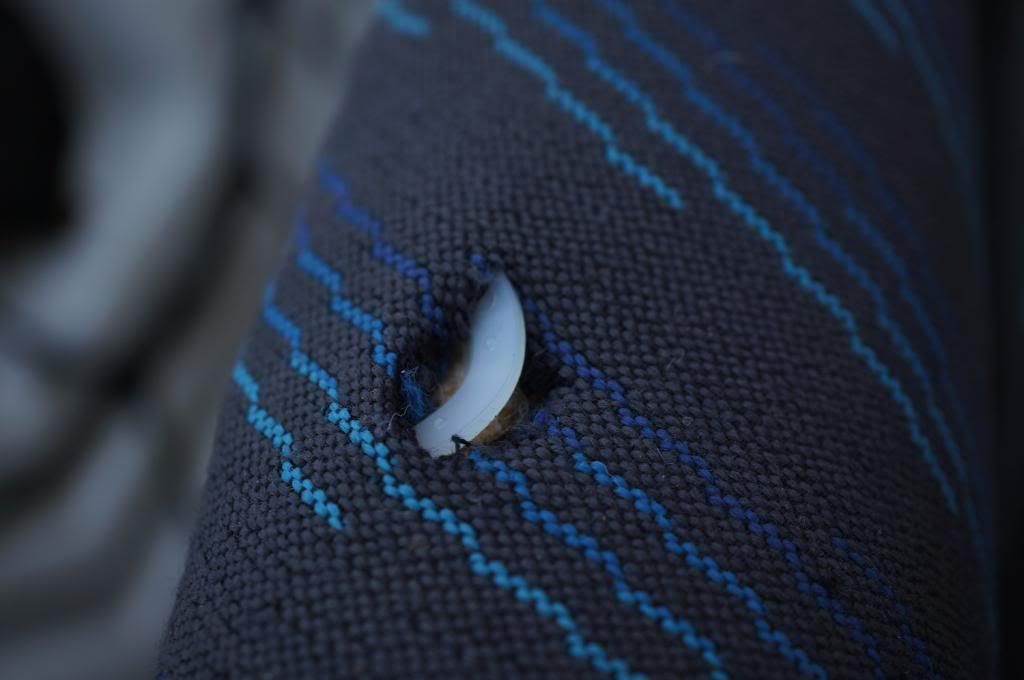
Pop the top cover on and push down. You should hear some clicks of the lower cover doing its job of keeping the top in place:
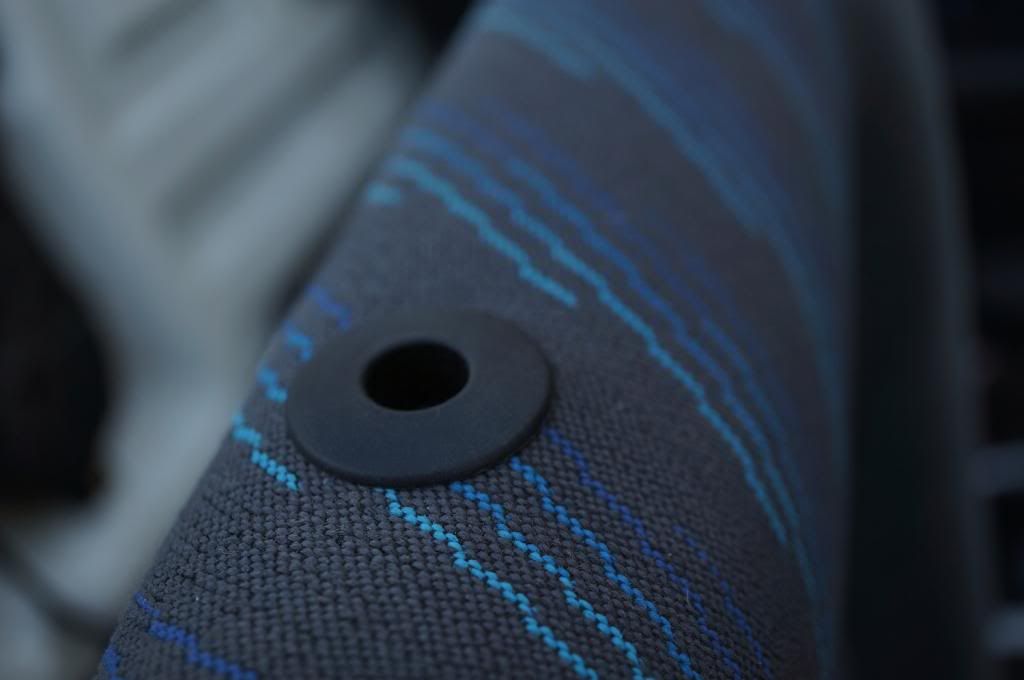
If you did it right it should look like this. Note there's no obstructions in the hole nor is it not flush with the cover:
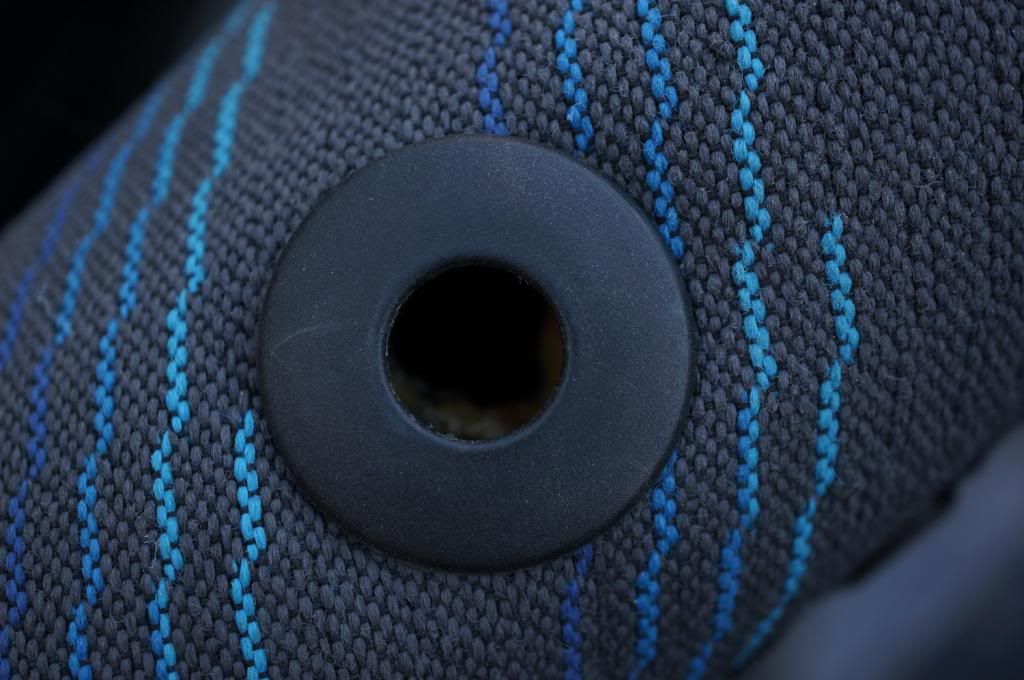
Finished Product:


Comment
-
Finally got it running correctly. Between a bad ground in the harness and a bad gas vapor valve Sofie idles correctly! Still no O2, but that will be fixed when the exhaust is redone in the coming weeks.
Comment
-
-
sweet jesus!!!!!
why do you have so many weed whackers?sigpic
Gigitty Gigitty!!!!
88 cabrio becoming alpina b6 3.5s transplanted s62
92 Mtech 2 cabrio alpinweiss 770 code
88 325ix coupe manual lachsilber/cardinal
88 325ix coupe manual diamondschwartz/natur
87 e30 m3 for parts lachsilber/cardinal(serial number 7)
12 135i M sport cabrio grey/blackComment
-
Love the hartges. Let me at em.
Comment
-
More pics of the weed wackers.~ Puch Cafe. ~ Do business? feedback ~ Check out my leather company ~
Instagram: @BWeissLeather
Current cars:
~ '87 325 M30B35 swap
~ '87 535
~ 01 540 Msport 6spd
~ '06 X5 4.8isComment
-
Meh
:pWrecking cars, closing bars.
Tie rod spacers for sale: http://www.r3vlimited.com/board/showthread.php?t=245785Comment
-
You guys are special.
Rear brake setup pics were also missing for a long time. Found those on my old computer I let a friend borrow.
This is the 300mm.de 294 bracket w/ E36 M3 rear caliper carier

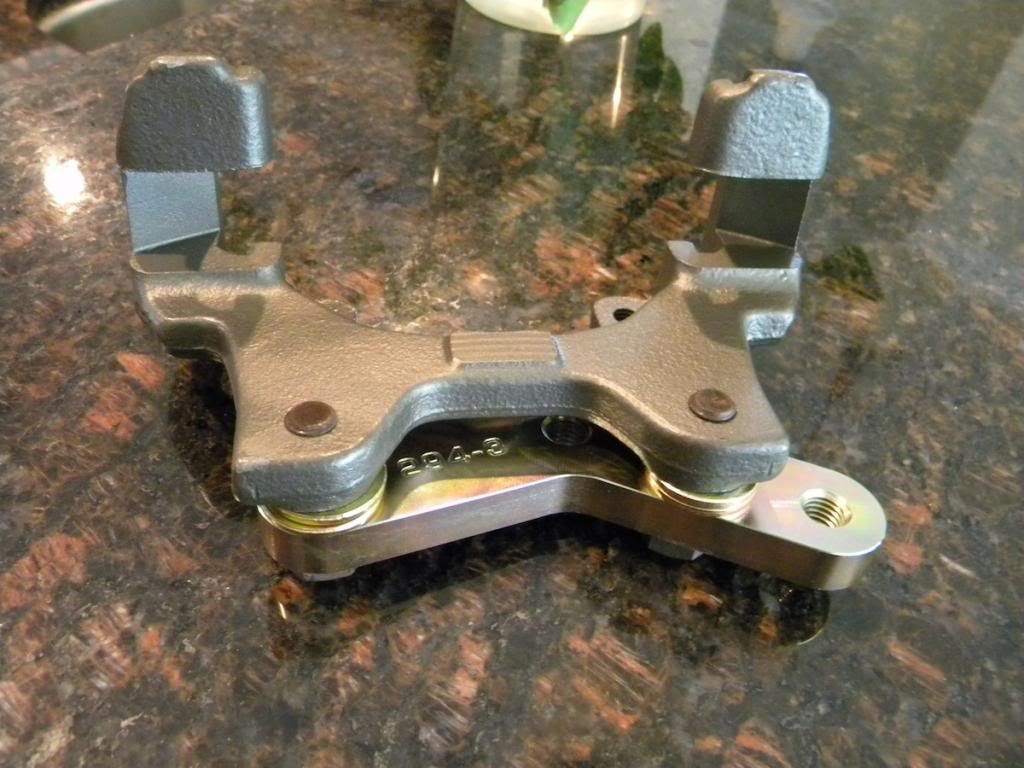
To get this to work you have to do some hacking, so here's what I started with. Stock 318ti dust shield
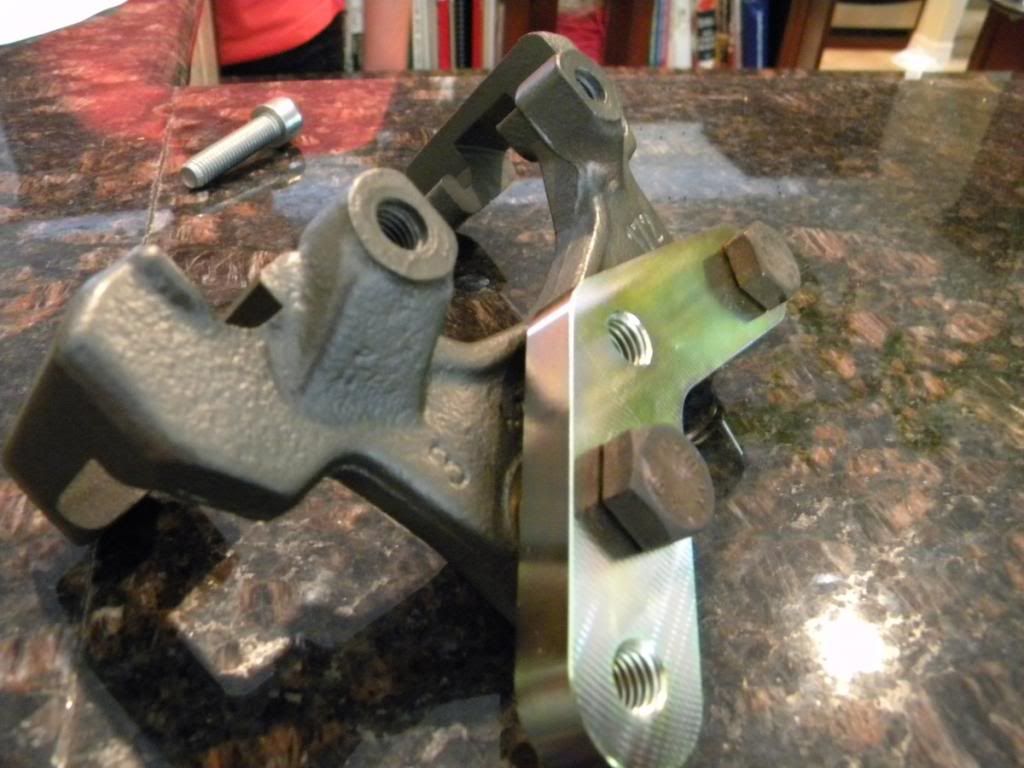
Bracket bolted up
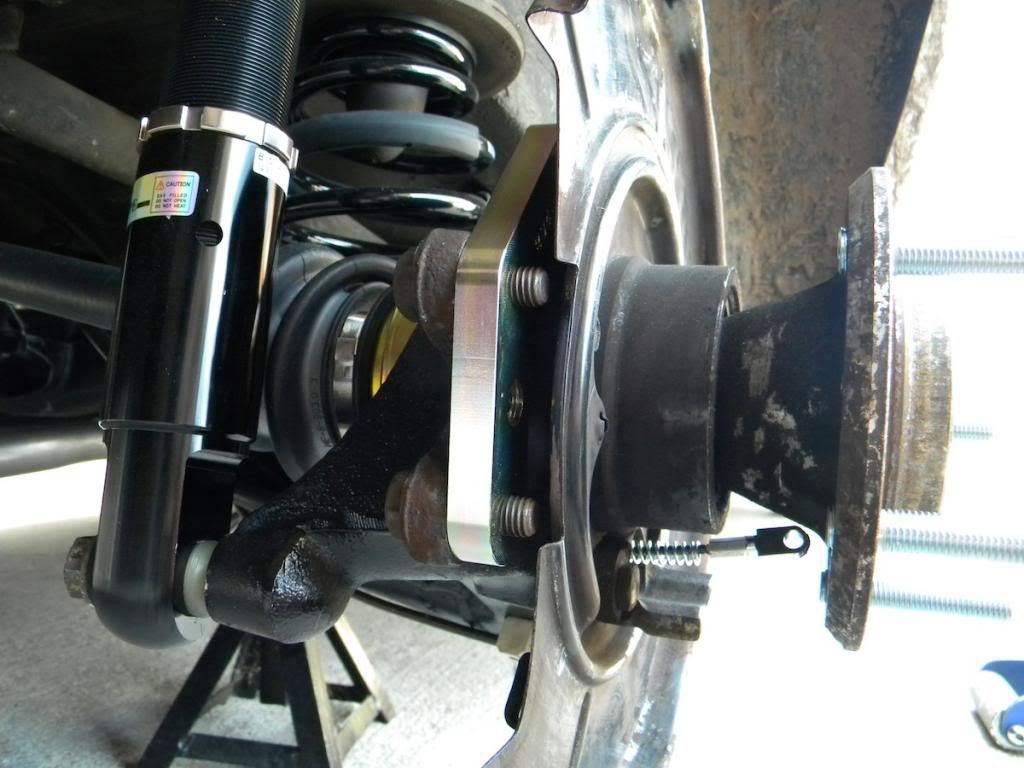

Marked where I needed to cut

Snipped
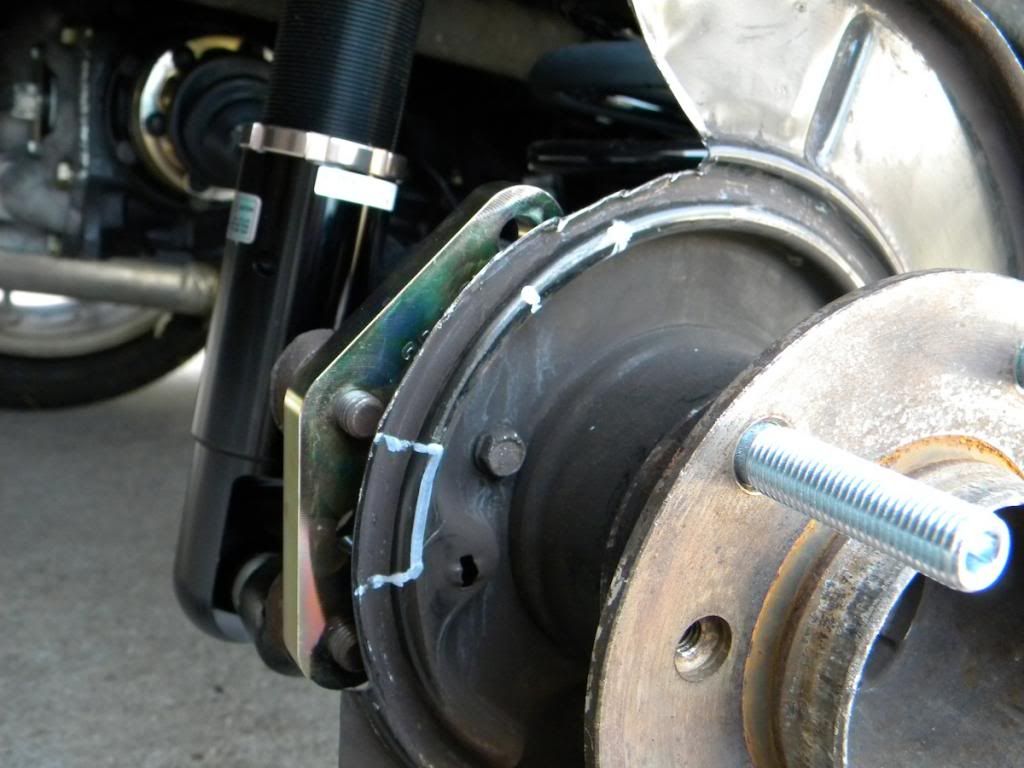
and some more
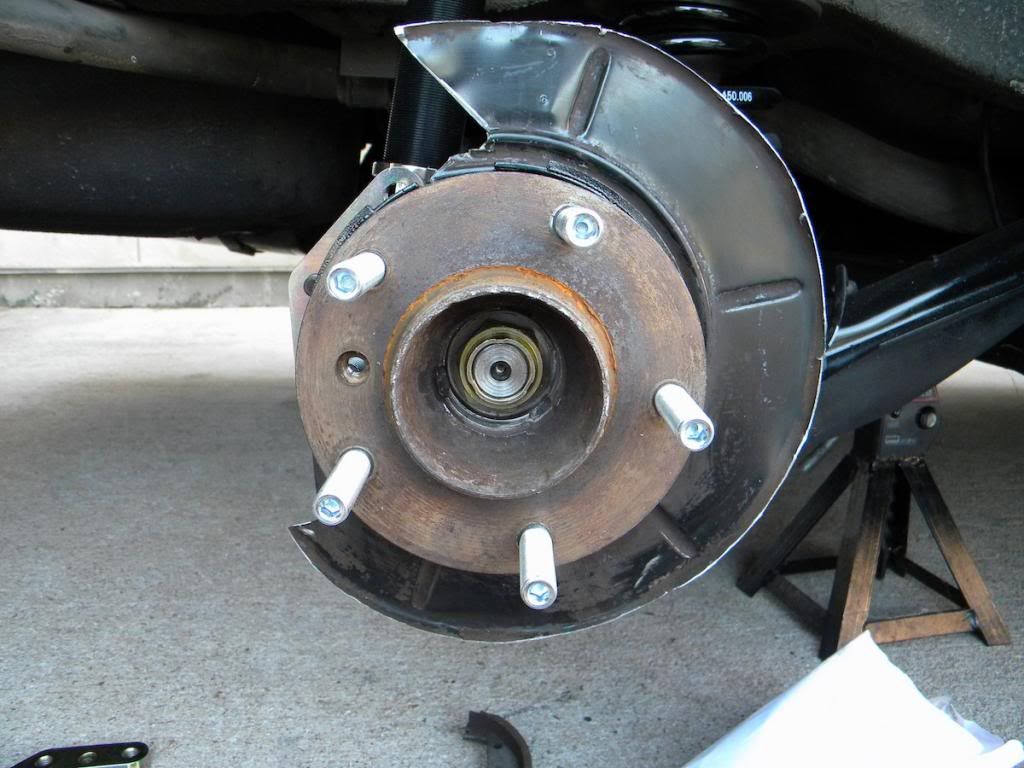
Checking clearance. The rotor is a Z4 3.0 si
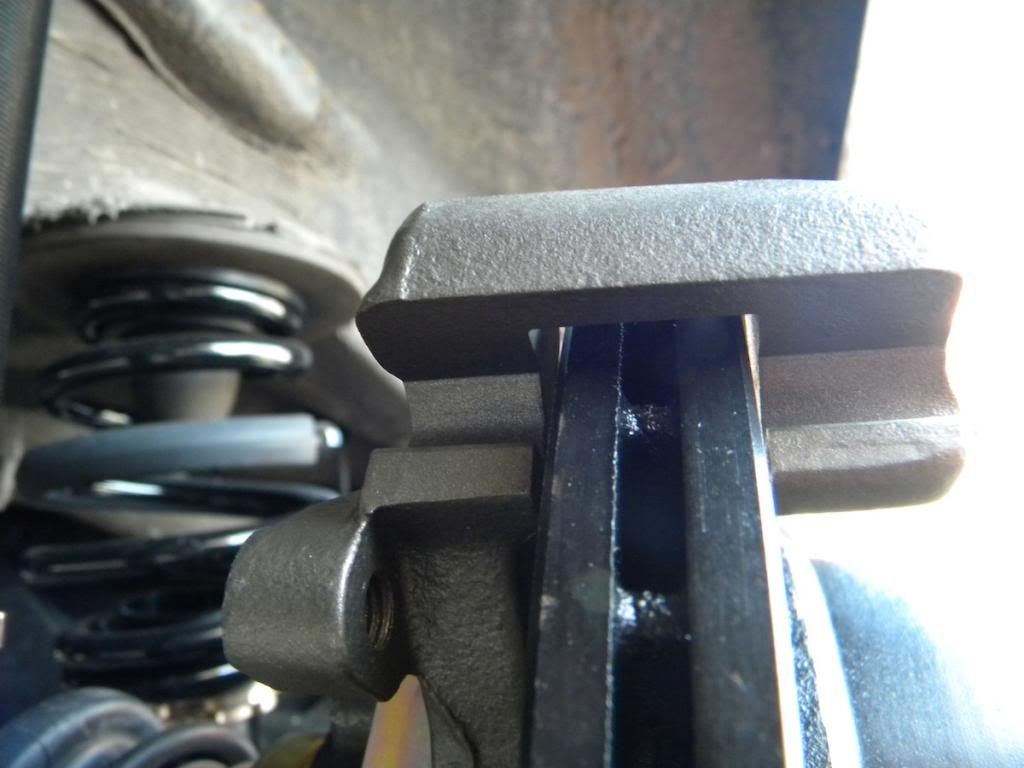
E-brake setup is stock 318ti


The setup sits on the carrier and functions as it should

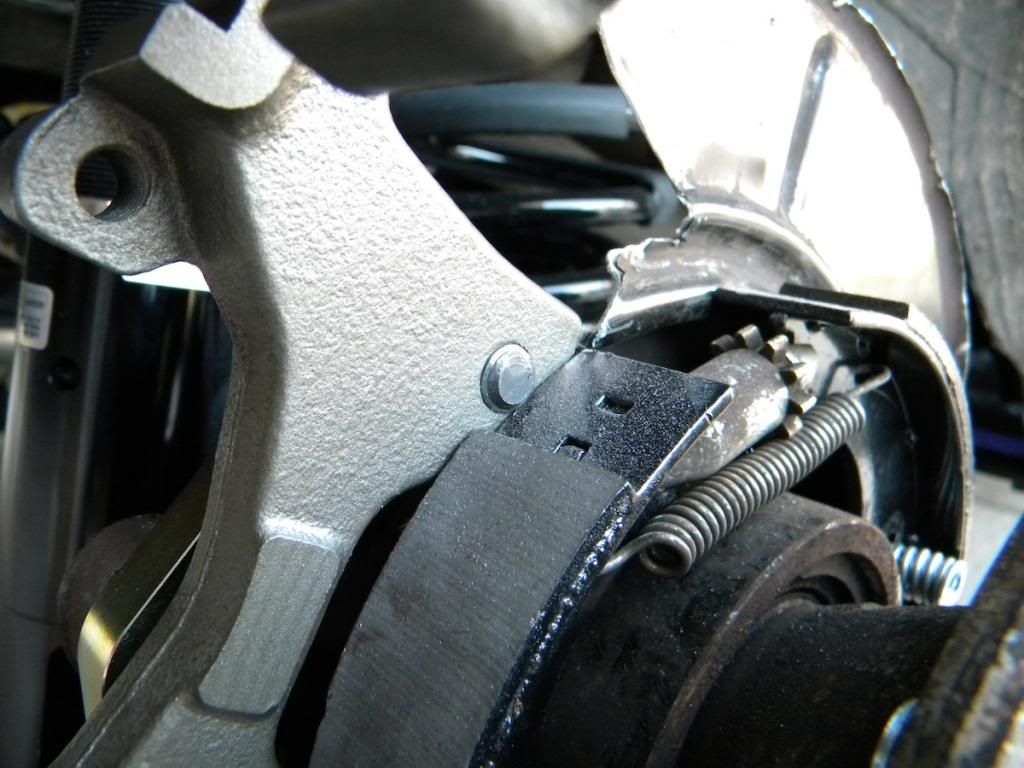
End result. M3 caliper on Ti trailing arms w/ 294mm vented disk :)
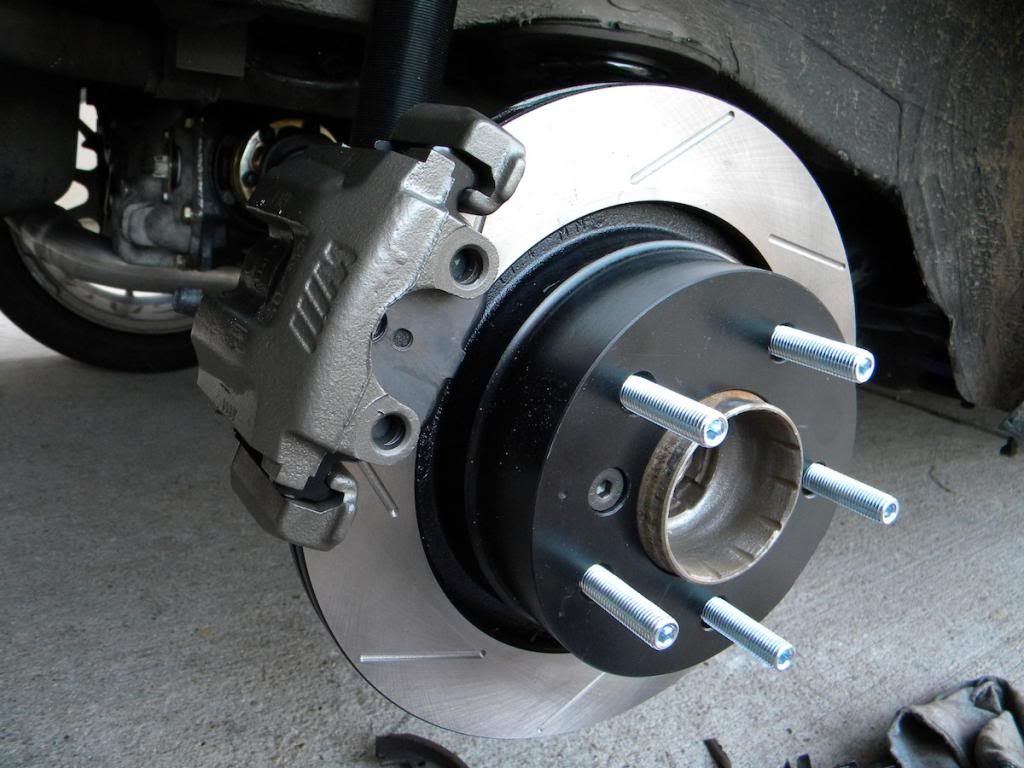
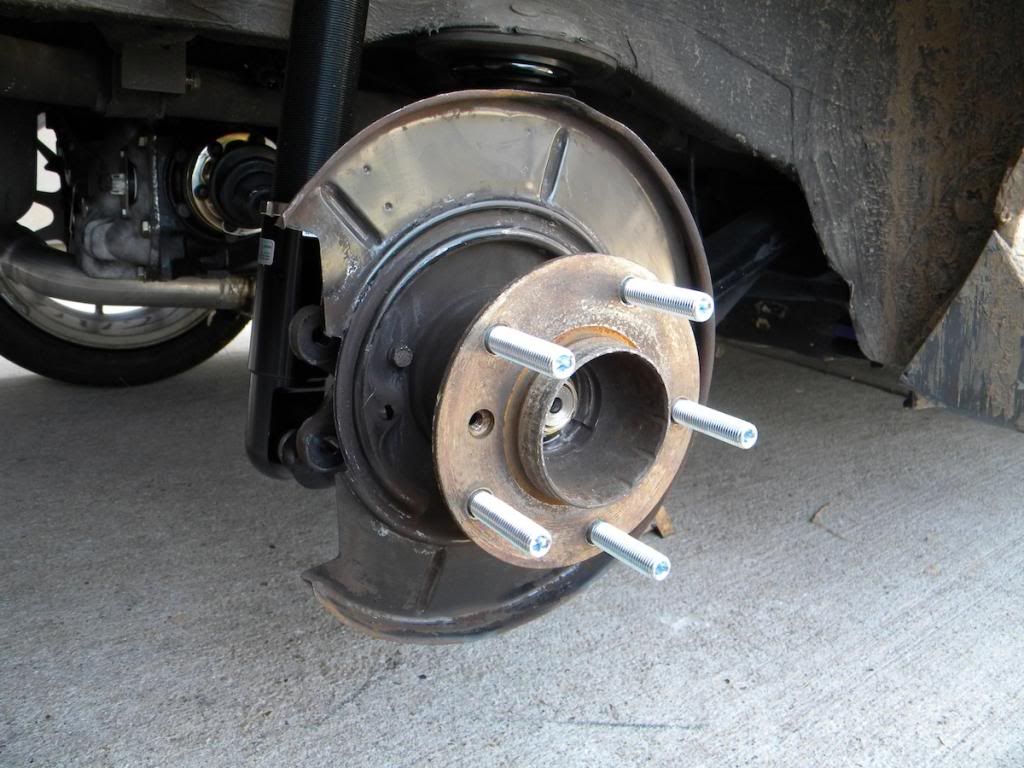
After getting the car aligned a few months ago, I found out passenger side trailing arm is quite bent. So I'll be replacing it in the coming months and when I do I'm going to try out the Z4 dust shields to see if they fit on the Ti trailing arm as I had to do some cutting to get a rotor that big to fit. ;)Comment
-
So I've had a bit of a major set back. As a few of you may know my headgasket decided to let go, which was kinda frustrating. As a "while I was in there" I wanted to take off the timing case cover and have a look see as I've been having some interesting chain noise as of late. This is what I found. It took out the guides and a couple teeth on the main crank sprocket. As a result the engine is going to be yanked out and completely rebuilt. :/
Brightside it will be going to paint finally with the newly mounted MT-2 kit while the engine is being rebuilt.
 Last edited by glucklich21; 09-03-2015, 08:02 AM.
Comment
-
Ouch dude. But new MT2 and paint at the same time wow. Tough on the wallet and wonderful to the eyes :-)
Pix please!Last edited by bradnic; 08-18-2013, 07:10 PM.I BUY/SELL REFURBISHED CM5907s & CM5908s
HOWTOs:
DB vert plastic bumpers
OEM Keys
MTech1 docs
88 ix Lach/Card
91 ic Calypso 3.1
86 Cosmo 2.7
OEM+ or bust!

reelizmpro: I will always be an e30 guy.. I still do all of my own labor
TrentW: There's just something so right about a well-built M20 in an E30
e30m3s54turbo: I save my money for tuner parts.Comment
-
I like the seats a lot. I can't wait when you are finish the car.Projects Hartge,Alpina & AC Schnitzer Builds.http://www.r3vlimited.com/board/showthread.php?t=280601
http://www.r3vlimited.com/board/showthread.php?t=227993
http://www.r3vlimited.com/board/showthread.php?t=289362
 DSC04926 by Raul Salinas, on Flickr
 DSC03413 by Raul Salinas, on Flickr
Comment


Comment