
Your making one wicked 2002 here! I can only hope to pick one up soon for another project.
-
'Preciate the props guys.
Thanks man, and I wouldn't go that far. Your's will definitely beat mine in the 'low' category.
Do it. There can never be to many '02 project blogs!! :hitler:Comment
-
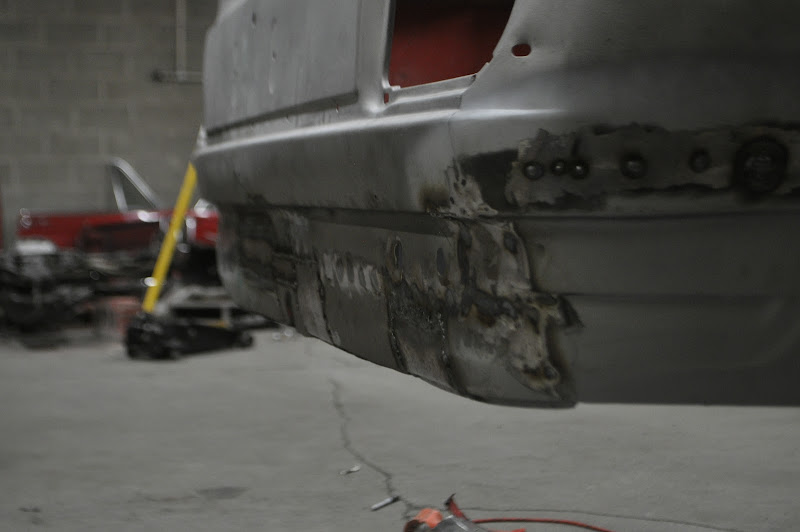
Not the most glamorous of updates, but an update none the less.
Keeping with the theme of working on her backside, I decided to test fit my rear bumper to see how it would look with the flares. Still a bit abstract at this point, but I like where it's heading.

Next up was to finish removing the last pieces of the old rusted trunk floor. Here you can see the rear panel of the trunk, and the upper and lower lips of the trunk floor that are left:

These were attached with a crap-ton of spot welds, and some seam sealer. So first thing first I drilled out all the welds:

Then carefully pealed away the seam sealer and viola! no more trunk floor:

With that taken care of it was time to start patching the rear panel. It had a few area's that were very pitted, as well as the old 'diving board' bumper mounting holes. I forgot to take pictures of all the steps of cutting and patching, but long story short about 1000 tack welds later this is what she looked like:

Note the truly centered exhaust cutout (I still need to cutout the indented section of metal). This is different from both early and late cars, as the early ones had the cutout over on the right hand side and the later cars had a slightly offset 'center-ish' exit. A true center exit was something I always liked, so I figured why not.

Did I mention there were a lot of tack welds...
Then I moved on to the driver side rear quarter panel. While not as bad as the passenger side, it was still pitted enough to require a full replacement.
The Bad:

The good:

Once I finish grinding the welds smooth I'll start fabing the trunk floor and fuel cell mounts. Then it's on to the front of the car!Comment
-
-
what gauge sheetmetal do you use for the panel repairs! I have some rear valance pitting that needs to be addressed.
you make it look easy, which gives me confidence that I can do it too (with great care)Comment
-
I've been using 18 gauge for everything, which worked great for the floor boards and other load bearing panels. But it is a bit thicker than the stock rear valence and quarter panels. If that's all your working on I would say 20 gauge would be fine.Comment
-
-
Just got caught up. I can hardly contain the respect. Awesome work, man. I wish I had the know-how to take on this kind of project. Maybe some day...
Absolutely subscribed.Who put this big Subaru-shaped dent in the back of my car?
sigpicComment
-
There are no words for this epicness. Amazing work.Comment
-
Registered just to tell you that this build is awesome, to subscribe to the thread, and to wish you the best. You are insane in the best possible way - and your '02 will be too.
-MattComment
-
Comment
-
Small update. My cousin came down to help me for the day and I didn't bring my dslr from home, so I only have one picture. I start framing out the trunk for the fuel cell and roll cage. If you look at the center section you can see the fuel cell will be slightly offset to the passenger side to help center the drivers weight.

Expect more updates soon.Comment
-
Nice, good to see some progress. Got a sticker going out to you next week....finally.Comment
-
This looks amazing man. The level of detail, craftsmanship and creativity is impressive.
Best of luck!Comment


Comment