If this is your first visit, be sure to
check out the FAQ by clicking the
link above. You may have to register
before you can post: click the register link above to proceed. To start viewing messages,
select the forum that you want to visit from the selection below.
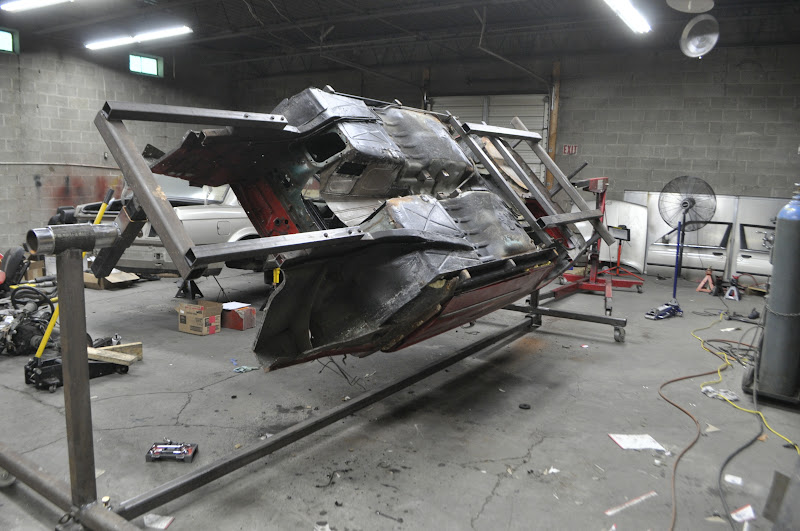
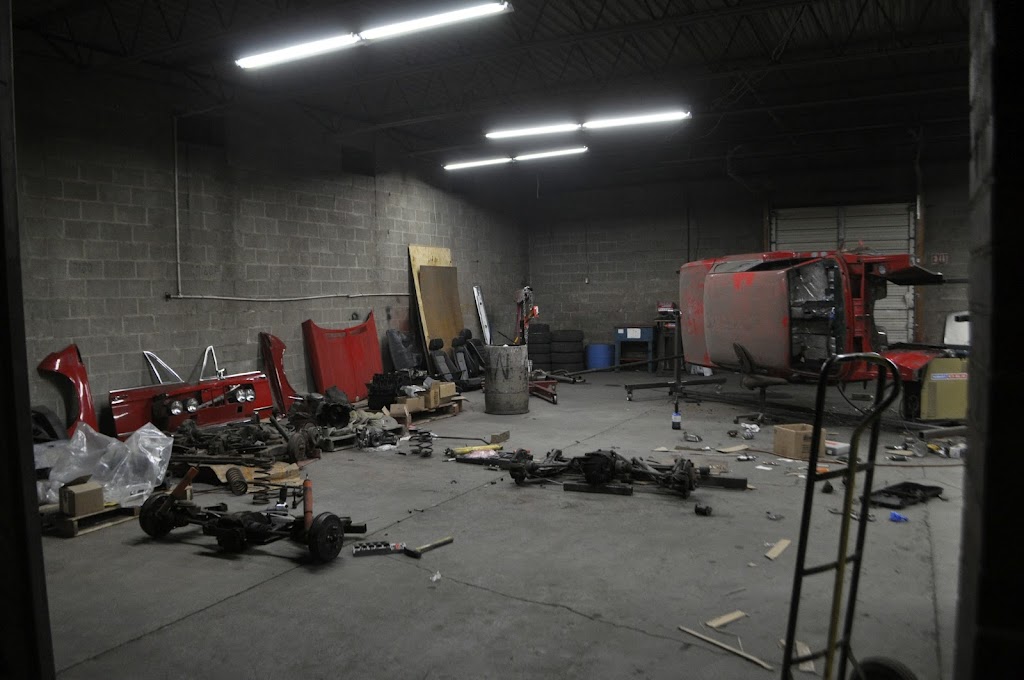
Haven't got as much done as I would have liked these past few days. Once I got the car on the rotisserie I came to the realization that the shop was a complete disaster, so I decided I should clean up and organize my large pile of parts. I did take time to look at the condition of the underbody now that it can be seen out in the clear.
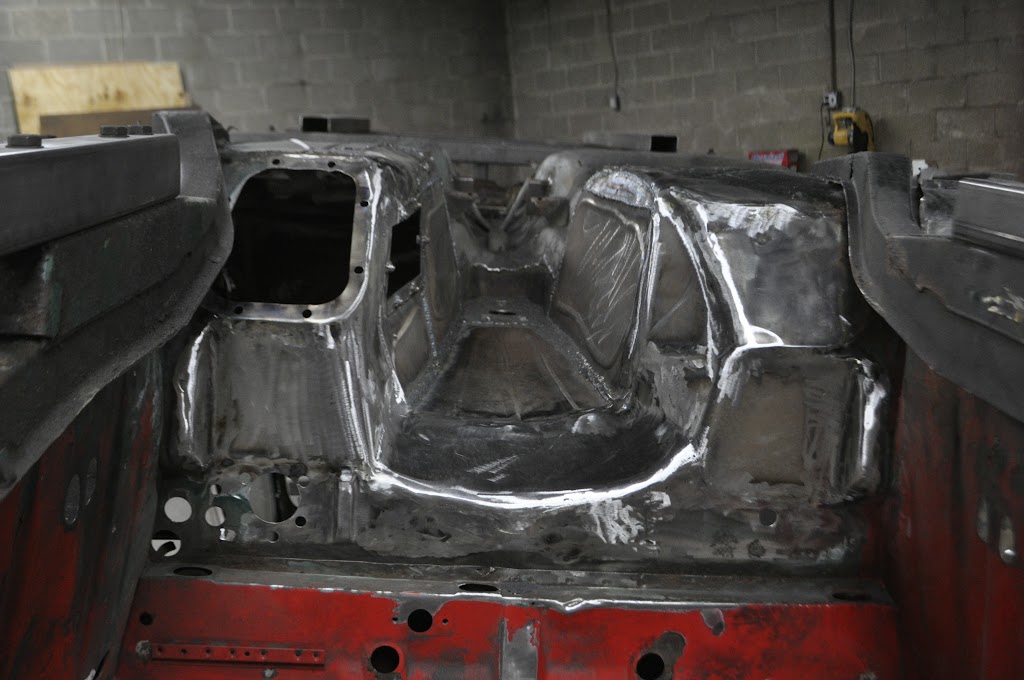
The first time the underbody has seen the light of day (or light of shop I suppose) since god knows when:
My rotation motivator. Low tech, high effectiveness:
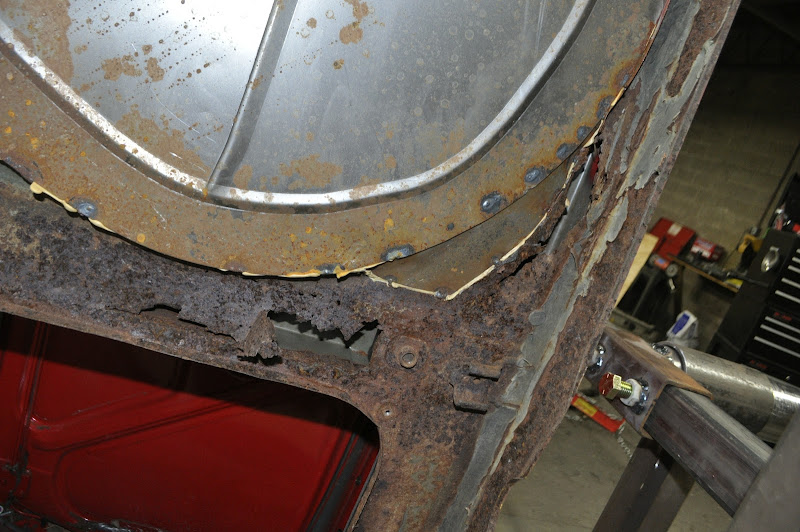
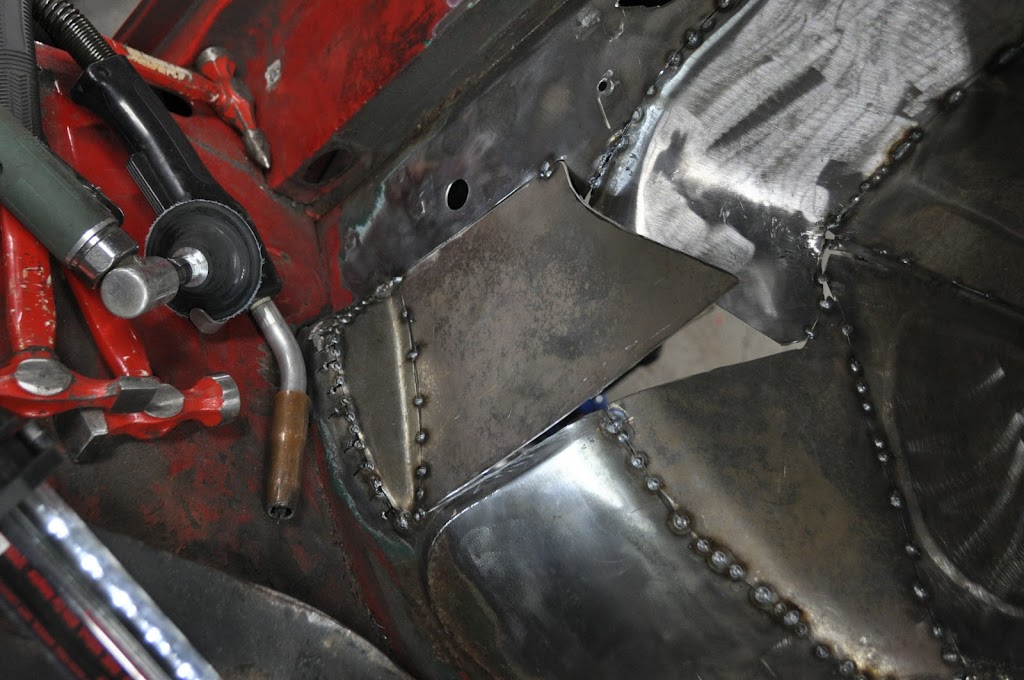
Trunk Under Side. This is probably the worst area considering I didn't really do much repair work previously. It needs pretty extensive repair including the floor, the inner rails, the lip around the gas tank seal as well as the inner and outer fenders.
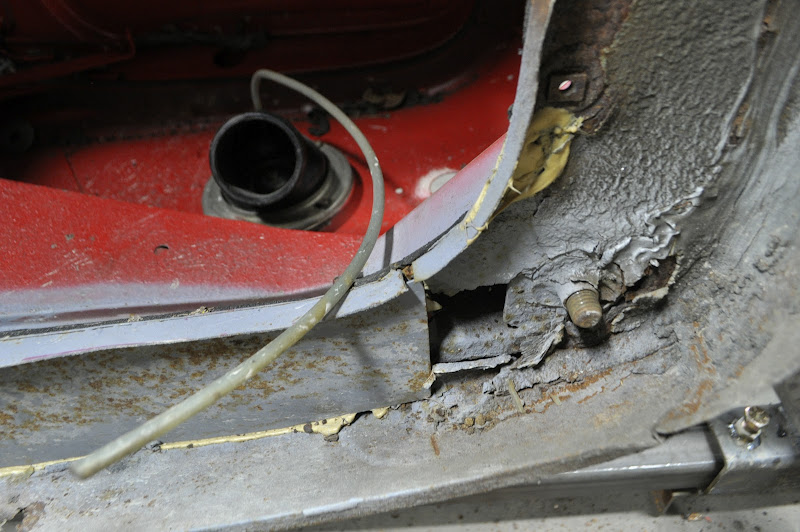
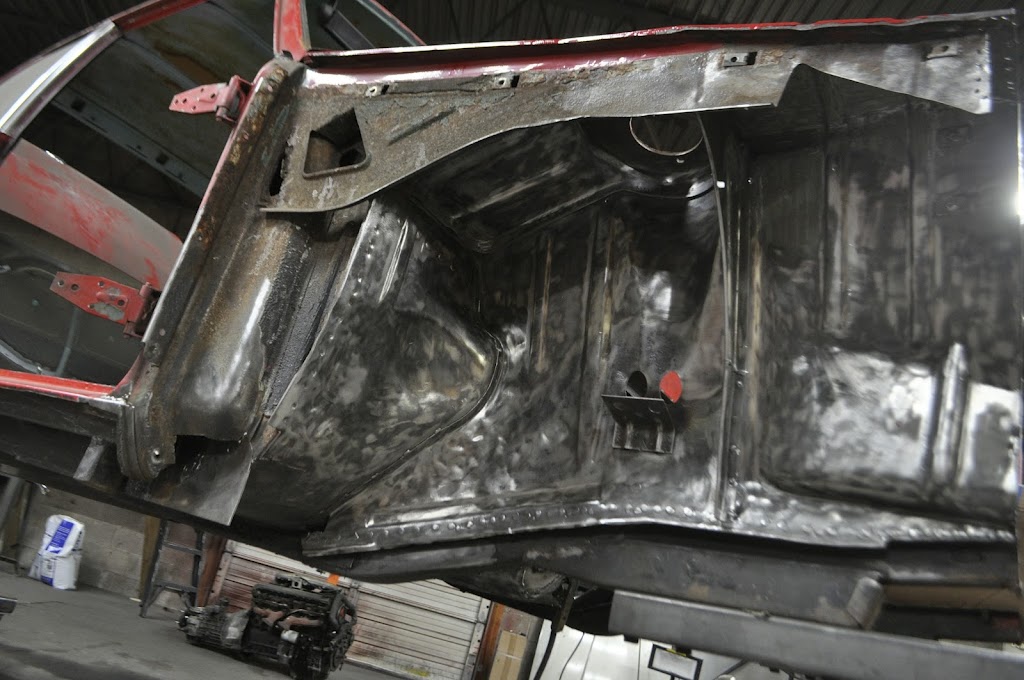
Driver Side Floor. Not to bad, glad to see my old repair holding up 1.5 years later. I do plan to grind the welds smooth and fully seal everything. I may cut open the frame rails to make sure there is no hidden cancer. That would give me a good excuse to reinforce them as well.
Passenger Side Floor. About the same as the driver side, except the area where the old heat shield was. Pretty much the same course of action as the driver side as well.
Tinker Engineering - 2014
Mica - 2000 BMW 323i - The one that started it all Fiona - 1975 BMW 2002 - The Definition of Project Creep Heidi - 1988 BMW M5 - The piece of BMW history Silvia - 2013 Subaru WRX - Stock, for now
Progress has been a bit slow the past week. I've averaged 10 hours at work per day (weekends included) and then 4-5 hours on the car per day, and a lot of that was planning out my fuel system and suspension components.
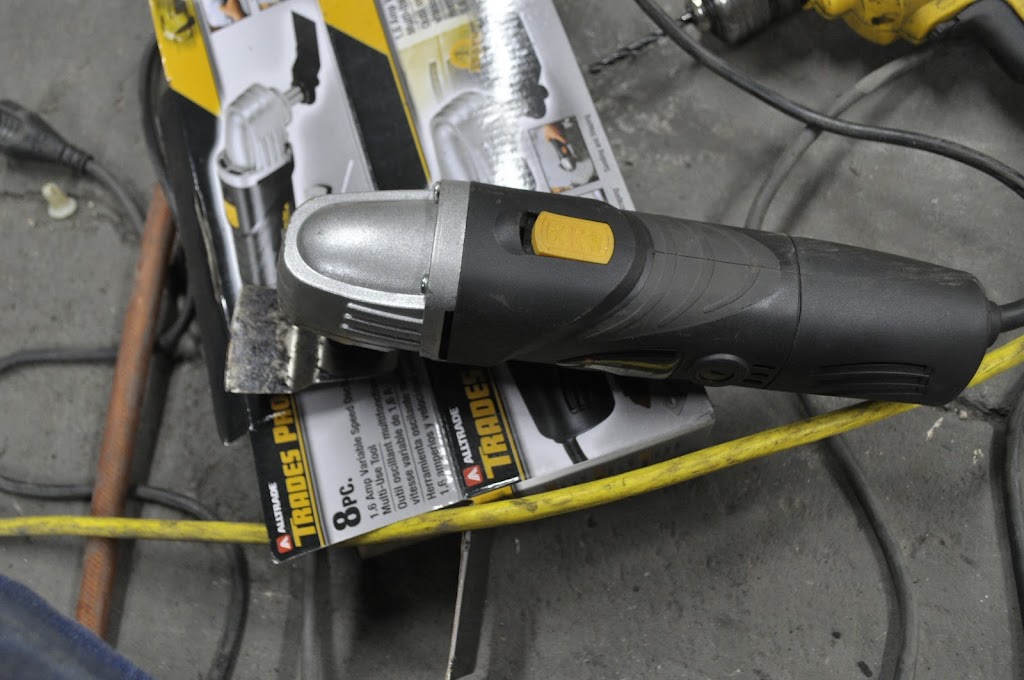
I was able to start stripping the body down to bare metal. For this I used a combination of an 'oscillating multi tool' with a scraper attachment and a angle grinder with a wire wheel. After spending a few hours getting it to it's current state, I decided that I wasn't happy with how much progress I was able to make. So I broke down and ordered some fine grade glass bead, which I will use to media blast the entire body in the next week or so. I already have a media blasting pot, so I'll just need to make a small 'booth' with drop cloths to keep the dust down and go at it. This will let me reach into all the nooks and crannies in the body panels and kill any rust, which will help me sleep better at night.
The progress I made before 'quitting' the wire wheel stripping:
In case anyone is wondering, this tools works great at removing undercoating and especially the sound deadening material from the inside of the car;
While I wait for the media blasting stuff to arrive I finished fabing up the new firewall and trans tunnel. I started with the center section:
Interior view, the new location doesn't really cut down on foot room which is nice:
Here are most of the panels tacked in place. I didn't bother to roll any beads or steps into the firewall pieces because they had enough curves in them to be pretty stiff to begin with:
Putting the last piece in place. Start by tacking the side in place:
Side view, you can see the curve that will be put in the piece:
Here is a before/after of two holes I shaved. The before is on the right, fully welded, the after is on the left, ground smooth. When done the whole firewall will be that smooth and covered in a thermal insulator to keep heat out of the cabin.
So... Many... Tack Welds....
Finally the last shot from tonight, the entire new firewall and trans tunnel tacked and ready for welding and grinding smooth. Hopefully I can knock out a large chunk of that tomorrow, but it depends on when I get off work.... And yes, the picture was taken upside down for better lighting (did I mention I f-ing love this rotisserie!! lol).
Tinker Engineering - 2014
Mica - 2000 BMW 323i - The one that started it all Fiona - 1975 BMW 2002 - The Definition of Project Creep Heidi - 1988 BMW M5 - The piece of BMW history Silvia - 2013 Subaru WRX - Stock, for now
Just got home, and I have to leave for work at 7 tomorrow. Pretty tired, so I think I'll just let the pictures do most of the talking. I finished welding up the outside of the firewall and trans tunnel, as well as patched another section of the floor that had 3-4 different previous repair seams in it. Then I started on welding the interior seams of the trans tunnel and firewall but my welder started acting up and it was late so I called it a night. Tomorrow (later today I guess) I'm planning to finish the interior welding and grind down everything. Then I can move on to blasting the rest of the body, assuming my media gets in tomorrow.
Old crappy panel:
Cut Out:
New Patch:
Tacked in place:
I got tired of moving my light around as I tacked stuff in place so I made this handy adjustable torch light. It's always right where I need it to be pointing!
First half of the tunnel welded up:
Exterior of new panels fully welded, ready for grinding:
All tucked in for the night, ready for sleep (me too!):
Goodnight!
Tinker Engineering - 2014
Mica - 2000 BMW 323i - The one that started it all Fiona - 1975 BMW 2002 - The Definition of Project Creep Heidi - 1988 BMW M5 - The piece of BMW history Silvia - 2013 Subaru WRX - Stock, for now
Excellent build! that is a great idea for a light on the MIG. It is always hard to see what is going on and a PITA to move the light or helmet up, helmet down, helmet down, repeat.
Excellent build! that is a great idea for a light on the MIG. It is always hard to see what is going on and a PITA to move the light or helmet up, helmet down, helmet down, repeat.
I'll be following this one.
Thanks! I have an auto-dim helmet, but even that is like wearing dark sunglasses. I did swap in new lens covers on it today though, that helped a bunch.
Originally posted by bobross
Droooooool all over those rockers
sick build man!
Haha, thanks! Can't wait to be able to use them.
Tinker Engineering - 2014
Mica - 2000 BMW 323i - The one that started it all Fiona - 1975 BMW 2002 - The Definition of Project Creep Heidi - 1988 BMW M5 - The piece of BMW history Silvia - 2013 Subaru WRX - Stock, for now
Tonight I finished the rest of the interior welds on the trans tunnel and firewall and started grinding them down. The idea is to make it smooth enough that you can't see the seams once it's covered with seam sealer, undercoating and paint, making it look somewhat OEM.
Just a few pics of the progress. I used up my last grinding wheel before I finished so I'll have to pick some more up tomorrow in the a.m.
Before:
After:
Tinker Engineering - 2014
Mica - 2000 BMW 323i - The one that started it all Fiona - 1975 BMW 2002 - The Definition of Project Creep Heidi - 1988 BMW M5 - The piece of BMW history Silvia - 2013 Subaru WRX - Stock, for now
Put in a solid amount of time today, and with the long weekend I still have two more full days I can throw at her. I'm hoping to get the whole body media blasted/stripped by the end so I can tear into the rust repairs that I know I'm going to come across.
First I started the day like any sane person, grinding down the rest of the underside welds in jeans, long sleeves and a welding jacket. Hell, it was only 95 degrees today.... But luckily that didn't take to long. Next up I took a break and ran to the hardware store where I found a 12ft x 100 ft roll of clear plastic drop cloth. I'll suspend this from the ceiling to make a 'booth' that I can blast the body in. This will hopefully keep the dust and sand from getting all over the rest of the shop.
But before setting up the booth I had to finish removing misc stuff from the unibody. First up was the rear chrome trim, which pops out with 4 plastic tabs:
Rear Emblem, it was a little dirty behind it:
Trunk Lock:
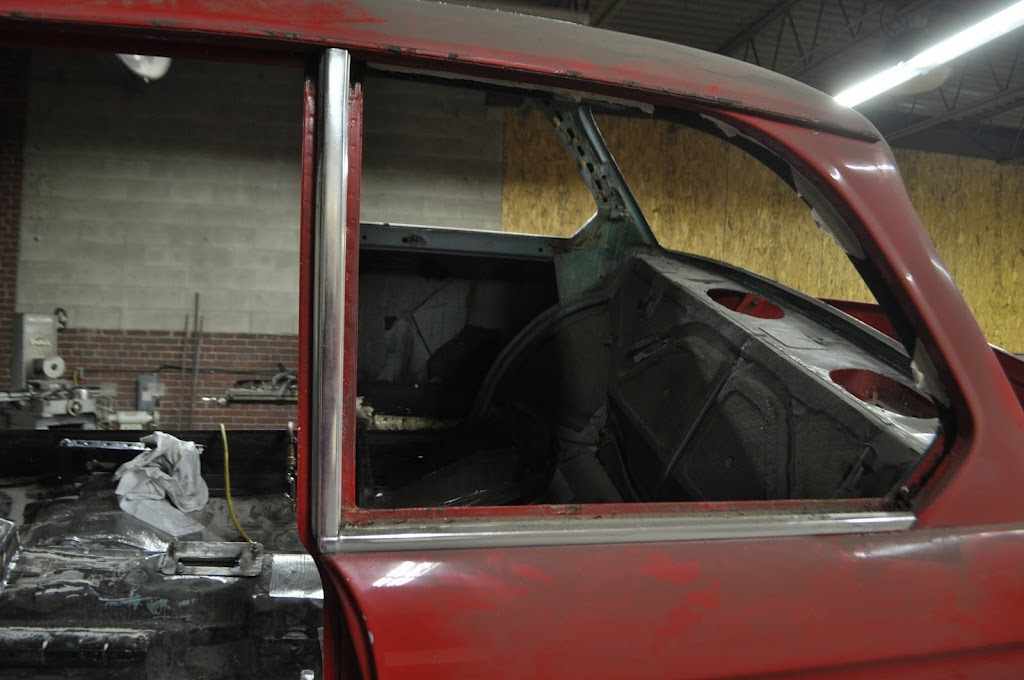
Door hinge and pins:
Rear Side Windows and Surrounding Trim (windows are already out in the pic):
The Trim is held on with a few rivets, you can see two in this pic:
Drilling them out:
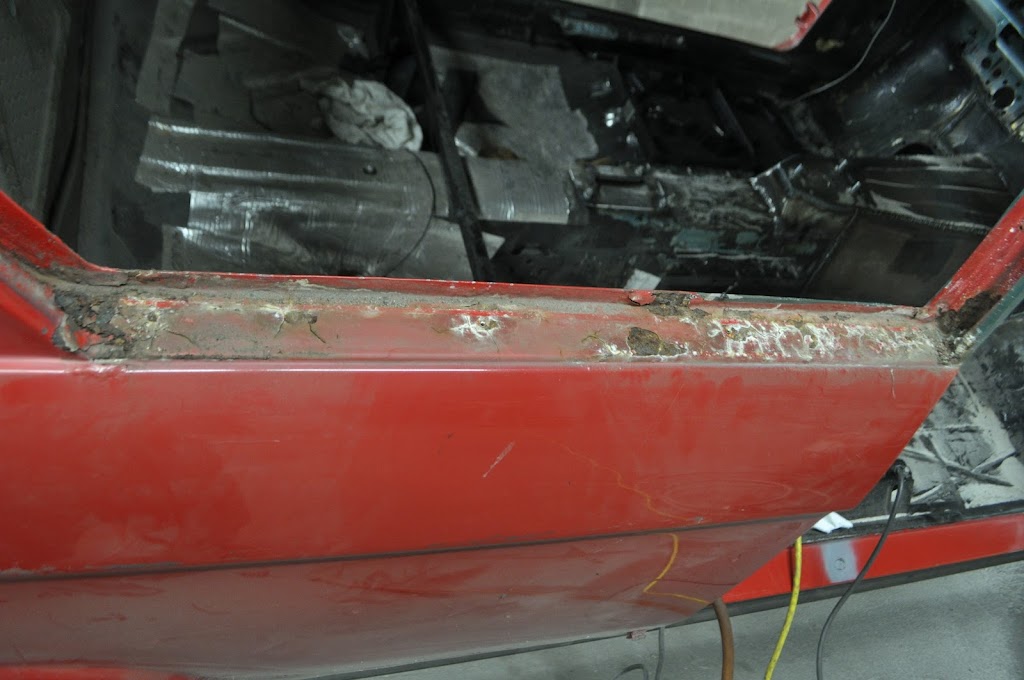
Yay, more surprise rust!! Although I guess it shouldn't really be a surprise anymore....
The other Side was just as good:
With the chassis/body stipped down to the bare shell the next step is media blasting to find any hidden cancer that is covered by paint and bondo. First thing tomorrow morning I'll set up the booth and start knocking it out. I hope to have it done by the end of the weekend assuming I don't run out of media or have any other issues...
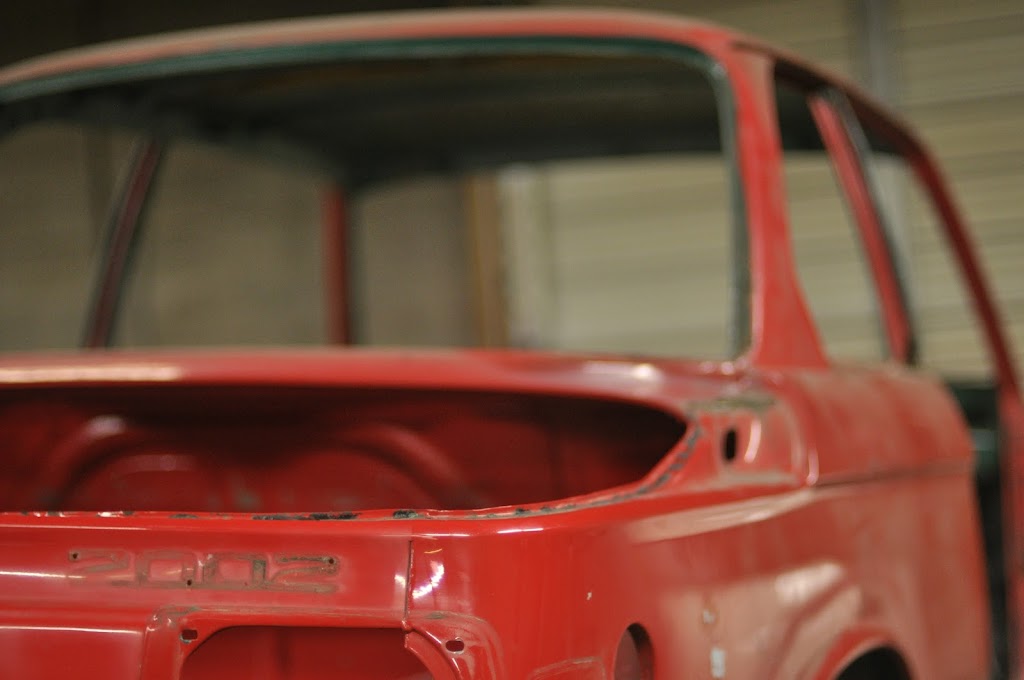
A little bokeh to end the night with:
Tinker Engineering - 2014
Mica - 2000 BMW 323i - The one that started it all Fiona - 1975 BMW 2002 - The Definition of Project Creep Heidi - 1988 BMW M5 - The piece of BMW history Silvia - 2013 Subaru WRX - Stock, for now
New update with good news and bad news. First the bad:
-Overall progress has been much slower than I had hoped. As I mentioned before, I was really hoping to have the entire body blasted during the long weekend. That hasn't quite happened.
-The sand blaster I was planning to use was left in less than great condition, and so I had to use most of my time Saturday refurbishing it.
-I'm not sure what kind of paint was used in the respray of my car, but damn it is tough to cut through. So even one the blaster was up and running progress is slow at best.
-Some area's of the body were hiding more bondo than I expected, and behind most of it was more rust.
And the Good:
-Some area's were less rusty/messed up that I though, which was a nice change for once.
-That's about it lol
Because of the above, I'm probably close to halfway done with the unibody. That then leaves the hood, trunk, fenders and doors. I'll make a more detailed post about the problems/progress once I finish (hopefully later this week), but here are a few teasers.
FUUUUUUUUUUUUUU
Tinker Engineering - 2014
Mica - 2000 BMW 323i - The one that started it all Fiona - 1975 BMW 2002 - The Definition of Project Creep Heidi - 1988 BMW M5 - The piece of BMW history Silvia - 2013 Subaru WRX - Stock, for now


Comment