

No worries. I wonder what the differences between our tie rods were...
-
No idea. I'm happy it's working we'll for you though.sigpic
"The bitterness of poor quality remains long after the sweetness of low price is forgotten."
Comment
-
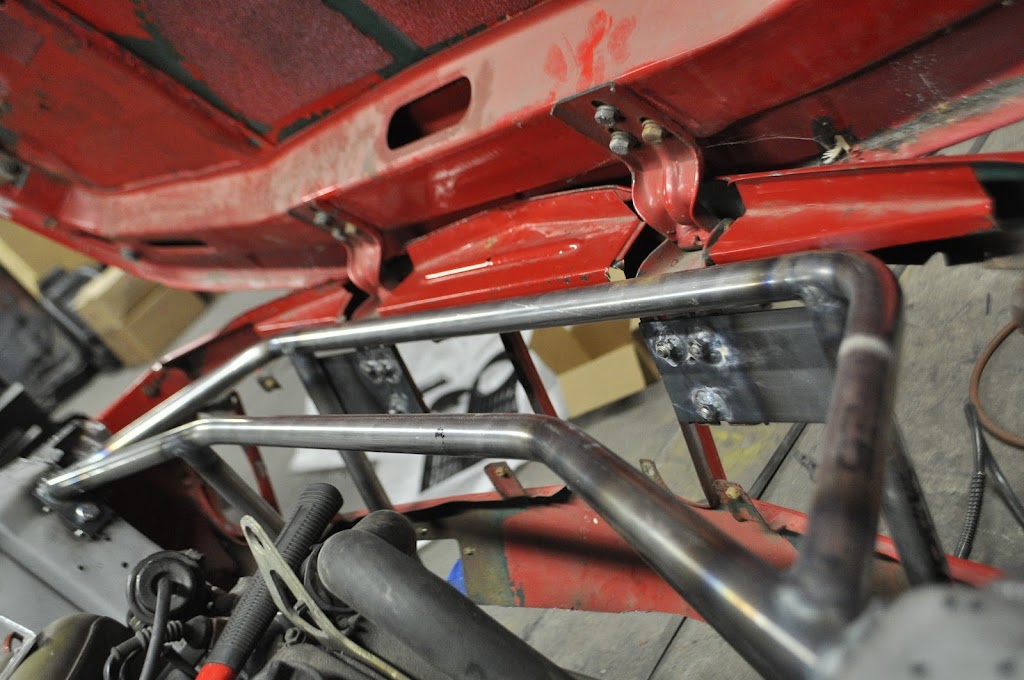
After thinking about it for a couple days, I decided I wasn't happy with my initial frame rail brace. The main reason for making the front clip removable was to make maintenance easier to do. But because the brace was welded in place, it meant that I would still need to lift the engine out of the car, or lift the car over the engine/subframe. Both of which can be a chore if you don't have access to an engine hoist or really tall jack. So I decided to cut it out and design a better solution. After a long day/night of measuring and fabrication, this is what I came up with. I only have two pictures right now, I'll get some more detailed ones when I'm not as tired.

It is completely removable, and gives me a sturdy frame to mount the radiator and oil cooler to. I should be able to run some lower bracing to the air dam in the front and hang the intercooler from the lower bar when that time comes. I will also have the strut bar tie into the top bar when I get that fabbed together. Here you can see how it clears the front clip at the top:

With this TIG'd together up next I will get the radiator and oil cooler mounts done. Once those are in place I will make a cover plate that goes over the top of the front frame section, mimicking the stock '02 sheet metal front end with a cutout for the radiator fill cap. I'll probably use sheet aluminum though, the front end is heavy enough already lol.Comment
-
that front end (also the entire car) looks awesome. I love seeing the updates.sigpicComment
-
Amazing. Just amazing.Yours truly,
Rich
sigpic
Originally posted by RigmasterComment
-
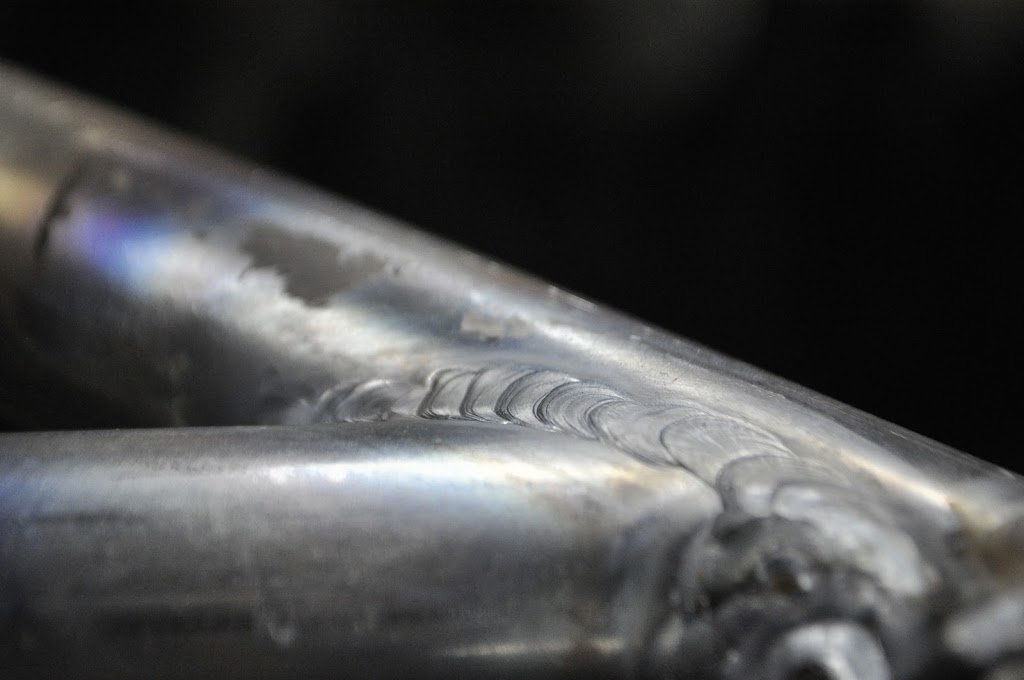
Happy to say my TIG work is starting to look better. I've decided that I'm going to TIG everything that I reasonably can (assuming the welding position isn't crazy or that the material is to thick for my welder). While it does take more prep and time compared to MIG, the welds themselves just look much nicer. There is also much less clean up work, with no splatter and less warping in most cases. These are from the front bracing I did this weekend:

So with the front clip as gutted as it is, it obviously won't be able to support the weight of the hood like it used to. And the front hinged hood was one of the original parts of the car that I didn't want to loose, so next up was figuring out how to fab up new hinge mounts. First I made two plates that mimicked the stock nut locations.
Front:

Back:

With those done, I mounted each side and tacked them in place with the hood in the down position:

Then I checked to make sure the axis of both hinges are still in line so the hood would open properly:

View of the hinges from the engine bay. I still need to add a lot of bracing/gussets to add strength, but they can support the hood fine even though they are just tacked in place.
And here's what the hood looks like mounted in place without front fenders or front clip. Because I can.


Now that I have the hinges in place I can work on mounting the radiator and oil cooler. I wanted the hinges in there first since they have to be in a certain position, while the radiator and oil cooler can go anywhere so long as they fit and don't interfere.
Oh, and these came in today:

Any guesses??Comment
-
wheels delivery?Comment
-
You bought four hats. What did I win?Comment
-
Lots and lots of fun bubble wrap!
Nice welds. I need a TIG welder.sigpic
"The bitterness of poor quality remains long after the sweetness of low price is forgotten."
Comment
-
Loving' the build!Comment
-
Nice looking welds.
Everytime this thread gets bumped I get all excited for the latest update. I really can't wait to see the rest of this build!Comment
-
You got some nice welding skills my friend. :) I love this build..Denny
___________
1990 BMW red 325IC M30B35 all stock Girlfriends ride
1991 BMW black 318IC (M62b44 Megasquirt 2 ver 3.57)
Blogs:
http://bmw325e30.blogspot.com/ (restoration)
http://bmw325e30turbo.blogspot.com (Twincharge M20)
http://bmw325e30m62b44.blogspot.ca/Comment
-
Thanks guys!
After a couple of weeks waiting, these finally showed up today:

They are HRE 504's in 16x8. I maybe end up building them up to 8.5 or 9 depending on how the offsets work out with the 5-lug conversion. I need to source some new center caps and repaint/polish, but they are pretty clean with no curb rash. Some more pics:
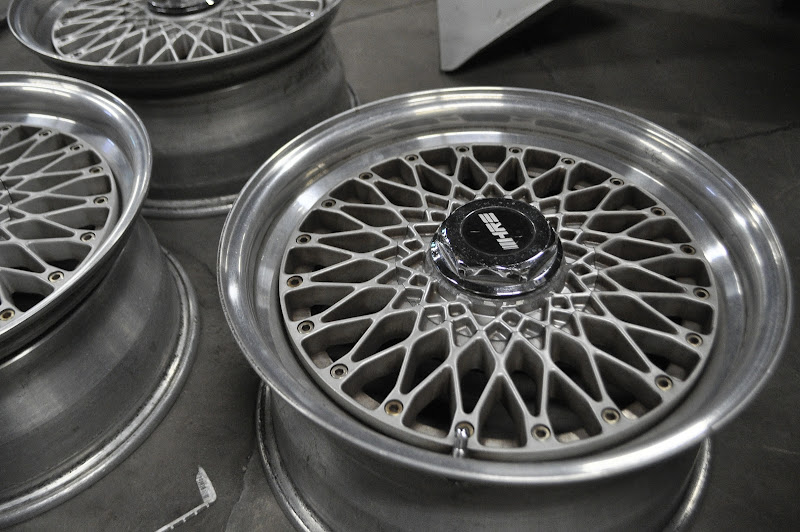
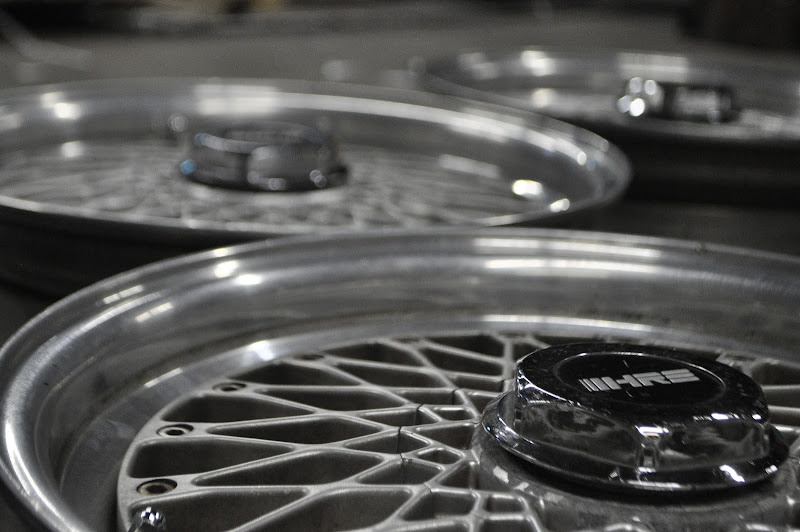
Test fitting, can't bolt them up to the subframe yet but this is roughly what they should look like:

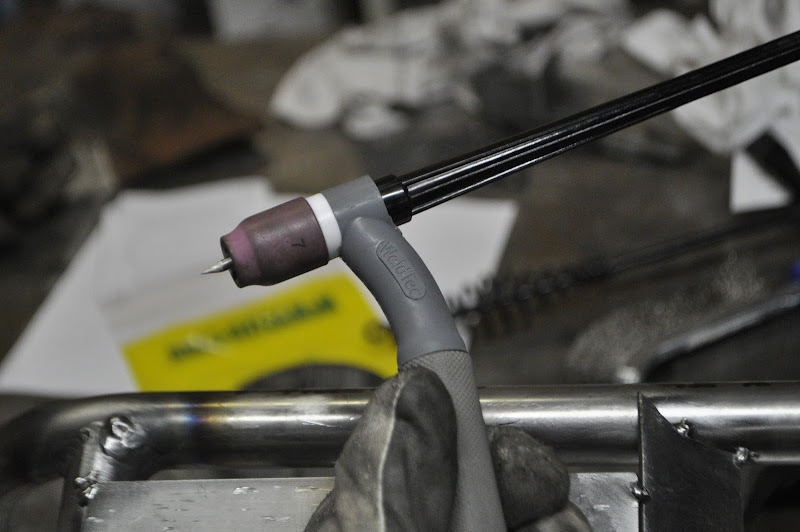
I also got a new TIG torch, with a flexible head. Very handy for getting into tight spots or just making a more comfortable welding position.

And with it I finished gusseting the hood mounts.

Then to finish off the night I fabricated the mounts for the oil cooler and radiator:
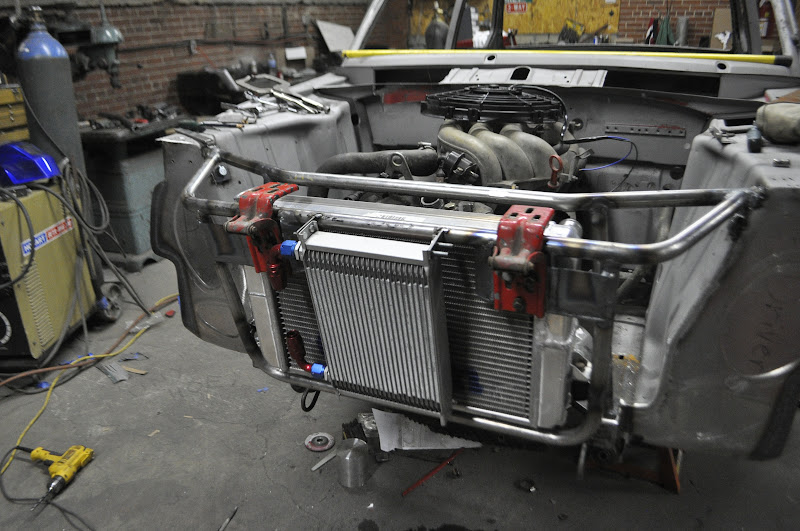
The upper OC mounts are just tabs that come off the front support bar:

The radiator mounts to the tie bar, one on each end. I will also be making an upper support bracket to hold the top in place.

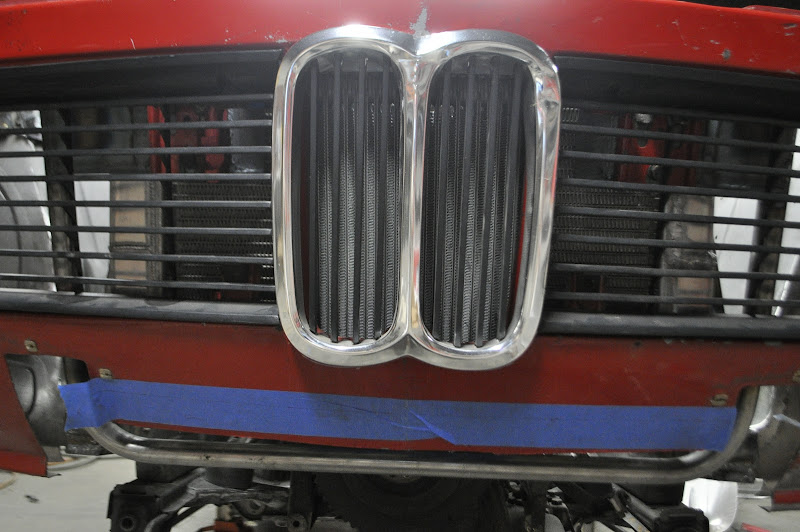
Nose panel bolted back up with everything else in place:

Here you can see the oil cooler behind the kidney grills. Worked out well with the cooler on it's side, the slates are vertical and match the lines of the grill.
Next up is the fab the lower oil cooler mount (it's only bolted in by the top right now) and the other radiator support. Then I will brace the mounting points on the front frame assembly and strip the nose panel for metal repair and some bracing.Comment
-
loving this project!
keep up the good work.
mtech1/2jzgte/r154/275tire
function>formComment


Comment