If this is your first visit, be sure to
check out the FAQ by clicking the
link above. You may have to register
before you can post: click the register link above to proceed. To start viewing messages,
select the forum that you want to visit from the selection below.
325ic Calypso Euro Conversion - Houndstooth & dbilas now, MT1 & MM 3.2 stroker coming
OEM+ or bust! reelizmpro: I will always be an e30 guy.. I still do all of my own labor TrentW: There's just something so right about a well-built M20 in an E30 e30m3s54turbo: I save my money for tuner parts.
Definitely sounds smoother.
It appears the readings (only word I can think of) appear to be pretty even in the second video. The first one doesn't look as clear to see in my end but they look all over the place.
Rain appears to be done for awhile now. Gonna take her for a bit of a cruise?
yeah the idea is to get the vacuum levels consistent across the TBs, both at idle and at a higher rpm. I couldn't do both so I tuned for level vacuum at 3k. idle is fine but vacuum is slightly off on the rear ITB pair relative to the other 4.
this vid shows the procedure. guy ended up doing the same thing I did, tuning for higher revs. Of course I found the vid after posting mine lol.
finally took her out this afternoon. started the car and idled fine at 800. nice and smooth on the road. can't say there's really more power though. also the idle's back up to 1400 after the drive unfortunately.
so will try re-syncing at lower vacuum levels. Engine started surging when I went too low yesterday, but I'll give the ECU some more time to adjust and see if it evens out. If that doesn't work the only thing I can think of is ICV stuck open. Don't really believe that's an issue though.
OEM+ or bust! reelizmpro: I will always be an e30 guy.. I still do all of my own labor TrentW: There's just something so right about a well-built M20 in an E30 e30m3s54turbo: I save my money for tuner parts.
Well 30 minutes of tuning and I just couldn't get the idle to drop. pulled the battery connection, let the engine cool a bit. Car starts up and idles at 800 rpm, and within a minute it's back up to 1400-1500.
Every attempt to drop the idle results in the engine surging between 1000 and 2000 rpm.
OEM+ or bust! reelizmpro: I will always be an e30 guy.. I still do all of my own labor TrentW: There's just something so right about a well-built M20 in an E30 e30m3s54turbo: I save my money for tuner parts.
My hartge does just the opposite. It starts cold at about 1100 and then in about 3-4 minutes it drops to 850. Wonder if your warm up system is messed up??
jm
OEM+ or bust! reelizmpro: I will always be an e30 guy.. I still do all of my own labor TrentW: There's just something so right about a well-built M20 in an E30 e30m3s54turbo: I save my money for tuner parts.
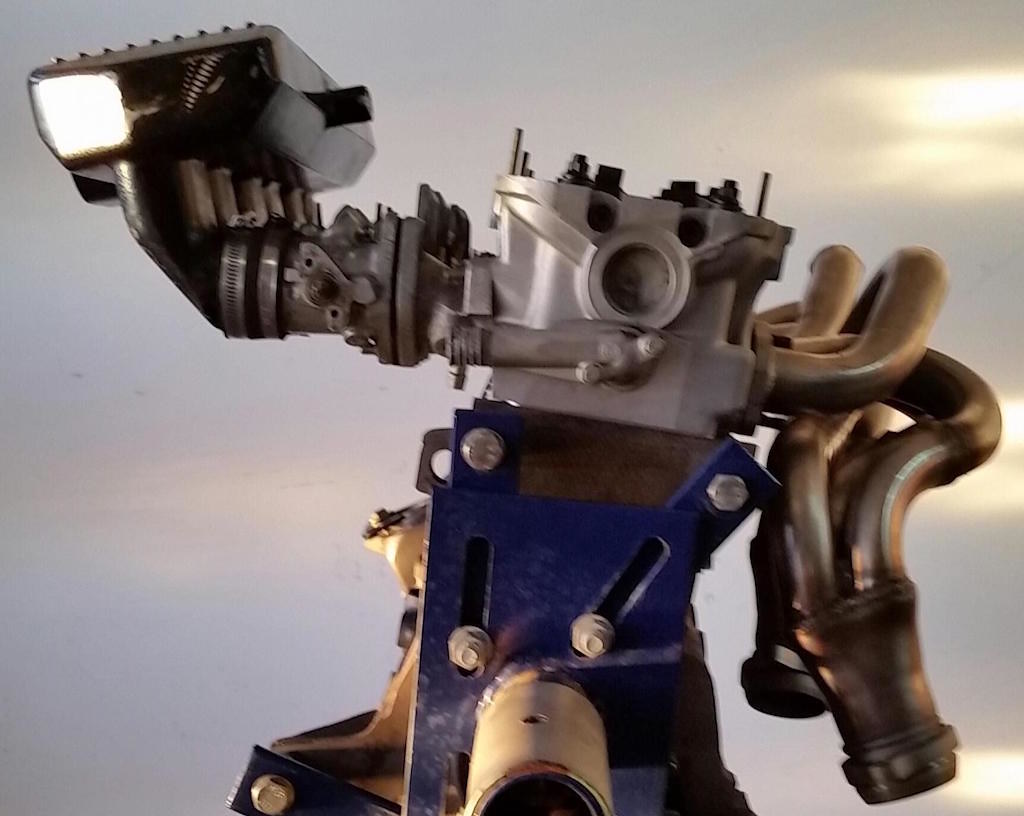
The ITBs flow more than stock obviously, and I did add the M30 AFM, mustang injectors and tune. I've been pretty careful and thorough with the build.. I just don't get why the surging idle happens. As you can see in the vid the itb vacuum is all balanced now. I'm not touching the throttle in the vid. I tried disconnected the ICV wiring and it had no effect on the idle - what you would expect with the engine warm.
So at least for now I'm stumped. Tempted to pull the ITBs and throughly inspect them, but there's no reason to think that will really help.
OEM+ or bust! reelizmpro: I will always be an e30 guy.. I still do all of my own labor TrentW: There's just something so right about a well-built M20 in an E30 e30m3s54turbo: I save my money for tuner parts.
OEM+ or bust! reelizmpro: I will always be an e30 guy.. I still do all of my own labor TrentW: There's just something so right about a well-built M20 in an E30 e30m3s54turbo: I save my money for tuner parts.
fporro just posted this Hartge Japan H20 interior in the Hartge group on fb. cool to see OEM leather + houndstooth. every OEM houndstooth interior I've ever seen has anthracite/blue/brownish cloth bolsters
OEM+ or bust! reelizmpro: I will always be an e30 guy.. I still do all of my own labor TrentW: There's just something so right about a well-built M20 in an E30 e30m3s54turbo: I save my money for tuner parts.
My OEM euro valance is finally arriving this week. Will get it body schützed and painted just in time for the vintage
Busy with the car all weekend:
- thermostat housing replacement to deal with a coolant link
- reworked the ITB throttle linkage, grinding off part of it that wouldn't let me tighten mounting nuts correctly
- swapped ECU tune to deal with high idle. a 3rd tuning is coming
Spent all day today reworking my hardtop, re-gluing the headliner and replacing all the seals. We didn't want to drive all the way to Asheville with just the soft top... learned our lesson picking up the hardtop in Toronto lol.
Anyway the hardtop rework came out GREAT! Was really concerned about the adhesive soaking through the headliner cloth, but it all worked out. Bottom line: DON'T use 3M headliner adhesive, use Permatex.
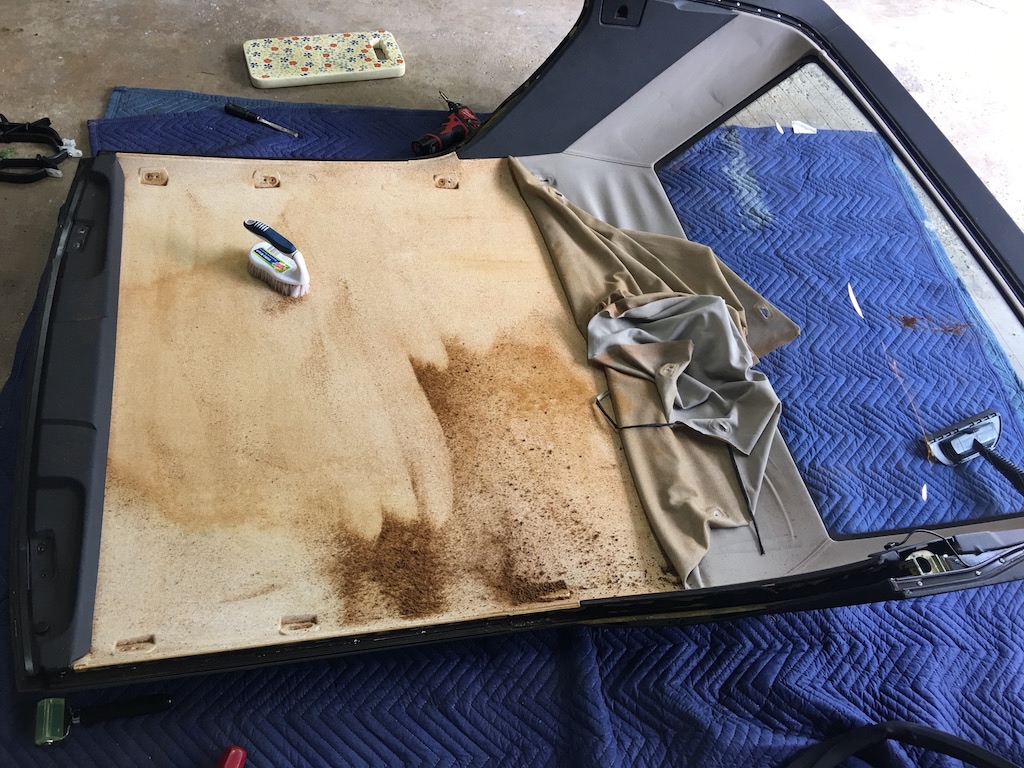
STEP 1: strip the headliner back to the rear window (don't pull it off the window area). Since I was replacing the hardtop seals I went ahead and remove them at this step too.
STEP 2: scrape all disintegrated foam off the hardtop and back of the headliner cloth. be as thorough as possible. Took me over an hour to get it clean enough to not be concerned about lumps
STEP 3: follow instructions and lay out 3 coats of adhesive, changing directions each coat and waiting 5-10 minutes between them. I also brushed the adhesive flat between coats and removed any lumps by hand.
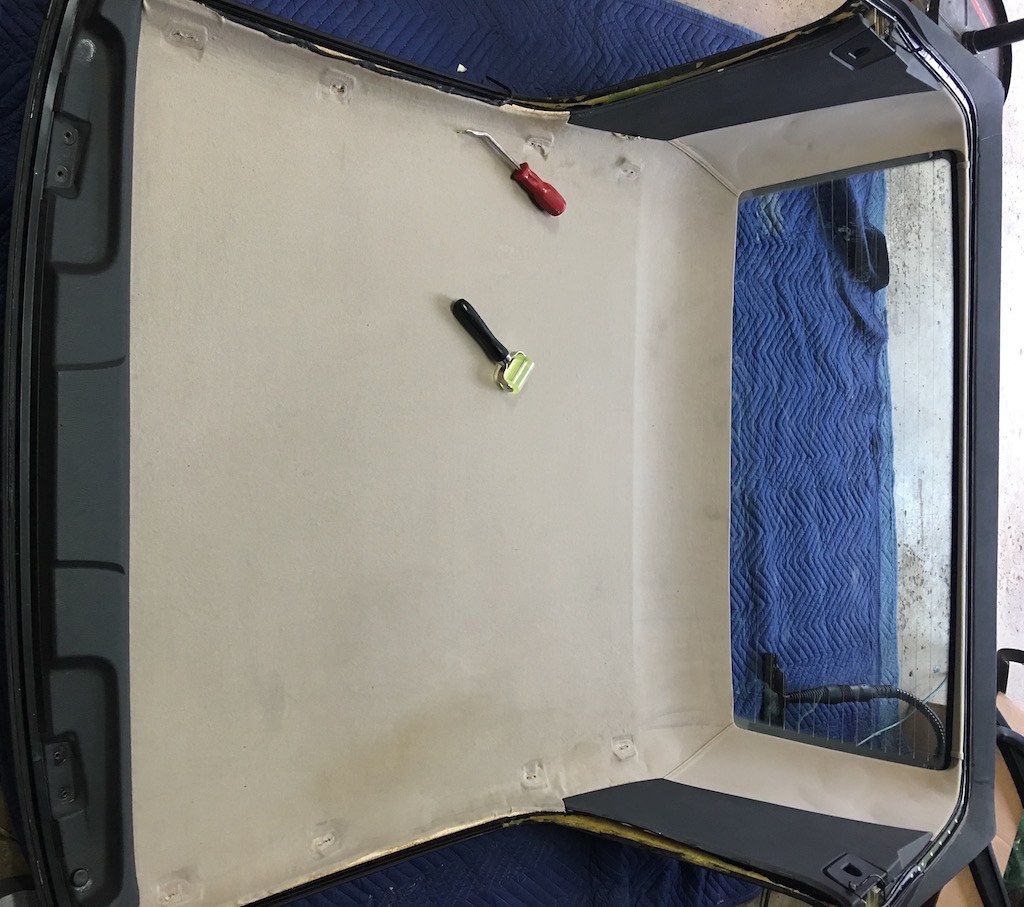
STEP 4: wait a bit and start attaching the headliner from the middle and work your way out to the edges. Take your time as it takes at least 30 minutes for the adhesive to start setting. I used my hands initially to smooth out the cloth and then followed up with a roller. BE SURE TO USE A ROLLER designed for this purpose. It is amazing how good that roller is at smoothing out the headliner!
STEP 5: let it sit a few hours before moving it.
STEP 6: Clean up the headliner fabric after the glue sets (still waiting on this). I picked up a portable steamer which should help here.
No pics of the seal work unfortunately, but it took about 3 hours to replace the front and rear seal. If you don't have patience I'd recommend not doing it :-) still gonna go back and selectively add adhesive to a few spots. The original seals where glued in place in certain areas, and there was also some black silicone or adhesive used in certain areas.
OEM+ or bust! reelizmpro: I will always be an e30 guy.. I still do all of my own labor TrentW: There's just something so right about a well-built M20 in an E30 e30m3s54turbo: I save my money for tuner parts.
OEM+ or bust! reelizmpro: I will always be an e30 guy.. I still do all of my own labor TrentW: There's just something so right about a well-built M20 in an E30 e30m3s54turbo: I save my money for tuner parts.


Comment