Announcement

Collapse
No announcement yet.

Joey's iS

Collapse
X
 
  • Filter
  • Time
  • Show
Clear All
new posts

    #61
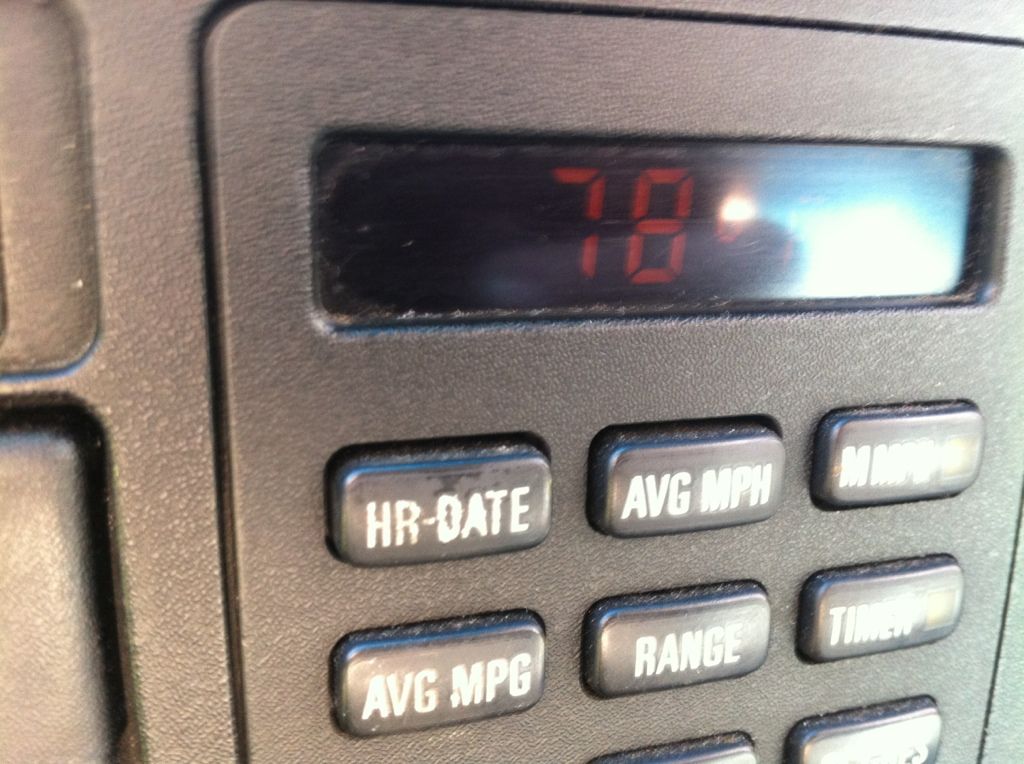
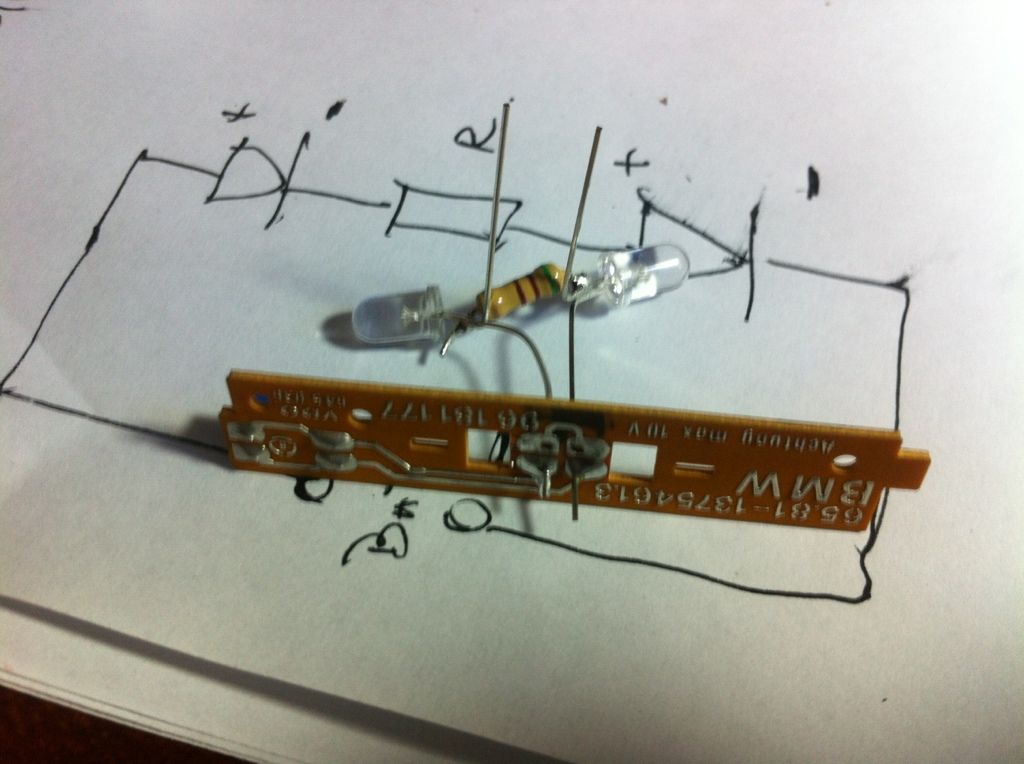
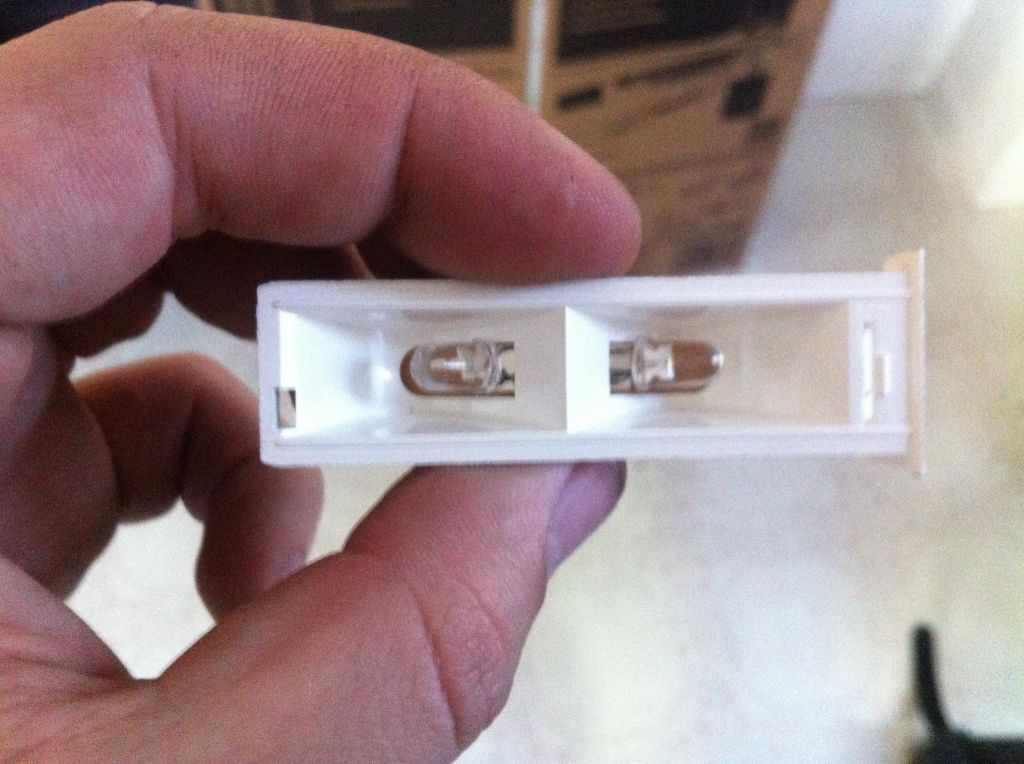
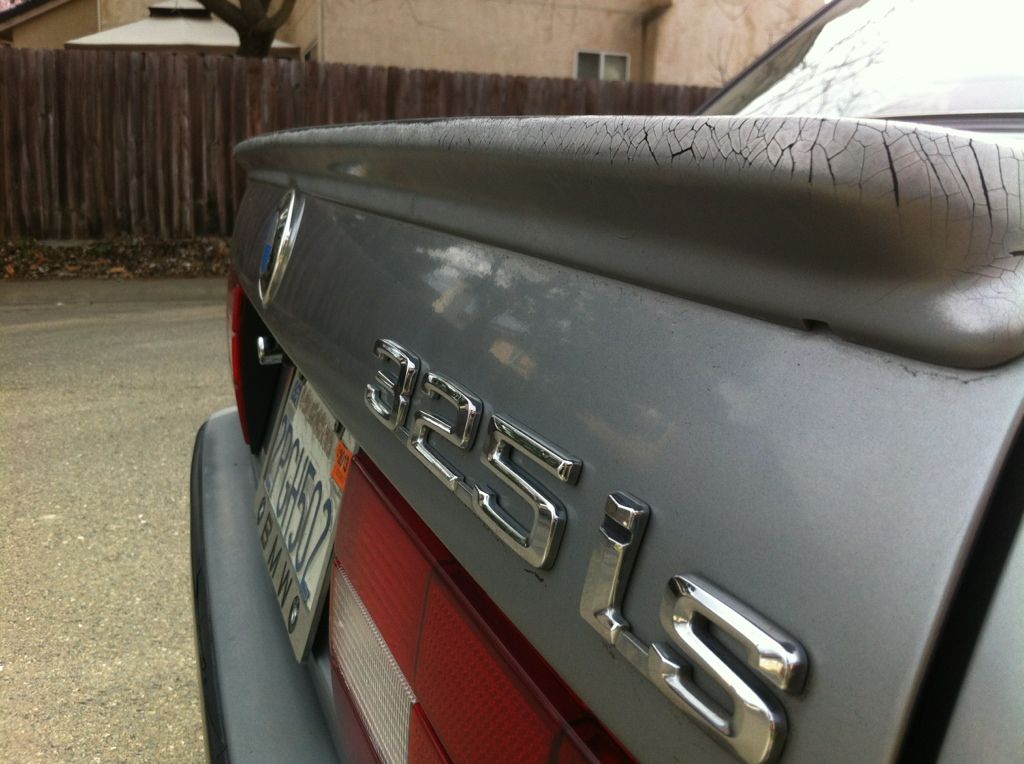
    So finally got around to installing the Red Rocket Labs (George Graves, AKA e30 Master Electrician) temp sensor

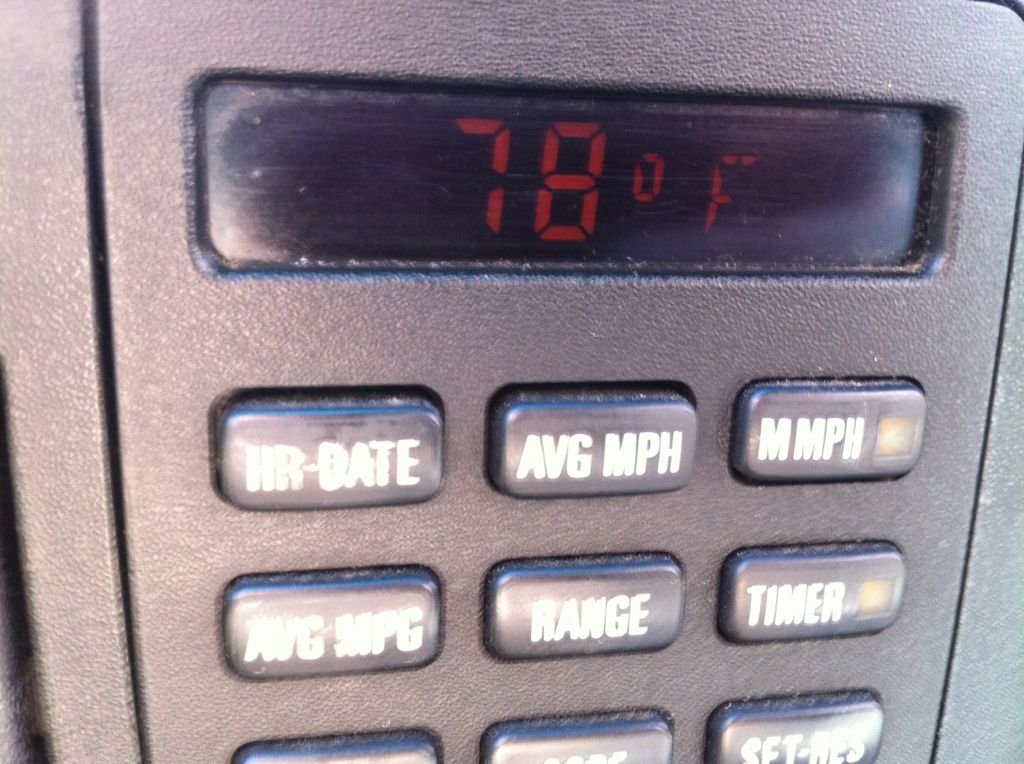
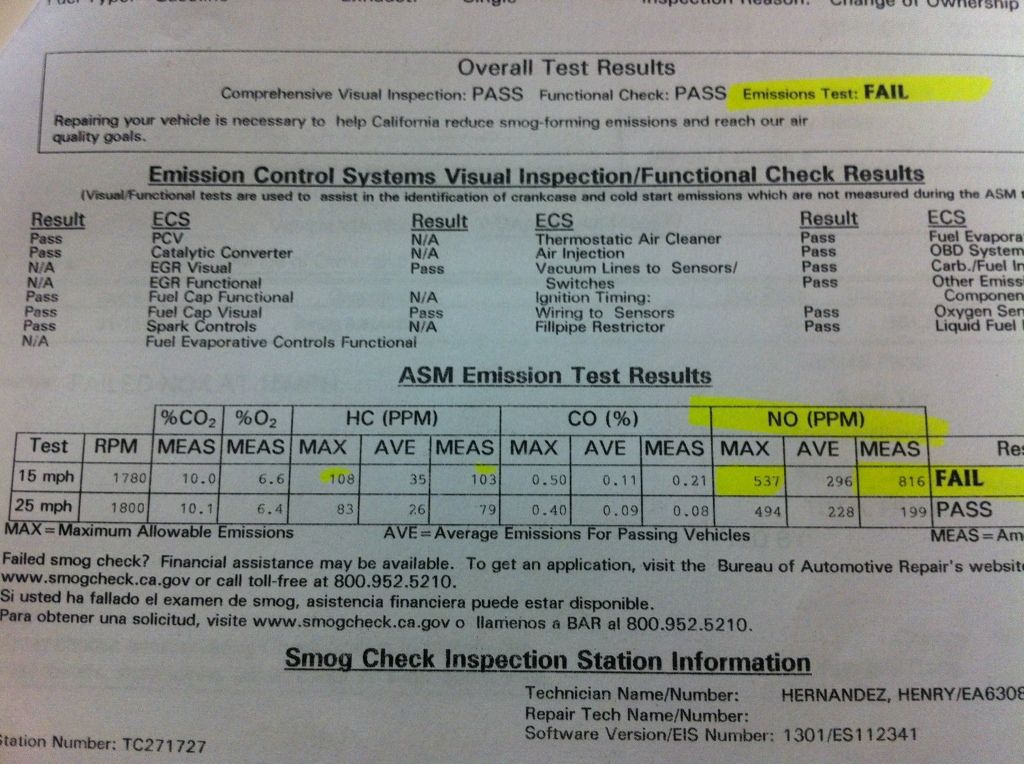
    Needless to say, I was very pleased with the results:


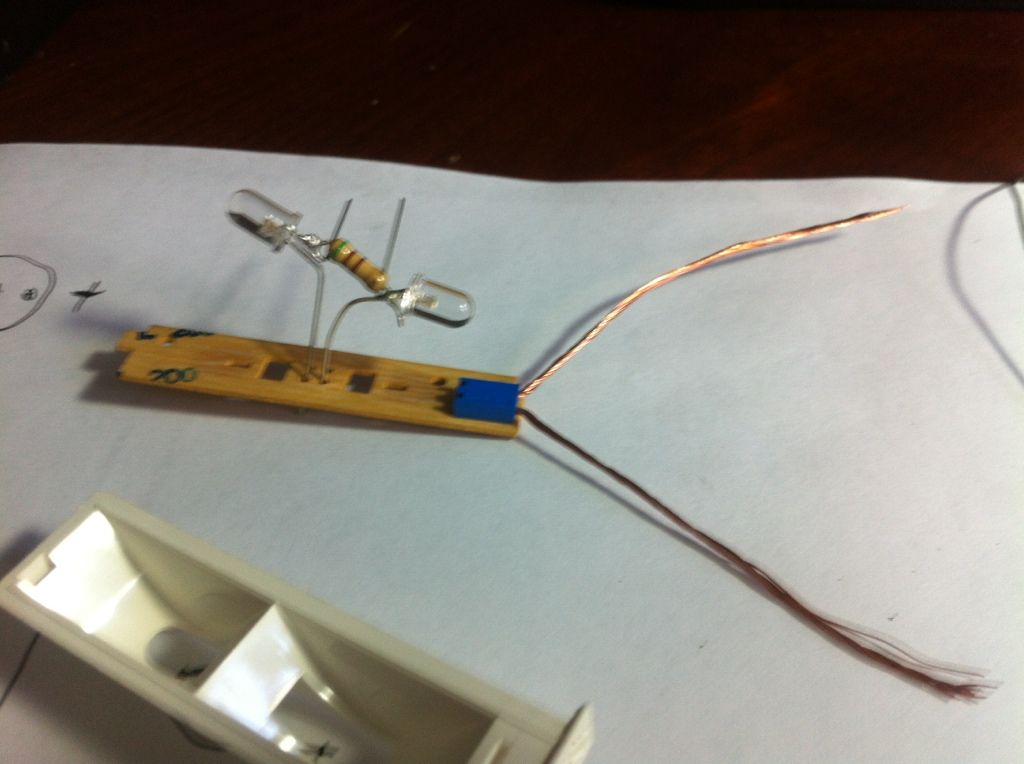
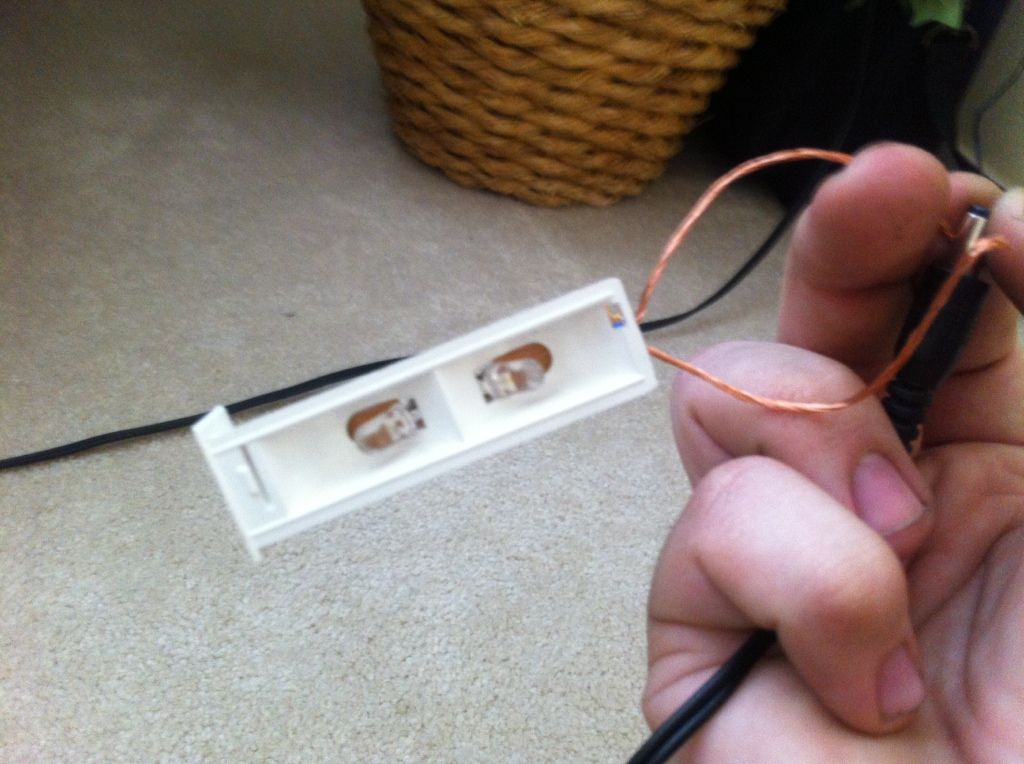
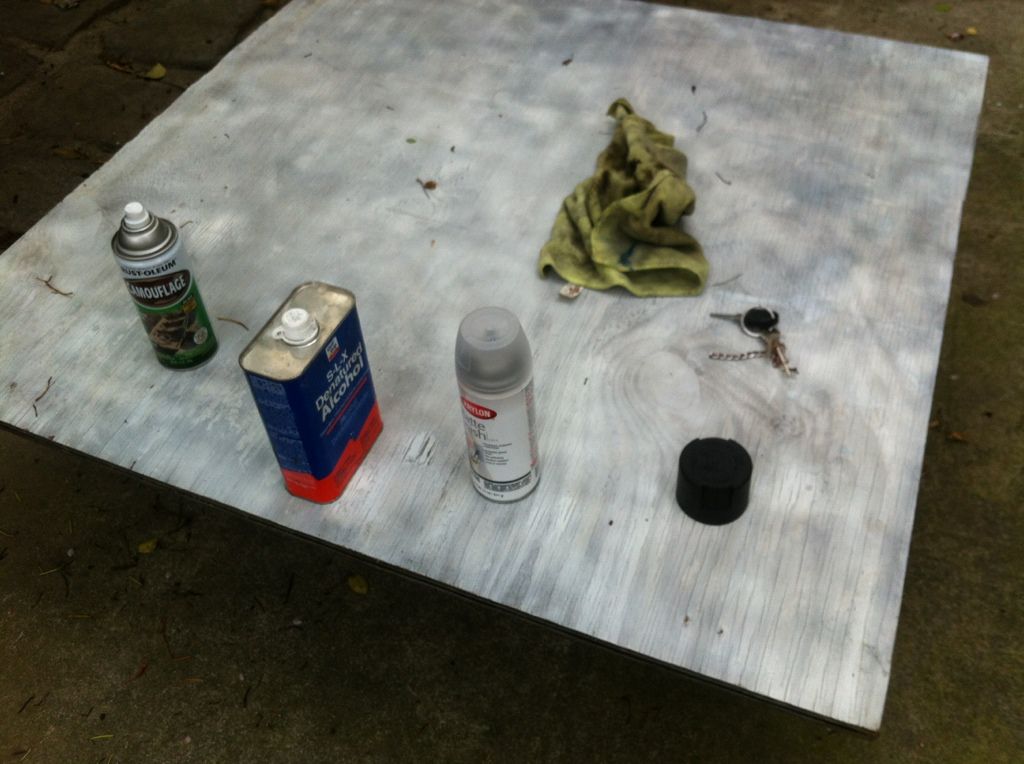
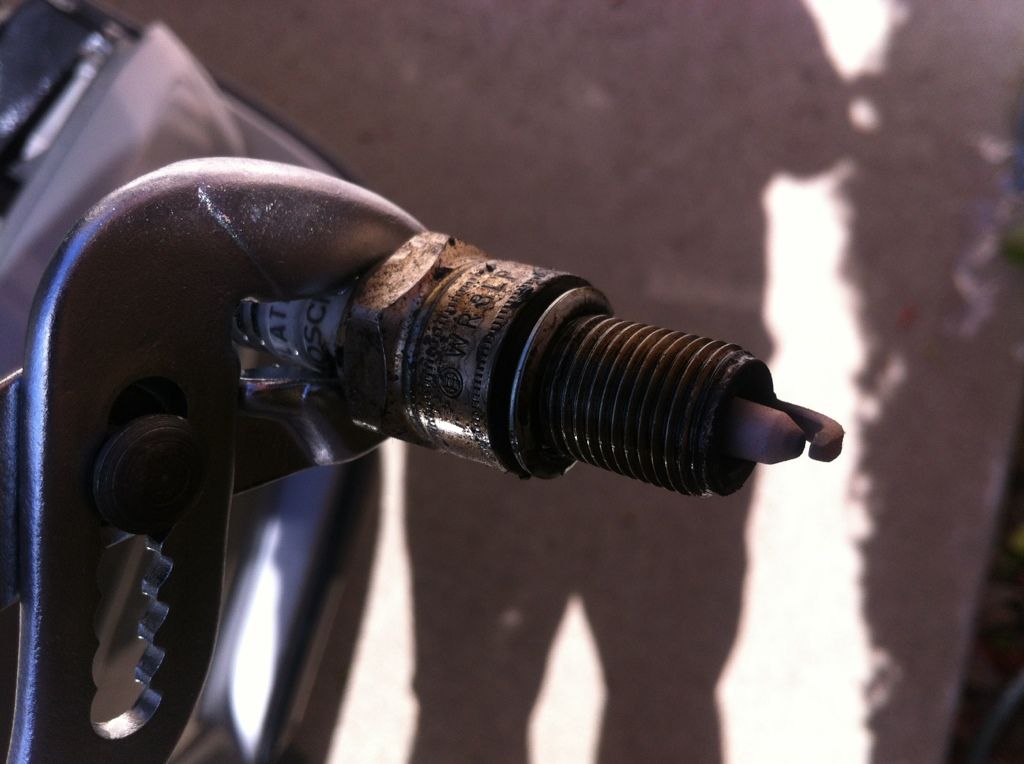
    But, I couldn't get over the way it.. "looked"


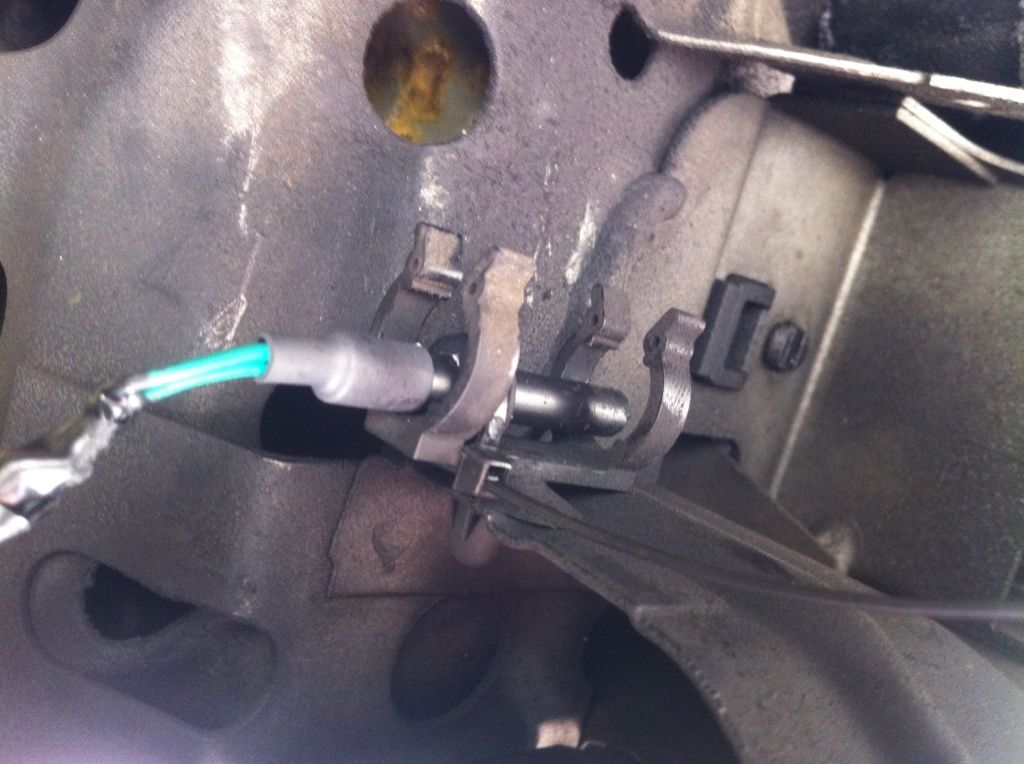
    That's no fault on Greg or the Company, it functions as it should, but I wanted a more OEM look. I still give their product a 10/10


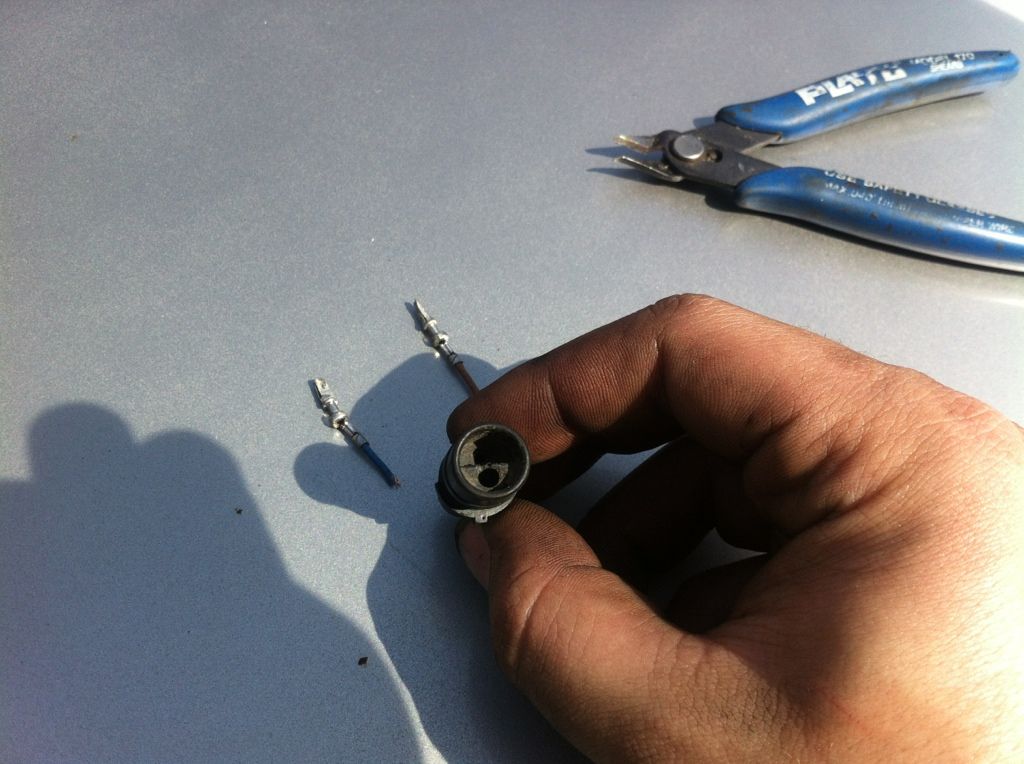
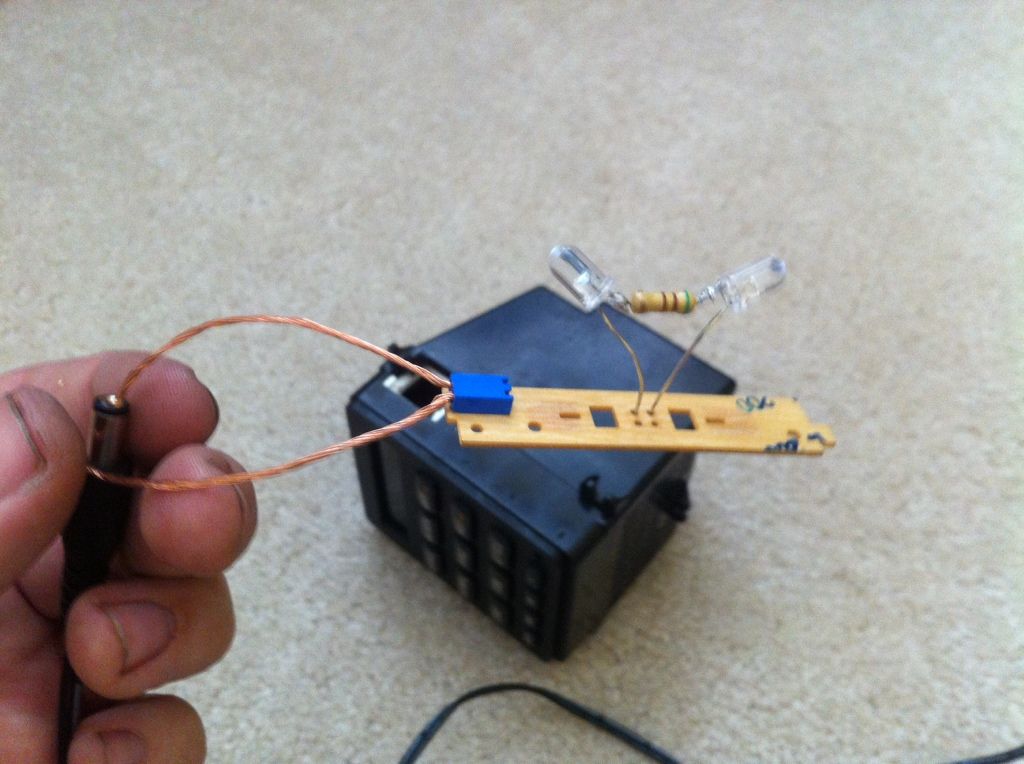
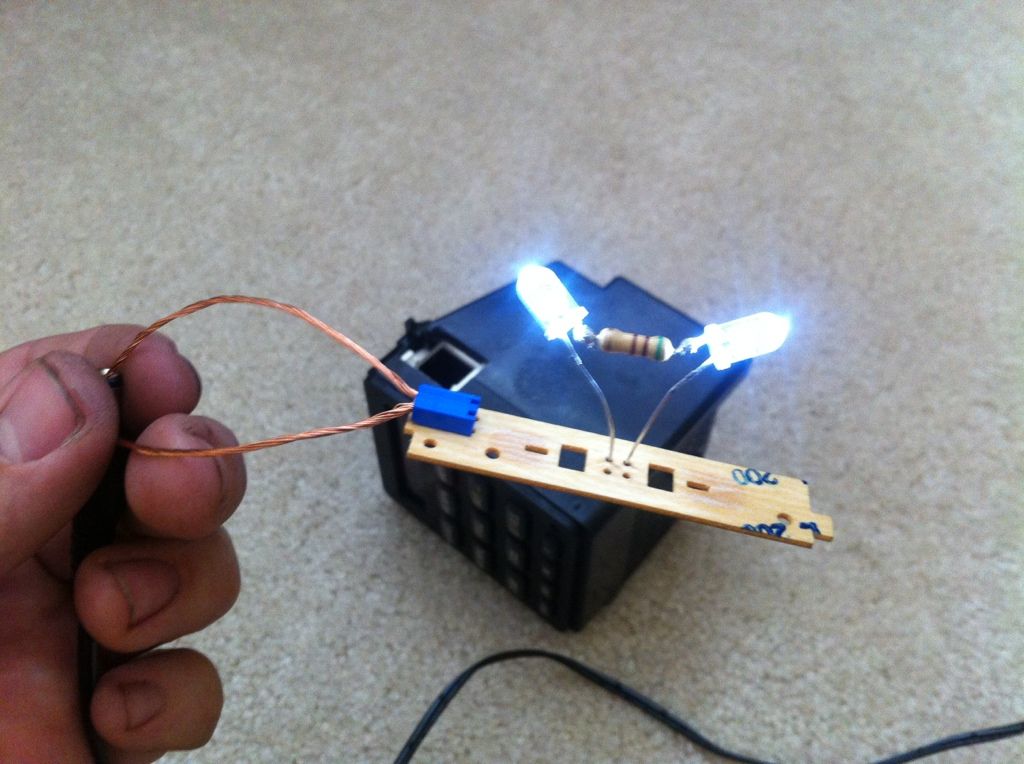
    So I did something about it


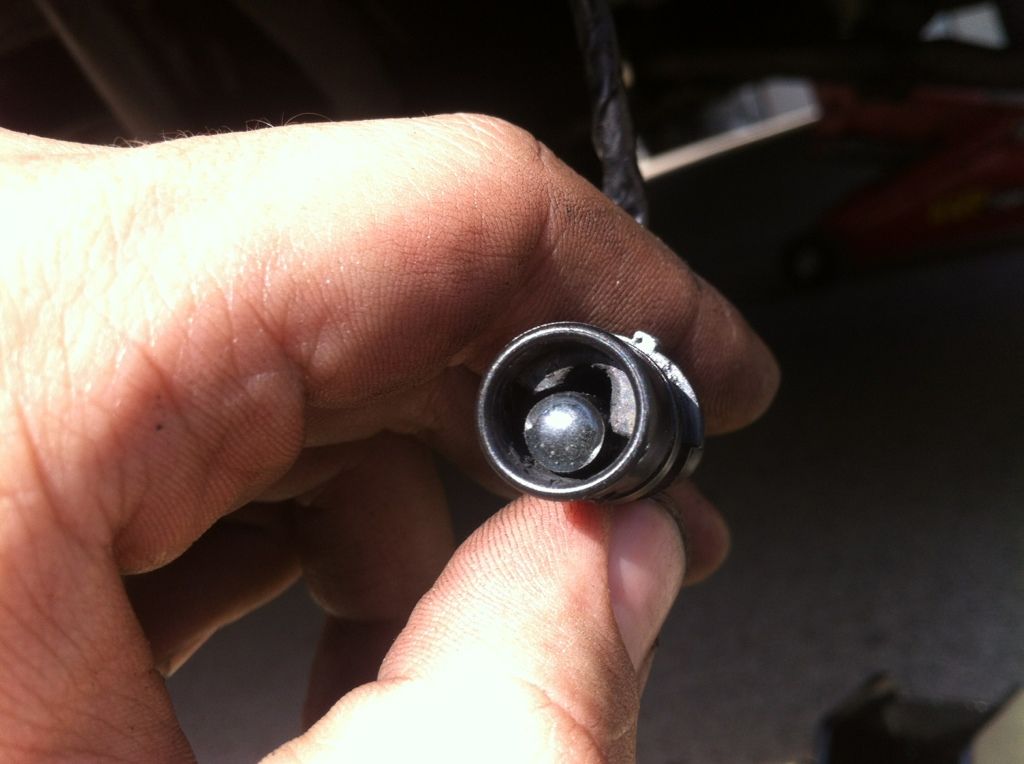
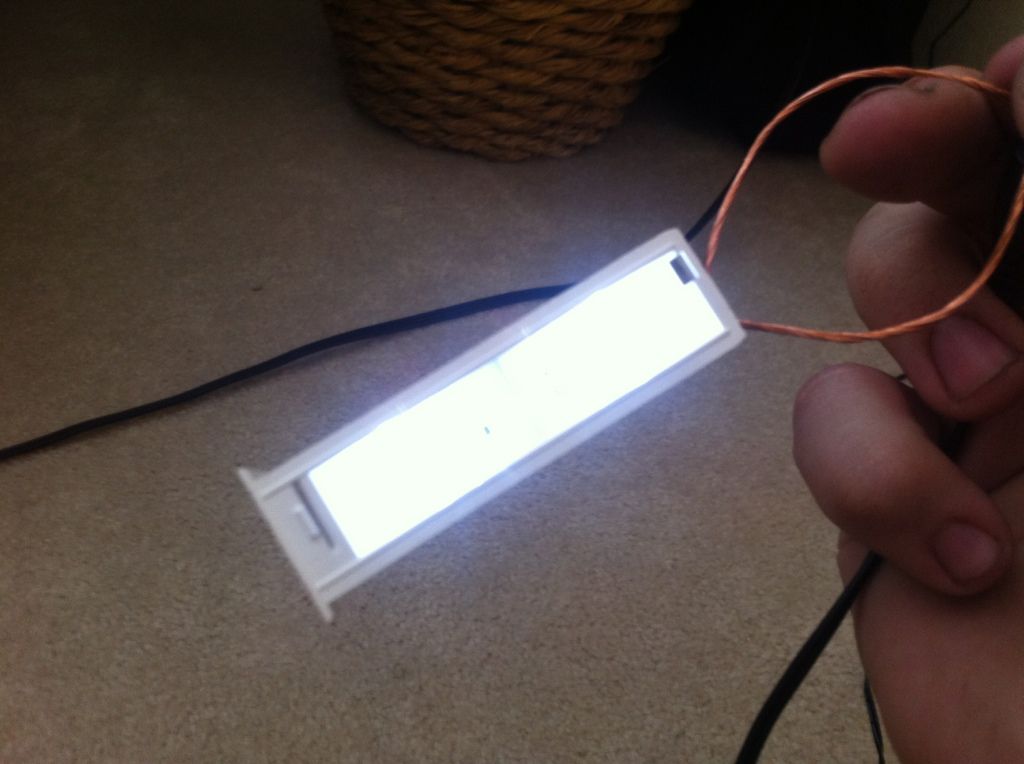
    Gutted out the existing wires on the old sensor, and drilled out the inside rubber with a power drill and vice


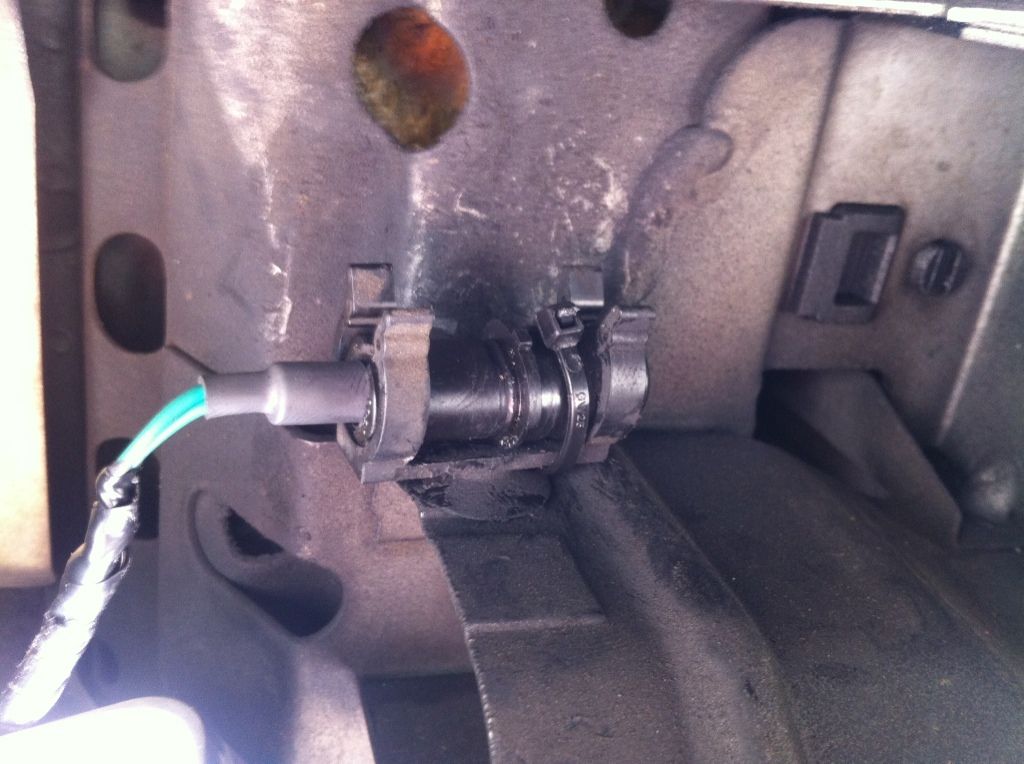
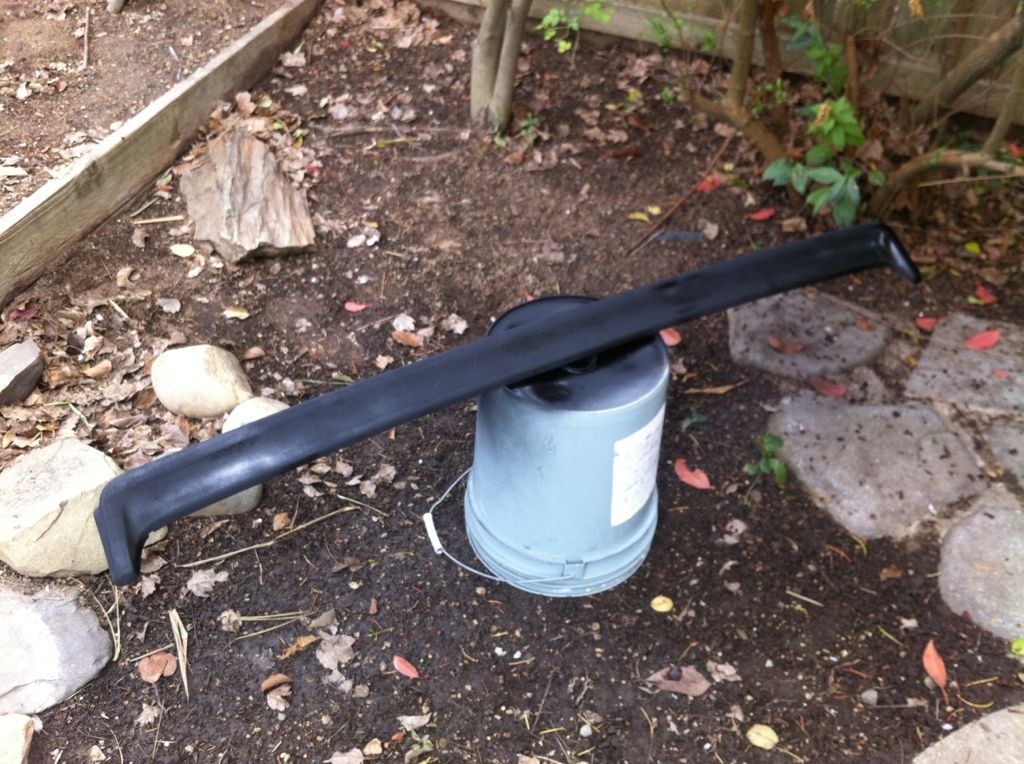
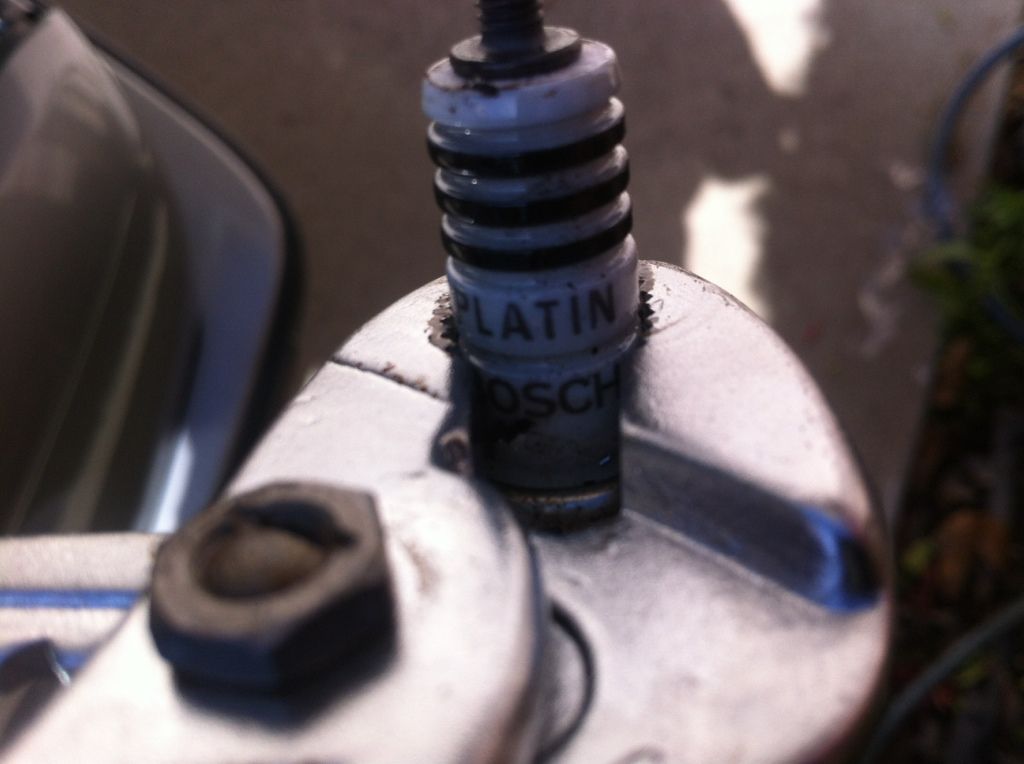
    I like how it came out, fit like a glove


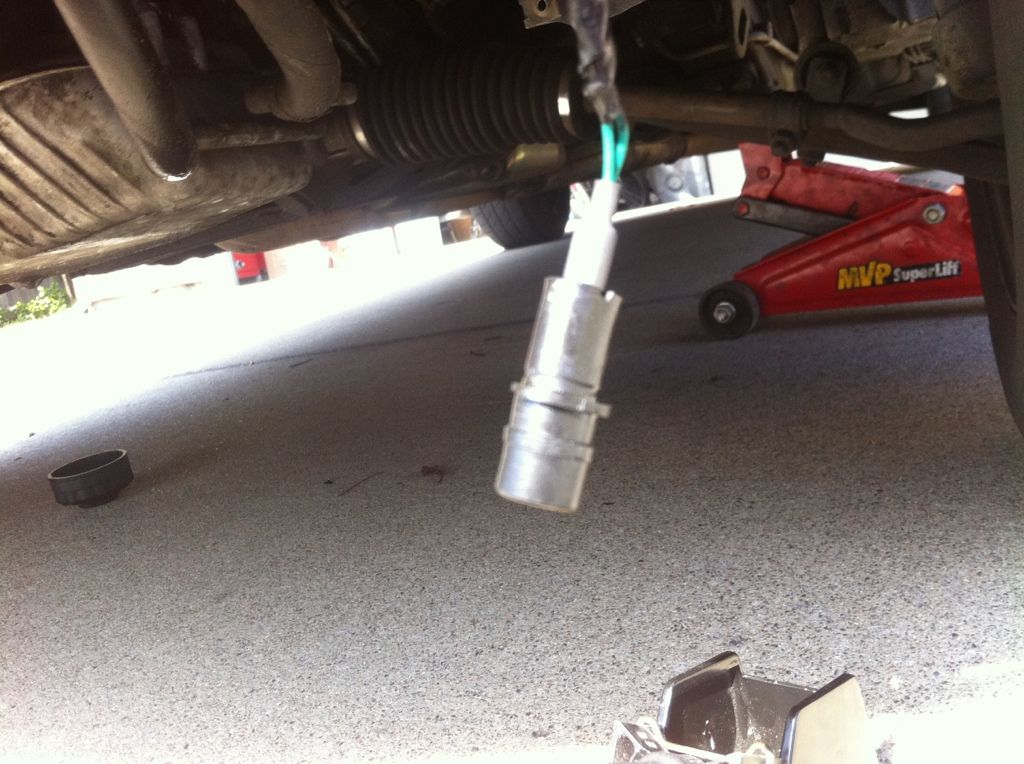
    The end sticks out just a hair, but it still fits within the whole rubber boot of the old sensor


    And it didn't interfere with any of the readings


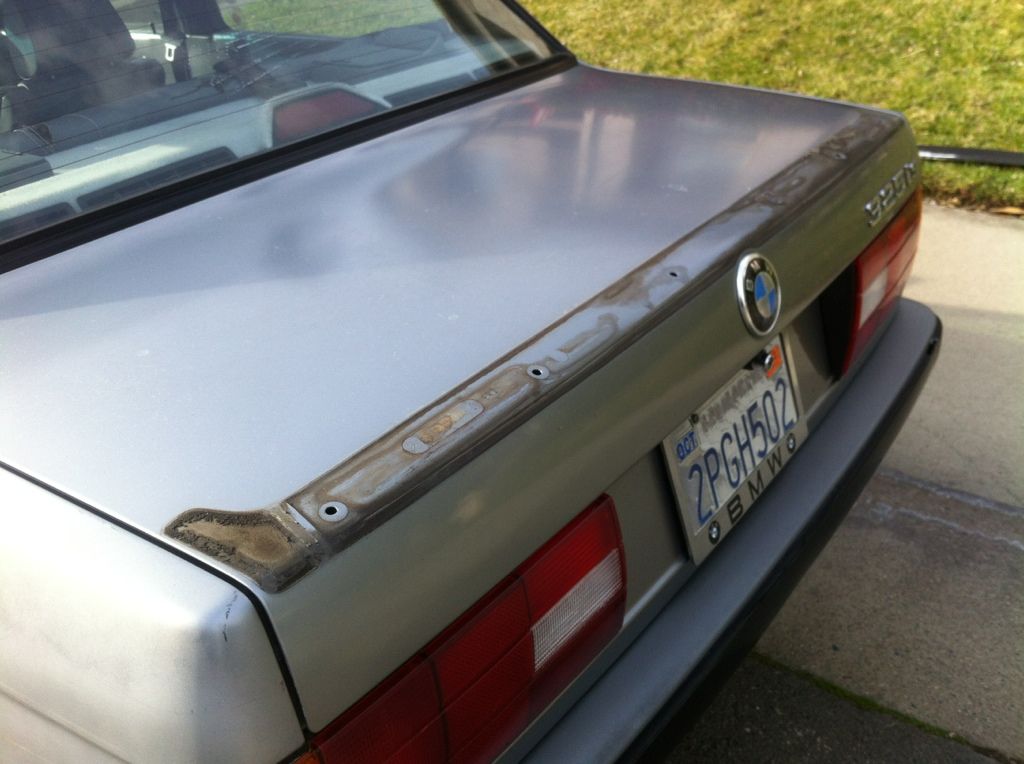
    "looks OEM, nothin to see here folks!"


    EDIT
    So it turn out what I THOUGHT was the temp sensor was actually the temp sensor connector.
    I've messed up, but will enjoy the working temperature gauge until I can piece together the parts for repair. So far, all I need is the brake duct and I can troubleshoot from there
    Last edited by JinormusJ; 02-22-2013, 05:26 PM.

    Comment


      #62
      STUFF KEEPS HAPPENIN!


      So, my OBC light was burnt out. And I'm pissed when it's burnt out.
      Wanted to order one from the guys of the forums, but I'm too impatient to wait a week for turnaround now that I had my OBC fully functioning.

      So, I had a minty junkyard OBC I wanted to swap in with a light bar core...
      Guess what happened?


      My dad, AKA Main Electrician Bawuce, drew me up a semantic of the stuff (don't ask me what it means, I still don't have any idea lol)


      He said that because of the 2 7.5V LEDs, any resistor under 500 ohms would cause it to fry over a long period of time and burn way to bright. I dont want to change this anytime soon, so I listened to him. My 510ohm resistor would dim the LEDs enough to match stock lighting perfectly


      So I starting stripping


      Soldered up the main module. As you can see, the white/cream color in the middle means the LEDs are white


      Gettin it DONE!


      Ghetto testing, but it works


      IT'S... ALIIIIIIIIIIIIIVE...!!!


      Final product


      Once more for good measure


      Bright!


      More than pleased, came out even better than I expected


      All buttoned up + Minty OBC swap

      Comment


        #63
        This is a mini update

        Decided to get crafty once more yesterday and upgrade my original e30 key light to work with a white LED and more powerful battery. Wrote a decent DIY for anyone who wants to give it a shot

        Comment


          #64
          Nice work on the OBC light. I just printed out the pictures from another thread and took them to an electronics store and bought the things that looked like the ones from the picture. In spite of being an electronics retard, it turned out ok.
          Project 325is


          Transaction Feedback

          Comment


            #65
            Thanks Ben!

            I myself can be classified as an electronic dummy, but I had my dad do a lot of the calculations cause he knew the full specs of the LEDs supplied and what not. I've seen people use resistors ranging from 150-630 Ohms (510ohm is what I used) but it all depends on the voltage and forward current of the LEDs in sequence as well. Its pretty sweet learning all this stuff, and I've gotten a better understanding on how electrical systems work now. Pretty cool honestly. Plus me and my dad did this together which was boss

            Honestly, its not that hard; just takes patience, and some basic algebra, physics, and soldering skills
            Last edited by JinormusJ; 02-26-2013, 05:34 PM.

            Comment


              #66
              Originally posted by JinormusJ View Post
              Thanks Ben!

              I myself can be classified as an electronic dummy, but I had my dad do a lot of the calculations cause he knew the full specs of the LEDs supplied and what not. I've seen people use resistors ranging from 150-630 Ohms (510ohm is what I used) but it all depends on the voltage and forward current of the LEDs in sequence as well. Its pretty sweet learning all this stuff, and I've gotten a better understanding on how electrical systems work now. Pretty cool honestly. Plus me and my dad did this together which was boss

              Honestly, its not that hard; just takes patience, and some basic algebra, physics, and soldering skills
              You're a good kid.
              I approve of your build thread.
              world renown Harry Potter expert
              sigpic

              Comment


                #67
                Haha! Thanks Ryan
                My life is now complete; I have recieved affirmation from a Danco
                I can die in piece

                Comment


                  #68
                  lol... no one is ever going to see that temp sensor ;)

                  Originally posted by SpasticDwarf;n6449866
                  Honestly I built it just to have a place to sit and listen to Hotline Bling on repeat.

                  Comment


                    #69
                    I'm OEM OCD
                    Sue me :-P

                    I fixed it lately after I got my brake duct tunneling. It has the OEM Sensor mount in the top and I just stuffed George's sensor in there

                    Comment


                      #70
                      So I decided to fix my nasty trunk spoiler the other day


                      I ended up using Rustoleum's heavy duty multi-surface Primer+Paint Camouflage paint and Krylon's outdoor Satin finish clear coat. Both these are rated to dry in 2 minutes or less


                      I was able to slap on 2 small coats of paint, 3 heavy ones, and 3 heavy coats of clear in less than 30 minutes. it was dry within an hour


                      Old one off.. Dirty!


                      New one on


                      The new one is still slightly pitted, but the full black looks much nicer than the deteriorating Lachssilber one. Honestly, I'm content for the time being

                      Comment


                        #71
                        Took the old girl to the sniffer today


                        Ended up failing NOx in 15MPH


                        So I decided to fix my exhaust leaks


                        Run some Seafoam Intake Cleaner

                        And finally changing my spark plugs


                        As you can see... DIRTY!
                        This was the cleanest one


                        Better yet, good old OP used Platniums. Everyone knows e30s take Copper!! Super Plus or GTFO.


                        Even fixed up my rough starts


                        Buddy dropped of a smog-passing exhaust, so hopefully we can drop mine and put his up in tomorrow and resmog. Tomorrow tomorrow

                        Comment


                          #72
                          Ahhhh I know all about swapping exhausts for smog purposes. Always fun. Lol

                          Car is turning out great dude keep it up!

                          -NICK

                          Comment


                            #73
                            NIce ride, keep repairing the fubared parts that what I'm doing to my 90 is,
                            88 M3 Lachsliber glass top, 90 IS project,

                            Comment


                              #74
                              Awesome updates. I feel like build threads without a turbo or S5X get no love, so here's to the relatively low key custodians of God's chariot.
                              Project 325is


                              Transaction Feedback

                              Comment


                                #75
                                Originally posted by Balleristic31 View Post
                                Car is turning out great dude keep it up!
                                Thanks Nick! Hopefully she'll be street-legal soon

                                Originally posted by steve68 View Post
                                Nice ride, keep repairing the fubared parts that what I'm doing to my 90 is,
                                Just one step a time a time. Thanks Steven :up:

                                Originally posted by benyen soljax View Post
                                Awesome updates. I feel like build threads without a turbo or S5X get no love, so here's to the relatively low key custodians of God's chariot.
                                Thanks!
                                I feel the same way, but I honestly just like documenting everything; give me good times to reminisce of all the things I did to the car at one point. Truthfully, this beginning tune up stuff is boring, but once the thread progresses into a swap, I thought I'd be awesome for future r3vers and readers to take a look at the car from the very beginning stages as its lowly life as a beat up 325iS m20 as they read of what its becoming and has become in the future.


                                Fixing broken stuff one day at a time

                                Comment

                                Working...
                                X