-
Slowly making progress.
Installing 3.15 torsen lsd.

Exposed.

Replaced my old rear set of eibach sports with some h&r races.

Got my gauges back from Greg@BavRest. They've been completely transformed into a work of art. The needles were airbrushed, paint matches stock e30 m3 gauges. All solder joints reflowed, odo rebuilt, plastic polished, installed gauge rings, all lights replaced, sprinkled with pixie dust, etc etc. Check engine light wasn't working here as I had yet to hook up power to the dme.

Did some more work that I didn't get around to take pics of:
- Got my Galletto 1260 cable to work. Pulled the 24k data section of my ms41.2 dme and started figuring out how to modify it. So far I'm planning on deleting ews, raising rev limiter to 7k and disabling the speed limiter. I'm installing all the emissions equipment so no need to modify their values.
- Refreshed driveshaft by painting one half that was missing some paint and replacing the csb. Installed it with all new hardware.
- Cleaned up and installed driveshaft heat shield.
- Replaced some rubber fuel/vacuum lines under the hood and car.
- Replaced the three engine harness relays (main fuel and sap).
- Installed the slave master cylinder and bled the system.
- Bled brakes.
- Mapped out how to connect charcoal canister and fuel tank pressure sensor and ordered parts.
- Figured out where to mount SAP and started building a mount for it.
I ran into an issue which unfortunately is going to take some work to resolve.
I couldn't get my e36 throttle cable to fit. I made a couple attempts at bending the metal portion of it up a bit so it clears the brake booster but both times the cable broke. After much research I finally decided it's not possible (or at least not easy) to run the obd2 manifold with an e32 booster installed with the spacer. There's just not enough room to install the cable without interference. This appears to be the case for both style throttle bodies.
This also means my schrick manifold won't work with my setup so i have to sell it now
Fortunately the m50 manifold fits much better with it's shorter runners so the next major job will be to get that installed. I wish I would have known all this before spending countless hours installing and modifying the s52 manifold, but you live and learn i guess.
Coming up next:
- Install m50/obd1 manifold.
- Fill trans and diff with fluid.
- Install the SAP carbon canister and FTPS.
- Replace engine mounts (ordered a set of AKG mounts after deciding I don't like how the condors sit).
- Drain the old fuel out of the tank and install fuel pressure losses valve with new fpr.
- Flash dme with software update.
- Build up some courage and finally tackle pulling the carpet and troubleshooting the body harness issues.Leave a comment:
-
Finished ac install and a few other odds and ends.
Unfortunately I'm a bit stuck on what to do about my throttle cable.
I tried bending an obd2 e36 cable to get it to fit next to the e32 booster but even after removing the cable adjuster and bending it till it broke it was still hitting.
Anybody else have trouble fitting an obd2 throttle cable to an obd2 throttle body with the e32/ix booster?
Rebuilt ps and evap hoses.

Custom an-10 oil cooler hoses and a bypass hose so I can break in the motor without it.

Old ac tensioner with rebuild parts (one bolt missing in this picture).

Rebuilt tensioner.

New compressor and drier with pressure switch installed.

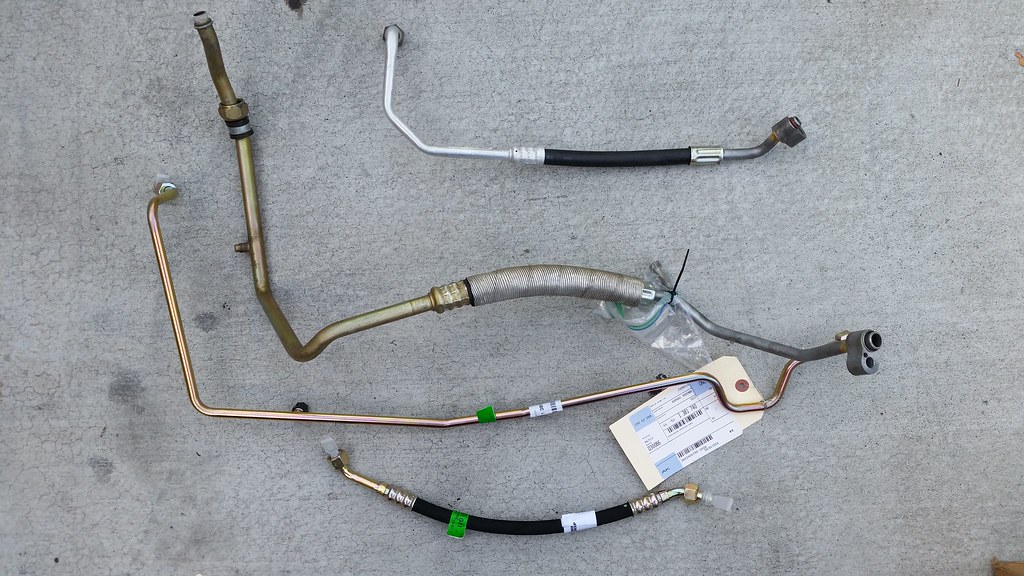
Power steering hoses installed, slilght bending of the cooling loops were necessary to get everything nicely fitted. Last edited by arch4ngel; 12-23-2014, 07:59 PM.
Leave a comment:
-
-
I don't think I can pass bar without an obd2 carbon canister.
Even I could pass it wouldn't work with the rest of the evap system which requires an operational shut off valve at the can.
The vanos rebuild was cake.
The rebuild itself can easily be done within an hour if the bearings don't need to be ground down.
Just make sure to buy the vinyl vice pads and the socket, both are needed for the job.Leave a comment:
-
-
how hard was the vanos rebuild? I wish I had done it while I had everything apart. Now its rattling...
Getting close though! I think you can use the E30 charcoal canister instead of the E36Leave a comment:
-
Made good progress this month.
Finished up the remaining engine bay wiring.
Figured out how to take apart the aux fuse box and added a couple circuits for the carbon canister and diagnostic port.
Extended brake fluid sensor and cleaned up a bunch of loose ends.
Made brackets for the dipstick and brake fluid reservoir out of a spare spal bracket.
Replaced most of the ac system, just waiting for a few parts to wrap everything up.
Evaporator condenser and most lines are installed.
Compressor and drier will be installed this weekend.
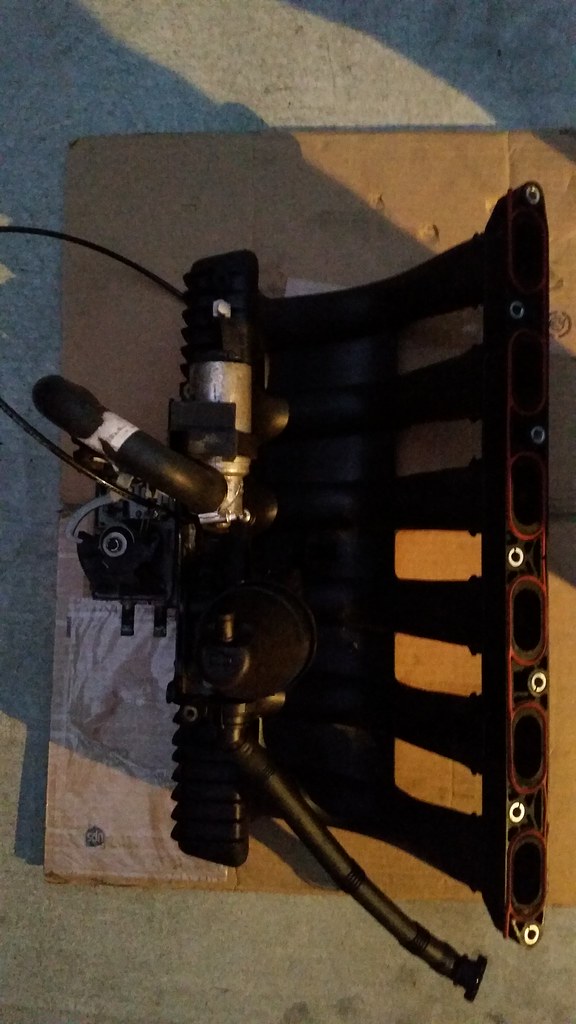
Intake manifold was prepped and installed.
It received all new gaskets and hoses, a cleaned out icv and rebuilt injectors.
Despite my early attempts at measurement I ended up having to shim the motor mounts for everything to fit.
Three s52 head washers did the trick.
I shimmed the passenger side as well to make the engine more or less horizontal.
I found a local shop that can make me some an-10 hoses for the oil cooler.
I left them my high pressure power steering line and both interior ac hoses for rebuilding as well.
Next up I'll be wrapping up the ac system and engine bay then adding fluids.
Diff seals then driveshaft are up after that.
Then carbon canister, fuel tank pressure sensor, fuel pump and fuel pressure losses valve.
Finally the task I've been procrastinating on for months, the dreaded interior wiring project before a trip to the exhaust shop.
Have some pics.
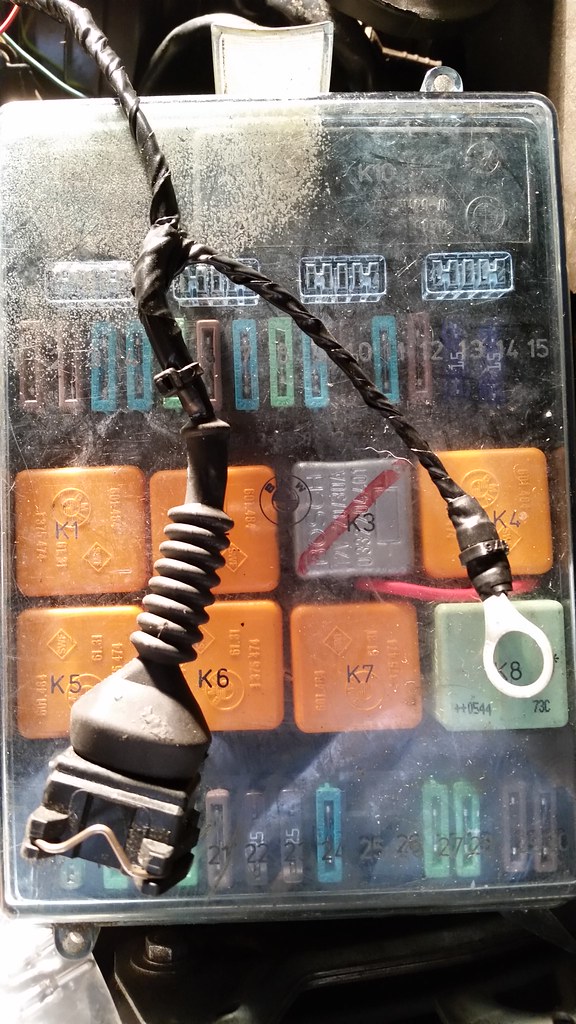
I figured out how to disassemble the aux fuse box.
This will supply fused power to the carbon canister and diagnostic connector.
I may move the obd2 connector here to clean up the battery terminal wiring.
Intake manifold, ready for installation.
Zionsville compressor lines and new oem evap/condensor lines.
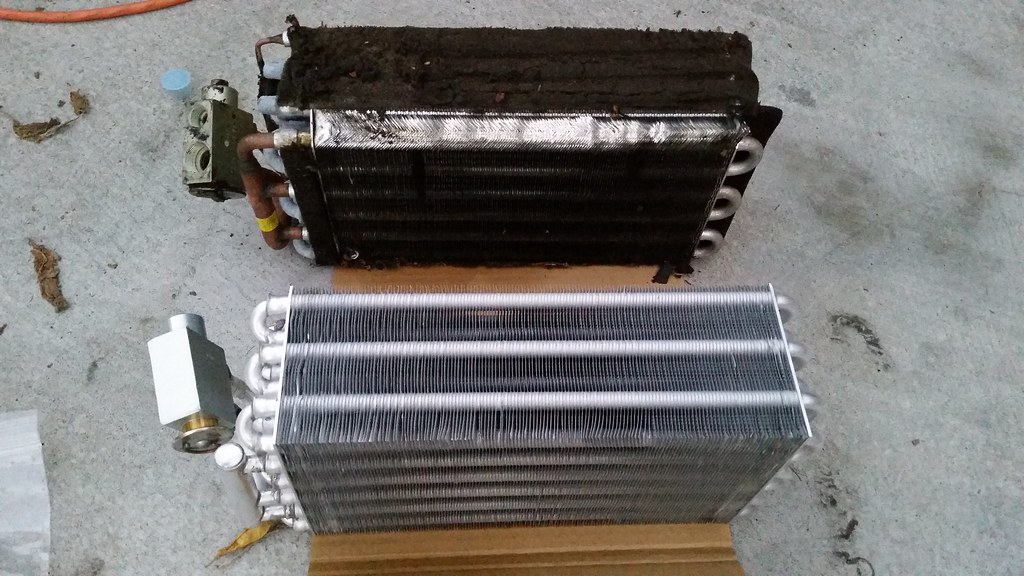
New and old evaporator.
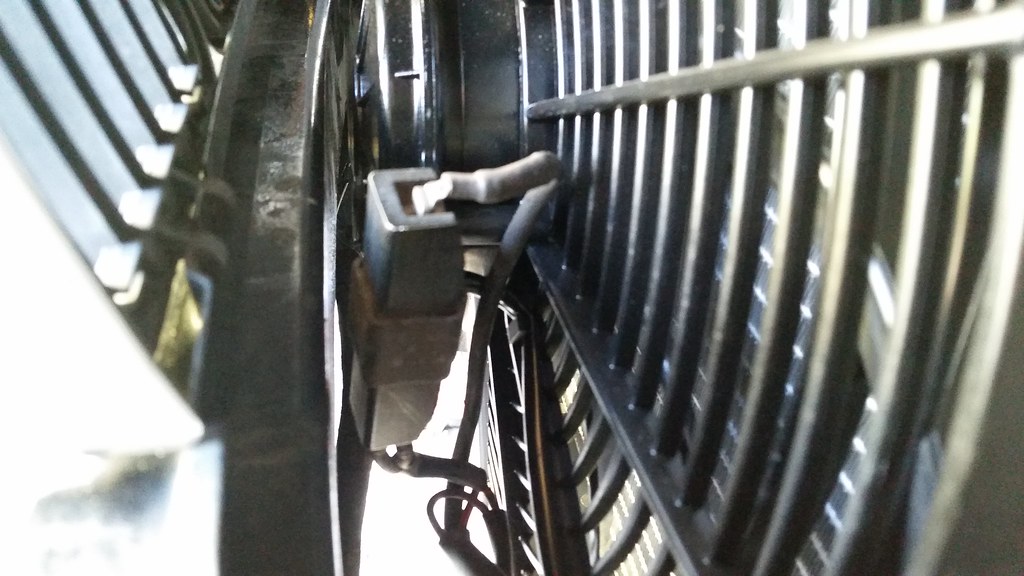
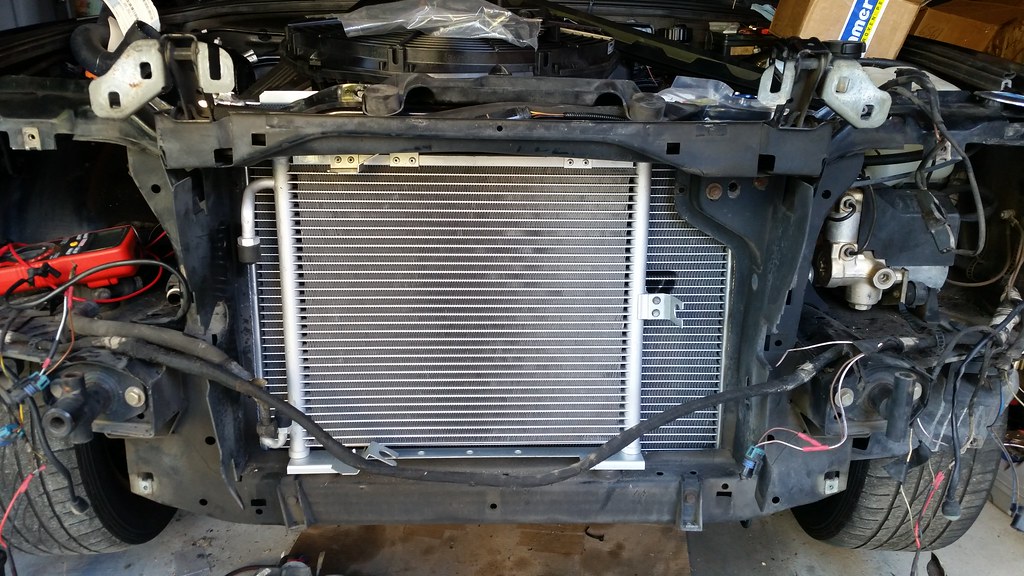
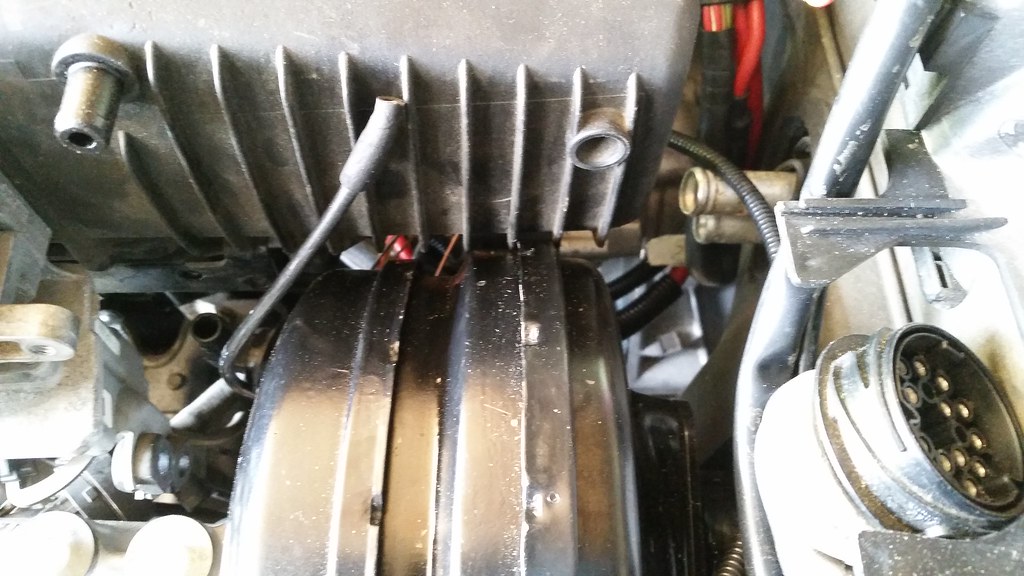
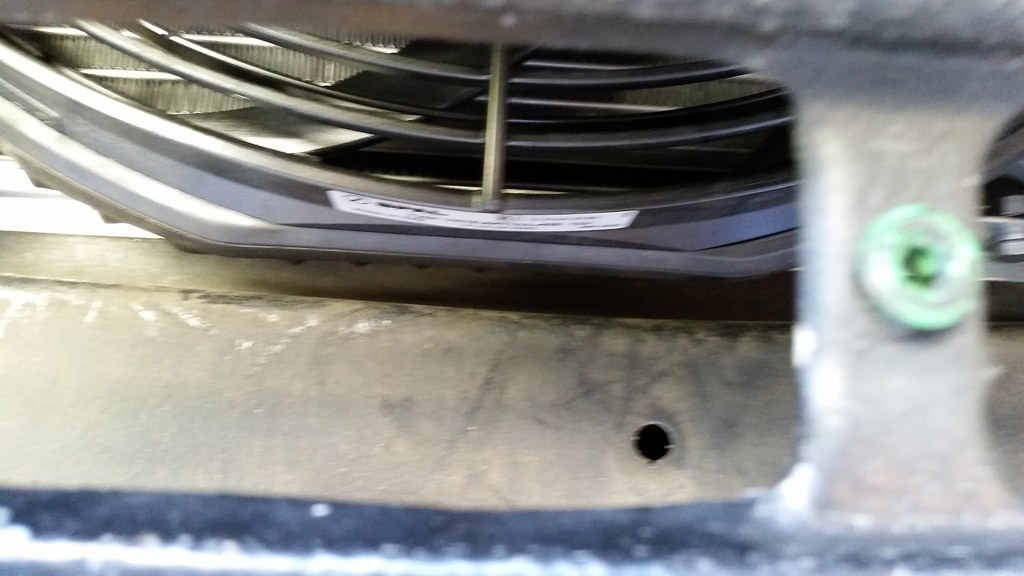
Fan to valance clearance.
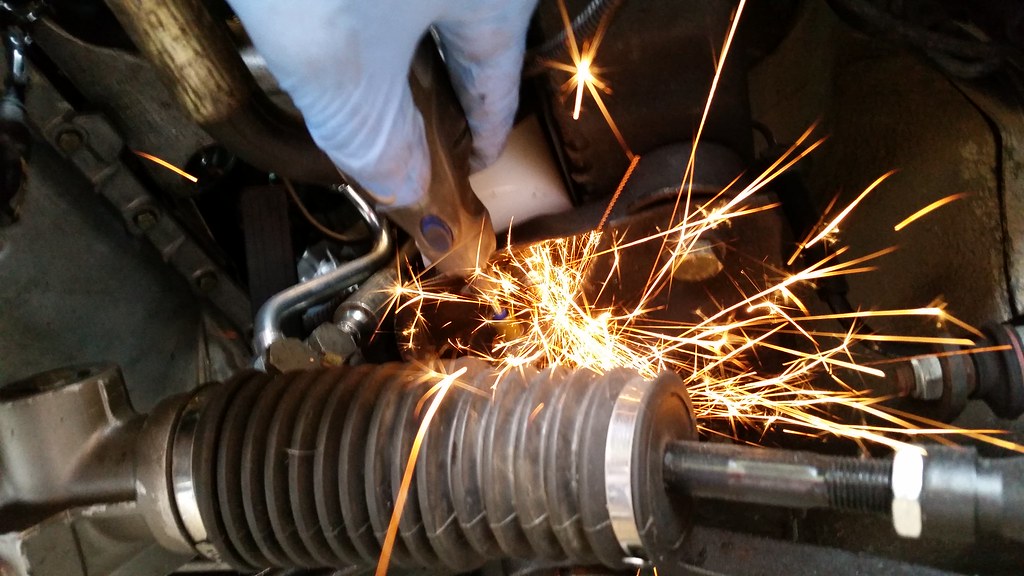
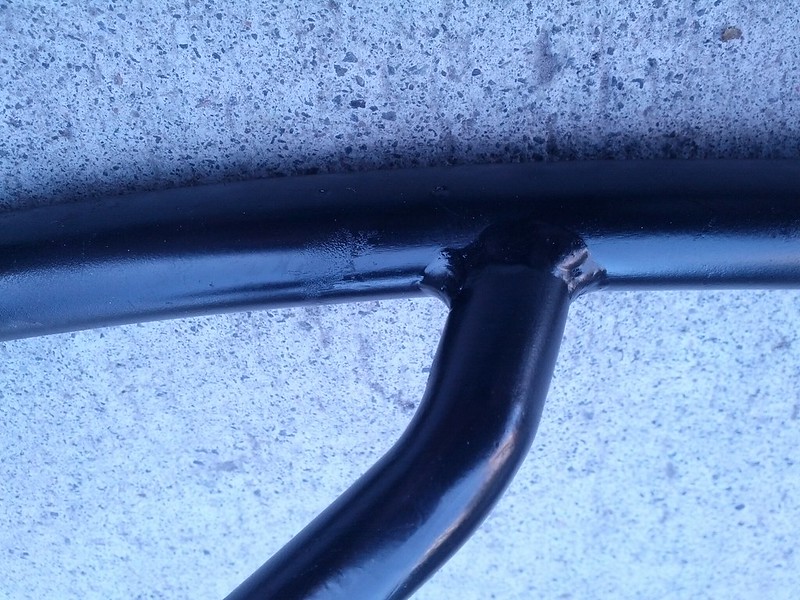
Grinding down the engine mount bolts. They were long enough to touch the bottom of the subframe.
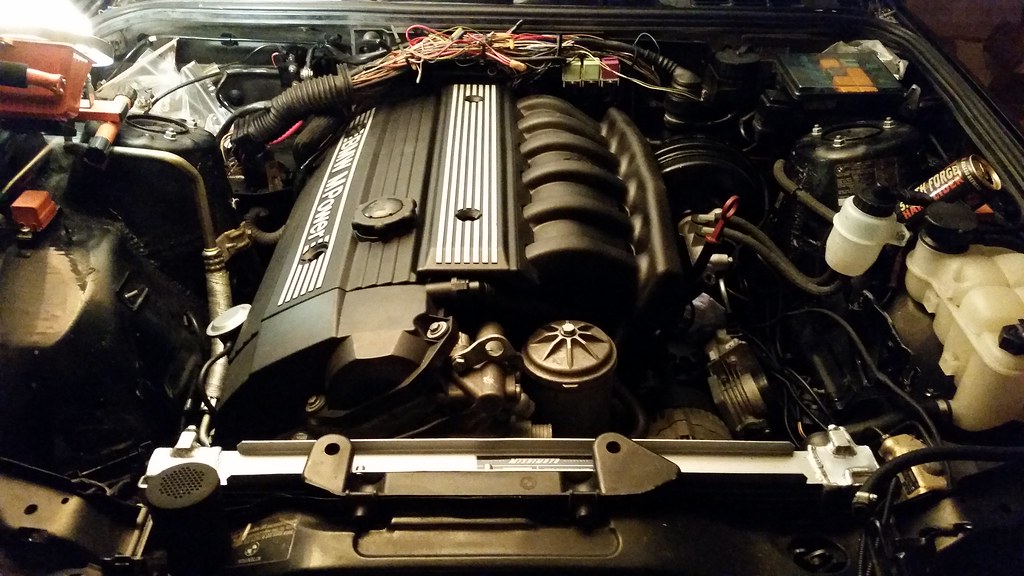
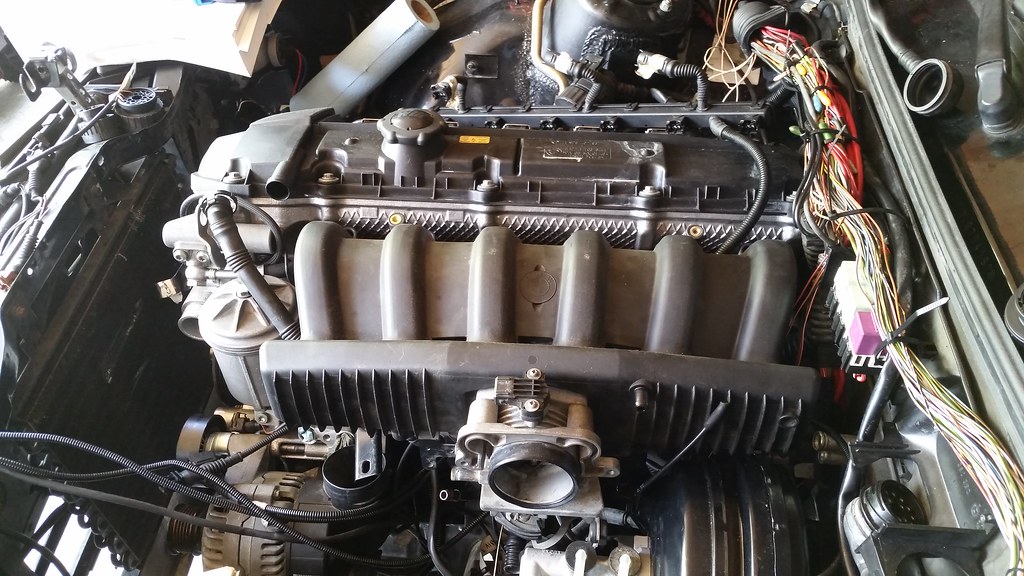
Current engine bay status.
 Last edited by arch4ngel; 10-07-2014, 10:40 PM.
Leave a comment:
-
Haven't had much time for the car lately but I have a few updates to share.
Finished up c101 -> x20 wiring.
Wired up my oil level sensor.
Installed a new parallel flow condenser and mishimoto e36 radiator.
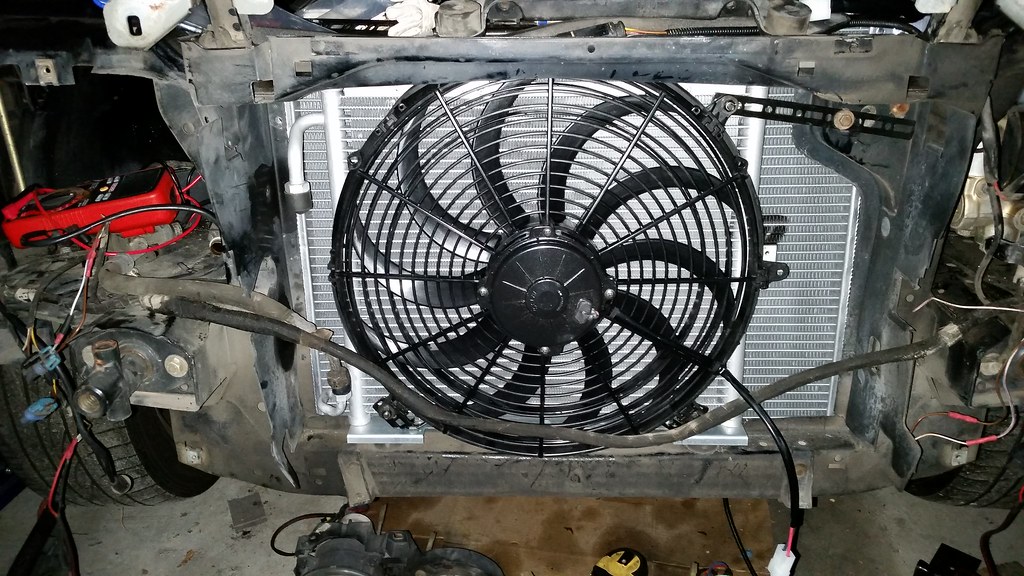
Then installed and wired up a new 2048 spal fan with brackets modified similar to bimmertecks setup. Wiring not hooked up in this pic.
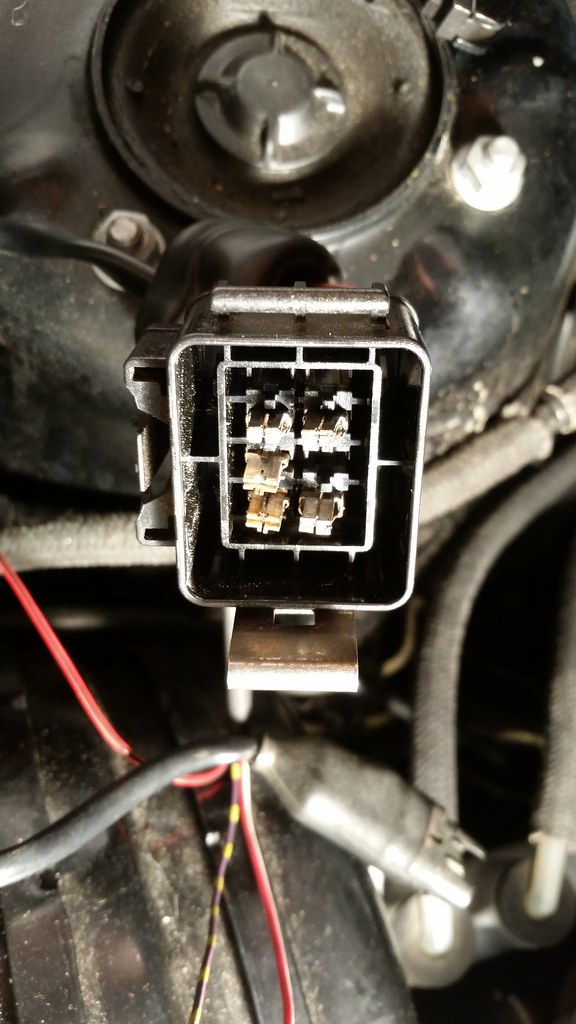
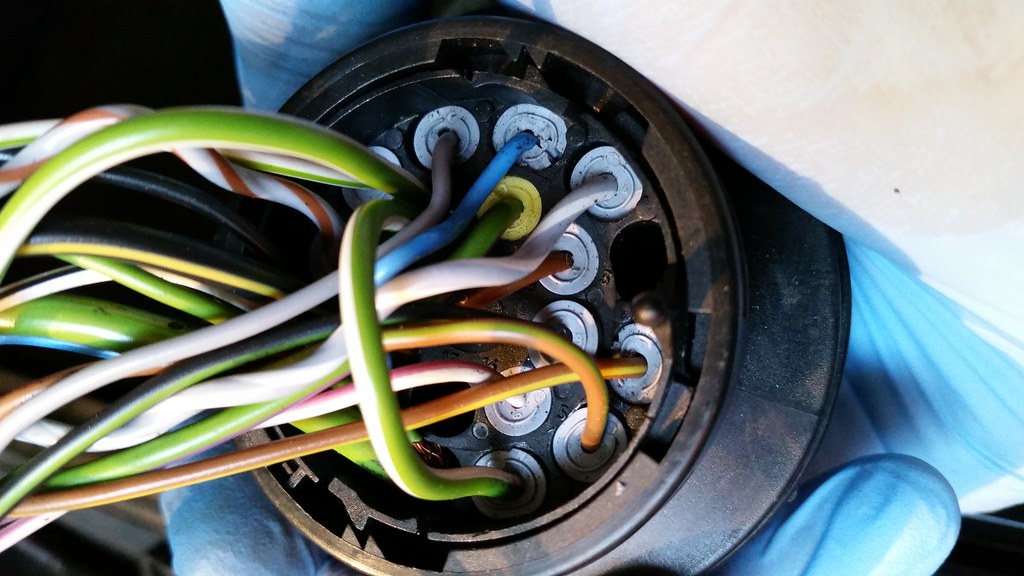
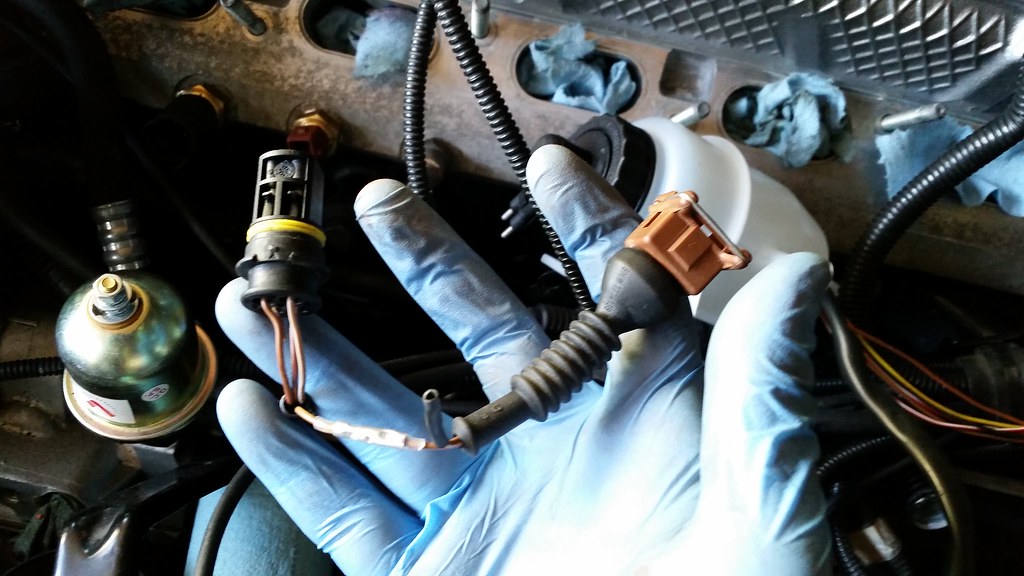
Found this little gem while removing my gauge cluster. The foglights in this car were wired strangely when I got it and I disconnected them early on. Never realized how bad the wiring was fubared until I saw the back of the headlight plug.
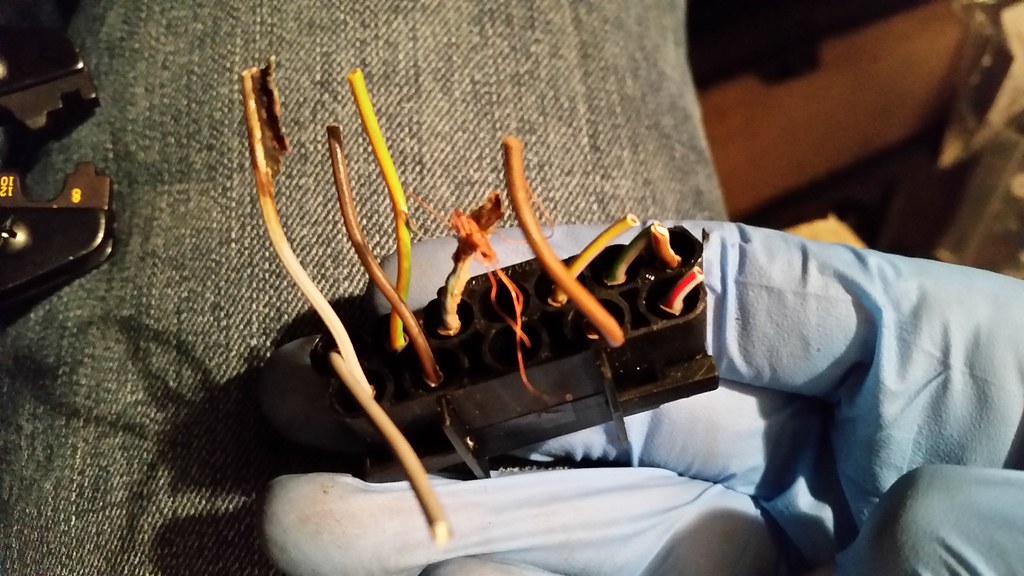
I tested the harness c103 harness plug (where this harness ultimately leads) and found continuity between several pins. I'm going to have to remove the interior to get any further with this so I"m holding off till everything else in the project is more or less done.
Also wrapped up some loose ends and performed various other tasks.
- Installed dme brackets, dme and hooked up to harness.
- Ordered and started installing new ac components including condenser, compressor, evaporator, hoses (oe and zionsville orca hoses), orings and drier.
- Wired up the podi.ca gauages.
- Installed water hoses below the intake manifold.
- Put the dipstick into place, still needs a bracket to hold it steady.Leave a comment:
-
Between a wedding, work and parting out the 535i I've had very little time for the e30.
Here's some of the meager progress I've made over the last month or so.
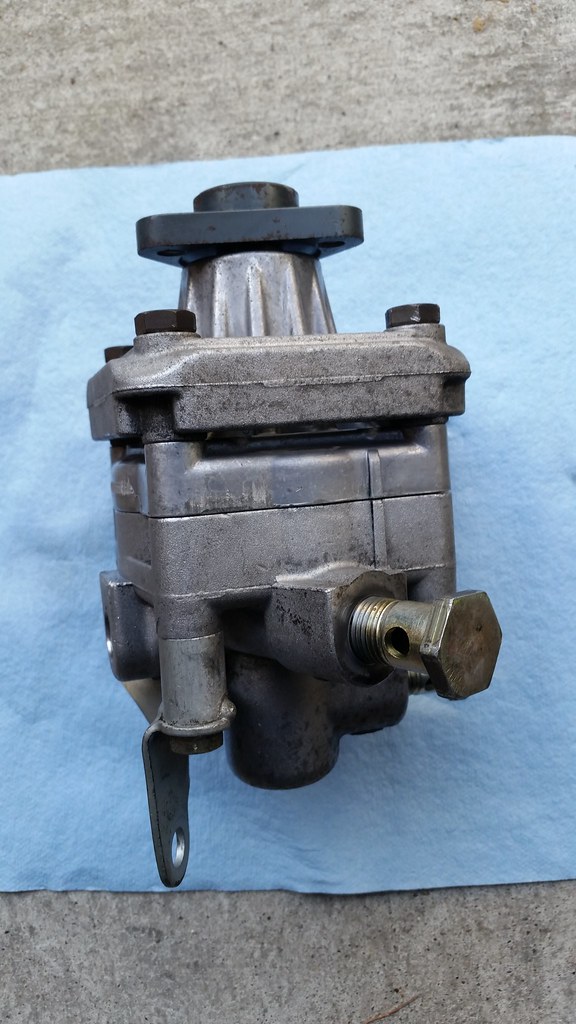
Rebuilt power steering pump and attached all lines.
Used e30 low pressure and e36 high pressure lines.
The high pressure line fits a bit weird but it should be fine.
I may get a new line custom made at some point.
Did some wiring work, including the e30 coolant temp sensor.
Just used one of the two unused wires from the obd2 combined temp sensor.
Started planning out where to put my diagnostic connector, decided it will most likely be run to the drivers side of the engine bay in the round port on the side of the m3 harness cover. Should be much cleaner then running it on the shock tower.
Also started routing the bundle of emissions wiring that needs to be run to the back of the car (ftps and carbon canister) along with the 16 pin obd2 connector and ews components.
Didn't get to finishing up the x20->c101 harness, waiting on some parts that should be here next week.
Test fitted the intake manifold to see what modifications might be needed.
Believe it or not the fins aren't touching the booster here.
There is less than 1mm clearance between the fin sides and the booster lip.
I'll be shaving them anyway to be on the safe side.
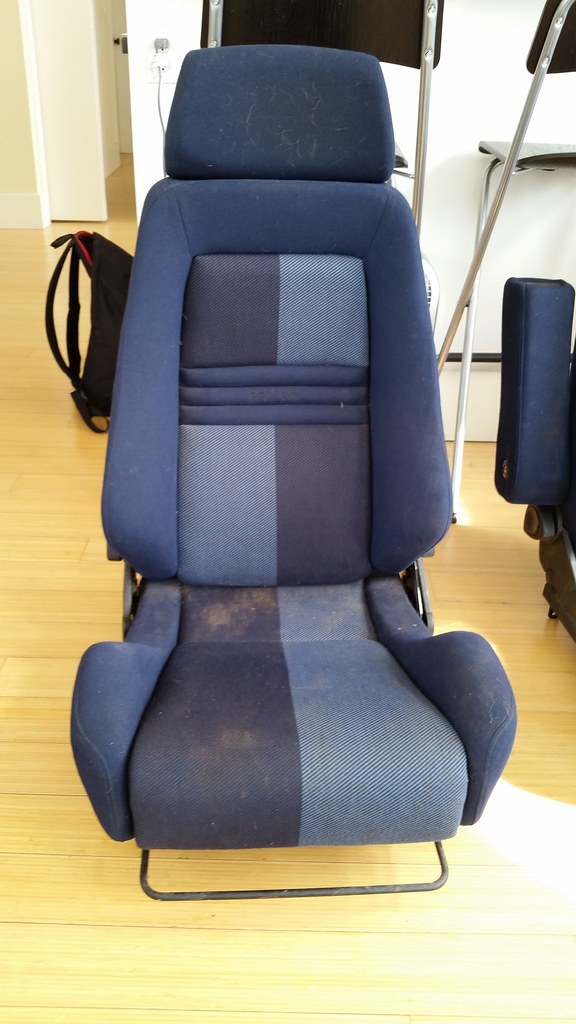
Last but not least picked these bad boys up for cheap.
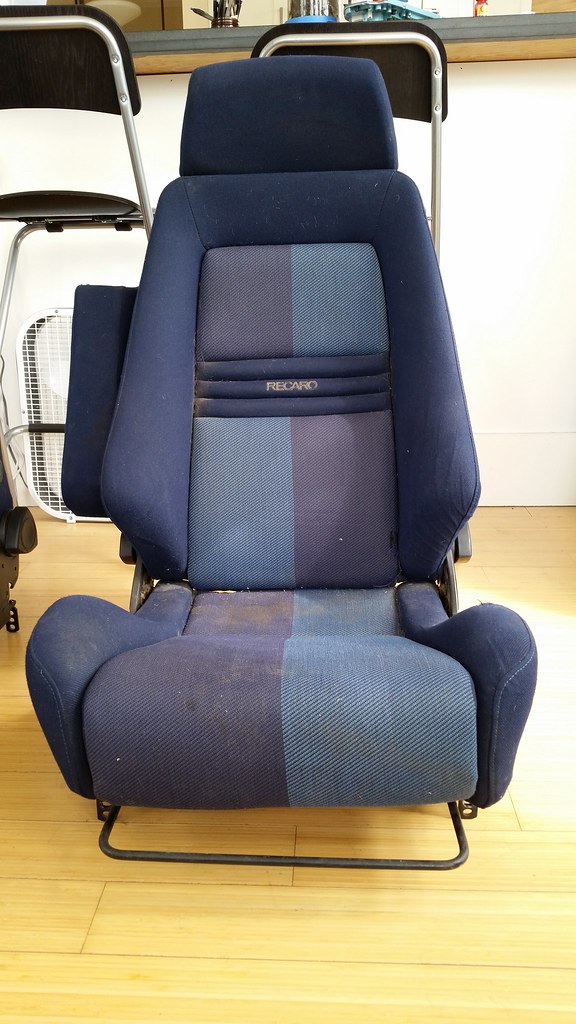
Recaro lx-s in monza blue.
Never seen them with an armrest before, hoping it will fit nicely without blocking my elbow.
It will be a nice addition during trips.
I really want to keep them but I can't figure out how to make them work with my interior and the blue monza cloth has long been NLA.
The fabric is in great condition and would be a shame to recover them. We'll see.
Dirty dirty armrest.
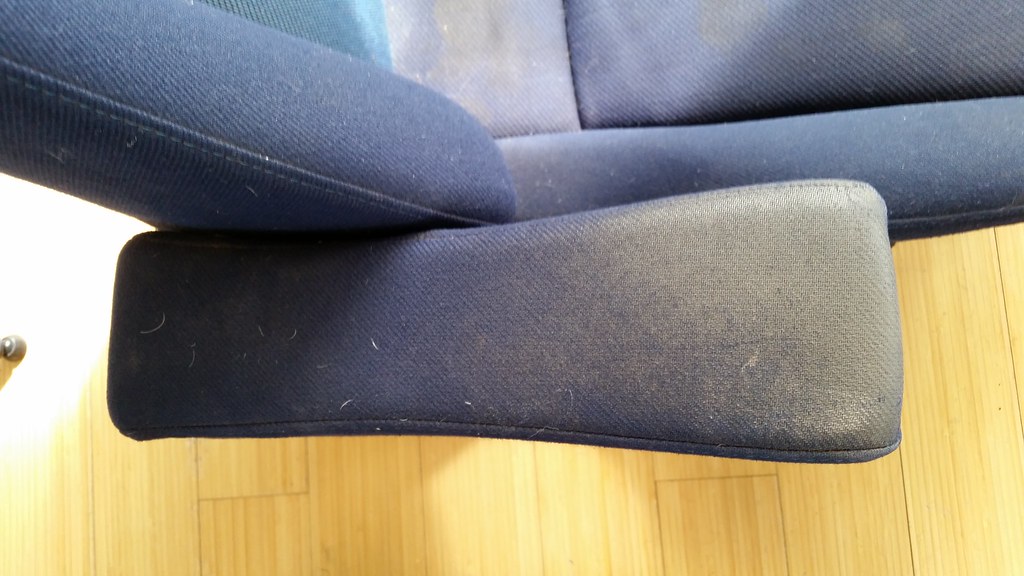
Leave a comment:
-
Yup, for obd2 only.
It connects to the ccv system.
Obd1 cars have a nipple on the intake boot iirc.Leave a comment:
-
Had the shop weld up the ccv tube to my e34 dipstick tube.
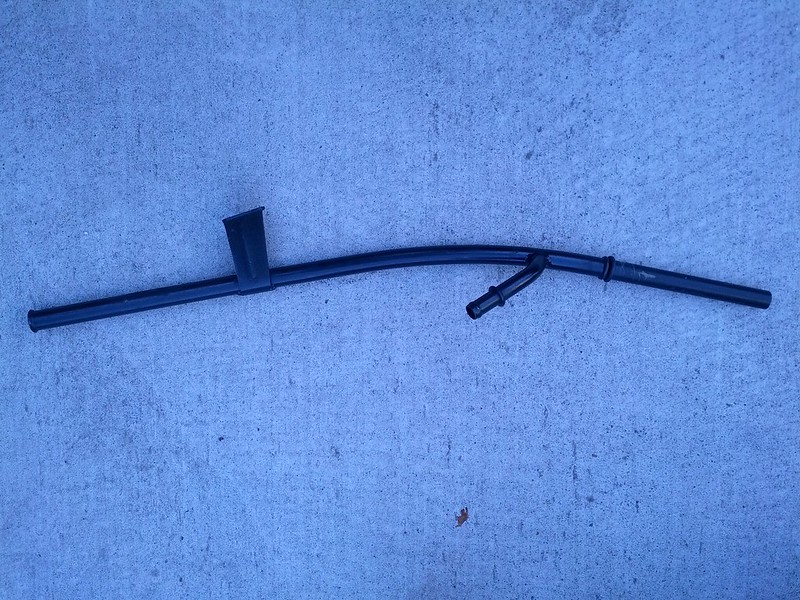
You only do this for OBDii correct? Since I have an OBDi and have not done itLeave a comment:


Leave a comment: