-
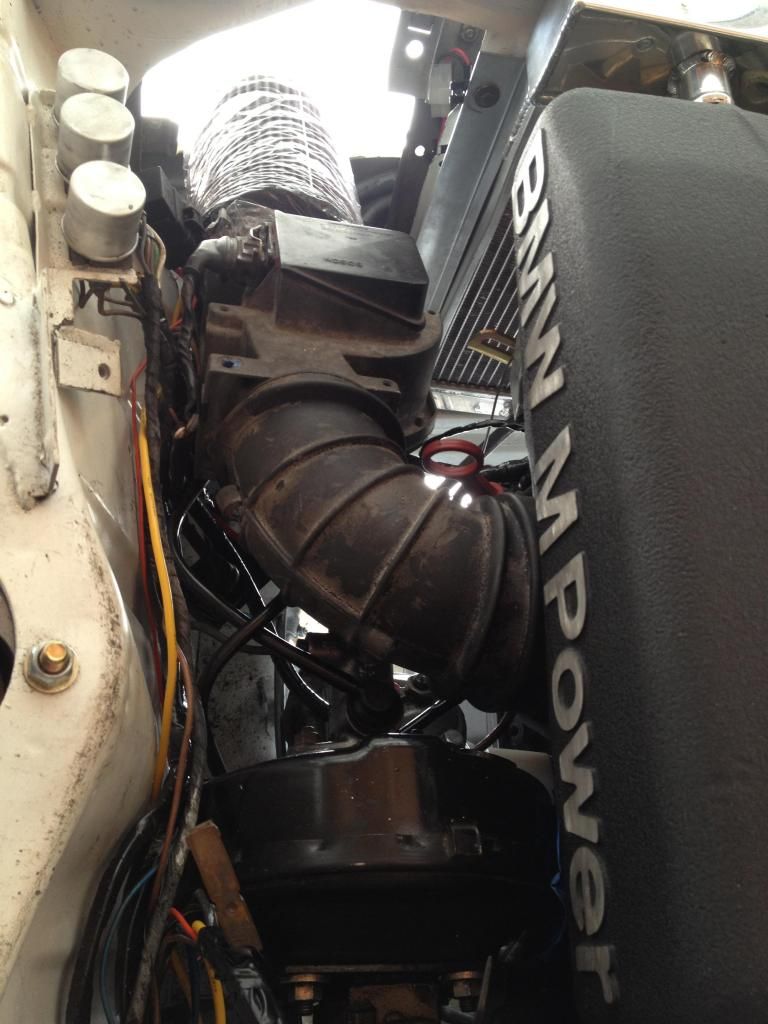
Hah, it looks old and beat for sure! It's actually brand new. It came in this weird coating that I've only rubbed off of the inside. If I rub the outside there is brand new shiny rubber underneath. Not sure what the gross powdery coating was? It looked like NOS. I was going to grab a silicone elbow but I was worried about clearance since I have almost none between the intake boot and master cylinder. The silicone was a few mm's thicker in places from what I read. -
nice, nice.
Just a heads up for the intake elbow: It looks like the original and that's a good thing. The "new" one that I bought from BMW like last year isn't stiff like my old one. What can happen in the heat is it can collapse a bit under hard throttle and can cause some air restriction. I took it off and put the old one on; it's old lookin' but a little better. Unsure of the QC from part to part, so it may not apply if you do decide to get a new one. My 2c.Leave a comment:
-
I had a feeling that picture would generate some criticism. I ordered a BMW connector a few weeks back that I was going to pin. The soldering and shrink wrapping just would keep the harness looking cleaner and easier to hide than the additional plug. I guess I need to check your thread out and look over this discussion in your thread for some new inspiration. For the 5 minutes that the testing will take to verify all systems are a go I doing see any catastrophic events occurring.
What do I know though? I'm just a peckerwood who lives out in the hills with too many BMWs.Leave a comment:
-
Leave a comment:
-
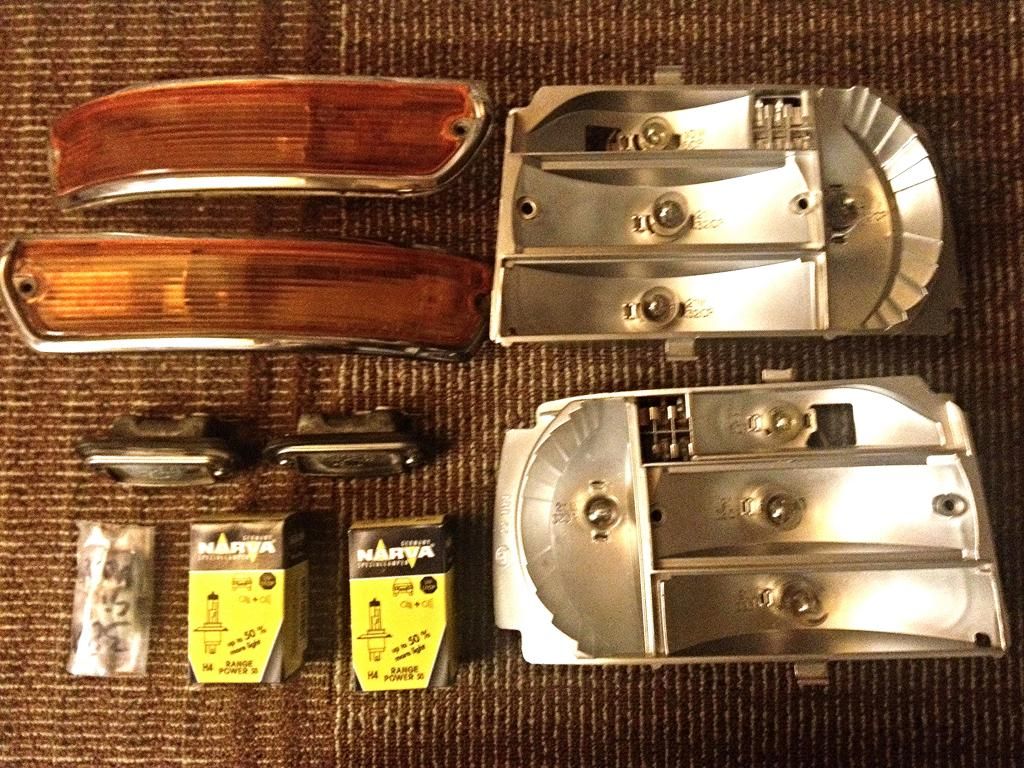
Christmas came early! I received my 2002 illumination set up from MoBrighta a couple days ago and just opened it up today. Im very pleased with the work Andrew did to make the 2002 more visible when on the road in traffic.
All the reflective backings for the lights were refurbished and recoated to reflect maximum light. Installed were dual filament HO bulbs and added lamps for more braking light output. Also, he ordered me a Hella LED 3rd brake light and made up a harness to install it (thats still en route). Euro turn signals and rear license plate lamps got the same treatment, HO bulbs in the turns, dinanm3atl LED festoons in the plate lamps. Andy also sourced me the Hella Euro Super flat-faced headlamps with city lights and provided the bulbs and protective covering. Very happy with the final products and the customer service and organization of the operation. Thanks again MoBrighta! Ill install these once I have the 2002 in front of me and get some real pictures of the work up.
Leave a comment:
-
Awesome work! I love seeing progress on this thing, it's going to be a beast.Leave a comment:
-
-
-
Thanks!! 2.5 S14... one day.
Ill dig up some details. Its the Euro header used on the 215hp version of the S14, the one without the catalytic converter and a few other changes. I had a cool website bookmarked that described the exact measurements of the many S14 headers offered but the link is now broken
Whats nice about it for the M2 is the added length of the header. The longer down piping gives the needed clearance for the track rod that translates up and down as the wheels turn. Most S14 swap guys need to dent the US header a bit to allow this clearance as the wheels turn.Leave a comment:
-
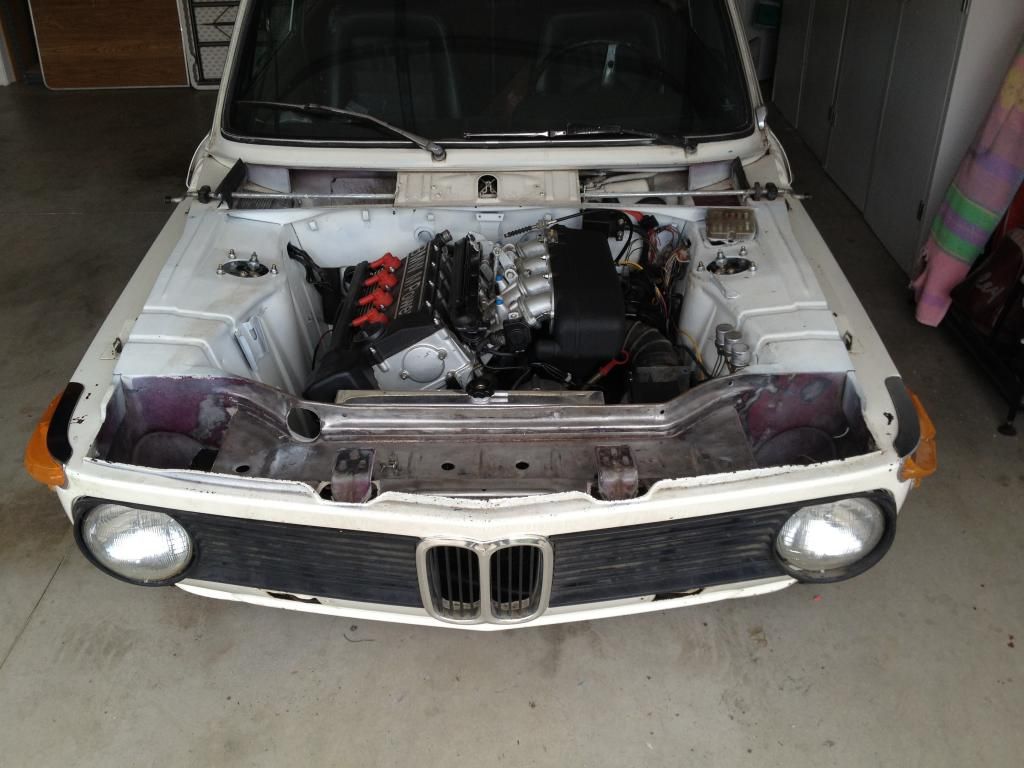
So its been a while since I have updated. The weekends have been going towards the small stuff, things I didnt realize would be so time consuming but needed to happen to get the car on the road.
I started here:
I finally took the many pages of wiring resources that I have saved over the last couple months and went to town with some wire strippers and butt splices, (remember, this is temporary wiring and will be properly trimmed and soldered once the car is running and the wiring all checks out). As mentioned before, Im using the C101 connector. I have the E30 M3 engine harness, an E34 m20 525i male C101, and then of course the factory 2002 body harness. First step was to write out a detailed diagram of the colors of the wires between both sides of the C101 (E30 M3 vs the E34 525). Ive already trimmed out the unneeded wires from the C101, and added the oil temp pin back in. After some trimming and splicing I was left with this ugly bundle:
Mated up the other needed wires with their respective homes: alternator, starter, etc. and like that this dreaded wiring job was complete, at least I hope. Included in the job was running the new wiring to the E30 electric fuel pump and the fuel level sender.
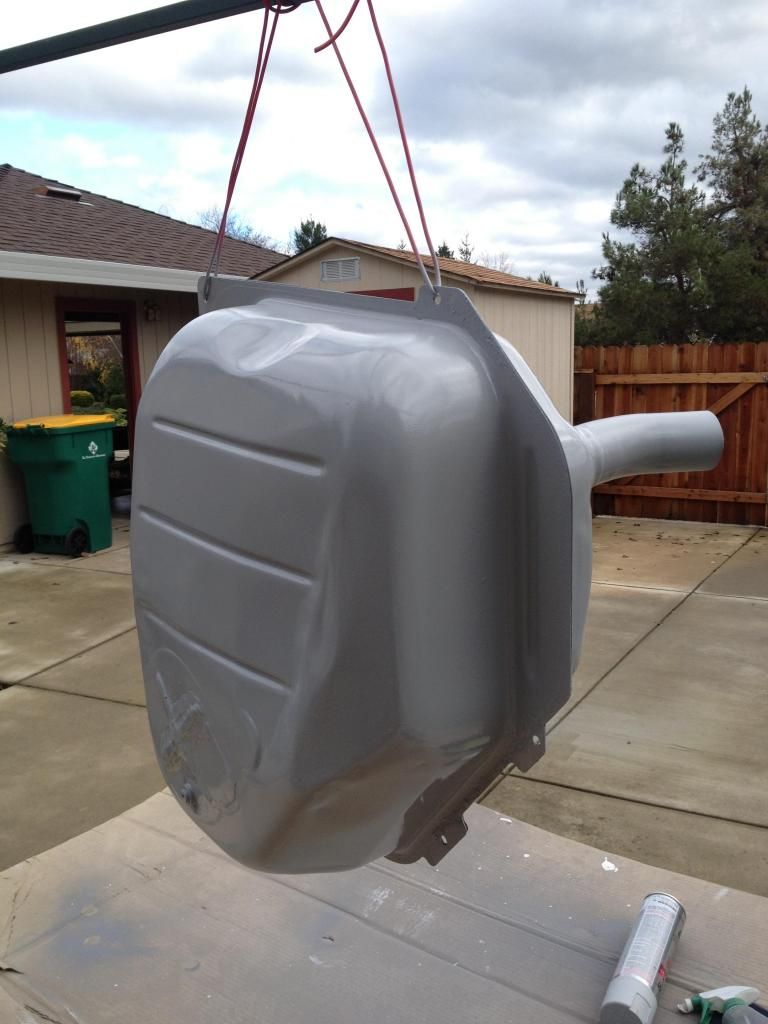
While on the subject of the fuel pump, I used a break in the weather to remove the fuel tank and pretty it up. After much sanding and a couple wire brushes I was left with this:
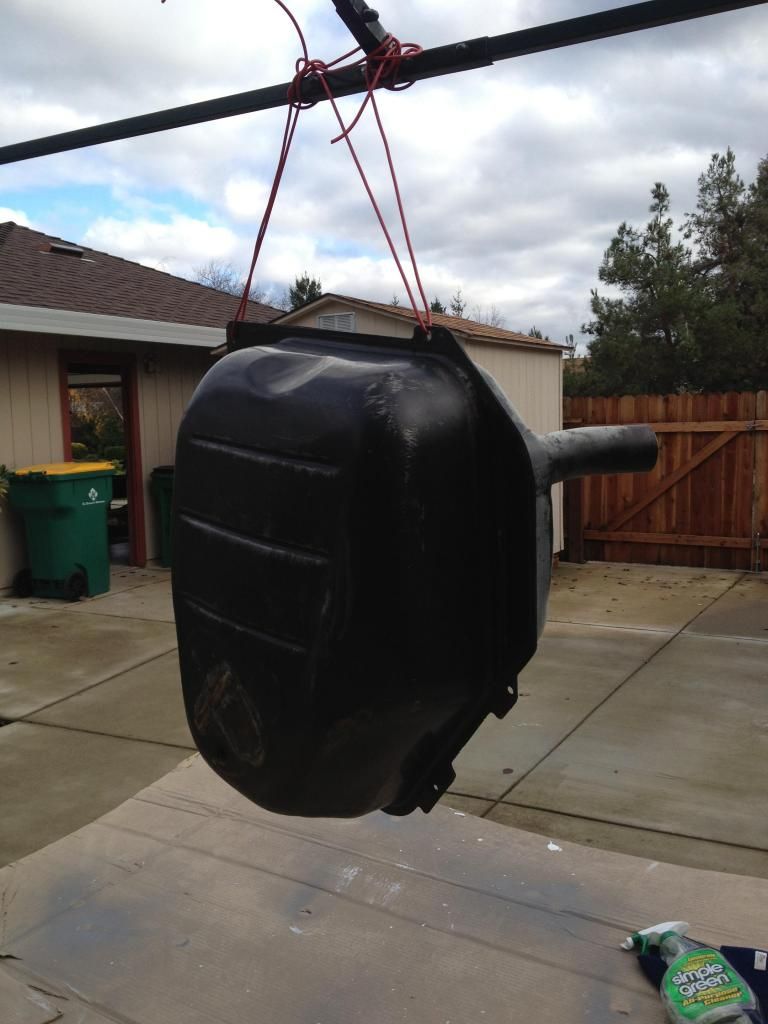
A couple dents, but overall a solid tank, clean inside and out now. Shot some rattle can primer and some paint next.
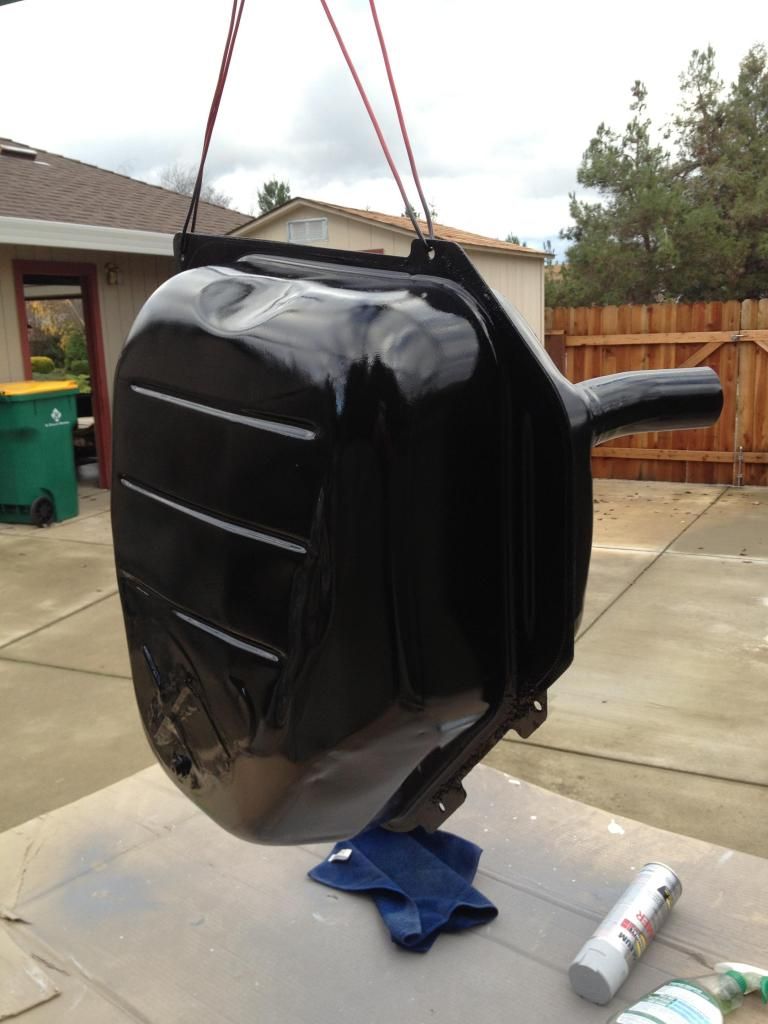
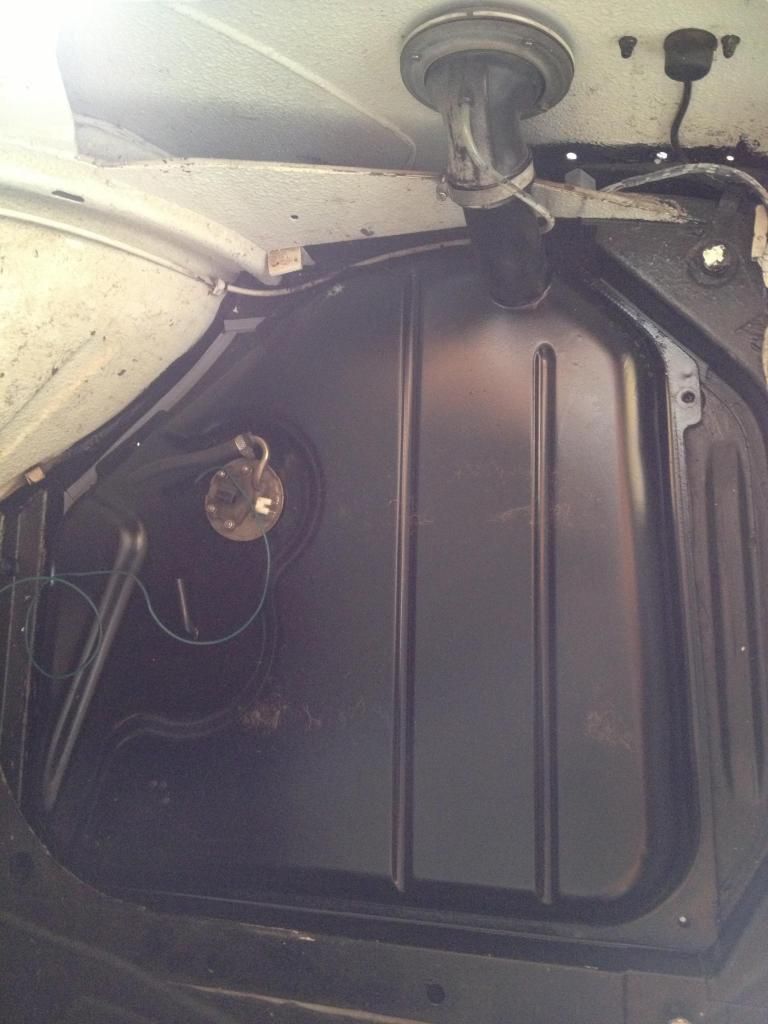
I Installed the tank on some 5/16inch rubber weather stripping in the trunk and dropped the final product in (thanks for the tip on the weather stripping mlytle!) Isolates the tank a bit, mainly adds a nice seal to the elements in the trunk since whatever factory gasket is long gone under the fuel tank.
I had been looking for a donor 2002 to come up on either craigslist or pick-n-pull. My wish was granted a couple weeks ago in the San Jose junkyard --> 1976 Chamonix 2002. I grabbed the high pressure metal fuel line from the car, along with some other bits that might come in handy later on. As mentioned previously, the now fuel injected S14 2002 requires a hard fuel line that can hold up to the high pressure of the electric E30 fuel pump. With the factory non Tii 2002s having only 1 metal hard line (used as the return line from the factory), I didnt want to rely on 40 year old plastic for a fuel line, even if it was to be used as the low pressure return line as some swappers do. So out came the old plastic lines along the passenger side of the car and up went the additional hard line. I didnt get a picture, but it runs right next to the existing hardline.
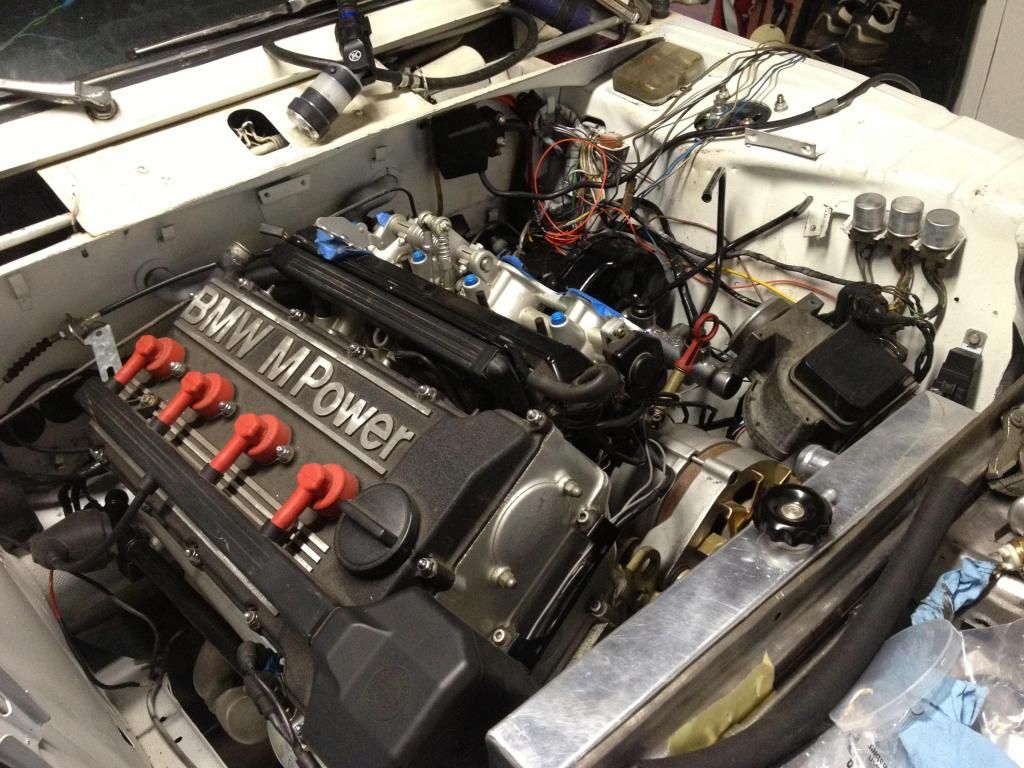
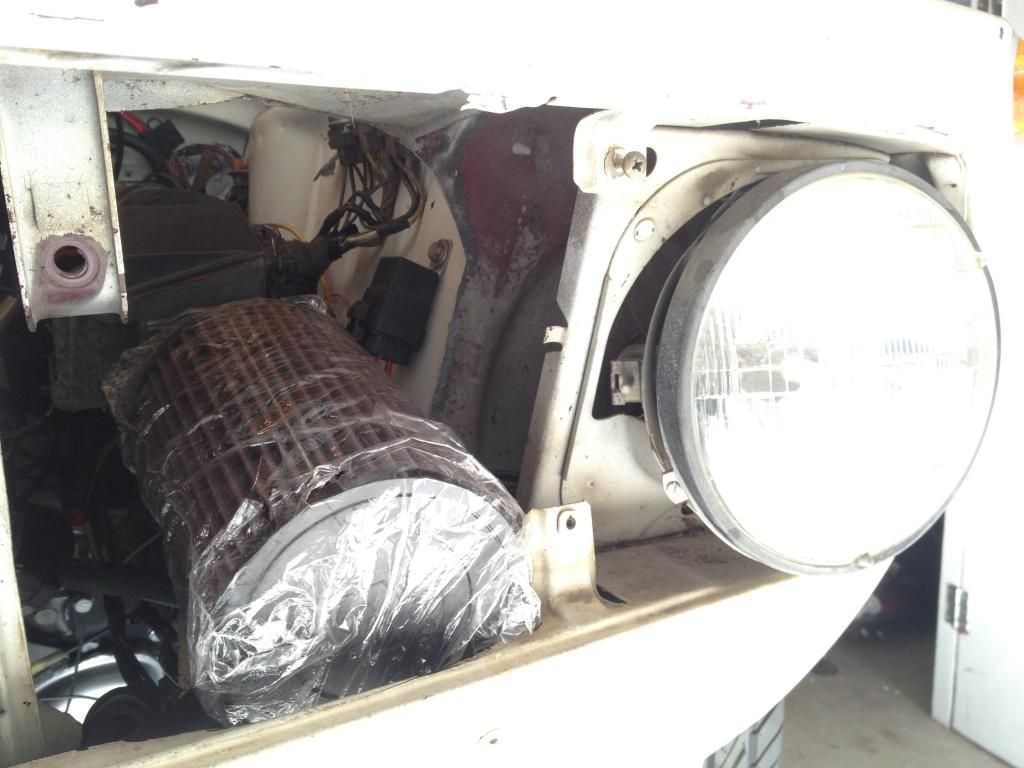
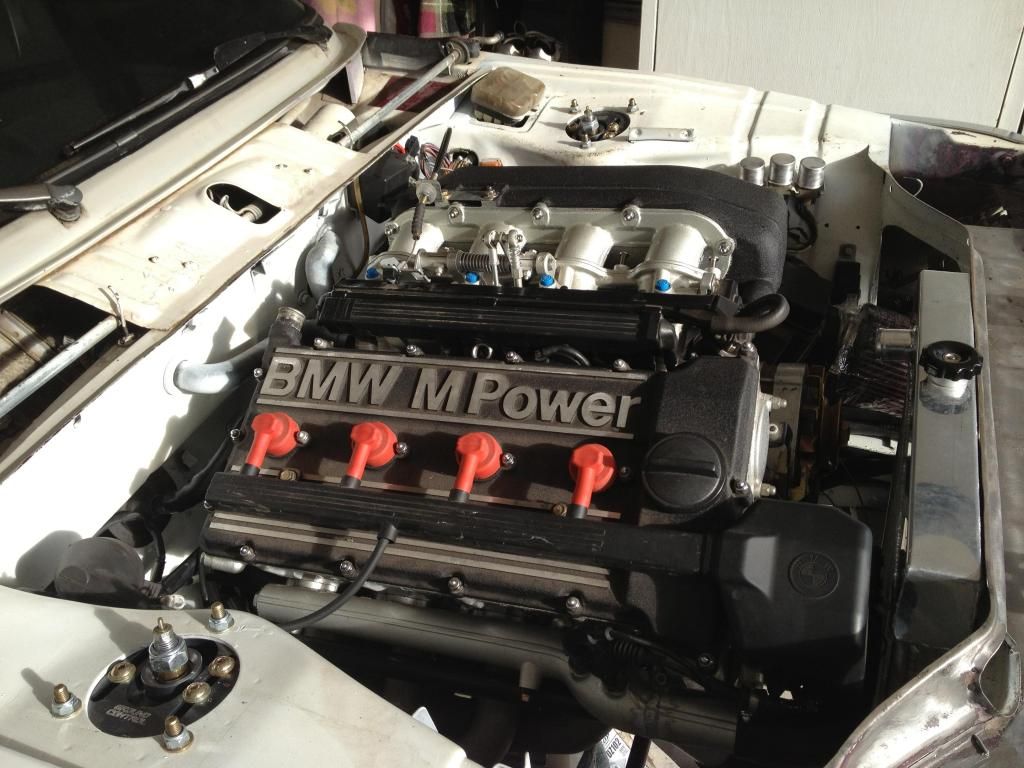
With the fuel and spark now there for the engine, I turned to the other necessary element of the engine swap, the need to breathe a little oxygen. Enter the Aardvark Racing K&N intake system and AFM mount. I think I got a bit dremel happy many months ago when I removed some metal for the future intake system, Ill build an intake box and isolator eventually to seal off the dead space.
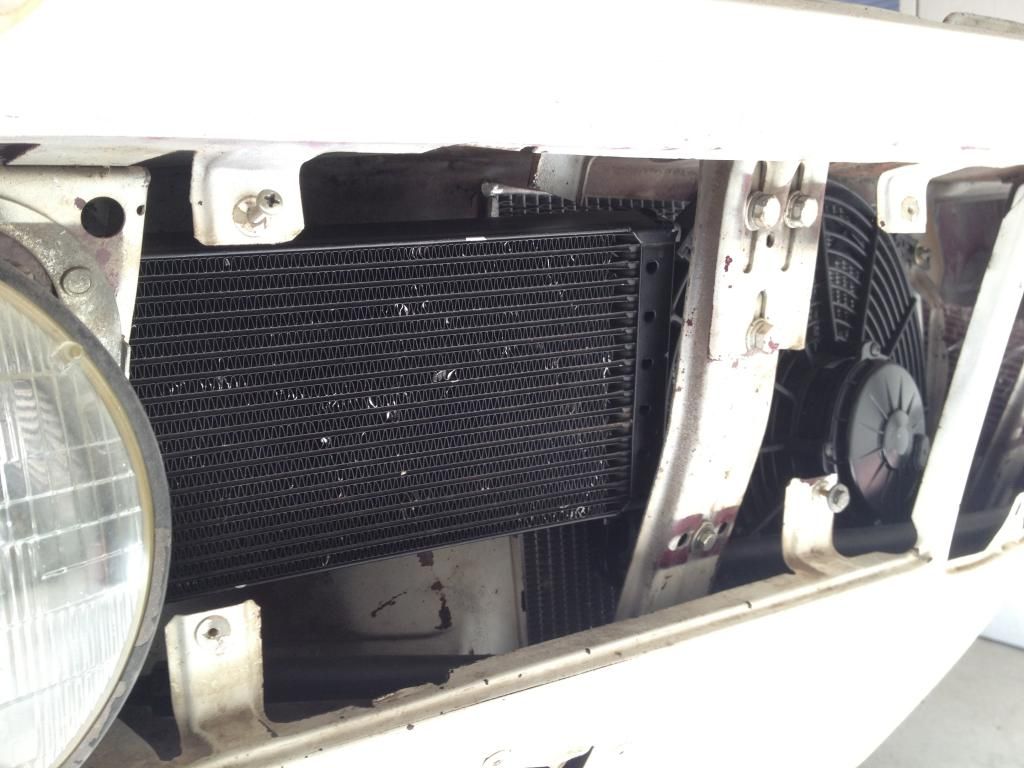
Next to the intake kit is the IE aluminum radiator and the now wired Spal 13" pusher fan:

And next door to those is a 19 row Setrab oil cooler with AN fittings and new lines. I cut away a section behind the oil cooler to allow air to flow through it easier, similar to the cut around the K&N intake, but smaller. Eventually these cuts will be cleaned up better when the car get stripped down for paint at some time in the distant future.
Many hours went into fitting coolant and vacuum lines since many need to be hybrids or trimmed a bit. I have both an E30 M3 and a 2002 thermostat, but I think the 2002 unit fits better since i have the late model 2002 with the large bumper mounts by the frame rails.
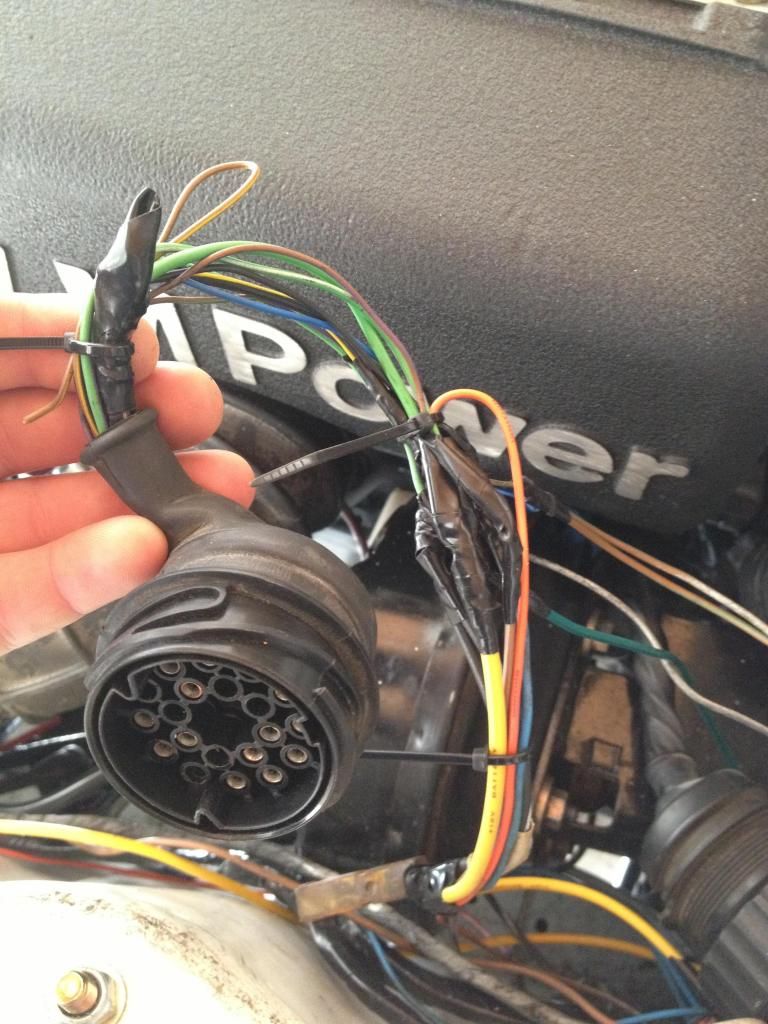
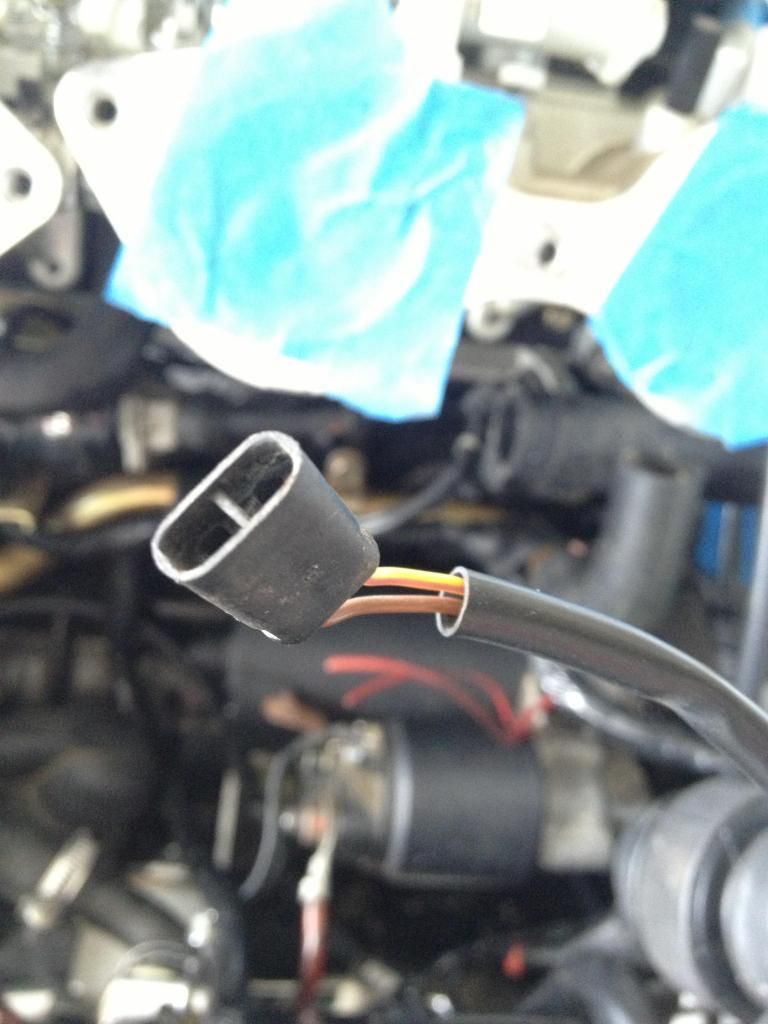
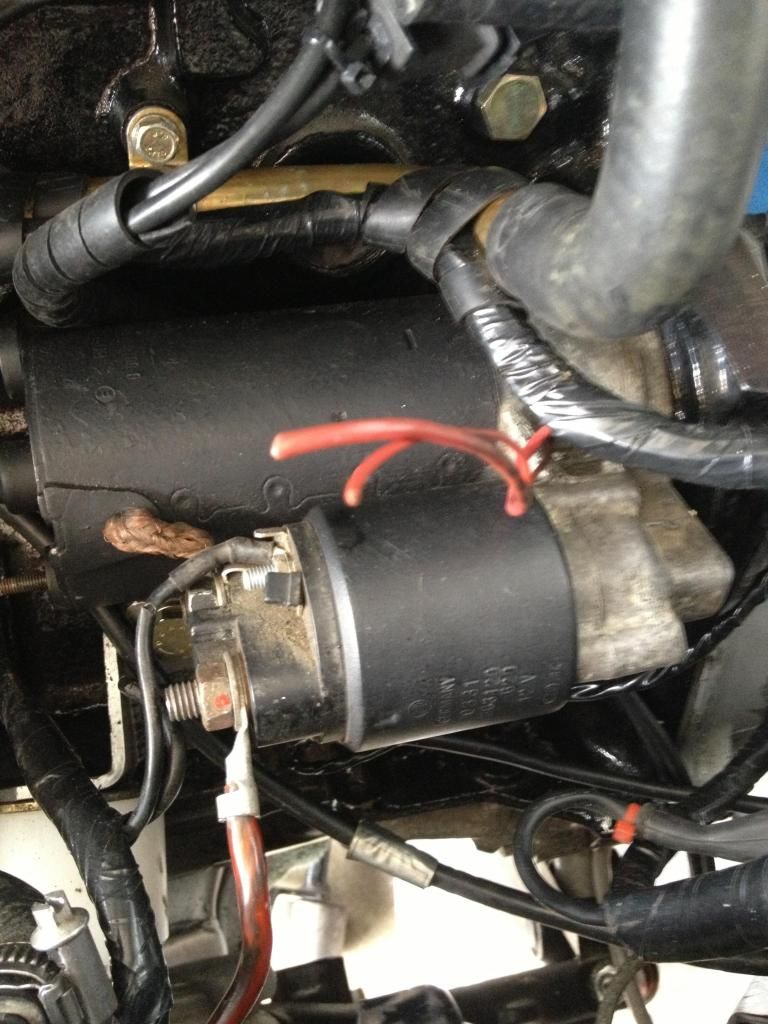
Having completed all of that, Im left with a couple unknowns, maybe you S14 guys can chime in. Where do these wires/ connectors go exactly?? I have an idea, but I want to quadruple check, mainly as 3 of the wires (the red ones) were cut at some point in the past.
[URL=http://s1106.photobucket.com/user/ryrythecollegeguy/media/2002019_zps69f50528.jpg.html]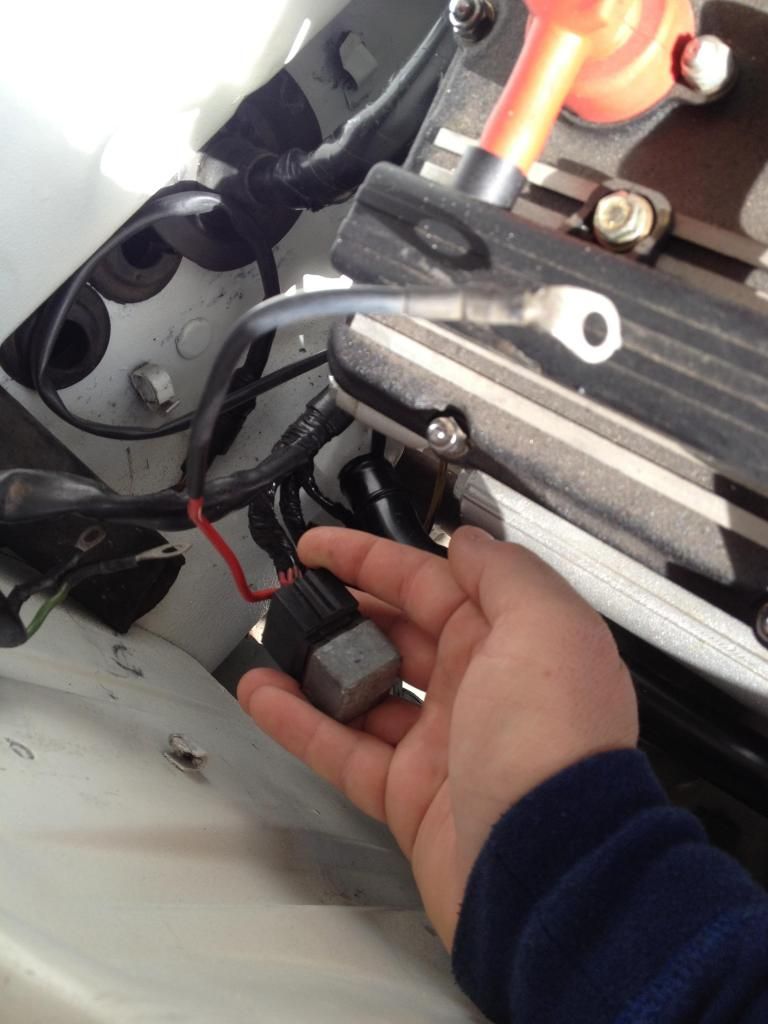 [/URL
[/URL
Done for the weekend. First start video will follow this post very soon.

I need to touch up some paint on the car also. I stripped off the badly cracked areas where the respray didnt hold up too well. Since the front shuttle makes a convenient tool holder I decided to wait to paint it until the hard wrenching ceased.
Nothing exciting, but progress is progress at this point. :)Leave a comment:
-
Really looking forward to Ryan finishing his M2. Doing some neat work!Leave a comment:
-
Nope. It is mine. I built it from scratch.
http://www.bmw2002faq.com/topic/1035...es-m2-madness/Leave a comment:
-
nice build there!
any details on the header? which one is it? I've been on the fence about sourcing one.Leave a comment:
-


Leave a comment: