

Nice update. Seems to be one thing after another with a full build like this. At least you're staying positive about it and powering through.
Quick question...after running with the oil drain tapped into the block would you recommend this route or have a bung welded into the oil pan? Any reason to choose one over the other?
-
Thanks! Hopefully Photobucket, Flickr, and ig all keep their shit together and don't break my links.
Since June:
Maximum PSI intake boot, and "Boost Proof" ICV setup arrived. A little on the pricey side to get it paid for/shipped (If you're outside the US, they're not currently set up to take payments by credit card, paypal, or EMT, so I had to pay an extra $30 to do a wire transfer - probably something I should have found an alternative to)

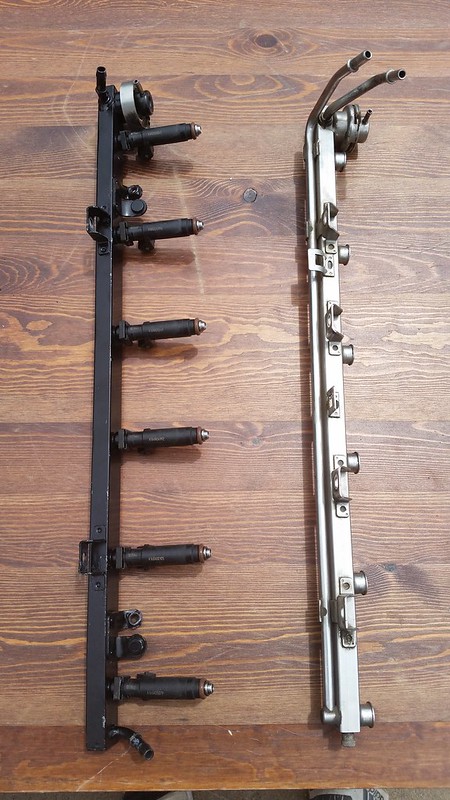
Picked up an early E39 M52 fuel rail to move the feed to the rear of the intake, hopefully now I can leave the rail attached to the lines when the manifold comes off. Flared the ends a bit to run regular fuel line instead of the push-to-connect stuff.
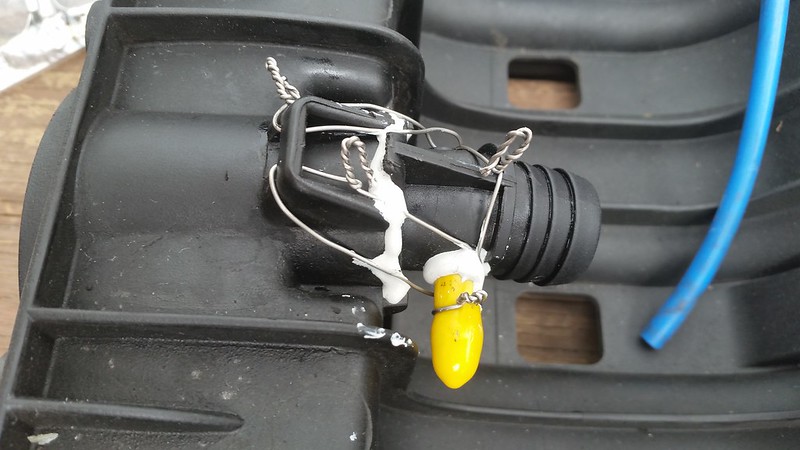
Cleaned/scuffed/glued/lockwired the crappy clip-in thing to the manifold, apparently this is common practice for boosted cars. Don't judge my awful lockwire.
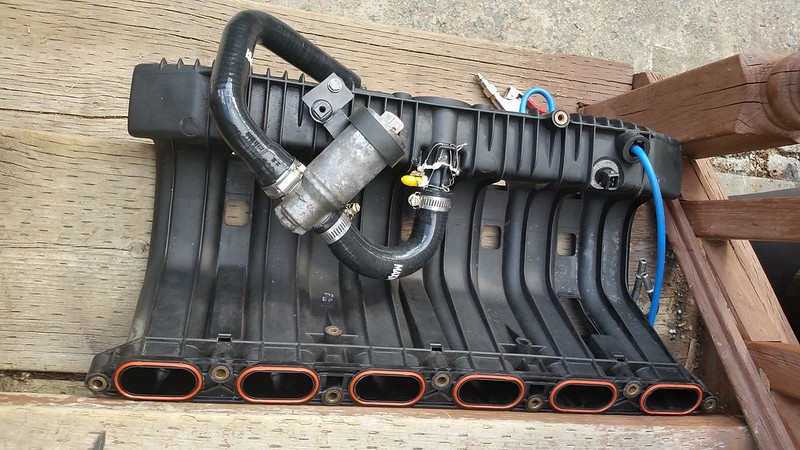
Pretty much how the ICV ended up, Used to have it attached to that threaded insert on the manifold between runner 2/3, but this icv hose is much shorter than the old one I threw together.
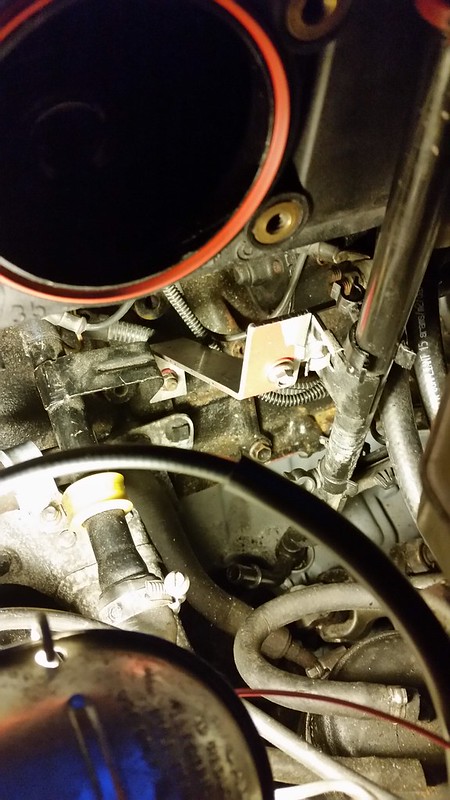
Didn't have a dipstick bracket and realized last year that the dipstick tube pulls out of the sump before it lets go of the dipstick itself. Figured now was the time to fix it, so I made a bracket to mount it to the manifold. Then I questioned why the hell I wanted something else to slow me down while removing the manifold, so I tossed it and made another that mounts to the block.
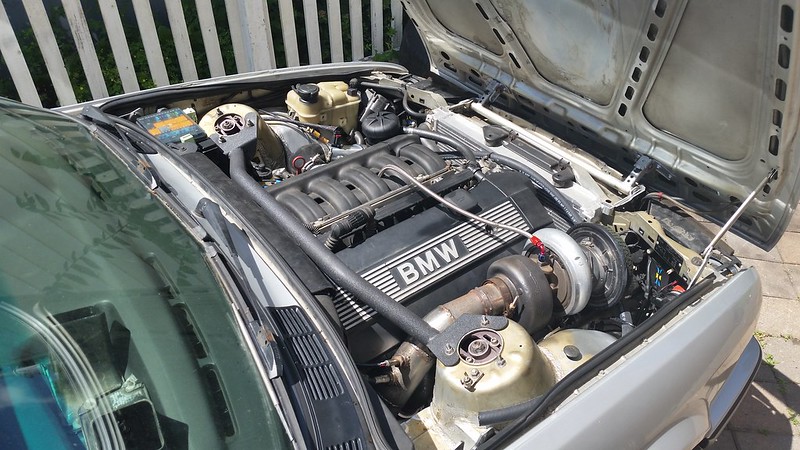
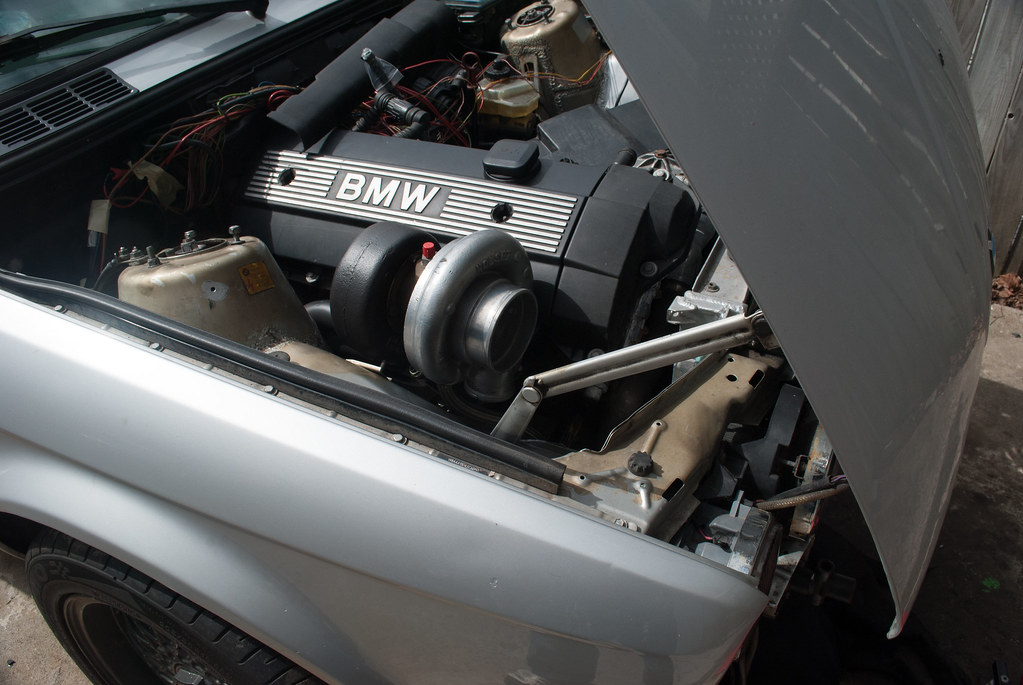
manifold, throttle body, intake boot on. Almost looks like an engine again...
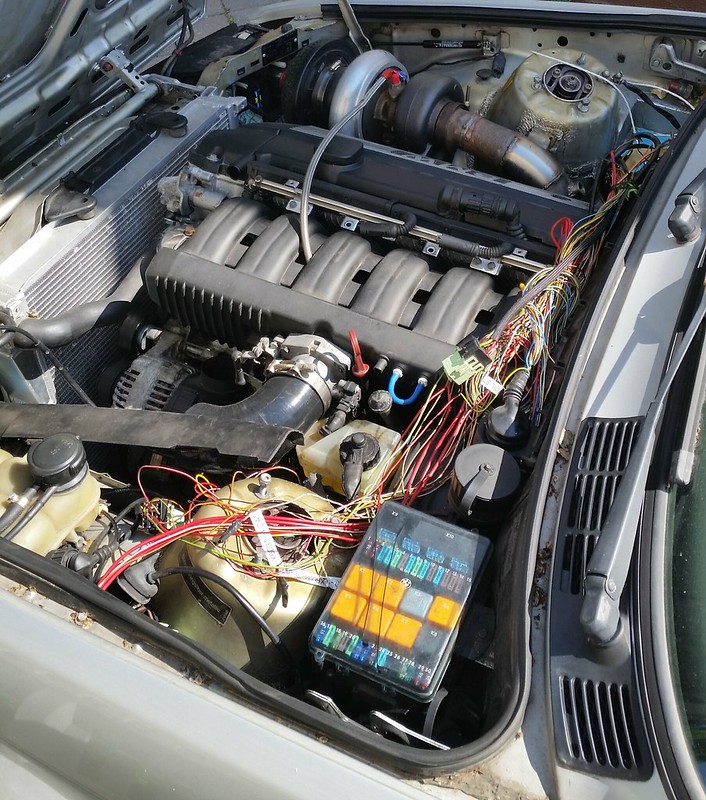
Made a charge pipe from compressor to fmic. Mild steel for now, aluminum one in transit.
MAF/charge piping/BOV installed(ish)
MAF spliced in, BOV vacuum done, looking for where to place the Mann Provent.
After finding Aux fusebox terminals online for insane shipping amounts that were probably another month out, I called BMW to order one. I figured, Hey - It's listed for every single car they've made since like 1960, of course they'll have some around. Apparently not. Ended up being like $4 per pin. Sounded good to me, then they told me it was a special order part that would have to come from germany, and the minimum order QTY was 25.
That probably would've been a problem if I didn't have the fusebox from a parts car in my shed. 5 minutes with a stolen bobby pin produced some good results:

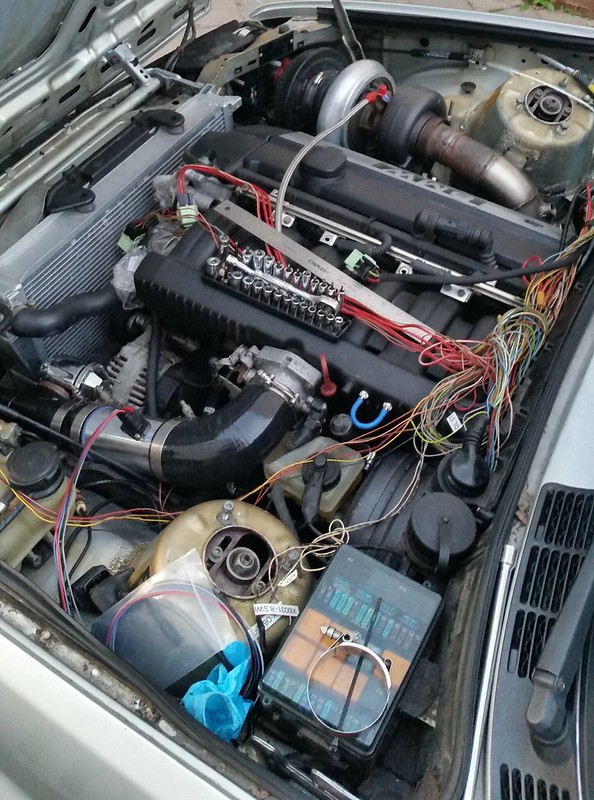
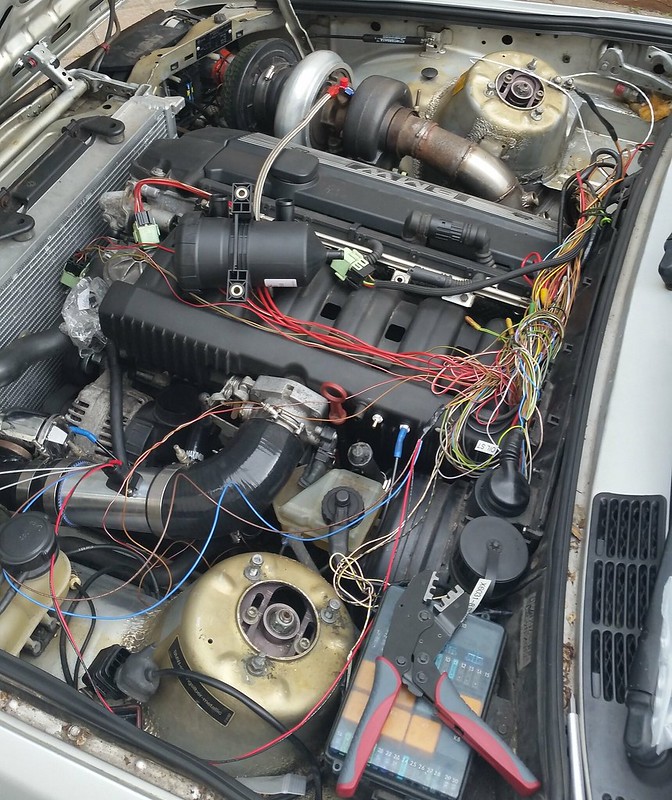
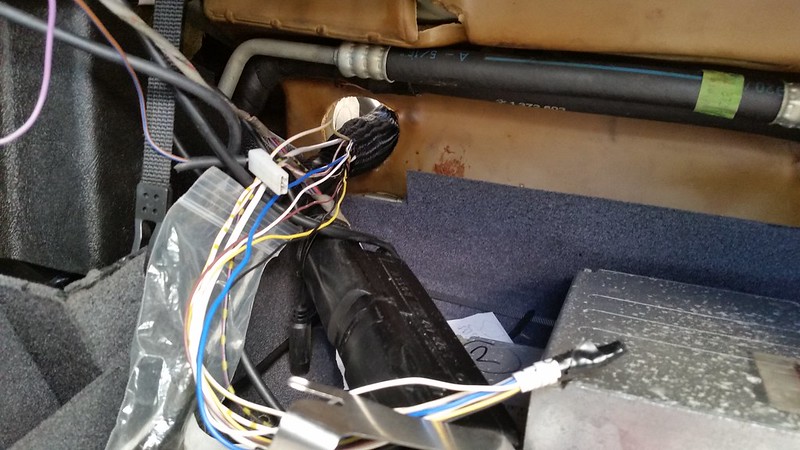
Running wires for LC-1, OBD2, Switched +12v, and oil pressure through the original loom because it seemed like the easiest way to go.
Took the flash I made last year (MS41.1 328i maps stuck in a 41.2 M3 file for the different decel/revlimiter/vanos maps/methods) and made a full flash for a 2048kg/hr MAF (Stock ECU is artificially limited to 1024kg/hr, but there's a workaround that essentially works as a multiplier to the MAF scalar table) and transferred the MAF scalar values from the PMAS HPX maf.
Then I re-scaled the RPM axis for my 7200RPM limiter, and the load axis to 1200mg/stk (almost twice stock) for all the fuel/timing tables, magic'd up values for all the "new" cells, scaled all the fuel tables for the 60lb/hr injectors, added a chunk of fuel and pulled some timing, turned vanos off (easier to tune fewer changes at once imo, it'll be turned back on again later) inserted my 328i knock tables, changed to single O2 sensor, and a bunch of other stuff.
Big shout out to ba114 for the patience to walk me through all of the stuff, as I asked roughly a million questions while trying to do all of this.
Flashed it to an ECU:
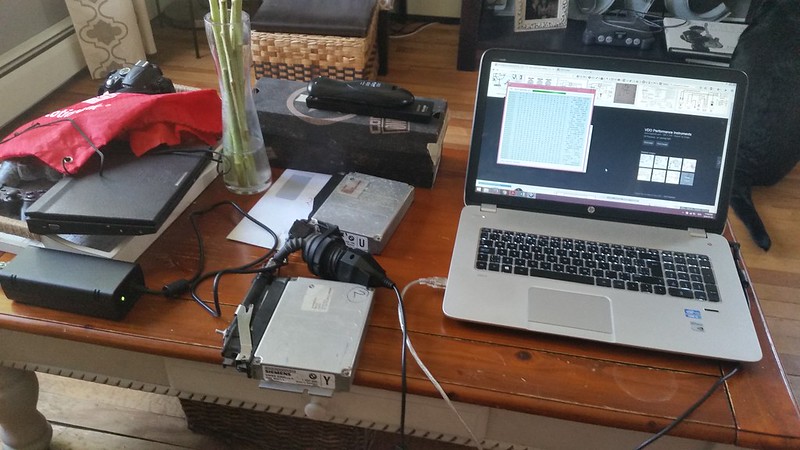
Still not a huge fan of the Innovate LC-1. Seems to be the most popular wideband with the MS guys, and that's what I originally bought it for ~4 years ago. Between the need to frequently calibrate the sensor, the strange headphone jack separate input/output cords, the weird capping plug + headphone to serial adapter, and the need to buy and use a Serial to USB adapter (well, it's not 1995 - when laptops came with a serial port) which is always finicky by itself at the best of times. This combo seems unnecessary, and ends up being about 20ft long:
And then you have to troubleshoot why it doesn't connect to anything:
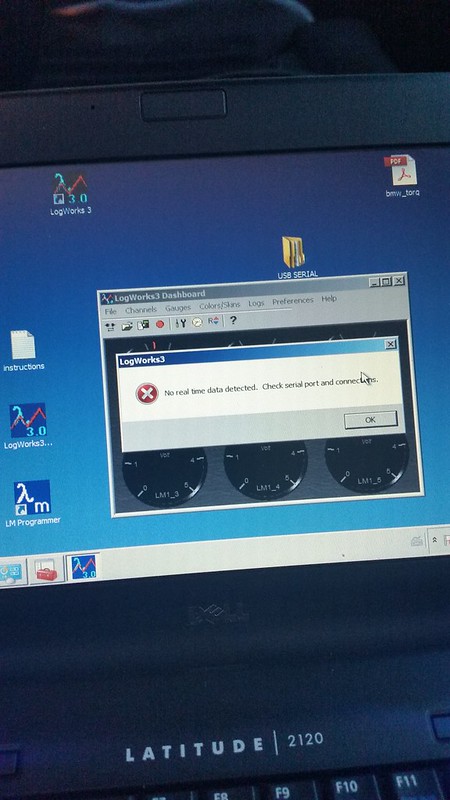
So your easiest choice is to buy a different $50+tax serial to usb cable:
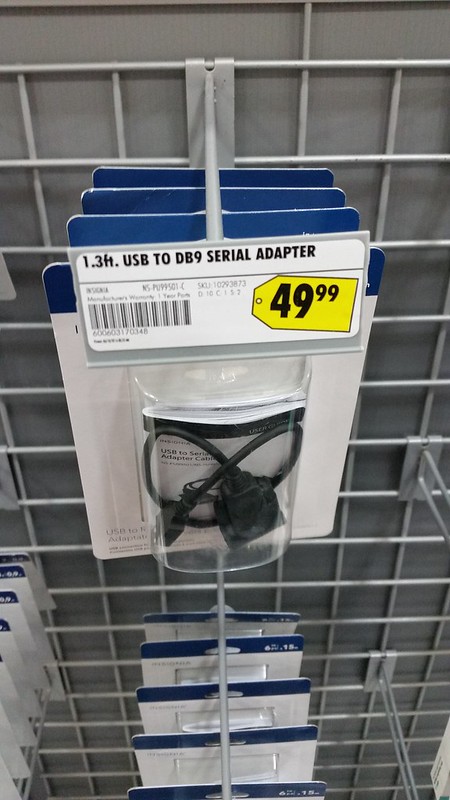
And that works, so now I'm torn on whether I keep it, or buy a bunch of $2 ones off ebay until I find one that works right...
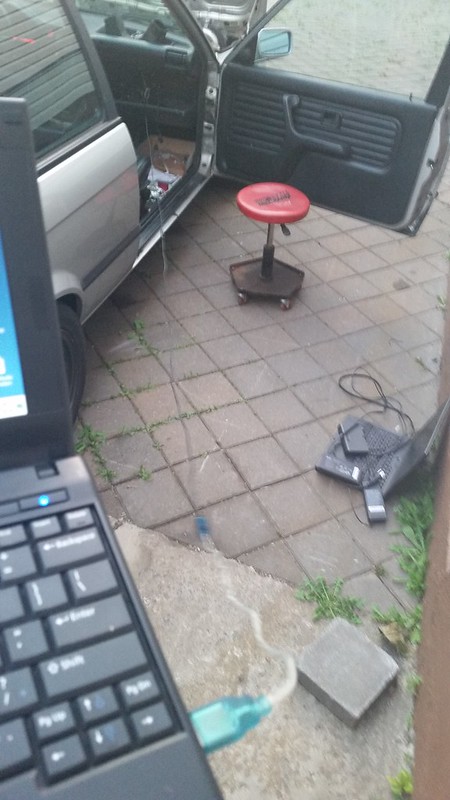
Managed to sleep through all my alarms, so I took the day off to get to the point that I was "done" enough to drive...
Still waiting on parts to switch to aluminum charge piping, non-"jdmaf" air filter, and some other bits.
SO I went for a drive...
The car had next to no fuel, so the first thing I did was baby it to a gas station to throw some 91 in the tank. Then I cruised around at low throttle for a bit and watched how the AFRs responded. My logs from this are garbage, because the LC-1 decided to spit out a "custom" value instead of AFR or anything normal.
Went home, fixed the weird LC-1 issue by resetting it and changing the signal it spits out back to AFR.
Then I went for another cruise while logging some more. I decided to give it something around half throttle up a hill, while watching the wideband gauge.
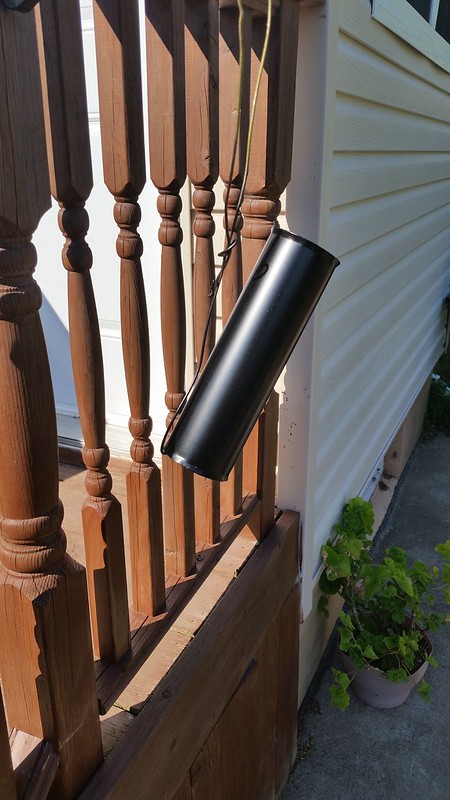
It was pretty rich, 10.0 -11ish, and I get to something like 3500 RPM when I hear a loud pop and a sort of wooshing noise. The car dies, and I pull over. I restart the car, and figure something I didn't tighten had popped/fallen off... Then I notice the big snap ring that holds the compressor housing on was just sitting on top of the center section. The snap ring had popped off and the compressor housing had sagged forward/down a little - just enough to do this:
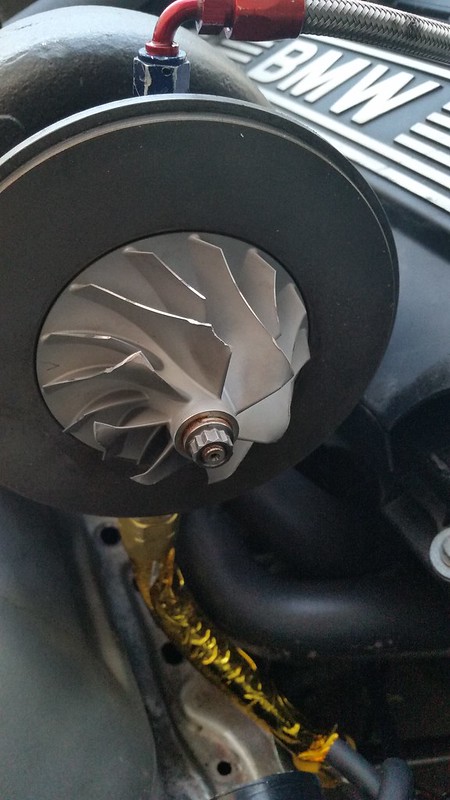
I came back to the car later, threw a filter in front of the maf, and removed the compressor housing to limp it home. The compressor spins freely, but it has some play now, and doesn't spool at all. I think the shaft snapped. I have one large chunk of compressor to find, hoping it got caught in the FMIC and didn't make it all the way through everything into the engine. Seems to still run alright right now with all the charge piping bypassed.
Googled it, and I found out the big compressor housing oring that comes in the HX35 rebuild kits isn't supposed to be used unless you have an HY35 or whichever varient uses the bolt-on compressor housing... so the massive HX35 snapring wasn't actually seated. I could tell this before: it was a massive asshole to install, way worse than I remembered, and it looked like it wasn't seated as much as it should be. I felt weird about it, but figured I was just being a bitch and decided to just run it. I guess that was a bad idea.
End of the day, it's another $300 to rebuild this. Then I'm stuck with a turbo that's too big for my goals, Old, and has a huge hotside housing (16cm/~1.13A/R). Sure I could buy a Bullseye Power .70AR housing and run this thing, but that's another $300.
I don't want to rebuild this thing again either. I really want to try to spin this into a positive, and buy a Borg Warner S257SX-E with a .82A/R hotside, which should be much better overall. I've seen a few people hit more than 500whp with one as well, so I don't think I'm gimping myself too much if I ever go for an MLS or CES spacer/cutring setup. Originally I was looking at a PT6062, but that's $2500+ and this BW is half that amount.
And to end on a positive note:
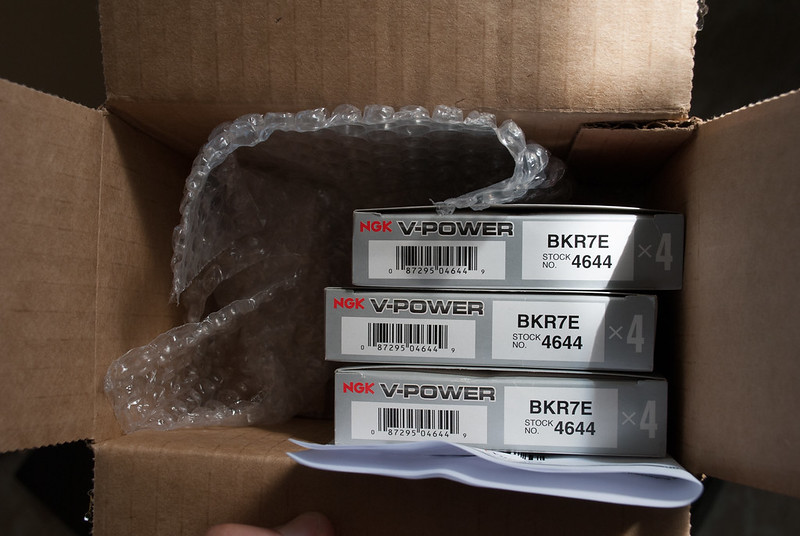
New NGK BKR7E plugs showed up (x12.) One step colder than the -6E, and copper top over iridium because this isn't an economy car.
 Last edited by Northern; 08-02-2016, 03:22 PM.
Leave a comment:
-
Need more updates!! And oh by the way…PLEASE PLEASE PLEASE don't let your photos turn into red X's for another year or so! You're doing almost exactly what I am and this is great having your progress to use as a reference. Love the pics and the progress, keep it up man!Leave a comment:
-
Still not sure if that Oil pressure sender is going to work, but on the upside, I think I can get at it without removing the intake.
MaximumPSI Intake boot and "Boost Proof" ICV hose setup is here.
New 3" couplers and 1/8NPT to 3/16" barb fittings showed up for gauges and stuff, and I picked up an early E39 M52 fuel rail to clean up my fuel lines a bit.
Hopefully get all that thrown on the car today, getting real sick of driving this mazda.Leave a comment:
-
Holy shit. Every time I've touched this car in the past month, I've found another problem with something.
Snapped a stud off my oil pressure sender sort of, so I don't know if it'll work. -update it doesn't, but I don't think it's related.
M20 silicone intake boot I have is too small.
My ICV hose is rotten
Try to buy the MaximumPSI silicon ICV/Intake boot kit but they don't ship to canada - EDIT: just needed to email them.
Decide to just use a 3" SS elbow with couplers
My 3" silicone couplers I bought in january are more like 3.2" so they're useless.
Can't find any 1/8NPT to 3/16" barb fittings locally anywhere, so I had to order them online and they're taking forever to ship
There's a lot more too, but that's my rant off the top of my head.
The 5 day a week rain that's been going on since winter ended doesn't help either.Last edited by Northern; 01-27-2020, 06:53 AM.Leave a comment:
-
Update time... From Mid April to today:
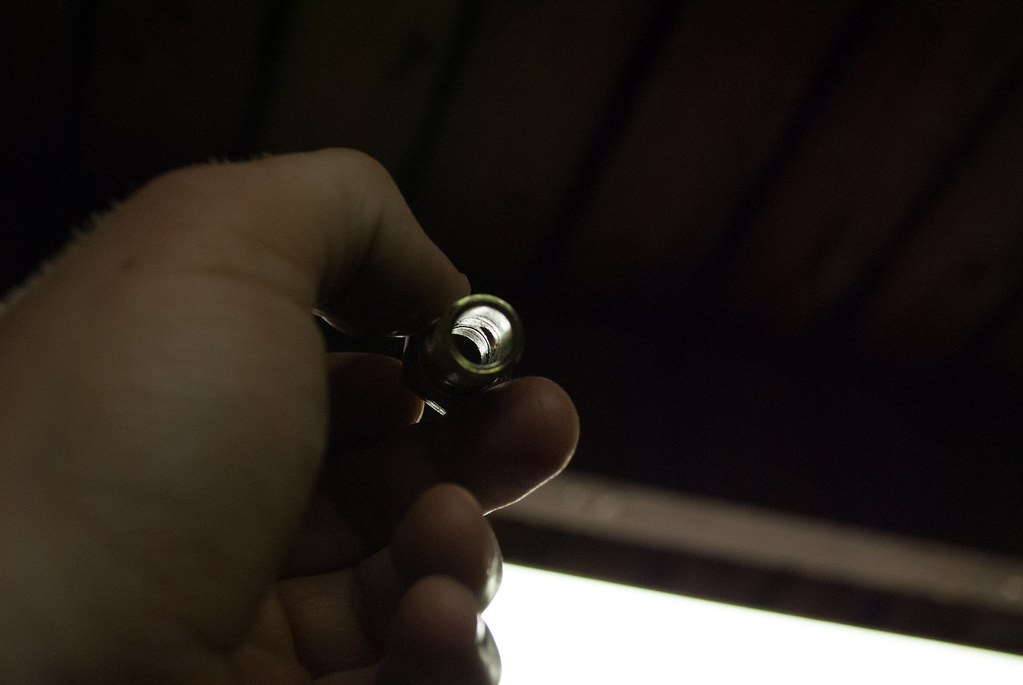
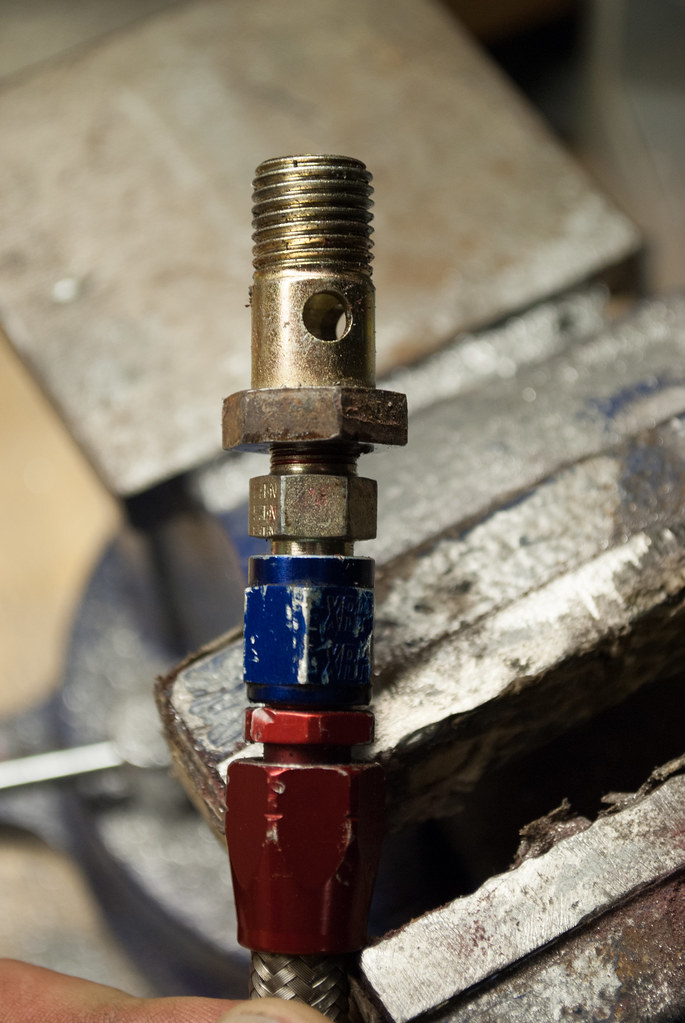
Piloting VANOS banjo for oil feed:
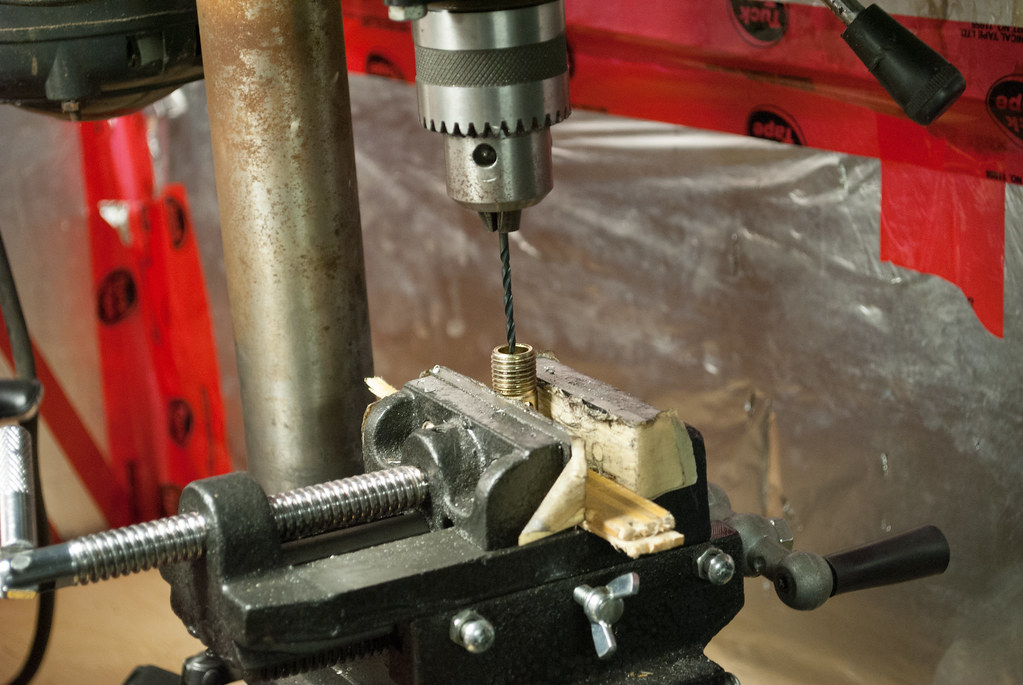
Nominal to tap 1/8 NPT:
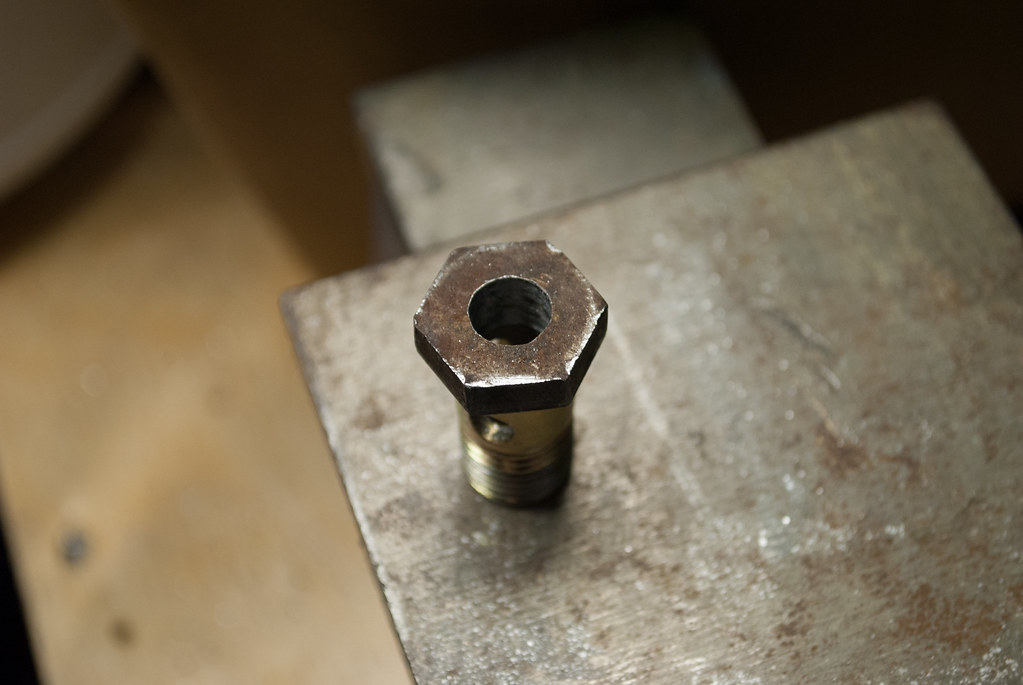
Tapped
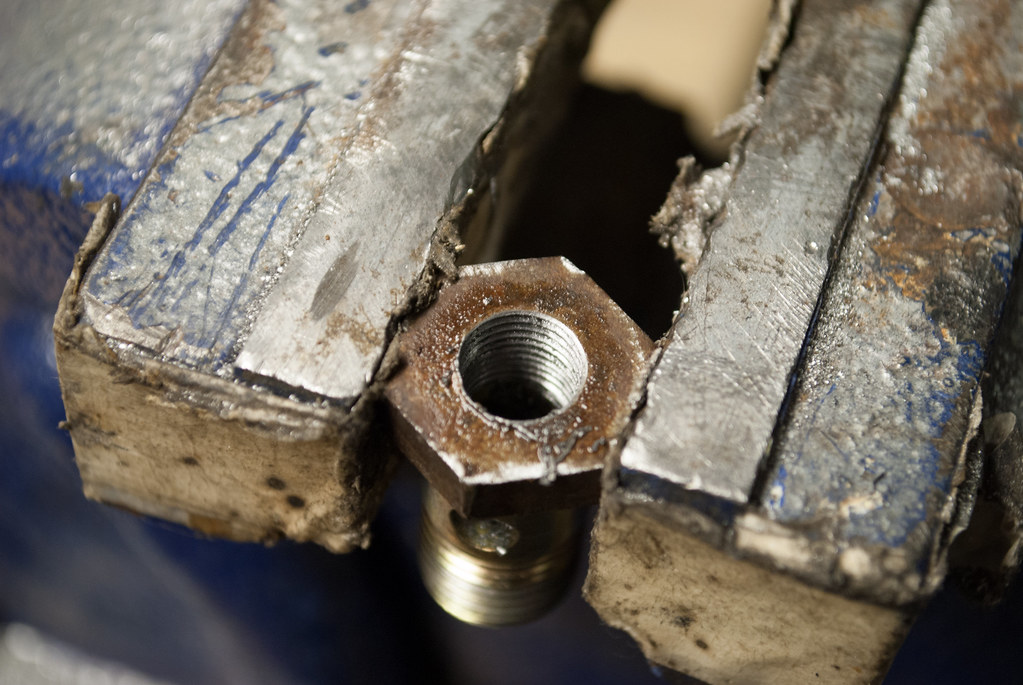
Vanos banjo -> 1/8NPT to -4AN union -> Feed line
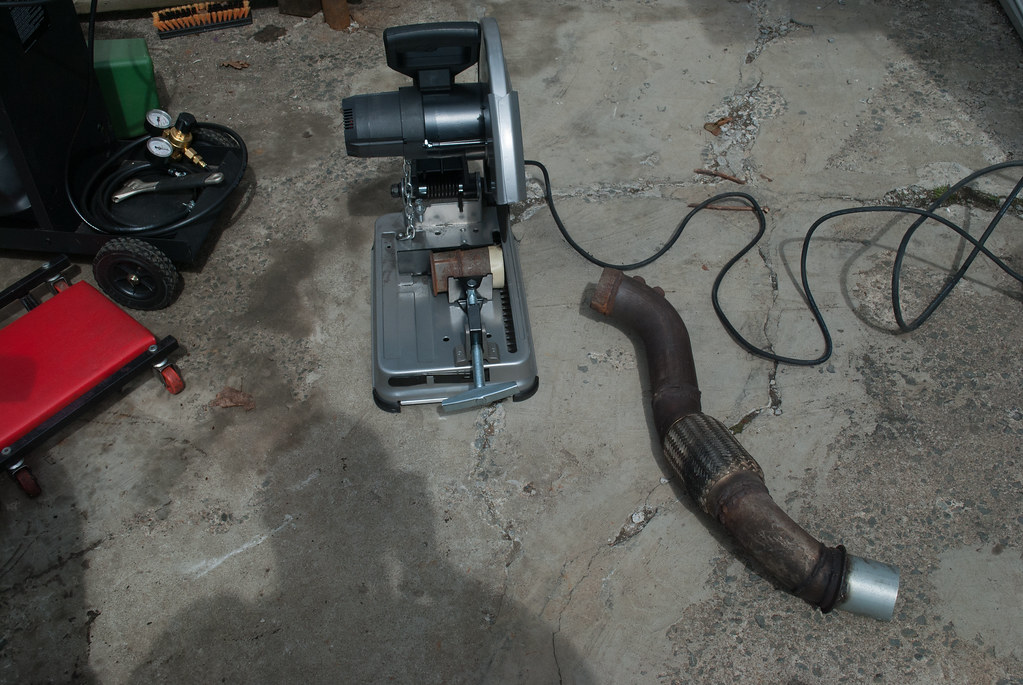
New welder, new chopsaw. SO much easier with a full size saw, vice the tiny princess auto one that needs to make 3 cuts to get through a 3" tube...

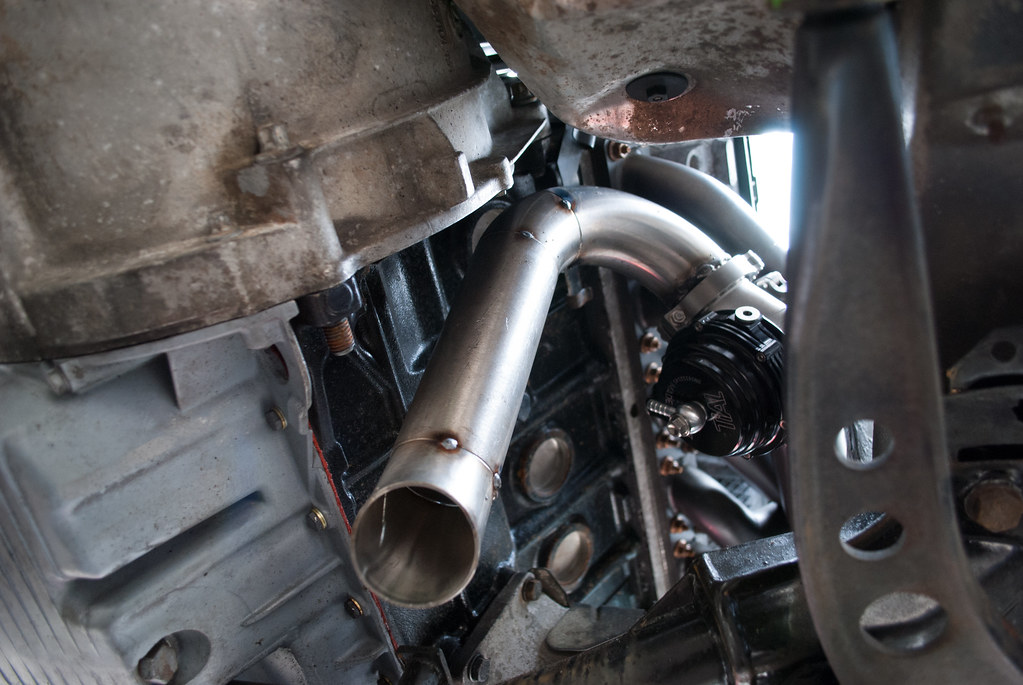
View from above, trying to align WG/clamp/dump for maximum downpipe clearance...
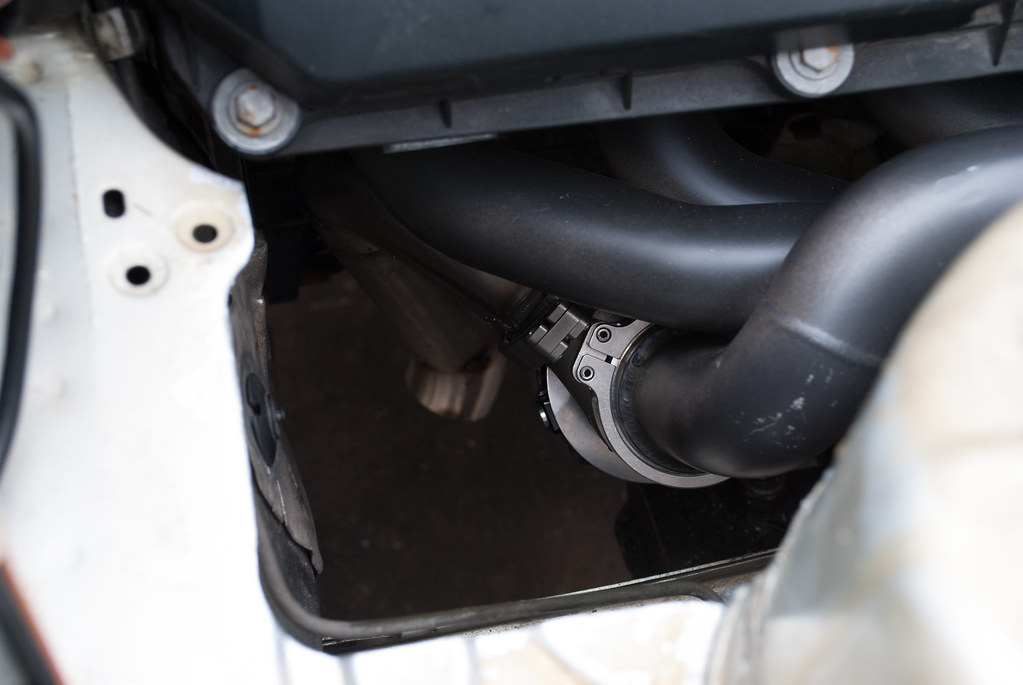
From below:
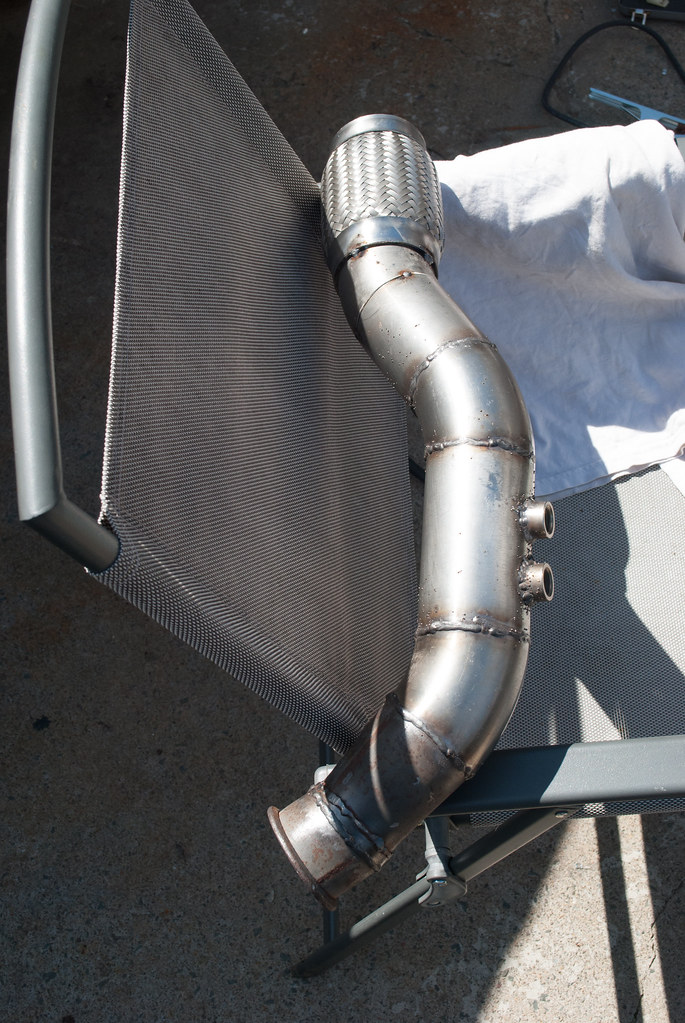
Off the car to weld:
Terrible welds:
running .035" ER308L wire, and Blueshield 6 gas. Not sure if that had anything to do with how ugly the welds are though.
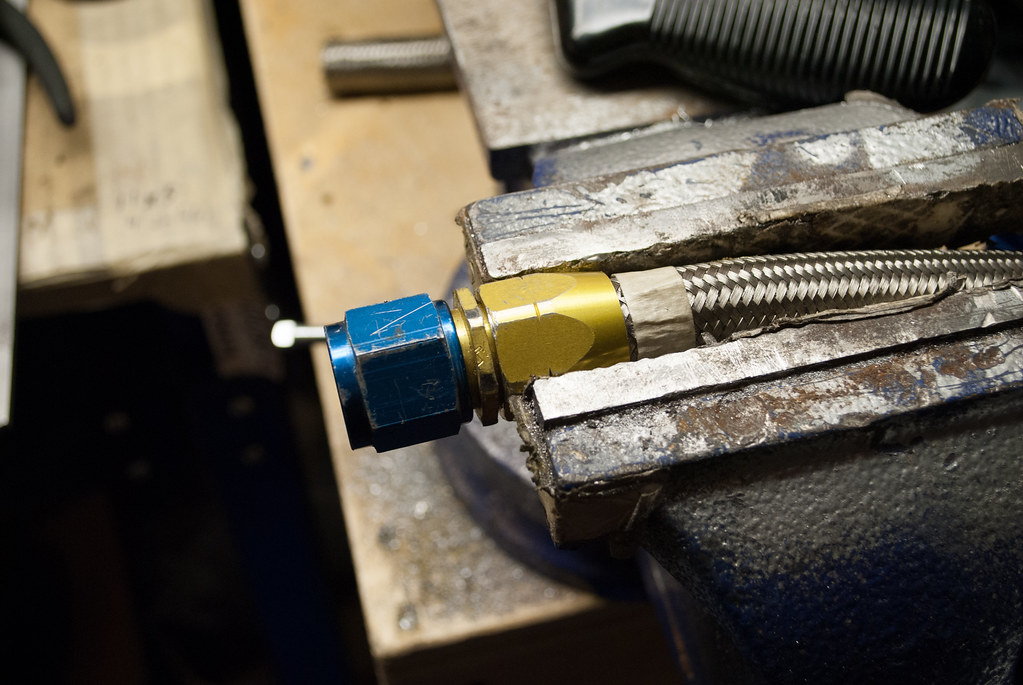
So ~5 years ago, I was given a bunch of unserviceable -10AN lines off some beechcraft. Most were pretty short, but I shortened one to use when I had the turbo kit mocked up on my iX. That one ended up being too short for this setup, so I made another.
Stick it in the vise and unscrew the thin "nut":
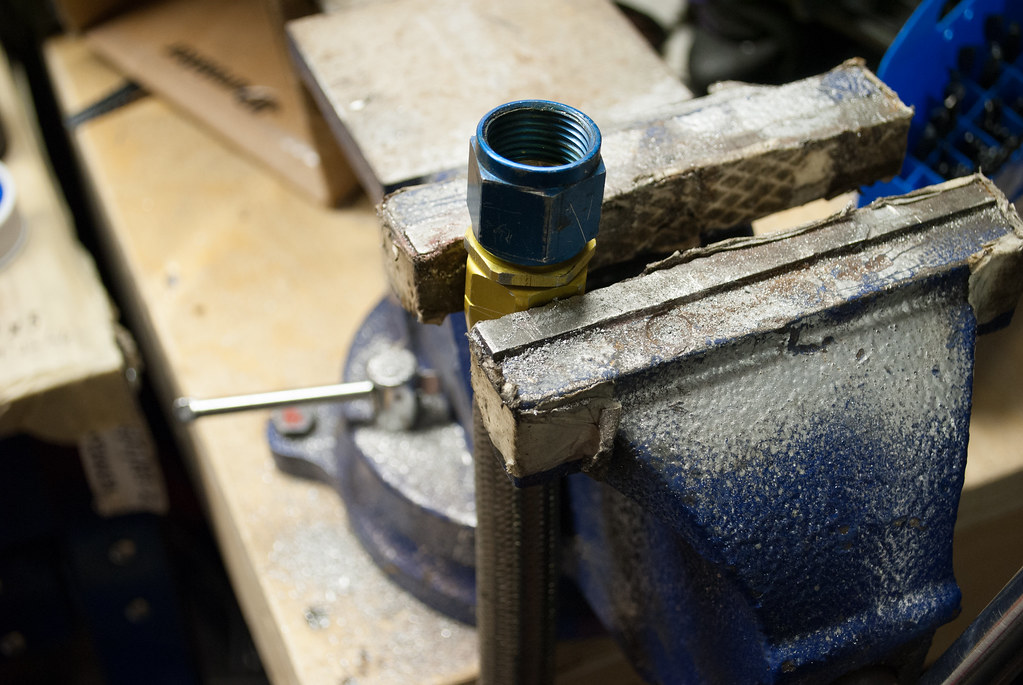
Once it's off, you'll be left with either two or three pieces (that ring and the left piece are often just one piece) and a mangled end of hose:
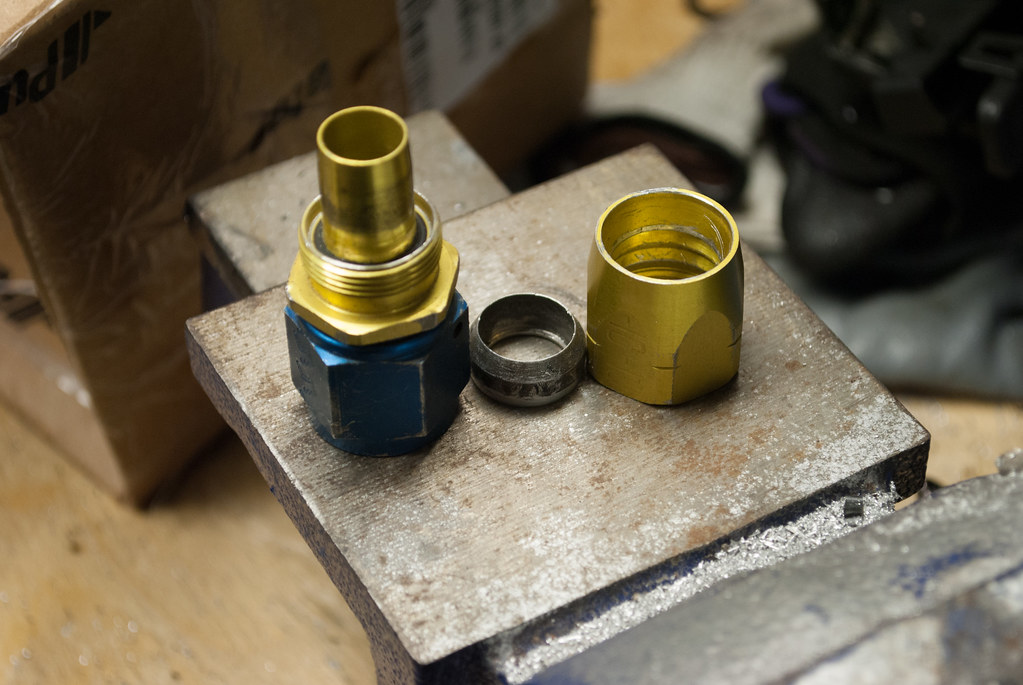
Cut your hose straight with a 32TPI hacksaw to desired length, and clean any stray firesleeve strands.
Stick the piece with the fitting/barbed piece in the hose, go test fit, make additional cuts as necessary.
Remove the barb/nut piece, and gently work the hose into the outer sleeve/nut and use the barbed piece to gauge when to stop. Stop the hose just before you can no longer start to thread the barbed piece into the outer sleeve/nut.
Mark the hose with tape to indicate if the hose creeped out while tightening:
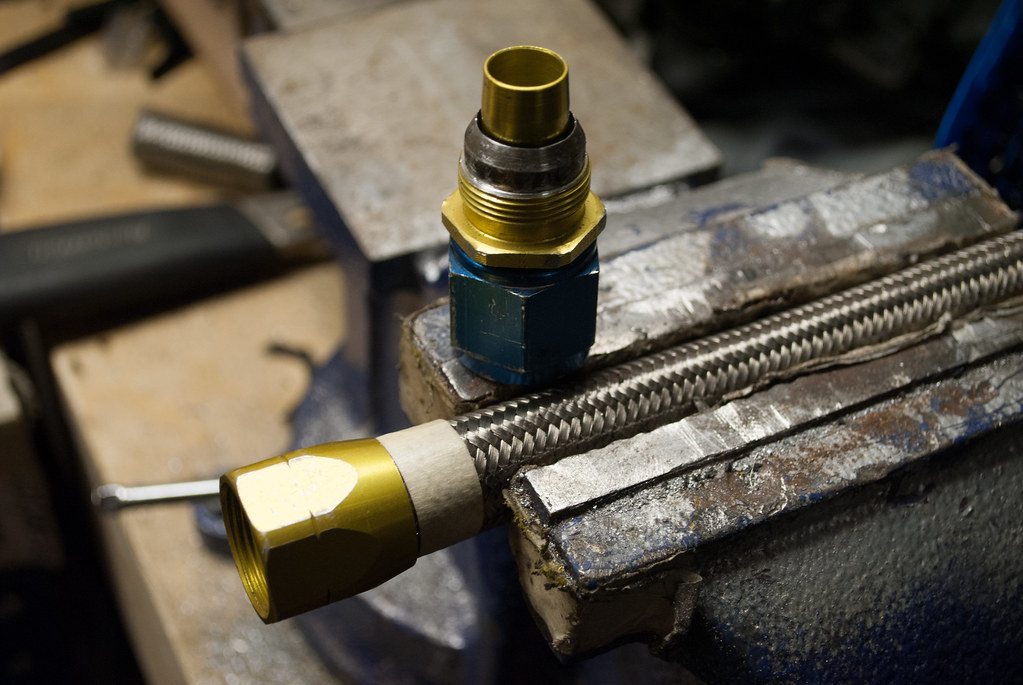
Thread the two sections together, make sure the hose didn't creep out more than ~1mm, and give it a good tug to make sure it's secure (assuming you're not actually pressure testing it haha):
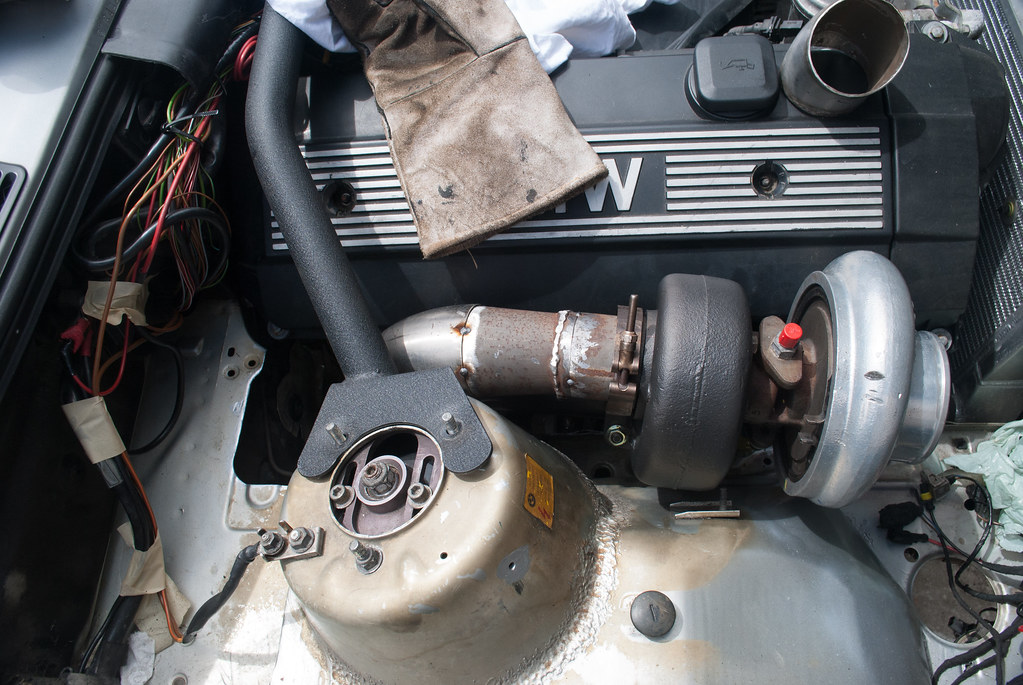
Notched the beauty cover and one of the old coil harness clips to clock the compressor housing the way I want:
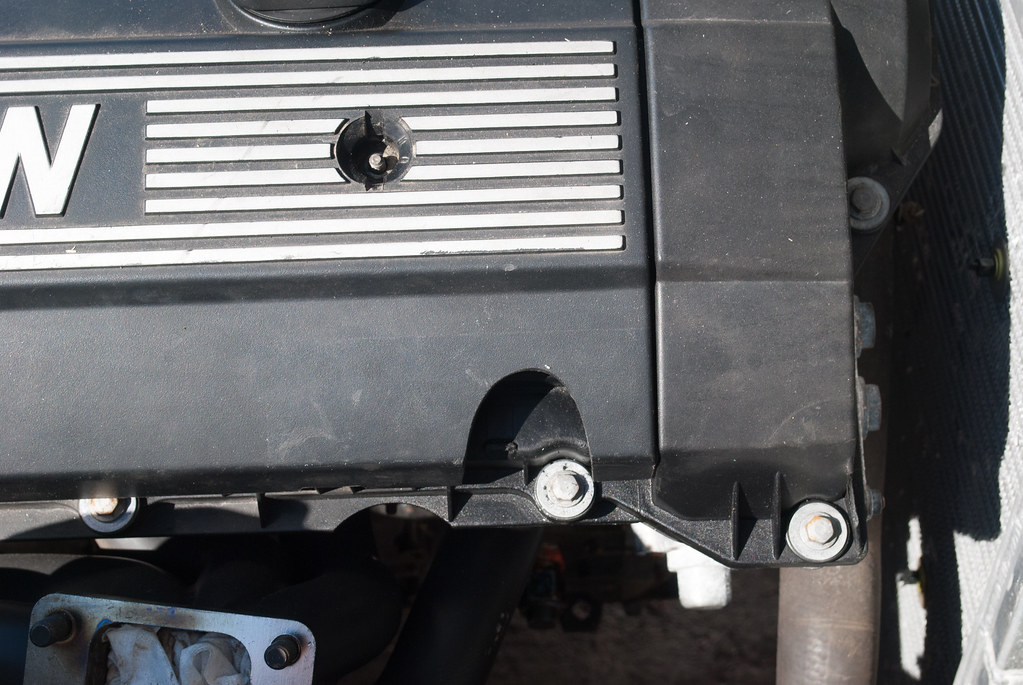
Copper spray it I guess?

Turbo on, drain line on, Took a few hours of thinking to figure out how to hold the drain line off the #1 primary and frame rail without welding a bunch of shit to the frame rail.
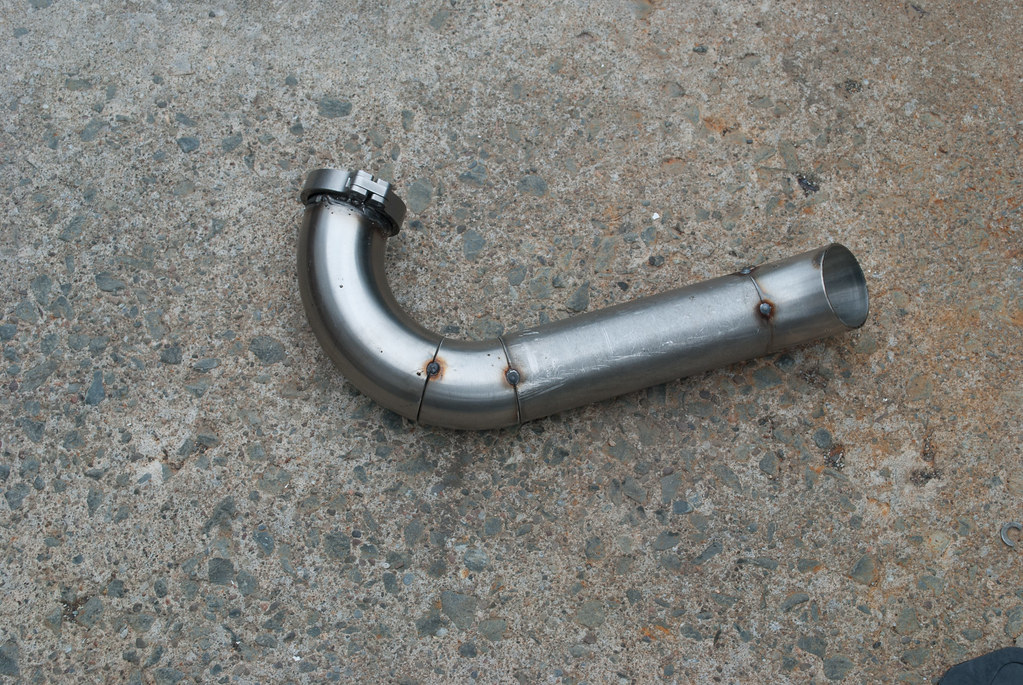
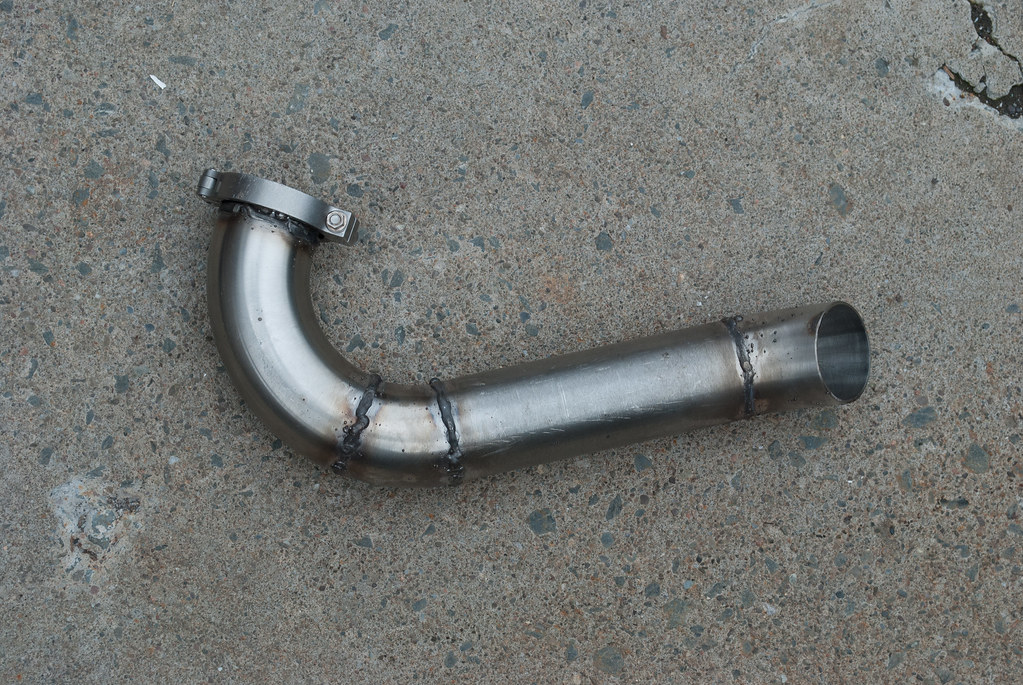
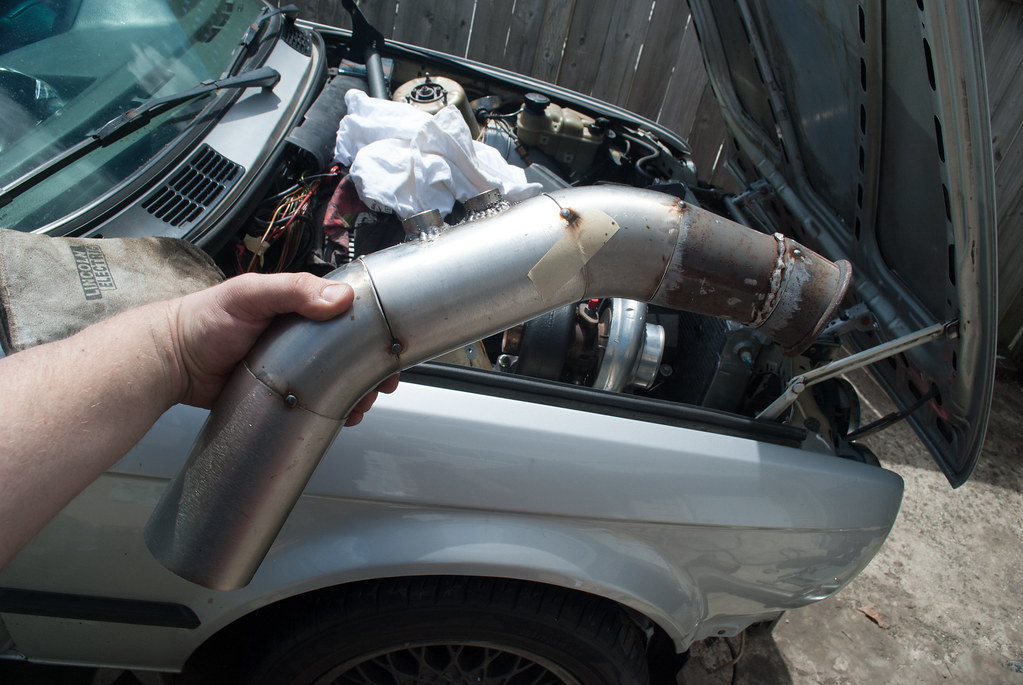
Cutting up the old downpipe for the reducer and vband flange:
Throw the strut bar semi-in place to gauge clearance and tack some stuff together:
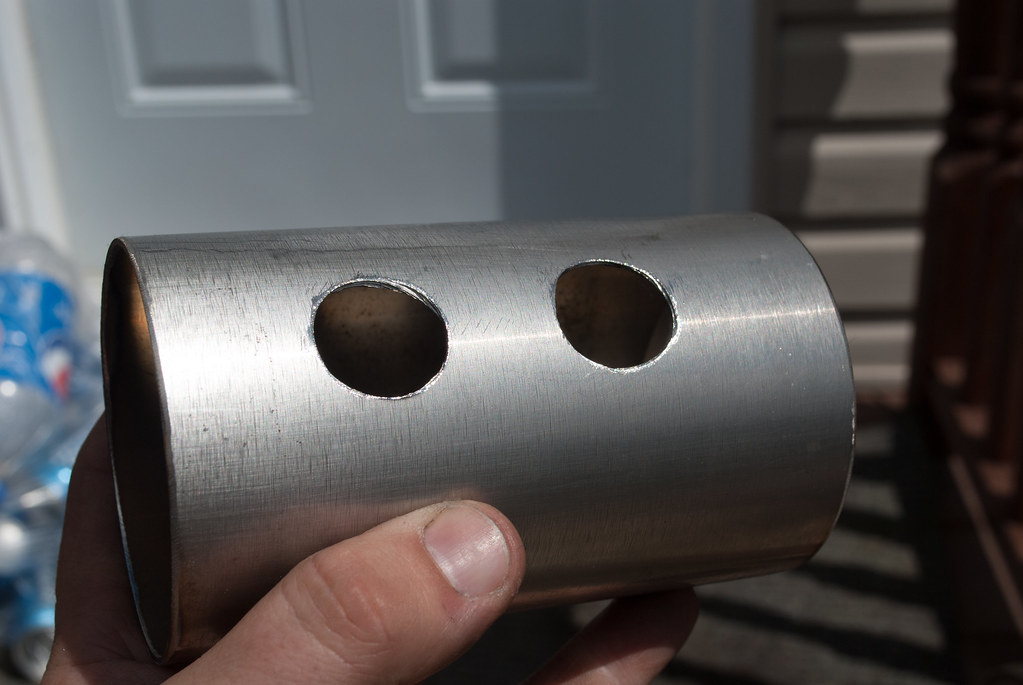
I don't remember where I ordered these T304 shouldered O2 bungs from, but they worked great:
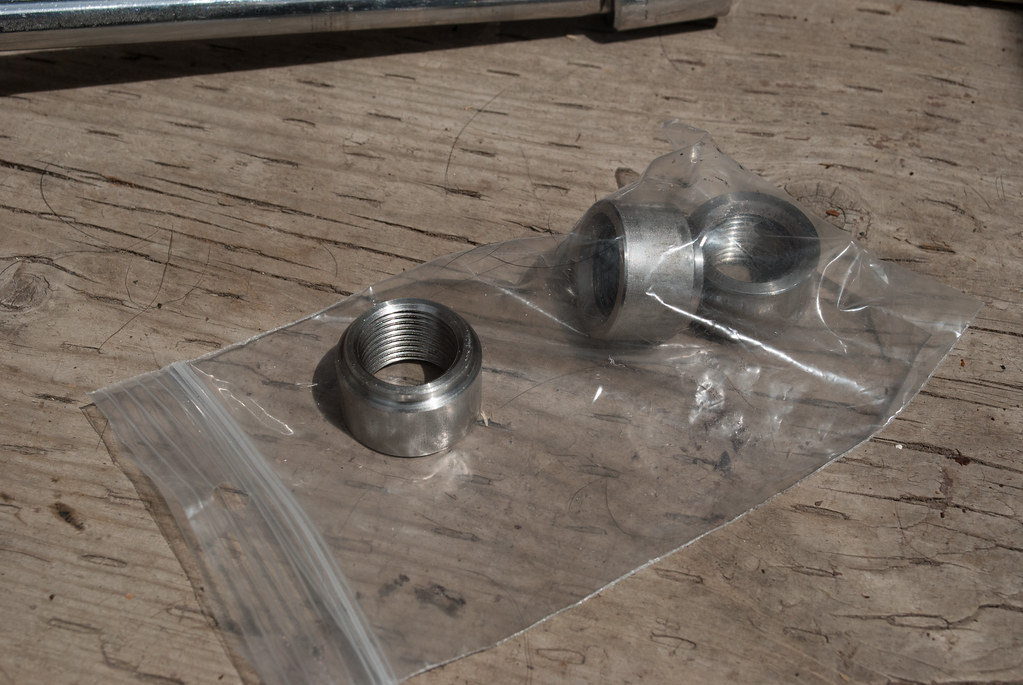
Hole saw kit had the perfect size (one sensor for MS41, one for LC1. I know the LC1 can spit out a narrowband signal too, but this seems easier, and if my LC1 goes bad, I can still drive the car (Plus I have like 12 O2 sensors between the 3 engines I have)
Coming along, ready to weld up:
Catastrophe:
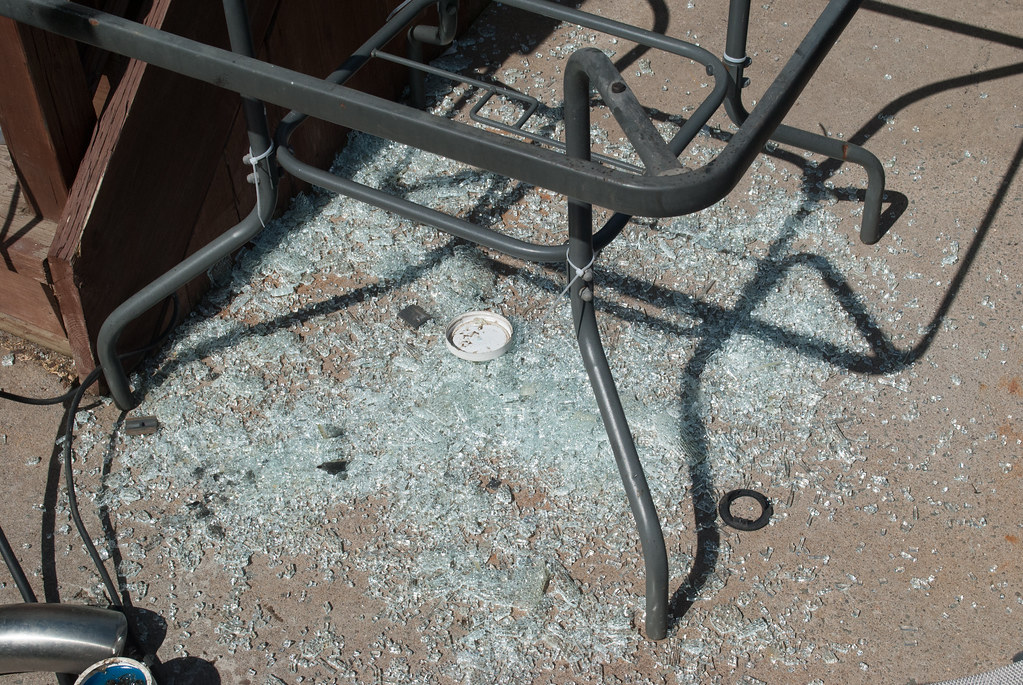
Surprised I got away with welding on that shitty glass table for like 3 years. I didn't even find it weird anymore to be welding on...
Somewhat welded:
I didn't take any pictures of it, but I fit an aluminum elbow for a friend to weld on my compressor housing.
I'm sore as hell tonight from going to the gym for the first few times in more than a year, and it's raining all weekend, so I don't think anything will happen until at least next tuesday night when I can maybe finish the downpipe.Leave a comment:
-
I've never been able to route a catchcan or breather to the turbo inlet without severely lowering octane rating from oil vapors and slightly pressuring the crankcase more, so I'm pretty interested to see how the Provent holds up. Venting to atmo is getting old.Leave a comment:
-
-
Planning on running from the provent to the turbo inlet. I actually think I have at least one of the pumps, but I don't want to add something like that back into the engine bay if there is any possible alternative lol
Hoping I pull decent vacuum and avoid oil from pooling in my FMIC or fouling my MAF.Leave a comment:
-
Really you'd just need the pump, they aren't expensive. I stopped routing ccv through the intake after I tried several times unsuccessfully to find a good catch can and combo of routing that comfortably limited the oil residue. Are you still going to route through the intake? Or Vent to atmosphere?
FWIW I've had the exhaust evac on my NA e30s52 for like 10k miles. It was relatively easy to route without risk of ripping off, and I checked the exhaust tubing for residue. There was absolutely no residue in the exhaust tube around the bung, and the bung itself had a bit of buildup inside of it. Seems to do a nice job of quickly vaporizing any oil that enters the pipe.
I installed it because A) I didn't want any oil residue in the intake and B) I didn't want to smell it while driving (like an open vent would)
this is trueI think the cyclone separator is better than 90% of catch cans out there anyway.Leave a comment:
-
All my SAP stuff is gone, pump/wiring/relay/solenoid, so that would be pretty involved.Leave a comment:
-
I know that the N54's have their own issue because of the PCV system, but I've seen so many other turbo cars with catch cans that don't stop oil from ending up through the charge piping that I don't even want to take the chance. I think the cyclone separator is better than 90% of catch cans out there anyway.
I thought about the exhaust evac, but I'm scared of filling up my resonator with oil or something, plus extra stuff under the car to rip off with road debris. This is my backup plan though.Leave a comment:
-
They do work if you go with a decent can and route it properly. Most of them out there are useless garbage that people install because it "looks good". I've read a lot of good stuff about the provent can as well. I've also read a lot of very good stuff about the company saikou michi who builds custom catch cans to your spec and will help you size one/a system to fit your needs. I have one that I had custom made for my car - it's a very nice piece.
Check out this thread I started in bimmerforums FI section: here it started as a simple question and evolved into a nice technical discussion of the whole system. If you search, there are a few other good threads on the topic. A handful of guys there have had great success running crank vent through a can, then through the SAP (believe it or not) activated with a hobbs switch, and then to the exhaust. That will be my plumbing when I add the SC to my s52e30.Leave a comment:
-
Catch cans on the n54 are mostly ineffective as they don't remove/externalise the pcv (which is built into the valve cover).
They are starting to get more success with new solutions.Leave a comment:

Leave a comment: