Announcement

Collapse
No announcement yet.

The E30 Cabrio "Winter Project"

Collapse
X
 
  • Filter
  • Time
  • Show
Clear All
new posts

    The E30 Cabrio "Winter Project"

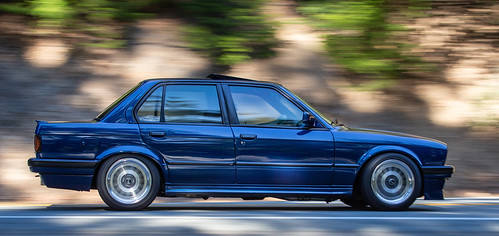
    I bought this thing from an older couple in Boulder about 3 months ago,and have been collecting parts and trying to decide the direction that I want to go with the car. So far the plan is to Get the maintenance all up to date ,but it was in pretty good shape mechanically so I dont have much to do there. It definitely isnt much of a looker , and I really dont like the color, but it does remind me of my first project car (an 85 Euro spec 528i w/ the cool dogleg manual gearbox) that I never got to finish. This one I am going to do EVERYTHING on myself. A few past projects I have taken the car to shops to do the bodywork and paint, but this one will be different. Here she is.


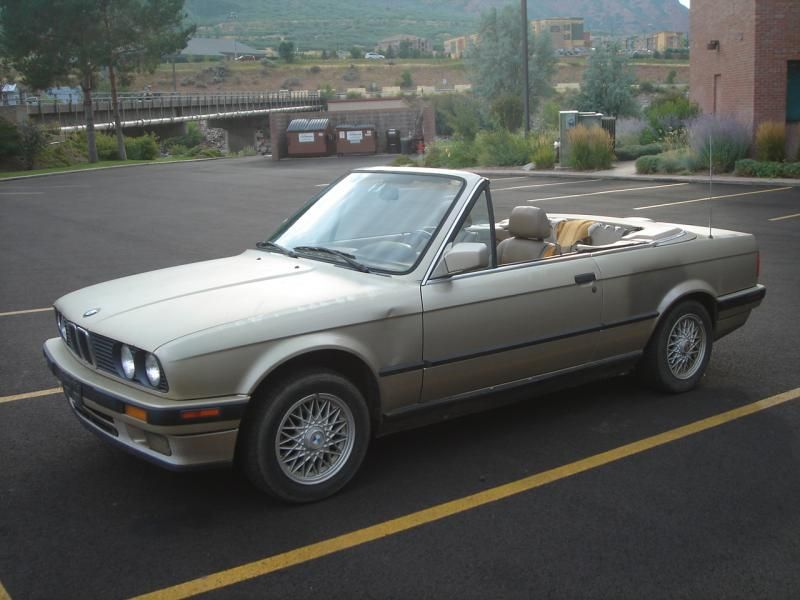
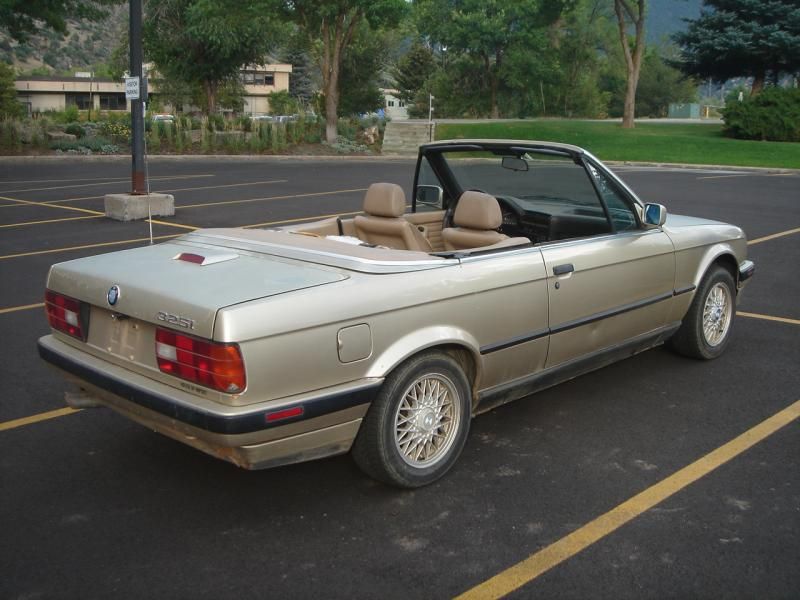
    The Interior is in quite bad shape ,and I hate beige inside too so , the seats will be recovered in OEM style Black leather covers. Suspension will get lowered with Mild to moderate drop with all the stiffening bars available plus a skidplate. The top is trashed so will replace with a new Black Cloth top. Now for the paint well, Im still thinking about what to do about that. The color will most likely have to stay cause to do a proper color change might be more work than I want to do on this car plus Im trying to keep the budget under a certain "reasonable" amount. More to come soon.

    #2
    An E30 cabrio is a wonderful car,,,,,,,,, and stick with the oem engine.. it is enough for cruising
    Sveinbjörn Hrafnsson

    E30 CABRIO V12 M70B50 ///
    ALPINA B10 BITURBO 346 @ 507
    E34 550 V12 JML


    Finnish wisdom : If you want to Win,, hire a Finn

    http://alpina.123.is/pictures/

    Comment


      #3
      Sub'ed for some body work action.
      Originally posted by Matt-B
      hey does anyone know anyone who gets upset and makes electronics?

      Comment


        #4
        Interior and Timing Belt replacement


        See what I mean about busted interior. I am pleased to report that the seats are still quite comfortable. The sport seats are almost a supportive as the Recaros in my MK2 GLI, almost. I got a ton of service records with the car so I had a pretty good idea of its history. The only timing belt service that I could find was for one at 141,000 miles in 1999(I bought it at 211K) so I didnt want to take a chance on that one. I ordered the timing belt kit with water pump and T-stat the day after I bought it. Time to get dirty.
        Last edited by WERDNA75; 11-03-2014, 01:02 AM. Reason: blah blah blah

        Comment


          #5
          I am in great need of a lower left bolster from that passenger seat. If you swap seats or part them out, please LMK.


          Good project.
          ACS S3 Build / Dinan 5 E34

          Comment


            #6
            Looks Good! glad to see your bringing it back to its former glory.
            Bmw CCA # 490080

            1995 525iA RIP
            1987 325e Cirrusblau-Metallic/Pacific Blue (Daily)

            DSC_1725 by Matthew Johnson, on Flickr

            Comment


              #7
              Timing belt job


              So the first step to doing any motor work to an E30 is ,of course , removing the hood. The timing belt job went fairly smoothly ,and it reminded me of doing a timing belt on my 16V GLI because it was a simple job to do.


              So this is what we're dealing with, ugh I hate dirty motors.
              Removed Radiator and viscous fan first(remember left hand threads on fan)


              Stupid V-belts


              The belt really looked like it was in good condition,and I wonder how long it would have lasted. It being an unknown to me wouldnt pass so it gets replaced along with all the other belts too just in case.


              Timing marks all had fresh paint on them so someone has been in there recently.


              Block looked a little rusty so flushed and filled with fresh BMW coolant which is the only coolant that should ever be used in any BMW.

              They forgot to send me my new waterpump gasket so while I waited for it the valve cover got cleaned up and painted.


              Did a valve adjustment too. Gave me a good excuse to buy some more specialty tools which is always fun.

              New belt and tensioner on


              Drove it around for about a week with no hood on until a buddy could come over and help put it back on. Got lots of approval driving with no hood,but I dont know why.

              More to come soon, next up some /\ rust repair, oh joy.
              Last edited by WERDNA75; 11-03-2014, 07:34 PM. Reason: Arrow

              Comment


                #8
                Nice good luck bronzit forever

                Comment


                  #9
                  just a heads up. that is a really crappy waterpump. they have been known to fall apart and the fins get stuck in the water passages.

                  when you did the valve adjustment did you rotate the head so that the lobes were down, while the belt was off? if so you can damage valves this way and it is not recommended.
                  Much wow
                  I hate 4 doors

                  Comment


                    #10
                    Waterpump

                    Originally posted by Cabriolet View Post
                    just a heads up. that is a really crappy waterpump. they have been known to fall apart and the fins get stuck in the water passages.

                    when you did the valve adjustment did you rotate the head so that the lobes were down, while the belt was off? if so you can damage valves this way and it is not recommended.
                    I will keep that in mind about the waterpump. Of course, I didnt rotate the crank or head while doing the timing job. I waited until I had it back together and running before I adjusted the valves. Oh , and it aint Bronzit , its kaschmirbeige-metallic. I despise the color though, might change it.

                    Comment


                      #11
                      bronzit clubb

                      Comment


                        #12
                        Excited to see the body work. Considering tackling my own, but I've never done any body work. Don't know where to start. Post up some good step by steps! ;)


                        1986 325e - RIP
                        1987 528e - Sold
                        1989 325iX - Parted Out
                        1991 318iS - Sold
                        1991 325iS - Current

                        Comment


                          #13
                          Grinding and planning the cuts

                          So this is what I have to fix , not so bad right ? Well , now that I have taken a closer look how that corner is put together it might be a little more involved than I thought. Oh well, It has to be fixed so here we go.

                          Got the metal that I needed sent to me from another R3Ver.


                          Got the car jacked up at a good angle to work on it.

                          Took out the Vibration Damper that convertibles have where the other cars have the battery. It is just a solid block of metal,and is quite heavy. It looks to me like water got in thru the broken taillight or seal ,went down the inside corner and just sat down there and rusted thru because the damn car was full of dirt down there from living on a dirt road. Someone may have backed into something with that corner too, it looks like to me.


                          Im prob. gonna have to remove that rear bracket that the block of metal sits on to cut and remove that outer skin so that means drilling out spot welds , Oh goody ! :roll: Then I get to weld it back in afterwards,but hopefully it wont be too difficult. We shall see.

                          Looks like underneath that corner it is double layered spot welded together too so I will be drilling that out cause Im going to go all the way around the corner with the patch. So now let the power tools and grinding commence !!!

                          More to come soon.
                          Last edited by WERDNA75; 11-06-2014, 07:58 PM. Reason: So Dirty

                          Comment


                            #14
                            Interesting project. Never heard of "kaschmirbeige-metallic." Looks like bronzitbeige-metalic ...

                            Comment


                              #15
                              Drilling spot welds and scrapin seam sealer,fun.

                              I still havent gotten the panel stripped of the metal that wont be used,but I am getting close.


                              Unibits work very well for drilling out spot welds


                              I am working on getting that big part of the frame off the skin now so I can test fit it and decide where I want to make my cuts.

                              Comment

                              Working...
                              X