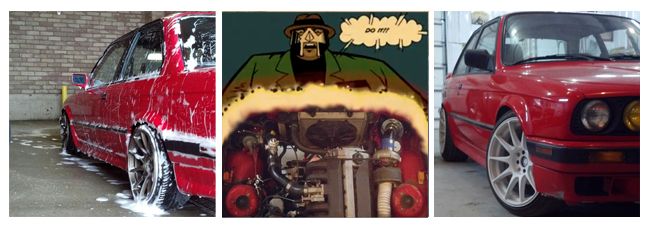
M30 OEM Turbo project
Collapse
X
-
Comment
-
Just a heads up, keep an eye on that tee. I had a similar setup on my car and it ended up cracking from vibration. Someone warned me about it in my build thread and it ended up happening so I figured id pass it along. Your tee does look much sturdier than the one I used though.
Sub'd as well!Comment
-
M30 OEM Turbo project
^thanks for the tip, I'll keep a close eye on it.
Yesterday was amazing, warm and sunny. So what did I do? Crawl around on the floor of my garage for 6 hours of course!
I borrowed an engine beam from a fellow r3v'er in preparation for pulling the subframe, oil pan, and tapping the block for the turbo oil return.

First step was to remove the turbo and manifold. I did this both to gain some clearance to work in, and also because they're getting sent off for thermal costing soon.

Next step: remove old subframe and transfer swaybar on to new reinforced piece.

Then pull the oil pan (so easy w/o a subframe in the way!)

Here's the boss on the outside of the block that the m106 motor uses. Getting ready to drill!

Top tip: put a magnet near your drill point on the inside of the block to catch any wayward shavings that might go flying and stick to your crank, bearing caps, etc.

Drill pilot hole using firm pressure, medium speed, and lots of cutting oil. You don't want to drill bit to get too hot or it will dull very quickly.

In total I think I used 5 different drill bits to get to the final 37/64" needed for the tap. I started with 1/8" and stepped up in 1/8" increments (1/4", 3/8", etc). Here's the final hole at 37/64"

Next: grab beer, drink beer, grab tap, and do work! (I forgot to take pictures while I was tapping, but you get the idea)


Now time to button it all back up with my new poly mounts from G-man
 Last edited by CorvallisBMW; 02-22-2015, 04:18 PM.
Comment
-
-
Comment
-
^Reminds me of
Comment
-
Nice progress, how did the engine mount work out?Need a Turbo manifold? We have them in stock- Click here---> http://rapidspoolindustries.com/
____________________________
E-mail Panayiotisx2@gmail.com
Dyno vid http://www.youtube.com/watch?v=C7aM7..._order&list=ULComment
-
The engine mount worked great! I had to do just a little bit of grinding to gain a few fractions of an inch here and there, but it was pretty amazing considering you only had some crappy cell phone photos to go off of :p Thanks again for the piece!Comment
-
Dropped off all the exhaust bits at the coater's today so they can get to work. The list is as such.
Insulating coatings:
-Cast iron log manifold
-Cast iron wastegate elbow
-Lengthened aluminum turbo up-pipe
-Turbo exhaust housing
Heat dissipating coating:
-Intercooler
I called around to several places in the Portland area that do this type of work. In the end I chose Finishline Coatings in Milwaukee. They specialize in auto applications (unlike the other guys who were more geared towards firearms and just happen to dabble in automotive) and also had the best prices. Old school hot-rod guys, really fun to shoot the shit with.
 Finishline is the leader in Ceramic Coatings for automotive and industrial purposes for exhausts, turbos, brakes, chassis or engine parts.
Parts should be done in 2 weeks! Future plans include having the wastegate dump pipe and turbo downpipe coated too, but they have to be fitted first. I'll also have a custom aluminum pipe fab'd and coated to run from the turbo to the IC. For now I have a series of silicone elbows doing the work, but they're so close to the exhaust manifold that I don't trust them to last very long
Comment
-
I like how your ideas are working out. Never a dull moment.Projects Hartge,Alpina & AC Schnitzer Builds.http://www.r3vlimited.com/board/showthread.php?t=280601
http://www.r3vlimited.com/board/showthread.php?t=227993
http://www.r3vlimited.com/board/showthread.php?t=289362
 DSC04926 by Raul Salinas, on Flickr
 DSC03413 by Raul Salinas, on Flickr
Comment
-
Great update! Keep 'em coming! 8)Comment
-
I had a bitch of a time getting the steering rack and x-brace back in last night... guh I couldn't get the steering rack in place with the column or lines attached, so those all had to come off. Then I discovered my x-brace was actually bent in a few places (torque/twisting? hit something? I dunno
  ). Add in the fact that spacers are required for the e36 rack and for the x-brace, and I was trying to thread a 4"-long bolt through: x-brace -> spacer -> subframe -> spacer -> rack -> sufbrame ->washer. Getting all of those to line up required a lot of grunting and smashes with the BFH. My hands feel like jell-o this morning.
Comment


Comment