
I've been working hard. The 2.5 twin exhaust is on, the tank is drained and has 5 gallons of ethanol free. All the wiring is done, tach updated to 7k and cluster in place, air box refurbed w a BavAutRest AFM and got the new oil pressure sensor to match to plug on the 1.3 harness.
I did change the oil and filter for good measure and when I went to crank it to get the oil circulated (after removing the fuel pump relay) it wouldn't crank. I heard the relay click, did a quick VOM check then hit the solenoid with a ball peen hammer. Then I could hear the solenoid click so I hit it again and now she cranks fine. Sitting for 2 years makes them stick.
The other interesting thing I learned is that the 1.3 harness I used does not require jumpers for the tach and econo gauge as per strictlyeta. I traced the wires to the ecu and they are as they should be. Will confirm when running.
After ALL of that, we are on hold because I do not have the 3 fan belts :(
It's radiator, hoses, belts and coolant and it will be time to turn the key (with fingers crossed).
-
We realized when we picked it up that we had forgotten to ask them to sand the intake. Since they clear coated everything it after they sanded it would have to go back in the oven so we will just live with it.
I got everything under the intake buttoned up yesterday. I was dreading that part but having my cabrio right beside her for reference helped a lot and the cabrio parts car was a great source of for misplaced bits and pieces.
I was a bit surprised how much is involved in refreshing the throttle body and its connections. Besides that silly $5 cork gasket (yes I could have bypassed it) there's the vacuum purge valve, snaking the breather hose, cables etc. easy steps but quite a few of them. It takes time when you're trying to make everything newish.
I'm working clockwise around the bay so next is the tstat & cover and probably the intake boot and afm. I don't have a decent plug wire loom so rather than adding the #6 wire with the reference sensor I'm ordering a new set to go with the new distributor cap and rotor. No point in doing pulleys til I route the new reference sensor so I'll probably skip to the exhaust (complete 2.5 dual pipe) and interior (ecu & cluster) til parts arrive.
I haven't mentioned it here but we had bought another 87 eta that was a non runner in need of quite a few upgrades. Since we knew Alice was going under the knife anyway I made the difficult decision to take her off the road before we were ready to do all this since we now had the perfect donee for parts we were going to pull anyway. Short story on this is that we added Konis, H&R sports, new CAs & offset CABs. She is going to be a very different car when we are done.
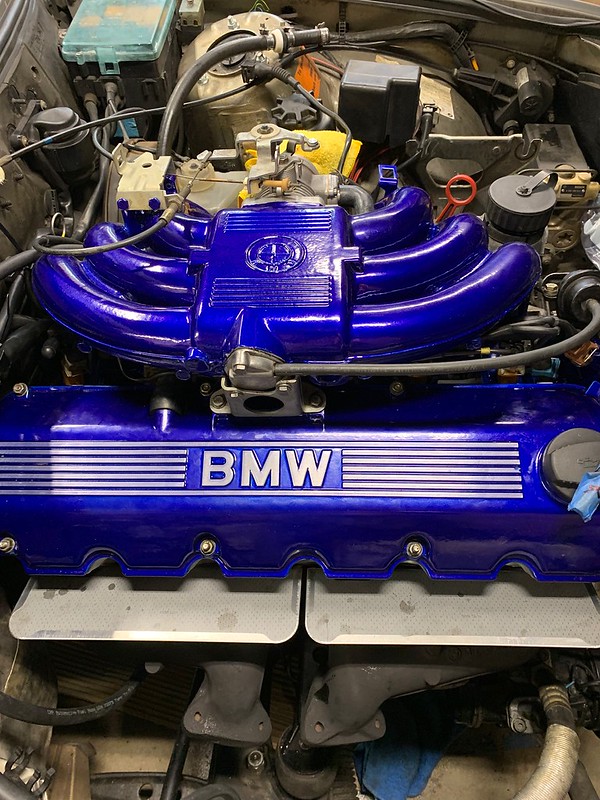
After that she gets paint (hopefully just the faded horizontal surfaces) and sport seats which will be redone using 5 of the last 7 yards of OE blue check fabric that is known to exist (sourced from NZ) and blue alcantara bolsters (that match the intake manifold)....and of course new seat shocks :)Last edited by jeffnhiscars; 07-16-2019, 03:14 AM.Leave a comment:
-
oh so pretty. you should also sand the fins on the intake manifold to match the valve cover. wonderful story and progress.Leave a comment:
-
We are progressing to the point of excitement. I'm ordering a few last minute parts so we can wrap up the engine compartment then bolt on the full 2.5 exhaust, probably drain the fuel tank, hookup the ECU, install the cluster, pray then turn the key
Leave a comment:
-
It's been so long since I've posted an update that I'm embarrassed...well not really but it makes me sound humble :-)
Long story short is that I bought another 87 ETA as a rescue project and it needed sop many parts that were going to come off Alice anyway that it made sense to "borrow" them. The rescue needed injectors to get running plus the complete exhaust, springs and struts, CA's etc so in the end Alice has sat patiently waiting for her 731/motronic upgrade.
The head is off (and is FS), the block is cleaned and next up is the motronic swap and all new hoses. The exciting part is we just got back from the PC shop and the pic says it all.

Leave a comment:
-
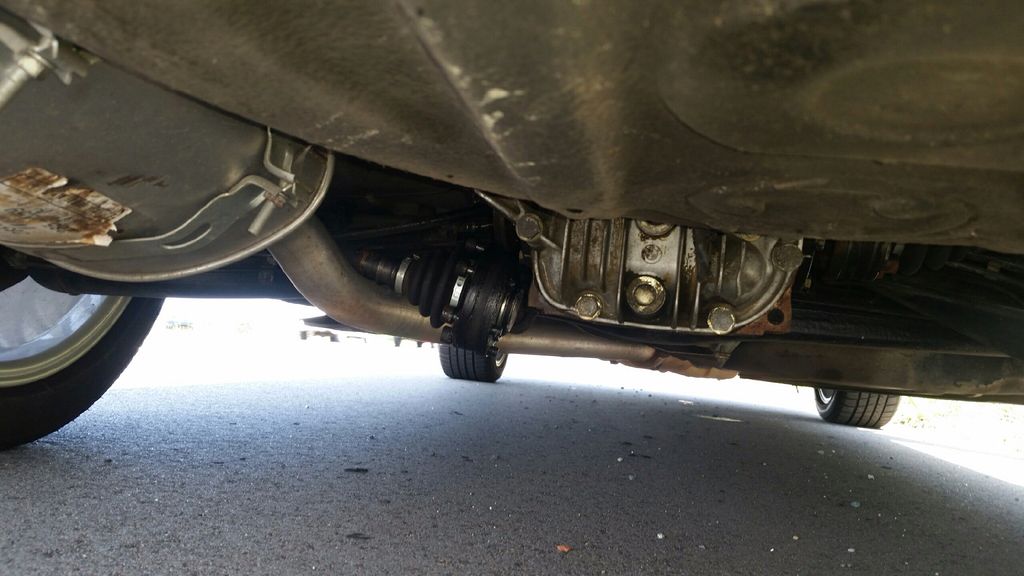
I grabbed my floor jack, stands, tool box, loctite and spare half shaft to diff bolts and made a road side assistance trip. 1 bolt was missing and 2 were bent, but wouldn't you know I had 3 spares.
Half hour under the car sweating my ass off on an off ramp and good as new. However, my pride is damaged as I apparently did not use loctite the first time. I can easily see the potential for a lot of damage here so call it a get out of jail free cardLeave a comment:
-
I got a frantic call and a pic text today. Seems Alice was immobilized by this
Leave a comment:
-
Thanks guys. I've been busy lately but just installed a new ate master cylinder.
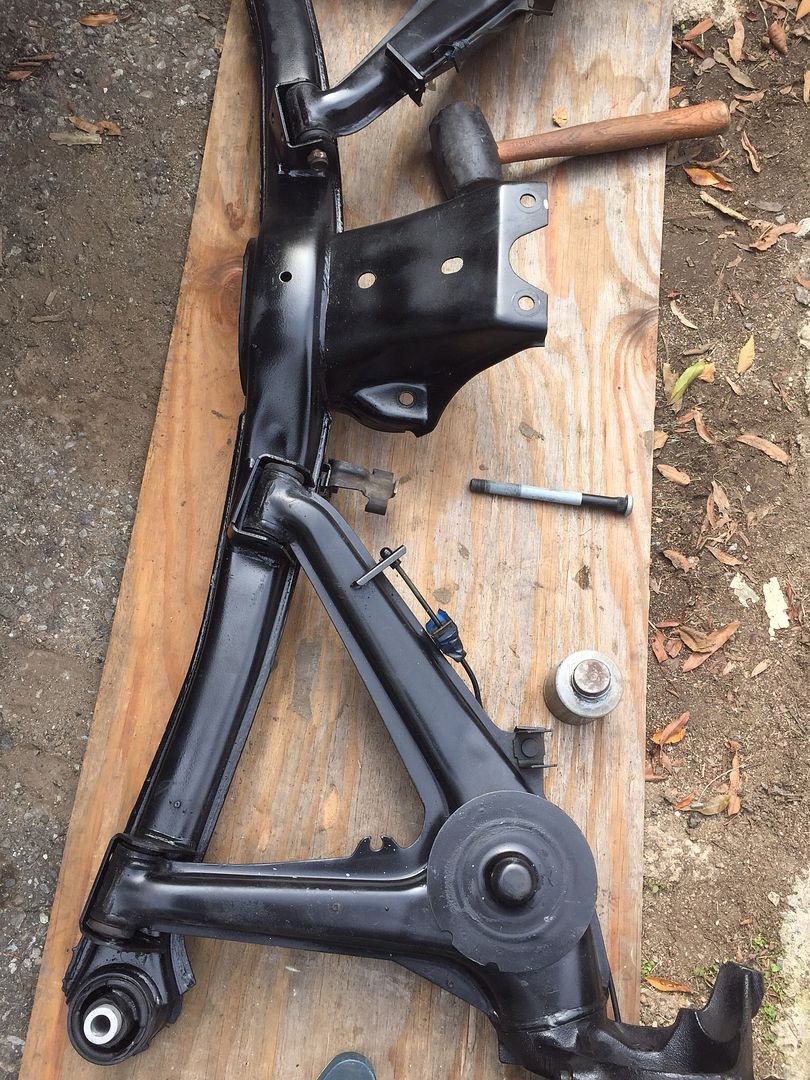
Oh..and this is how the subframe cleaned up.
The head is back from the machine shop. Again, there's more detail in the 731 thread in the m20 section but a brief summary.... All new genuine valve guides, new +2 Osvalt valves (so b25 valves) with a 30 degree back cut, new inner valve springs and stem seals
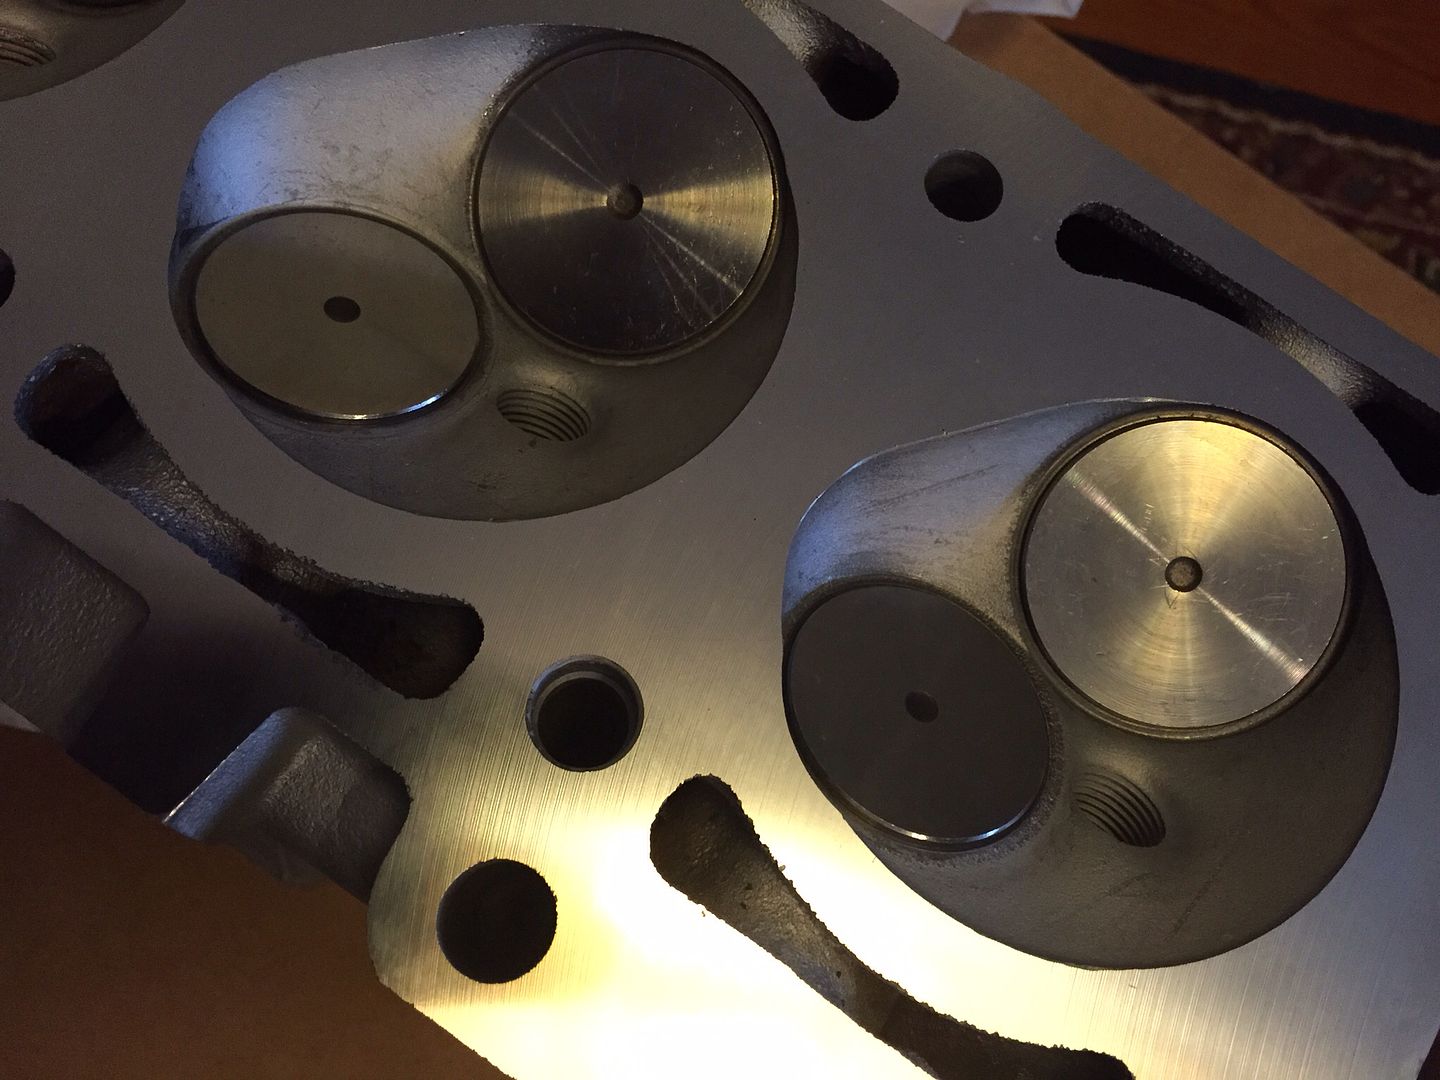
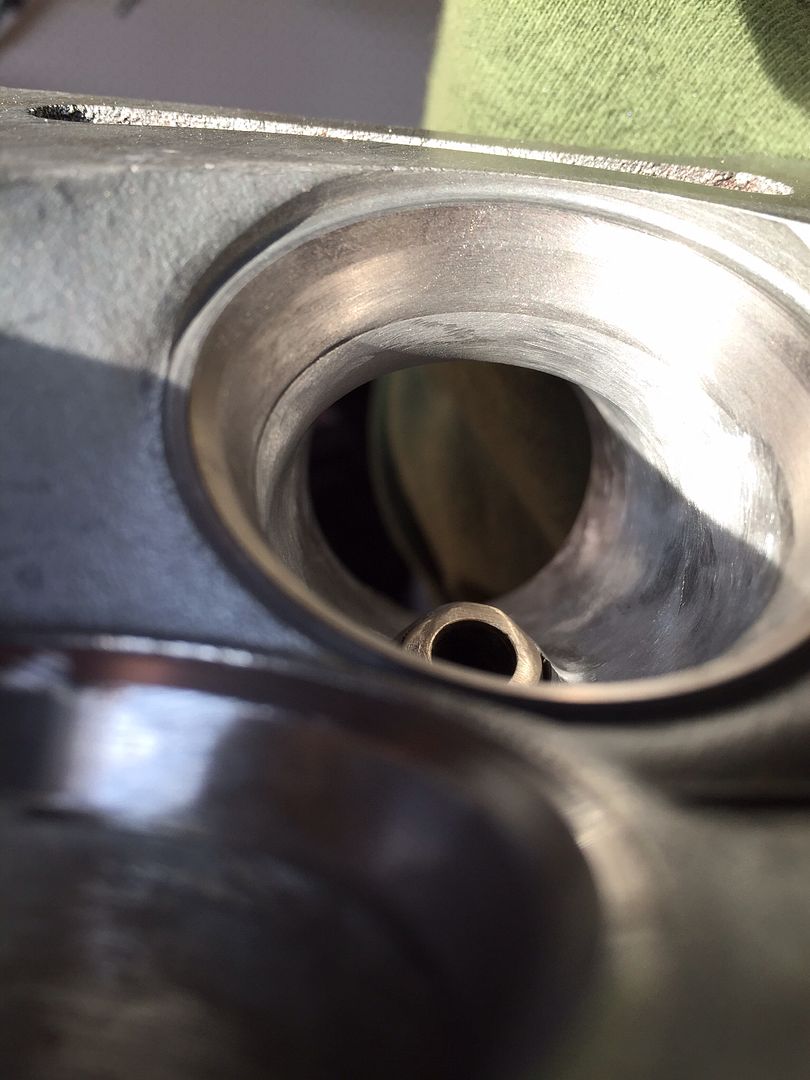
Did I mention a slight bit of porting ?
 Last edited by jeffnhiscars; 12-28-2015, 07:26 PM.
Leave a comment:
-
This is super cool!! What a great find. Nice color. GLad to see you taking such good care of herLeave a comment:
-
Amazing what you can do with some lengths of all thread and other hardware. I will need to revisit this in time.. I expect next winter to redo the rear end. For now, I am on the front suspension and will try making a tool for the control arm bushings.Leave a comment:
-
-
When people find cars like this my first reaction is to call them douches. Not because they did anything wrong, but because I am so insanely jealous. Seriously man, incredible car. You're a lucky dog.Leave a comment:
-
I saw that happening as well. Post #102 shows how I did a bushing without tensining across to the other side. It's a 36mm socket and doesn't sit quite square but beats a bent TALast edited by jeffnhiscars; 10-11-2015, 04:06 PM.Leave a comment:
-
Nice pics Jeff!
any pics of the whole puller? the contraption I built actually squeeze the trailing arm legs together... ended up having to pull them back apart lol.Leave a comment:

Leave a comment: