Announcement

Collapse
No announcement yet.

Project rust-bucket...

Collapse
X
 
  • Filter
  • Time
  • Show
Clear All
new posts

    #46
    Originally posted by 2mAn View Post
    the floor seat mounts you made push the seat up pretty high, Id have a look at re-engineering them. Have you checked to see how tall you sit in the car with the seats as-is, and with a helmet? Im sure you'll find that you need to redo them.

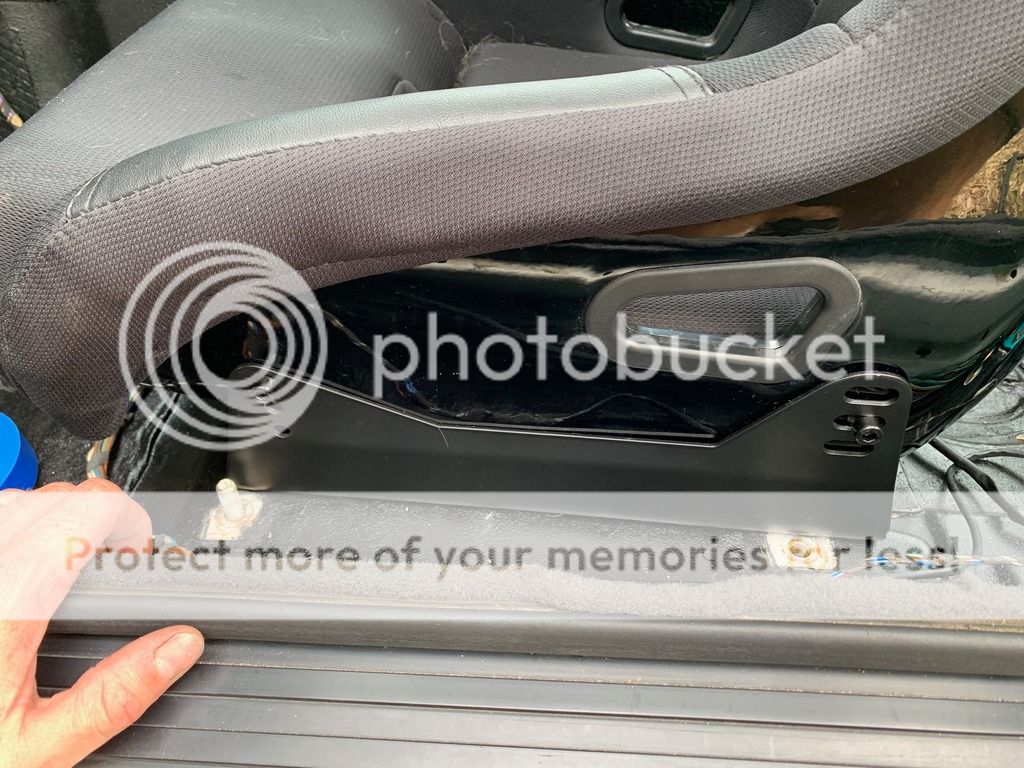
    These are the typical styles of seat mounts, you can imagine how using your seat side mounts on these will drop the seat about 2" and completely change that angle on the harness
    https://store.garagistic.com/BMW-E36...Floor-Adapters
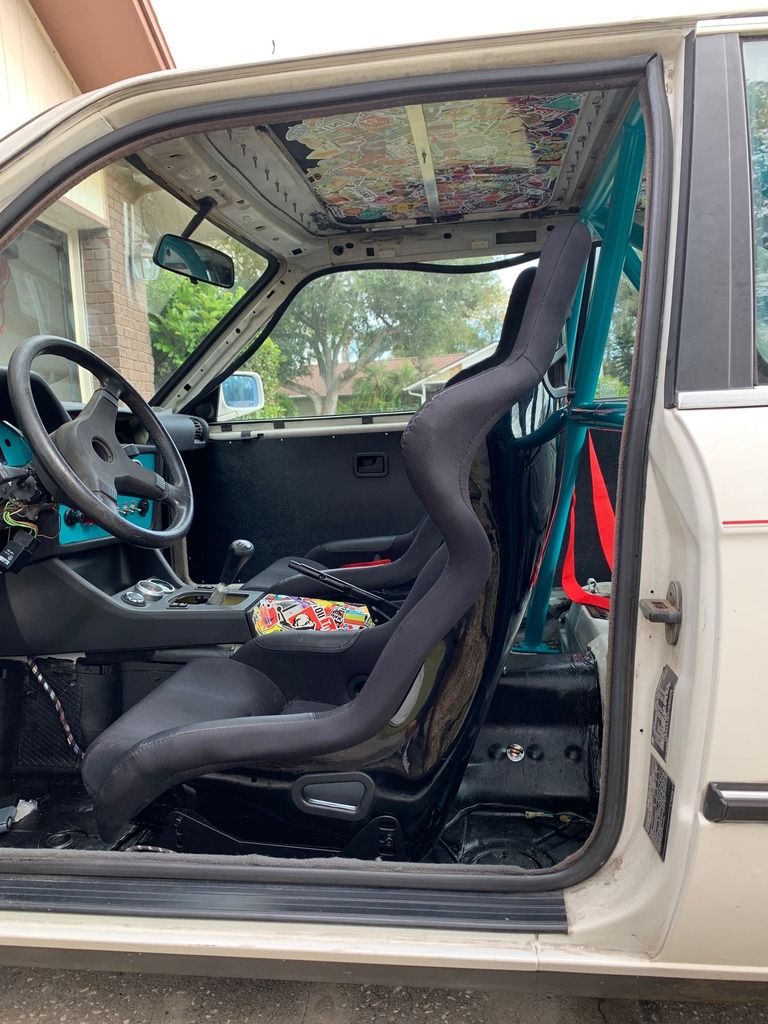
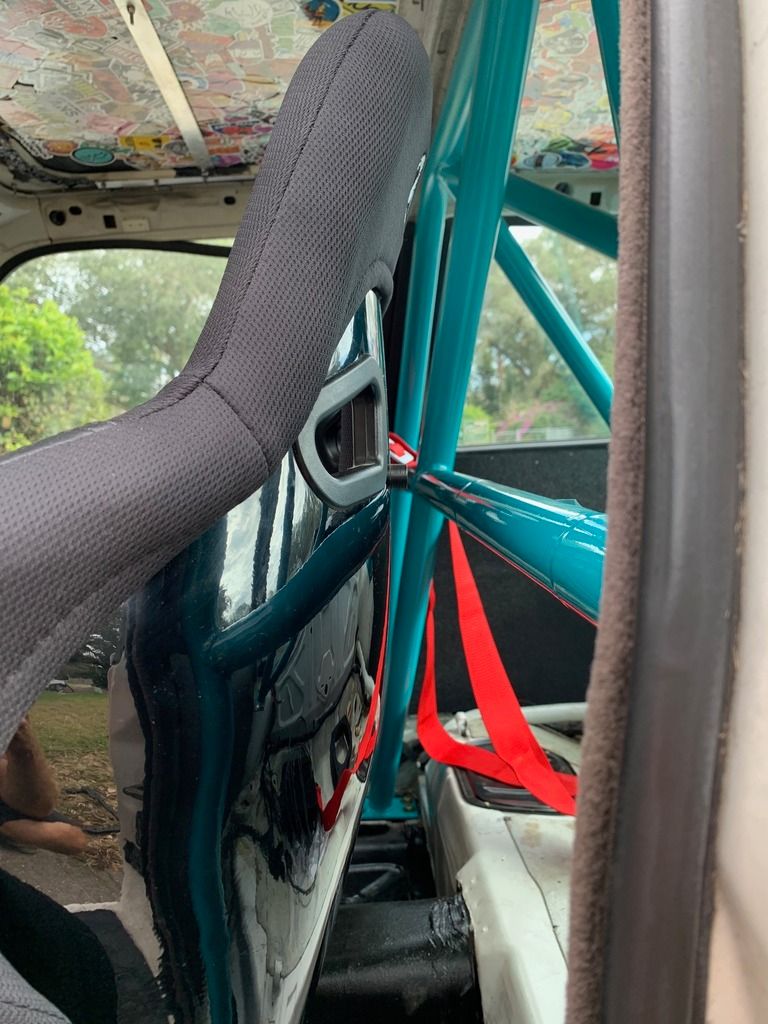
    So, I have sat in the seats with a helmet and fit with plenty of room actually. I’m 6’1, so it’s not like I’m short either, lol. The brackets are literally 2” tall. The bottom of the seat at the rear actually touches the bracket. I could easily make a new set of mounts that were only an inch, but I don’t know if that’s going to solve the issue. I literally sat the seats on the floor pan and the Angle was still greater then 15 degrees from what I could tell. That and the seating position sucked and I wasn’t comfortable sitting that low at all.

    What I’ll probably do is mock up a set of shorter brackets and take some measurements on the drivers sode while the passenger seat is in for comparison.
    Last edited by haaken675; 01-13-2019, 12:45 PM.

    Comment


      #47
      Originally posted by Northern View Post
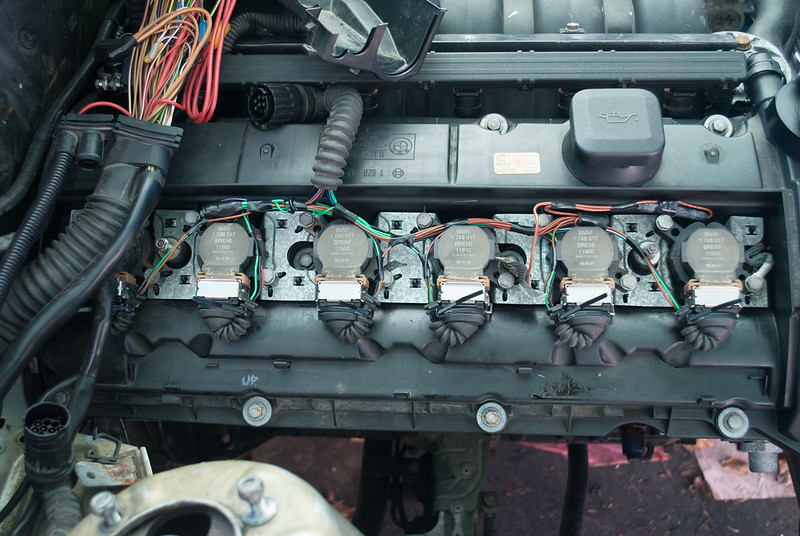
      Re: Coilpack wiring, if you're looking for ideas, here's what I did:


      After this, I wrapped the harness a little more and trimmed the boot back.
      I filed circular notches into the beauty cover and valve cover rib for the wire to lay in.

      With cover:


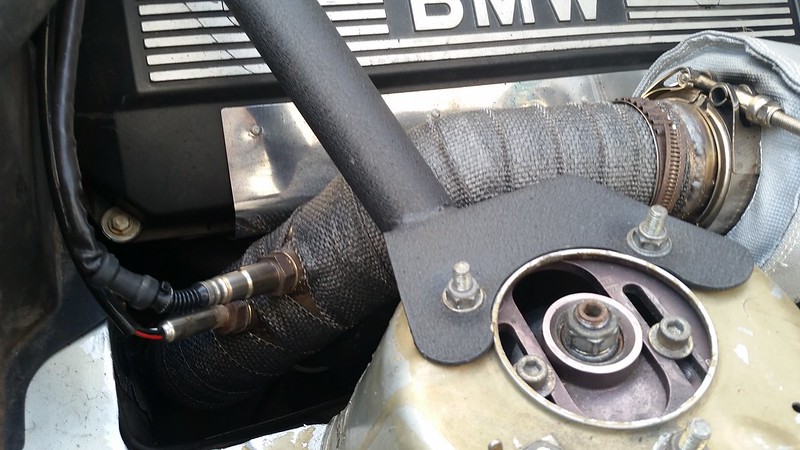
      Still needed to wrap the downpipe and put an aluminum heat shield on the plastic beauty cover to keep the heat away, but it worked well.

      after adding the aluminum piece:
      Thanks for sharing what you did to modify the ignition harness! I will definitely be doing that. I already have the heat wrap for my downpipe, and have a pretty good idea in my head for an aluminum heat shield similar to yours. Bought some of that reflective heat tape as well to see if that helps. I plan on putting vents/Louvrers in the hood to help get heat out as well

      Comment


        #48
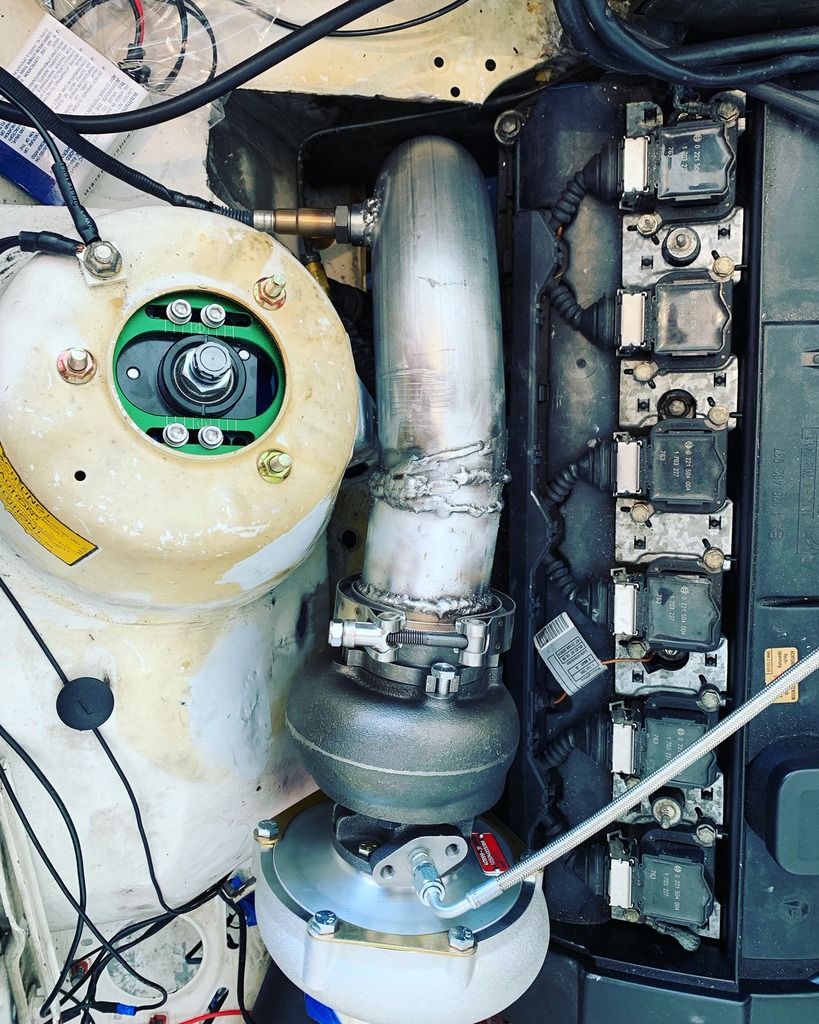
        Finished up version 2.0 of the downpipe. Thankfully I was able to use most of what I made previously and modify if to work with the new turbo. It actually came out better then the original and I am pretty happy with that!


        What's really nice is that the downpipe lines up perfectly with where the wastegate is, so routing that back into the exhaust instead of just dumping to atmosphere will be much easier. I'm getting much better at welding now as well, so I think I might just work on finishing up the entire exhaust next weekend and the one after. Anyone have any opinion on what muffler would sound best with the turbo and 3" exhaust? I was always partial to magnaflow mufflers on these cars n/a.

        On to the seat brackets...

        I essentially put the seats on the floor pan rail level with where the bolts/studs are.


        This angle looks better, but this is with me holding the front up to angle the seat back more. Part of the problem is these corbeau seats have squares on the bottom at each corner that hold bottom mount bolts and I can't get the rear to go lower easily


        I can't get my angle finder to fit in between, but it still looks too much for me...I just don't want to spend $400 on seat brackets when that still isn't going to solve my problem when I am happy enough with the brackets that I made, or am happy enough to just make some lower ones if that really does it.

        Comment


          #49
          Holy shit, it lives!!!


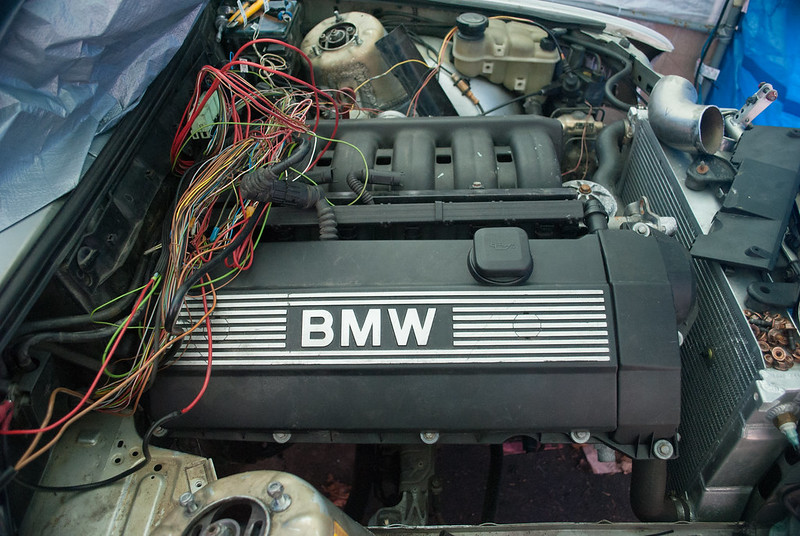
          Actual update to follow. Ignore the wire mess, we had to do some rewiring...

          Comment


            #50
            I have those same seats. You can cut those squares off but then you can never bottom mount the seats again. I used side mounts like yourself and it gains an inch or 1.5 Made the difference!

            Comment


              #51
              I hadn't thought of cutting the squares off. I wonder how that would effect their rigidity/safety?

              Comment


                #52
                I did some search on the google machine and it was a common work around. Not a structural engineer so I couldnt say.

                Comment


                  #53
                  So updates...

                  Went for my first start two weekends ago, and found out that my in tank lift pump shit the bed, likely because I used it to pump out the 3+ year old gas that was sitting in it...


                  Definitely pretty dirty...So I turned around and ordered a TRE 255lph pump. I have to say, that was a much harder thing to install then I would have thought. The tank opening really doesn’t give you luck wiggle room...

                  I started getting really frustrated with the wiring harness and relays just not playing nice, so I rewired a good bit of it to work with my switch panel. I should have just done that from the start. I also swapped out the brand new m42 crank sensor for a diy auto tune hall sensor since it has a built in pull up resistor. I’m very happy I did that as tunerstudio is registering 0 sync loss ok the crank and the car fire up immediately.

                  This actually brings me to a good point, especially since there is so little info out there on this. The DIY auto tune sensors are a perfect match for the crank on the m52’s. All I had to do was modify the mounting tab slightly. They should work for the cam sensor as well, but you will need to shim it as it is slightly longer then the factory cam sensor. These are a great alternative at $37.

                  Should be working on the exhaust this weekend and getting a decent base tune to start road tuning.


                  Sent from my iPhone using Tapatalk

                  Comment


                    #54
                    Project rust-bucket...

                    Did a bit of wiring cleanup in the engine bay now that I know the harness works. I like to think of this as v1 of the build, and will likely do a completely custom tucked wire harness once I get to a more completed stage of the car.


                    and finally committed to a big brake kit. Ordered a Massive 300x32 brake kit which hopefully will come in pretty soon. Once that's in and I bleed the system, I can do some road testing.

                    I cannot wait for that! I need this thing rolling so I can get some more work done to the buggy!


                    And finally this meme because this pretty much sums up how my wife feels about my car addiction and me constantly browsing Facebook marketplace and Craigslist for deals...

                    Comment


                      #55
                      Big box of goodies came in today!


                      Just waiting on my parts from massive to get here so I can mount everything up!


                      Sent from my iPhone using Tapatalk

                      Comment


                        #56
                        Finally finished my downpipe. I think I have a much better idea of what I am doing exhaust wise now. Ordered some really cheap bends that came from China and will have to reorder some new pipe to actually finish the exhaust. Learned my lesson on that one...


                        My welding is getting a LOT better. This has bean such a learning experience with this build.


                        And finally wrapped it with exhaust wrap I had lying around to finish it off.


                        I have to say, the v bands are a bit of a pun in the ass as they tend to warp much easier, even at low amperages. Nothing some red rtv won’t solve...


                        Sent from my iPhone using Tapatalk

                        Comment


                          #57
                          New wheel bearings/hubs on both side. Cannot wait to get this thing bled so I can actually test drive/tune it!


                          Sent from my iPhone using Tapatalk

                          Comment


                            #58
                            God Damn those brakes look good
                            1989 325i LS Swap (Money Pit):https://www.r3vlimited.com/board/sho...d.php?t=244933
                            COTM Feb 2019: https://www.r3vlimited.com/board/sho...d.php?t=428404

                            Comment


                              #59
                              They do indeed! I can't wait to get it all buttoned up and bled so I can get some road testing/tuning started. My passenger wheel rubs the caliper ever so slightly on about 3 of the spokes, and now I am debating sanding down the spoke ever so slightly, or try and find a2mm spacer if anyone even makes one that small. It's possible that if I actually torque the wheel to spec it will center itself and not be an issue, but its definitely tight for sure.

                              Comment


                                #60
                                You can get a 2mm spacer made
                                1989 325i LS Swap (Money Pit):https://www.r3vlimited.com/board/sho...d.php?t=244933
                                COTM Feb 2019: https://www.r3vlimited.com/board/sho...d.php?t=428404

                                Comment

                                Working...
                                X