
looks super flat through those corners! This car is next level.
-
-
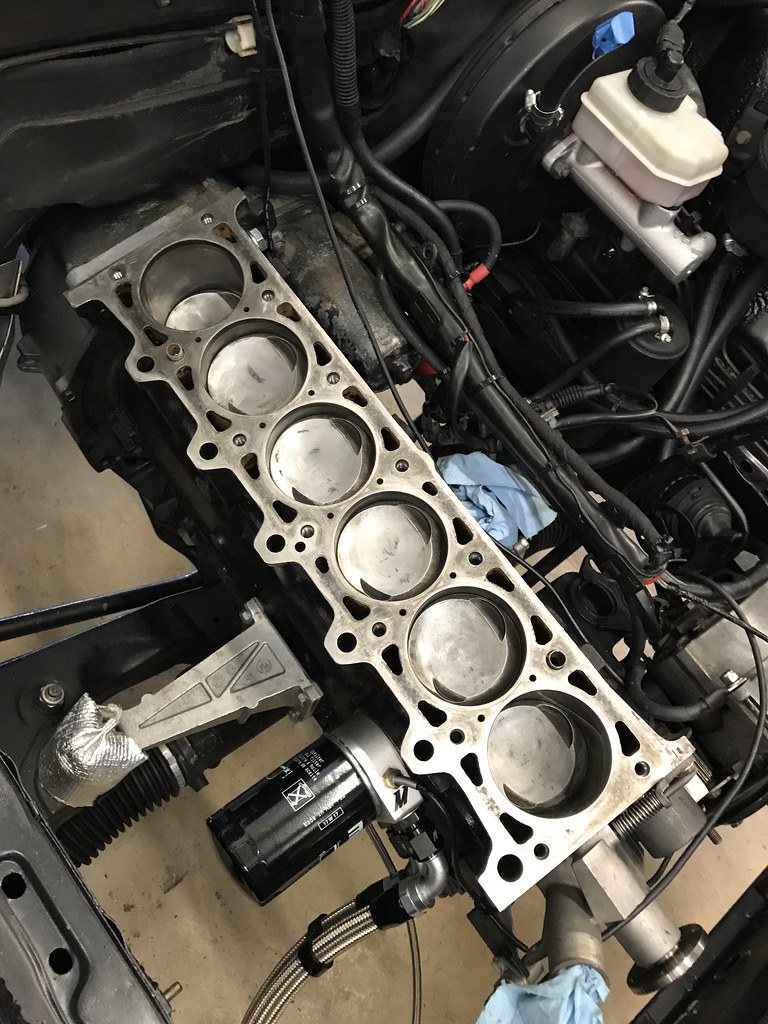
Looonnngggg overdue for an update. After my last track event, the head gasket leak was clearly getting worse. Lots of coolant streaks on the block under the headers. It was time to pull the head!
It has been slow going since then. With the holidays and being busy with work, not a lot has been done. It took about a month for me to pull the head, then it sat for a month before I brought it to the machine shop. It's been there for about 7 weeks now. Definitely got delayed from the holidays.
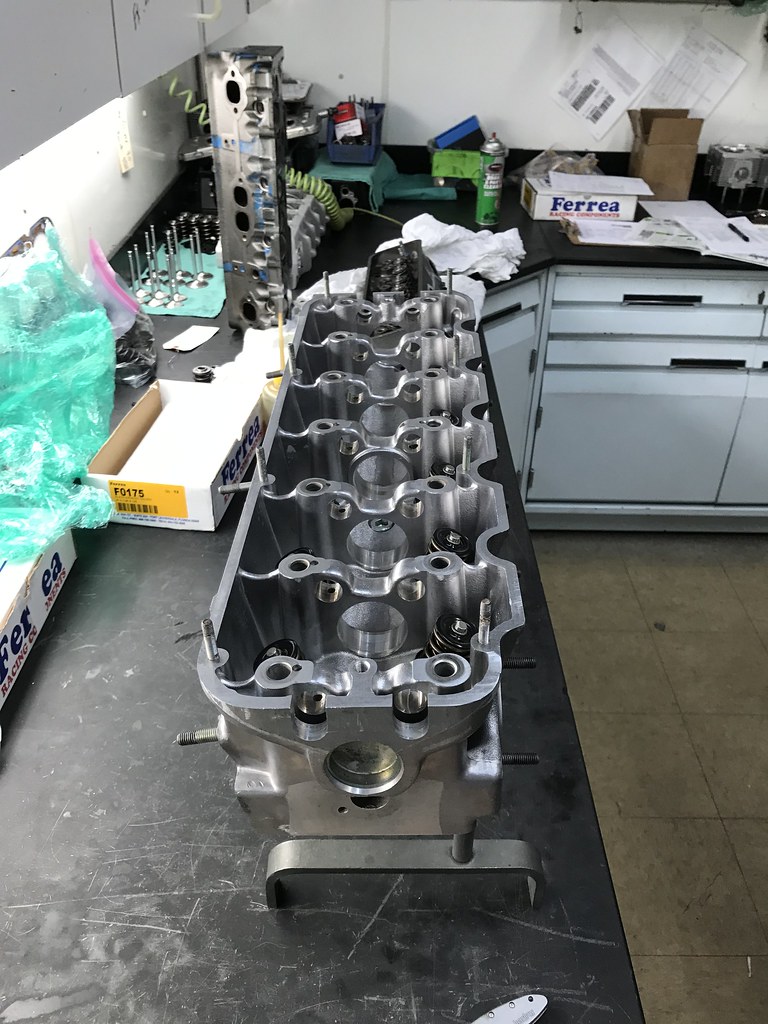
The head checked out okay, but the valve stems were very worn. It is getting a valve job, new stems and seals, new eccentrics, back cut valves, minor valve bowl porting, and the surface refinished. It should be done next week.
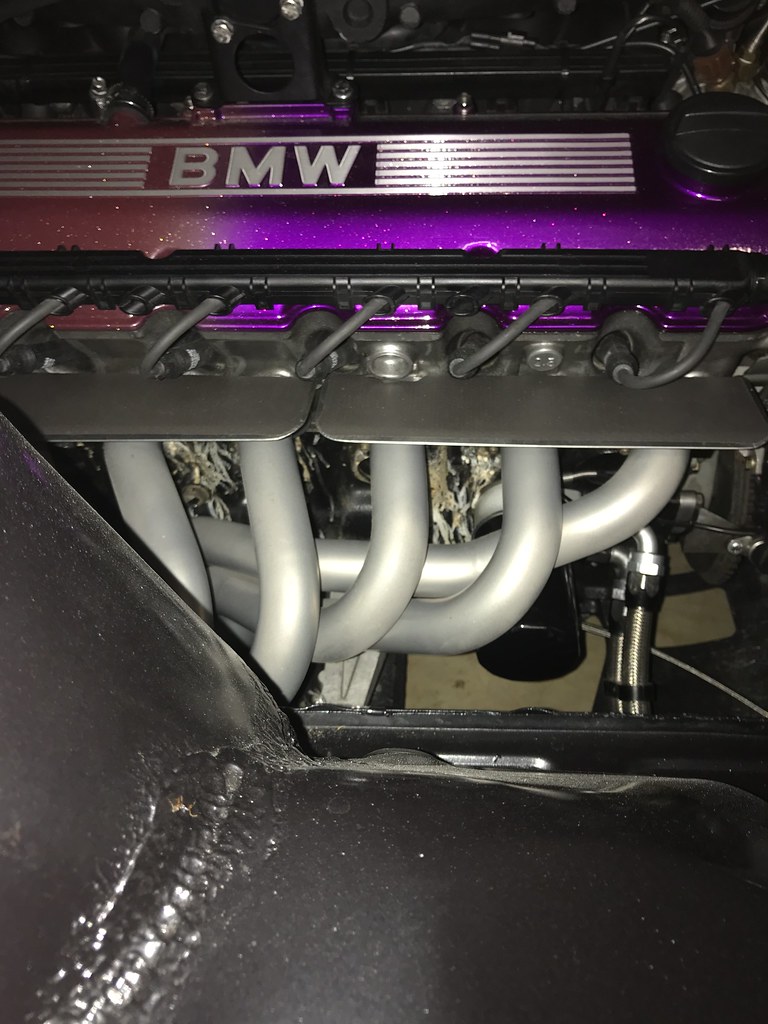
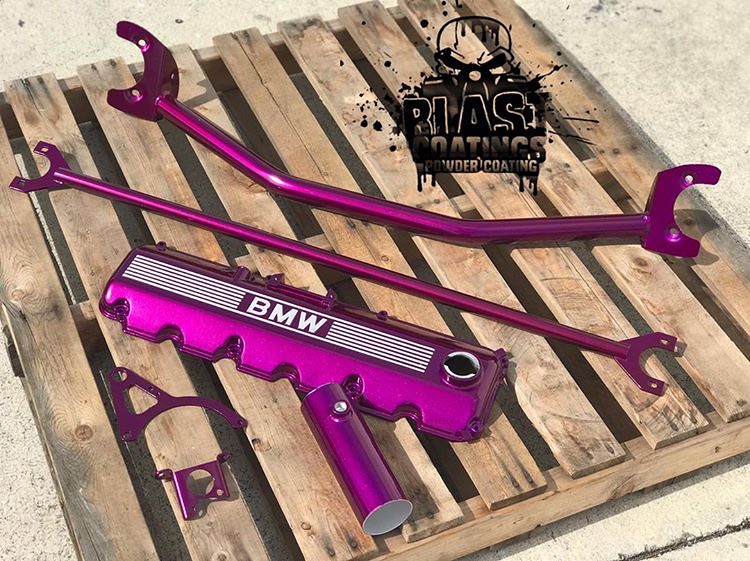
A couple weeks ago I ordered all the parts I need for reassembly. I will be using an OEM +0.3mm head gasket with ARP head studs. I also had the headers re-ceramic coated at Jet Hot, and had some more parts powder coated purple while I was at it.
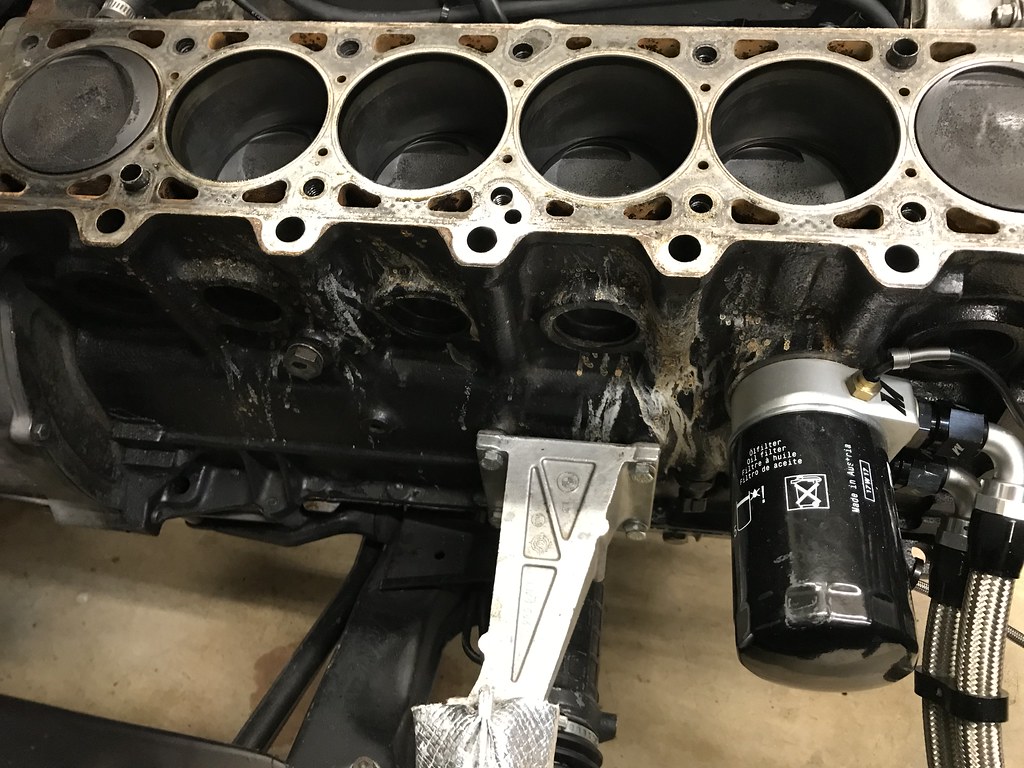
Mmmm coolant streaks:
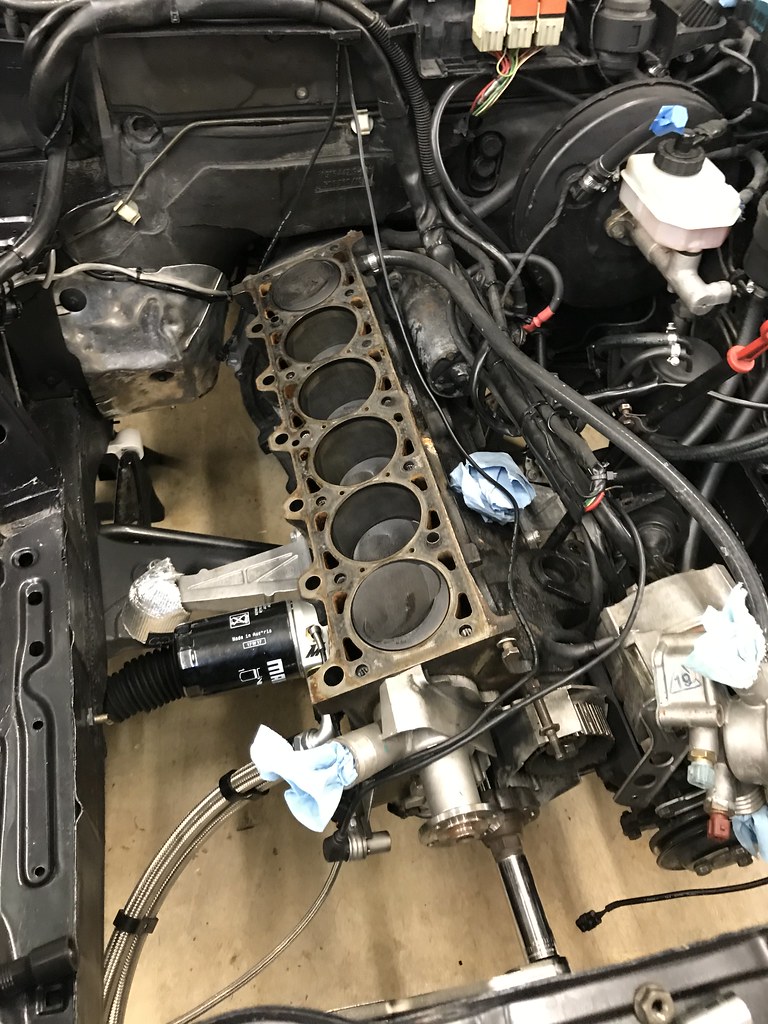
Started disassembly:
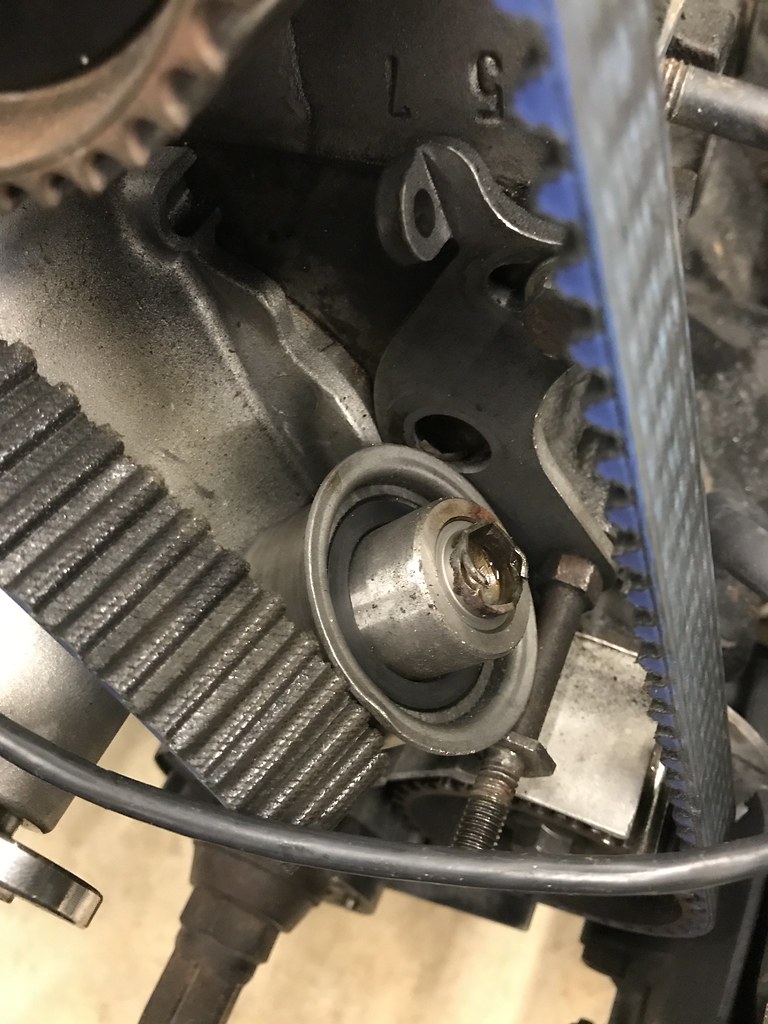
Put a little pressure on the tensioner to release the timing belt and it sheared right off. This no doubt would have failed eventually. It was a cheap Uro part. Learned my lesson there... the new one is OEM.
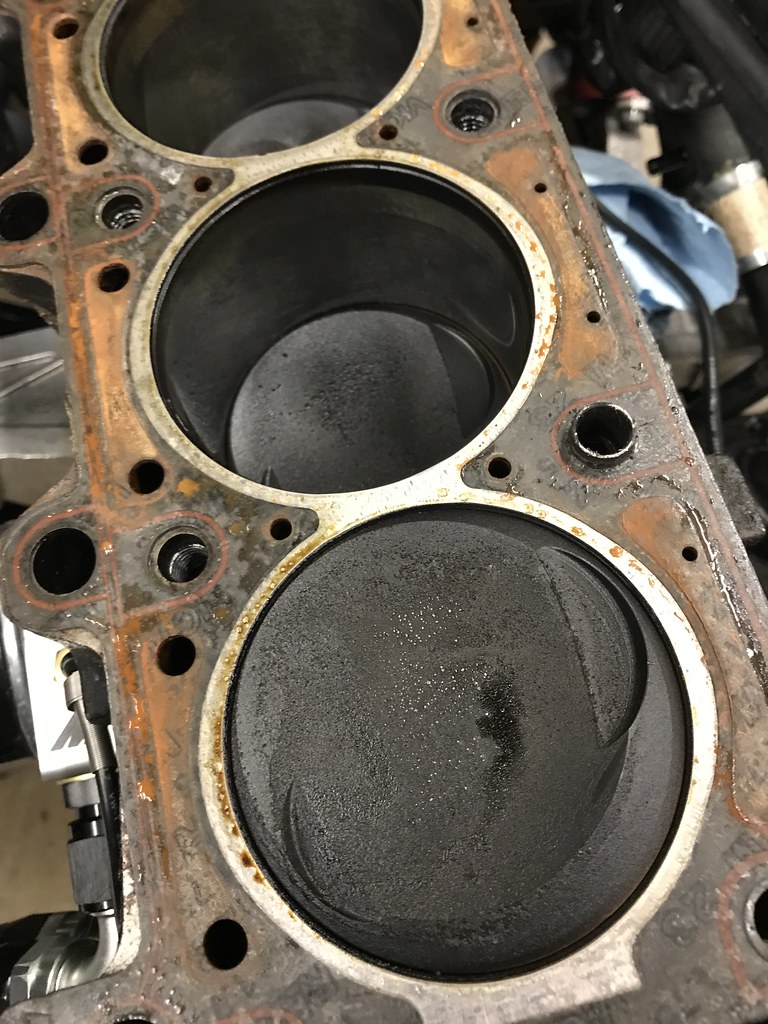
Decent amount of carbon build up on the pistons and the intake valves. Not sure if it will help much, but I am going to add a catch can to the VC breather when I re-assemble.

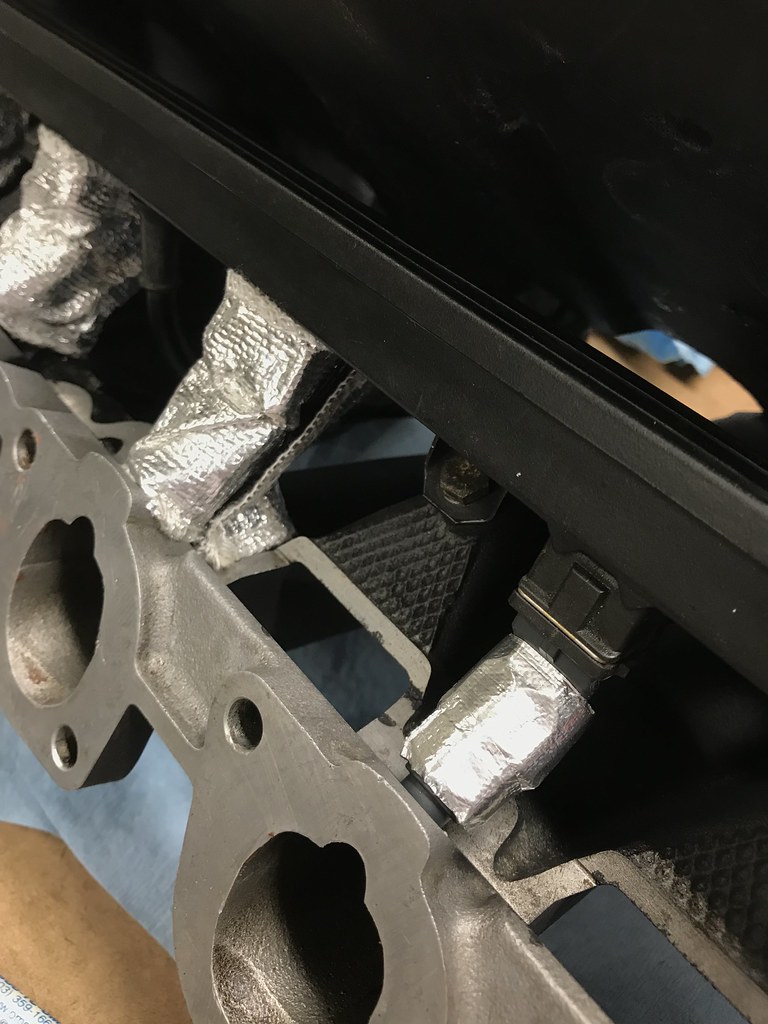
My tuner (@varg here on r3v) and I have surmised that my running rich when the car is extremely might be fuel injector heat soak. After trying soooo many other things, this is another ditch attempt at fixing that. I have wrapped the injectors and fuel rail in DEI heat wrap.


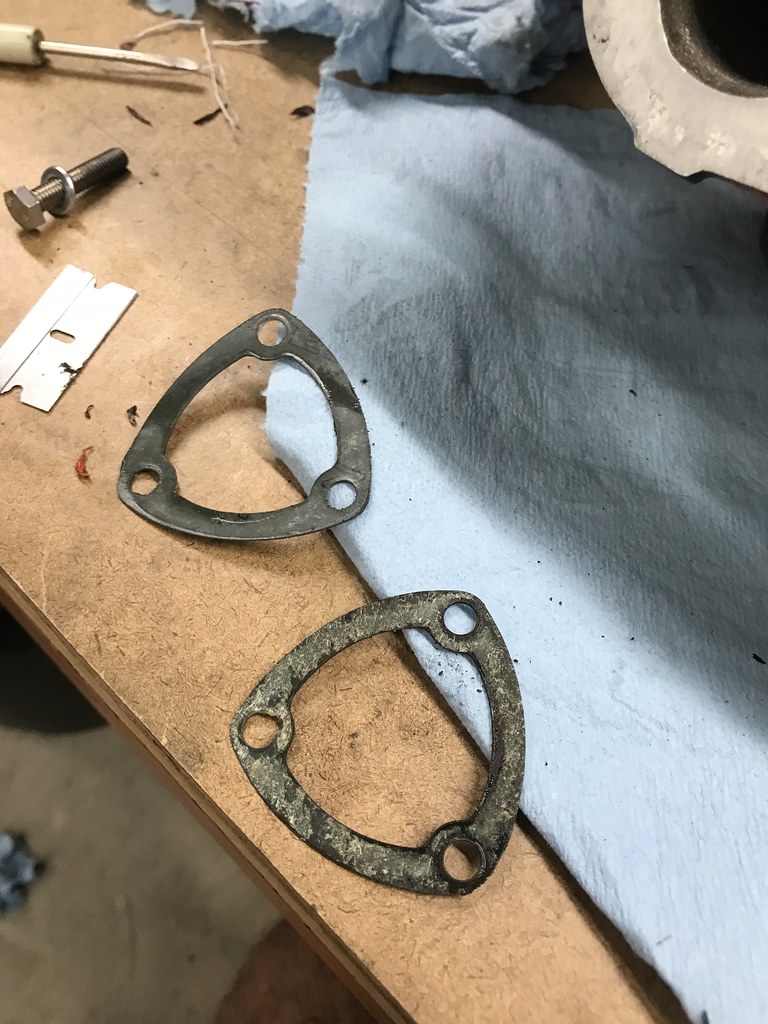
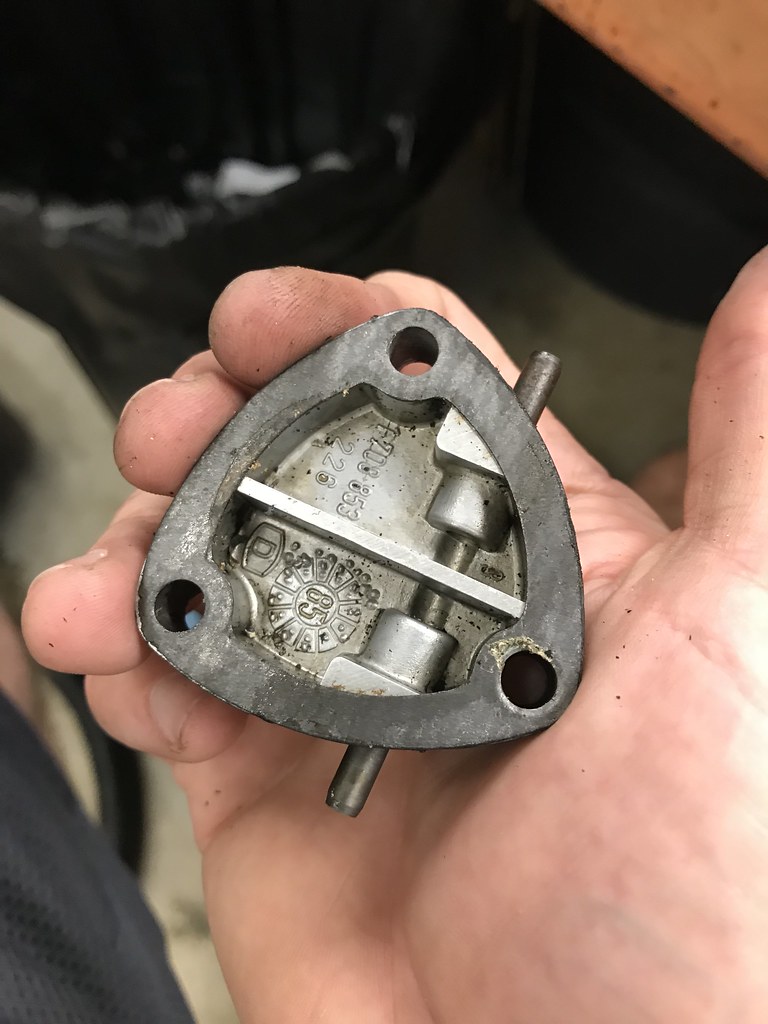
When working on the intake manifold, stupid me realized that I had 2 gaskets on the vacuum port on the VC side of the IM. Doh. One was really stuck on there, it looked like it was part of the cap.
Headers and mid pipe back from Jet Hot:

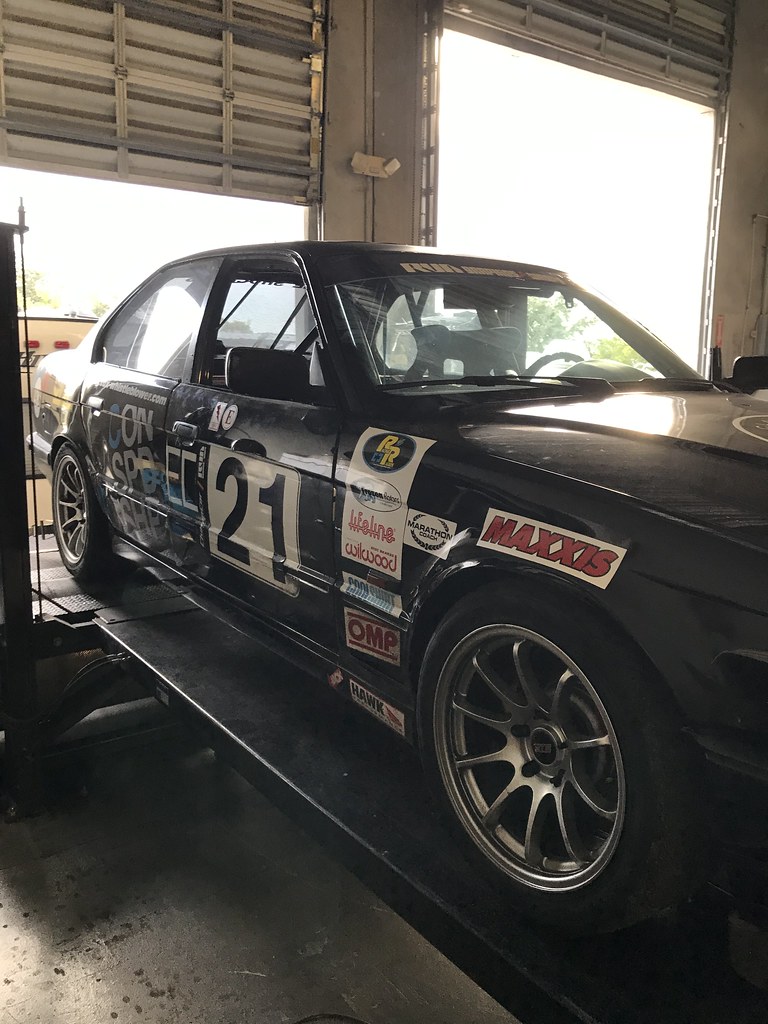
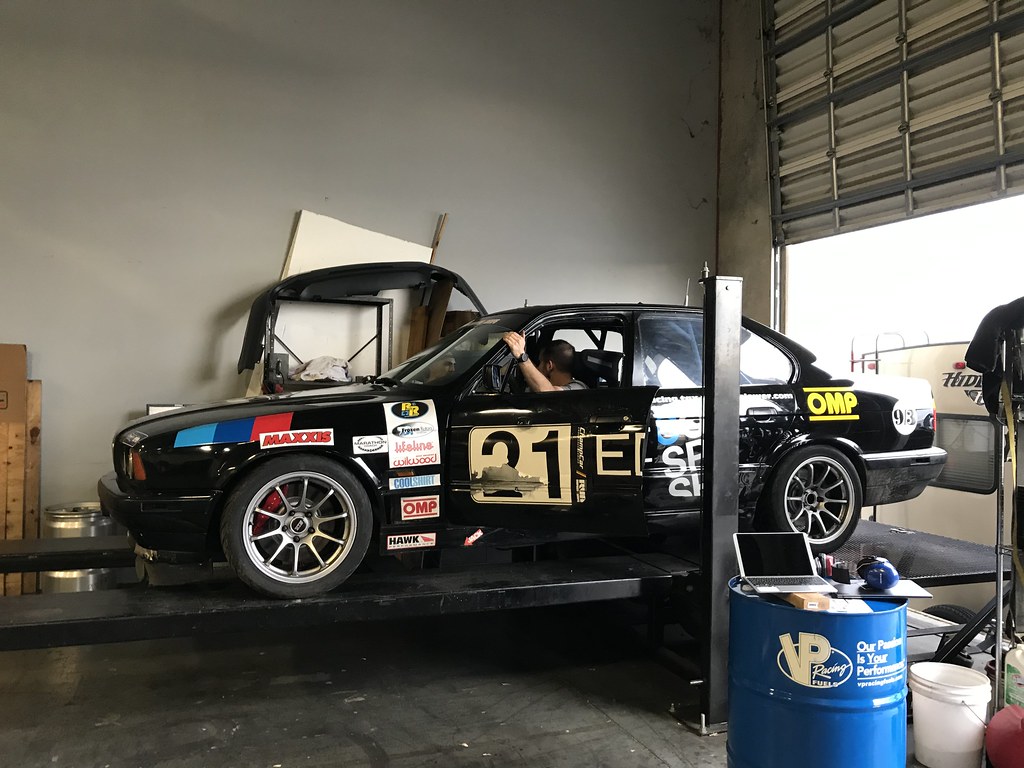
Took an afternoon to help the Condor Speed Shop E34 endurance car get dyno tuned. It is running Speeduino, pretty cool. Car made good numbers. The dyno was borrowed from Performance Tech, an insane SFL race shop that races IMSA. Got to see a variety of LMP cars, one of which is racing at Daytona this very weekend!

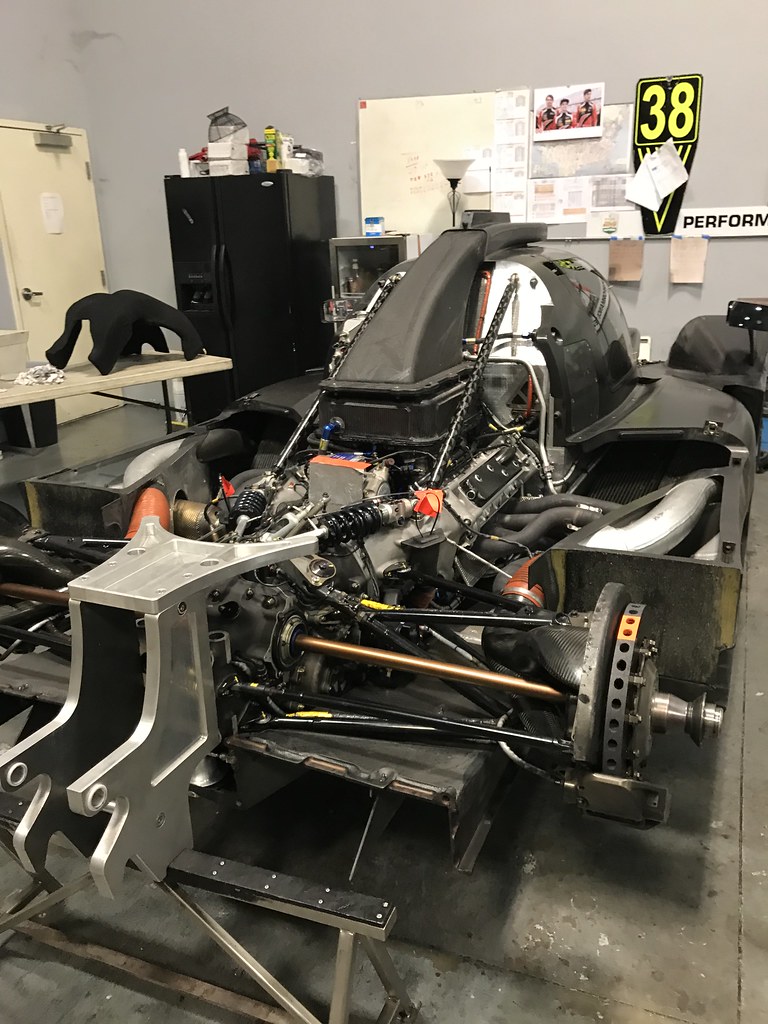

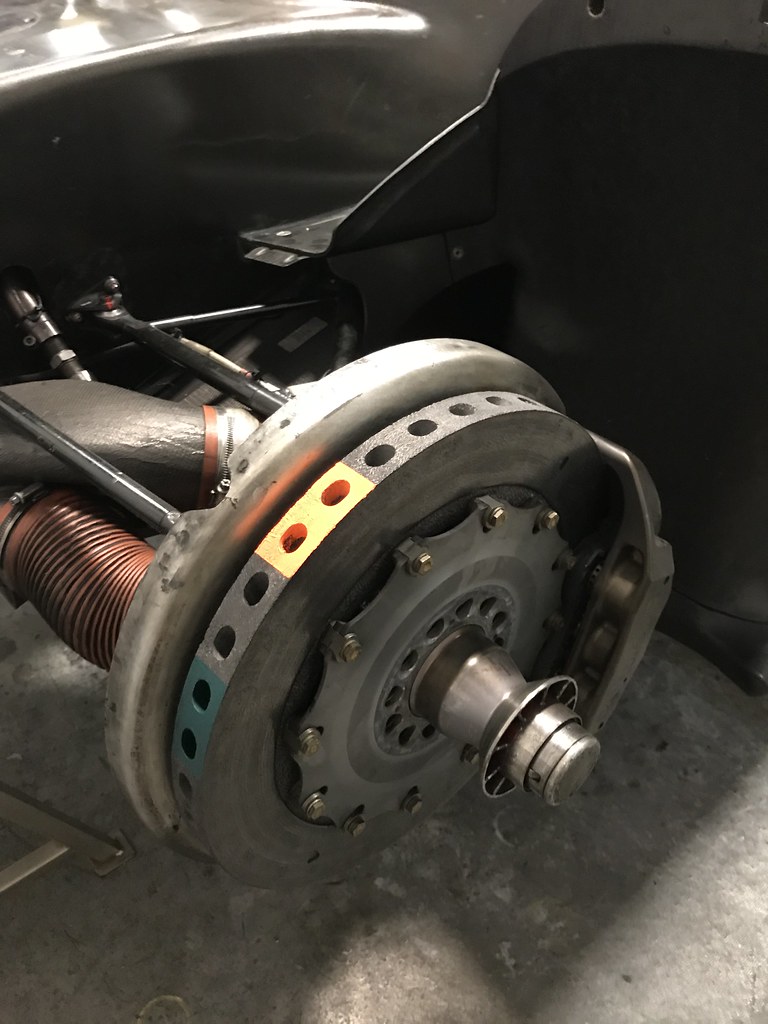
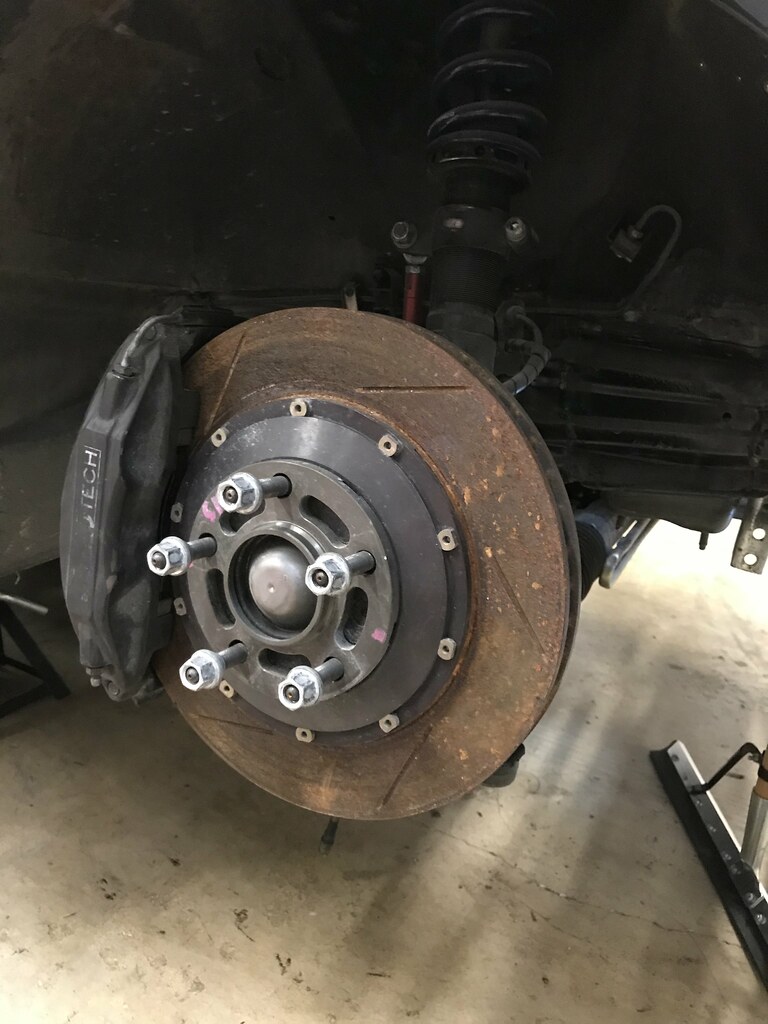
$40,000 brake job. Pictures don't do justice just how huge these are.
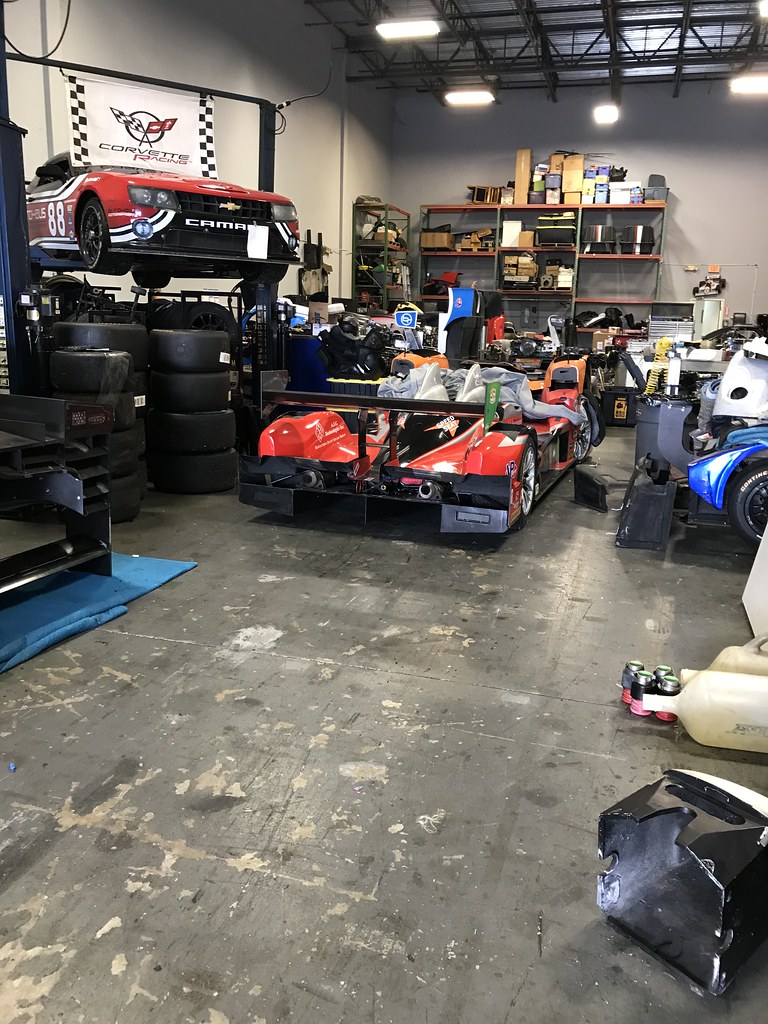
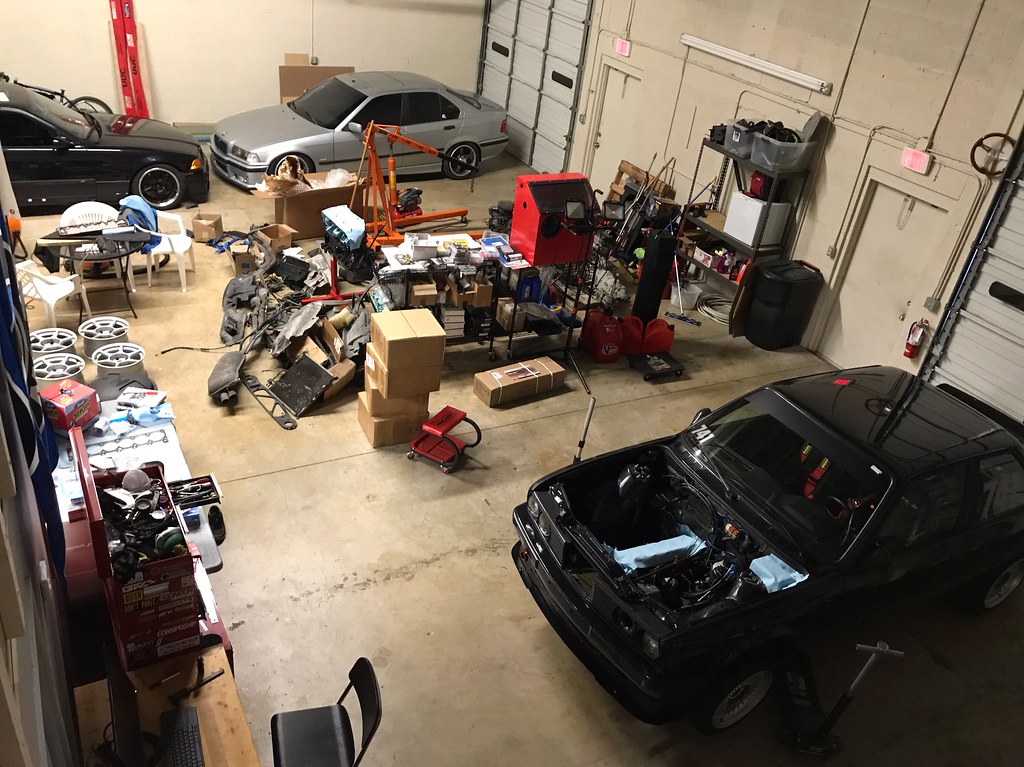
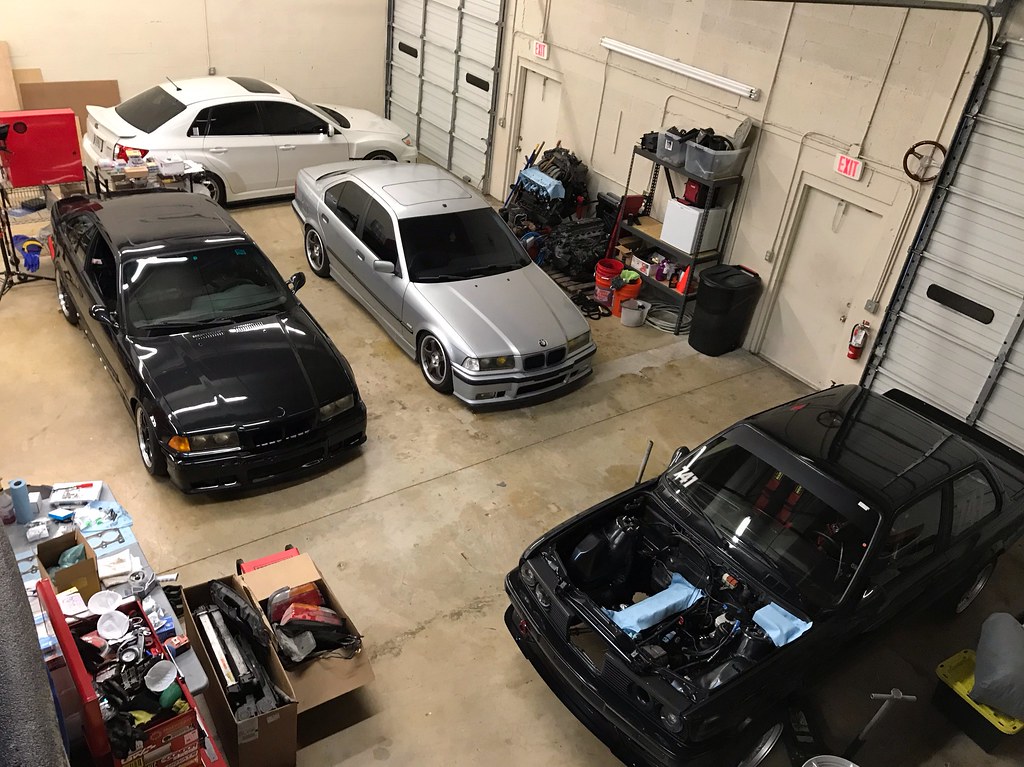
Then... I did a thing.
Then... a friend did a thing (the silver one). Shop got full again, fast.
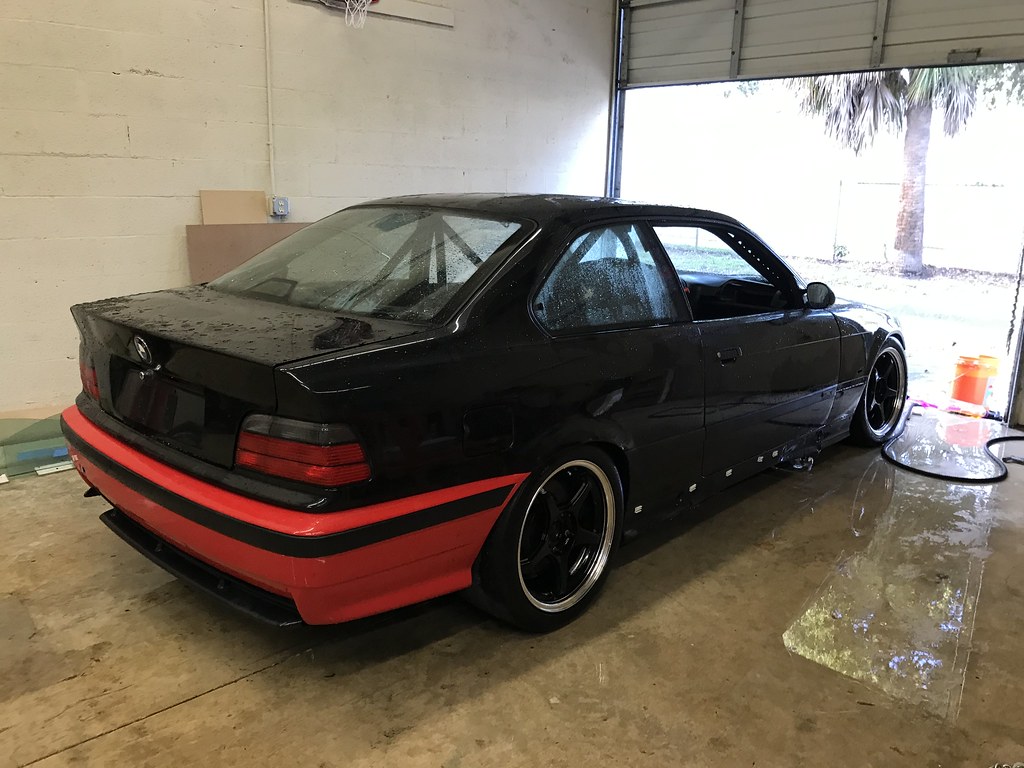
Washed the E36 and started assessing it:
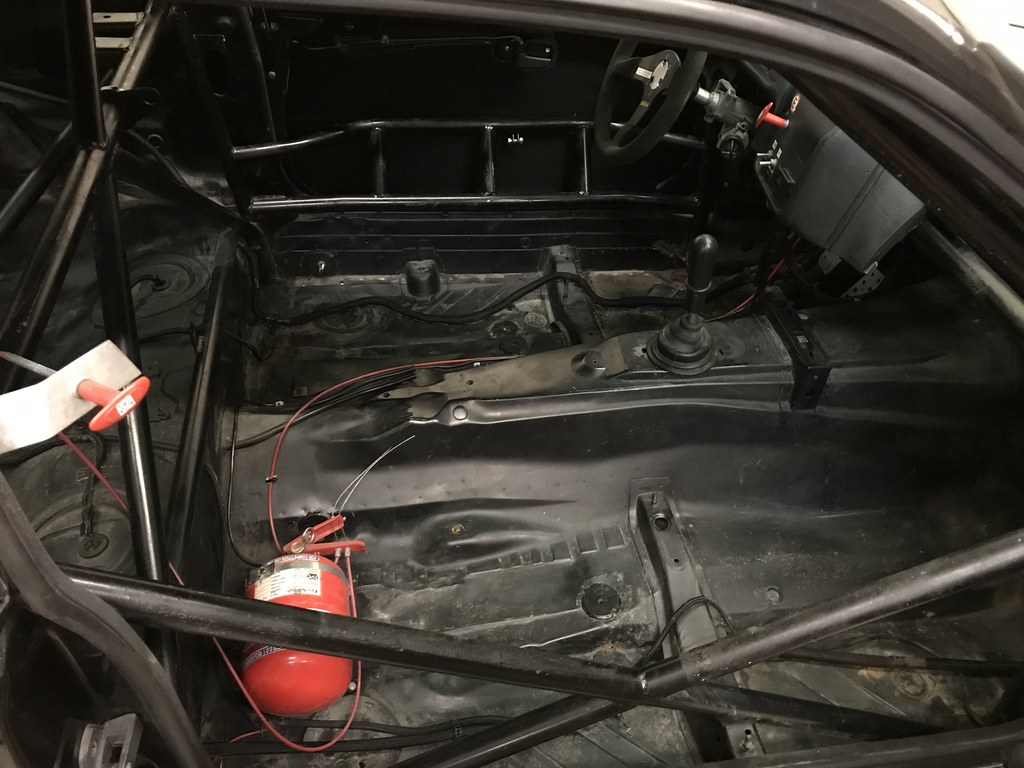
Tore out of a ton of wiring from an outdated data acquisition system that was in the car, and it was starting to look a little better.
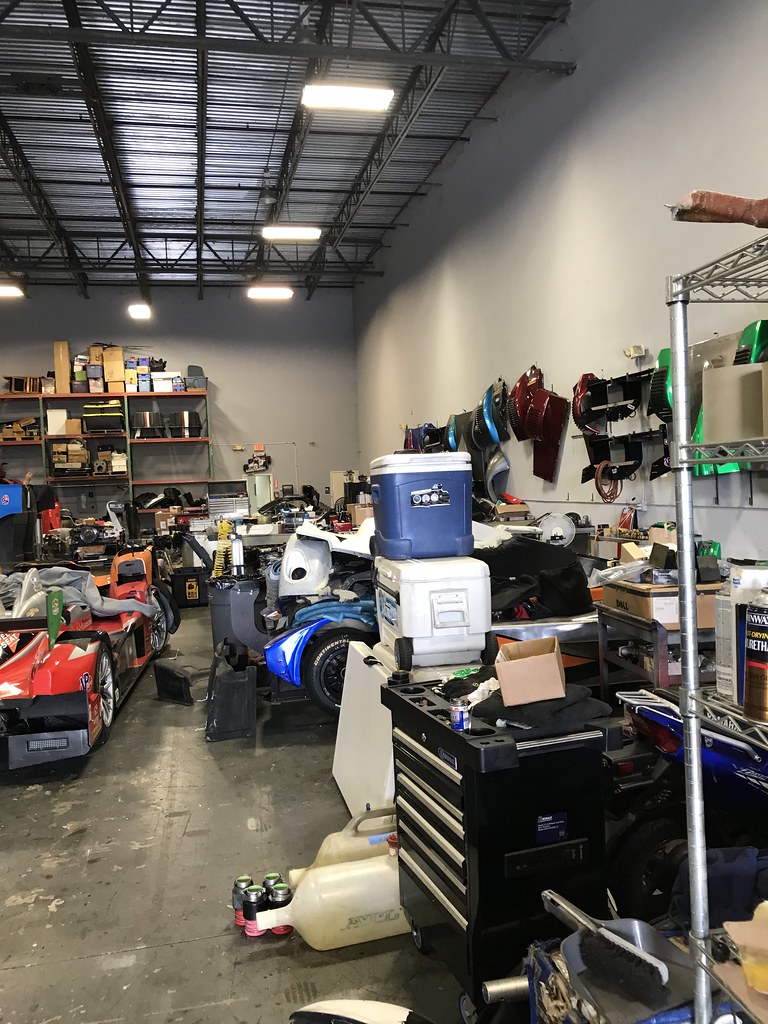
We organized and cleaned up the shop:
Picked up some 15x8 ET22 Kosei K1's for the E30. Going to run these on the track with Spec E30 take-off slicks.

Since I bought the E30 from the original owner and it had every record/receipt since day one, I have kept up with that:

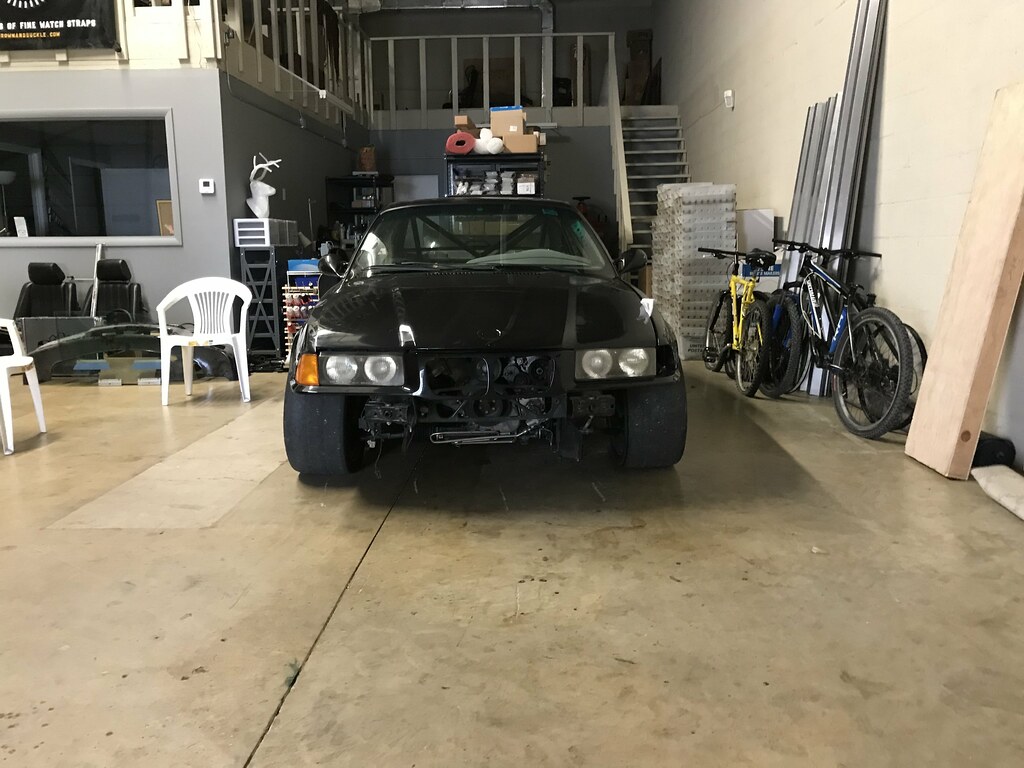
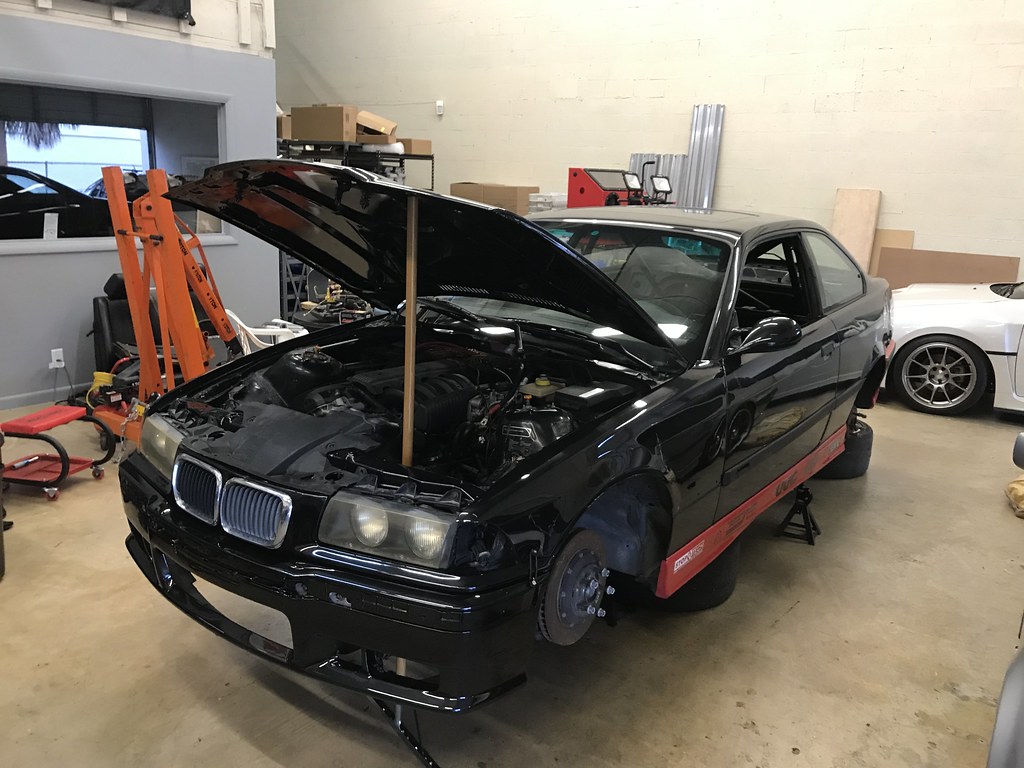
So a little bit more info about the E36. A friend of a friend had it in his race shop for several years. He was going to re-build it and race it, but started racing Mustang's in American Iron instead. It is *supposedly* a Bimmerworld-built car. It has definitely been ridden hard and hung up wet. I got it for a song. Plan was to part it out, which I may still do, but I'm going to see if I can get it up and running on a tight budget. If so, I might keep it for a while and learn how to drift with it. I've always wanted to learn how to drift, but I couldn't bring myself to enter an event with my E30.
The E36 has a very nice roll cage, tied in to 4pts of the rear subframe, braced in 2 positions on each side of the front strut towers, NASCAR door bar, SPA fire suppression system, built diff with Rogue finned diff cover, solid aluminum AKG bushings through, AST 5100's with Hyperco springs, true coilover in the rear, Vorshlag camber plates, Stoptech 4 pots in the front. Car came with a lot of spares, 2x M52's, 1x S50, and 1x ZF tranny.
The S50 looks pretty beat, and there is known-running, low mile M52 in the car right now, so I am going to wire that up and get it running with the M52 since it will be much easier and cheaper.
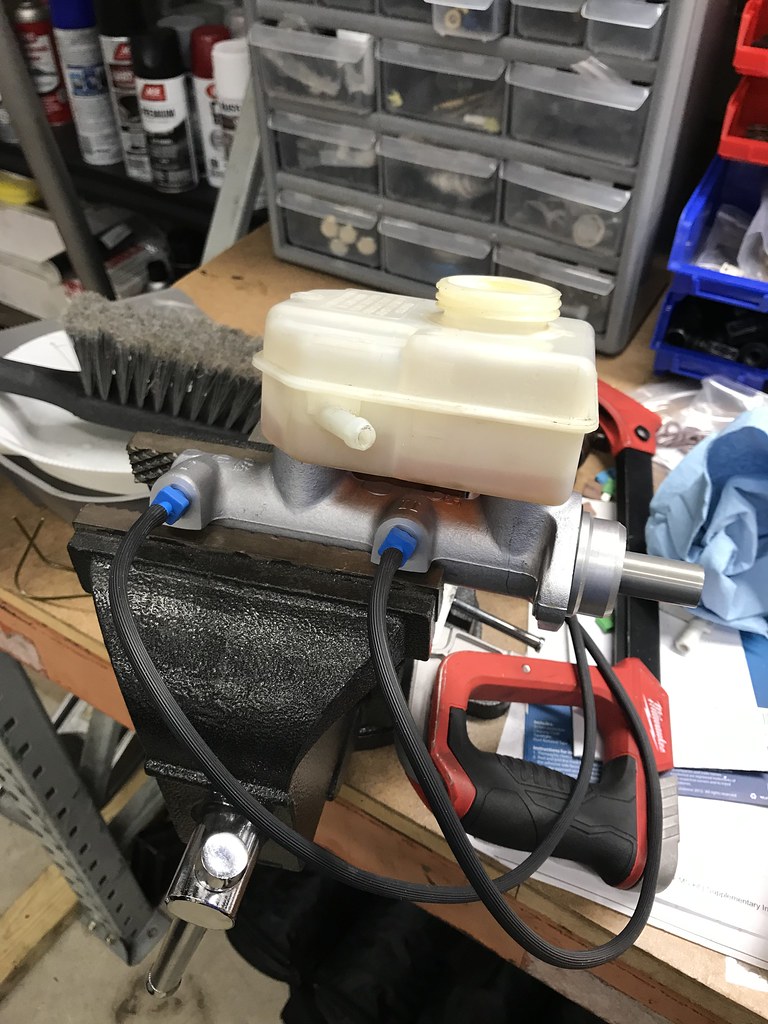
On the E30 front, I have a new 25mm Master Cylinder to install. Once the head comes back next week, I have everything I need to start re-assembly. I hope to have it back on the track for the NASA season opener in February at Homestead.
Until next time...Last edited by Digitalwave; 11-07-2022, 01:10 PM.Comment
-
Finally making some progress!
Still lending a hand to Curtis in tuning the Condor Speed Shop E34 endurance race car. Finally figured out that the car is out of injector duty cycle... explains the momentary hesitation up top.

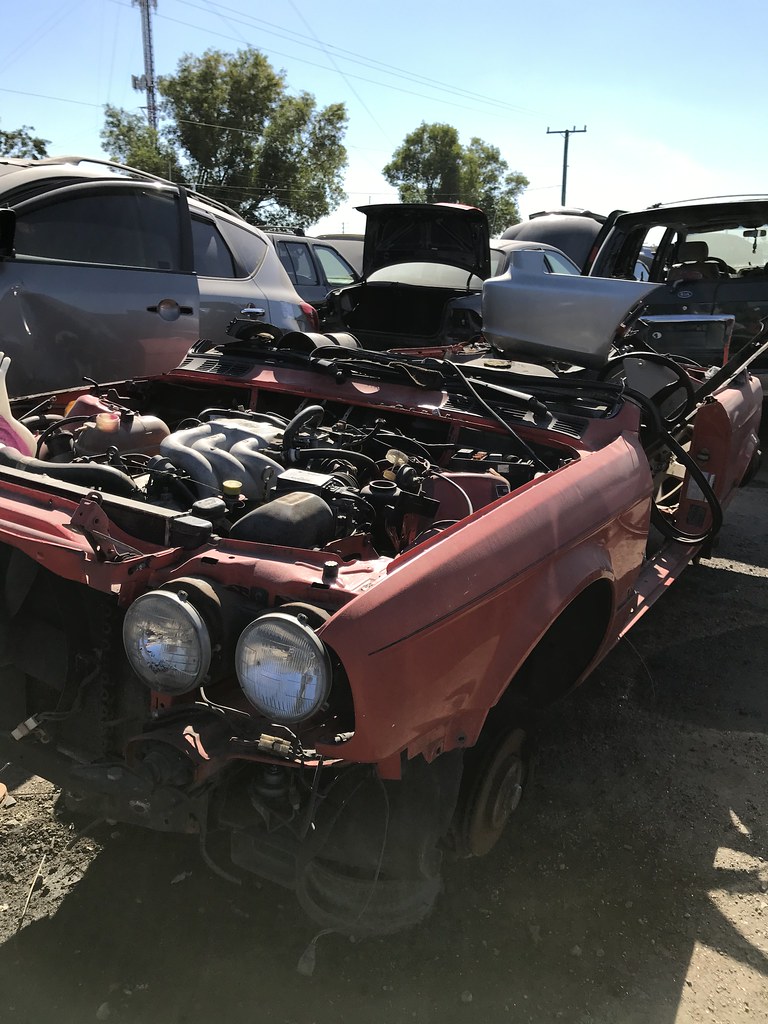
Saw an '84 henna car in the junkyard. Car wasn't even in an accident. Sad to see. Someone cut the roof off, so I am guessing it was a slick top car.
Got some Hoosier take-offs for free at the track, they've got a weekend or two left in them. 245/40-17 for the E36 and 205/50-15 for the E30.

And finally, got some good work in on the E30 this week. The head is finally coming back together. I cleaned the pistons and block, and I clayed the piston to head and piston to valve clearance since the head was decked. Both were safe and in spec, but next time the head is decked I am going to need to go up to the +0.3mm head gasket.


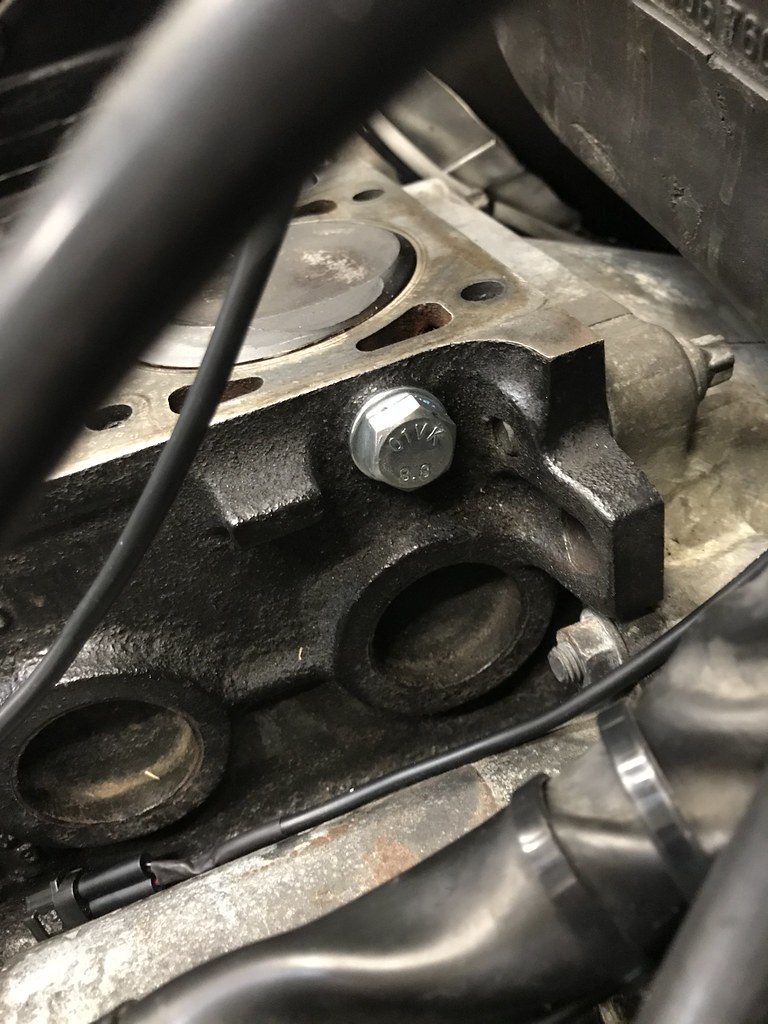
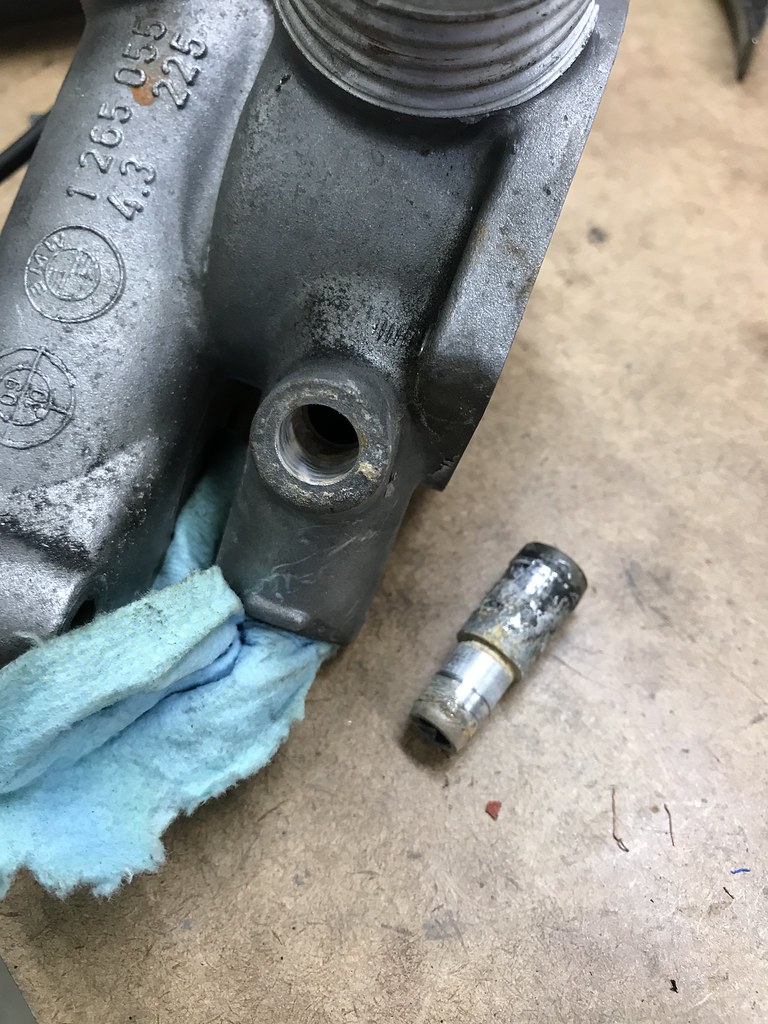
In order to simplify the cooling system even further, I got rid of the line from the block back to the thermostat housing that previously looped into the throttle body heater. I had already deleting the t-body heater, but was still running the line. M12x1.5 bolt in the block, and I tapped the t-stat housing for an M12x1.5 stud to close the port.


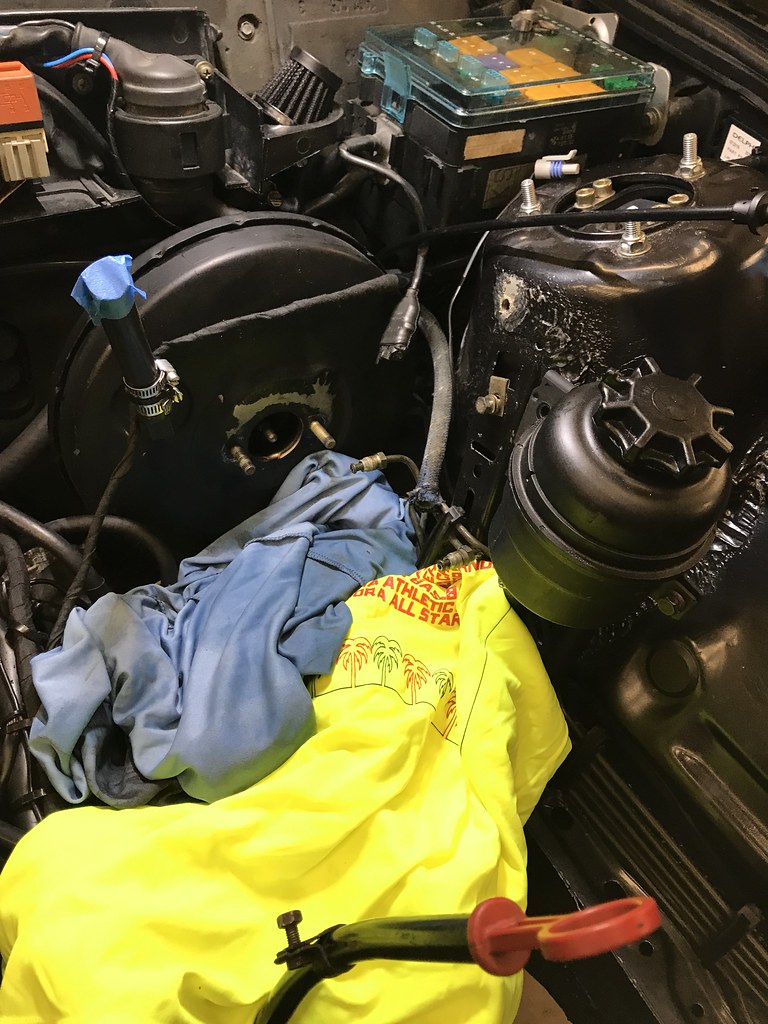
Install the new E32 25mm master cylinder. Made a huge mess of brake fluid everywhere. I bench bled the MC which was well worth it.

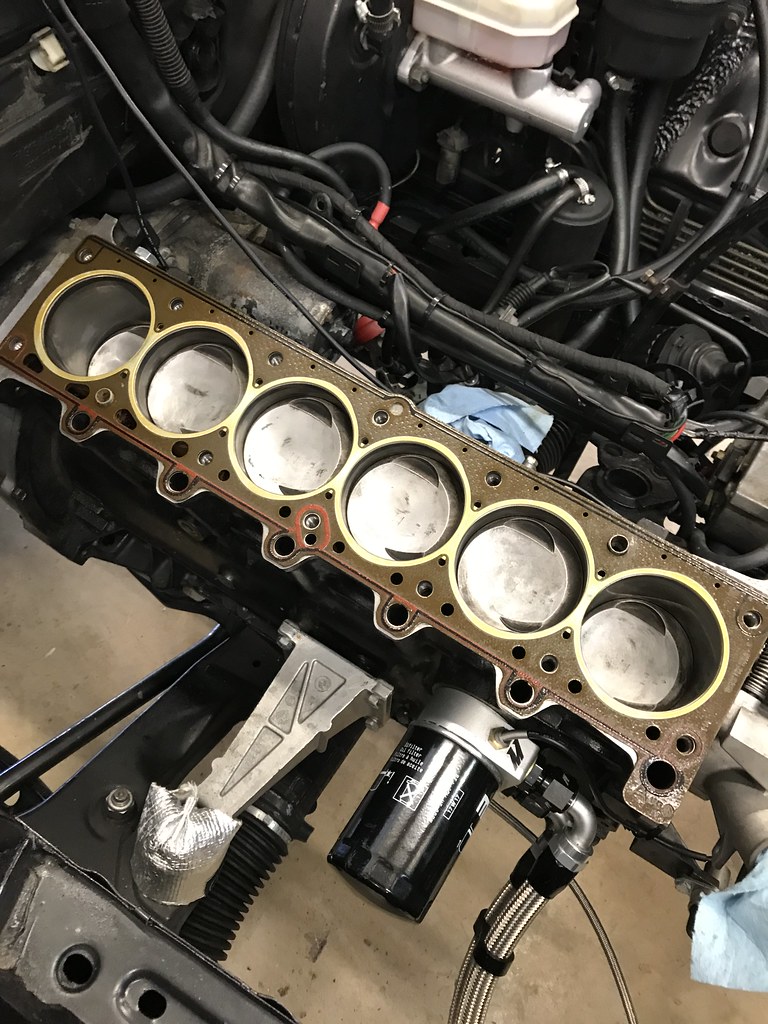
Deck prepped and ready for the new gasket. I initially cleaned the head bolt holes with brake clean and compressed air and thought that would be enough. After reading ARP head stud install tips, I chased the threads and I am glad that I did. They were much more dirty than I realized. I chased them twice and brake cleaned/blew them out twice. The ARP's installed like a breeze.
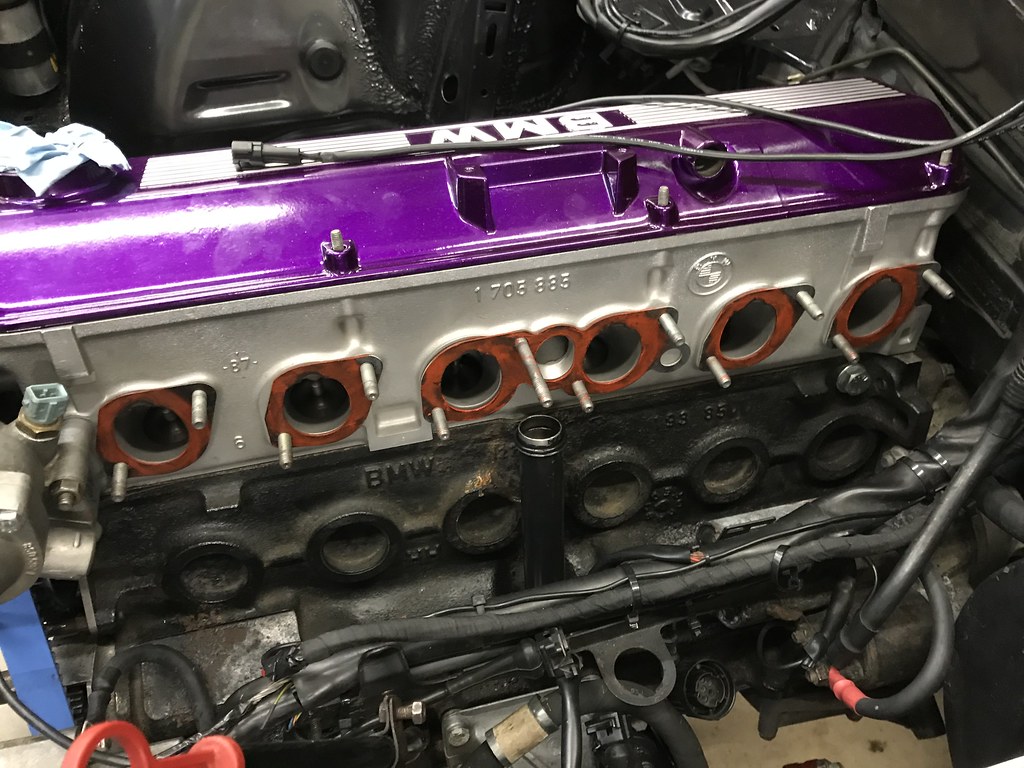
OEM head gasket used:
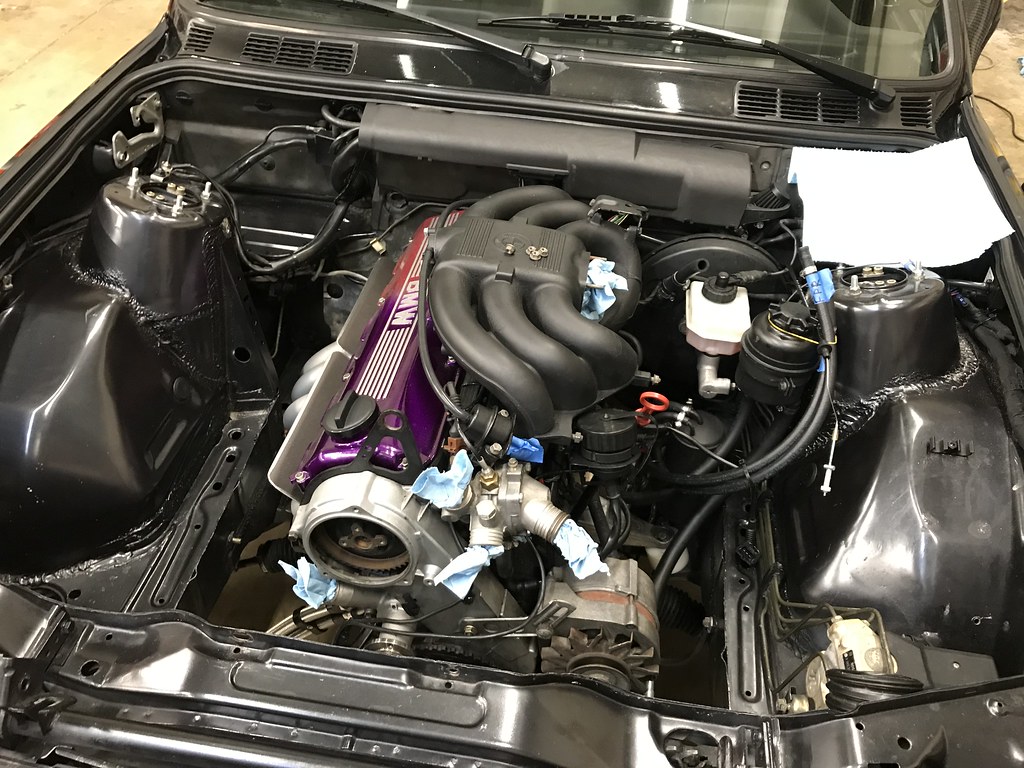
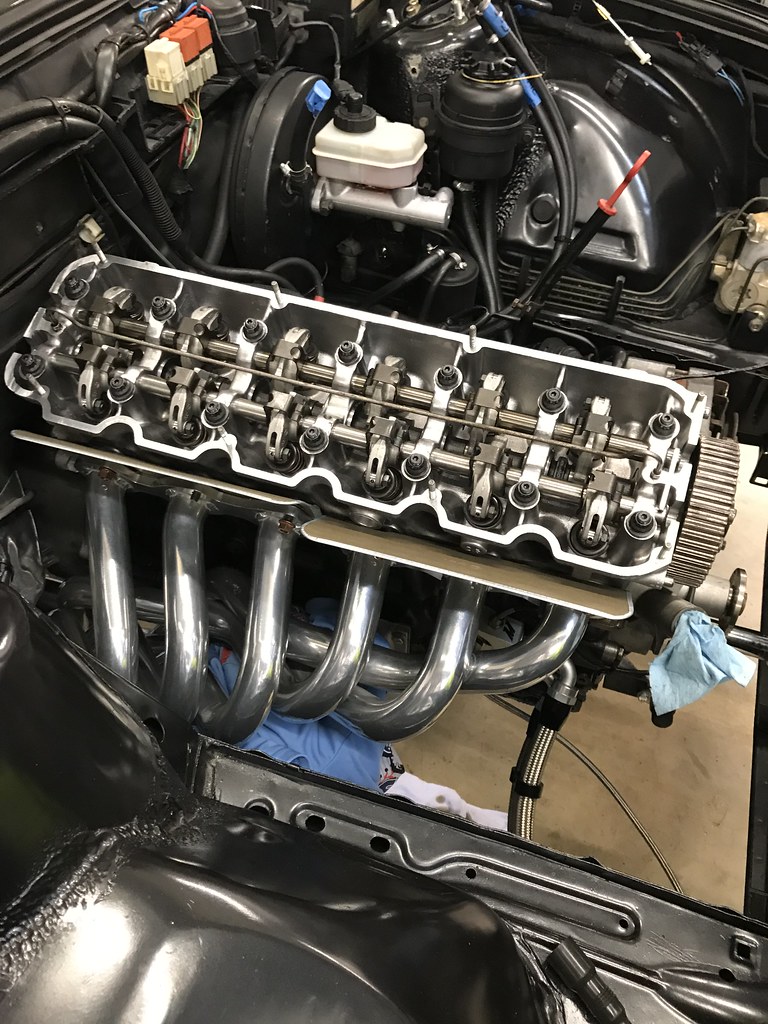
I had previously only ever installed these headers with the engine out of the car. I had not realized that they simply cannot be installed in the car with the head bolted on. The runners for cylinders 4-6 hit the frame rail and won't pass the exhaust studs. So after torquing the head on, I had to loosen and tilt the head to get the headers on. Live and learn (and glad I had ARPs so I could reuse them).

Finished the day with the head back on and torqued, and the headers on the studs but not fully bolted down yet. A productive day overall!
Lastly... parts back from the powdercoater. The purple looks super pink in this photo, but it's more of a plum purple in person (and in lower light). Gold metallic flake added in the clear. I'll get better photos when they are in the engine bay.
Comment
-

This sensor is before the thermostat right? How accurate is it when you have tuner studio up?
I have my gauge's sensor in the hose right after the thermostat and it's a 10-15*F cooler difference in tunerstudio.
1991 325iS turbo

Comment
-
Theoretically when the thermostat is opened this thermistor is separated from the other 2 (gauge cluster and ECU), however the reading from mine never differs more than 2* F from the ECU thermistor that Megasquirt sees. I'd imagine it's partly because of the hole in the thermostat housing that allows coolant to pass between the two passages even when the thermostat is open and blocking that port between the two. If yours are that far apart, it could be an issue with one of the thermistors, or the calibration of the thermistor in TunerStudio.Comment
-
Any more information on that oil cooler setup? The Mishimoto one? I've wanted to change mine for a long while now and this is the first time I'm seeing this.Comment
-
It's their universal 19 row kit and sandwich plate. I think I used the 3ft and 4ft braided lines, but I don't recall. Mishimoto braided oil lines are -10AN but they are sized closer to -12, so standard fittings don't work. I had to buy an extra 90* below from them directly to make it work the way I routed it. The lines go through the undertray in the stock oil cooler line location, so I didn't have to cut anything.Comment
-
Man this is a great thread. Lots of inspiration here! Keep it up dude!
Comment
-
This seems straight forward enough. Kind of what I was thinking it was. In the 325IX this whole area is a complete clusterfuck in my opinion. Every oil change dumps oil all over the mount and it's simply just in an awful spot for changing the oil after the car is hot. This might be an option to remedy that, plus deal with an AN line oil cooler at the same time.
Thanks for always having the coolest shit on your e30. Always a great source of information and ideas.Comment
-
Thanks for the kind words guys.
I have never worked on a 325ix, but on all of the cars that have the oil filter rotated under the headers, they are a pain to do oil changes on. I like the sandwich plate for getting rid of that alone.Comment
-
Is it about time for you to update your signature?How to remove, install or convert to pop out windows
http://www.r3vlimited.com/board/showthread.php?t=297611
Could be better, could be worse.Comment
-
Dude, This is seriously impressive. The attention to detail is awesome to see. I think you've just changed my mind on the direction I want to take my e30. Looking forward to more updates.
Comment
-
Thanks everyone!
Got some work done the other night. The headers are bolted up. Put on the timing belt and verified the timing at least 5 times. Installed the thermostat housing. Installed the intake manifold. Very thin smear of grey RTV on the thermostat housing gasket, and red RTV on the intake manifold gaskets. Probably not necessary, but I have a habit of doing this.


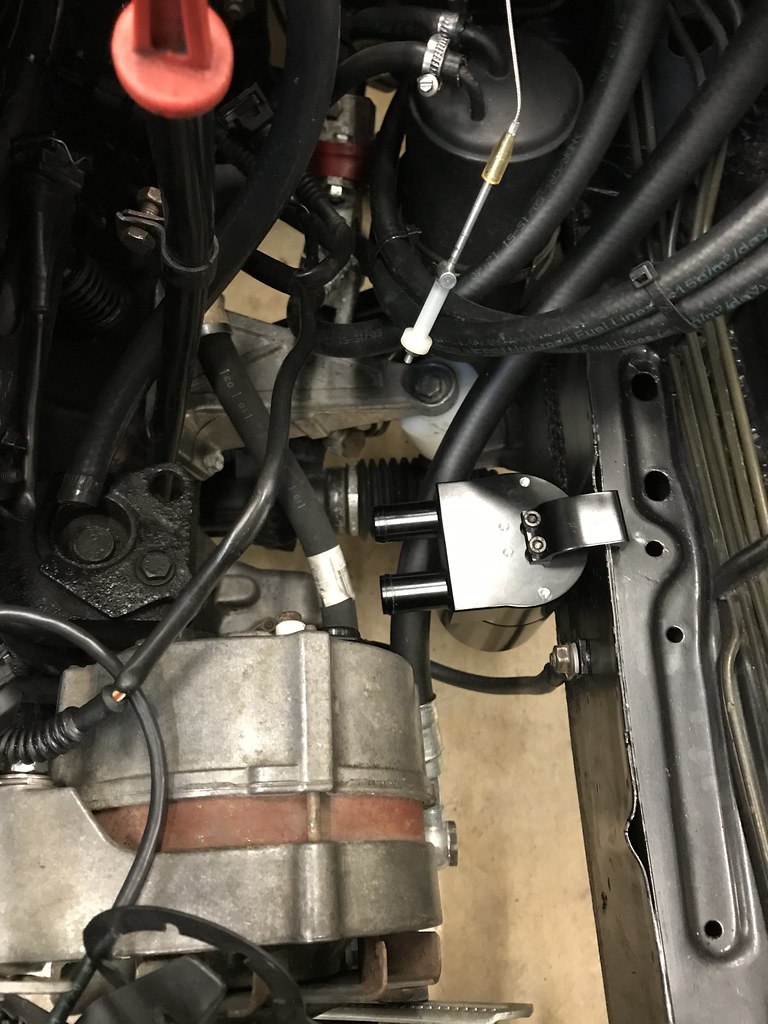
I started messing around with the mounting location for my new oil catch can. I think this spot is going to work well. It's out of the way, fairly hidden, and can be accessed from underneath the car easily to drain it. This catch can seems fairly nice. It's the same one that Burger Tuning sells for $150+, can be found on Amazon for about $30. It will be plumbed in-line from the valve cover breather to the throttle body.
Comment
-
can you share what silicone intake boot that is?Comment
-

Comment