-
2001 Titaniumsilber 540i Sport 6-Speed
1990 Diamantschwarz Alpha-N 2.5L ///M3
1986 Alpinweiss 325e M50B25 (R.I.P.)
-Talk to me when more sound comes from the induction than from the exhaust...
-Argentina........lo mas grande que hay.

-
Josh, how is your rear valance going? I fit mine on today, and if the weather holds out for tommorow, I will hopefully be welding it on and painting. I didn't realize quite what was involved on fitting the valance correctly. I wanted to keep the side mounts for the plastic bumper, but that isn't in the cards. I may try to weld them on though.Comment
-
Not tryin to jump on ya josh...but here is a pic of a rough mockup.

if you need help IM me.Comment
-
nice work, looking forward to see how it turns out. I agree though that the sidemarker delete really cleans the car up, and I think you'll regret it if you don't. looking at my euro car next to my u.s. car, i notice the little things and they really urk me
nice project thoughOriginally posted by bluntComment
-
How many times have I gone over this?
Euro trim is cool, but it's not high on the list of priorites. One of these days when I find a cheap set, and I feel like hacking another set down, I'll do it. FOr now, I like my all-red sidemarkers. Let it go.Comment
-
NIce project. I did mone not too long ago, but didnt go for the rear valance, even though the parts car had one. It looks like alot of work for the rear, but certainly will be worth it.Comment
-
Part VI: Primer means you're gettin' close...
Alright, today we started to primer a few areas of the rear bumper, rear trim, and the front bumper. The front bumper had a couple of small spots of badly chipping paint, so we feather-edged them down and built up the areas with SEM high-build primer. We also did the same with the seam areas of the rear bumper and bumper trim, building up the areas where we sanded down the plastic epoxy and took out paint/bumper material with it.
As stated above, starting to primer the seam/sanded area of the rear bumper. I don't see a seam, do you see a seam?

Here we see a seam, but it's pretty much gone now. We filled it up a lot more tonight, some more pictures will come tomorrow when we've sanded some. The globby-ness you see in the trim area is plastic epoxy, left thick for 2 reasons. 1, you'll never see it, and 2, it gives extra strength to the bonded bumper pieces being left on the surface:

Top side of the front bumper lightly primered, the underside has a couple of areas that need it, also:

Rear trim piece. It looks a little orange-peeled in one area, there were some bubbles in a couple of shots that popped, but this stuff is so thick anyway, and we also did several more coats to fill up the lower area from sanding, so it will sand smooth, anyhow:

Rear trim piece that had the cracked corner. Fiberglassed, plastic welded, and covered in high build primer? Ain't cracked no more...

Front bumper, the damaged paint area was at the inside corner of the bumper, high build primer did it's job nicely, I HIGHLY reccomend it:

Parts piled up on the roof of Andrew's MGB-GT parts car, drying:

Damn, that's some mighty clean rebar!

Ok, you guys are going to love this. The rear bumper shocks and brackets on my rear bumper were quite rusty, so we needed to clean them up before installing them back onto my car. Andrew discovered on his MGB forum a method for removing rust from car parts by use of electrolosys. Basically, the parts are hung by wire from a steel plate suspended in a solution of hot water and Arm & Hammer washing soda. There is a steel plate that hangs and connect to the + on the charger and the part hangs in the water via wire, which connects to the - on the charger. The washing soda acts as an electrolyte in the water, and the electrical current actually reverses the plating process in the water, stripping off ALL rust from the parts and drawing it to the steel plate. Now this actually WORKS, it really does. We started the process at about 8:00 pm, went back to my house to watch a movie, and when we came back at about 10:30, a significant portion of the rust was gone from the parts.

The setup as described:

Hanging from the plate is the bracket, from the wire is the bumper shock. This is just one set, we'll do the other set tomorrow:

The cloudiness in the water is actually the parts fizzing in the charged solution:

For this shot, we unplugged the batter charger, and plugged it back in, so we could get a pic of the reaction starting again. You can see the water fizzing up off of the flange of the bumper shock. Pretty damn cool!
 Last edited by Jand3rson; 10-14-2006, 11:27 PM.
Comment
-
Comment
-
Well, we had a bit of a setback today. It turns out that we're not going to end up going with the OEM rear apron. We put it up against the car to start test fitting, and there are HUGE gaps at the corners of the apron where it rounds the corner. We discoverd that most people were right, the only real proper way we're going to get it to work is to weld it. We're painting this weekend, which is probably going to be the last decent weather weekend before harsh fall/winter starts in, and there's no way we could have it ready to paint by then. So we're going ahead with the rest of the project and I'll deal with a rear apron later. But it's really not a big deal, I was actually starting to think about if I'm going to all this trouble, I'd almost rather go with something aftermarket like a Hartge, ACS or RD, something more aggressive/stylish looking, and something that would also require not much more than fabbing up some brackets.
But at any rate, the project plugs ahead. We're almost finsihed with using the filling primer to fill up the low areas, and I spent most of the day today sanding and priming, sanding and priming. Later this week, I'll be finishing up and completely priming the entire bumpers, as well as getting the front valence primed and ready for paint. We've got a couple of very tiny areas that are going to need a little dab of Bondo here and there, where Andy tagged the bumper skin with the grinding wheel while removing the excess epoxy, but on primer it will work fine.
What I wanted to show you all today is the results of the eletrolosys method of removing the rust from my very rusted rear bumper shocks and brackets. Check this out:
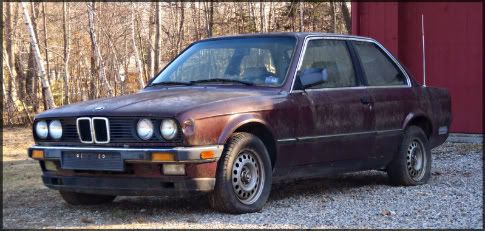
This is what the bumper shock/bracket assembly looked like going into the tub:

This is the bumper shock/bracket assembly after spending several hours in the tub:

That is literally after taking it out, and blowing it off with the air compressor. The remaining rust blew off like dry old wallpaper. We then painted it with Rustoleum, and it's ready to go back on the car.
This is the tub that the procedure was done in, after the first shock/bracket:

Comment
-
so did you just use something like a jump pack to for the current??? or car/ lawn mower battery??? I am going to have to give this a shot, but I am going to have to get a big tube for my subframe and trailing arms and possibly driveshaftComment
-
Did your apron get streched in the removal process? Mine matched up no problem, matches the factory weld lines and everything. Did you make sure trim out all the inner metal lines?
Ironically.. After all the work I did to install my rear apron.. I am considering going with a different rear apron now because my Zender kit and iS lip make the car look low in the front and middle and still kind of high in the back in comparison. Probably end up going with a Infinity rear apron because it's the only one that matches my Zender sides well enough.
Overall looking good.. Love the rust removal tips.
Here's a link for you Euro Trim fanatics who want to do it yourself.
Comment
-
It's funny you should mention that, I was actually starting to think the same thing. I'm going to be getting a Rieger Infinity front lip instead of an iS lip, and I'll also be getting iS sport sideskirts, and once I've got those installed, I think that even with the OEM rear apron, the rear still might look too high.Comment


Comment