
-
-
When I tore don my engine one of my chain ramps was cracked. It was the expensive one as well. Fortunately - I had been *given* a spare m42 which a local had run out of oil. That engine had a new-style chain ramp that was in excellent shape. Here is a photo of it still installed in the spare engine.I also used the water pump from the spare (it was excellent shape) and the inner timing case because the one that came on the engine I bought was badly corroded in the water pump area. Didn't get any photos guys - sorry about that.
Comment
-
I sold the head from the spare to a local who badly needed one. Did a good deed and made $250. I hope I don't regret it - I had plans to port that head and install it down the road.
Comment
-
Reassembling the engine about a month ago now and I made a tool out of wood to help me time the cams. In the end the wood piece didn't hold the cams square enough so I finessed it bit by bit until the end pieces were dead level. Torques teh sprockets bolts to some ridiculously low setting. Instructions are on line - I won't go into it here unless someone wants me to.
Comment
-
Engine assembled ready for install.
I wire wheeled every bit of aluminum and then wrapped my headers. I had painted the block black a while ago already.
I used Hylomar on the paper gaskets but for the oil pa(s) I didn't use any gasket - just a bead of Loctite 5970. I befriended a BMW tech and he says thats all they use. Same stuff that Porsche sent me when I replaced the pan on my 996 several years ago. Also a dab of gasket maker type RTV where the twp profile gaskets meet . I hope it all holds without leaking but frankly I will be surprised if it doesn't. I haven't seen a whole lot of dry m42 out there.
Comment
-
I did a hillbilly flywheel resurfacing. Came out good. This is a single mass flywheel from a 318is without an air conditioner. I learned this - air conditioned m42 cars got dual mass but non A/C cars got single mass. They're pretty rare here in North America because we normally got A/C but it's the other way around in Europe. Clutches aren't easy to find but I found a good kit for $120 eventually Valeo I think it was. The single mass m42 flywheel is very different than the m20 flywheel - it has a big rim around the outside and the clutch sits inside that rim..It's heavier too I think - but hey it bolted right up without mods. Only got these photos guys - sorry I should have been more diligent.
Comment
-
Here we are last weekend on installation day. A couple of buddies helped out - took about an hour in the end...not counting planning.
Comment
-
And finally in the car.
I got a shop to prepare a spray can of paint matched to my colour (sable brown). Ground off the m10 airbox mount and painted the inner fender. Ihave the m42 mount that was cut froma parts car and plan to rivet it into place. I removed the mess under the intake and do not plan to reinstall the heat exchanger under my throttle body so the mount will need to be moved just a bit from the stock location.
Comment
-
Here's the part where I had to buy a new subframe because the m10 subframe doesn't work with m42 motor mounts. I had filed out my m10 subframe to make set of e36 mounts fit (thinking they were e30 mounts - thanks RockAuto) and once I realized this I decided to start fresh with a new correct subframe. Had to strip and paint teh new subframe and then drop the old one and wrench in teh new one. Four hours from start of prep to torqued own. The hoist helps a *LOT*.
Comment
-
I also started cleaning up the front brakes. I had bought a set of struts from a 325 because the m10 struts were smaller diameter and wouldn't work with the KGB gas shocks I had. Those struts came with brakes and I was very surprised to see that the calipers were identical to teh ones that were on my m10 even though the m10 used unvented rotors while the 325 rotors were vented.
Just yesterday I started cleaning up the calipers and decided that instead of painting them I would leave them bare metal with a coating of high temp clearcoat. Looks good I think.
Comment
-
So we are up to date.
Wiring is keeping me up at night, and the fuel pump situation a bit...other than that it's just more reassembly. Will try to roll it outside foor wash this weekend and take some pics now that the suspension is done and the weight is in the car.Comment
-
nice work! cool project. How are you solving the c101 connector?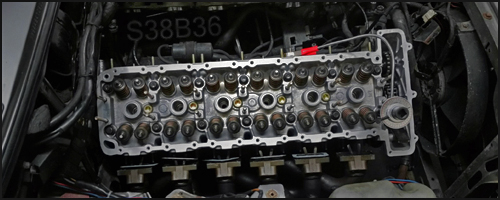 318iS Track Rat :nice: www.drive4corners.com
'86 325iX 3.1 Stroker Turbo '86 S38B36 325
No one makes this car anymore. The government won't allow them, normal people won't buy them. So it's up to us: the freaks, the weirdos, the informed. To buy them, to appreciate them, and most importantly, to drive them.Comment
-
That's a good question my man....I haven't gotten there yet. Fighting with the shift console at the moment. I bought a later style aluminum system but I don't think it's going to fit. I almost looks like the opening into the car is too far backward....Originally posted by downforce22 View Post
I can use my old sheet metal console but the holes where the rabbit ears bolt onto the trans aren't tapped on the m42 getrag 240 . It's going to be ugly to drill and tap them with the trans installed in the car. Yeesh.
Still doing my research, but it doesn't look good.Comment
-
Ok. Update is that I have a aluminum shift console from a 6 cylinder when of course I need one from an m42. I have located one and I'm back on track.
I finished installing my brakes, front and back, new rubber hoses pads, shoes, wheel cylinders... Re-using the rear drums, yes you heard right, I've left the old drum brakes. Long story, may be swapping to discs in the future, but I expect it will be fine. Bled them all today., plus the clutch system, I am one step closer to having a new car to drive.
So that brings us to wiring. I'm looking for a round female c101 plug so I can make a pigtail connector using the rectangular plug from my m10 loom , but nothing is jumping at me.
That's got me thinking of splicing the rectangular connector from my old m10 loom onto the new m42 loom. Why wouldn't I do this? I could then plug right into the fuse box.... Except
I see from the c101 wiki at e30zone.net that the motronic c101 has a bunch of pins that the jetronic c101 does not have... Including things like engine speed input, fuel rate input, speed signal to ECU, and switched power.... Which all seem prettty important.
There's a couple of things that I don't have that I don't think I need, like a check engine light an dynamic oil level, and for sure not ABS but can anyone explain what, why, how?
I have also heard that there are a few connections to be made behind the cluster, or under the dash....
I will keep digging of course, but if someone can point me in the right direction then that would be great.Comment
-
Dang - I see I didn't upload the photos after I washed the car. We all like photos...so
Comment
Comment