Announcement

Collapse
No announcement yet.

Thrifty S50's 1992 318i Vert OEM+ build

Collapse
X
 
  • Filter
  • Time
  • Show
Clear All
new posts

    Thrifty S50's 1992 318i Vert OEM+ build

    Hello r3v!


    I have been a long time bimmer nut and to give a quick history I started out 10 years ago in a 1987 325e 4/5 of which I sold to purchase a 98' E36 328i 4/5.


    Here is the only picture i have of that old E30 (next to the then new E36)


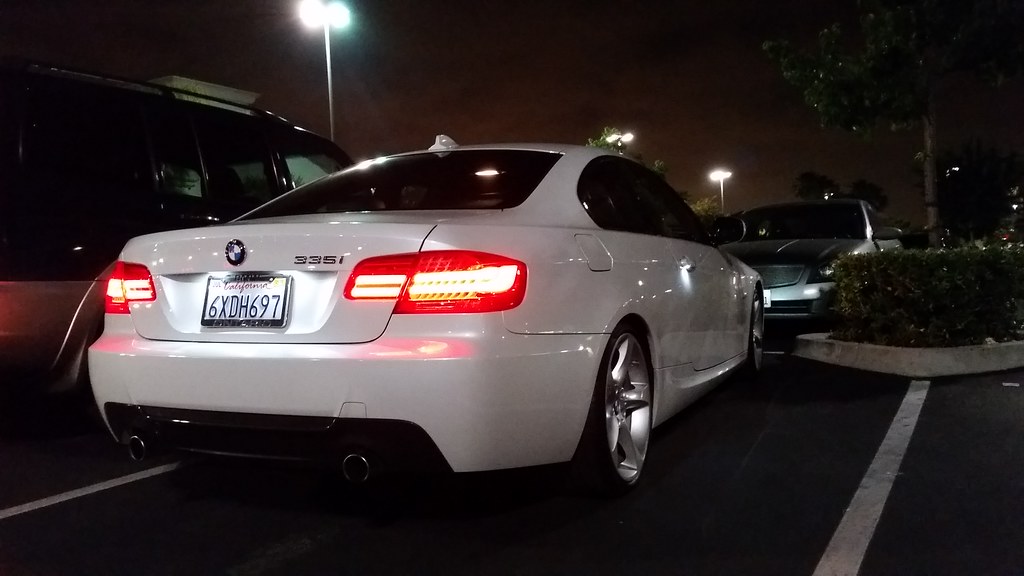
    Years later picked up an E92 335i


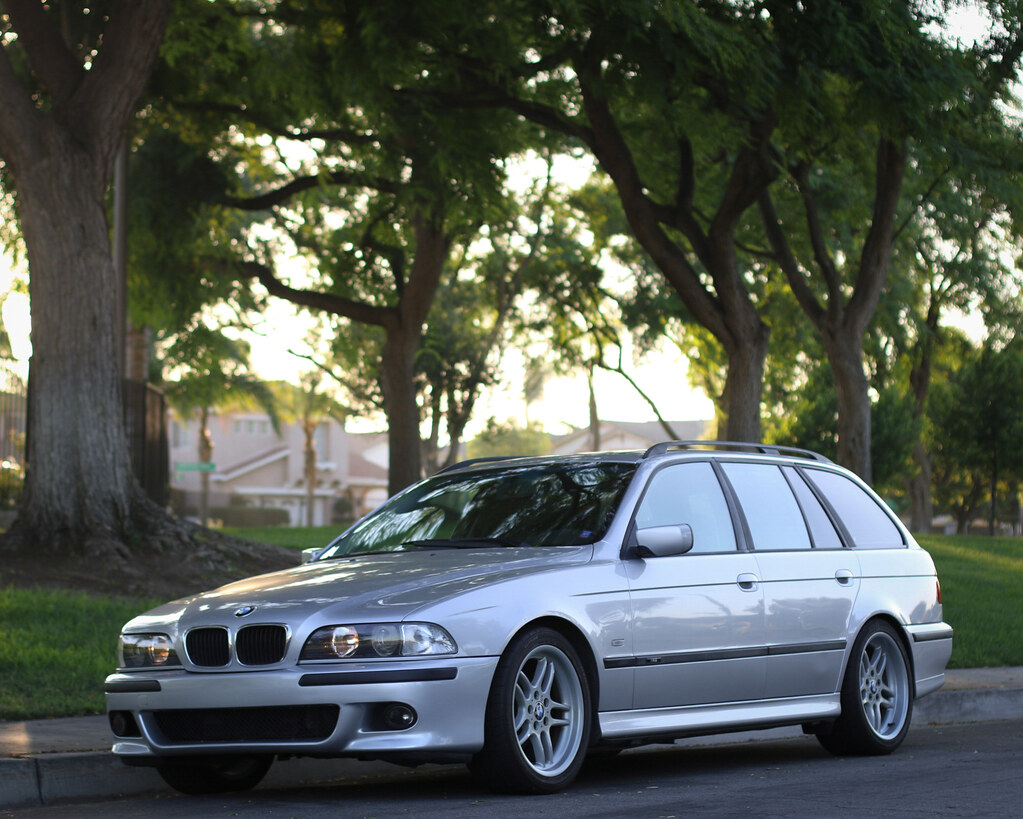
    Next hopped into a E39 Touring that I manual swapped


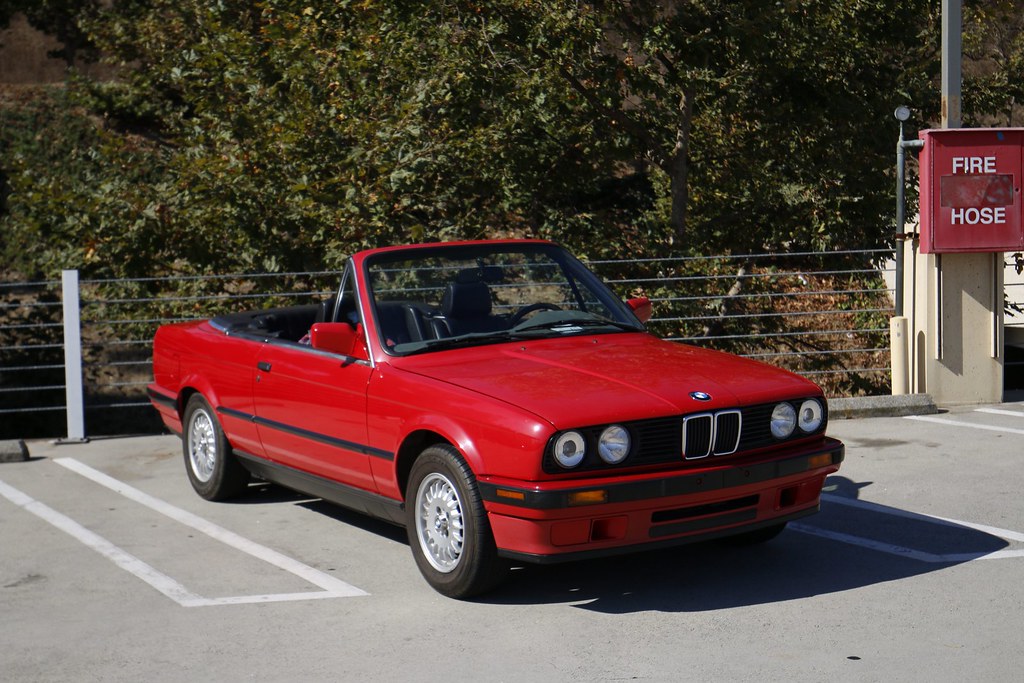
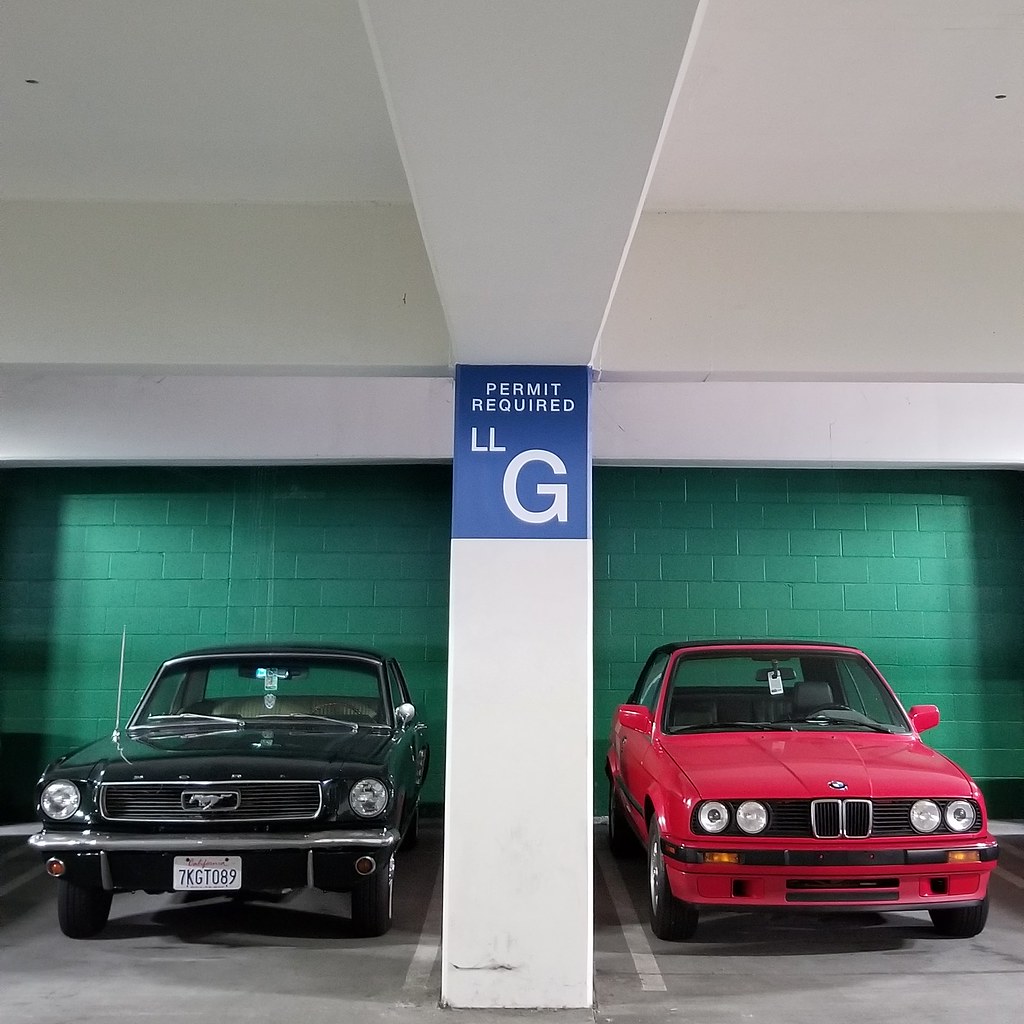
    & currently Ive found myself into a 1992 318i Vert in Brilliantrot on black, and almost 122k on the odo (still functioning!) with a manual top, manual (but heated) sport seats, and a 5 speed manual transmission.


    Yes this is the same E36 as before, has seen alot of love throughout the years


    So far Ive installed a set of Euro Hella Ellipsoids


    & done a bit of preventative maintenance by installing Garagistic Motometer ODO gears! The car is really clean, everything works and ive been having a blast in the week ive owned it so far.


    Have a few things lined up for the near future, but hope you all enjoy the build as I go.


    Thanks!
    Bimmerforums: Thrifty S50 / IG @ jt_e36

    #2
    Nice!

    Just about a twin to mine.

    The little M42 has been more fun than I expected.
    1991 318iC
    1989 325i Field Rescue

    Comment


      #3
      What a beauty, whats the history on the car. Looks super clean!
      sigpic

      Comment


        #4
        Originally posted by Poorhouse View Post
        Nice!

        Just about a twin to mine.

        The little M42 has been more fun than I expected.
        Yes i agree! Mine happens to have a 4.27 diff so it has a good amount of pick up


        Originally posted by Mike36 View Post
        What a beauty, whats the history on the car. Looks super clean!
        Thank you Mike! Car was with OG owner for 15 years and then sold to someone who had it for 6 months (obviously a flip) of which it landed with the gentleman I purchased it from. He has owned it since 2007 and had only put 2000 miles on it ( I Bought it at 122k roughly 6 months ago) Car is pretty immaculate, some wear on the normal spots (Third stop lamp turning orangeish, Clear coat peel on the top of the mirrors and Plastic bumpers are fading) but everything is there and other waise is basically 9/10!

        I have to apologize as I forgot about my R3v thread and have been only updating the Bimmerforums thread. My next few posts will be "catch up" posts to bring it current. I will just be copying and pasting my BF thread so I apolgize if there is some overlap.

        Came with all the original literature and a little surprise


        Stock signature from first delivery in 92’ tucked away in the service booklet as well as the original plate sticker for the front plate.


        The car came with OEM hella ellipsoids so I installed those and have been putting some miles on it


        Shortly after purchase I replaced the ODO gears with some from garagistic


        Had the A/C converted to R134


        Put some Floor mats in from an E46 wagon (OEM junkyard set scored for 15$, fit great!)


        Little time with the pressure washer annd...


        Also installed some Pioneer 5.25” speakers in the fronts and rear, weren’t my first choice but legit the only set I could find to fit in the rear and they sound actually pretty good youd have to go wide body to fit anything deeper in the rear lmao


        Gave the car a good wax and clay, came out great but made me realize how faded the plastic bumpers were lol


        Have been taking it to a few local meets and driving with the top down as much as possible


        But Ive quickly realized that there is a optimum temp range to run with the top down. Too hot and your boiling between lights, anything 77 ish and below is prime. Sorry for the photo dump but I have really enjoyed this car in stock form. It definitely has a few issues, some oil is leaking off the power steering and somewhere on the lower passenger side motor, and the front windows seem to catch on the top when fully up (not sure what that’s about) and most of all the rubber bushings are shot, but even as is I’ve been completely captivated

        Bimmerforums: Thrifty S50 / IG @ jt_e36

        Comment


          #5
          After putting about a thousand miles on the ol' gal I started to tinker with some wheel ideas on photoshop


          First I went with some Klutch SL1 wheels, with the classic kind of mesh design, liked the overall look and how they would fit as a 16" x 9" et15, plus they were already 4x100


          Then I did the Classic 2pc Style 5 in silver and Gold, But these are obviously 17" and E39 fitment so although they look great, its just a bit of work to fit them


          Then I went for something a bit different, BMW Style 29. I like these wheels and with caps they can be really unique. They can even be 2 pc'd and look great. But also E39 fitment, but 16" at least.


          After a few of these, I was searching Facebook market place and a set of E38 / E39 16" Style 5's came up for sale for fairly cheap (under 200$!). I did a bit of googling and kind of fell in love with them. I mean a 16" BBS OEM BMW Wheel with "almost" perfect E30 Fitment. Whats not to love. It was a bonus that they came with all the center caps as well. I went and picked them up immediately


          Not in 100% the best shape, but cleaner than many i found when looking for alternatives ( I fit the center caps off a few points so it looks a bit funky but everything lines up when im not being a complete idiot)


          The idea is to get them sandblasted and Powder coated and throw them on for a simple clean OEM look.

          Bimmerforums: Thrifty S50 / IG @ jt_e36

          Comment


            #6
            The brakes on the E30 had started to squeak pretty badly on my way to my morning classes, its primarily an up hill down hill deal so heavy on the brakes. I decided to change them out Front and rear with some Akebono Ceramic pads and Zimmerman Drilled rotors. Same set up as my E36 which performs great. Plus these will basically end brake dust all together


            This was almost a painless procedure except I Eff'd up big time when putting the rear rotors on. When dong so i remember It was a bit difficult to put the rotors onto the rear hubs, but not enough to make me think twice. I bolted everything up and that was that. Go to drive the car after wards and car isnt moving with the usual amount of power to get going from a still. I turn it off, put it in neutral and get out and try to push it. Car wont budge. Put the car back on jacks and rear wheels are locked. dammit.

            I remember the rear rotors being a tight fit and figure i jacked something up and would go back in and just adjust the rear shoes with the star gear adjuster. Nope rear wheels are locked like nothing was moving them and I had NO line of sight on the gear. Fack. Decided I would just roll the dice and put the car on the ground, forcefully move it under its own power until I had access to the adjuster. Now I am not a lucky person so I should have not chanced it but wouldnt you know it I move the car and adjust the gear but rear wheels still locked. At this point I am looking around at what it could be (everything unbolted again caliper off and everything) and see what I had done. I freaking did it. The worse possible thing. I freaking tore the E brake Shoe Mounting Pins straight through the Dust shield. The E brake was essentially LOCKED into my rear rotor. Feel free to put me in one of those medieval head locks and throw rotton tomatoes at me now...

            About a week later, after ordering some parts and through some very effective one on one time I was able to get the Rotor off (Passenger side) and guess what falls out onto the floor


            E brake shoes are just flopping around


            And viola, the Crime scene


            You can see how the pin bent and pulled right through the metal. LUCKILY the car doesnt have rust and it didn't completely tear the metal around it. I had essentially a full rebuild kit ordered with new Dust shields, But really no easy way of replacing those


            Looking at everything in front of me, I realized i couldn't get the car together If i wanted to replace the shields. The Shoes already on the car have almost as much material as the new shoes, and the rest of the hardware appeared to be ok. I decided I would try to salvage the OG shields and would torch the metal and attempt to re shape the brake shoe pin opening. After a few careful taps with a mallet and screw driver, I saved it!


            Had to do this for both holes on the Passenger side, the Driver side was unscathed somehow in all the madness. I replaced the Shoe Pins with the new ones from the Kit and saved the rest of the items for a rainy day. Then kept my fingers crossed as I put everything together. Take it from me dont forget to adjust your e brake shoes before putting rotors on


            Somehow I was able to recover everything and the (and E brake) are performing great! I also put a OEM Wooden shift knob in the car and Dash mat + an amazon door card cup holder.
            Best 7$ i ever spent.


            And just like that the car goes back up on jack-stands for the next project

            Bimmerforums: Thrifty S50 / IG @ jt_e36

            Comment


              #7
              Originally posted by superj
              I would have just tapped that back into place, also
              Yeah after a bit of scratching my head I figured this was my best option. The Dust shields had to be special ordered from Germany so I guess its not bad having a new set laying around.

              Anyways, I had the wheels powder coat and although the color on the wheel turned out great, the caps dont match 100%


              I guess the powder coater couldnt match them because being plastic they couldn't go into the oven, so they had to eyeball a paint match. In the right light they dont look too off but in any amount of shade you can pretty easily.


              This kind of leaves me two options, Either spend the time and try to find the closest possible match, or perhaps spray paint the face of the wheel and the caps the same color. For obvious reasons I dont want to do this but the more I think about it the Powder coating will act more as a protective layer than a finish, while still giving me the opportunity to paint over and have it all match. idk. I will run the them in powder coat form without caps for now but these wheels are made by the centers being complete imo.

              Oh yeah I also ordered some BC coils for the car. Had some time to review the stock suspension while doing the brakes and they are probably original from 1992. Although the car rode great, the suspension was obviously tired. I run the BC DS system on my E36 and they put up with alot so I figured BC 's BR would suit the E30 well since they will be babied in comparison.


              Before


              After


              crazy size difference


              Made sure to put in some rear mount reinforcement plates, these are from from Ireland Engineering

              Bimmerforums: Thrifty S50 / IG @ jt_e36

              Comment


                #8
                The Front end kind went fairly smoothly considering all that is involved for front end coilover conversion for E30's , The bump stop crumbled when pulling the original assembly out


                NOTHING i had would work to get the collar nut off for the strut cartridge, so i was forced to cut it off. The jagged marks you see are from a plumbing wrench!


                No goin back from here


                BC reccomends leaving 50mm of the original strut housing when cutting for the coilovers, and then welding at the bottom joint


                The rest of the front suspension was pretty weathered. Again my money is original 1992 equipment


                Figured this was my best itme to go ahead and replace those as well. Turned into one big "while youre in there" . Didnt feel right putting the car back together with everything else shredded like that


                Realized my bushing tool looks like the ray gun from COD Zombies when in its FCAB configuration lol


                Pulled the bushings from the lollipops, cleaned them and hit them with some of rustoleoms finest, and pressed Turner Motorsport centered FCAB's in


                New OEM Tie Rods. The tape was to eyeball the measurement for the new ones


                New OEM Control arms


                Got everything wrapped up and started to test fit the wheels. Im mounting the wheels with a 4x100 to 5x120 stud conversion adapter (18mm) .


                Its going to be tight but I know offset and wheel wise it should work with the right tire and suspension tweaks.


                Bimmerforums: Thrifty S50 / IG @ jt_e36

                Comment


                  #9
                  Originally posted by Thrifty S50 View Post

                  But Ive quickly realized that there is a optimum temp range to run with the top down. Too hot and your boiling between lights, anything 77 ish and below is prime.
                  Haha! I feel the same way. I also keep two hats and sunglasses in the car just in case.

                  What spring rates did you get with your coilovers? I'm getting ready to buy a set and was thinking of going with 6k in the front and 8k in the rear. You should also consider getting an x-brace, it'll really tighten up your front end. I went with the ejnight Racs Skids Xbrace since it seemed to have a sleeker design than Garagistic.
                  sigpic

                  Comment


                    #10
                    Originally posted by Mike36 View Post

                    Haha! I feel the same way. I also keep two hats and sunglasses in the car just in case.

                    What spring rates did you get with your coilovers? I'm getting ready to buy a set and was thinking of going with 6k in the front and 8k in the rear. You should also consider getting an x-brace, it'll really tighten up your front end. I went with the ejnight Racs Skids Xbrace since it seemed to have a sleeker design than Garagistic.
                    I actually went with 8k front and 10k rear! I think that 6k will be too soft for the front personally. These cars love to crunch fenders so better to be on the safe side! I upp'd the dampening to 5 clicks from the softest, and it rides great!

                    Yeah I plan on grabbing one definately! First I have my eyes on the Catuned Sump plate
                    Bimmerforums: Thrifty S50 / IG @ jt_e36

                    Comment


                      #11
                      awesome project! Thanks for sharing!

                      Comment


                        #12
                        Originally posted by jeenyus View Post
                        awesome project! Thanks for sharing!
                        Thank you Jeenyus! Appreciate it!

                        Last Friday I picked up some tires and had them mounted. Some Federal 595's ,195 x 45 's


                        Went and had the car aligned, rear camber is about maxed out for the wheel and tire set up. Fronts I have not adjusted Camber so there is plenty of adjustment left, however I do not think the car needs any the way it is sitting now. Had to of course do some minor tweaking to ride height. First go around and the car was so low I couldnt get the jack out


                        Went up about 3/4" and it has so far been just about perfect. I can get in and out of my driveway w/out going diagonal, and pulling diagonal into driveways I seem to clear the front fenders. These pictures are taken with about "2 fingers space" between the front wheels and the fender, then just barely a pointer finger fitting in the rear


                        So far some minor rubbing on major highway dips at speed in the rear, but only with 2 people in the back so I upped the dampening a few click in the rear and that will be that. I know I need to be concerned about the Oil pan, and I seem to clear speed bumps, I'll still most likely be getting a skid plate. Other wise the height and ride is very functional and Im quiet happy with the how it looks after settling. There is about a half inch rake from front to back (Font being half inch lower).


                        Really pleased with its overall drivability and my build timeline seemed to fall perfectly in line with being able to go out to the so~cal "BMW E30 Dock Weiler meet" . Threw the center caps on the wheels, plus It was a perfect day to run with the top down.


                        Bimmerforums: Thrifty S50 / IG @ jt_e36

                        Comment


                          #13
                          looks great. back in my daily driving e30 days, i did the same coil over work you did and it was awesome looking but the horrible roads here drove me crazy. and the speed bumps on base were the size of small hills so i had to raise the car a bit to get to and from work.

                          either way, it looks really good

                          Comment


                            #14
                            Awesome car. How'd you figure the right size spacer? And where did you source your spacer/ adapter combo?

                            Comment

                            Working...
                            X