Announcement

Collapse
No announcement yet.

The Delphin Rat

Collapse
X
 
  • Filter
  • Time
  • Show
Clear All
new posts

    The Delphin Rat

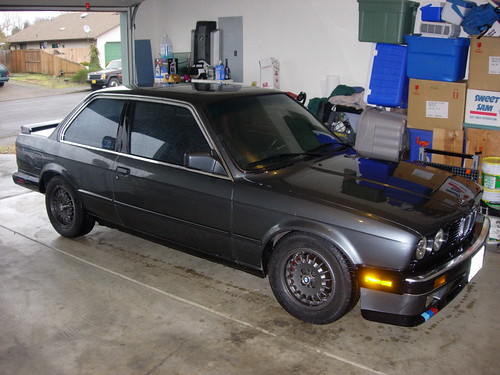
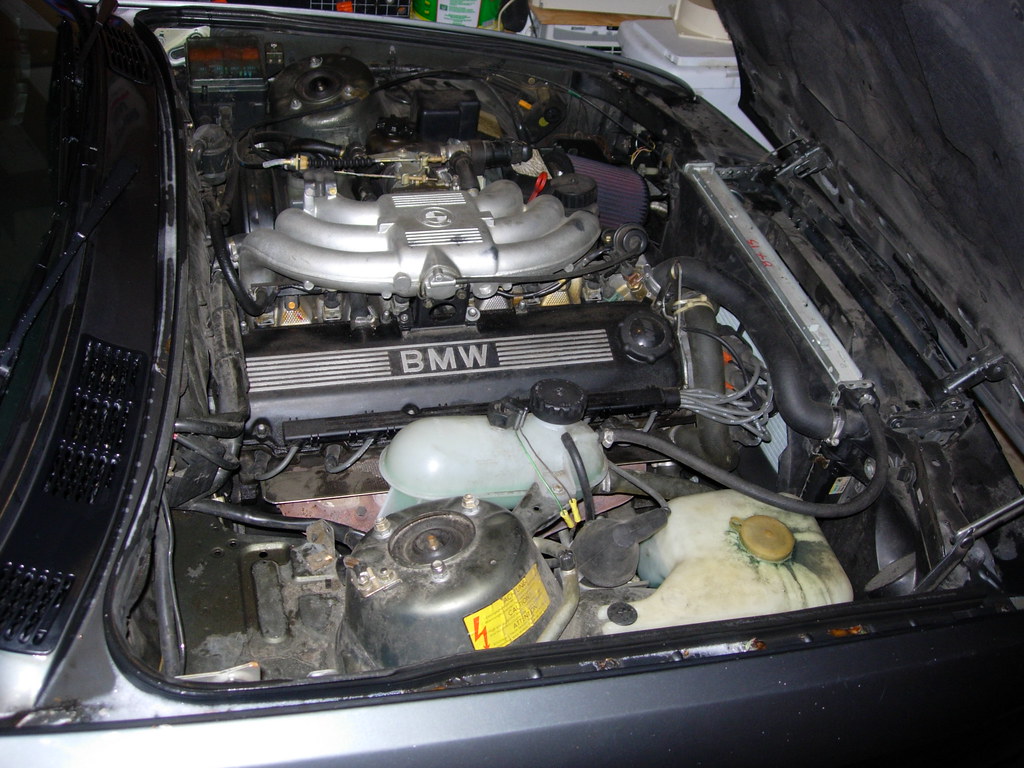
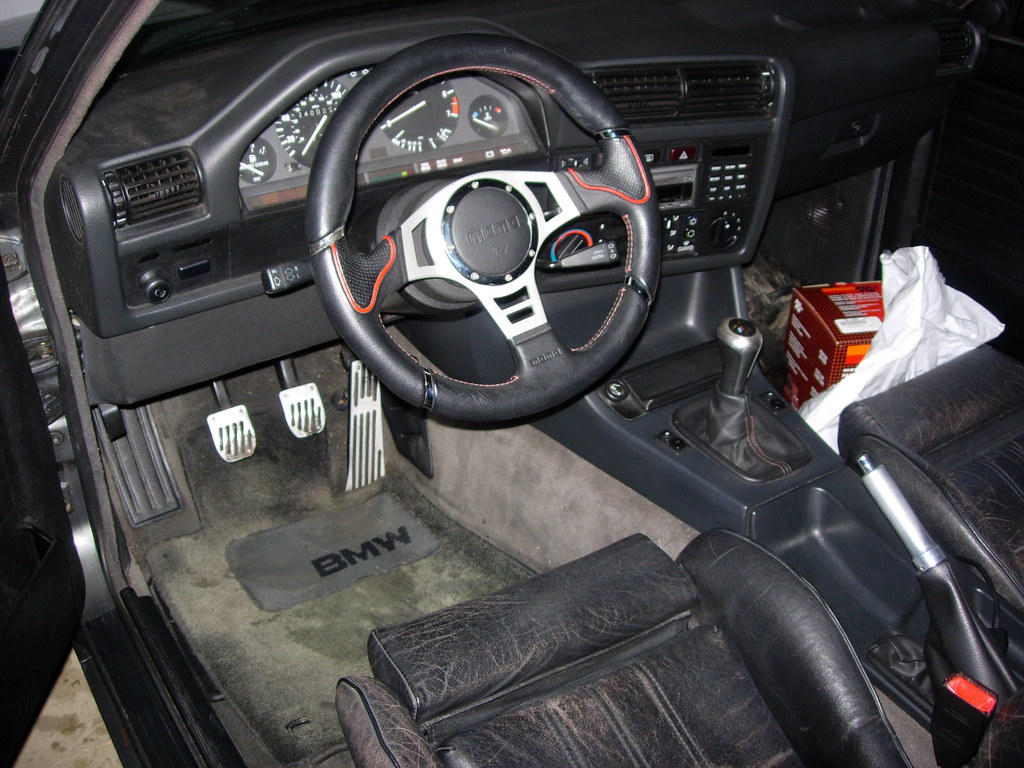
    I have a project car I have been working on for over a month now. I have gotten a lot torn apart and a few things put back together.

    If you want to read about my stupidity... err.... I mean mechanical prowess, you can go to my blog.

    I will post notes when I have updates if anybody is interested, or you can just get an RSS feed for when new posts happen.

    Anyway, I had one tonight that kind of ticked me off.

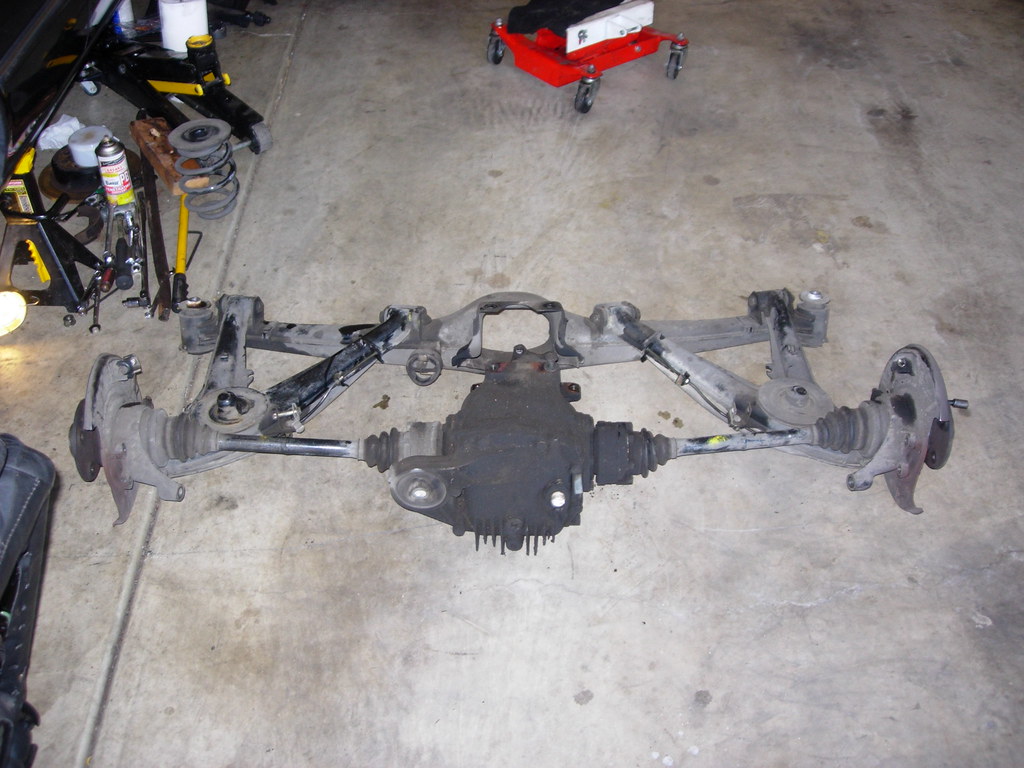
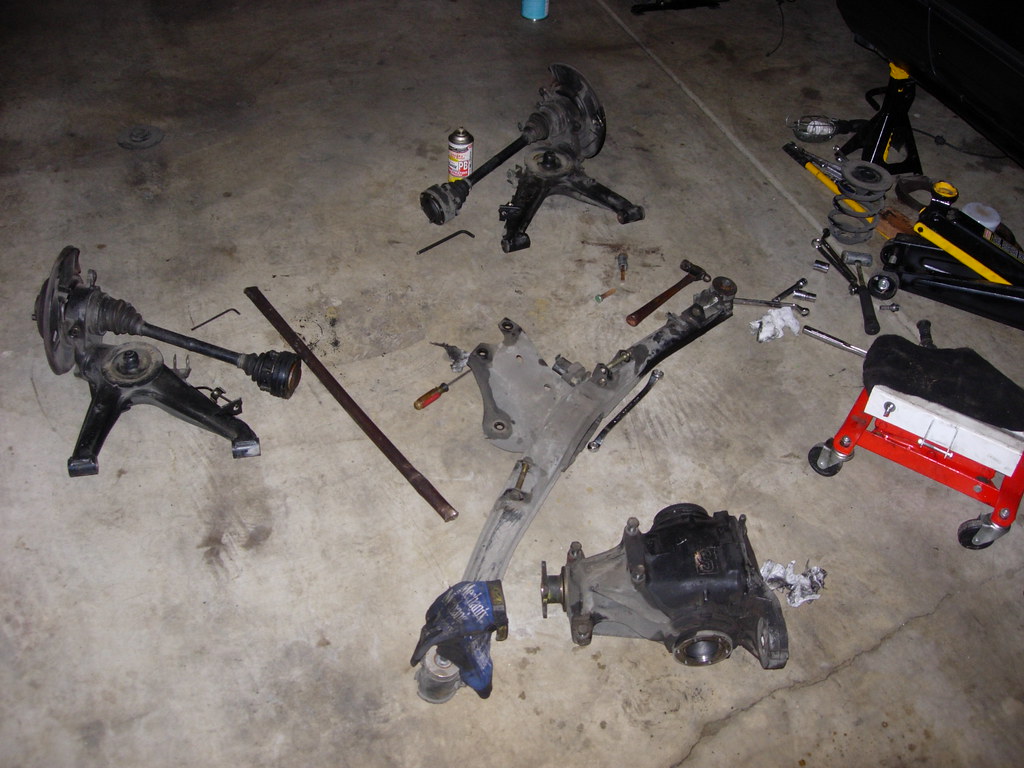
    This evening I went out and finished torquing the differential in. I attached a few brake lines and got the driveshaft partially hooked up. I had miss placed two of the nuts so by the time I had found them I was already out from under the car and didn't feel like straining my arms anymore. Torquing the differential didn't help my sore elbows at all.
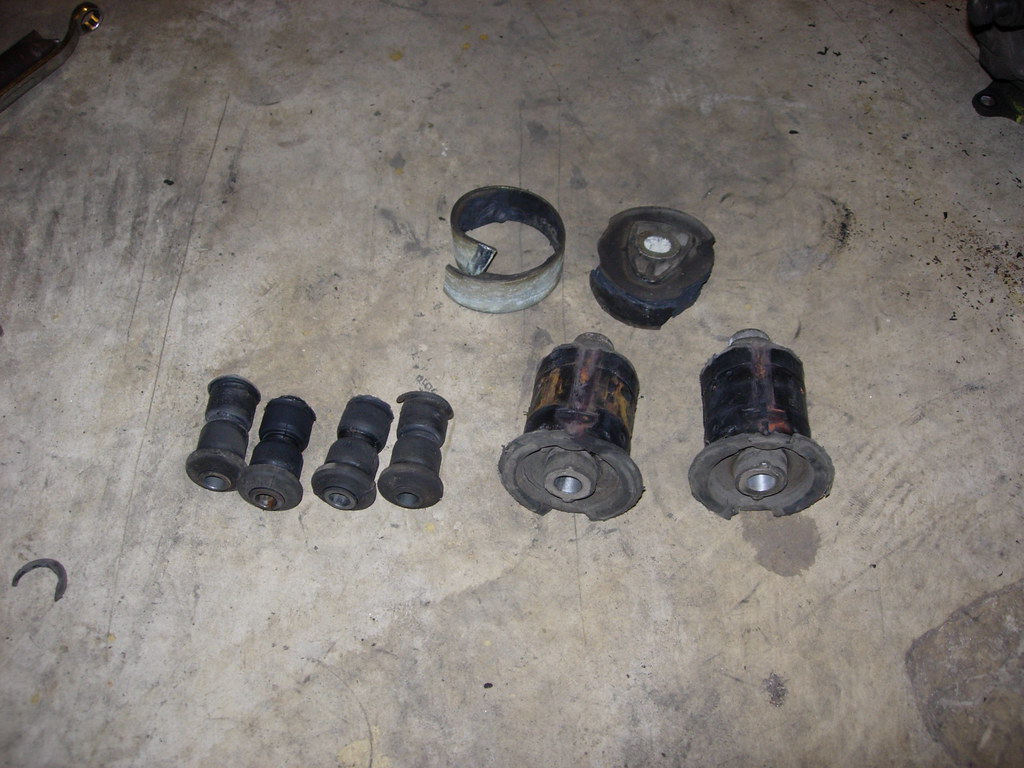
    I decided to do something a bit easier so I went to remove the two rear shocks. I have new shock mounts for them because I had noticed the mounts looked a little ragged when I was taking the covers off the inside of the trunk.

    Well, it turns out that one of the mounts was ragged, the other was just fine. This is one of those things that makes you say "what the heck was that guy thinking?"

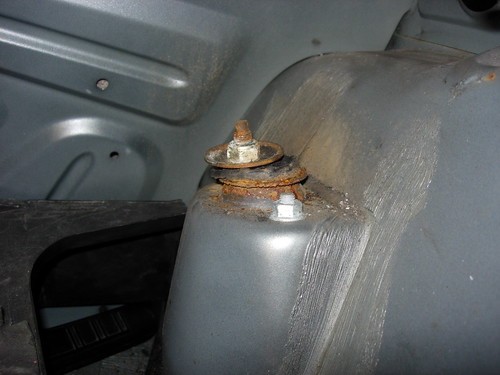
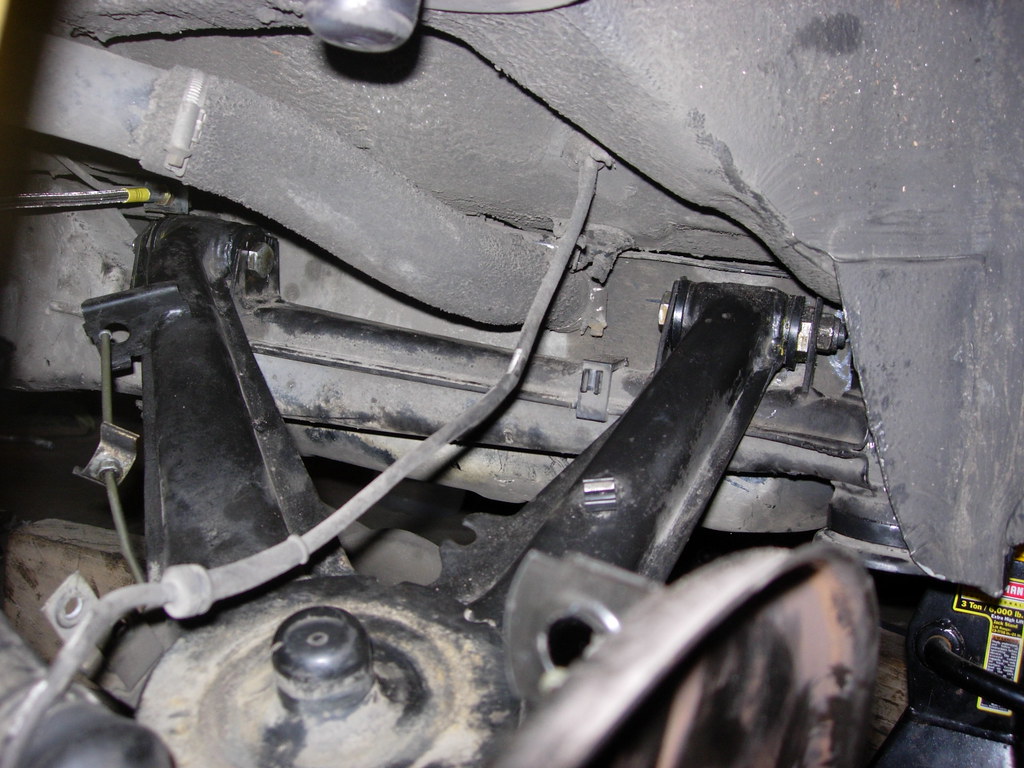
    The right side shock mount...ick!


    Conversely, the left side mount looked almost new.

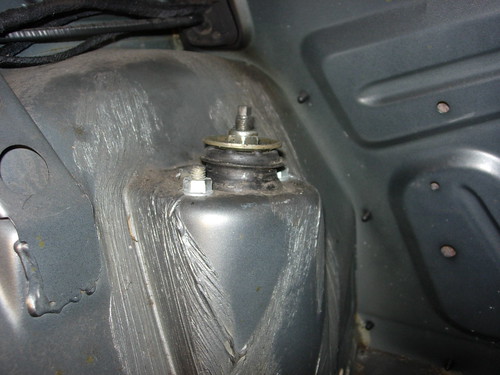
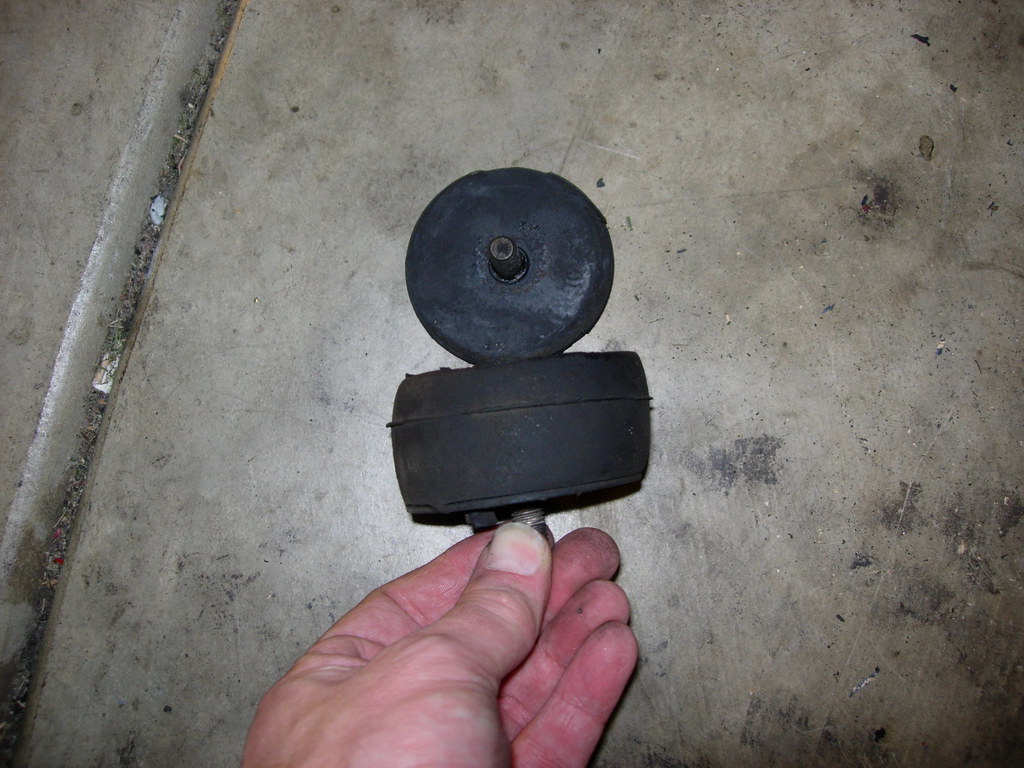
    The left side mount... pretty :)


    All the red stuff is rust, but it leaked down from the top washer and shock stud. It is supposed to be black rubber like the left side shows.

    The PO must have noticed the shock mount looked a little ragged on the left side of the car when he replaced the shocks. So, in true cheapskate fashion, he bought and replaced just one mount. In the mean time, the right mount decided to cut loose. At least that is what looks like how it happened to me.

    It is really stupid. You never replace one side of a suspension component without replacing the other side too. They have to be the same age or you will get odd behaviour out of the suspension. It's a good thing I decided to replace the mounts.

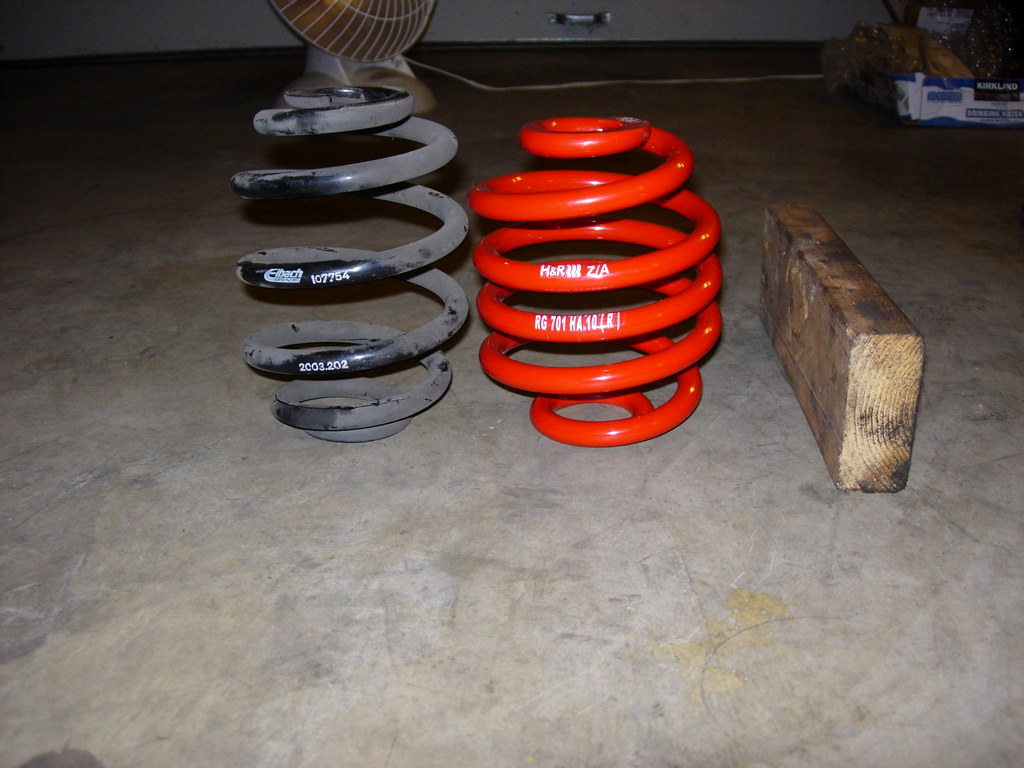
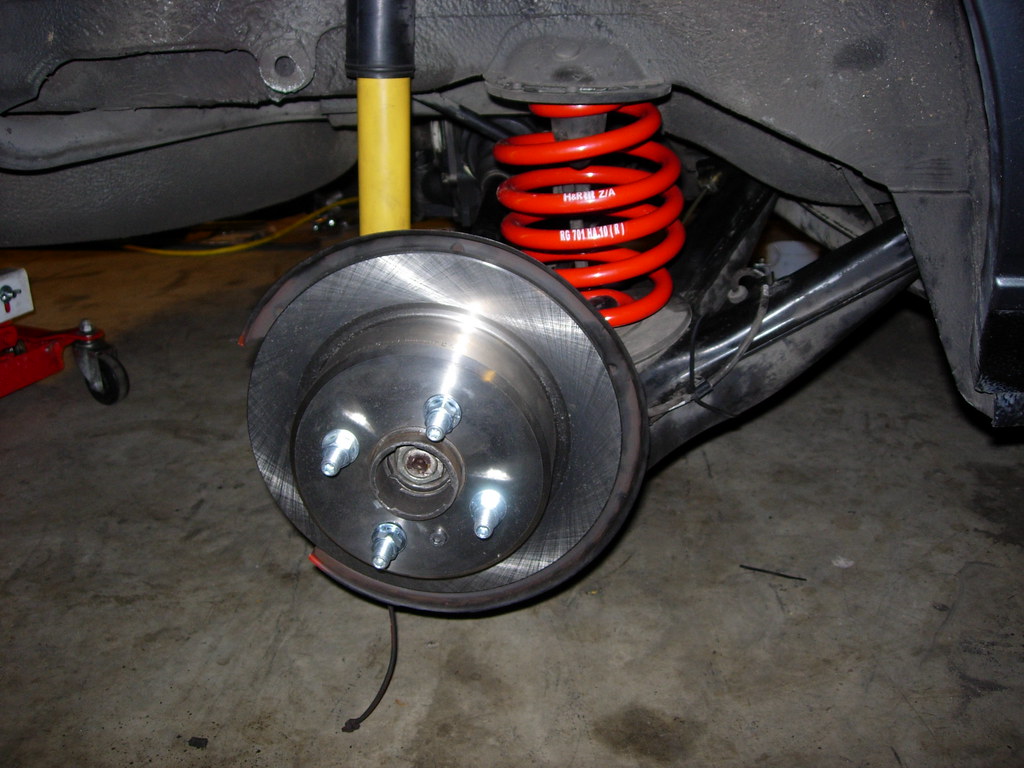
    Here are some more shots so you can see just how bad it was. The strut is soaking in a bath of PB Blaster tonight so I might be able to get the nut off tomorrow.


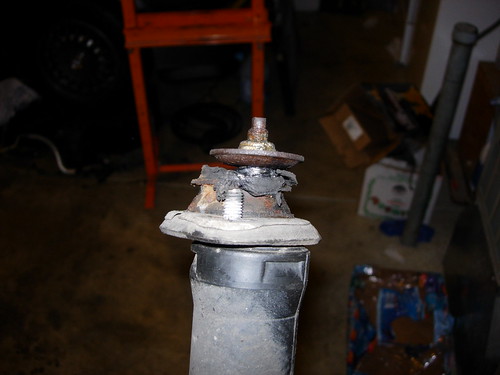
    You can see just how badly torn up it is in this shot


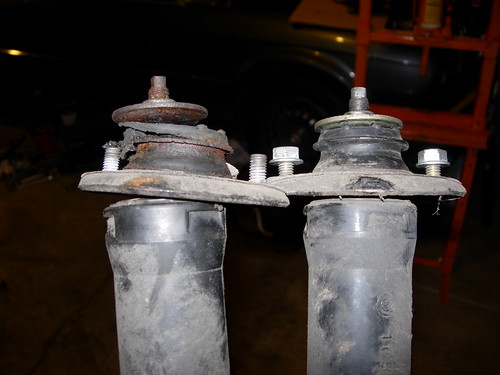
    The good and the bad... ugly is running the camera. Things that make you go "Hmmmm".
    1987 E30 325is
    1999 E46 323i
    RIP 1994 E32 740iL
    oo=[][]=oo

    #2
    I'm sure theres not too much we haven't seen around here .
    I'm curios what the rest of the car looks like.
    :pimp:

    Comment


      #3
      Before I tore into it...


      The paint isn't as good as it looks in the picture. The clear coat is worn off in most places. No real rust to speak of though. Some small seeps here and there, mostly from the power steering I think.
      1987 E30 325is
      1999 E46 323i
      RIP 1994 E32 740iL
      oo=[][]=oo

      Comment


        #4
        Just some other pics along the way...

        Again, if you want to read all about it and see the pictures in context, then go to my blog. www.griplimit.net.

        AKG Bushings all around
        H&R Race springs (Bilstein sports already with the car)
        AKG shock mounts
        New heater core
        New timing belt
        New water pump
        New Control arms
        New tie rods
        A/C delete
        More stuff to do before the end of the month and the first track day for me.

        Getting the rear subframe out and back in was a pain. I had a friend's press to do the bushings so that made things easier.


        Still lots of work to be done. It won't be a beauty queen, but she should be functional :)
        Last edited by Hallen; 03-10-2008, 03:13 PM.
        1987 E30 325is
        1999 E46 323i
        RIP 1994 E32 740iL
        oo=[][]=oo

        Comment


          #5
          Is that a TMS brake kit i spy? Looks like exactly what i did to my car. keep it up dude
          -Chris

          Comment


            #6
            how the hell did you get the subframe bushings out in one piece?
            IG: @Baye30

            FRONT VALENCE IS ZENDER!!! STOP FILLING MY PM BOX PPL!!!

            Comment


              #7
              Originally posted by golde30 View Post
              how the hell did you get the subframe bushings out in one piece?
              +1. Post your method please, I am dreading doing mine.
              Mtech1 v8 build thread - https://www.r3vlimited.com/board/sho...d.php?t=413205


              OEM v8 manual chip or dme - https://www.r3vlimited.com/board/sho....php?p=4938827

              Comment


                #8
                I really don't care what your damn method is, just let me know when I can come up and do mine!

                Looking great so far!

                Luke

                Closing SOON!
                "LAST CHANCE FOR G.A.S." DEAL IS ON NOW

                Luke AT germanaudiospecialties DOT com or text 425-761-6450, or for quickest answers, call me at the shop 360-669-0398

                Thanks for 10 years of fun!

                Comment


                  #9
                  Oh yeah...to sweeten the deal...I own a fender roller, and I am not afraid to use it!

                  Closing SOON!
                  "LAST CHANCE FOR G.A.S." DEAL IS ON NOW

                  Luke AT germanaudiospecialties DOT com or text 425-761-6450, or for quickest answers, call me at the shop 360-669-0398

                  Thanks for 10 years of fun!

                  Comment


                    #10
                    There is no secret to getting the subframe bushings out in one piece.
                    I used a press.

                    Obviously, I removed the entire subframe first with the control arms and diff still attached. The problem is that the studs where the subframe bushings attach to the frame are very long. If you have not removed the driveshaft, it sticks through the subframe and makes it so you can't lower the subframe straight down.
                    I simply dropped one side down, pivoted it to the rear, raised it back up to unbind the other bushing, and then lowered the subframe evenly to drop it all out of the car.

                    Then I disconnected the diff and the control arms from the subframe.

                    I put the subframe up on the press and pushed each bushing out. You can get the same press from Harbor Freight for about $100. It is a 12 ton press (If you are doing what I am doing, replacing all of the bushings, you NEED a press. It makes the job 10x easier). You need to take your time with it. Press it down and wait. Eventually, the bushing will slip down some and then you can apply more pressure.

                    This is assuming you don't have a mandrel that will exactly fit the outer steel ring on the bushing. If you use something smaller like I did, the rubber of the bushing just stretches out. If you go too far, you will tear the rubber and then you will be pounding out the steel ring with a hammer and chisel. Just leave it for 10 or 15 minutes and do something else. The bushing will start to slide out. Be careful, when it lets loose, it is like shooting an arrow with a bow. It comes flying out.

                    I got too impatient with the diff bushing and it tore. You can see the results in the picture. I had to cut and pound the steel sleeve out. Quite the pain.

                    The only real problem with doing this is getting enough grip on the outer subframe edge to support the subframe when using the press. I had to wicker up some supports on the press frame to do this.

                    I reinstalled the subframe in about the same way as I took it out. It was a bit more difficult because the new AKG bushings were a lot more stiff. They come in two pieces with a separate inner steel sleeve. I took out the sleeve and the lower section of the bushing and then did my pivot maneuver. Then I was able to carefully line everything up and get the sleeve and the urethane bushing back into the subframe. It wasn't easy. I was up and down, moving from one side to the other, pounding, pushing and wiggling to get it all to line up. It had to line up perfectly, or it wouldn't go in. I did get it after a couple of hours of fiddling around.

                    I am now working on the front springs. It turns out the idiot PO stripped all three of the right side upper mount studs when he did the struts. What a bone head. Now I am a bit stuck until I can figure out how to get the nuts off of those studs. This is not the first idiot move I have seen on the car... like the rear shock mount above. People who do half-assed work on cars like this aught to have all their tools taken away and relegated to driving Hyundai's for the rest of their lives.:hitler:
                    1987 E30 325is
                    1999 E46 323i
                    RIP 1994 E32 740iL
                    oo=[][]=oo

                    Comment


                      #11
                      Hallen, are you the guy who was willing to sell me a set of Eibach springs?
                      If so, please PM me again.

                      Terrific write up, dewd. Thanks so much. Now the only decision is urethane SFBs or just TABs.

                      Camber/toe setup should be done in a week on the spare subframe, wewt!

                      Luke

                      Closing SOON!
                      "LAST CHANCE FOR G.A.S." DEAL IS ON NOW

                      Luke AT germanaudiospecialties DOT com or text 425-761-6450, or for quickest answers, call me at the shop 360-669-0398

                      Thanks for 10 years of fun!

                      Comment


                        #12
                        Originally posted by StereoInstaller1 View Post
                        I really don't care what your damn method is, just let me know when I can come up and do mine!

                        Looking great so far!

                        Luke
                        lol, well, honestly, I would be happy to supervise... but I really don't want to do this again. It is satisfying to get it done, but not something I want to do every week. (btw, those Eibach springs will be available soon...)

                        You do need a decent transmission jack to hold the diff and the subframe up, or you can just remove the diff first to make it a bit lighter. I didn't have the right hex head socket to get the half shafts disconnected or I would have done that. It makes it much easier to get the subframe moved around.

                        Getting the diff back in after the subframe is reinstalled is also not all that easy. It is difficult to get it lined up properly and then you can't really properly torque the upper bolts because there is no room for a socket.

                        The other painful thing is that you have to completely disassemble the parking brakes to get the cable out. I hate working on drum brakes. All those springs etc, but, you gotta do what you gotta do.

                        See my blog for tons more detail probably a few good laughs from me being stupid.

                        www.griplimit.net

                        I have written most of this stuff up on the blog.
                        1987 E30 325is
                        1999 E46 323i
                        RIP 1994 E32 740iL
                        oo=[][]=oo

                        Comment


                          #13
                          I have all to correct tools to swap axels, and was planning on swapping the subframe and leaving the trailing arms in place.

                          Great blog, BTW, you write well.

                          Closing SOON!
                          "LAST CHANCE FOR G.A.S." DEAL IS ON NOW

                          Luke AT germanaudiospecialties DOT com or text 425-761-6450, or for quickest answers, call me at the shop 360-669-0398

                          Thanks for 10 years of fun!

                          Comment


                            #14
                            Originally posted by StereoInstaller1 View Post
                            I have all to correct tools to swap axels, and was planning on swapping the subframe and leaving the trailing arms in place.

                            Great blog, BTW, you write well.
                            So you are just going to use the torch or sawzall method and cut the bushings out? If you are going to drive the studs up you will need a good pneumatic hammer. I tried a jack and it just lifted the car up, the stud didn't move at all.

                            There is a new post up on the blog. More problems:roll:

                            www.griplimit.net

                            Last edited by Hallen; 03-12-2008, 08:50 AM.
                            1987 E30 325is
                            1999 E46 323i
                            RIP 1994 E32 740iL
                            oo=[][]=oo

                            Comment


                              #15
                              Most things I hit stay pretty damned "hit", so I should be able to bash those nasty bolts out. I do have an airhammer, (but it is a POS) and plenty of air. I also have a press and a lift available. Should not be too big a deal.

                              Gonna come to the meet at my shop?

                              Luke

                              Closing SOON!
                              "LAST CHANCE FOR G.A.S." DEAL IS ON NOW

                              Luke AT germanaudiospecialties DOT com or text 425-761-6450, or for quickest answers, call me at the shop 360-669-0398

                              Thanks for 10 years of fun!

                              Comment

                              Working...
                              X