
Great work! My inspiration..
How are you getting your oil pressure to the gauge?
-
-
oh. my. f'ing. god.. that is the sweetest HVAC panel I've ever seen..
mad, MAD props for your dedication to detail. wow.
AND YOU HAD MORE SEX !?!?!?!??!!!
Fuck yeah.Leave a comment:
-
ticking away, the moments that make up a dull day...
Time flies when you're having fun. It also seems to fly when you aren't. Update have been scarce but I'm hoping to change that. Work has been pretty nuts as of late with a massive reorganization and a promotion to boot. Well not really a promotion, i now have the title to go along with all the crap i've been doing in the past. And with that comes some stress and some health issues but fortunately no ulcers. As this was good news, i decided to reward myself with some time on the car.
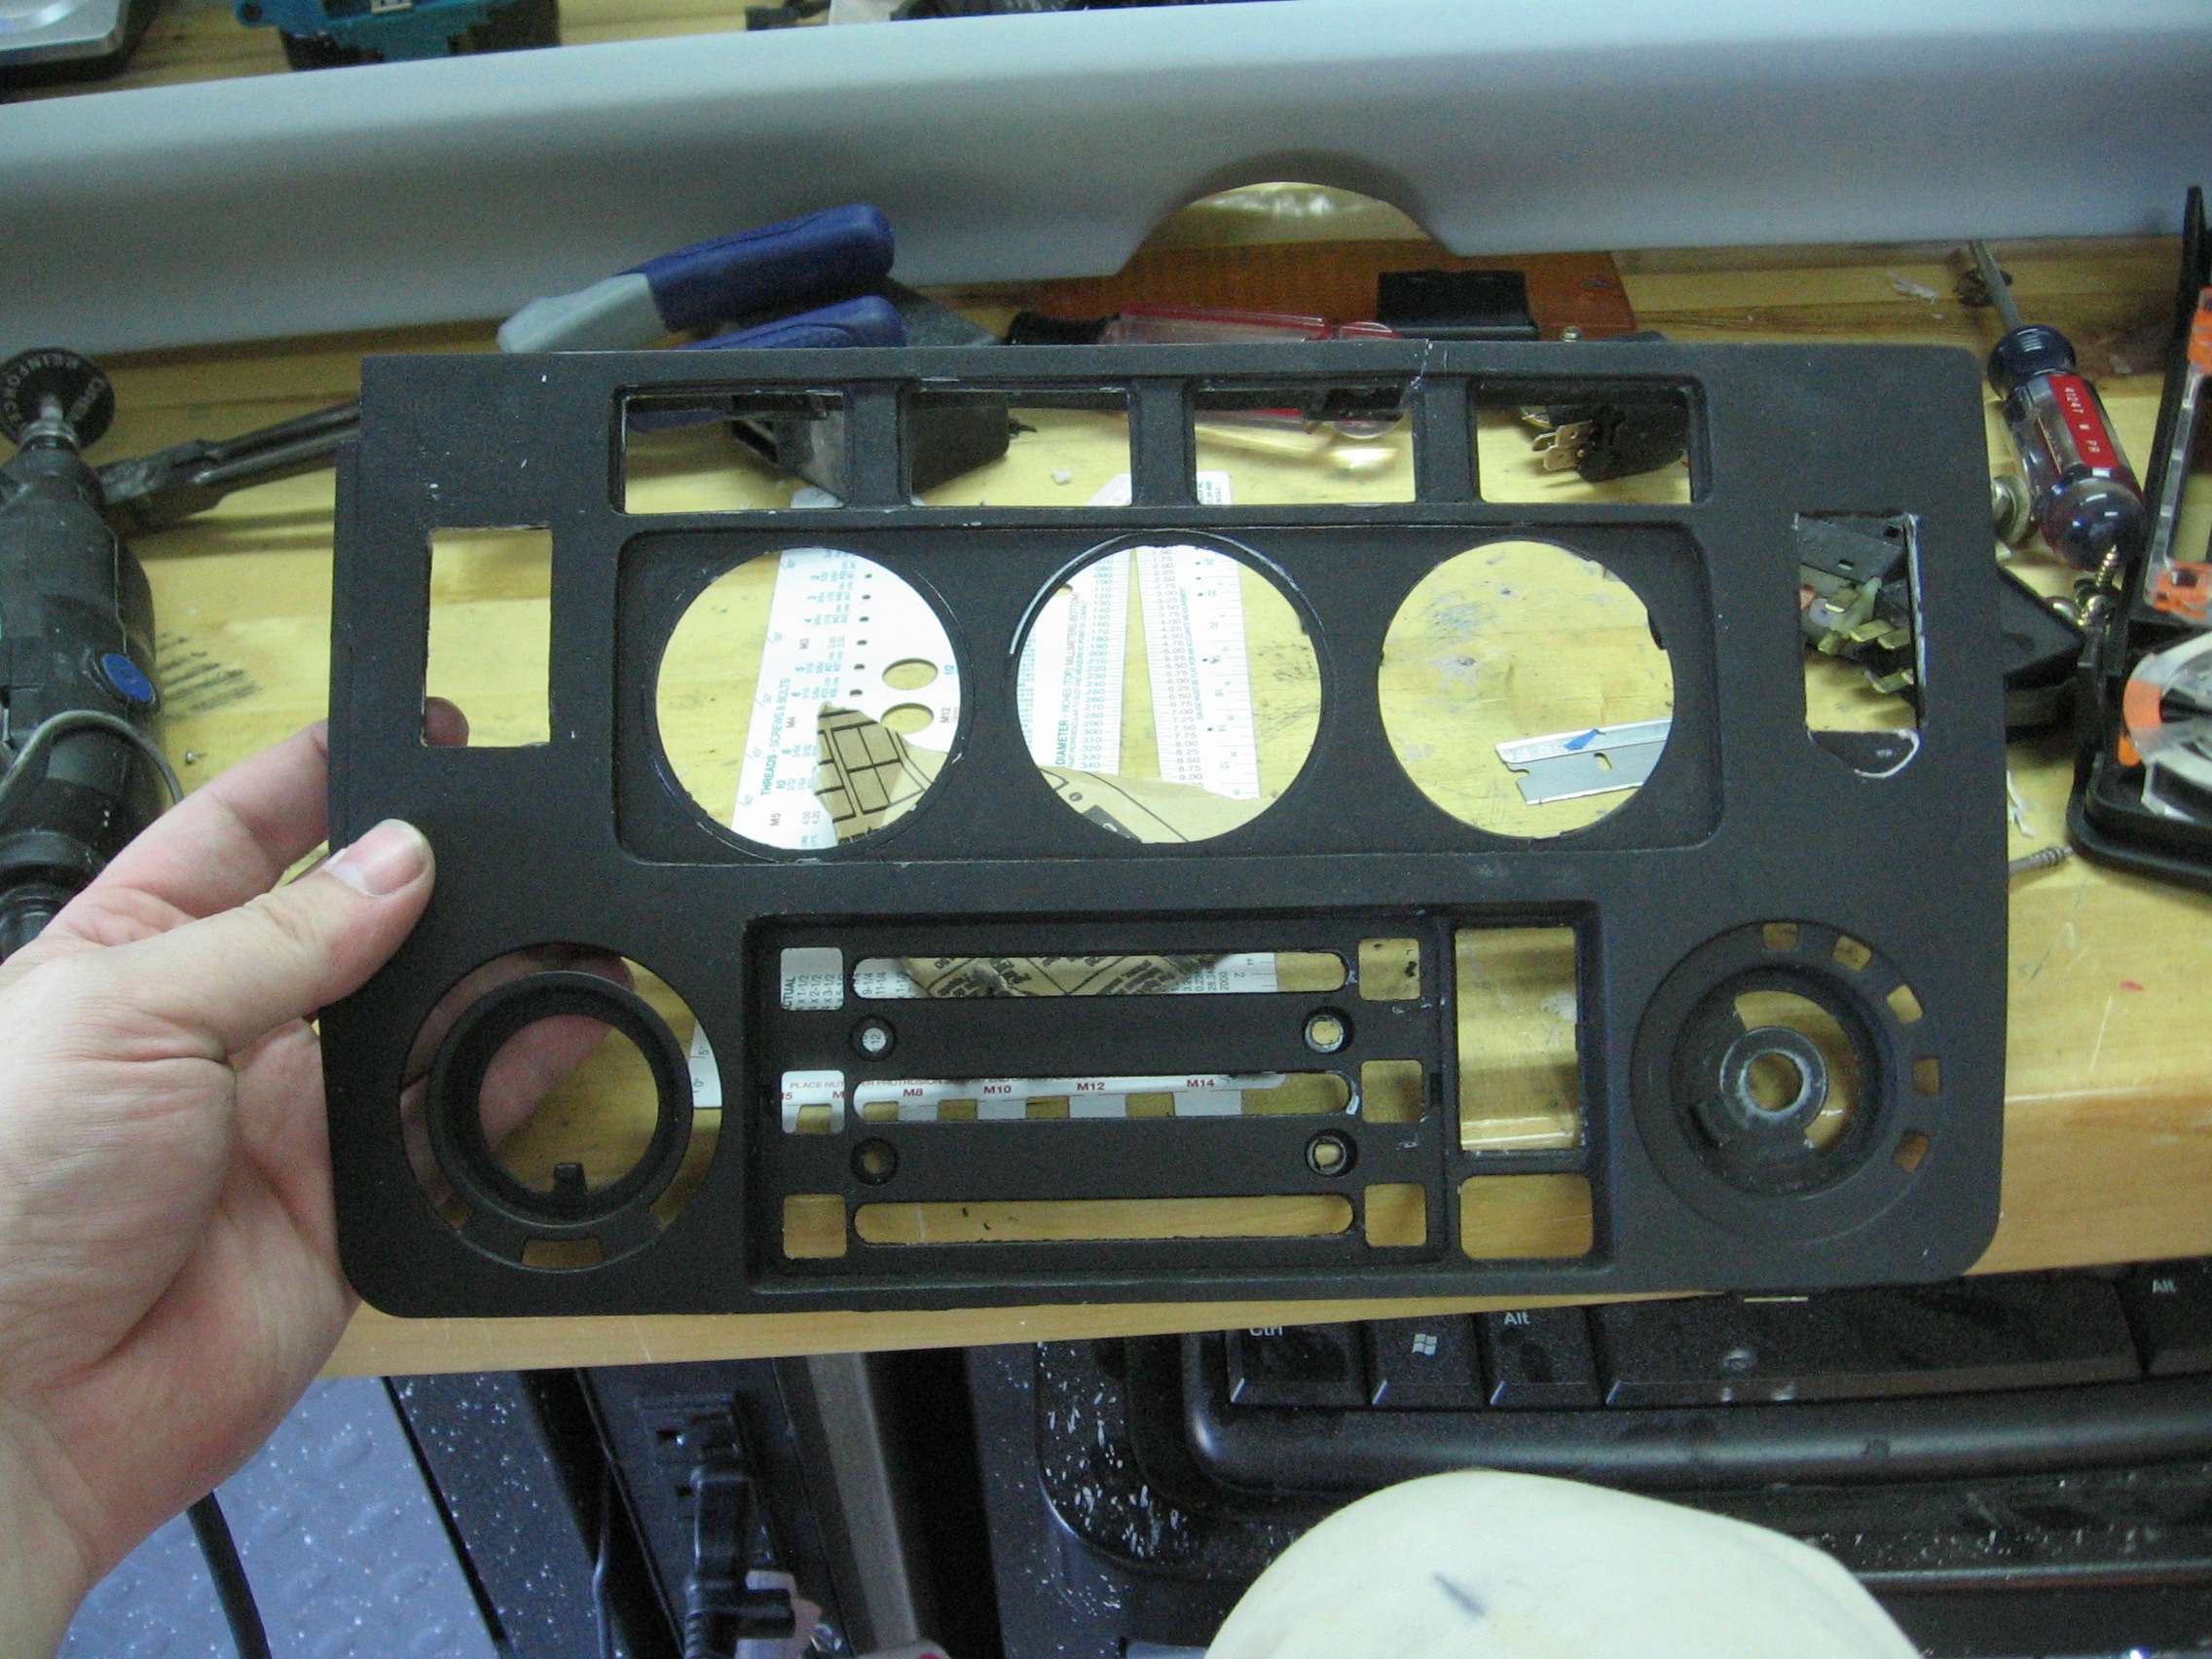
You will remember the disaster that was the HVAC panel and it breaking when i tightened it down on installation. I decided that there had to be a better way. Like many of you, I get Eastwood's catalog in the mail every other day and while flipping through it at dinner (eating by myself, lest you think I completely ignore my wife) I saw they had a plastic repair kit. I figured, why not, it's not like i can do that much more damage.
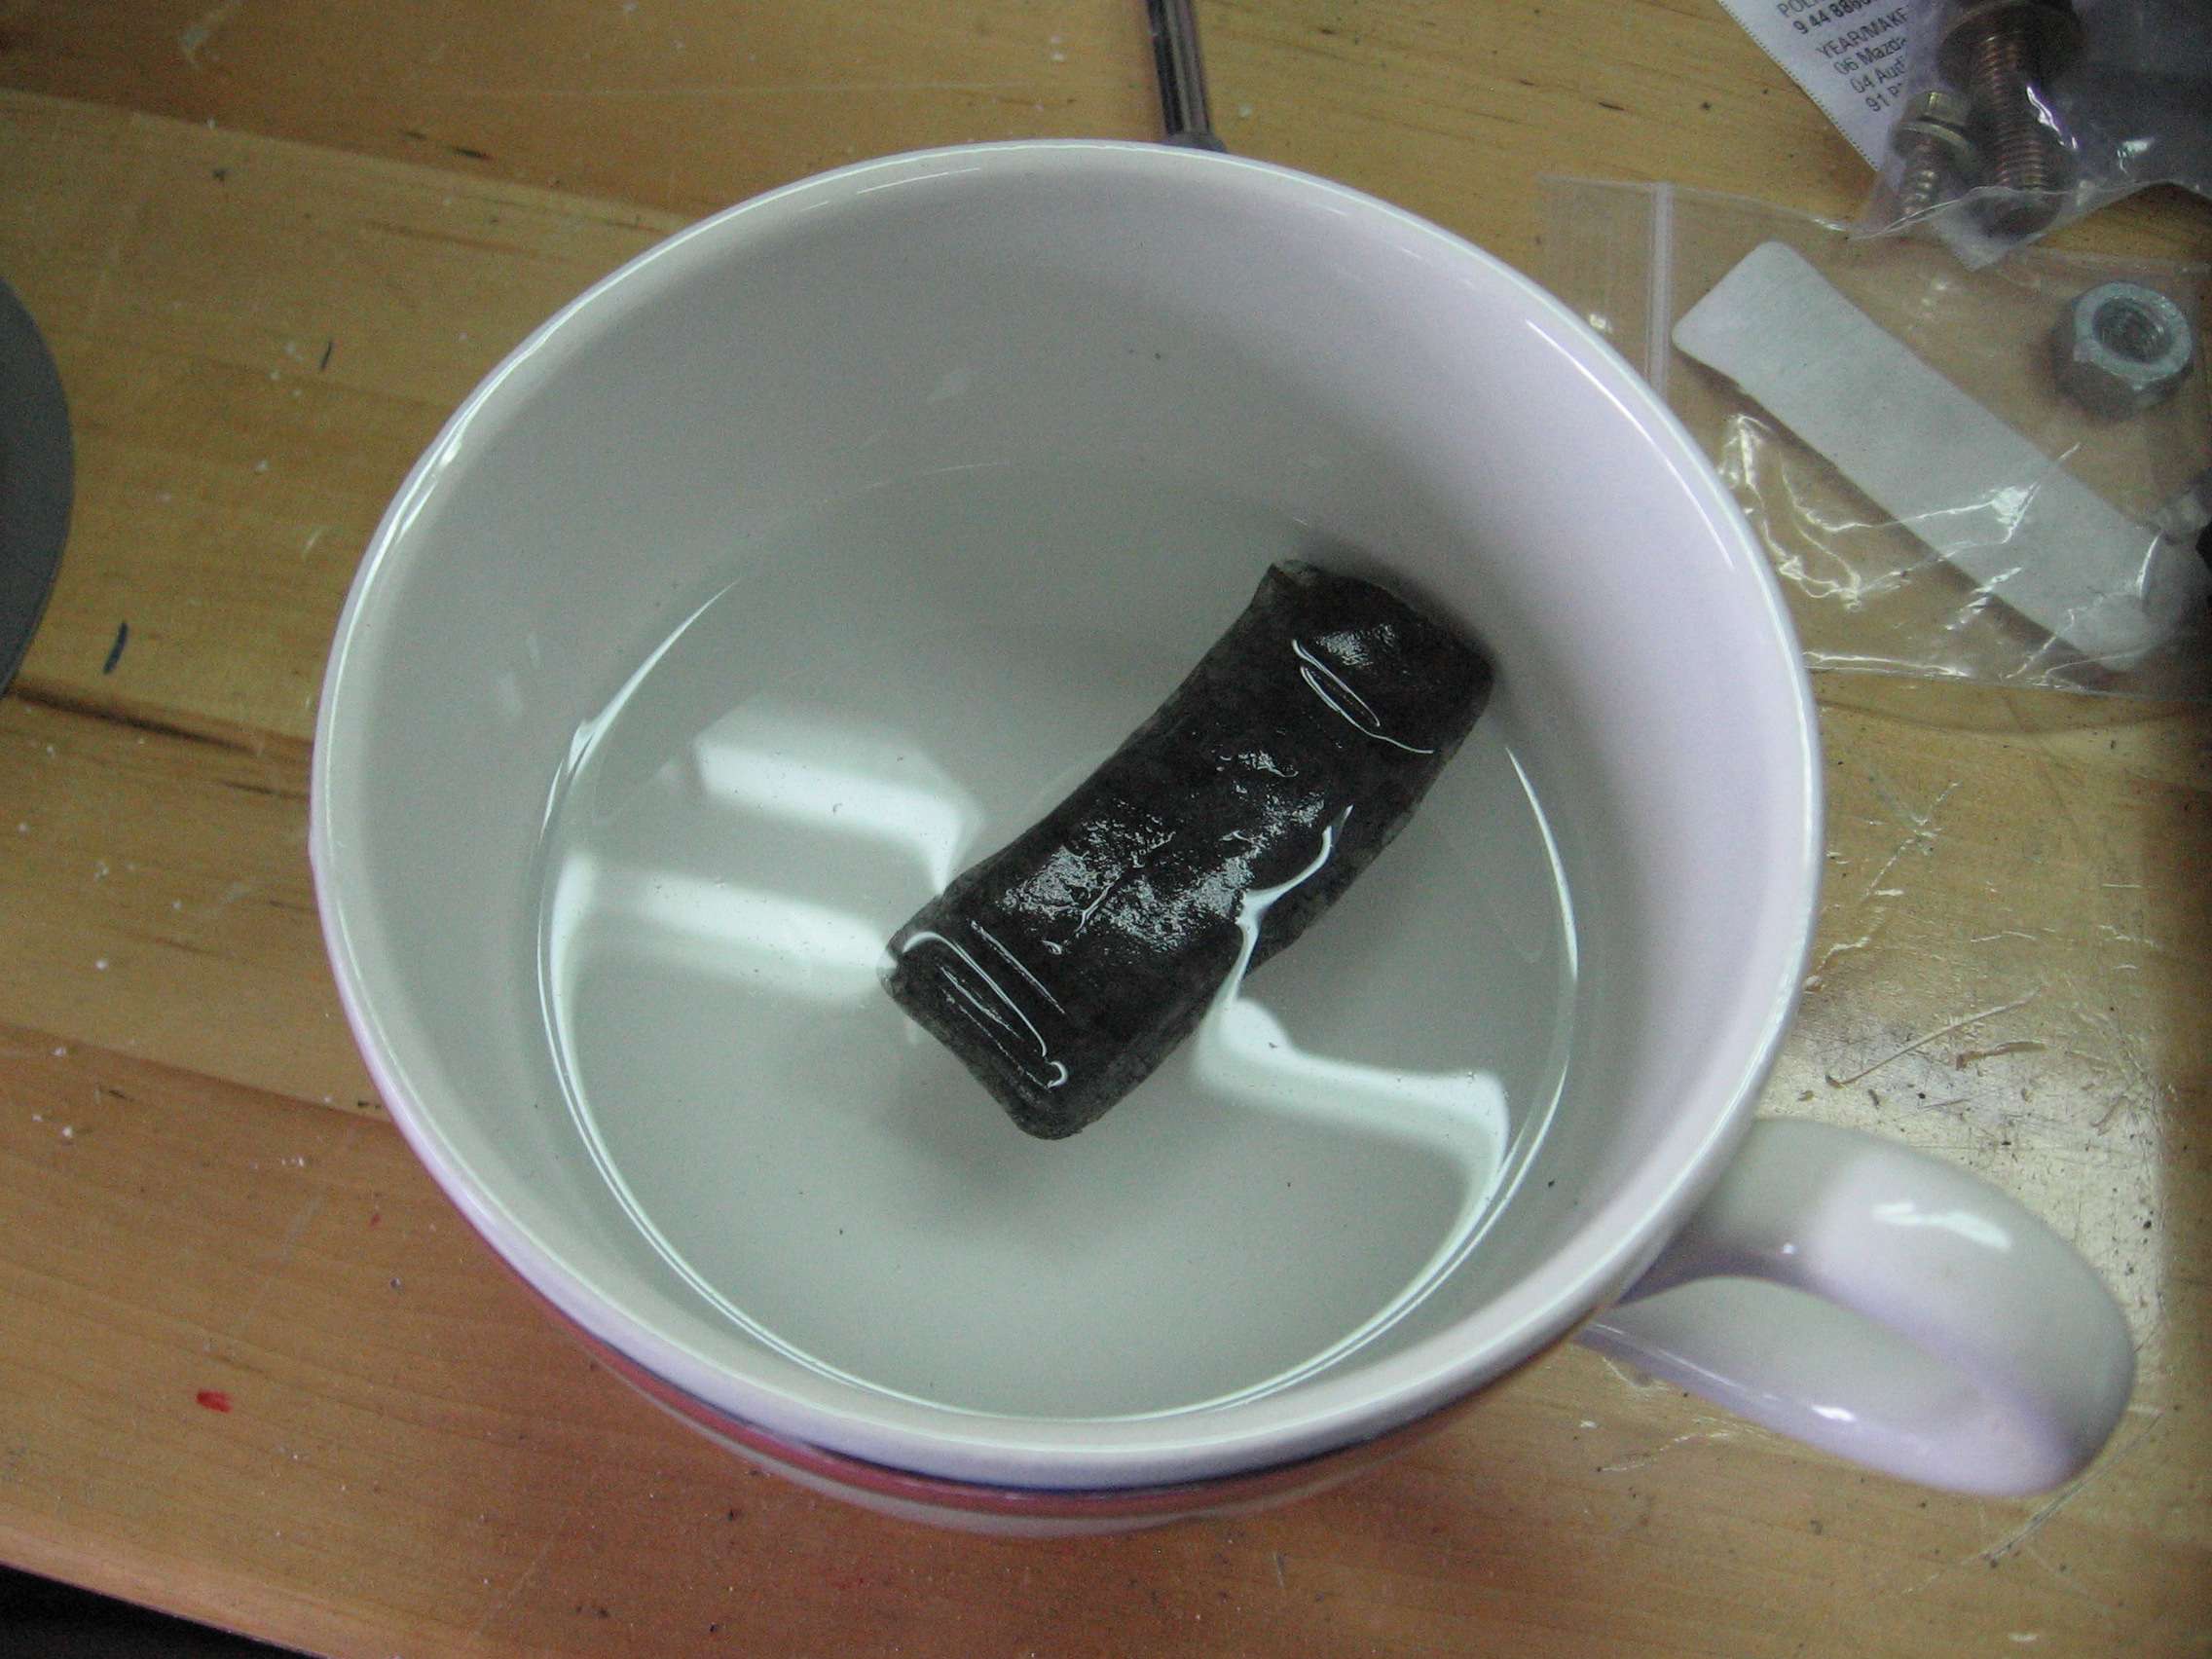
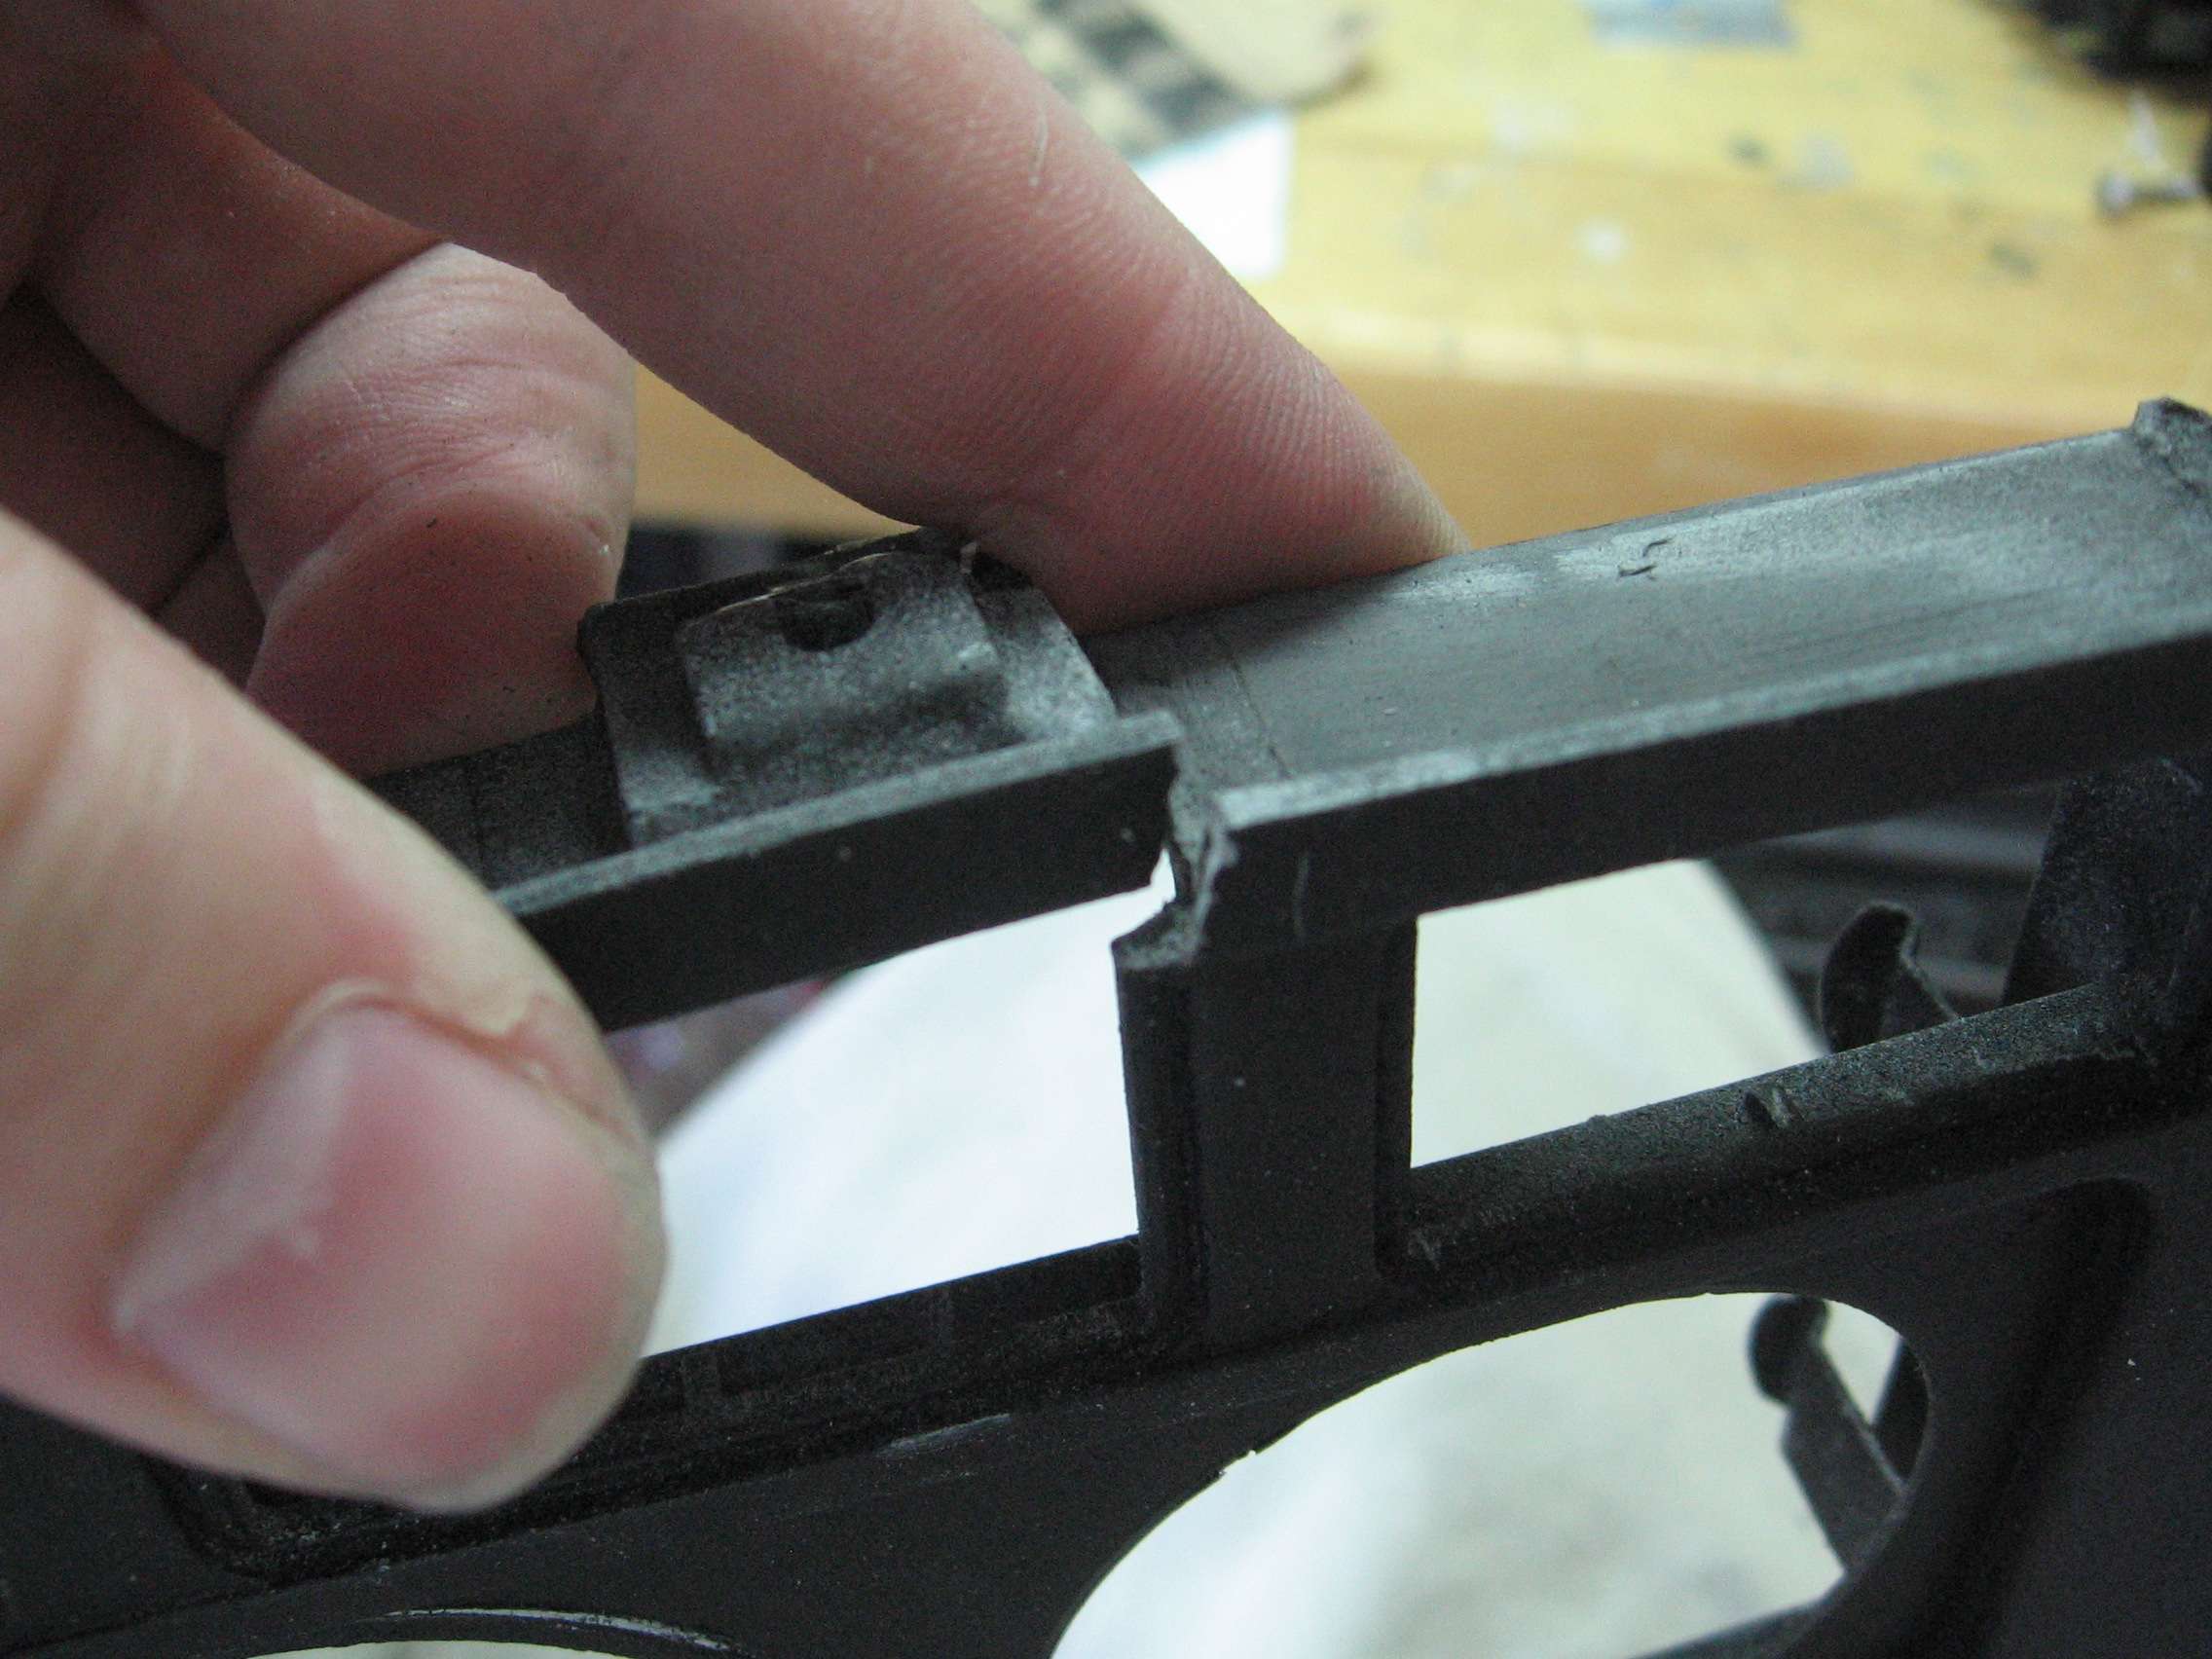
The kit is made by a company called plastex. It consists of a powder and a liquid activator. When the two are combined, they bond to the existing plastic and harden forming a very strong joint as well as a hard surface. I felt that this might be what I needed to get the panel the way I wanted.
It comes with a molding bar. You heat the molding bar to 130 degrees and then it becomes very pliable You can shape it so you can form tabs or missing pieces on your part. When it cools to room temperature, the molding bar hardens and allows you to use it like a casting mold.
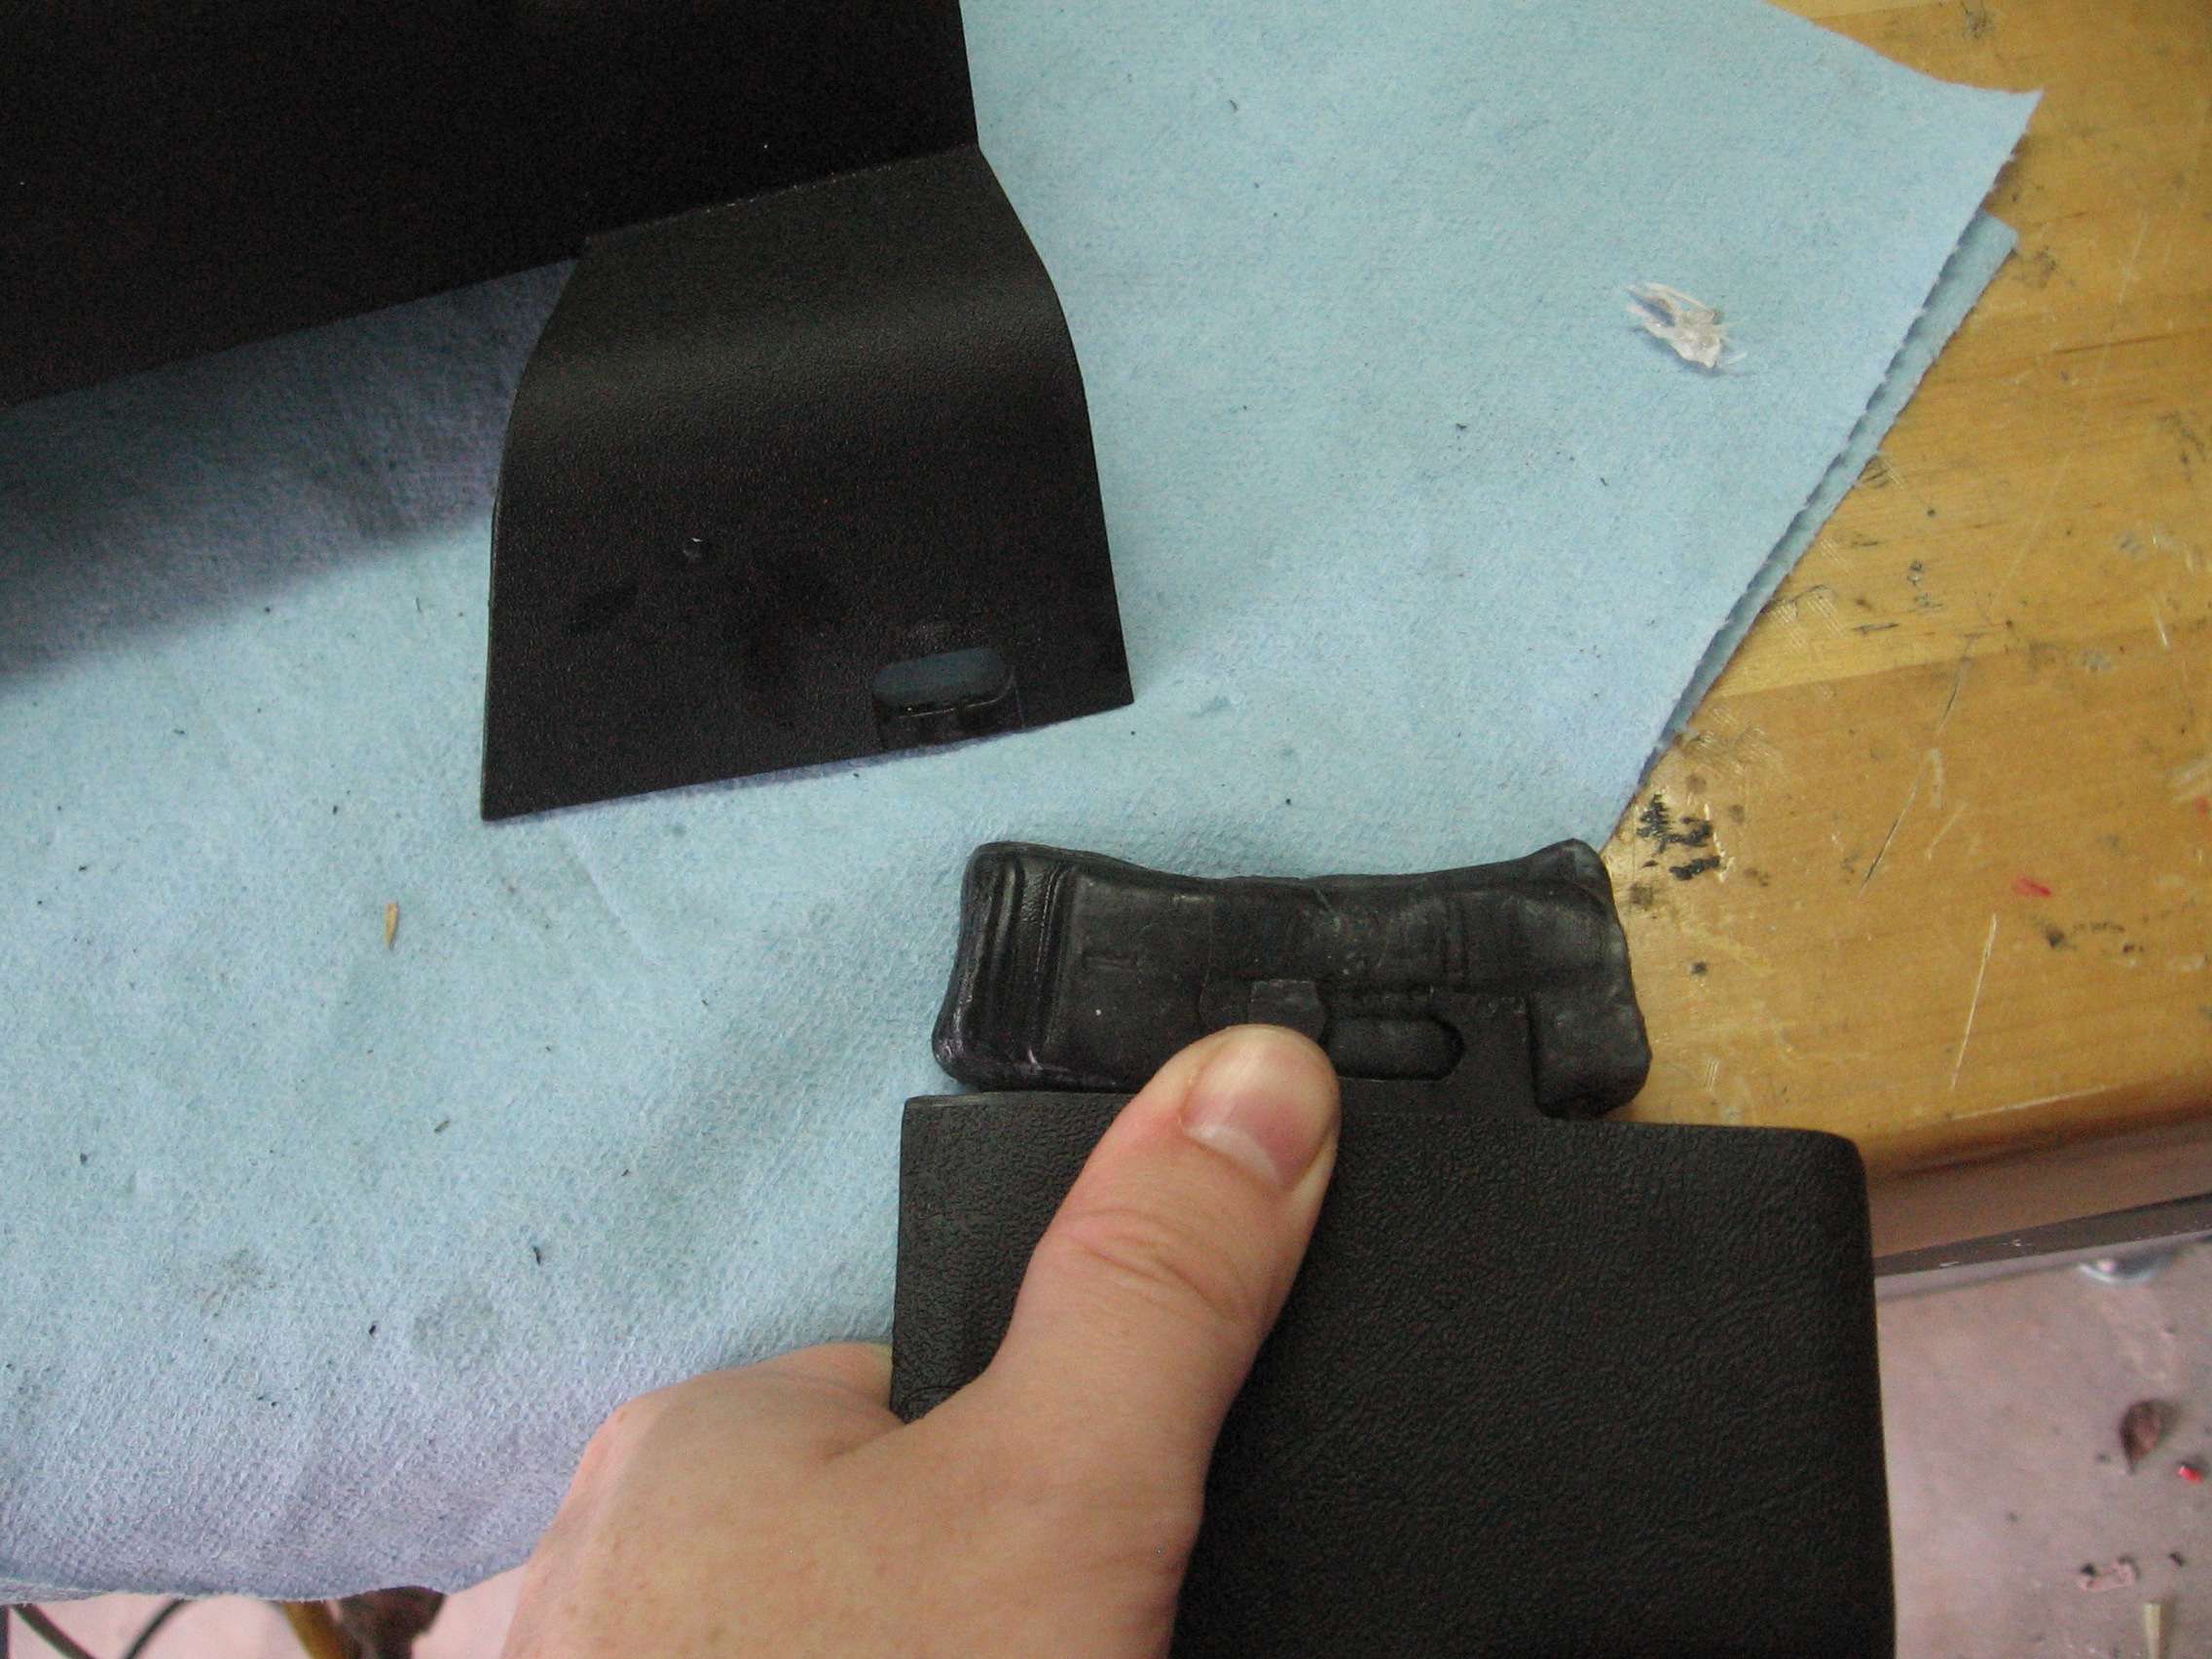
Here I had a broken tab on a piece of trim. I had another piece of trim with an unbroken tab, so I used the molding bar to replicate the shape of the broken tab.
From here it is a matter of mixing the powder and the activator to create new plastic. I had far greater success placing the powder directly into the mold and putting drops of activator on the powder with the supplied pipet.
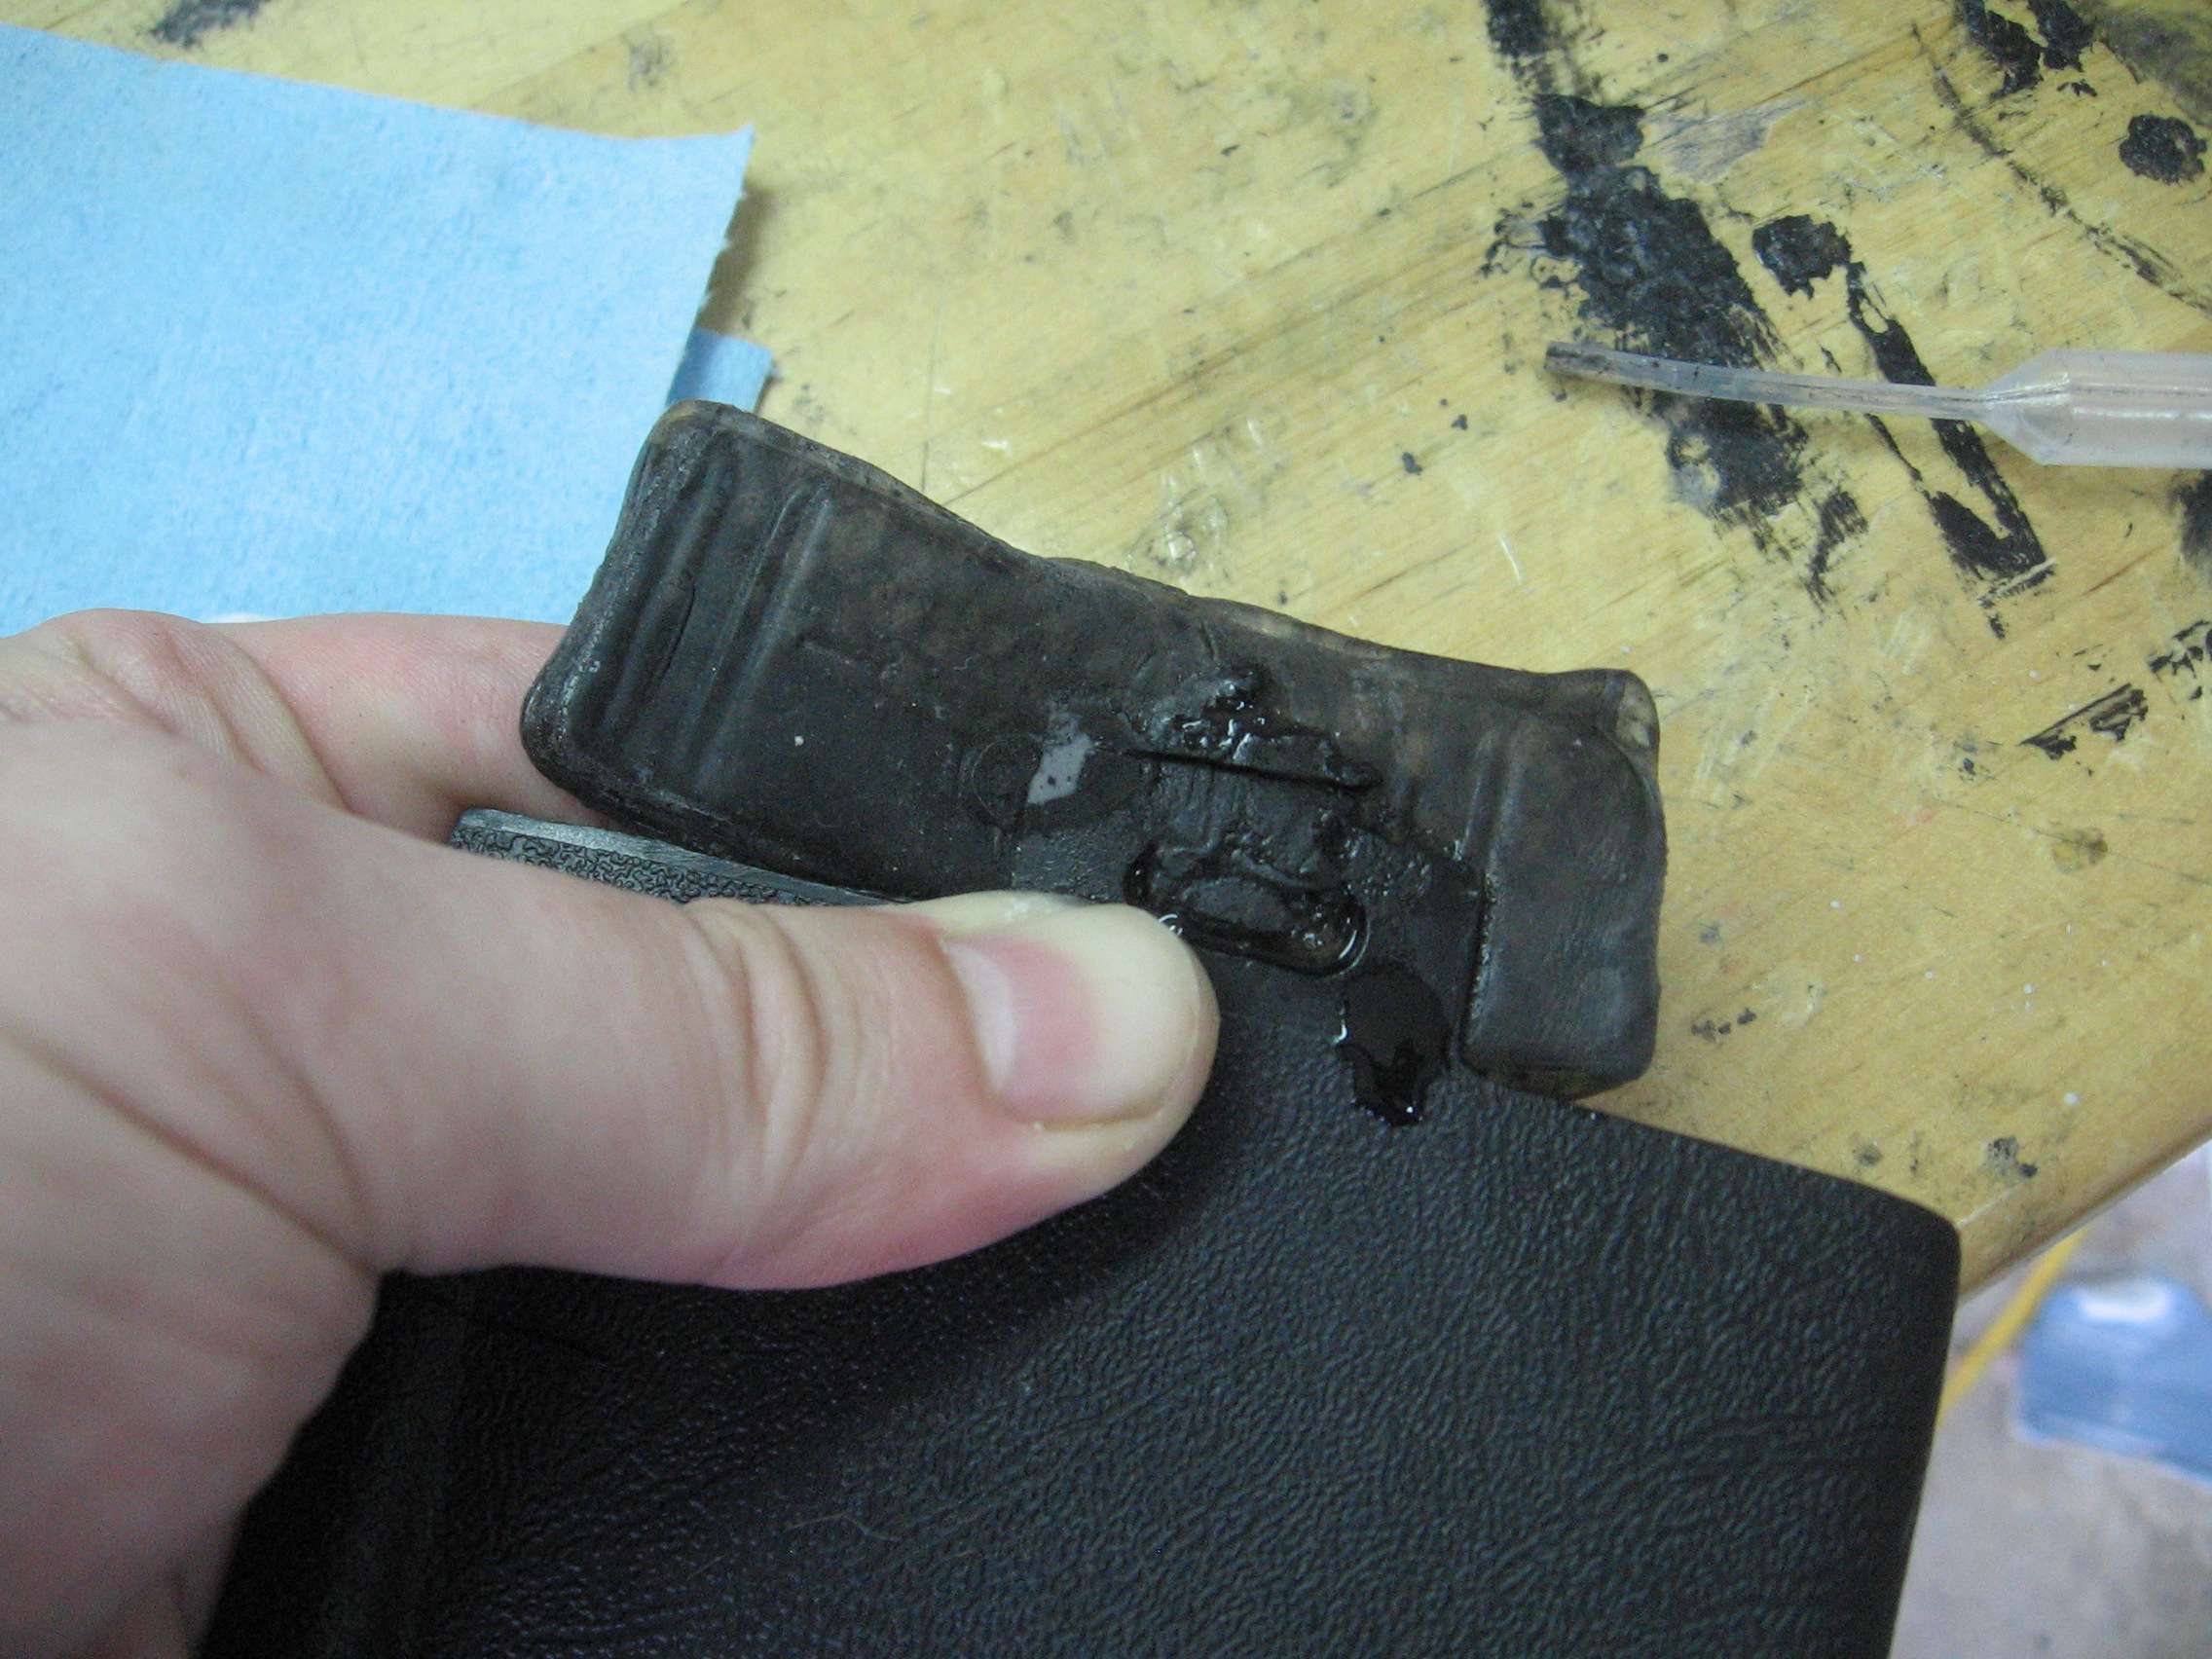
While this isn't pretty, it demonstrates how the system works. After the plastic hardens, you can remove the molding bar. Because the plastic hardens slowly, you have an opportunity to work it and shape it like plastic filler. This can save a great deal of time sanding.

The thumbprint is for id purposes <shifty>.
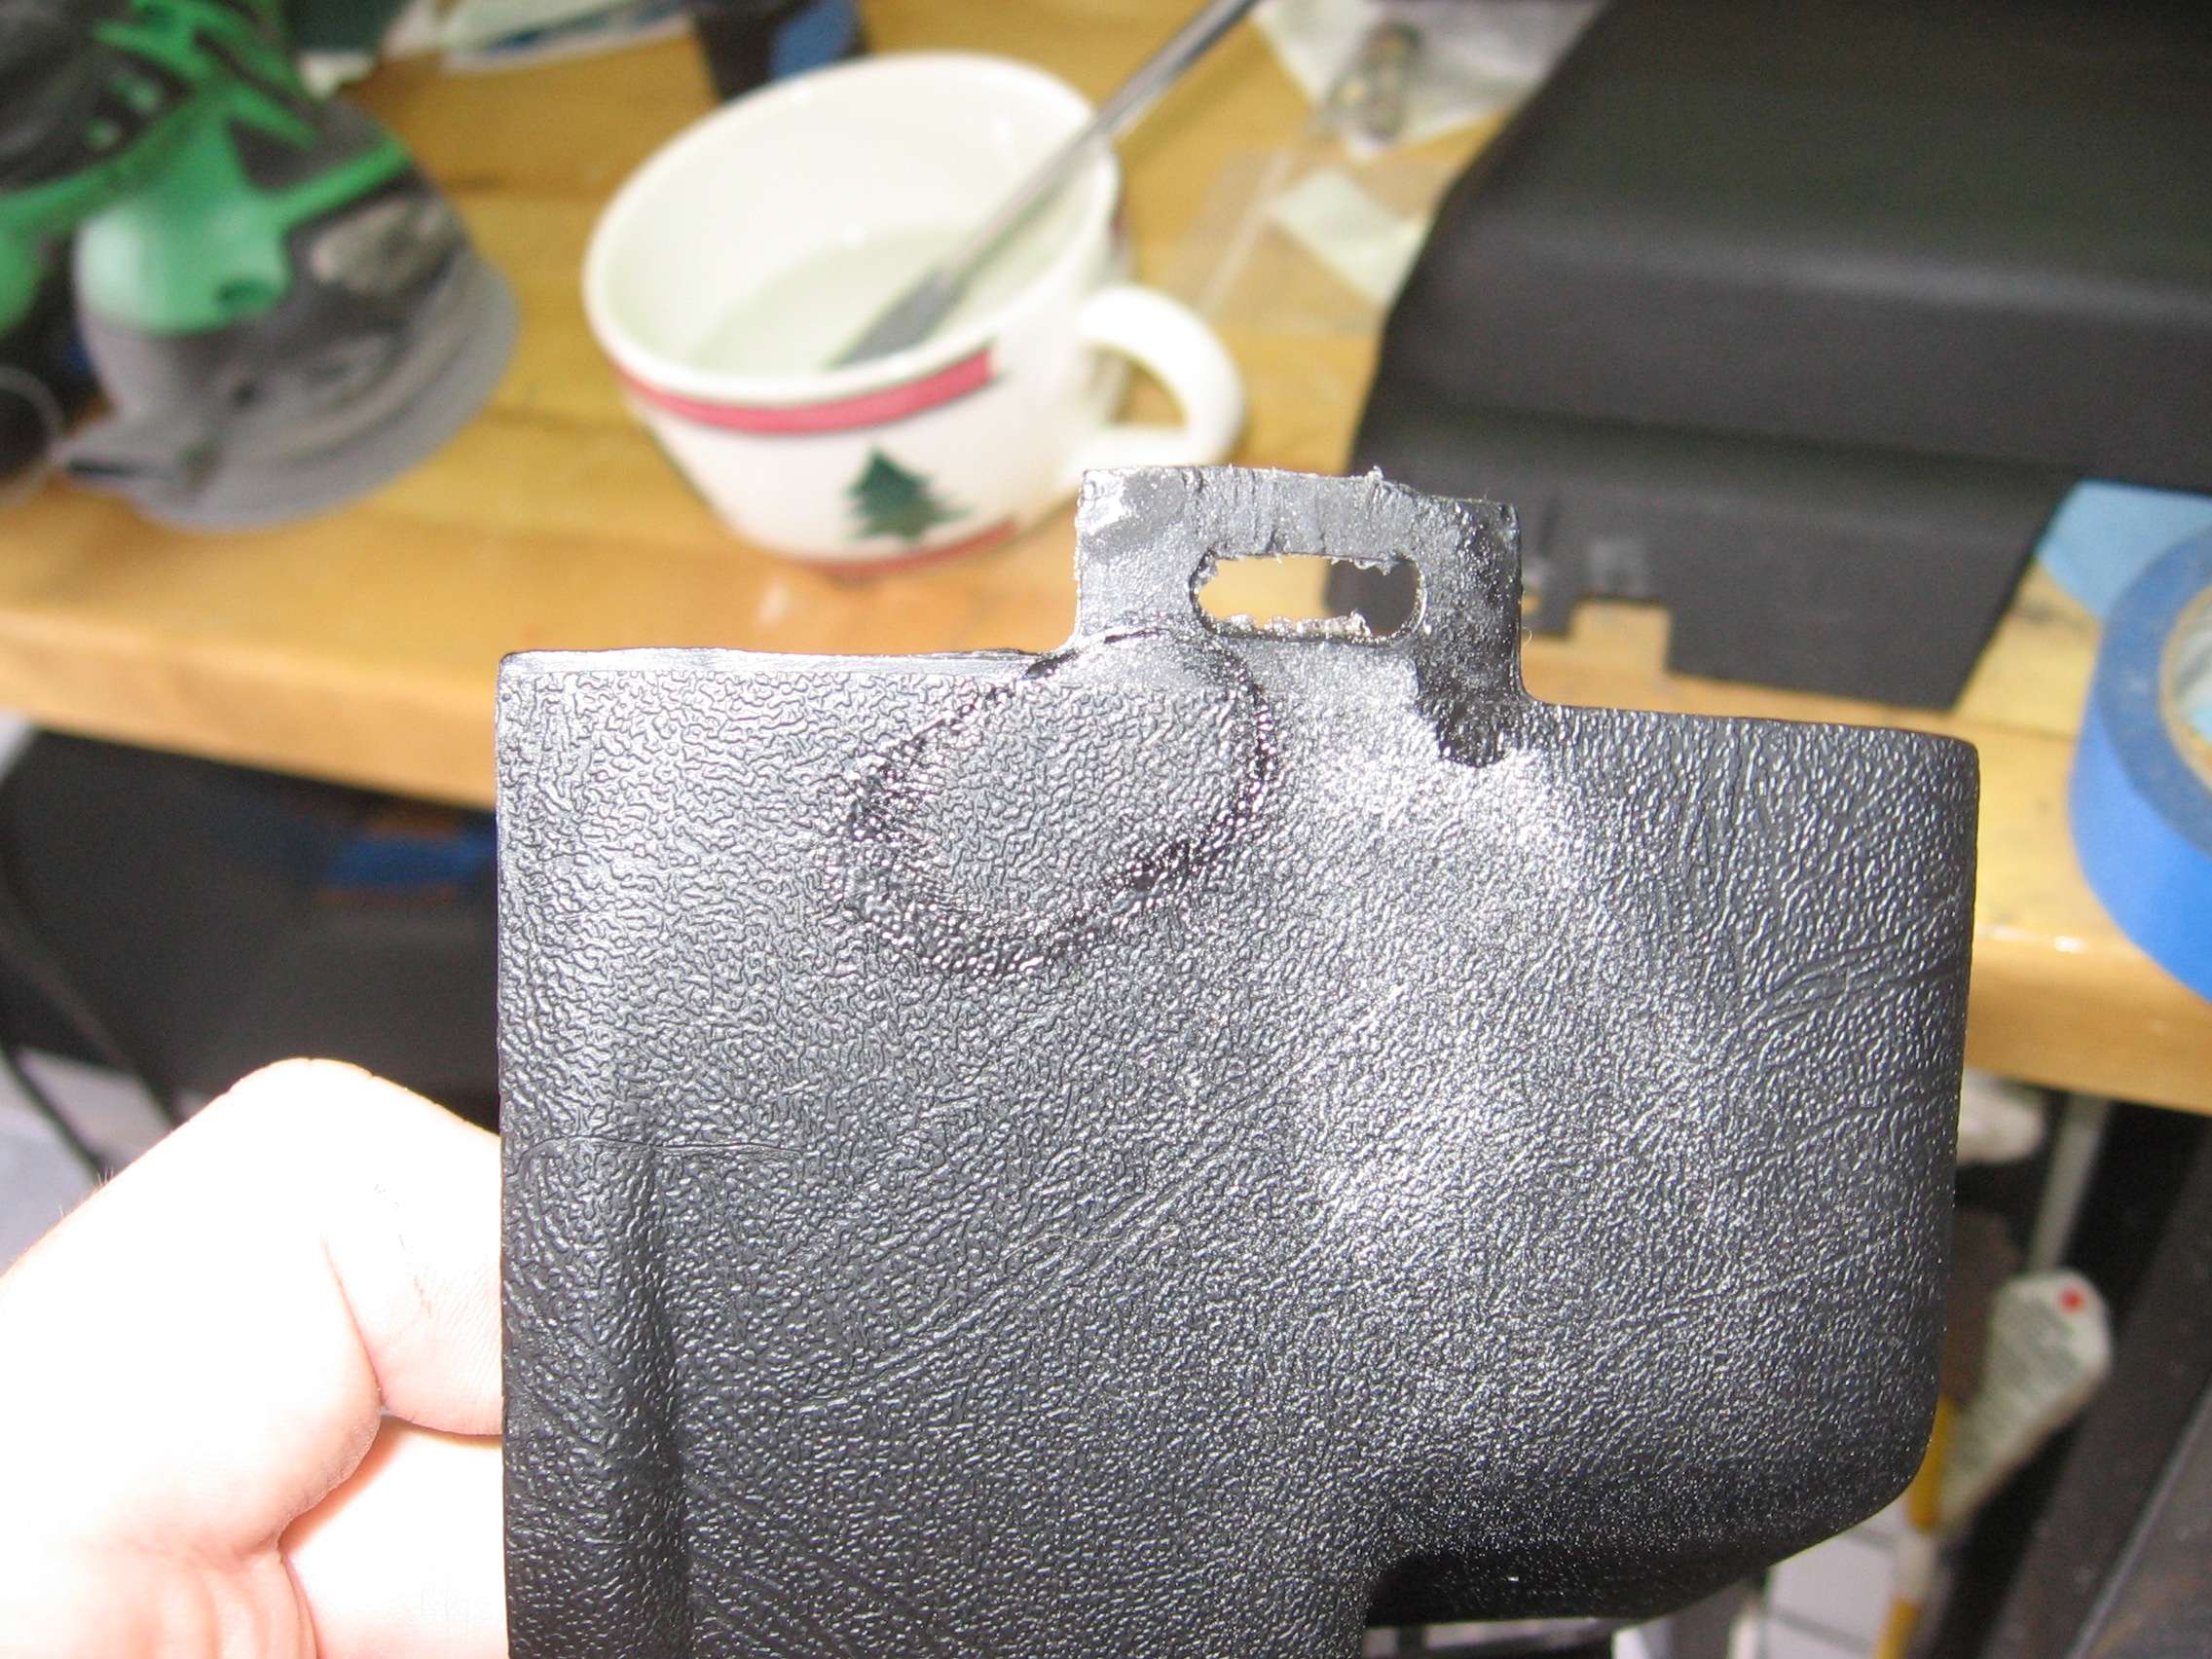
A little sanding and shaping and you have a strong, repaired plastic tab. Now that the basics of the system have been demonstrated, I can show you what I did to the HVAC panel.
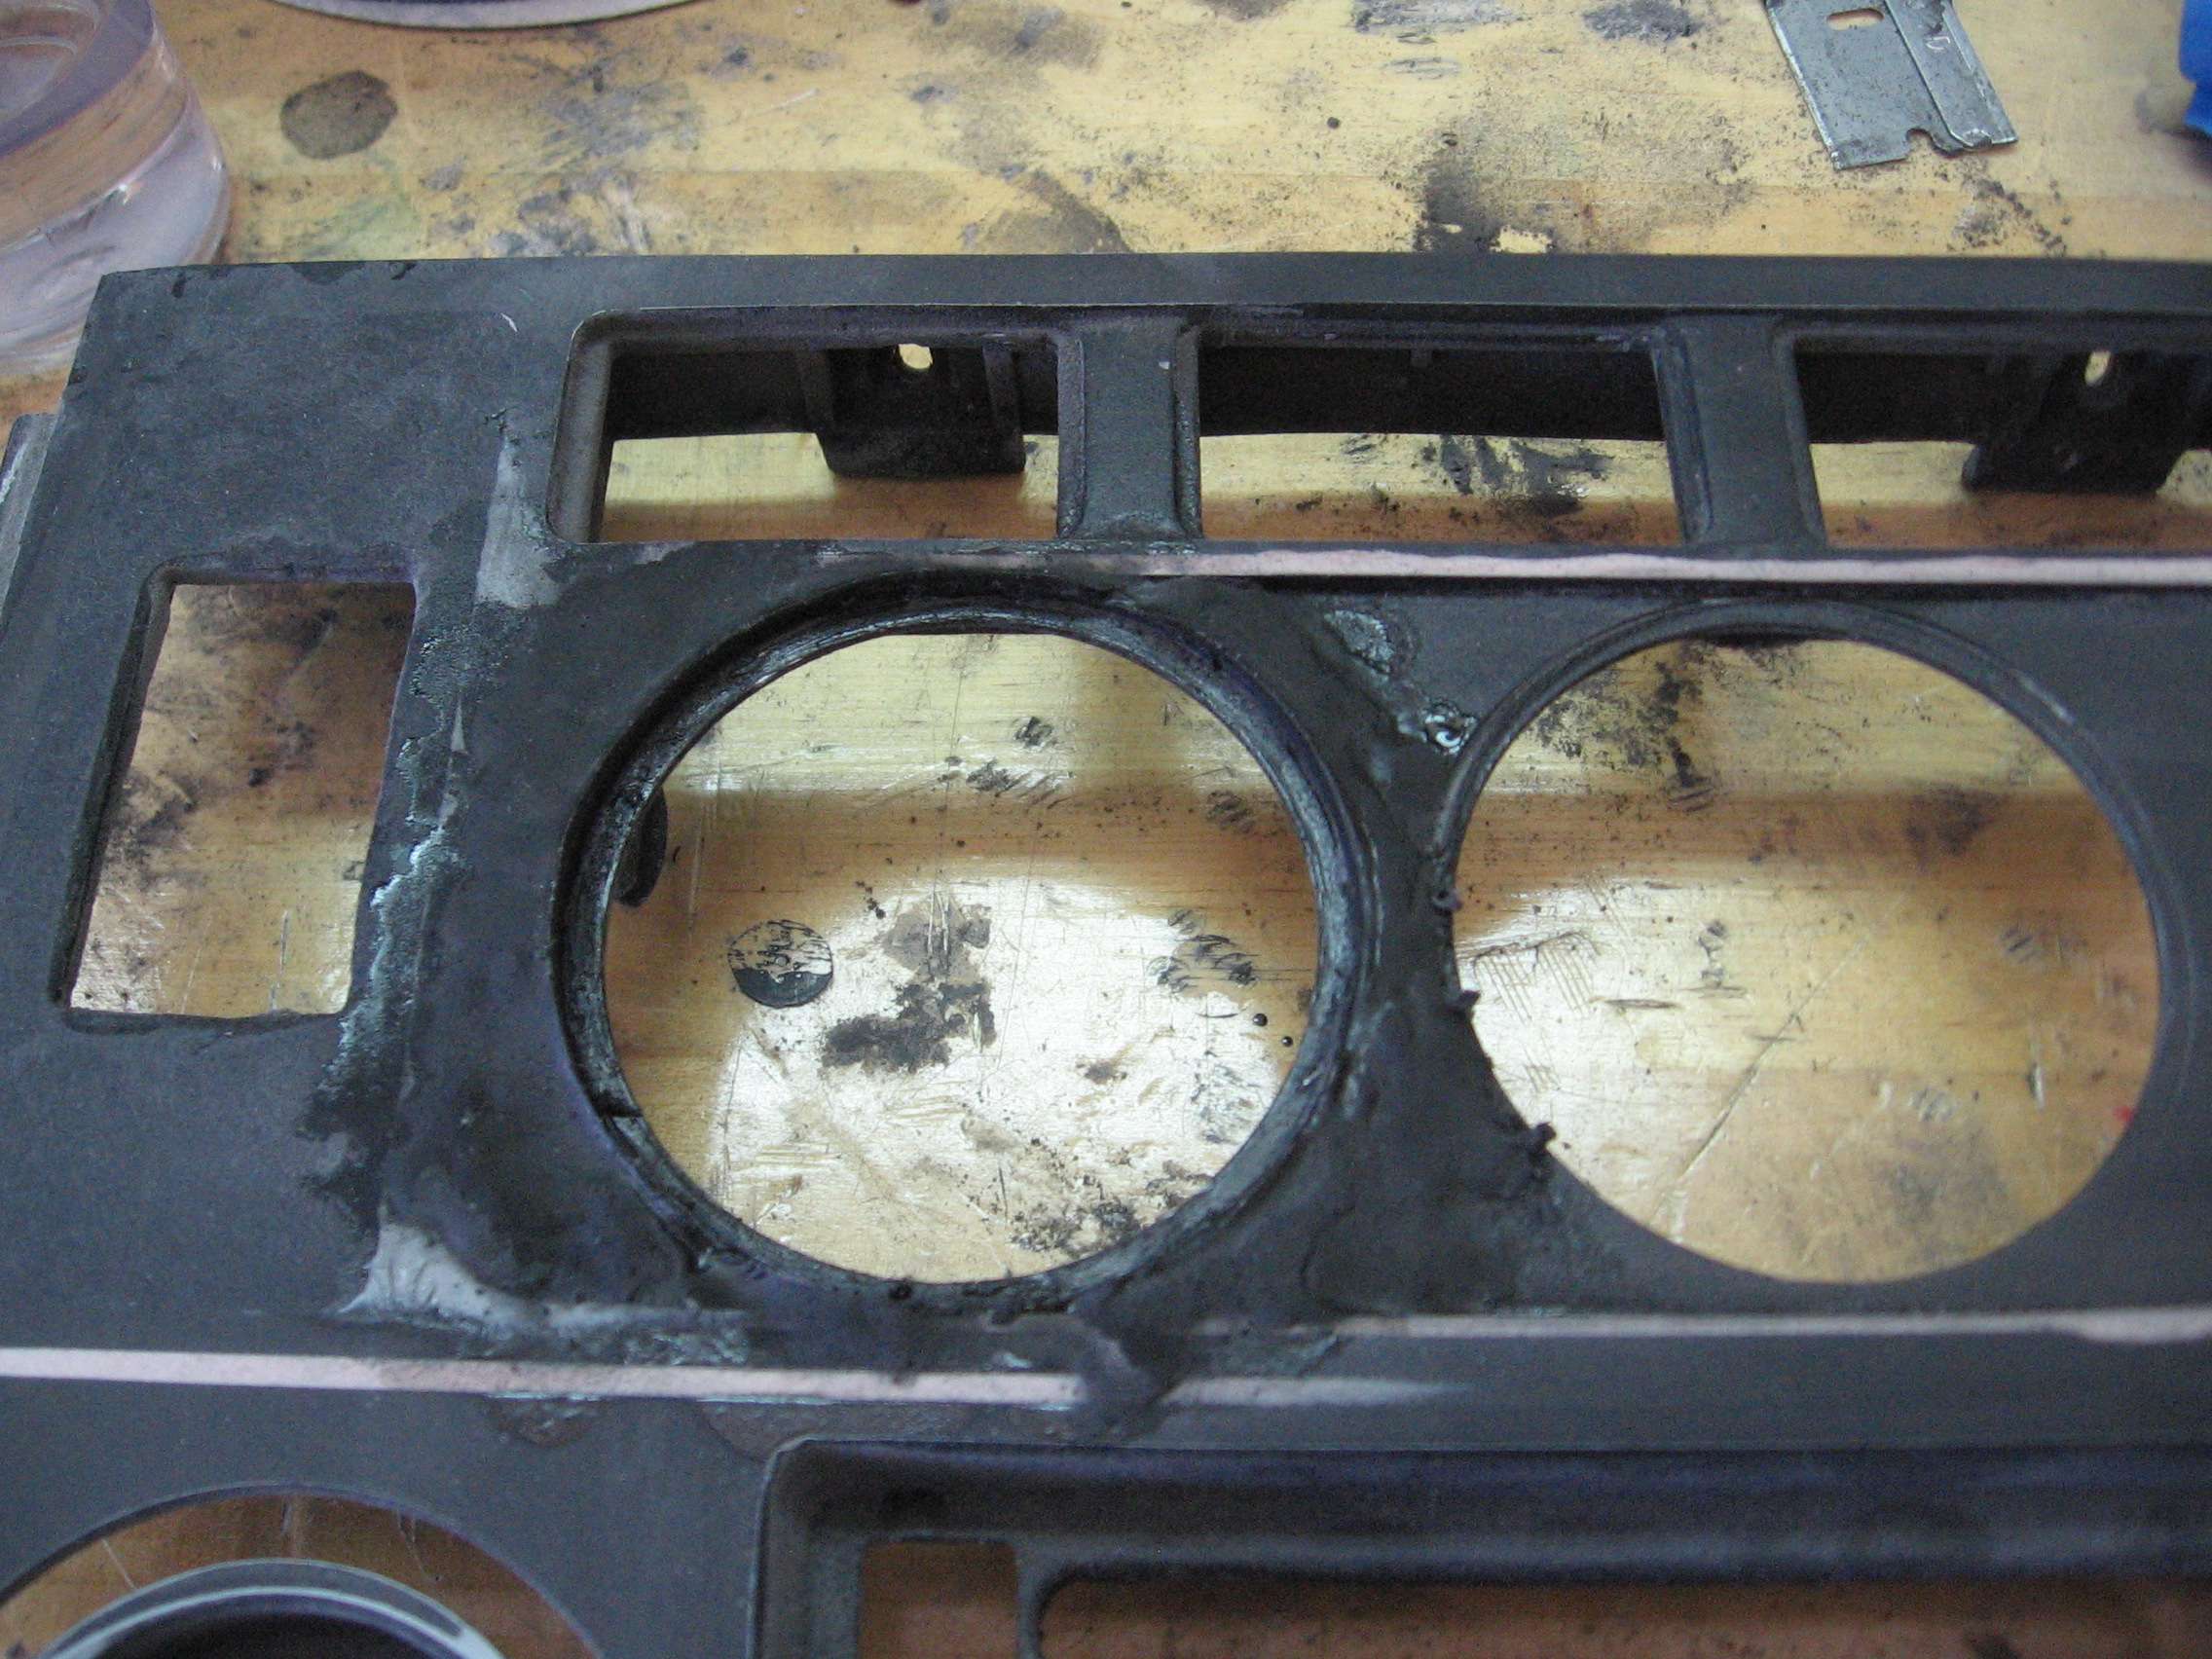
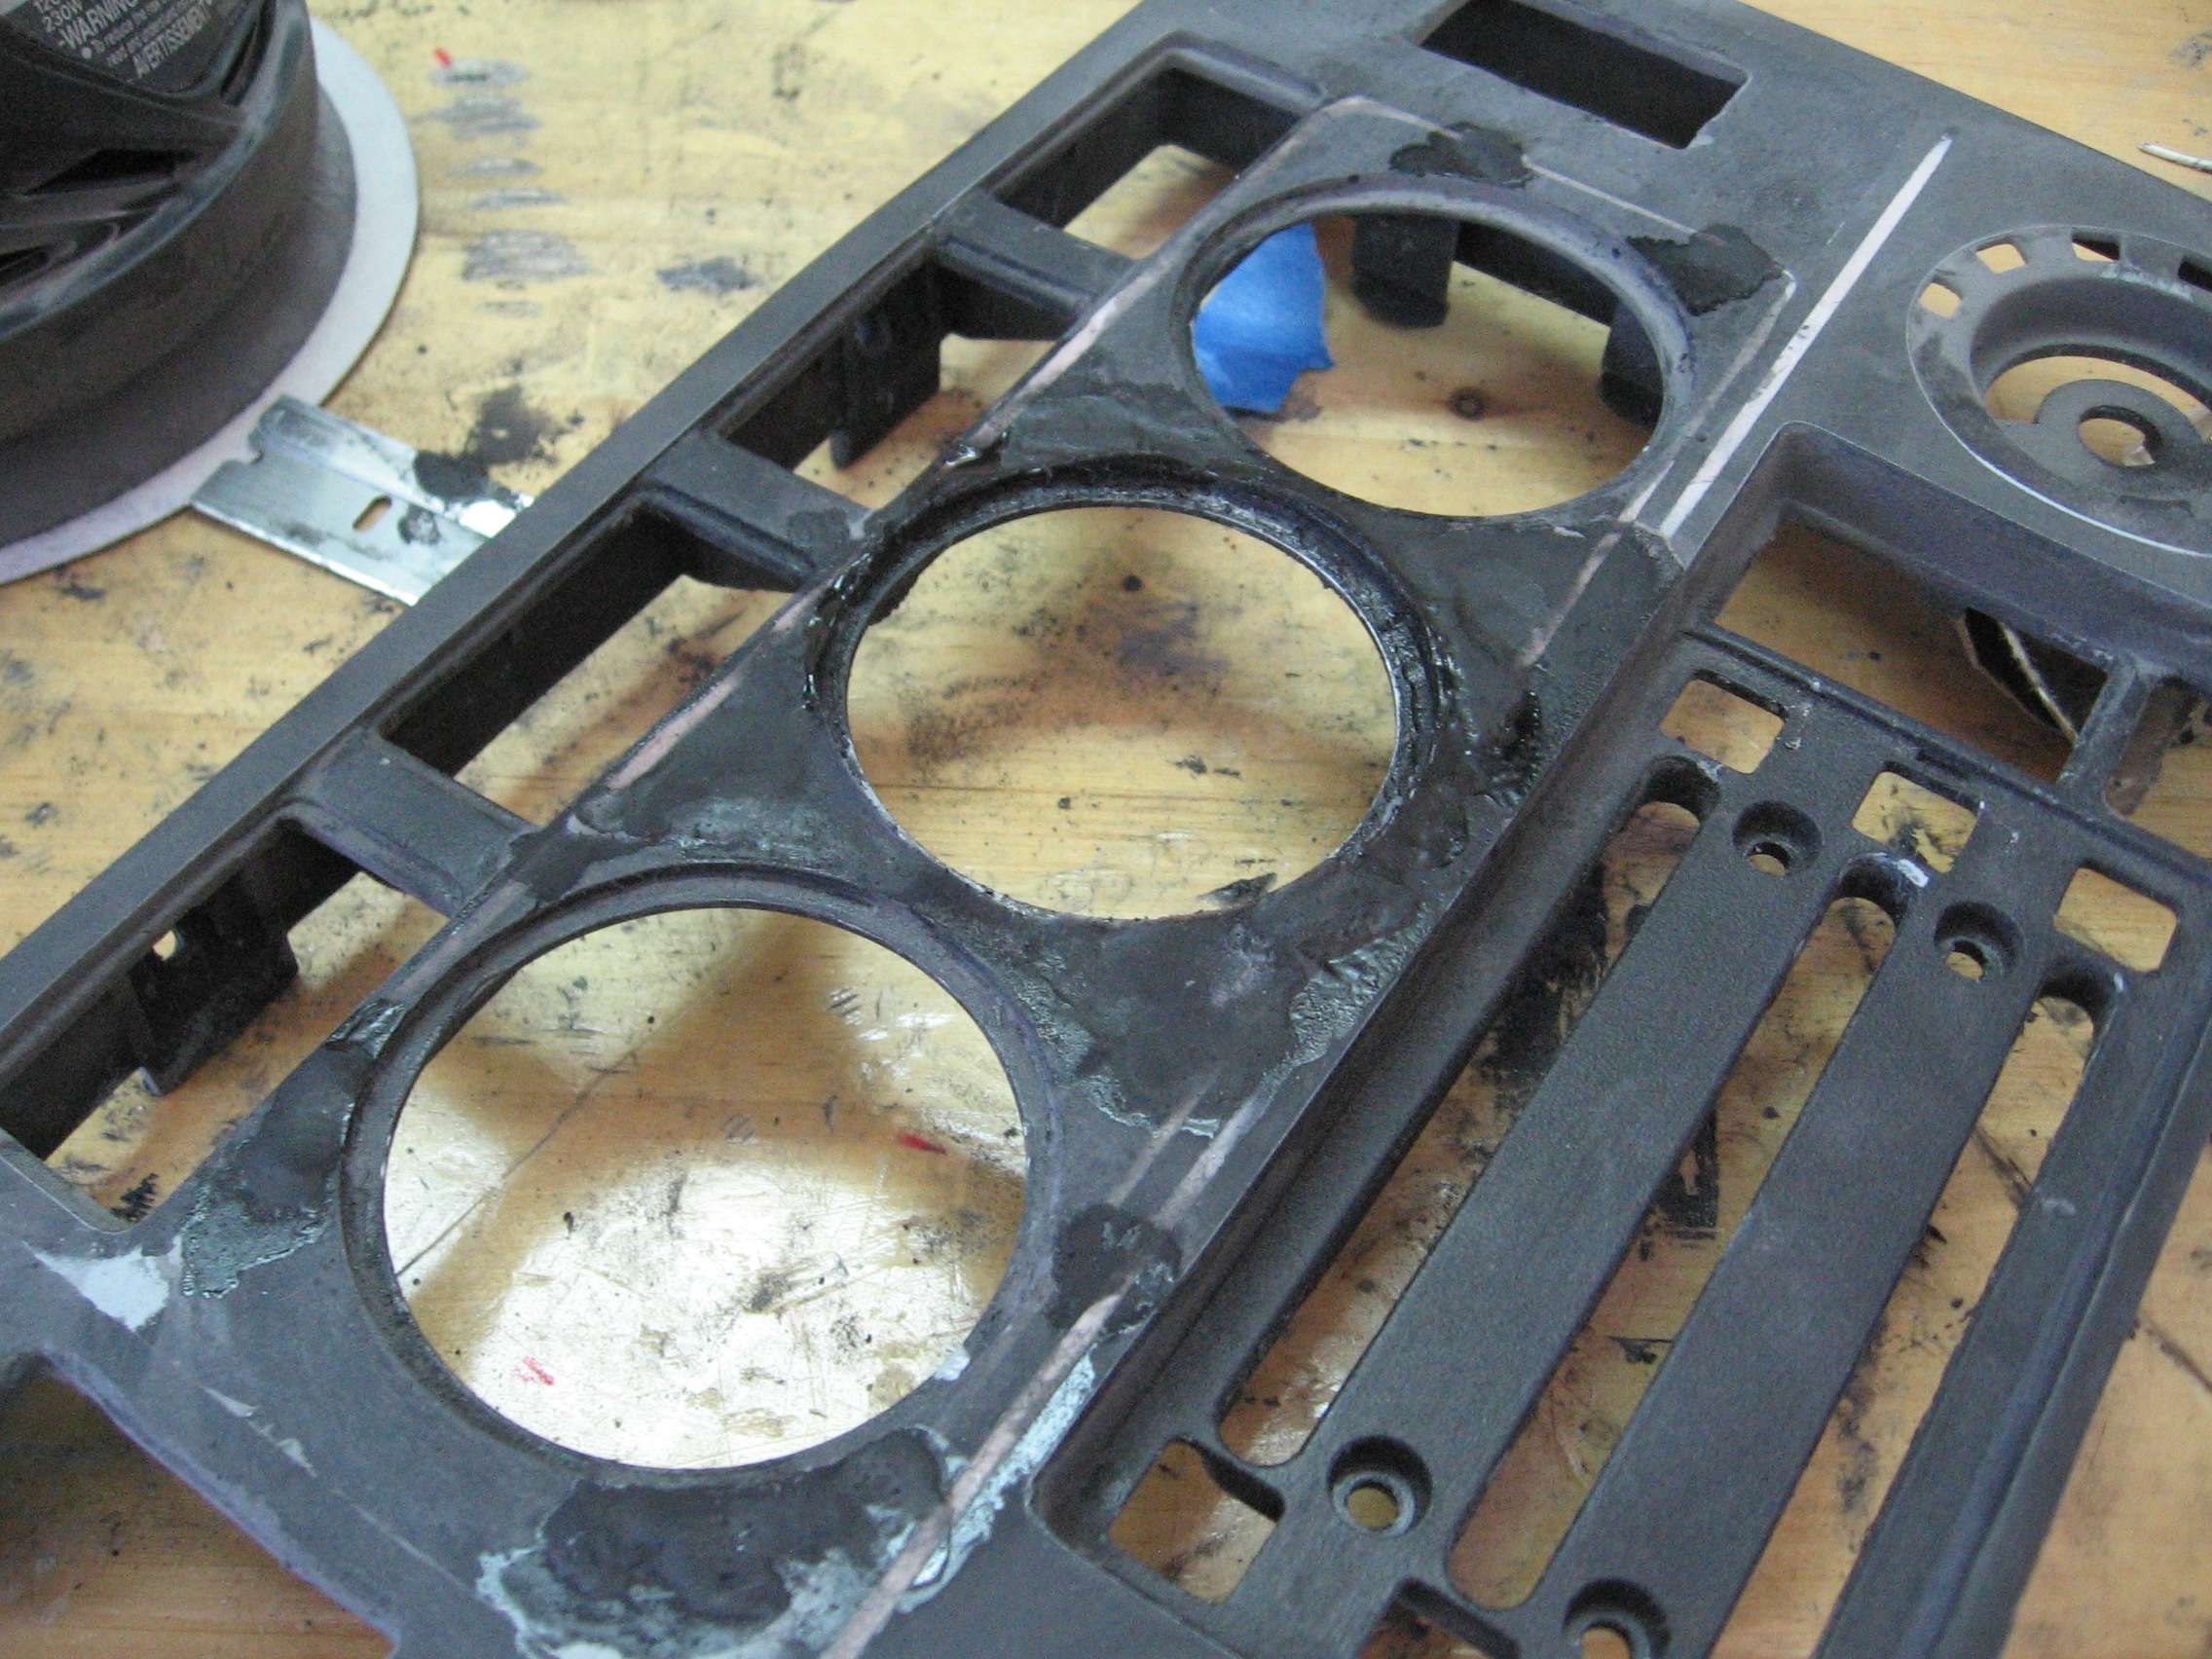
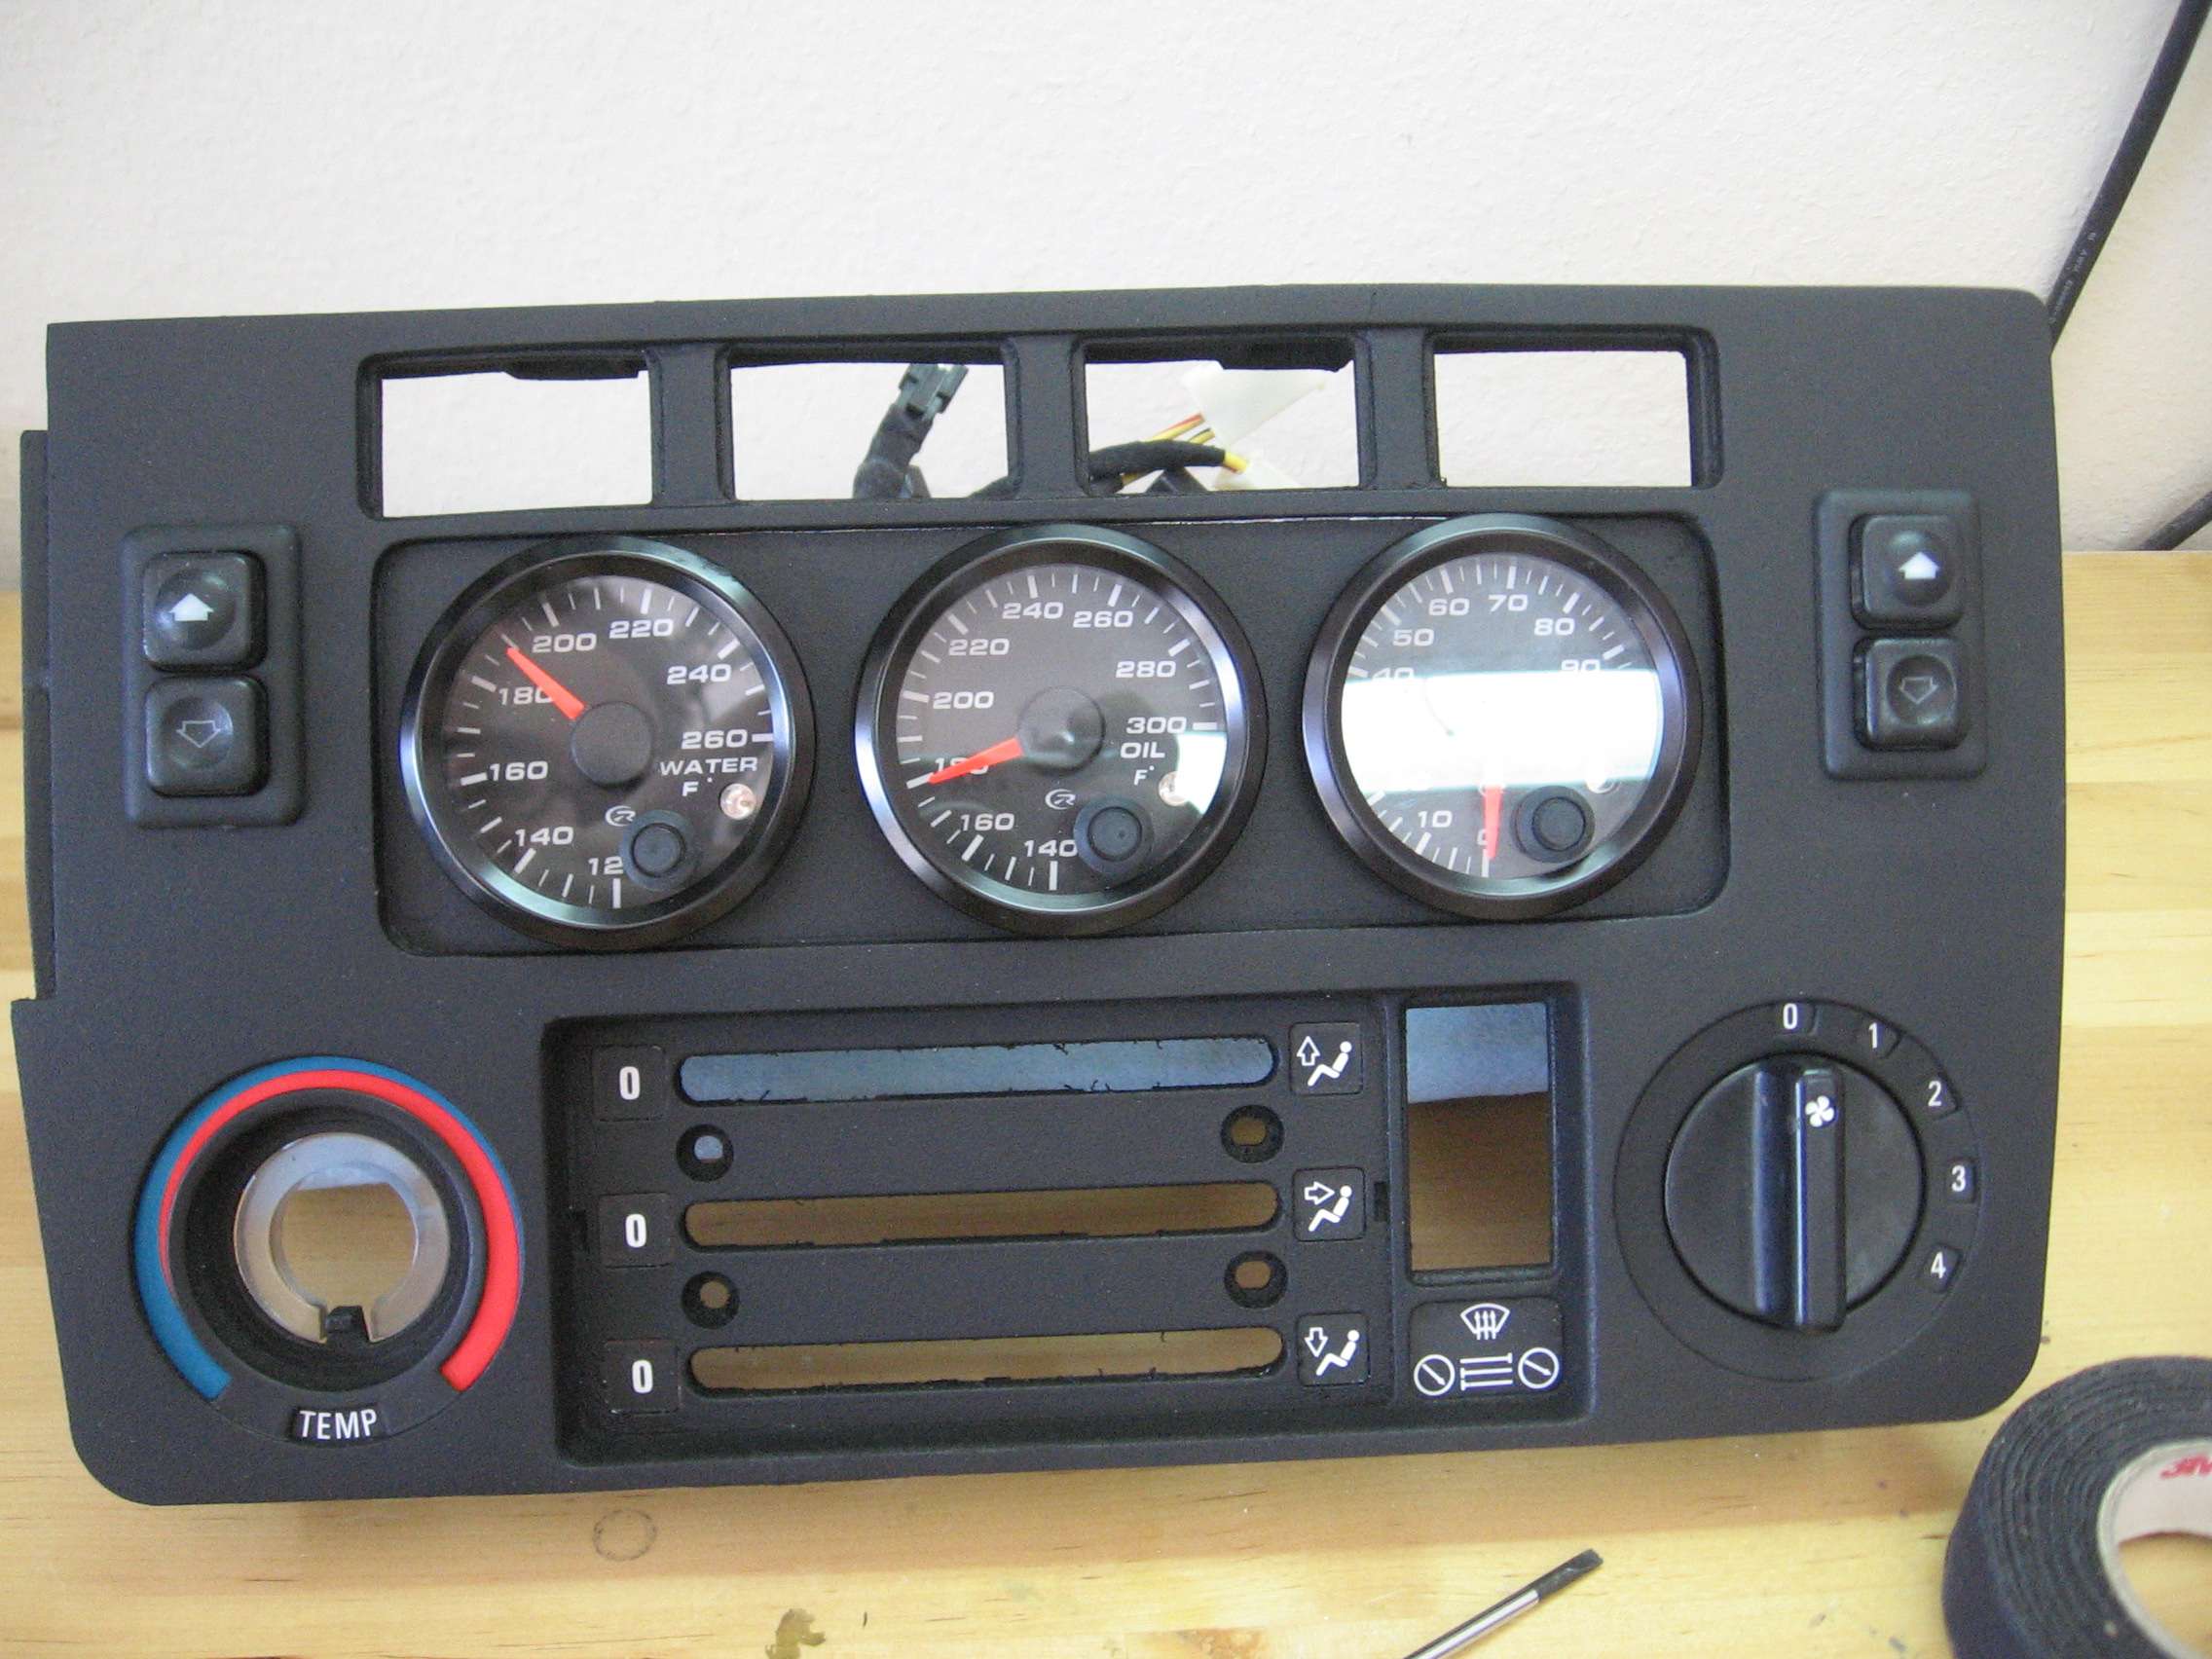
The broken joint needed to be repaired and I identified another crack as well. This was creating a warp in the panel so I placed some weight on the face of the panel and made the repair. I decided to fill in the recess portion for the window switches and since I couldn't get the gauge section to do what I wanted, I decided to fill it in and partially recess the 3 gauges.
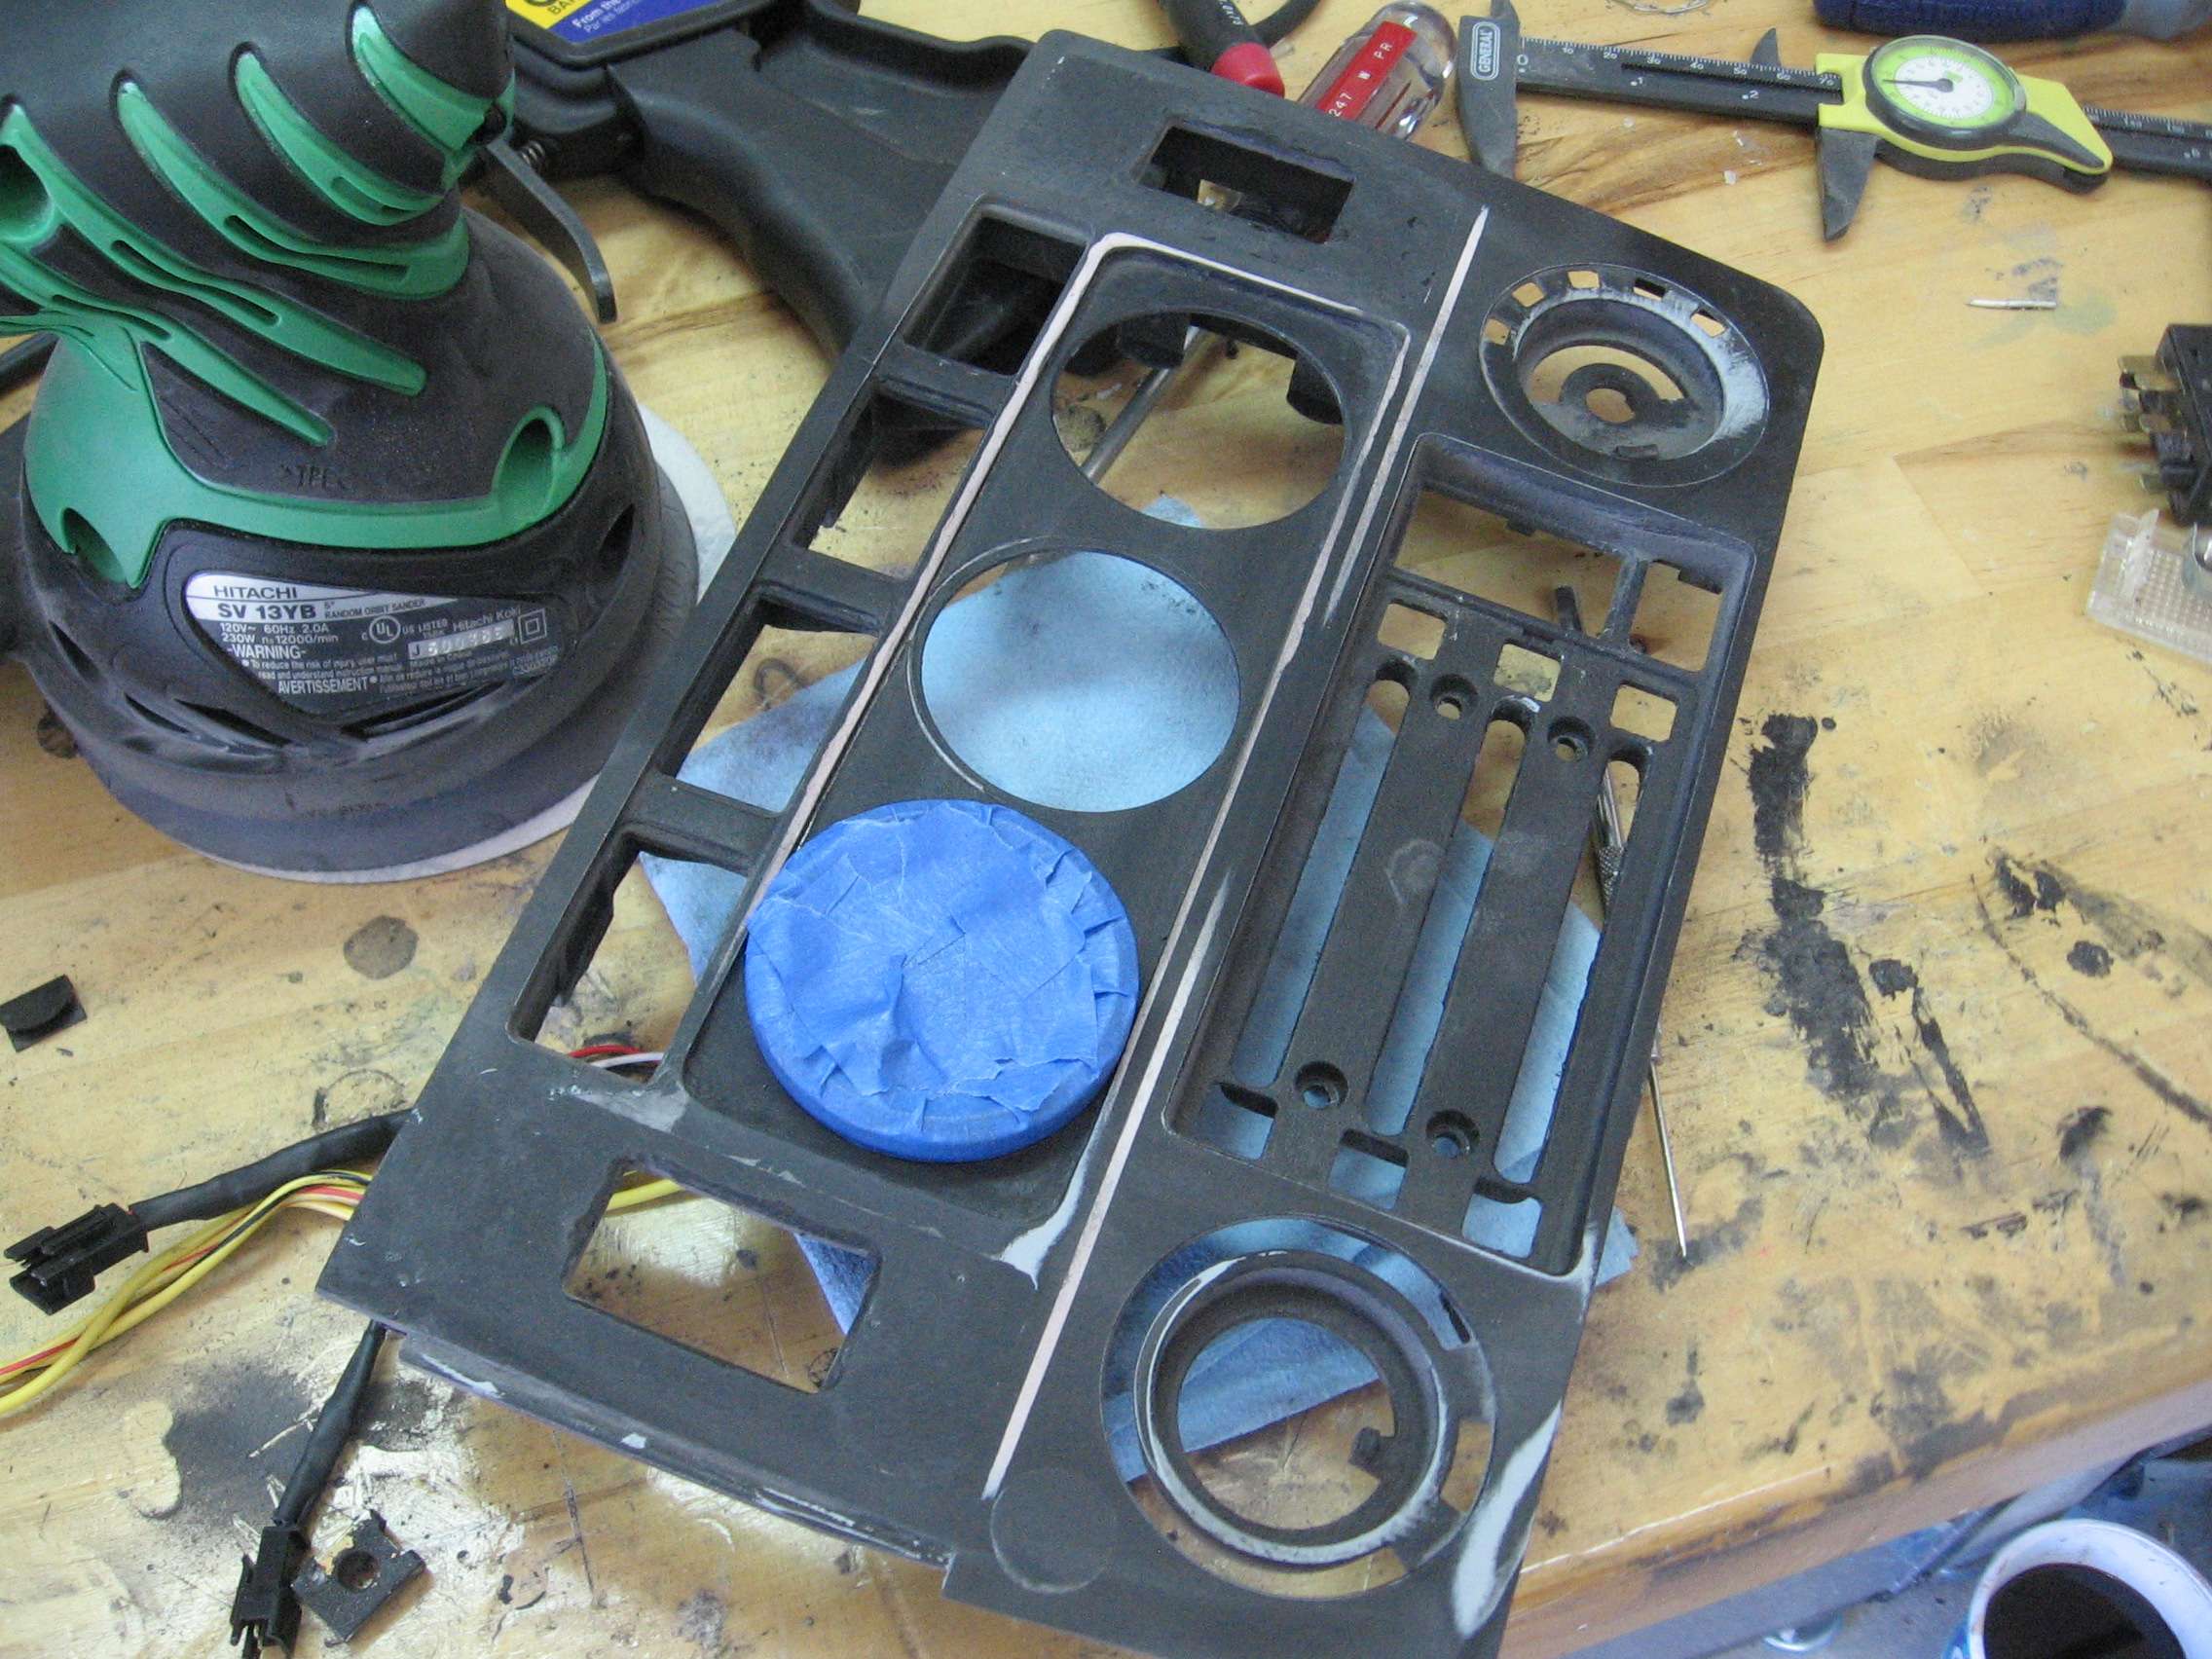
The gauge is taped because i wanted to use it as a mold. Any plastic would stick to the tape and allow for cleaner removal of the gauge. This was not an exact process and took some trial and error before I got a method that worked well.
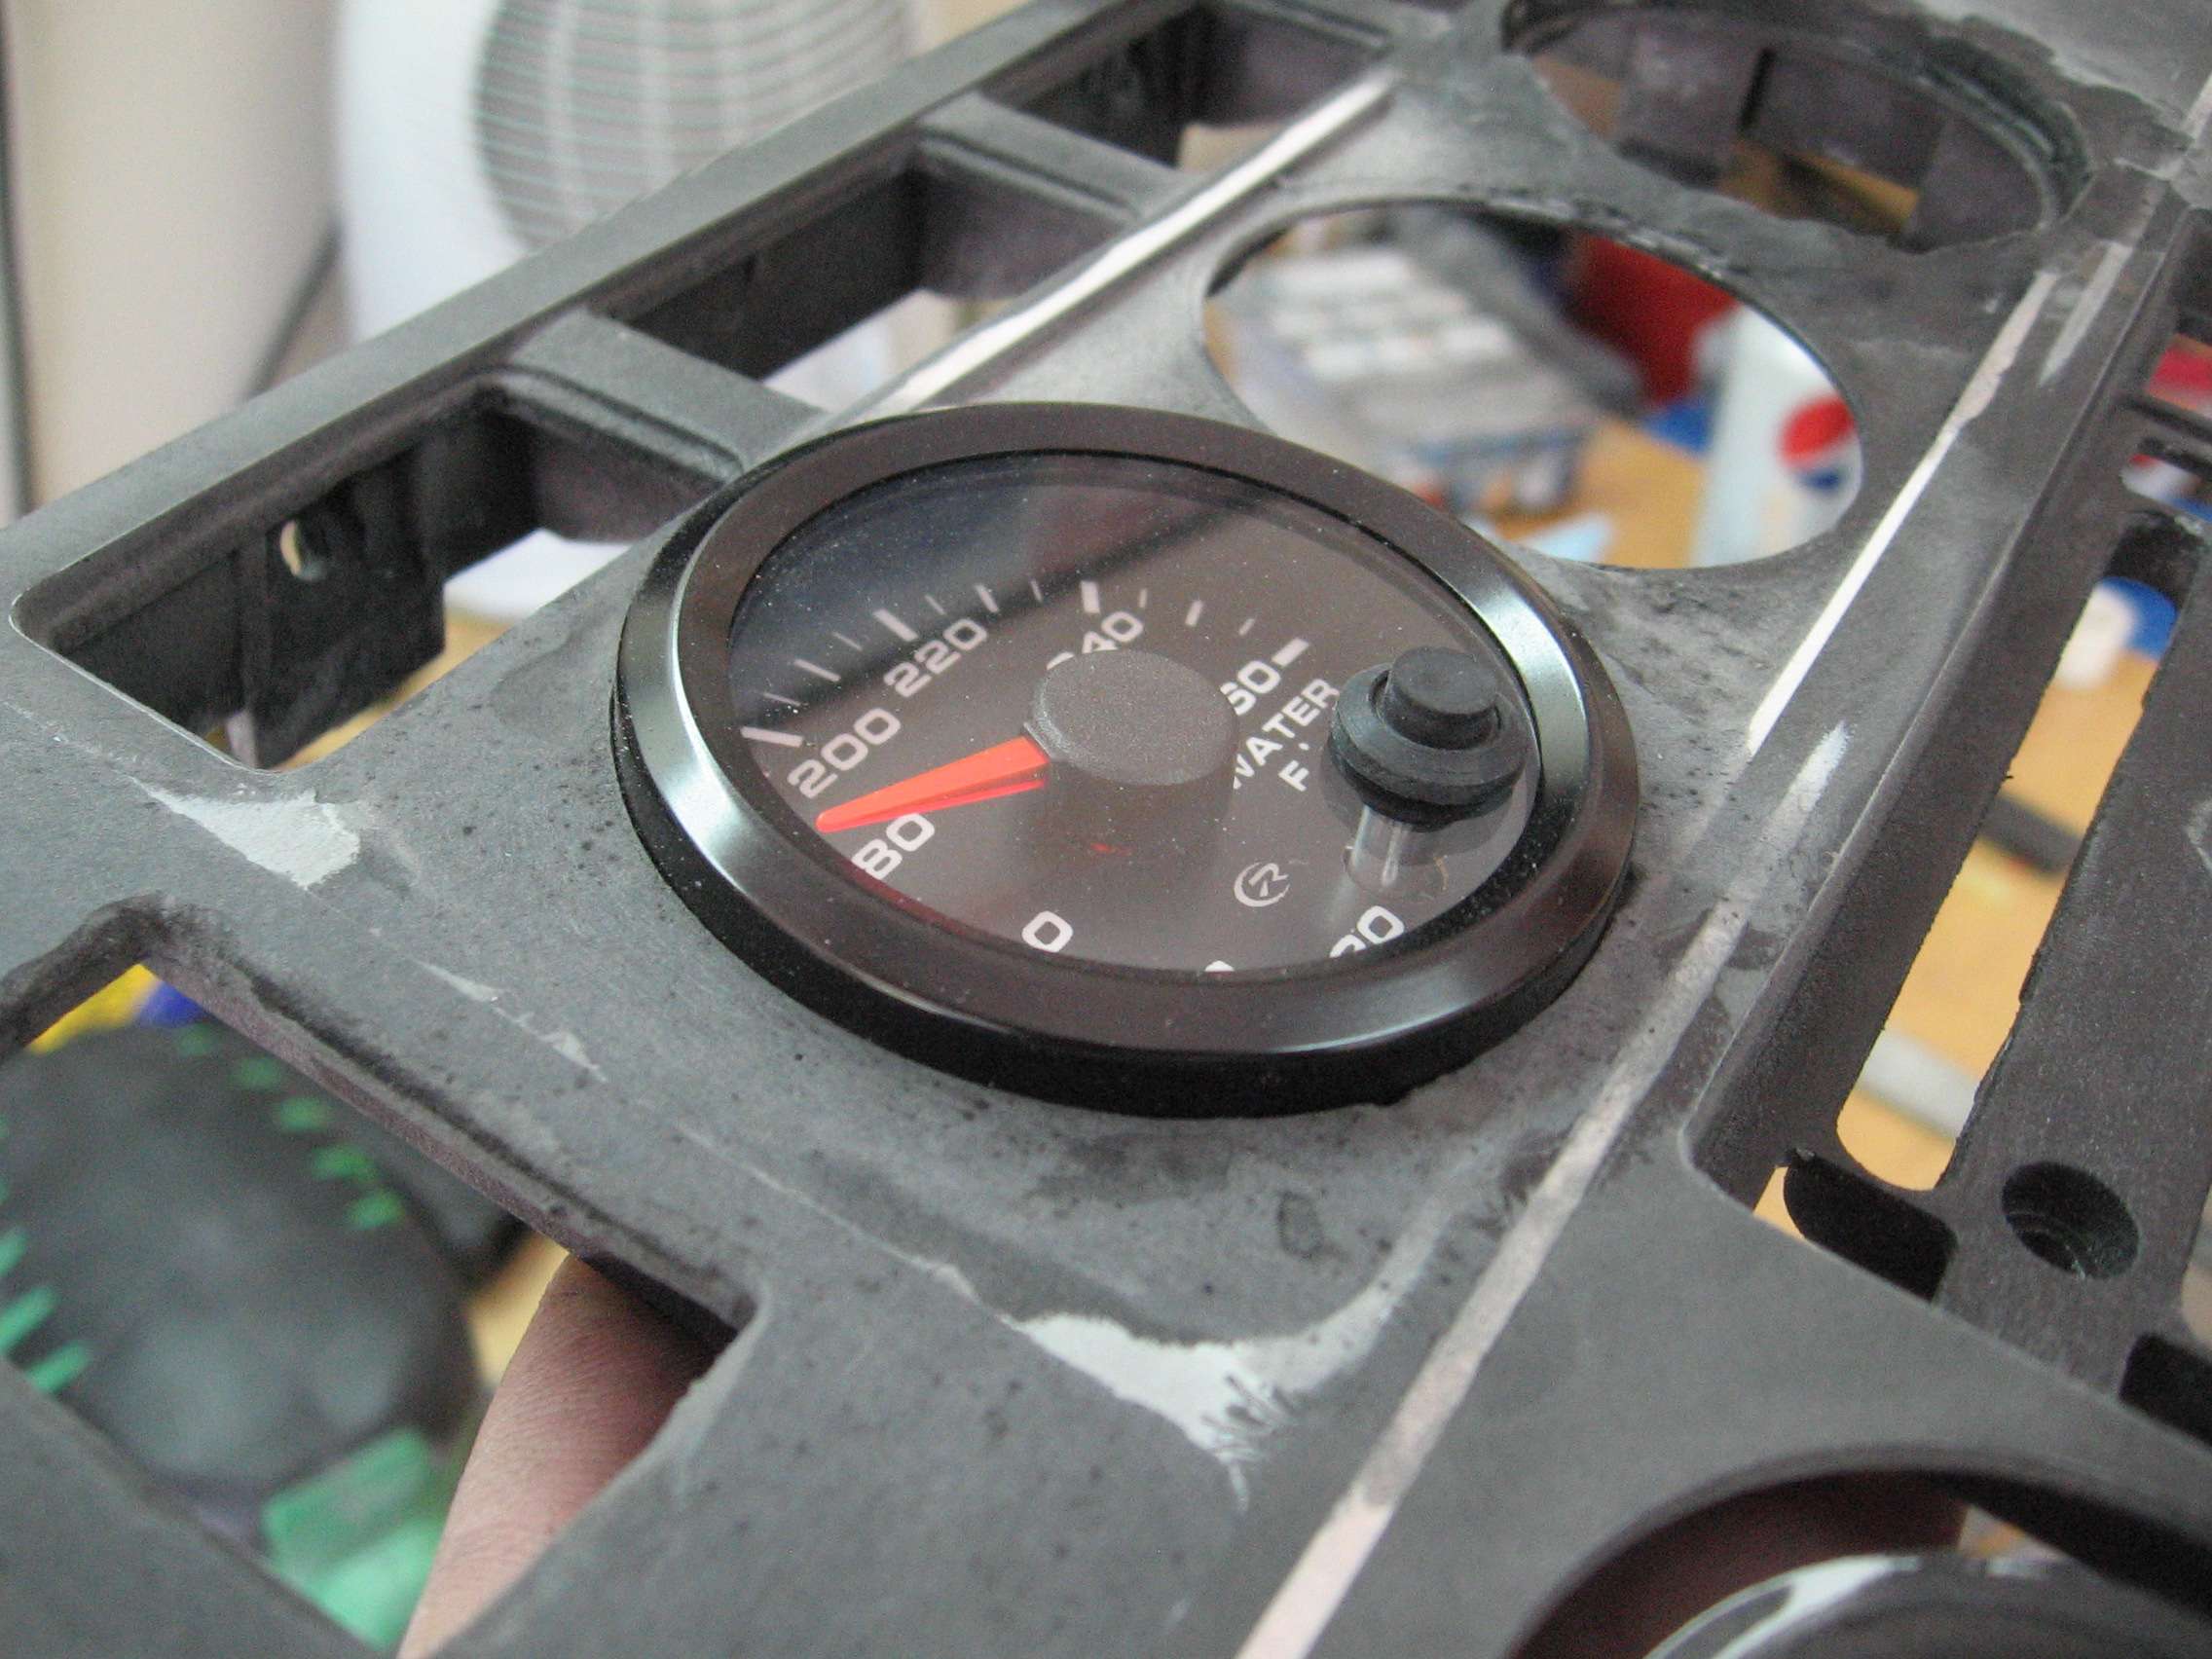
I ended up doing each gauge one at a time. The reality of the situation is that I was too scared to ruin 3 gauges versus 1. It took longer but still worked.
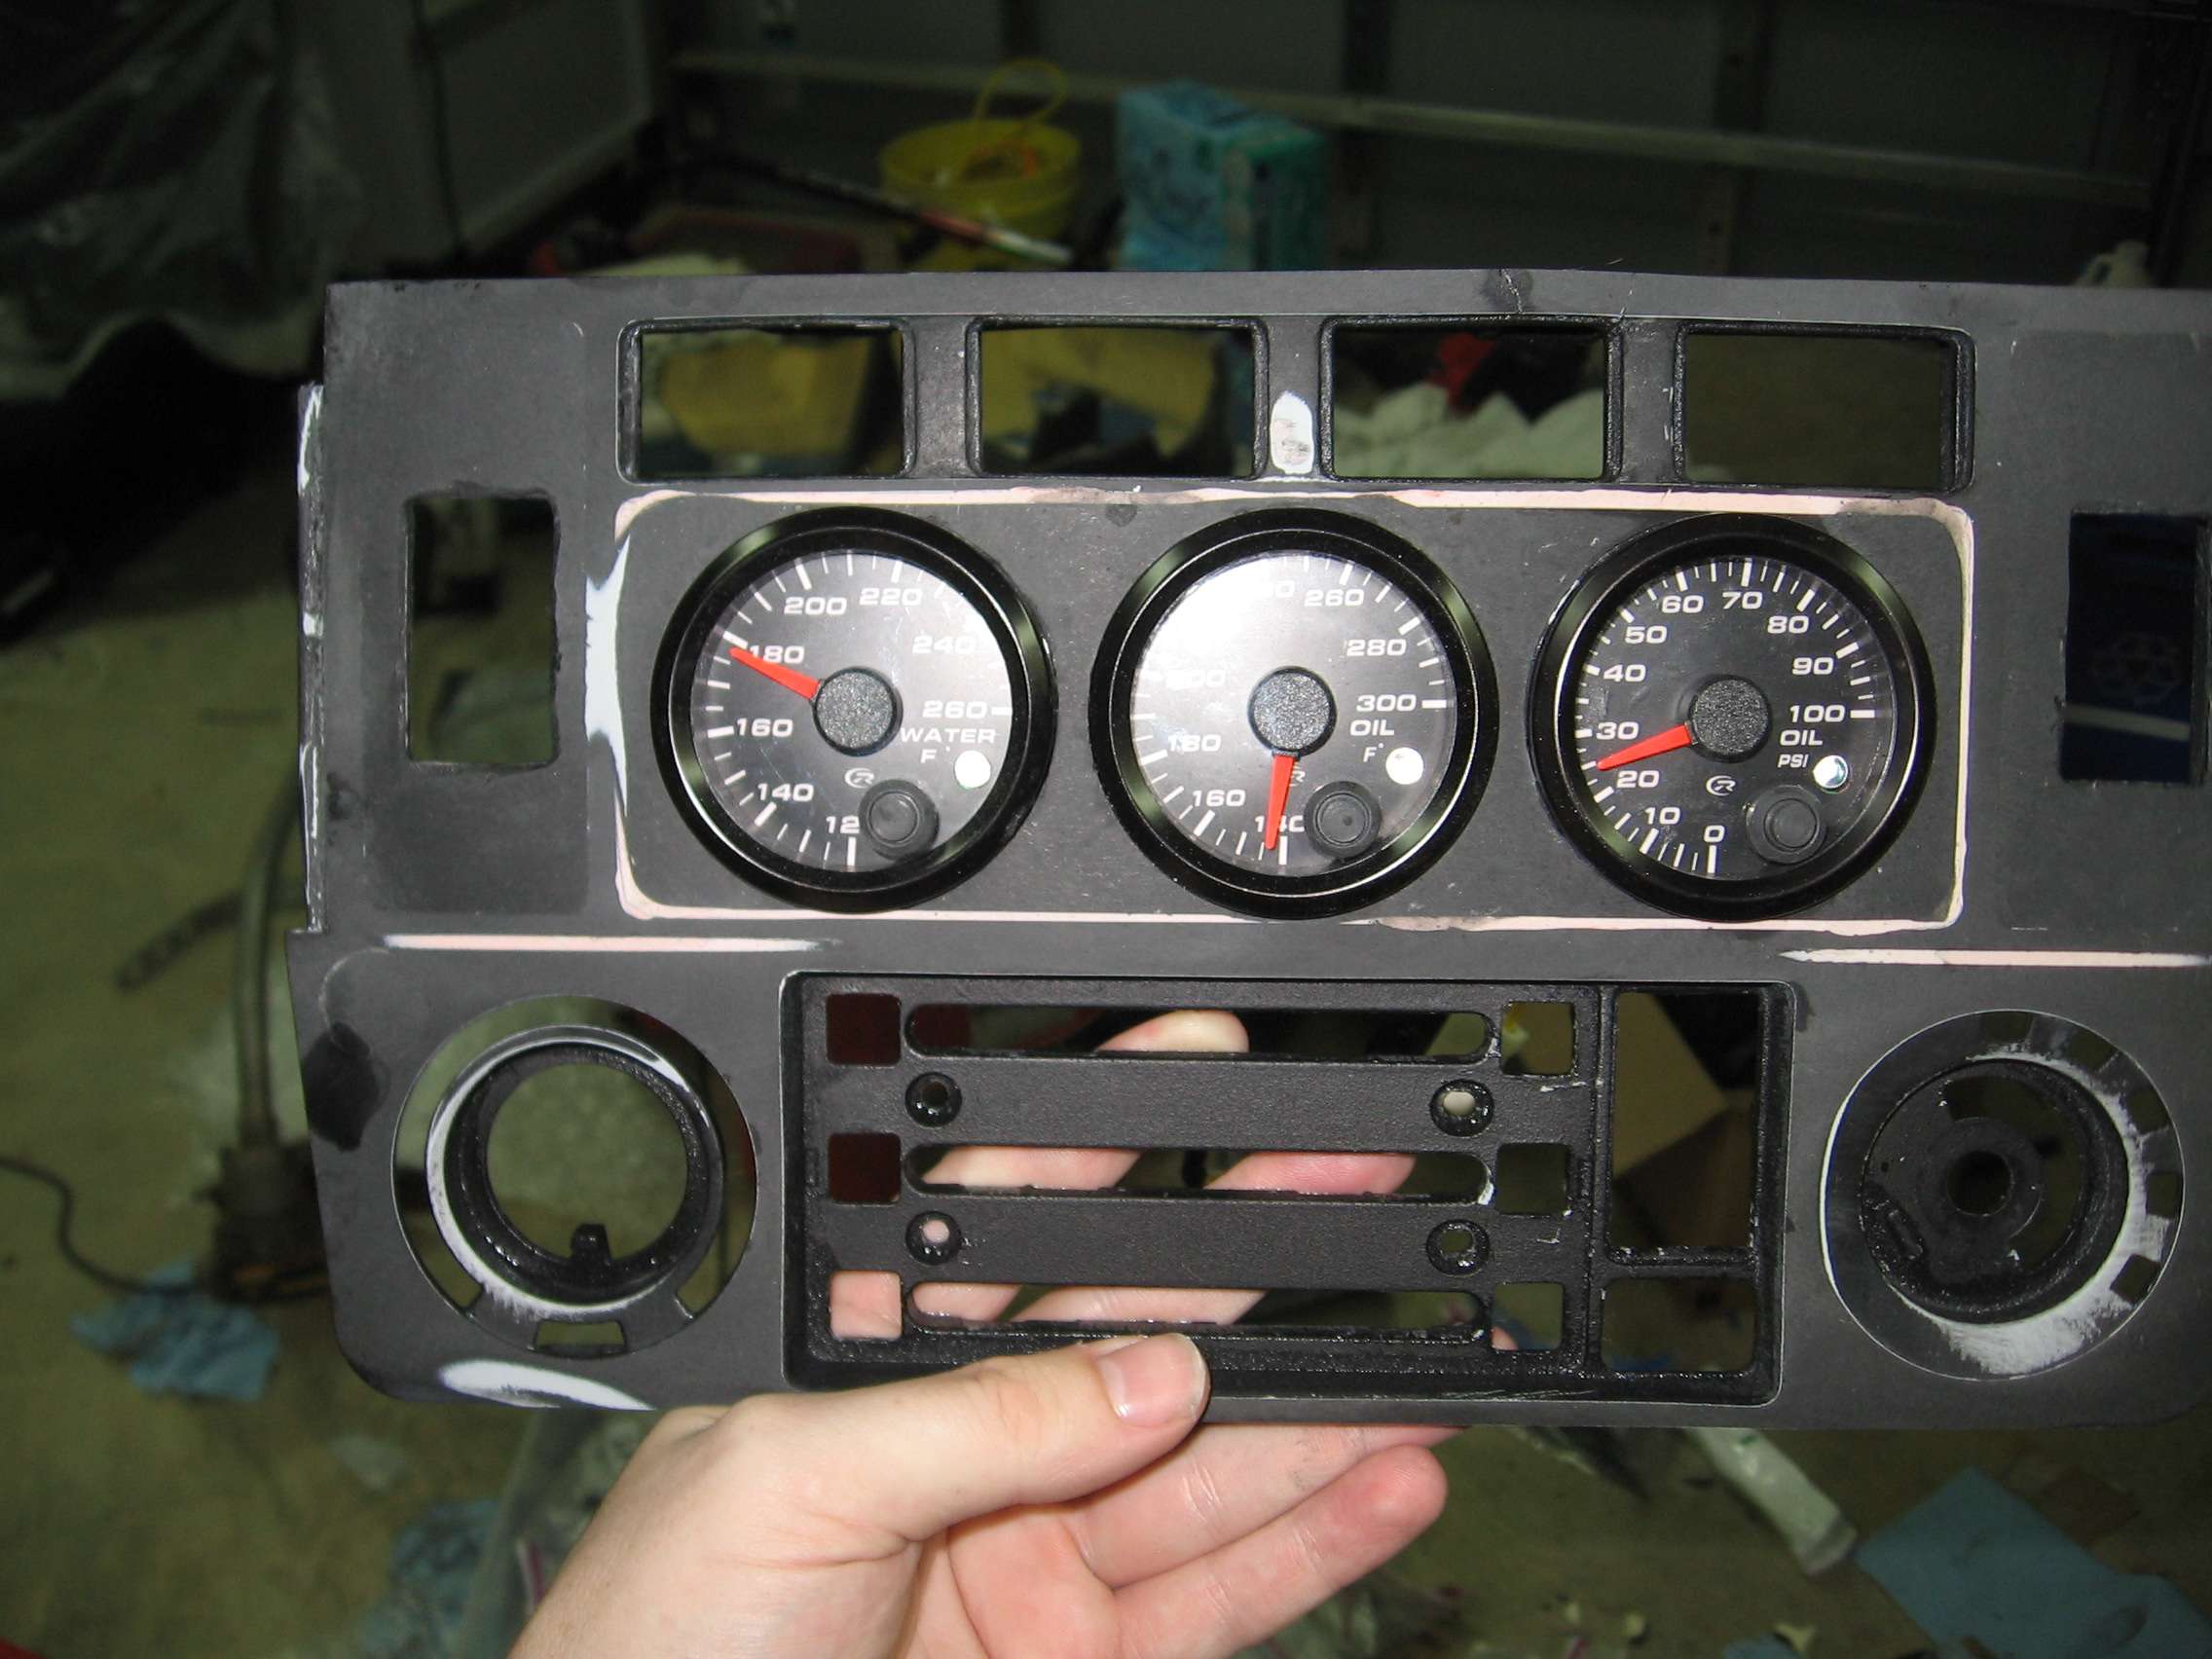
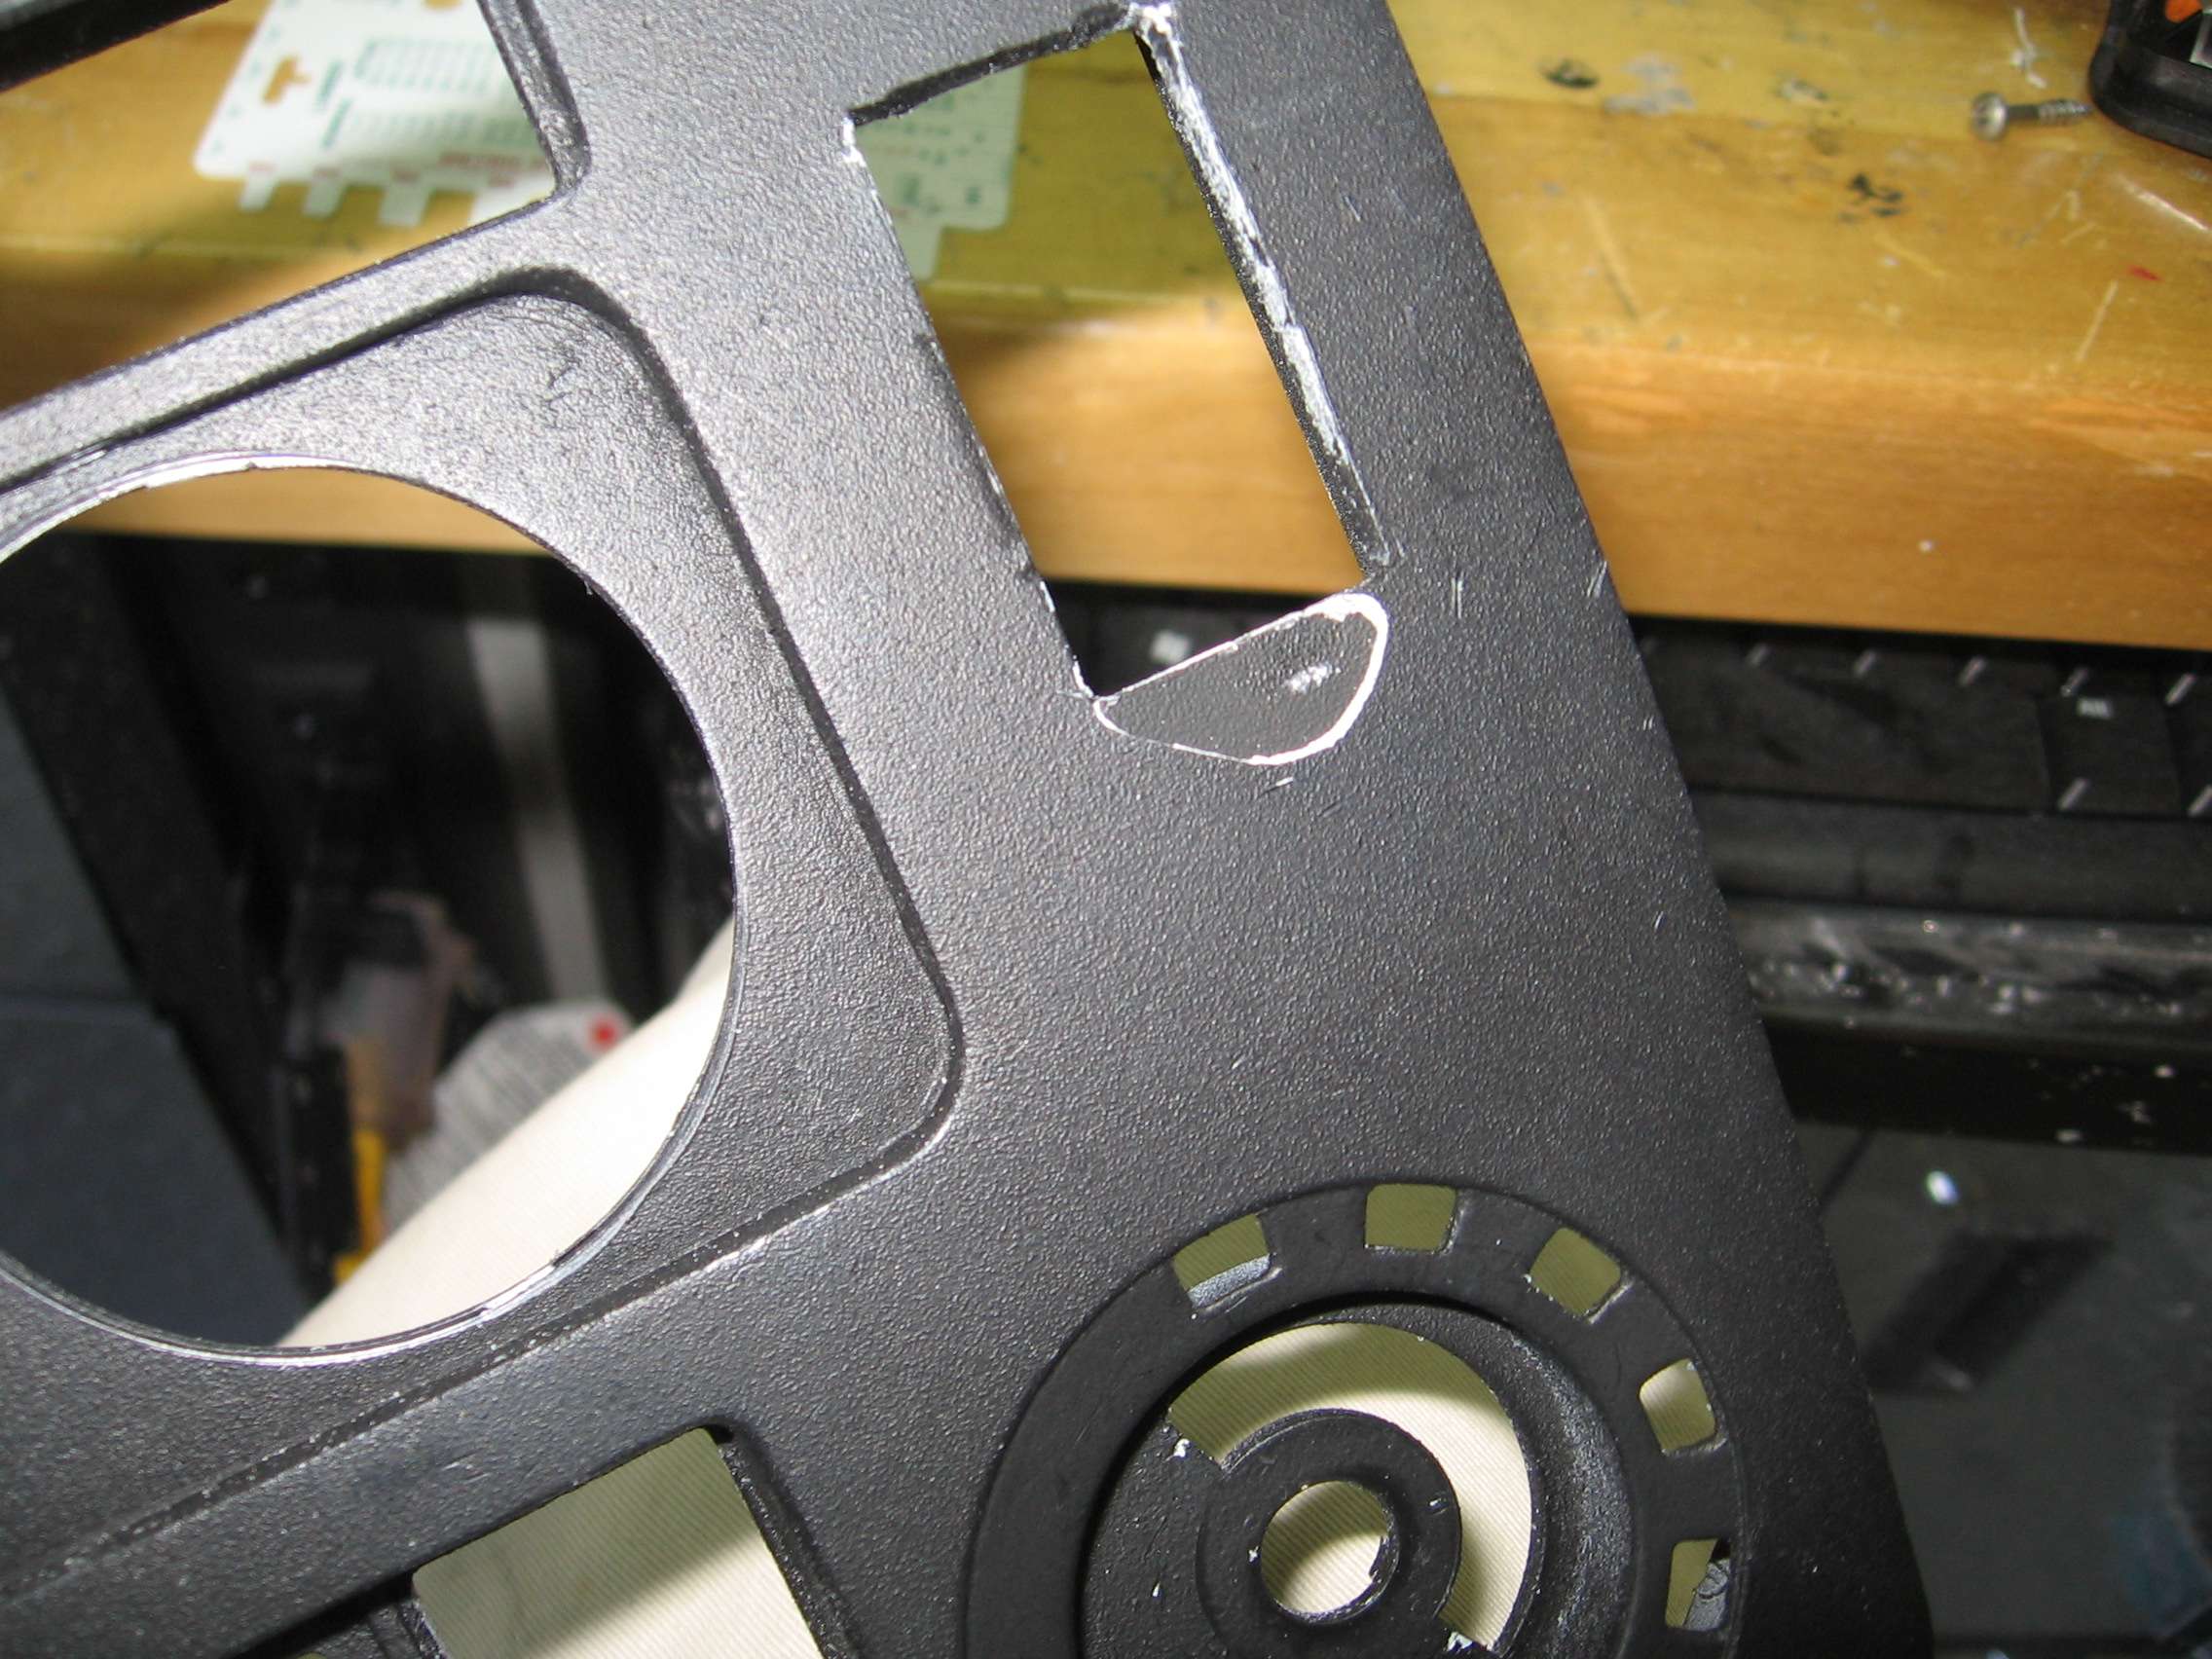
You can see how warped the panel is at the top in this picture.

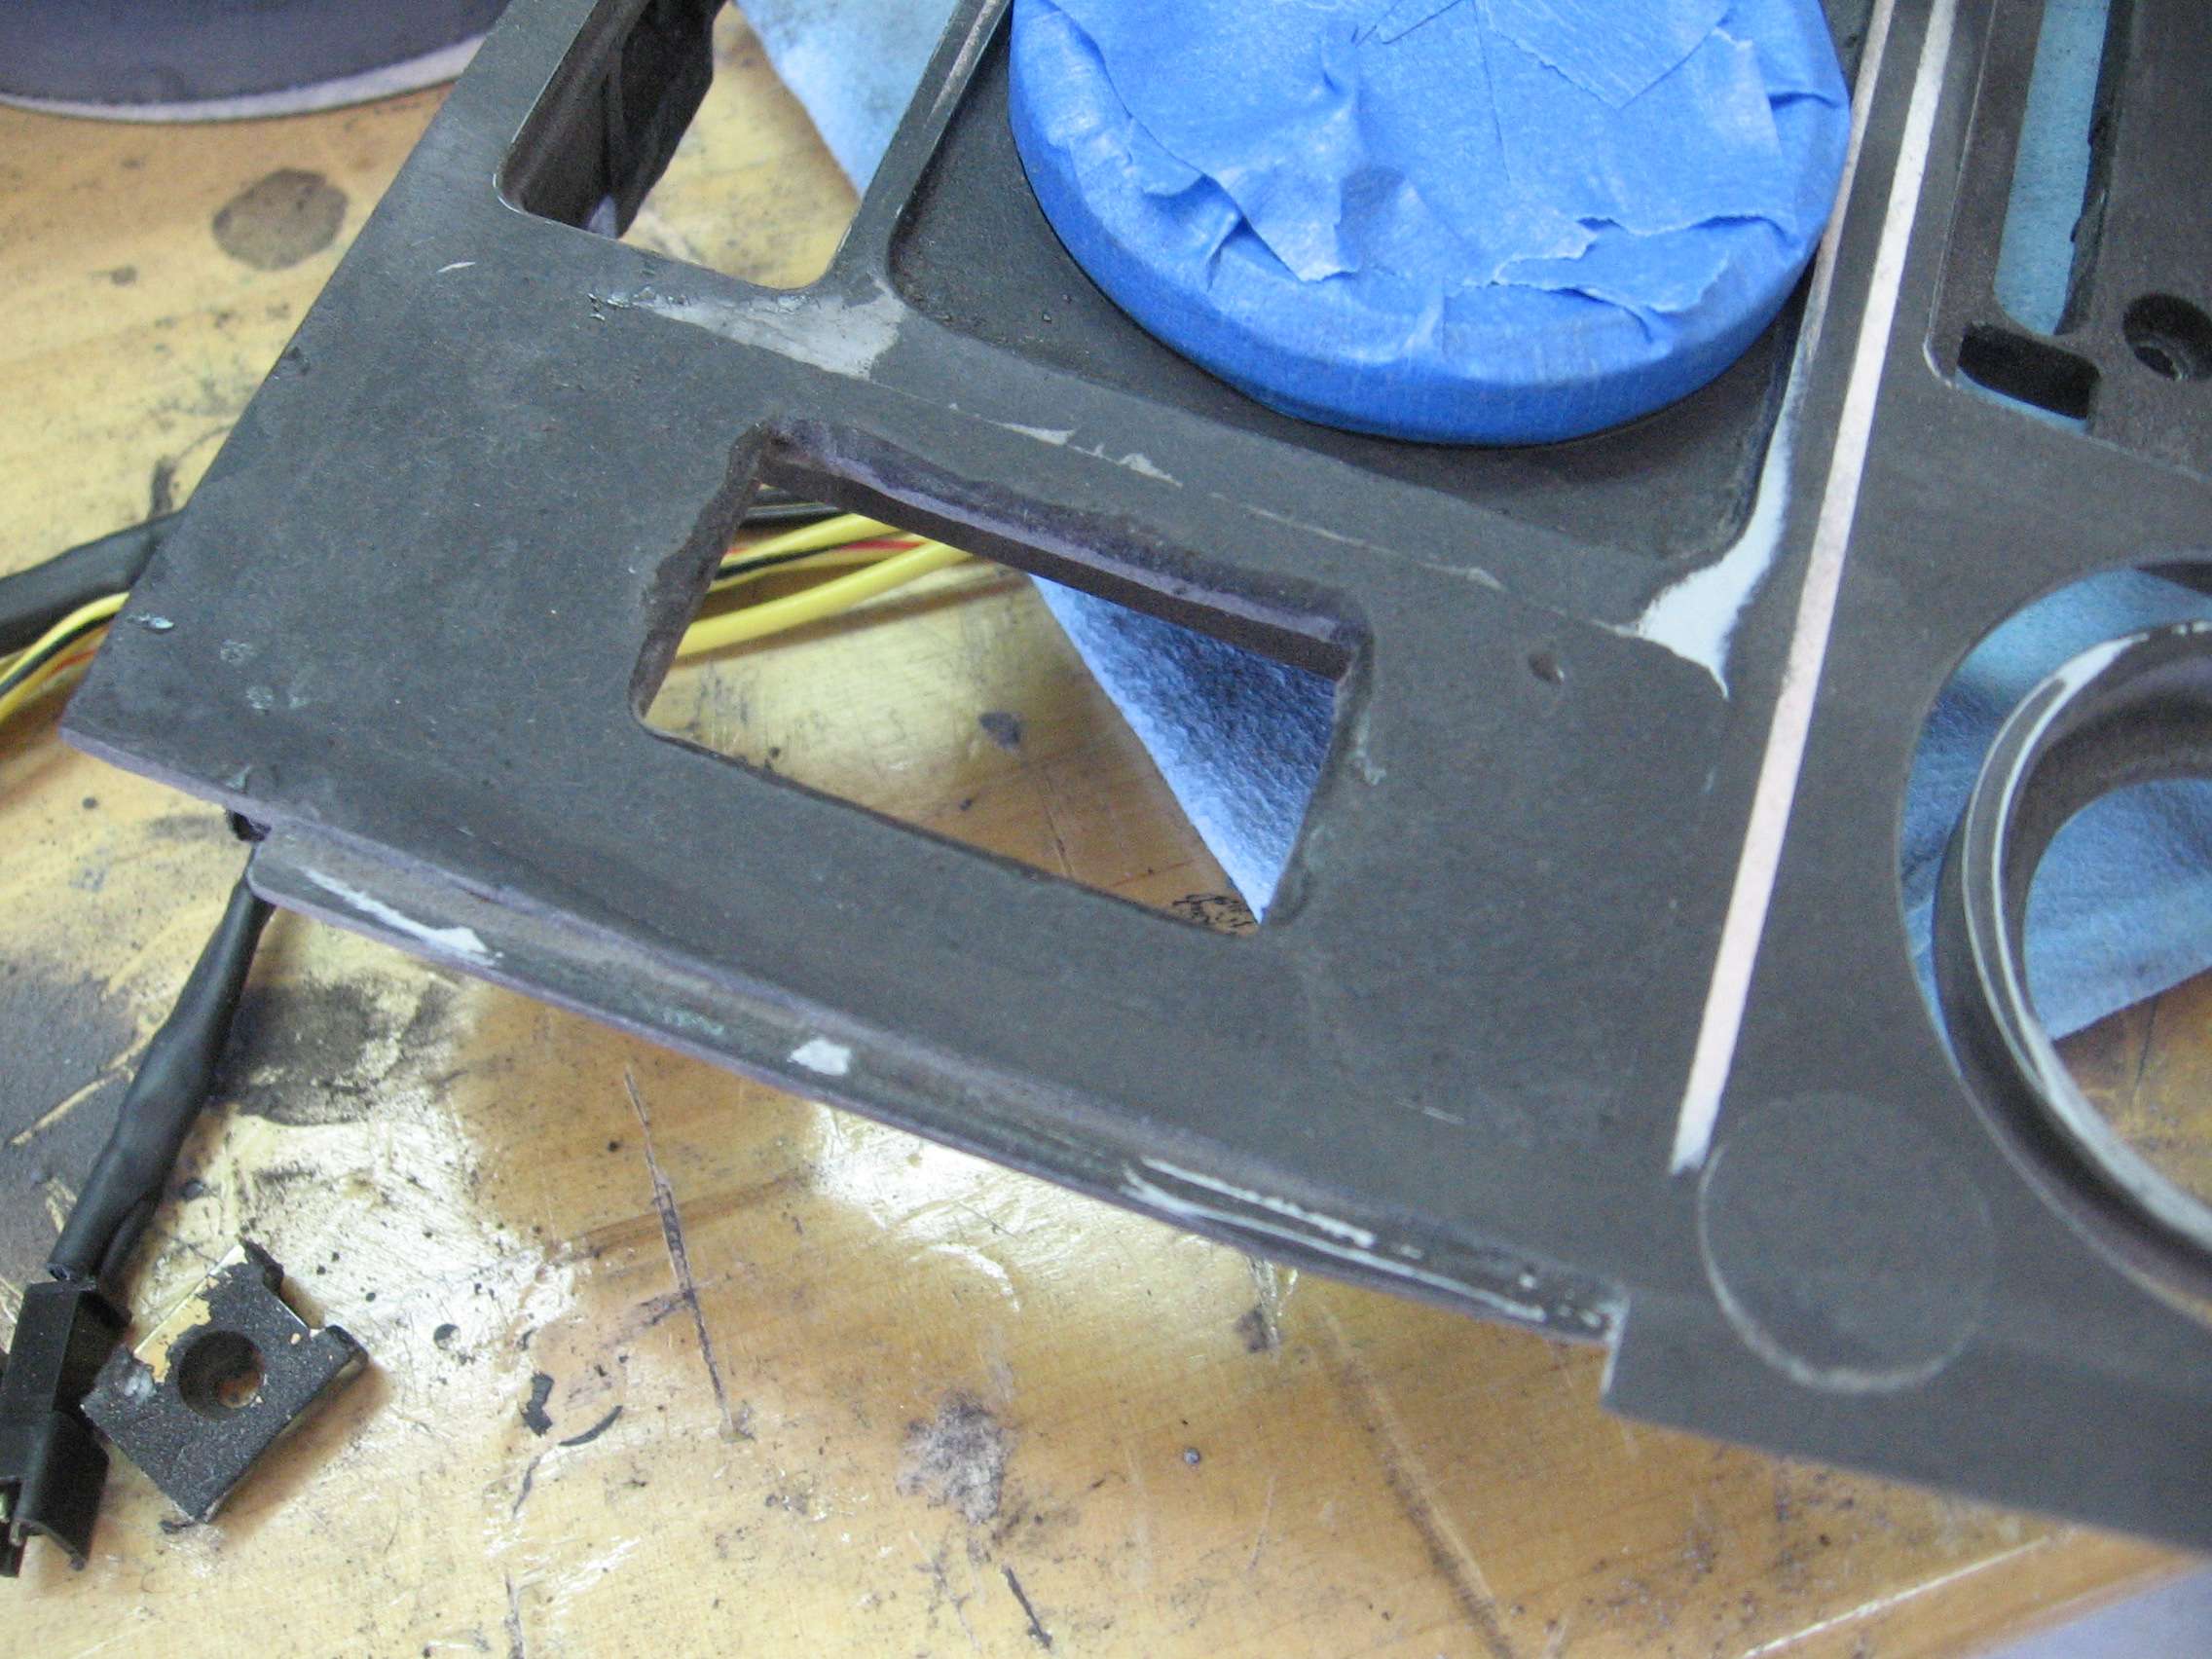
At this point I started to work the 4 holes at the top and straighten them out. This took way too much time but I was able to get a relatively satisfactory result.
The bad thing about the plastex is that it did leave some pin holes so I used a high fill primer to eliminate them and check my work.
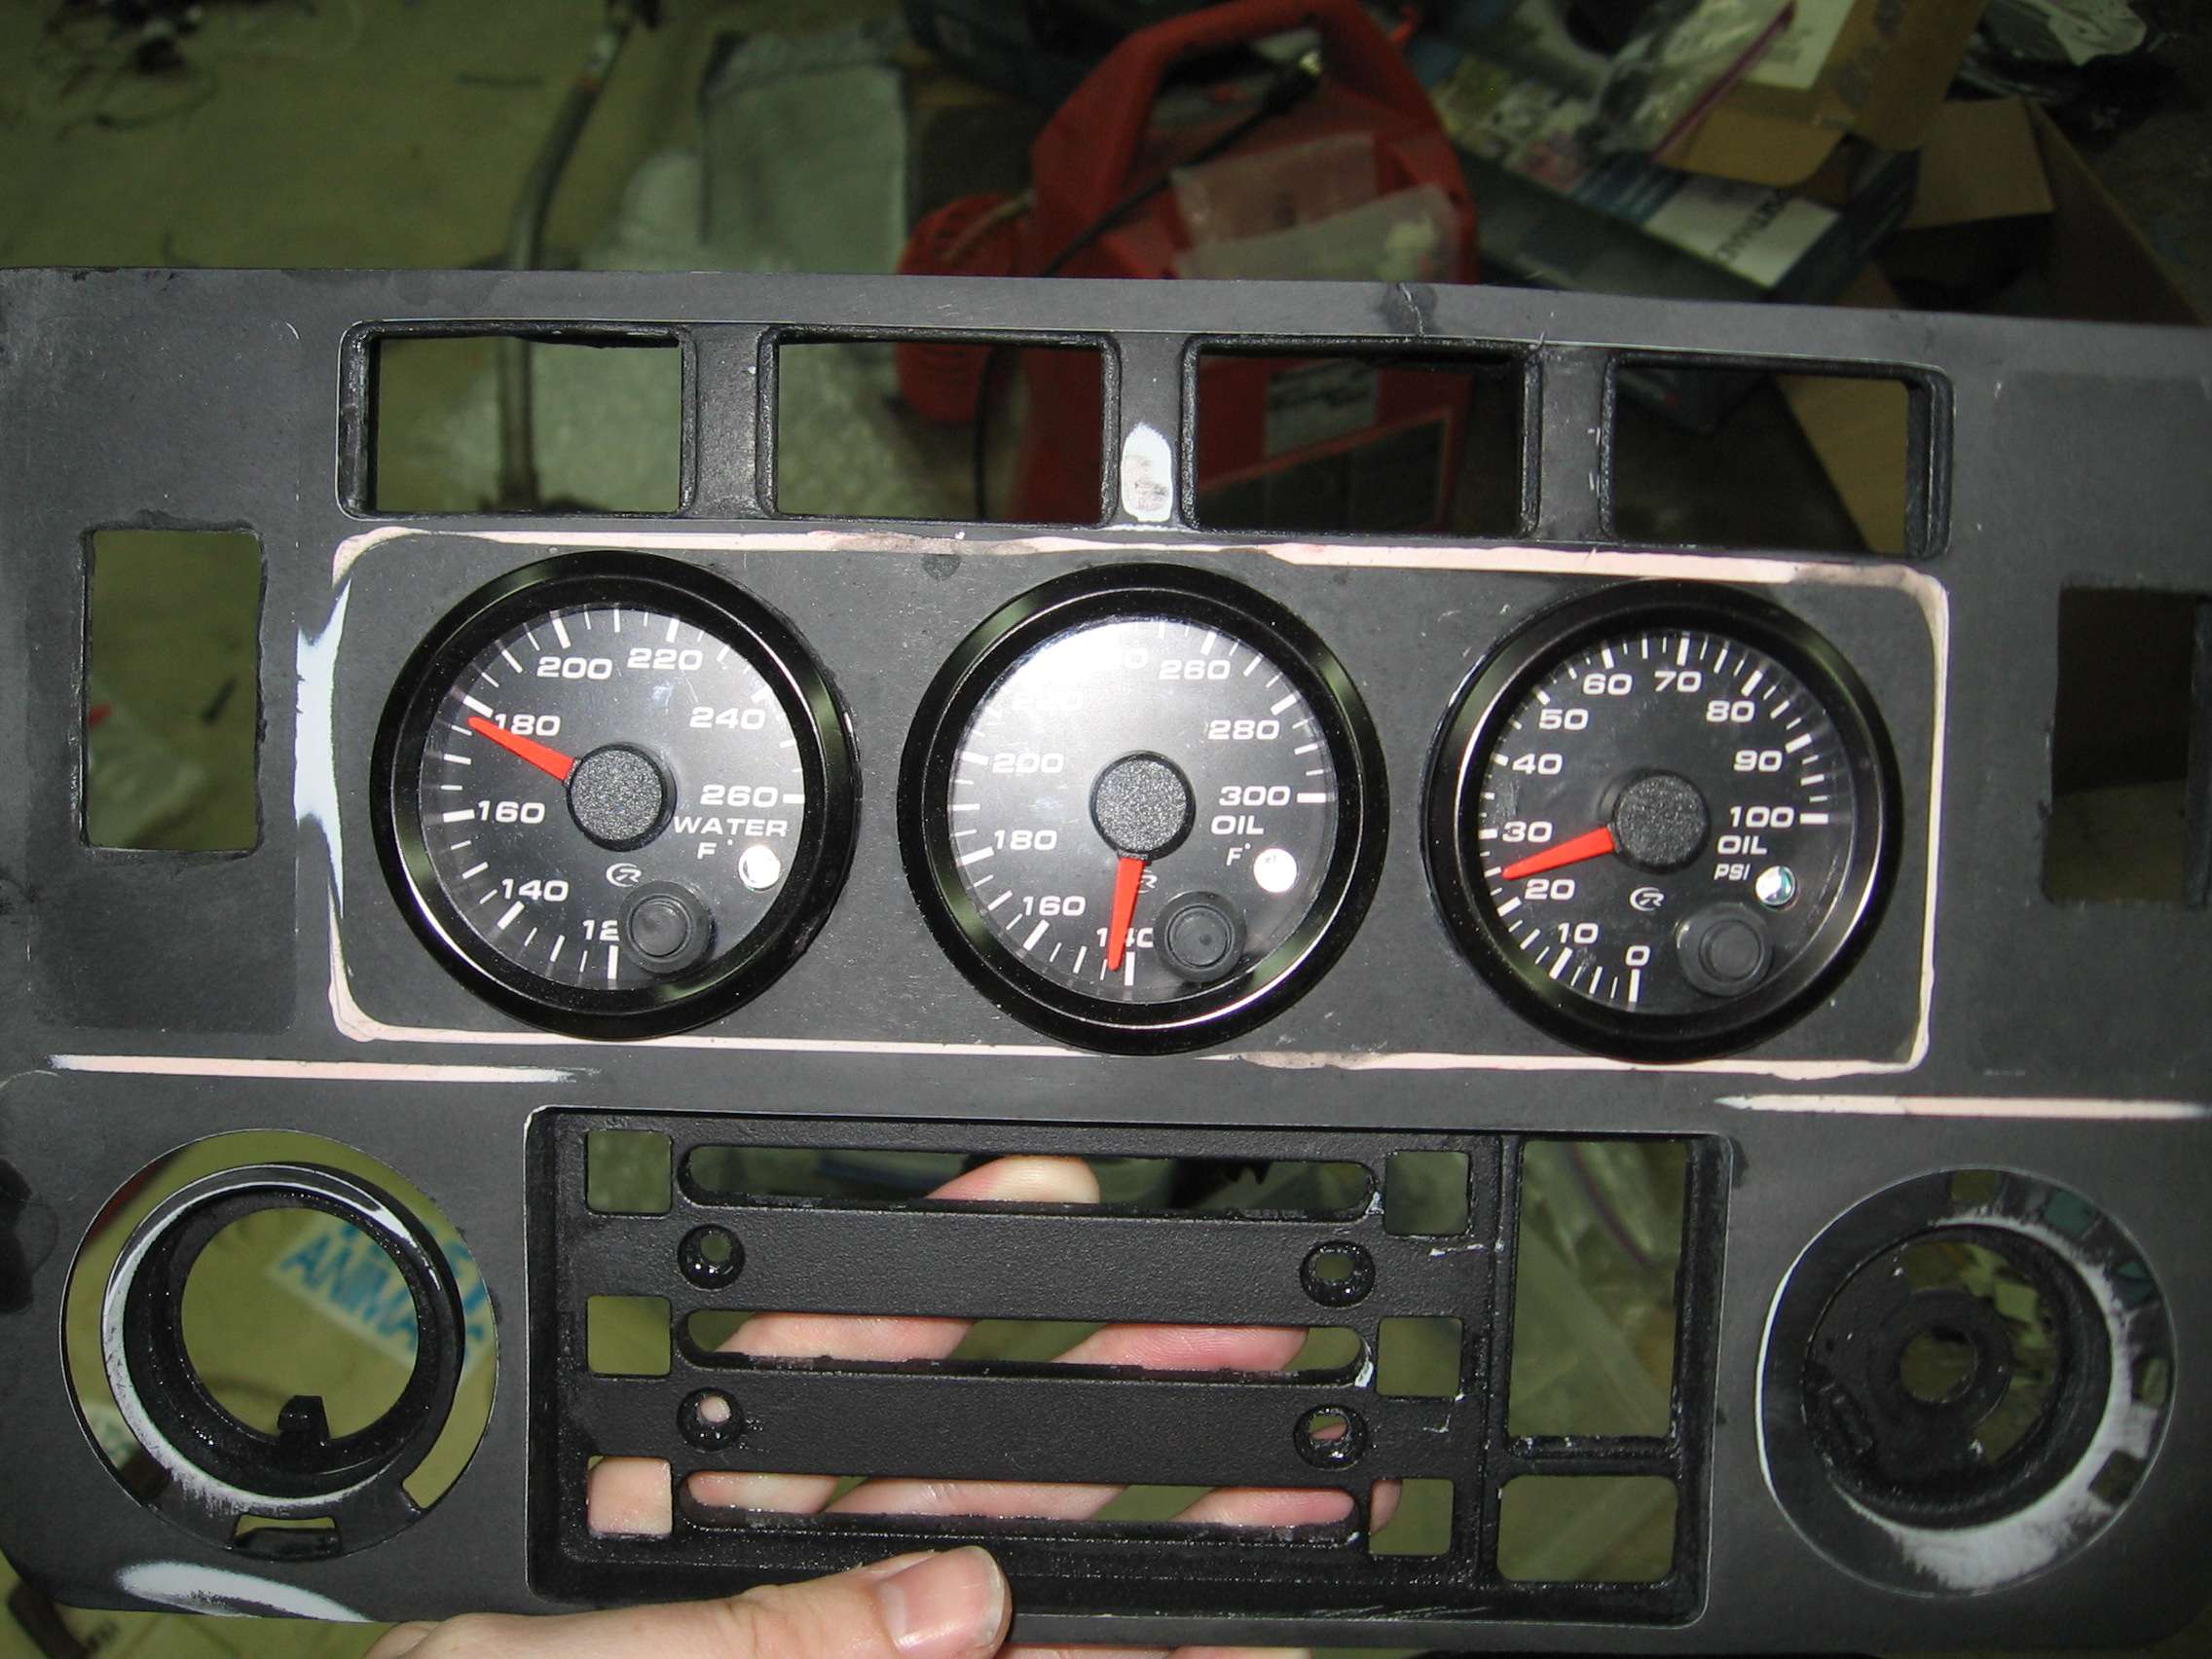
Here you can see the detail work on the 4 holes. rather than having the switches recessed, I wanted them to be flush. This proved tedious.
It's not perfect but it is loads better than before. At this point, I had to draw a line as more and more plastic was getting removed with each subsequent sanding.
I used some 400 grit wet to even out the finish before the final prime.
And the same painting procedure as before was utilized. Spray the panel with rustoleum texture paint.

and then coat with the color bond paint.

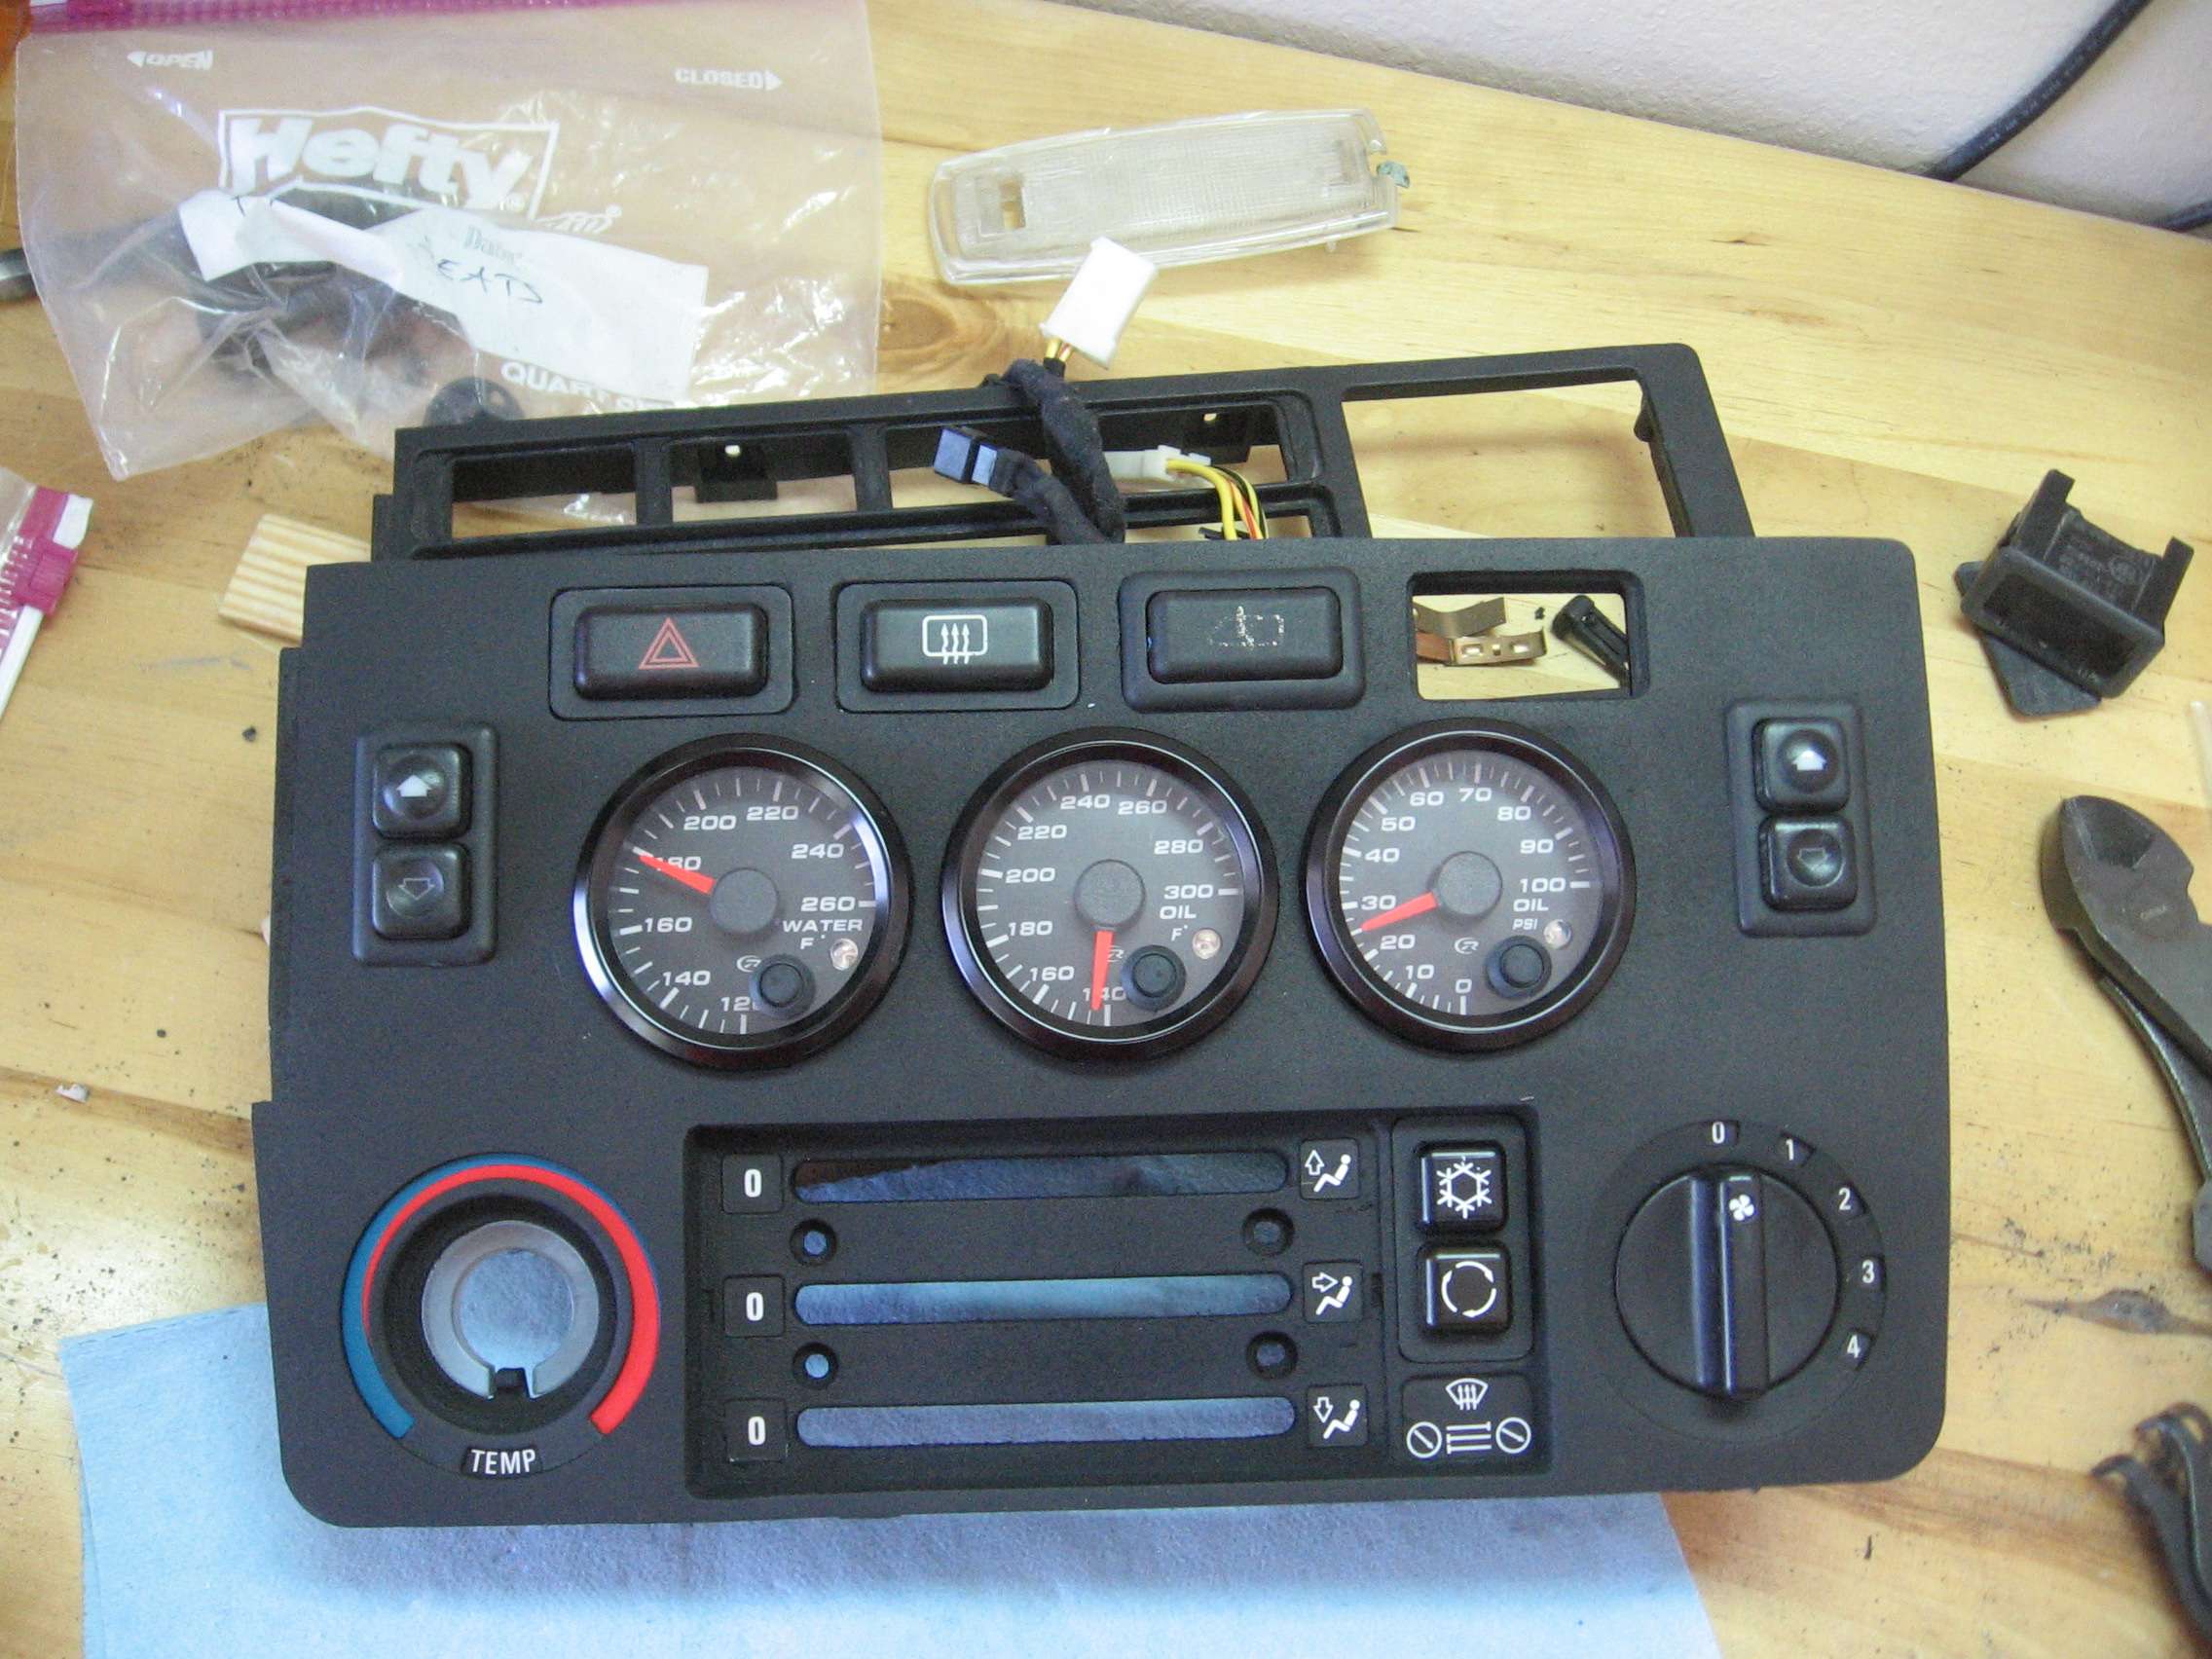
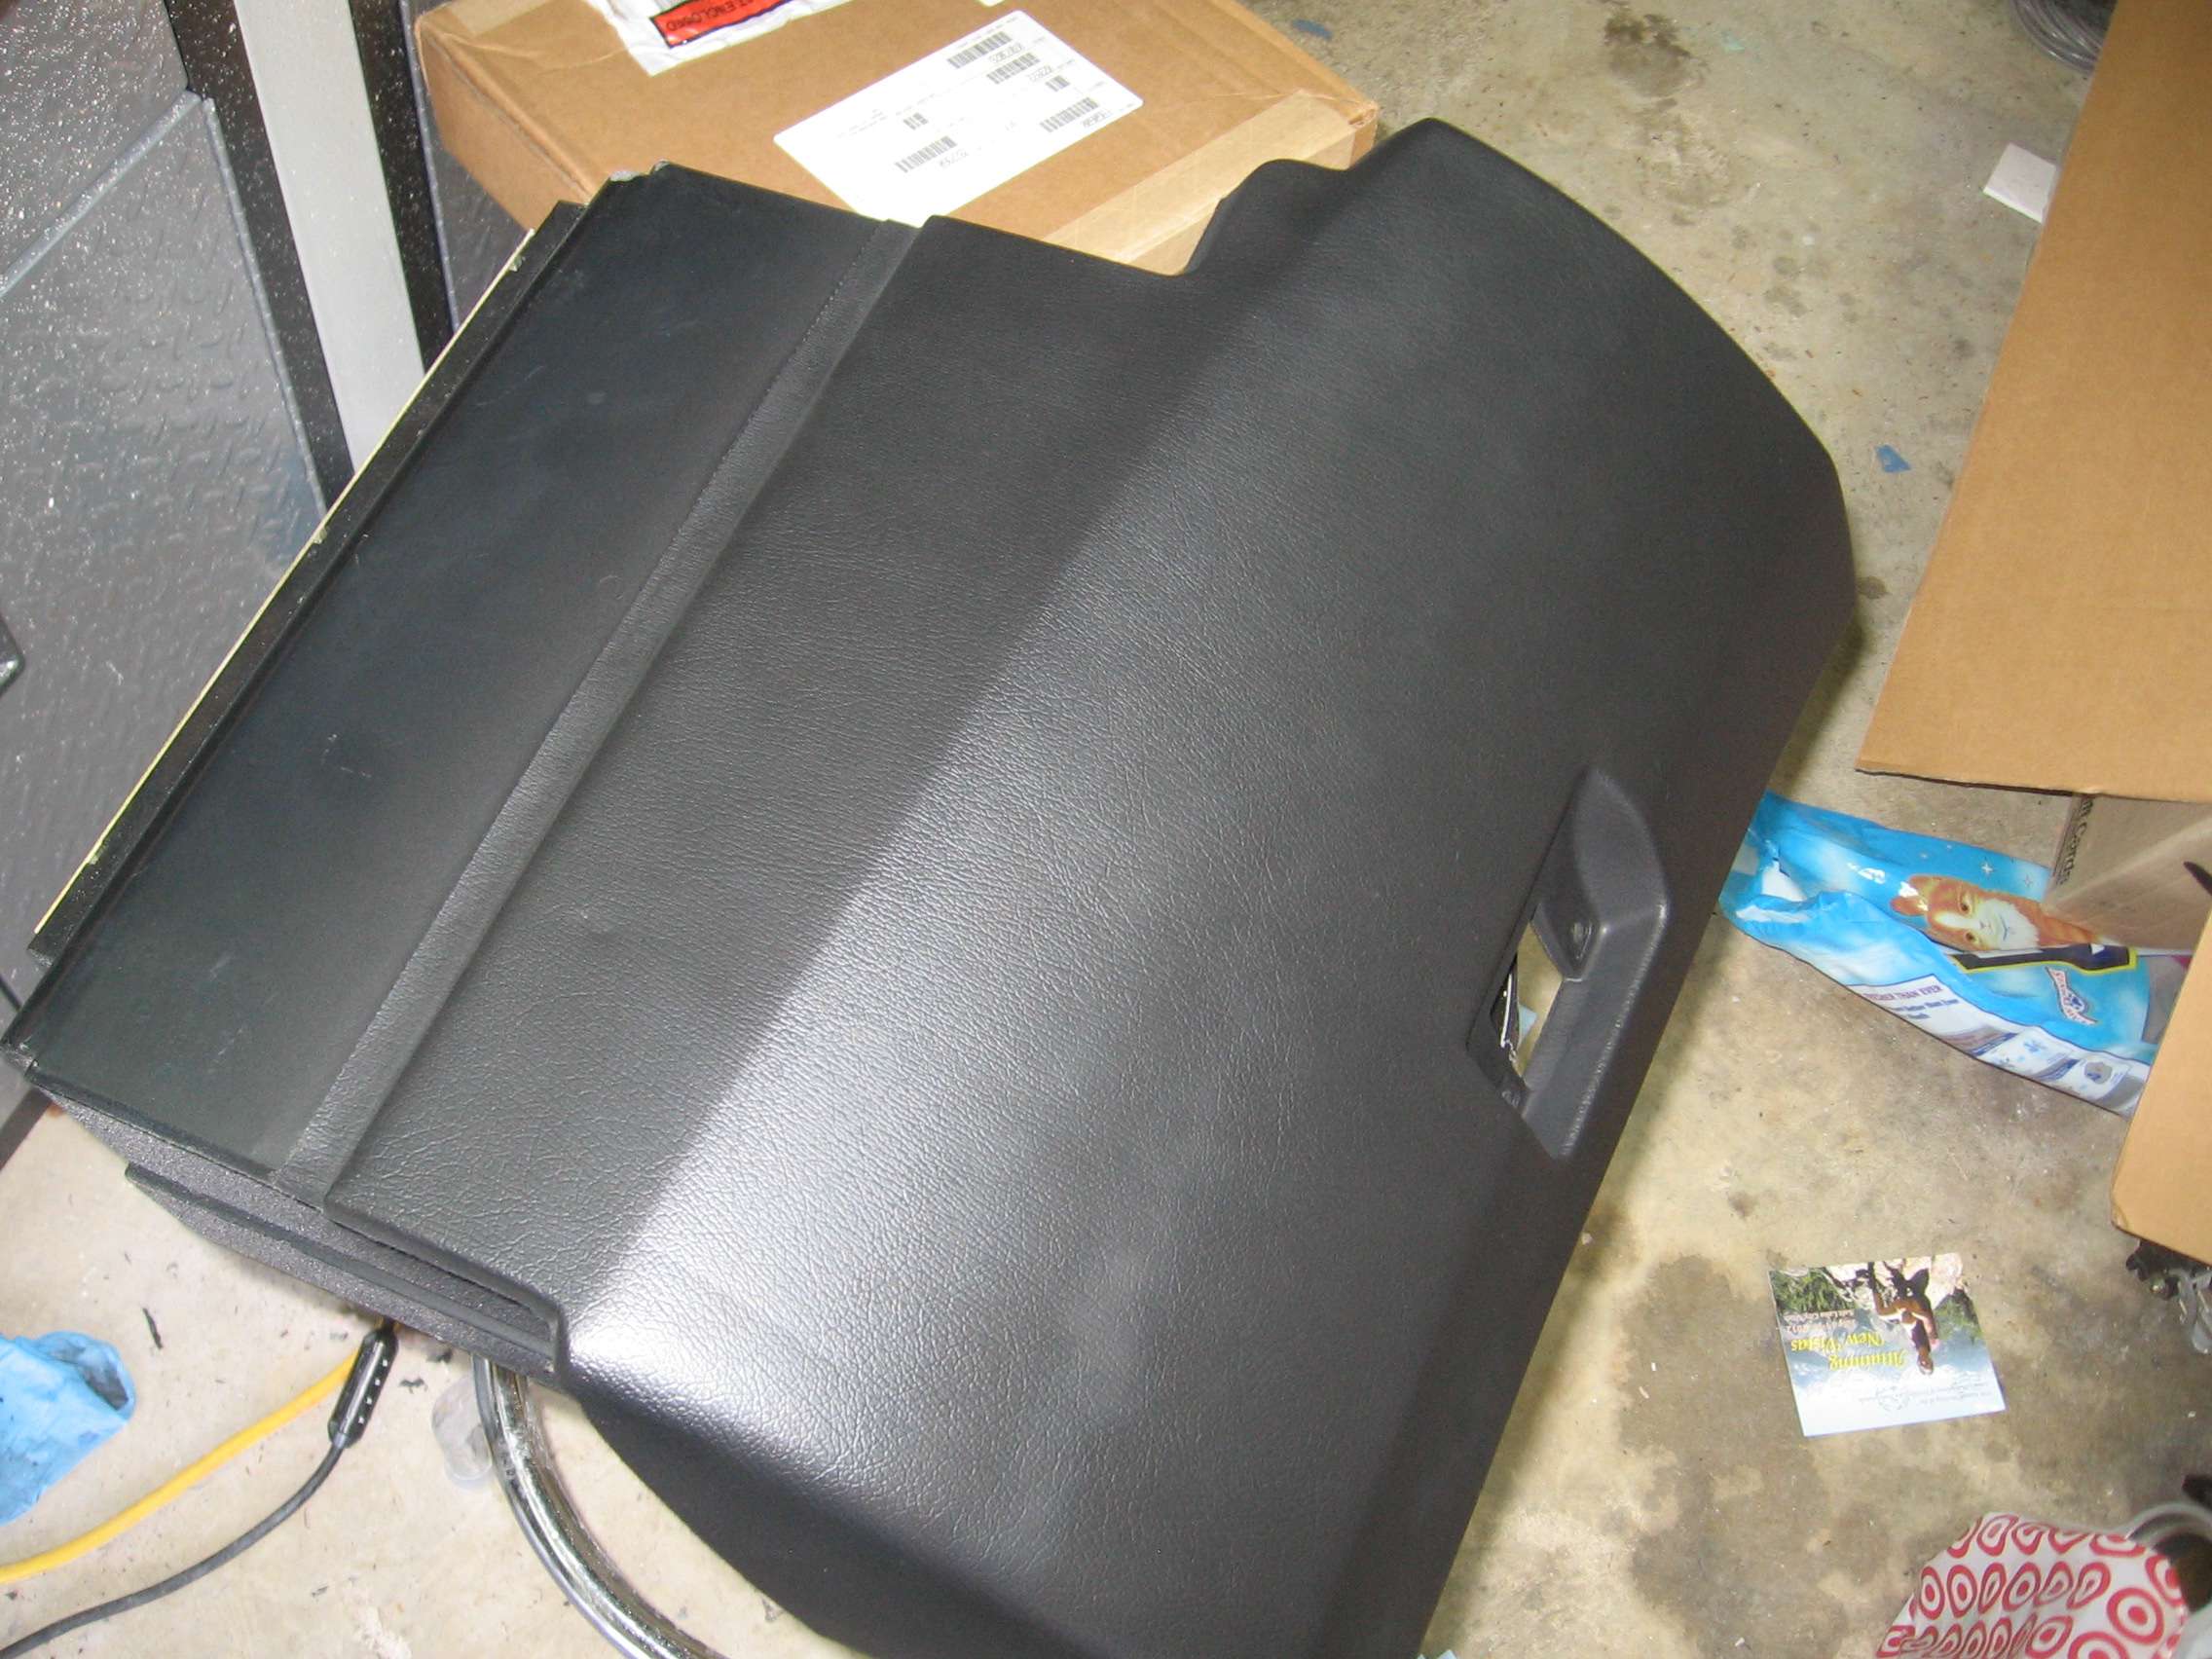
Reassemble and we have a completed panel
minimal issues on installation but there are a couple of spots to touch up. That will most likely occur towards the end of the interior assembly.
I used the color bond paint to refresh all of the interior dash board panels starting with the glovebox.
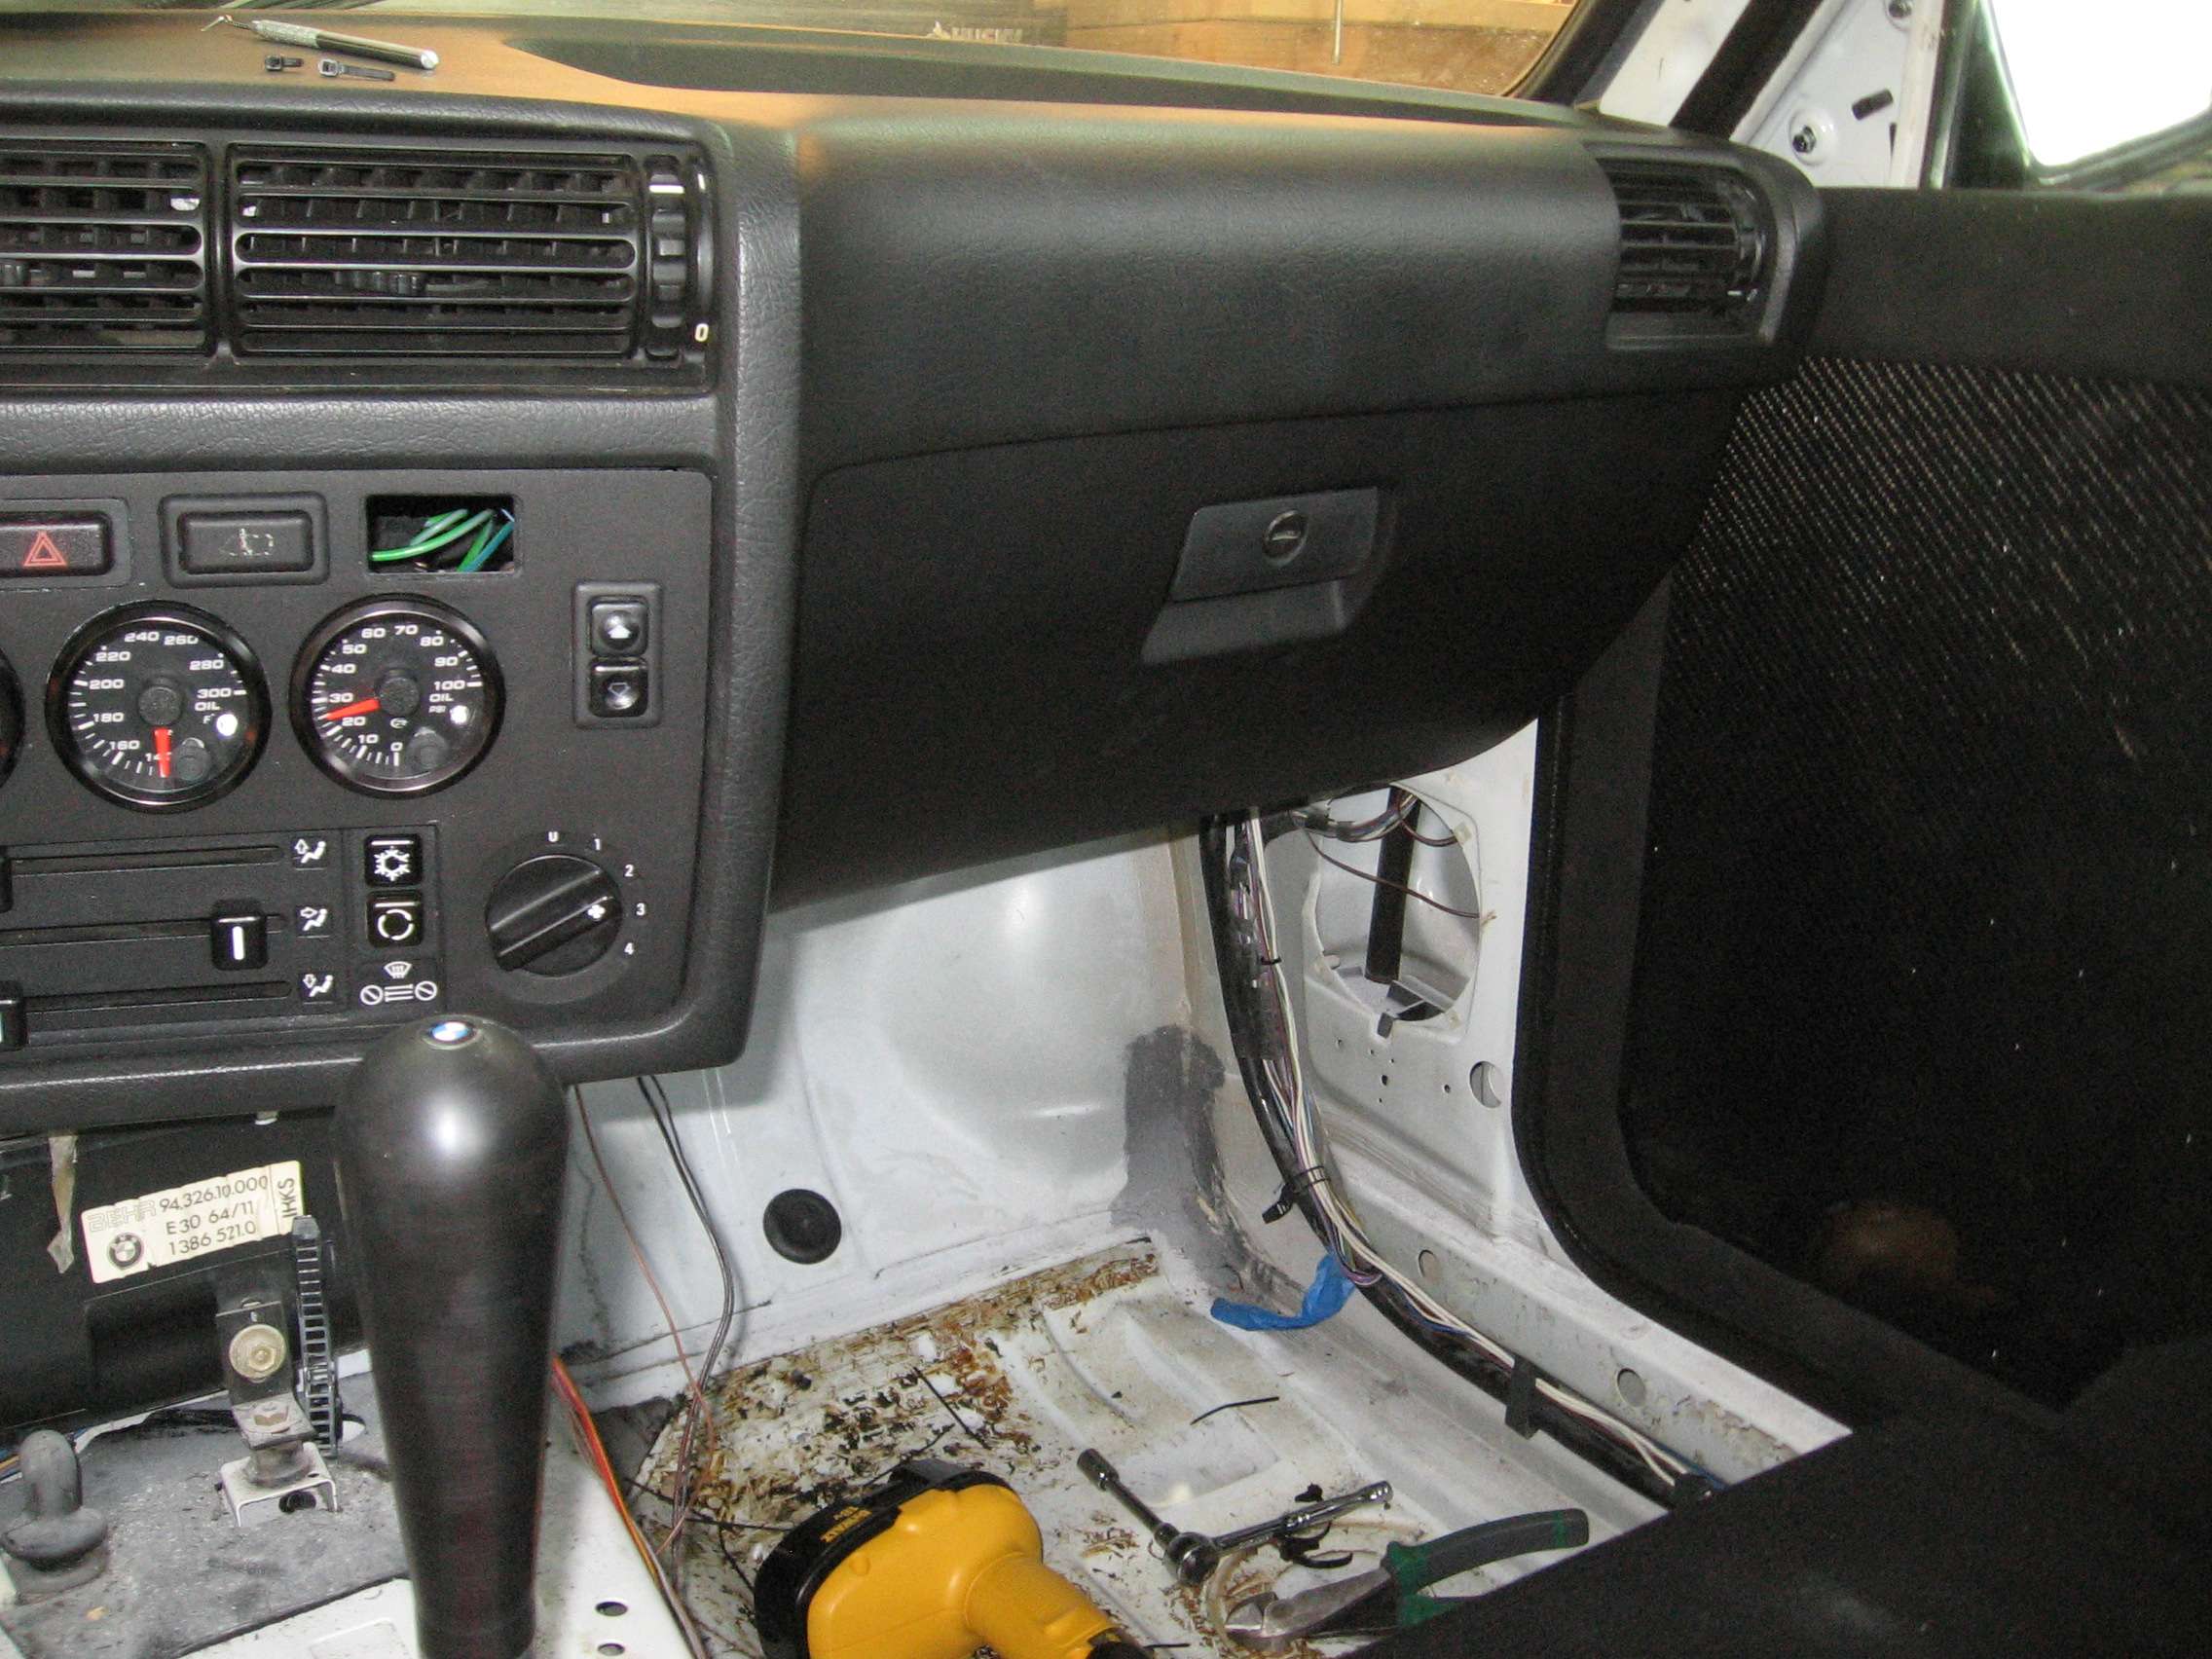
I also started to reassemble the drivers knee pad area. This was an airbag car so some modifications were necessary as I don't want to have a center console.
I probably assembled and disassembled this area 20 times until I figured it out.
With no center console, I needed to modify the inboard knee bolster attachment. A bit of cutting, grinding and hammering yielded a pretty decent piece.

So the interior is coming along and motivation is returning. We have another kid on the way so I've got to get this car finished by then as I'm pretty sure time will be scarce. Hopefully the updates will come weekly again and not monthly!Leave a comment:
-
I would sleep with those turbo fans, then marry it and have its children.Leave a comment:
-
Setbacks happen...
and often they can suck the wind right out of you.
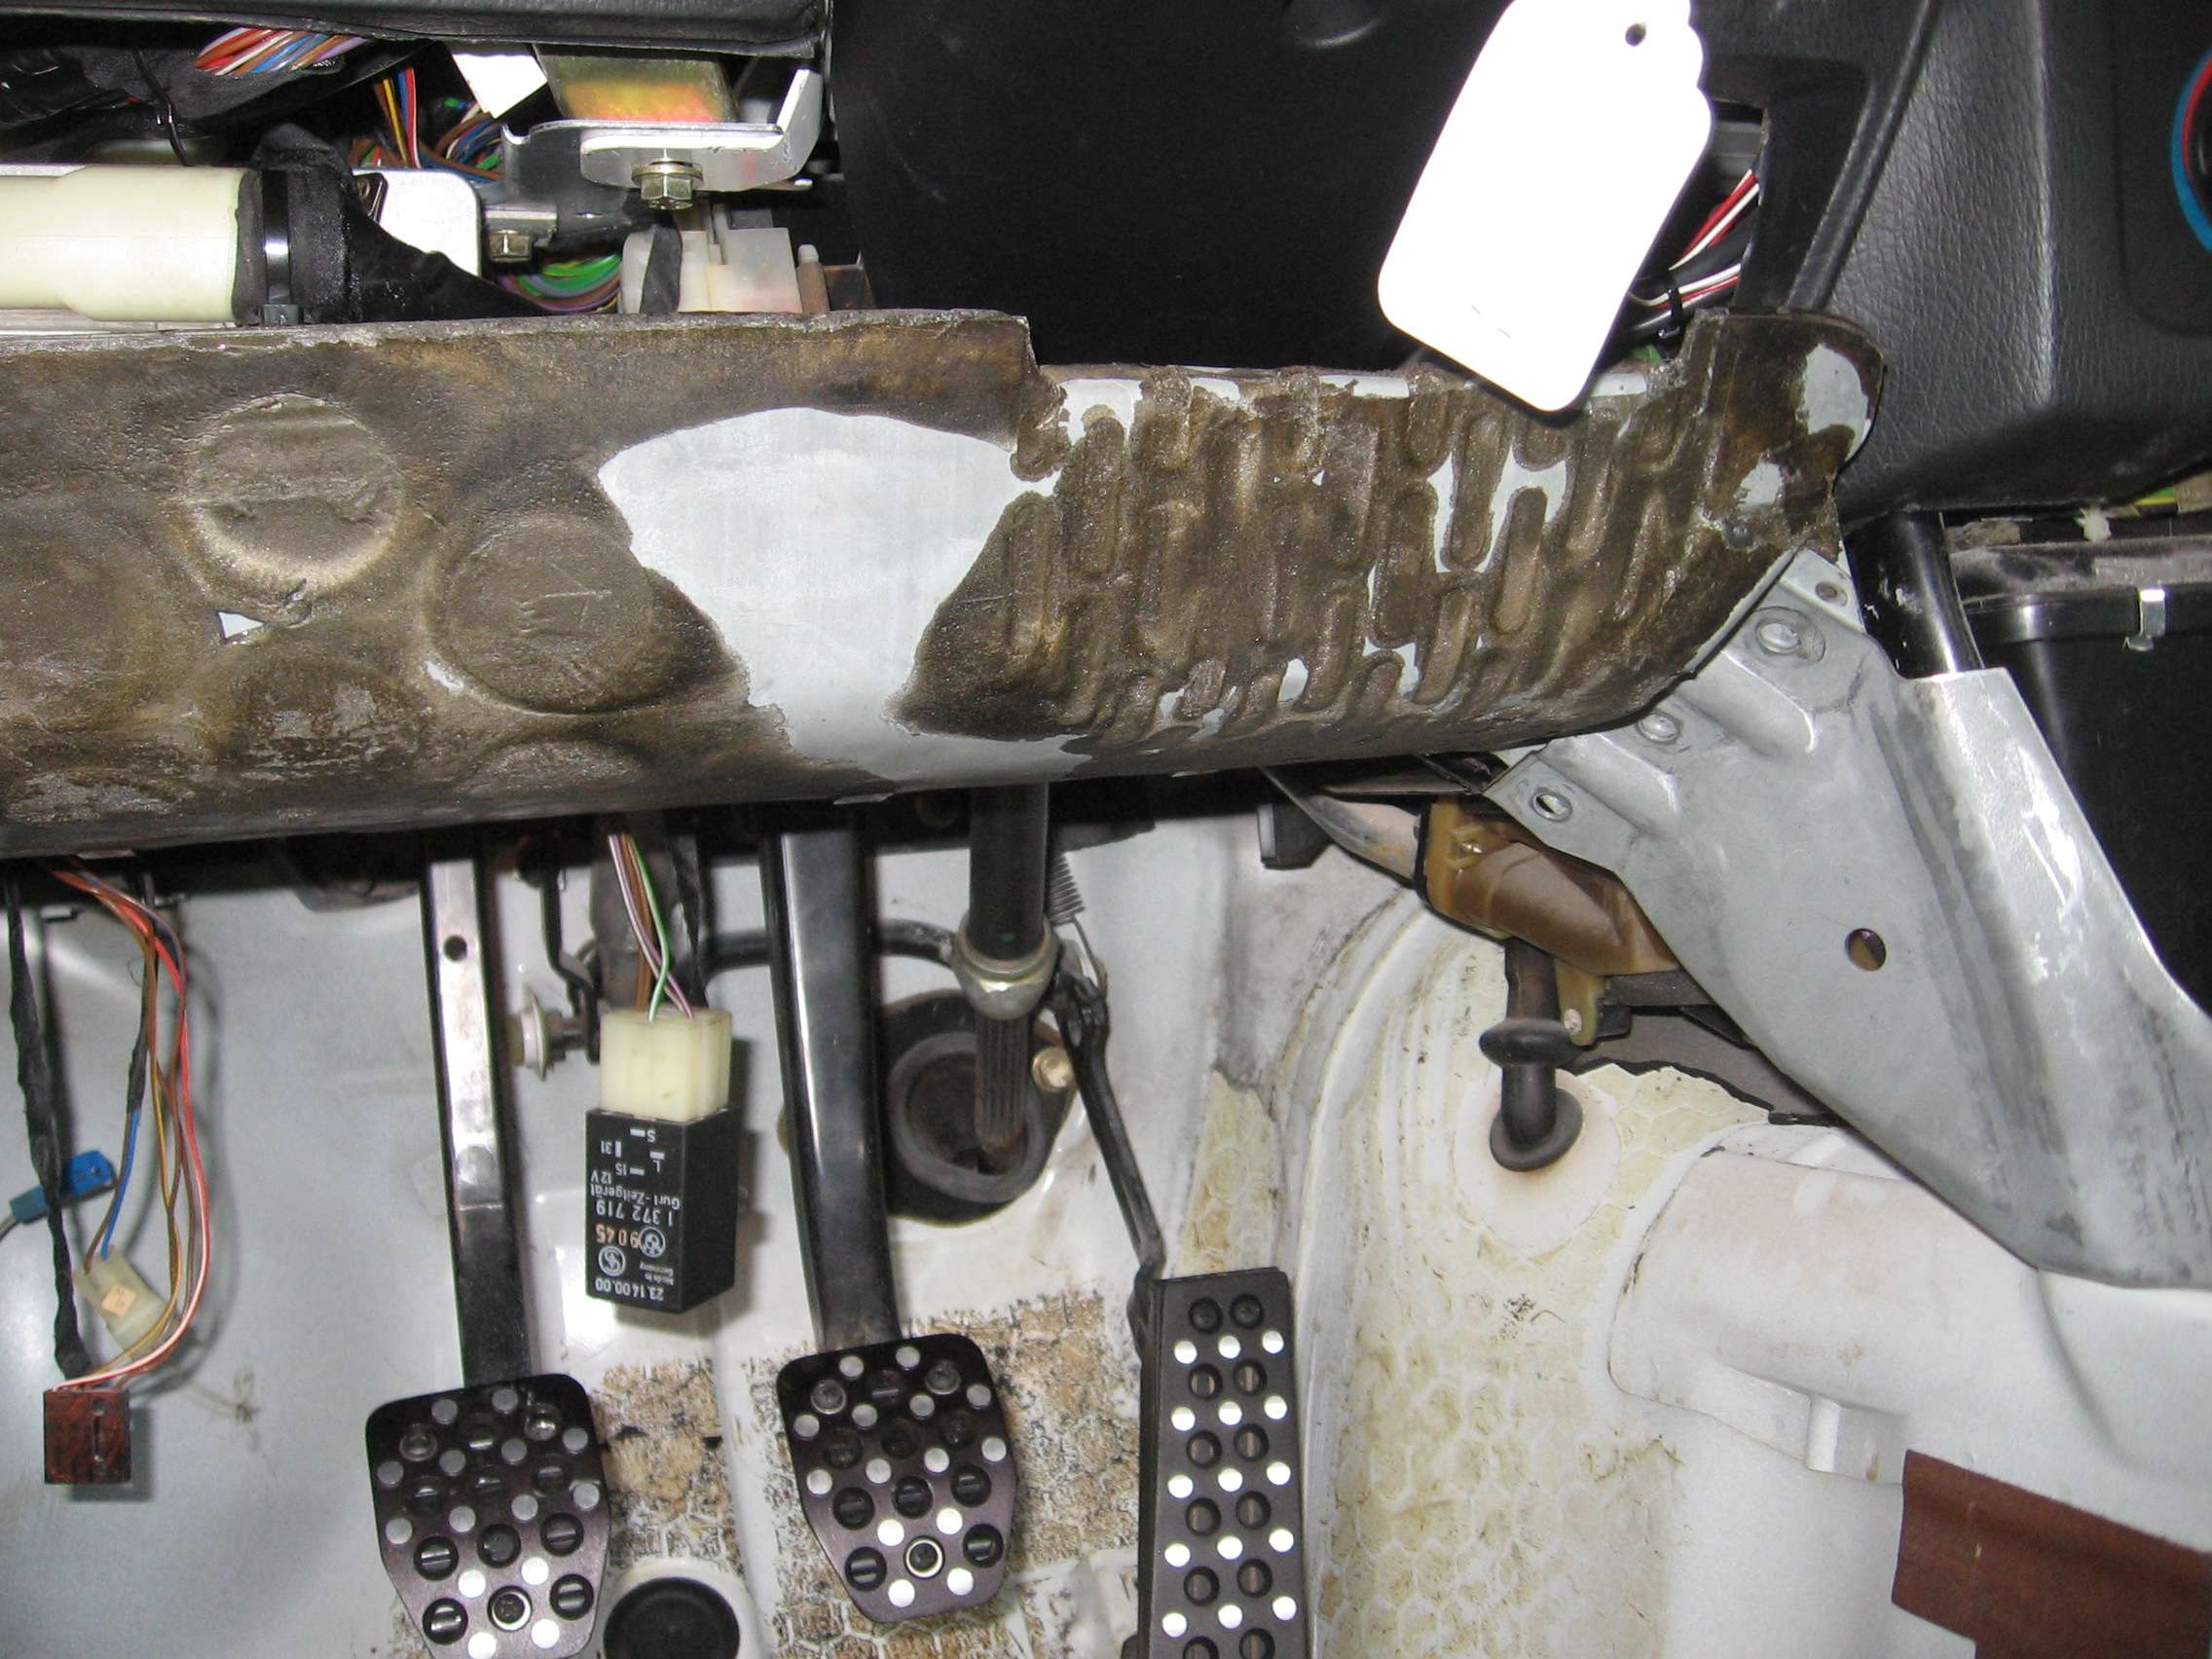
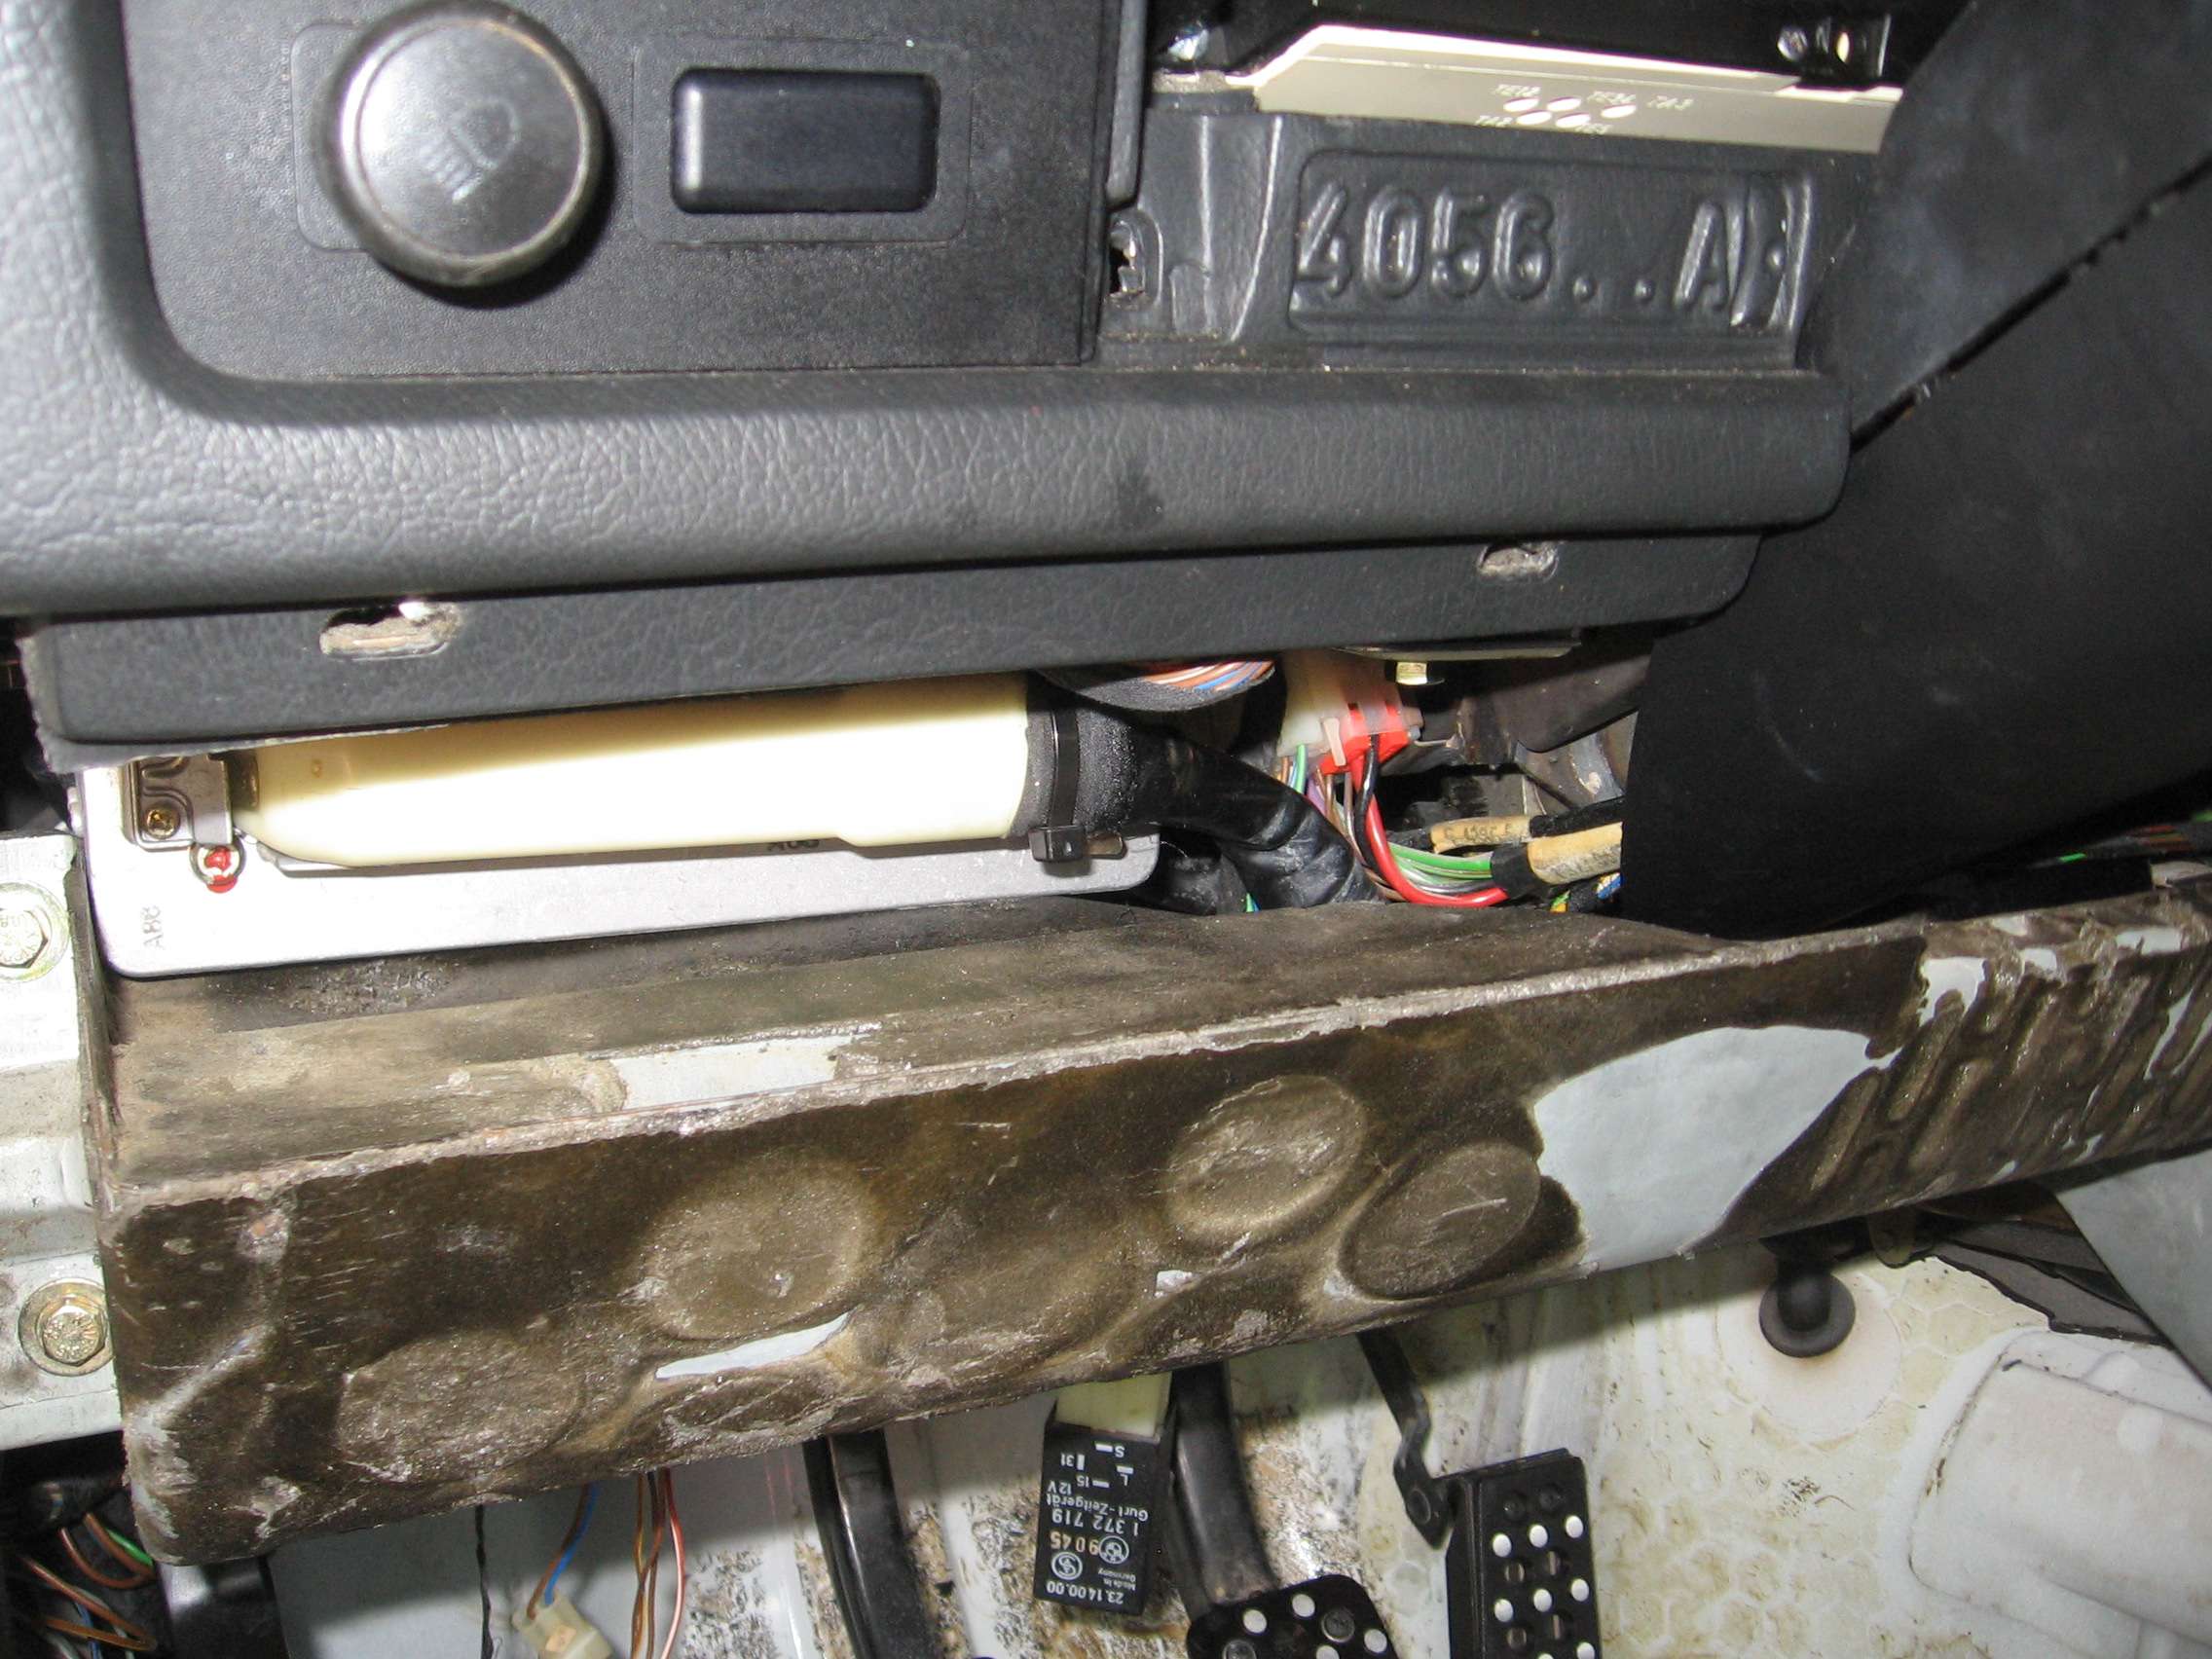
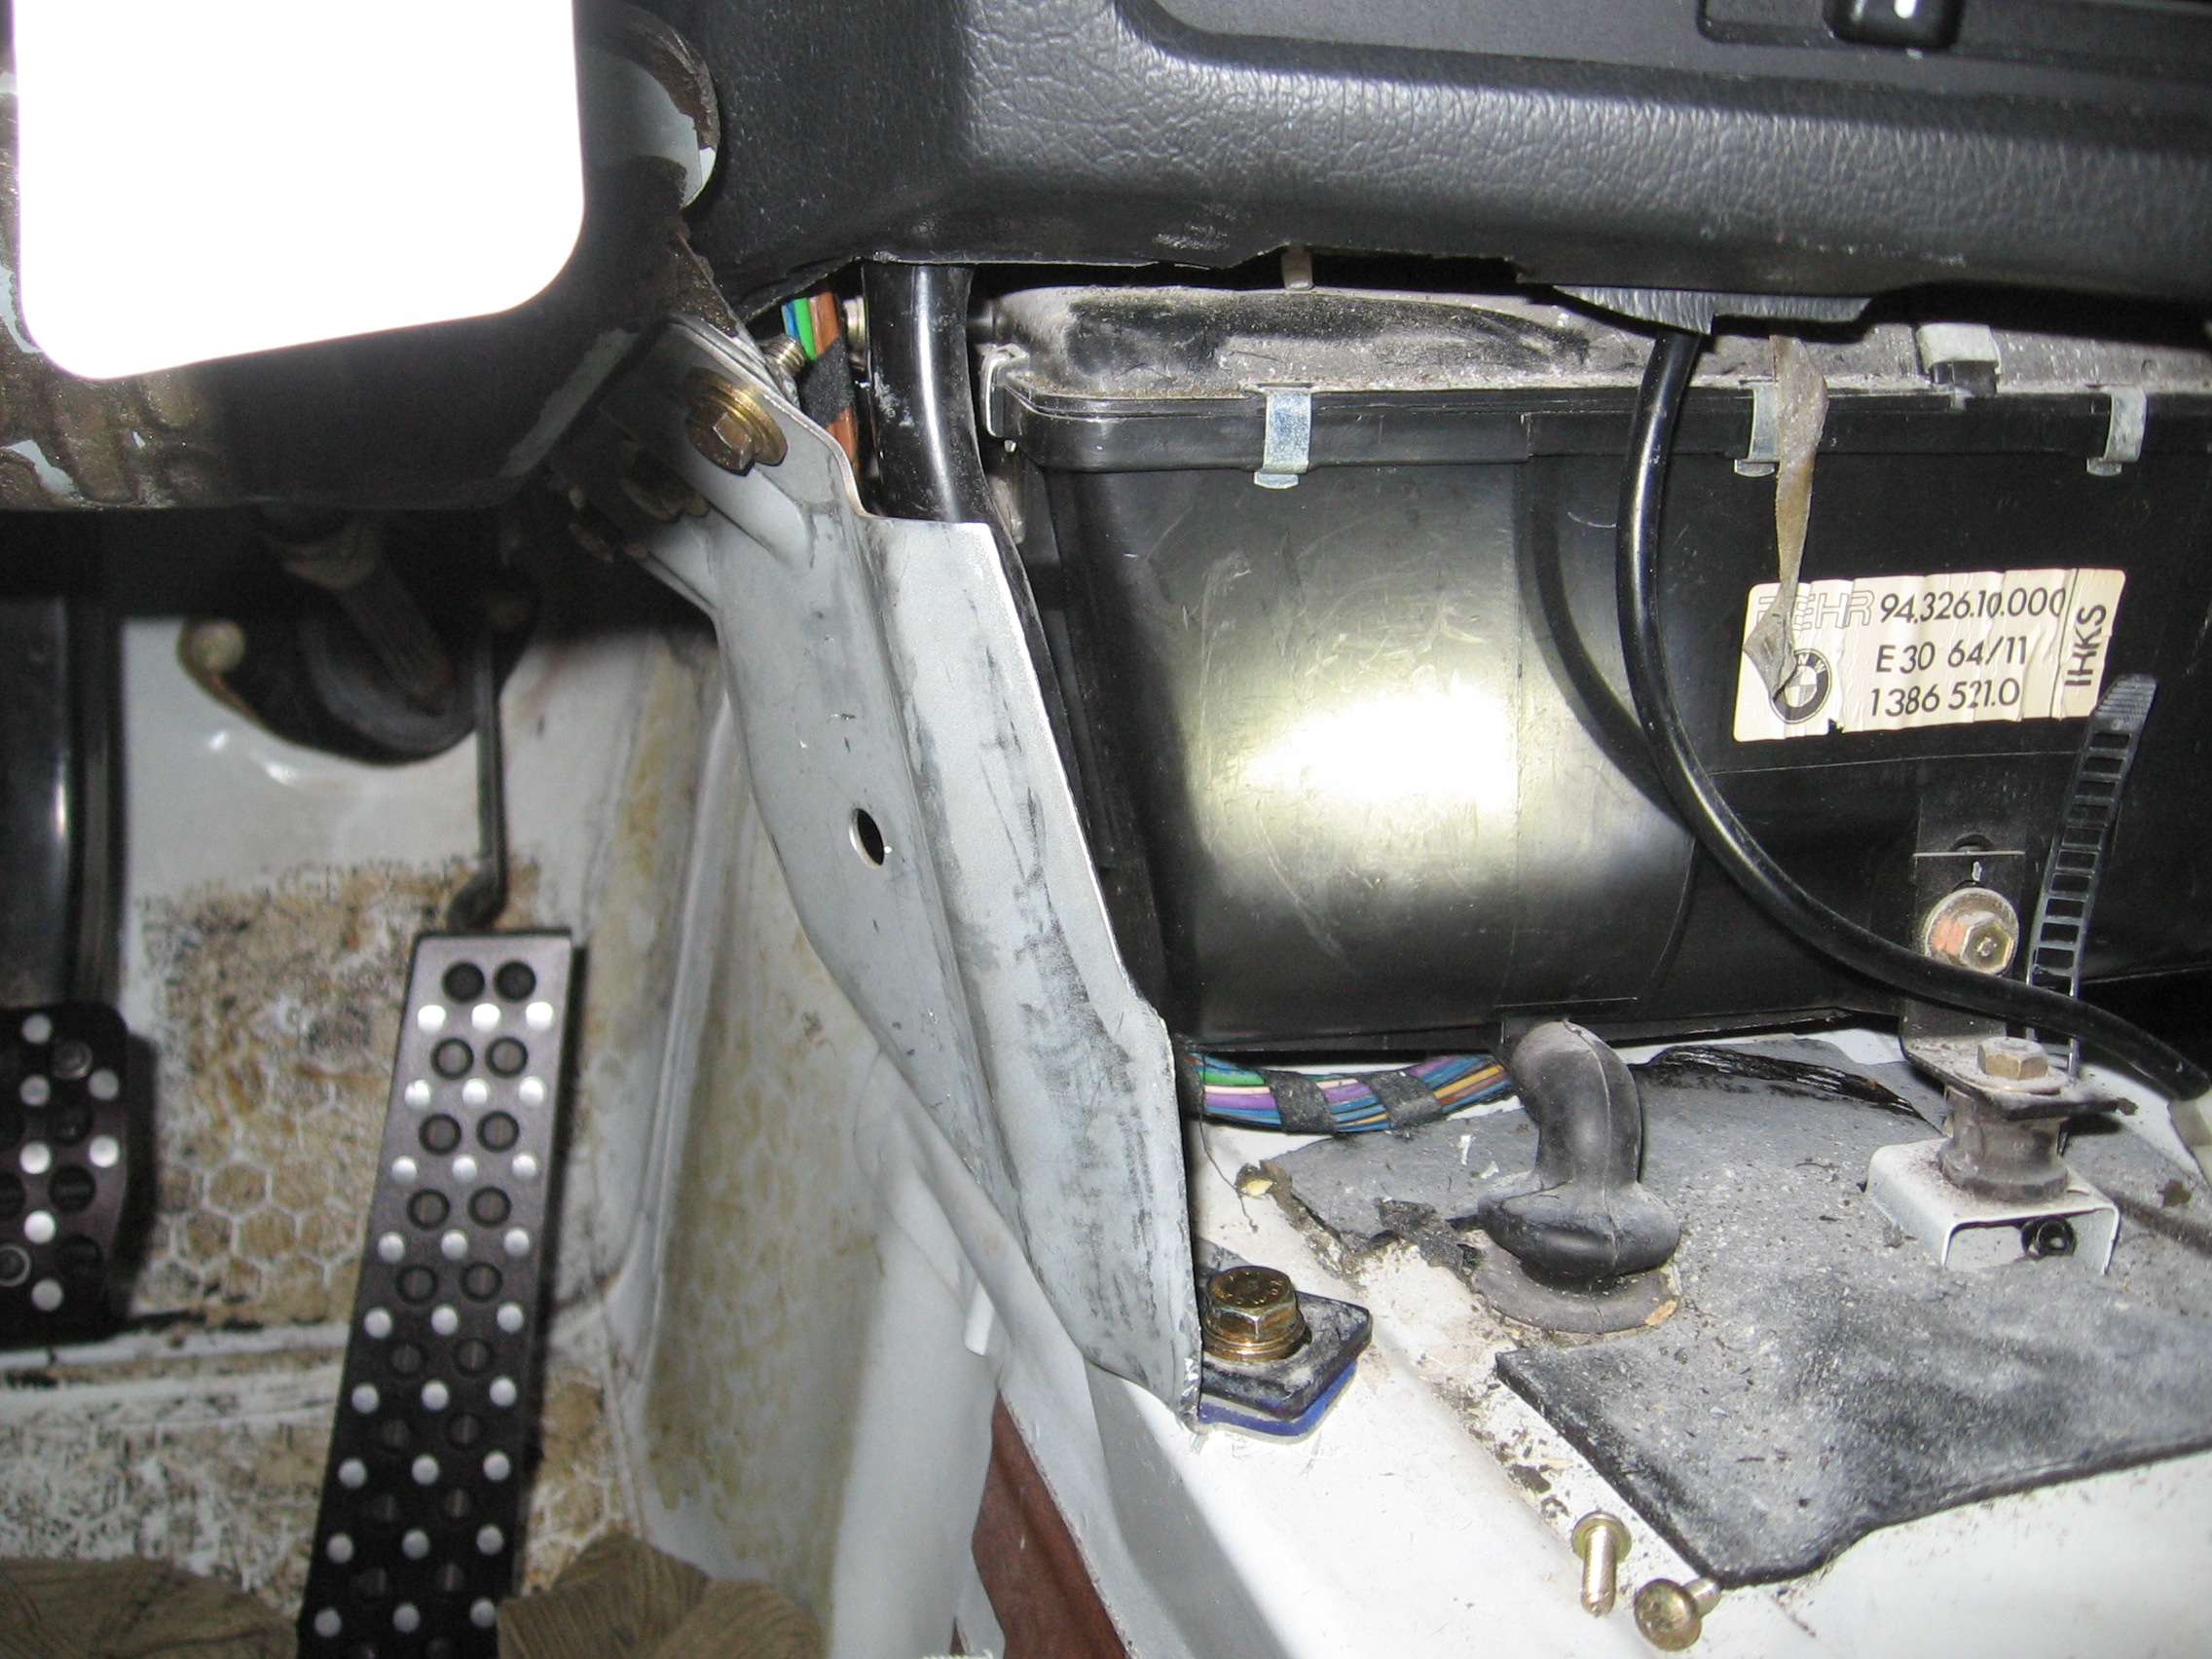
I've been spending a lot of time working on the interior trying to diagnose an electrical short attributed to the dome light. I hate the dome light, I'm sure BMW thought they were clever when they developed it but robust it is not (stupid plastic switch). But that's another project for later on (and will be documented). For now, it looks like I found the short. Many wires were plugged into the wrong spots and my dimmer module was missing. That must be why the lights never came on when the door opened. I wasn't about to drop 100 large for a new dimming module so I took advantage of George Graves' group buy for his module. There is a lot of harness cleanup to do on the driver's side but at least things seem to be working better. I'm getting pretty good at using the multimeter and for a mechanical engineer, I think that's pretty good.
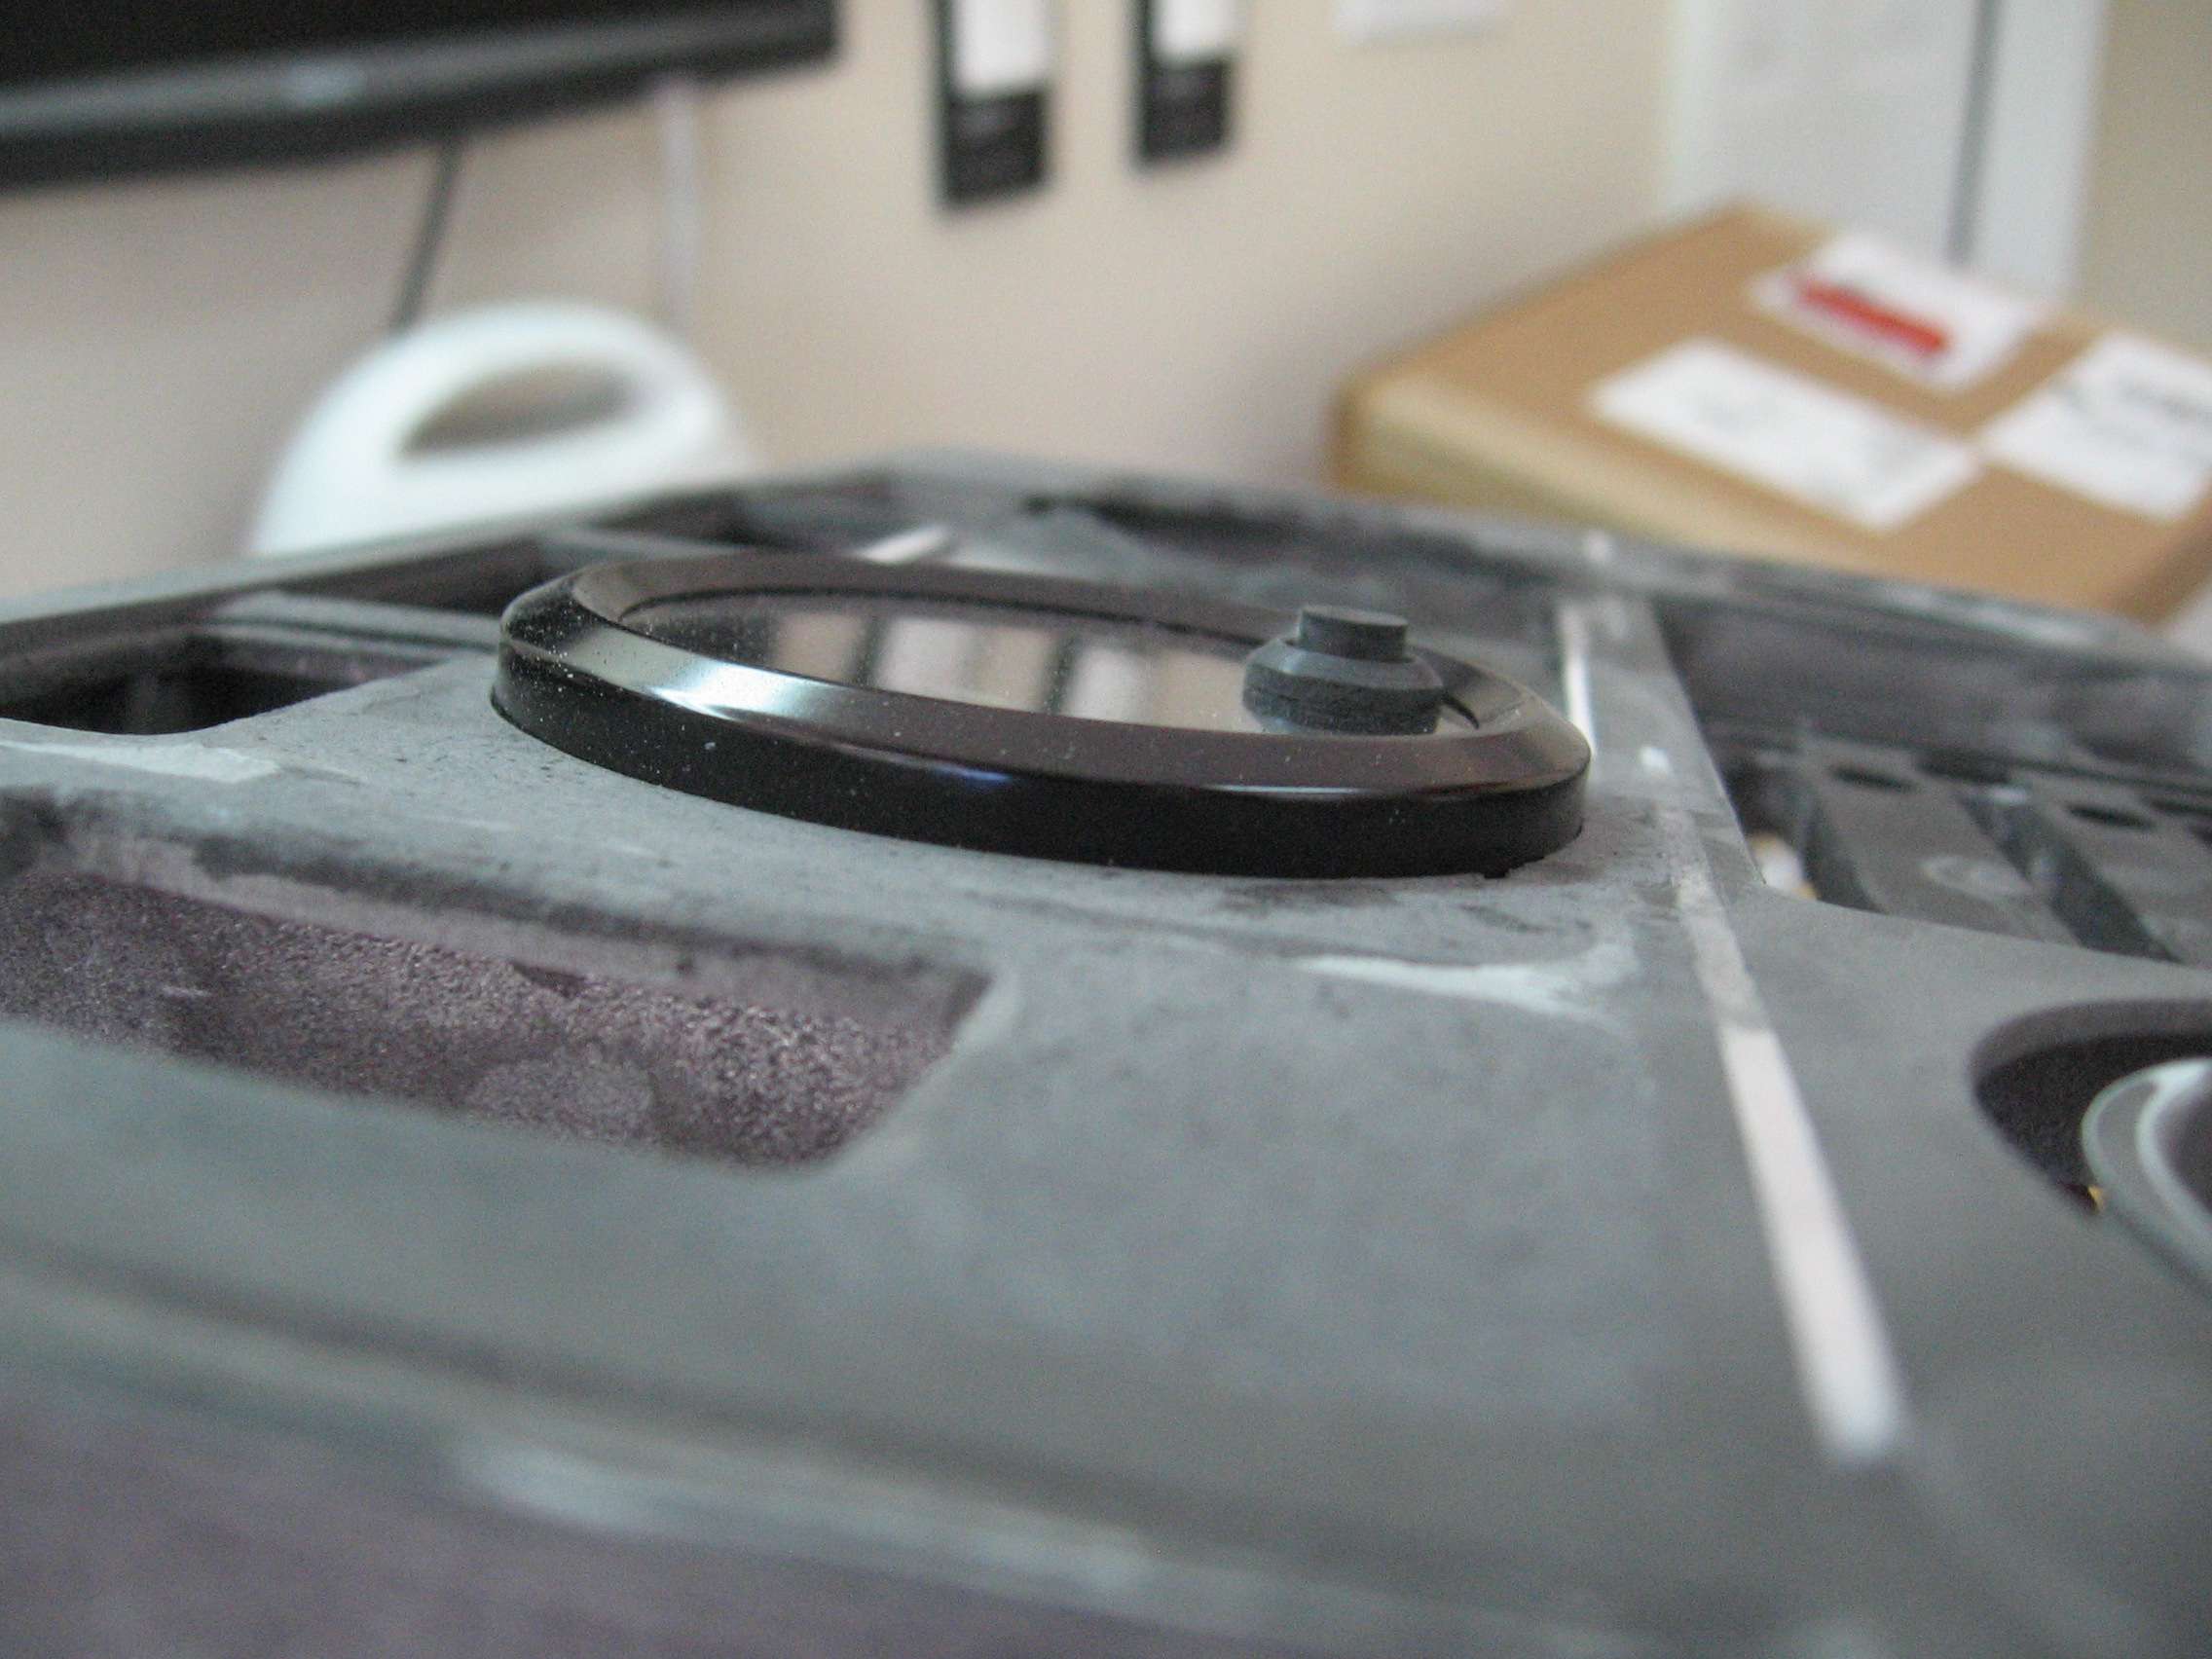
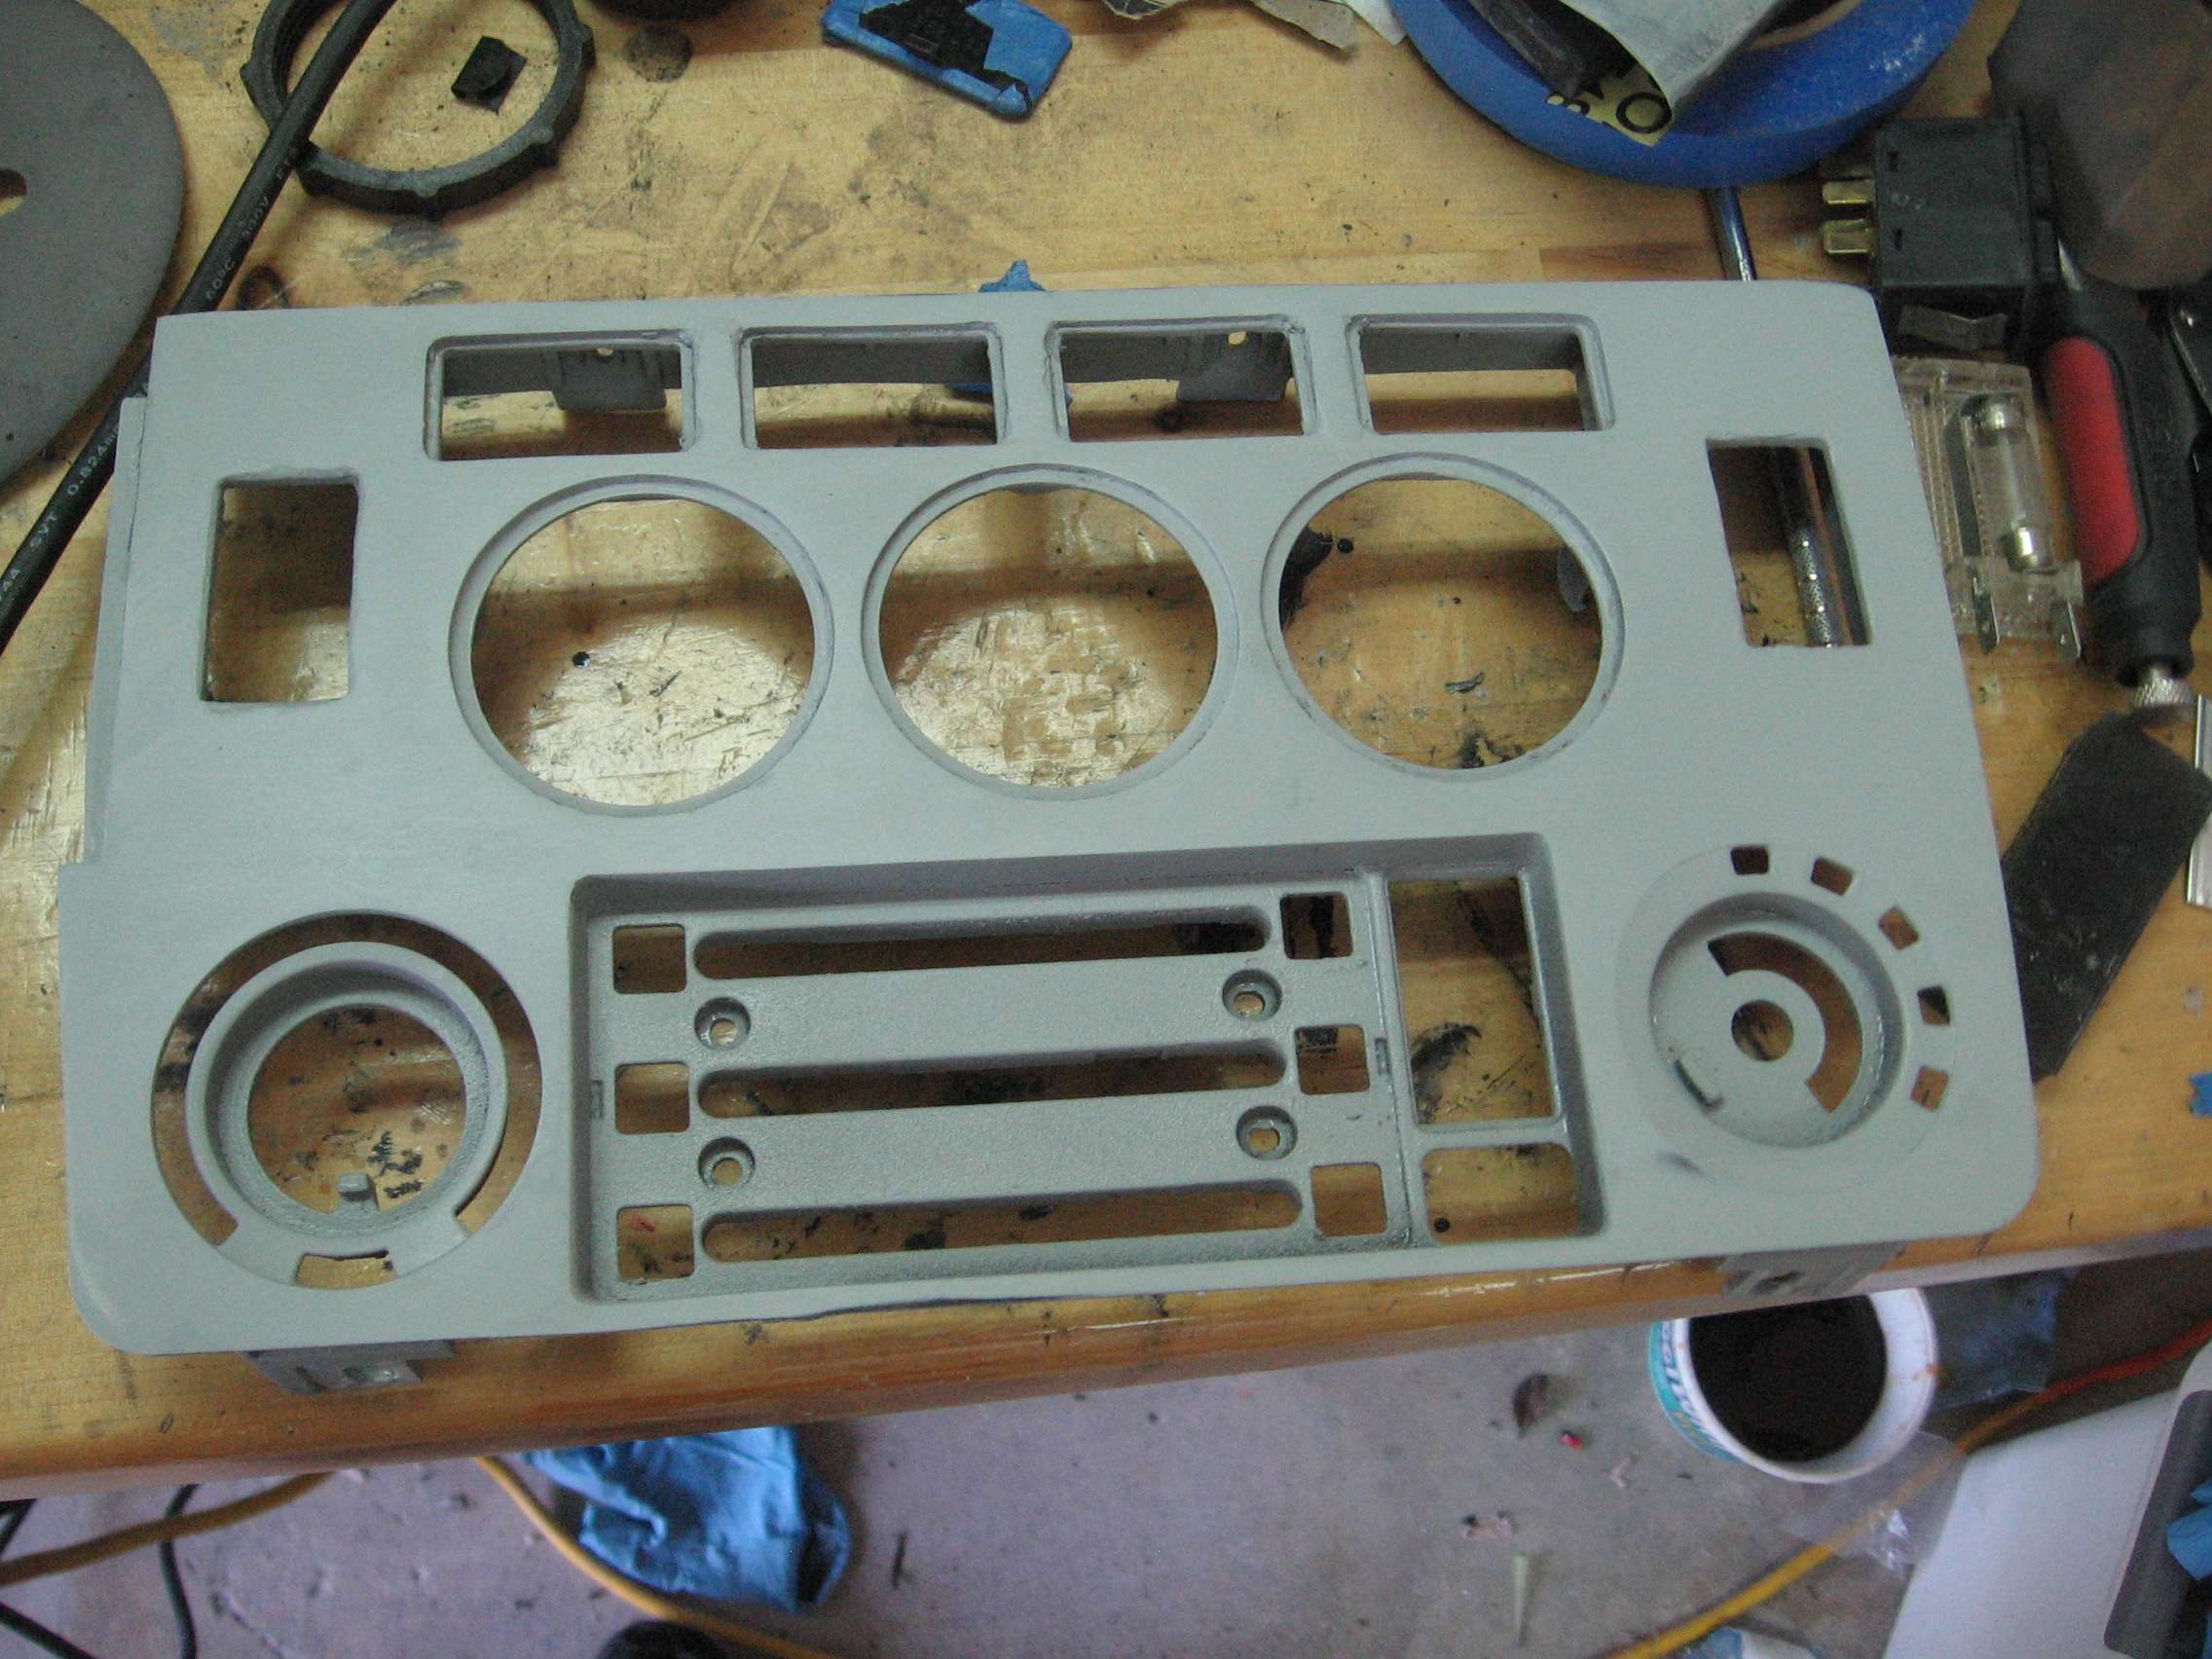
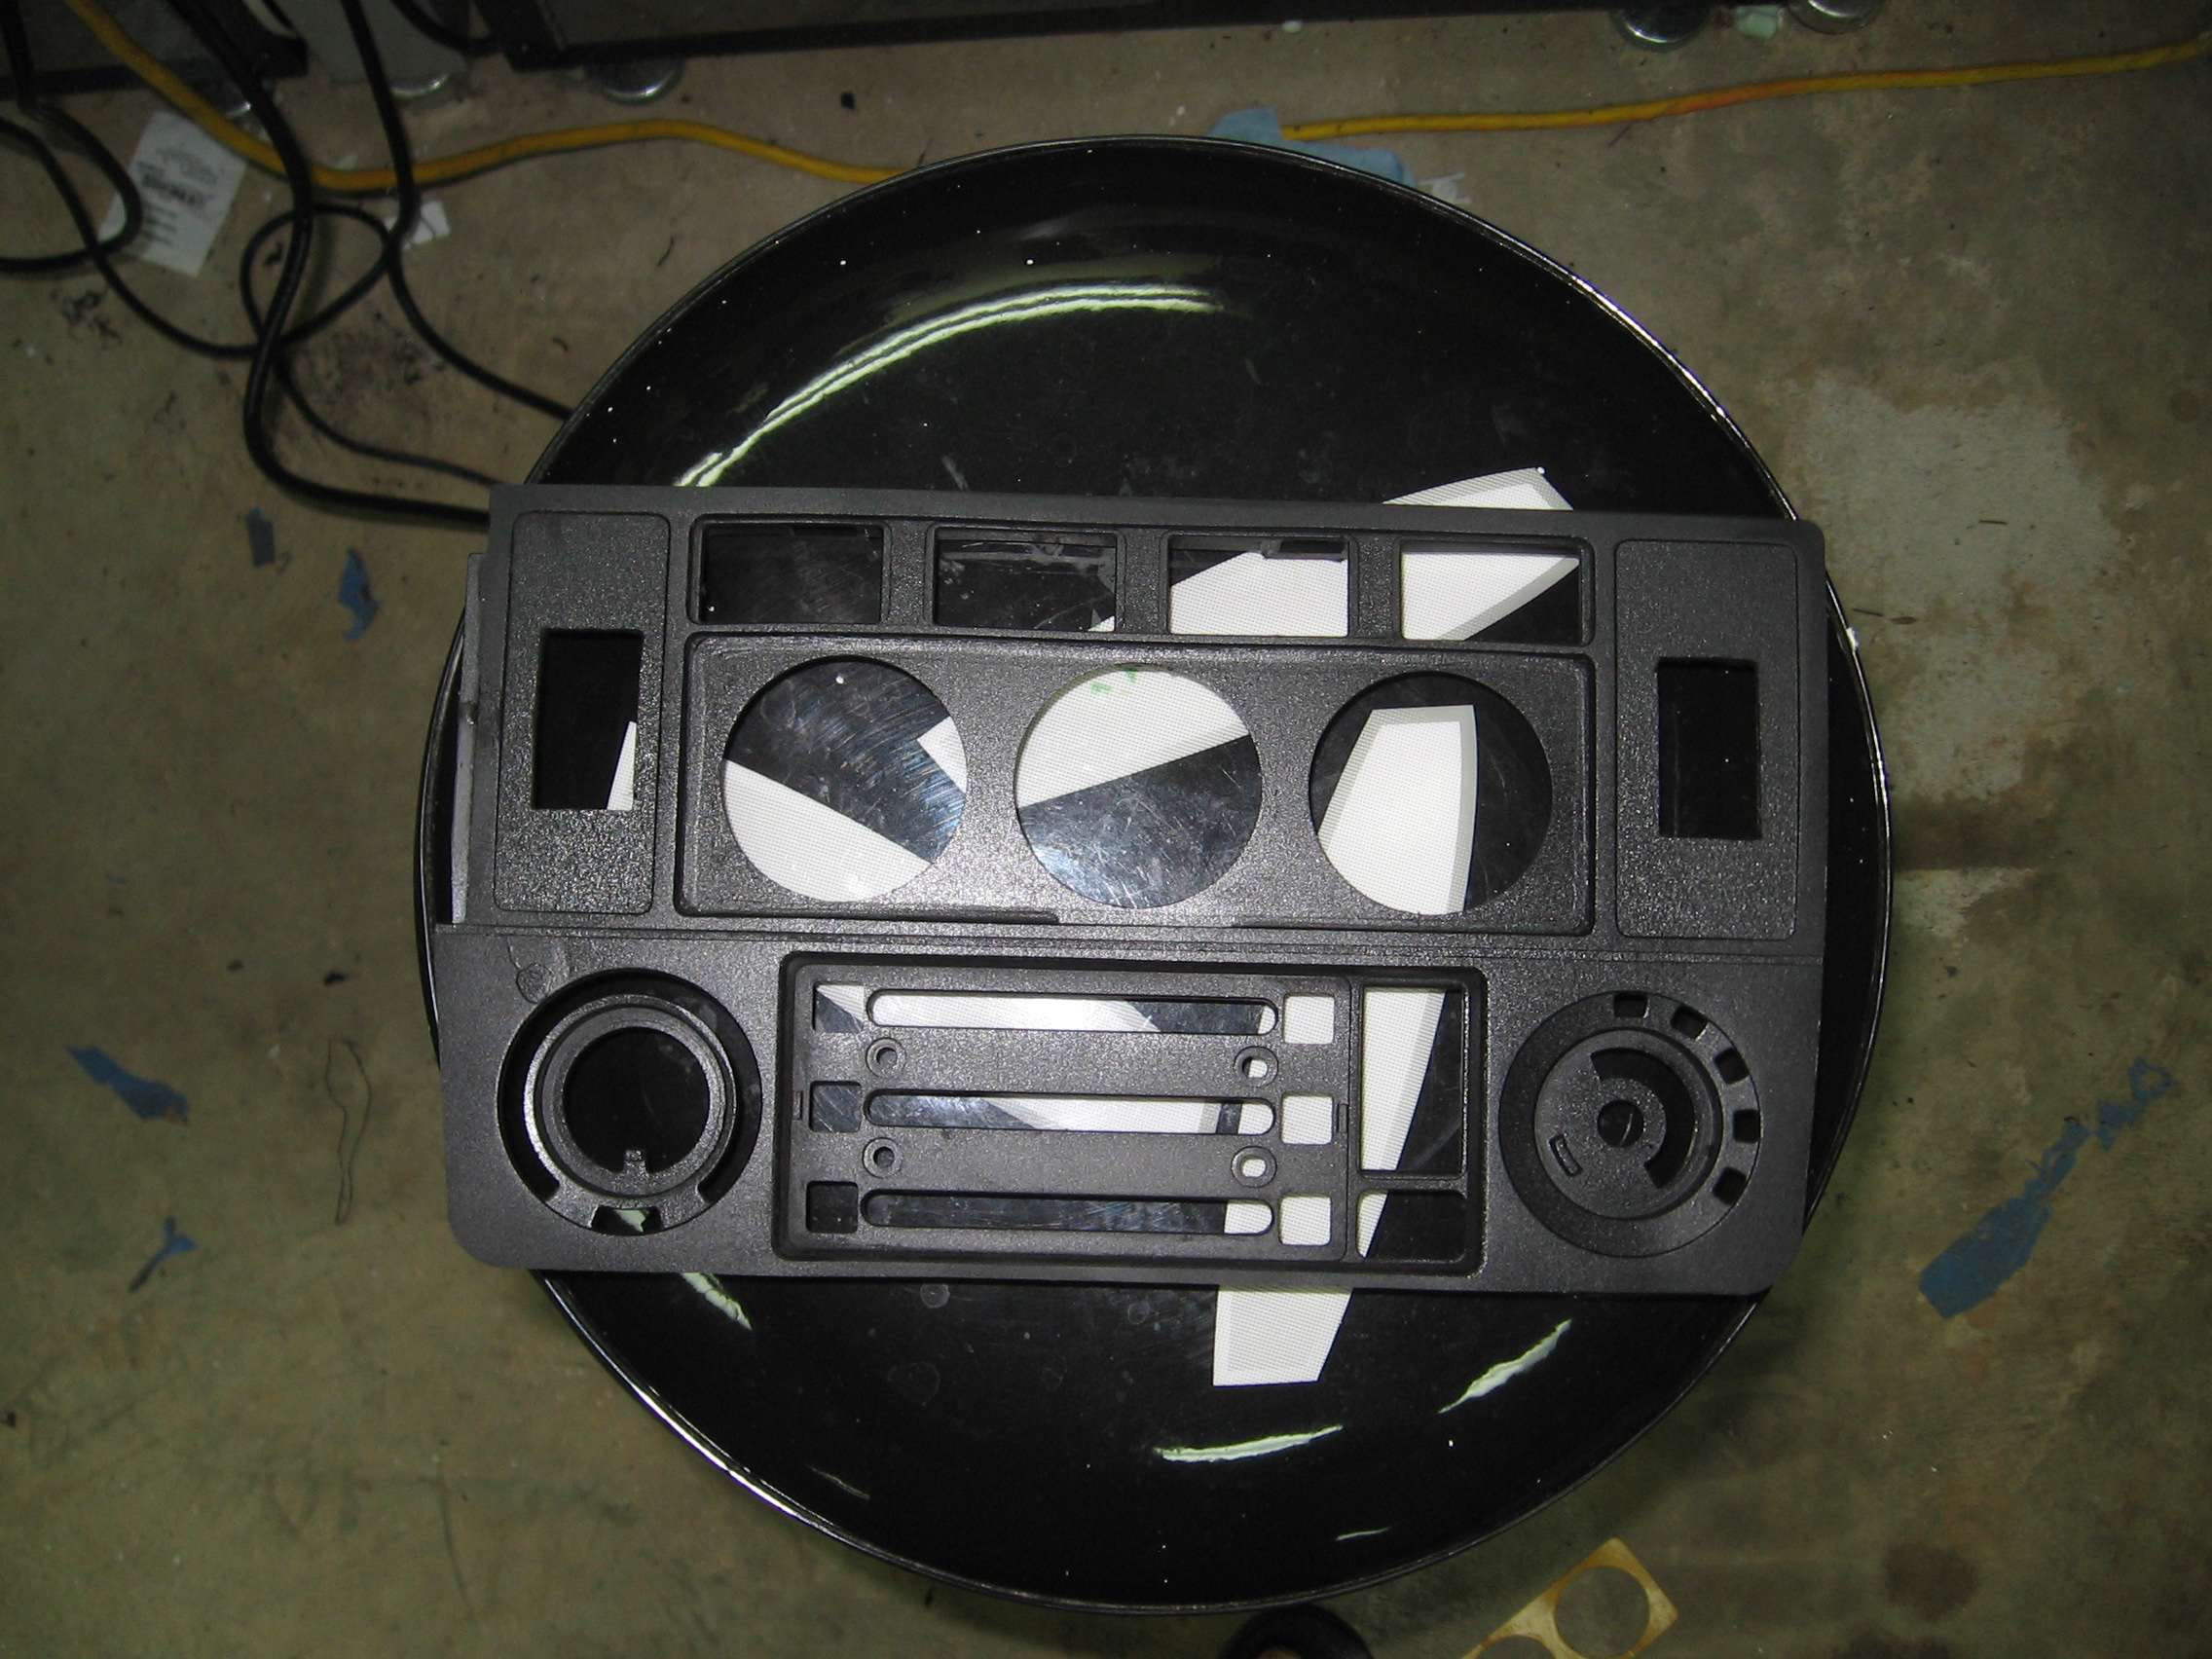
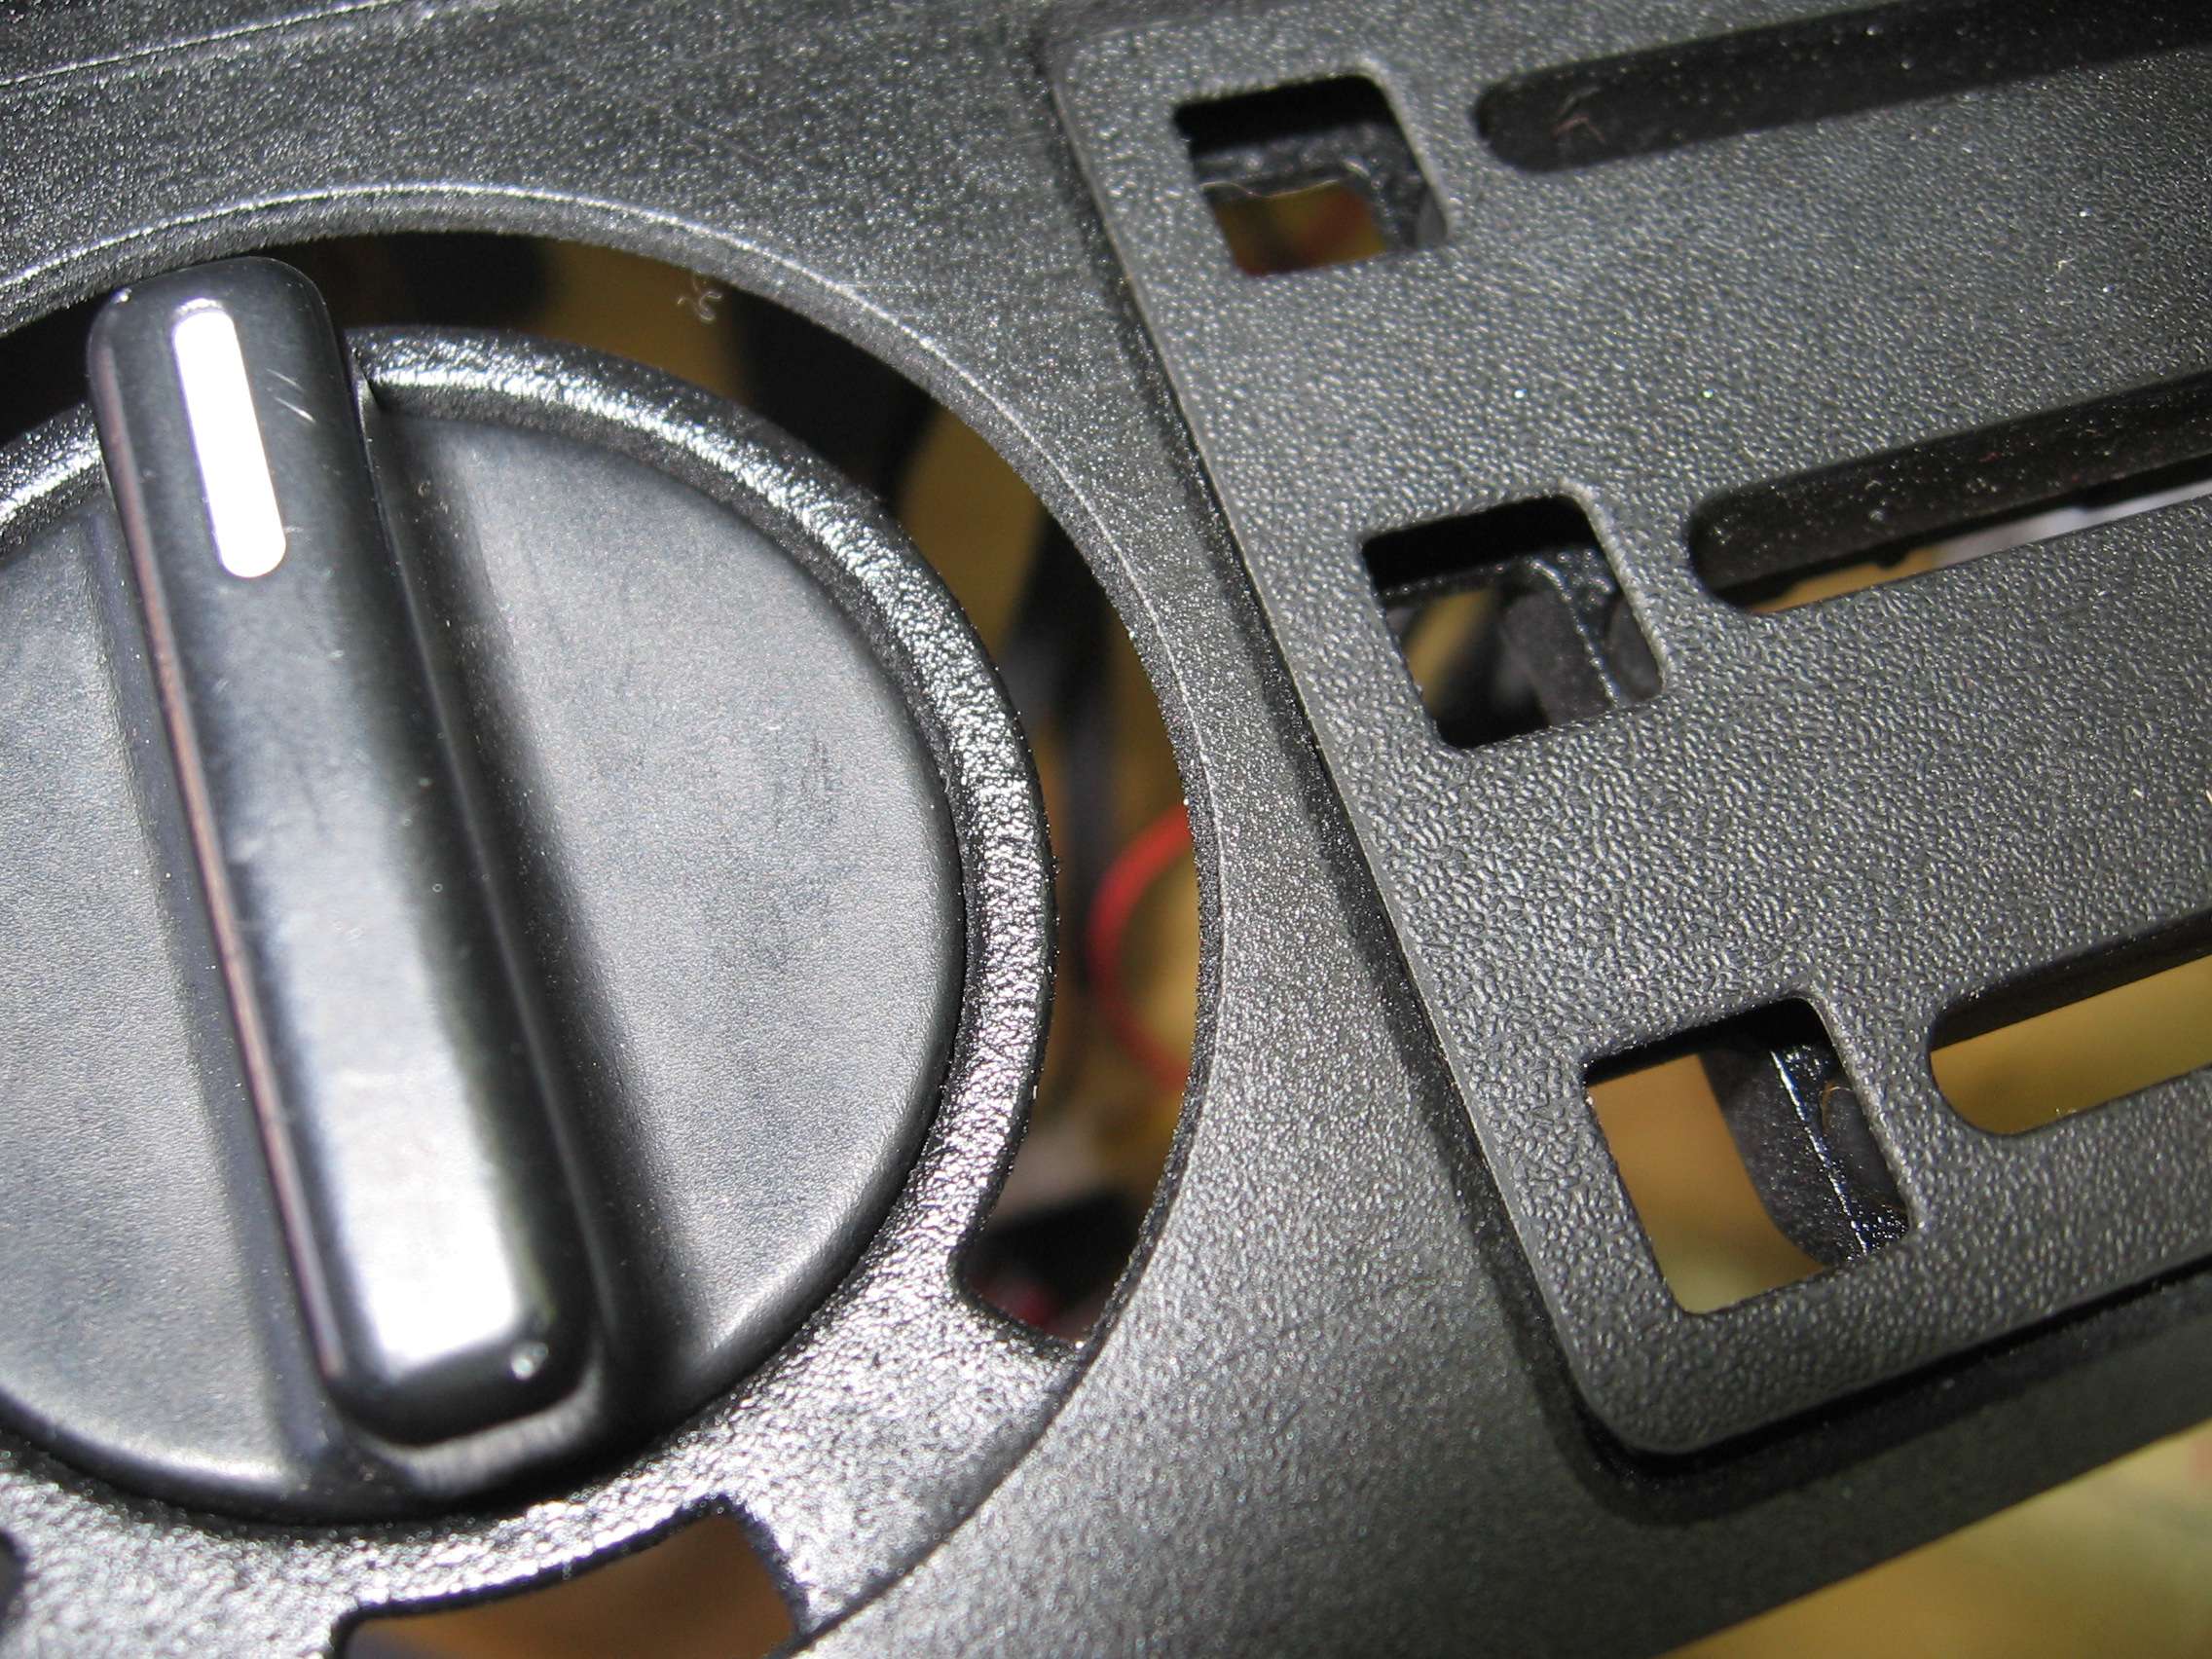
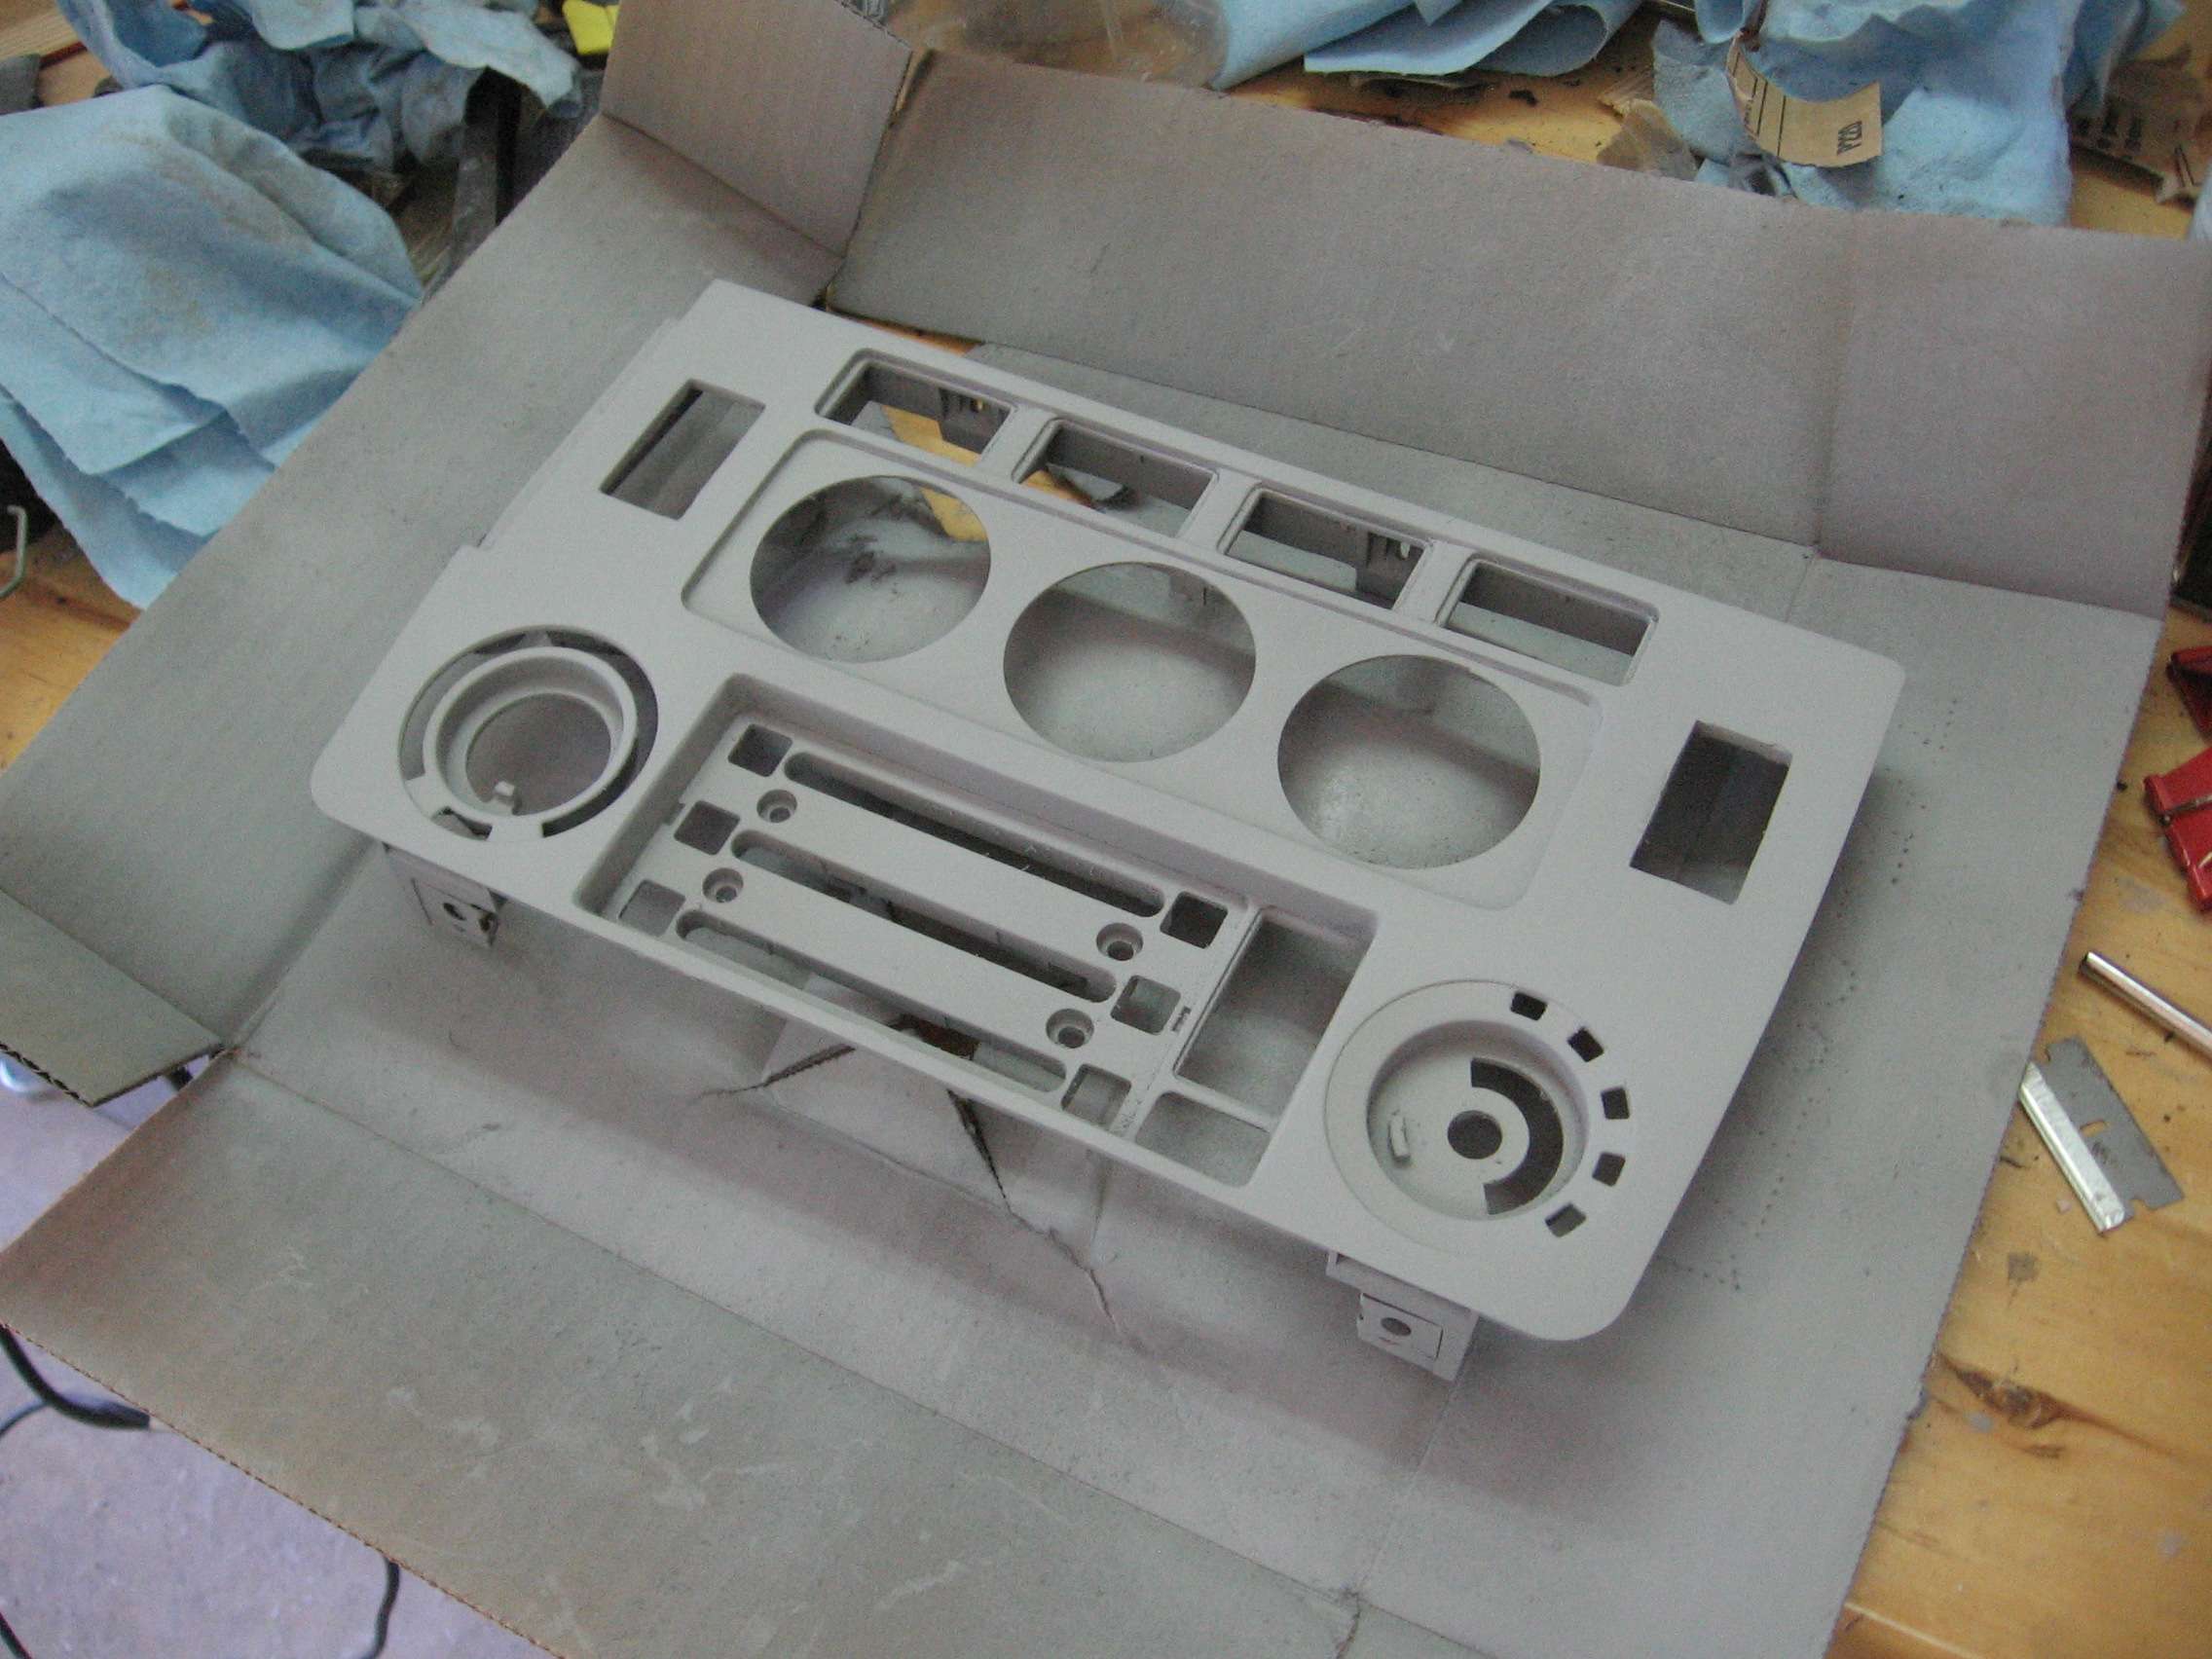
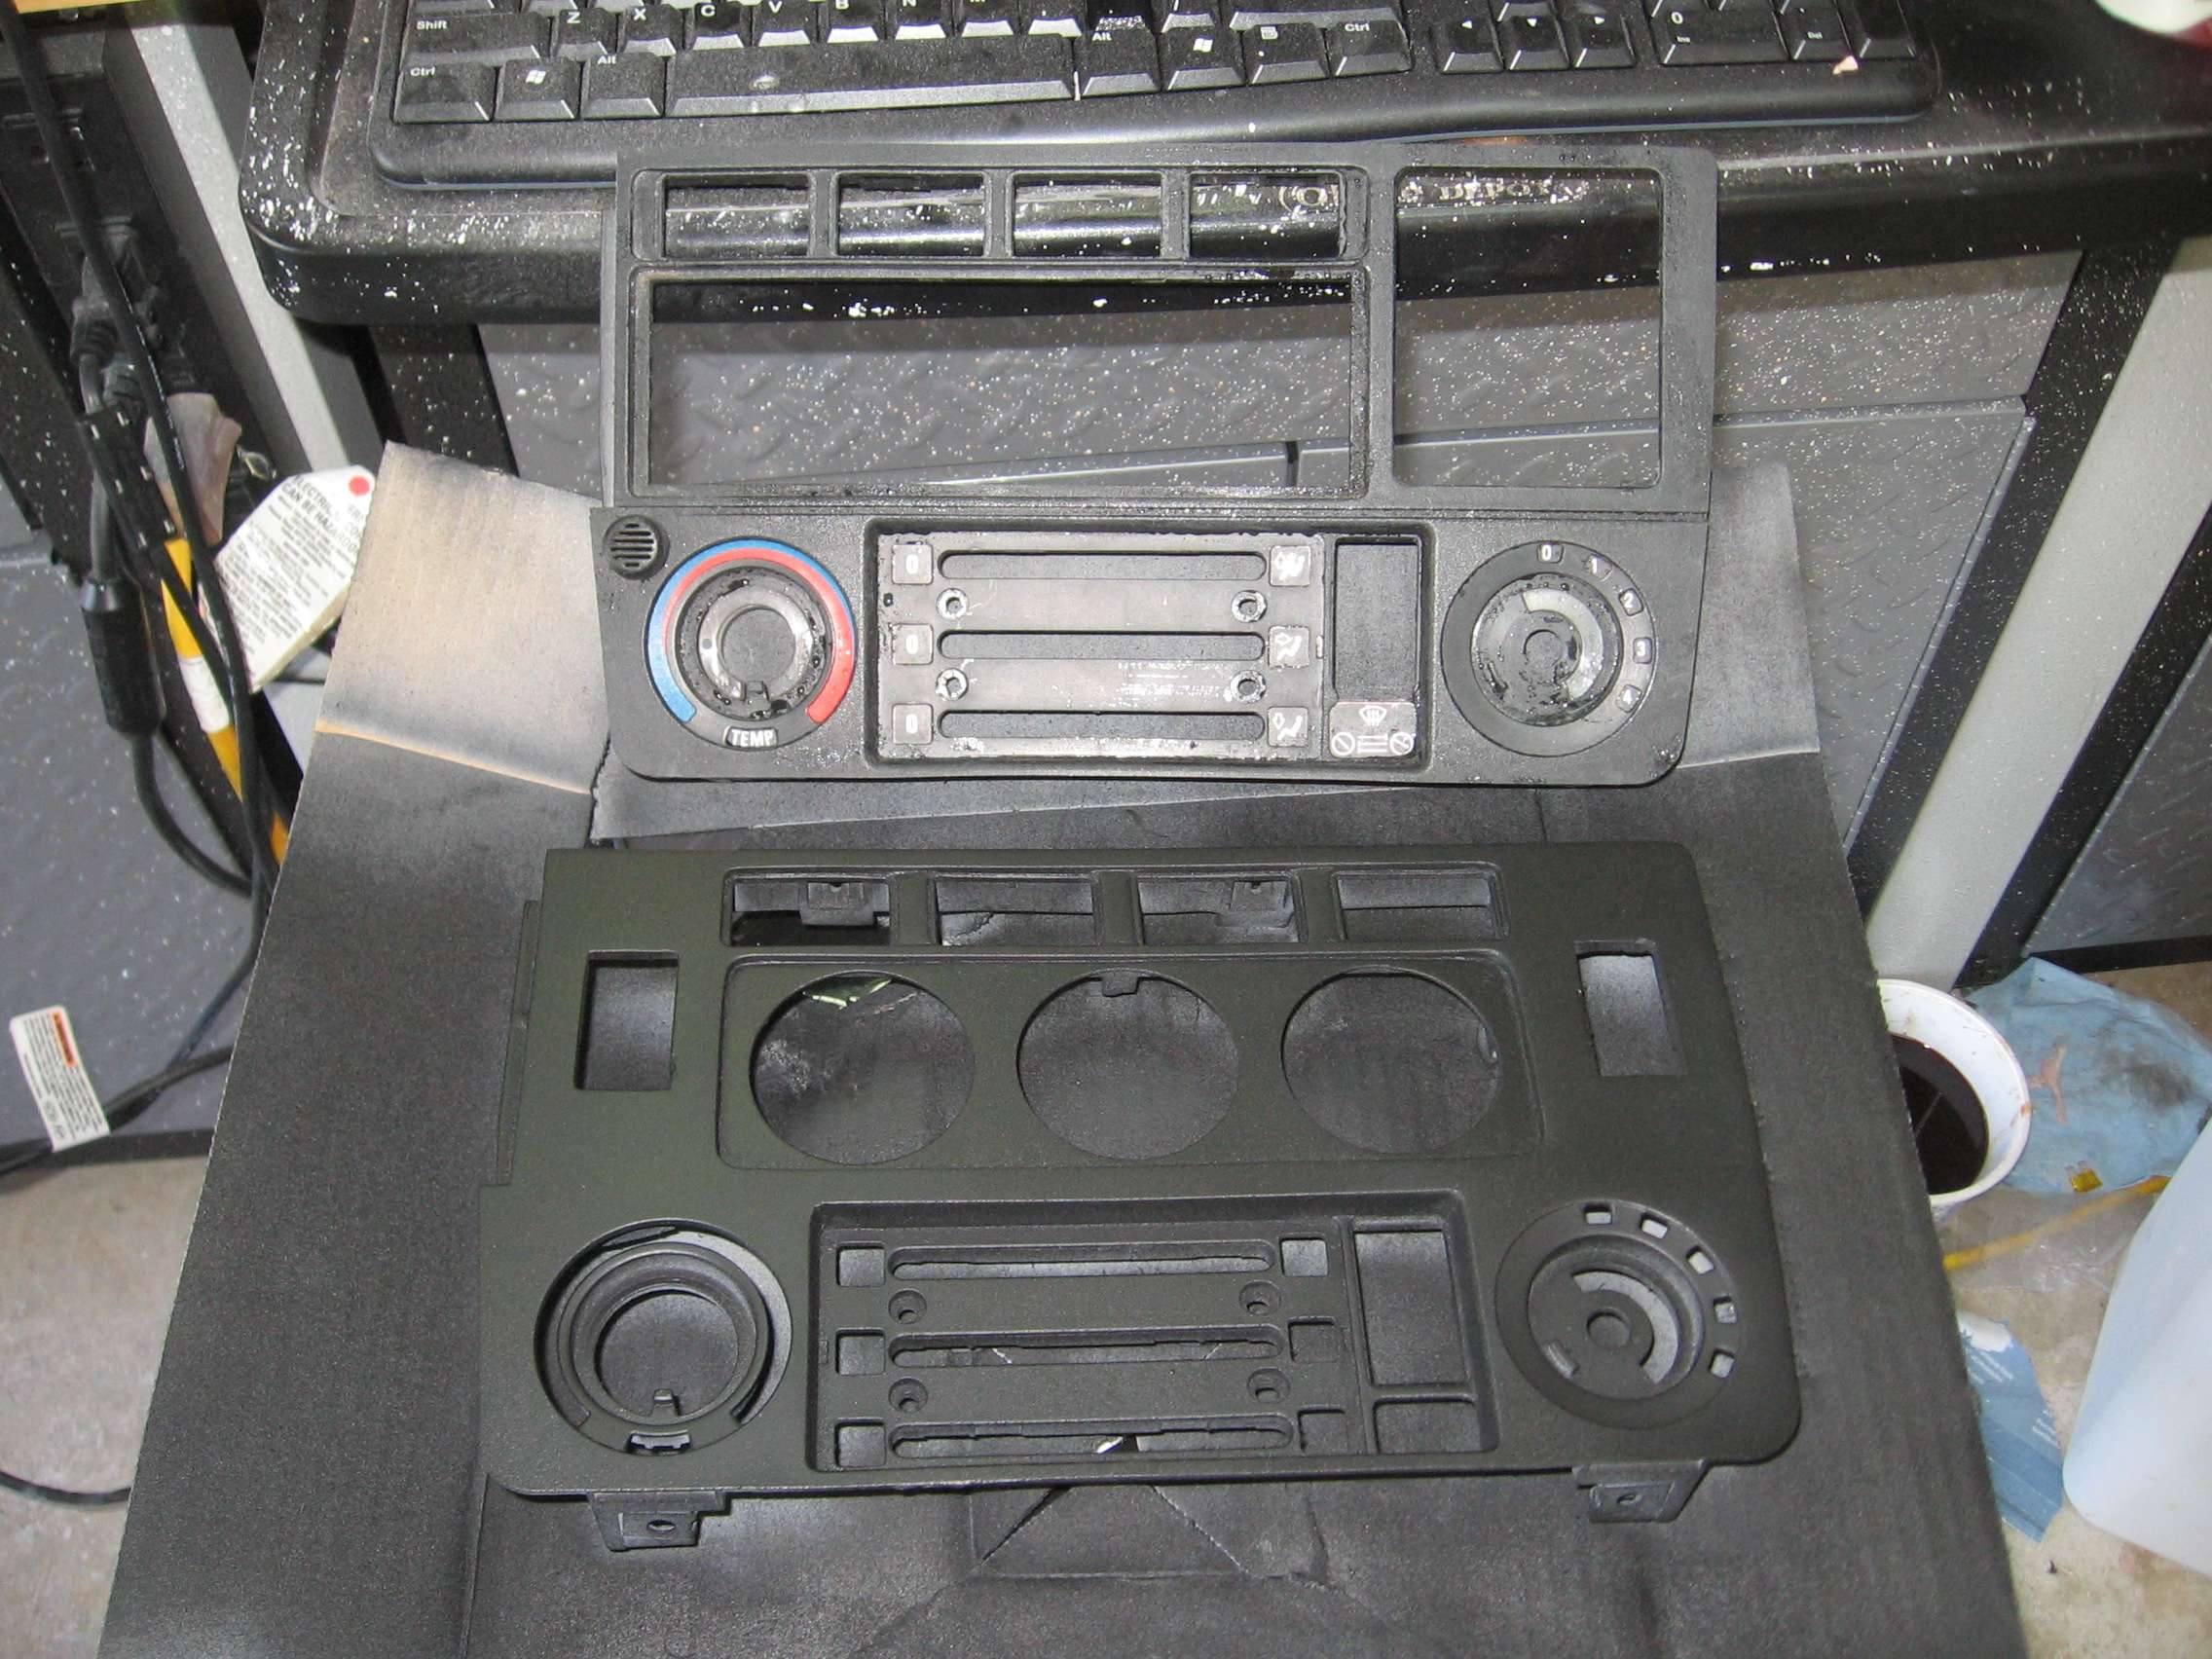
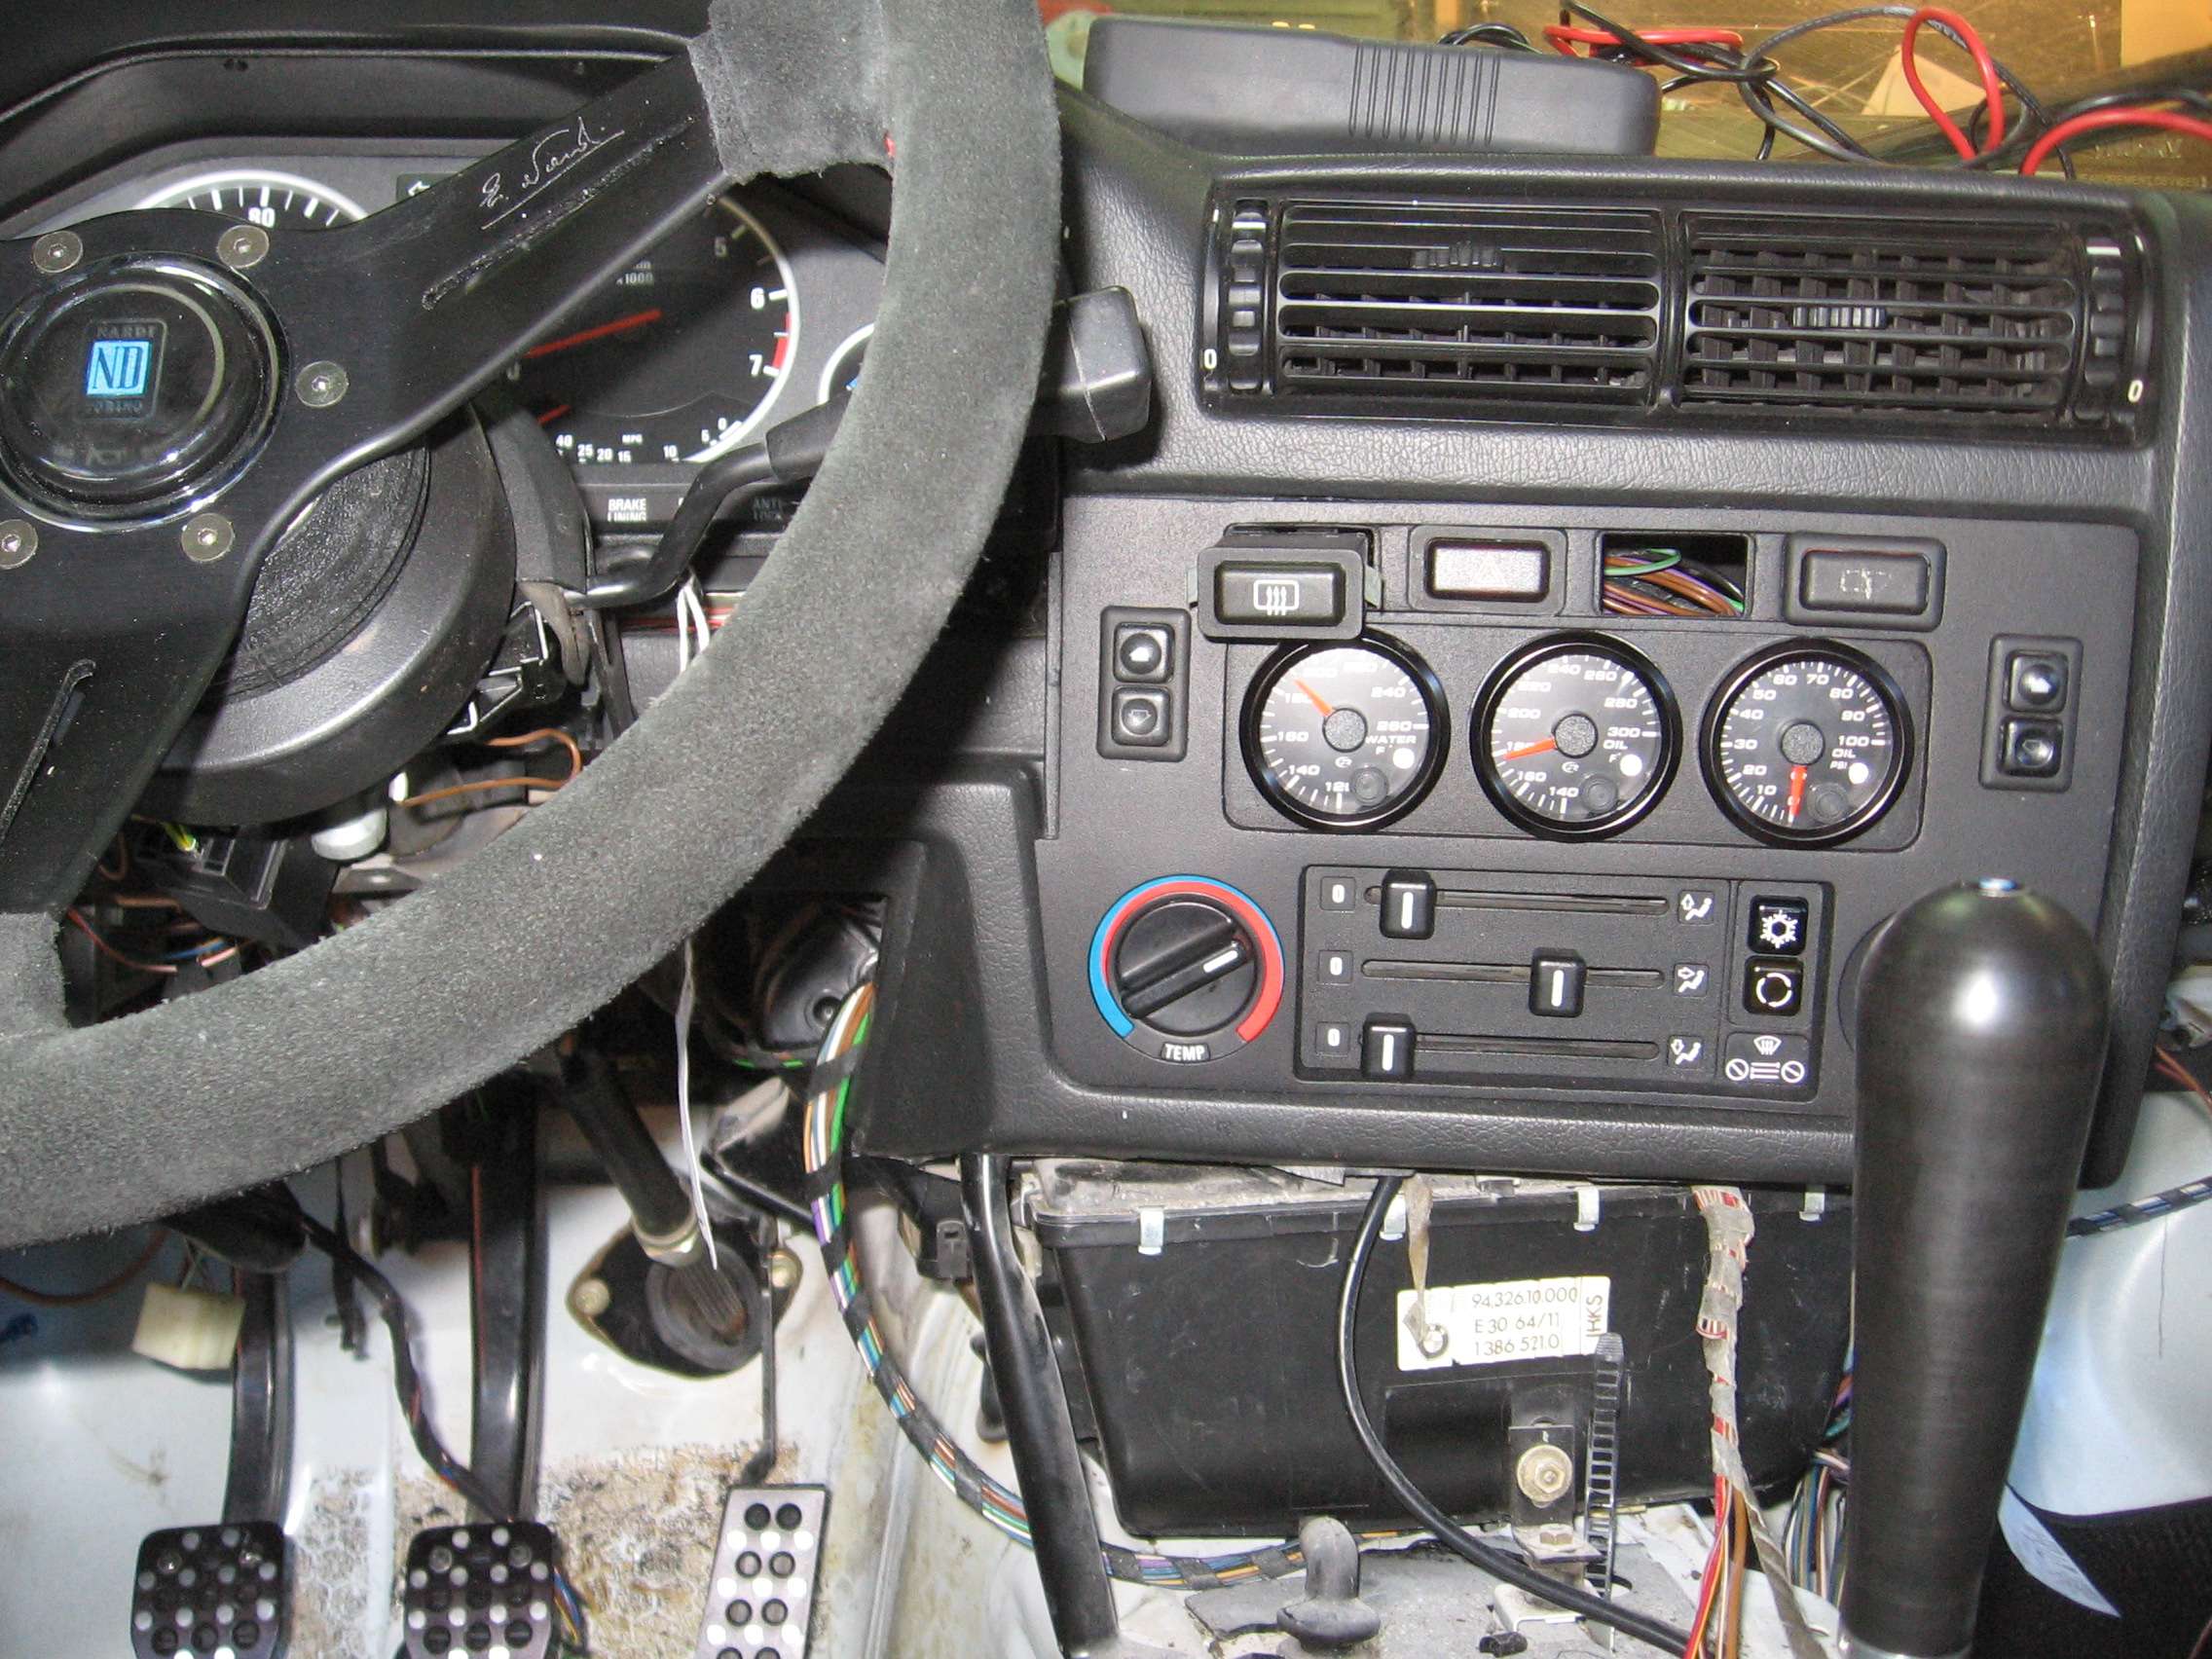
One thing I didn't like was my HVAC panel Since I will no longer run a center console, I needed to relocate my window switches and breakers. The HVAC with the OBC hole could provide a location but is far from symmetric or aesthetically pleasing in my opinion. A cheap lowly 316i HVAC panel on the other hand has two blank areas on either side of the radio slot, perfect for placing the window switches. Check out Simon S's thread for reference. I wanted something a bit more custom but still looks like a panel that BMW would have offered.
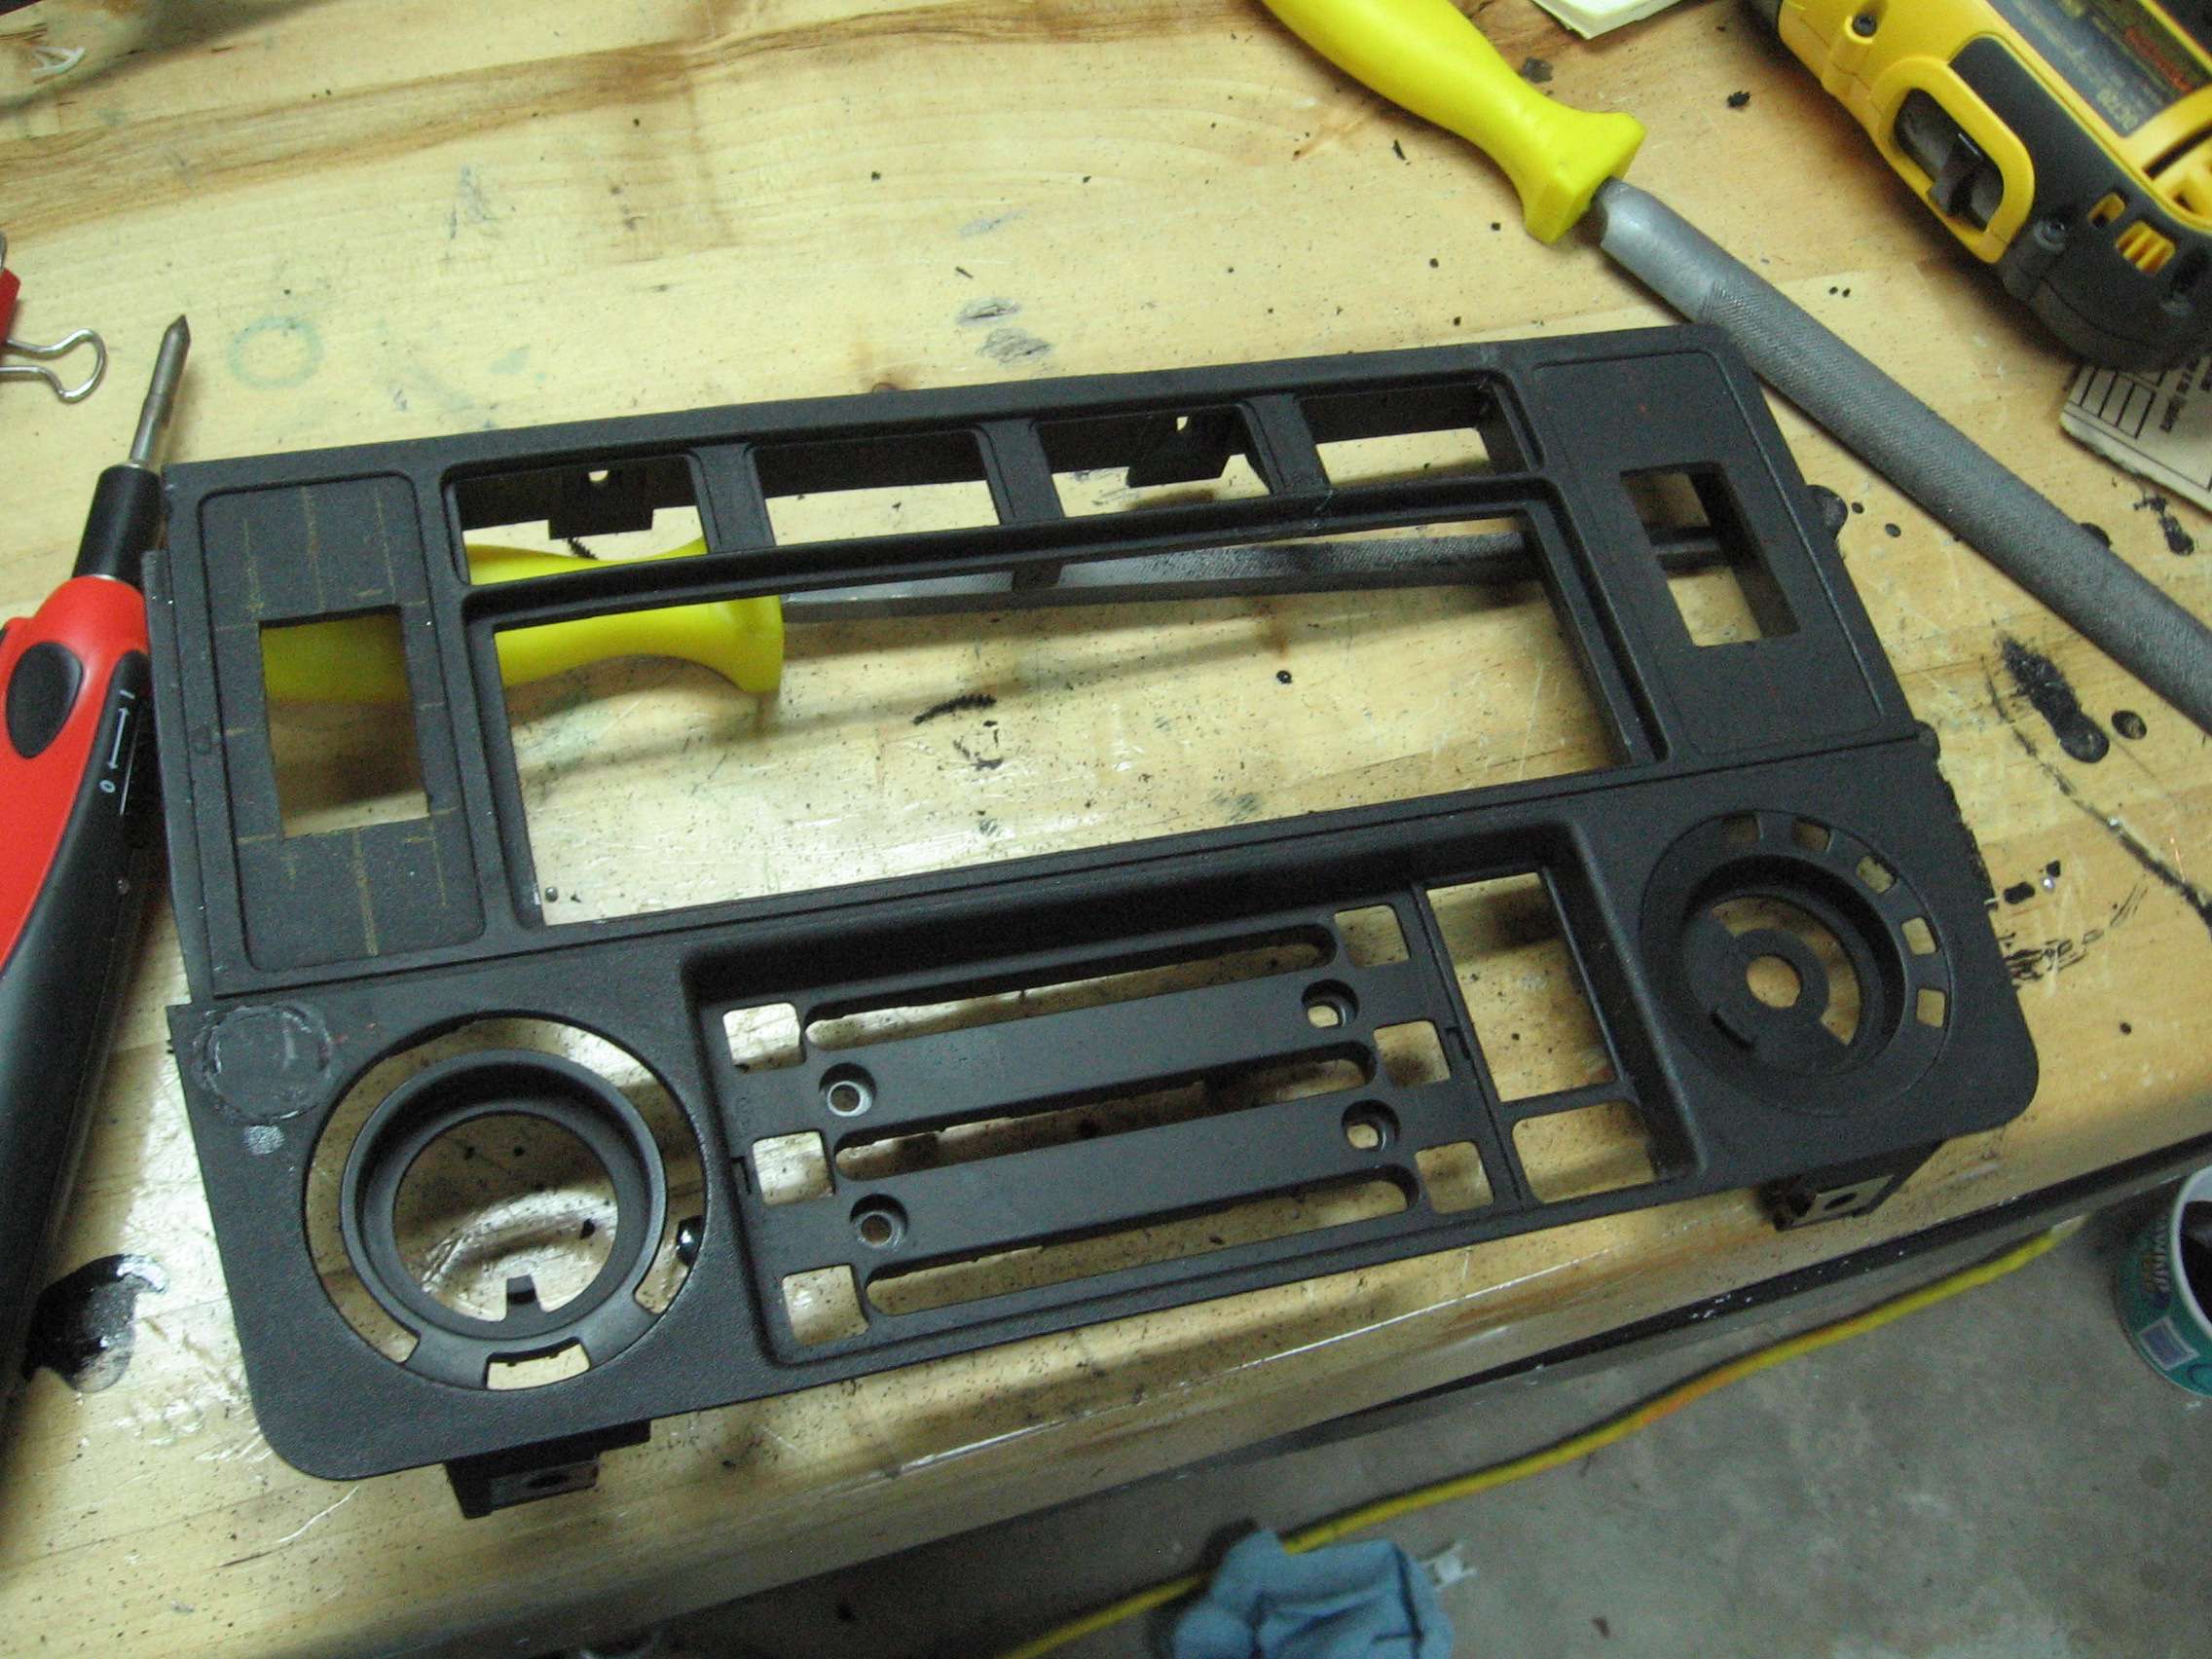
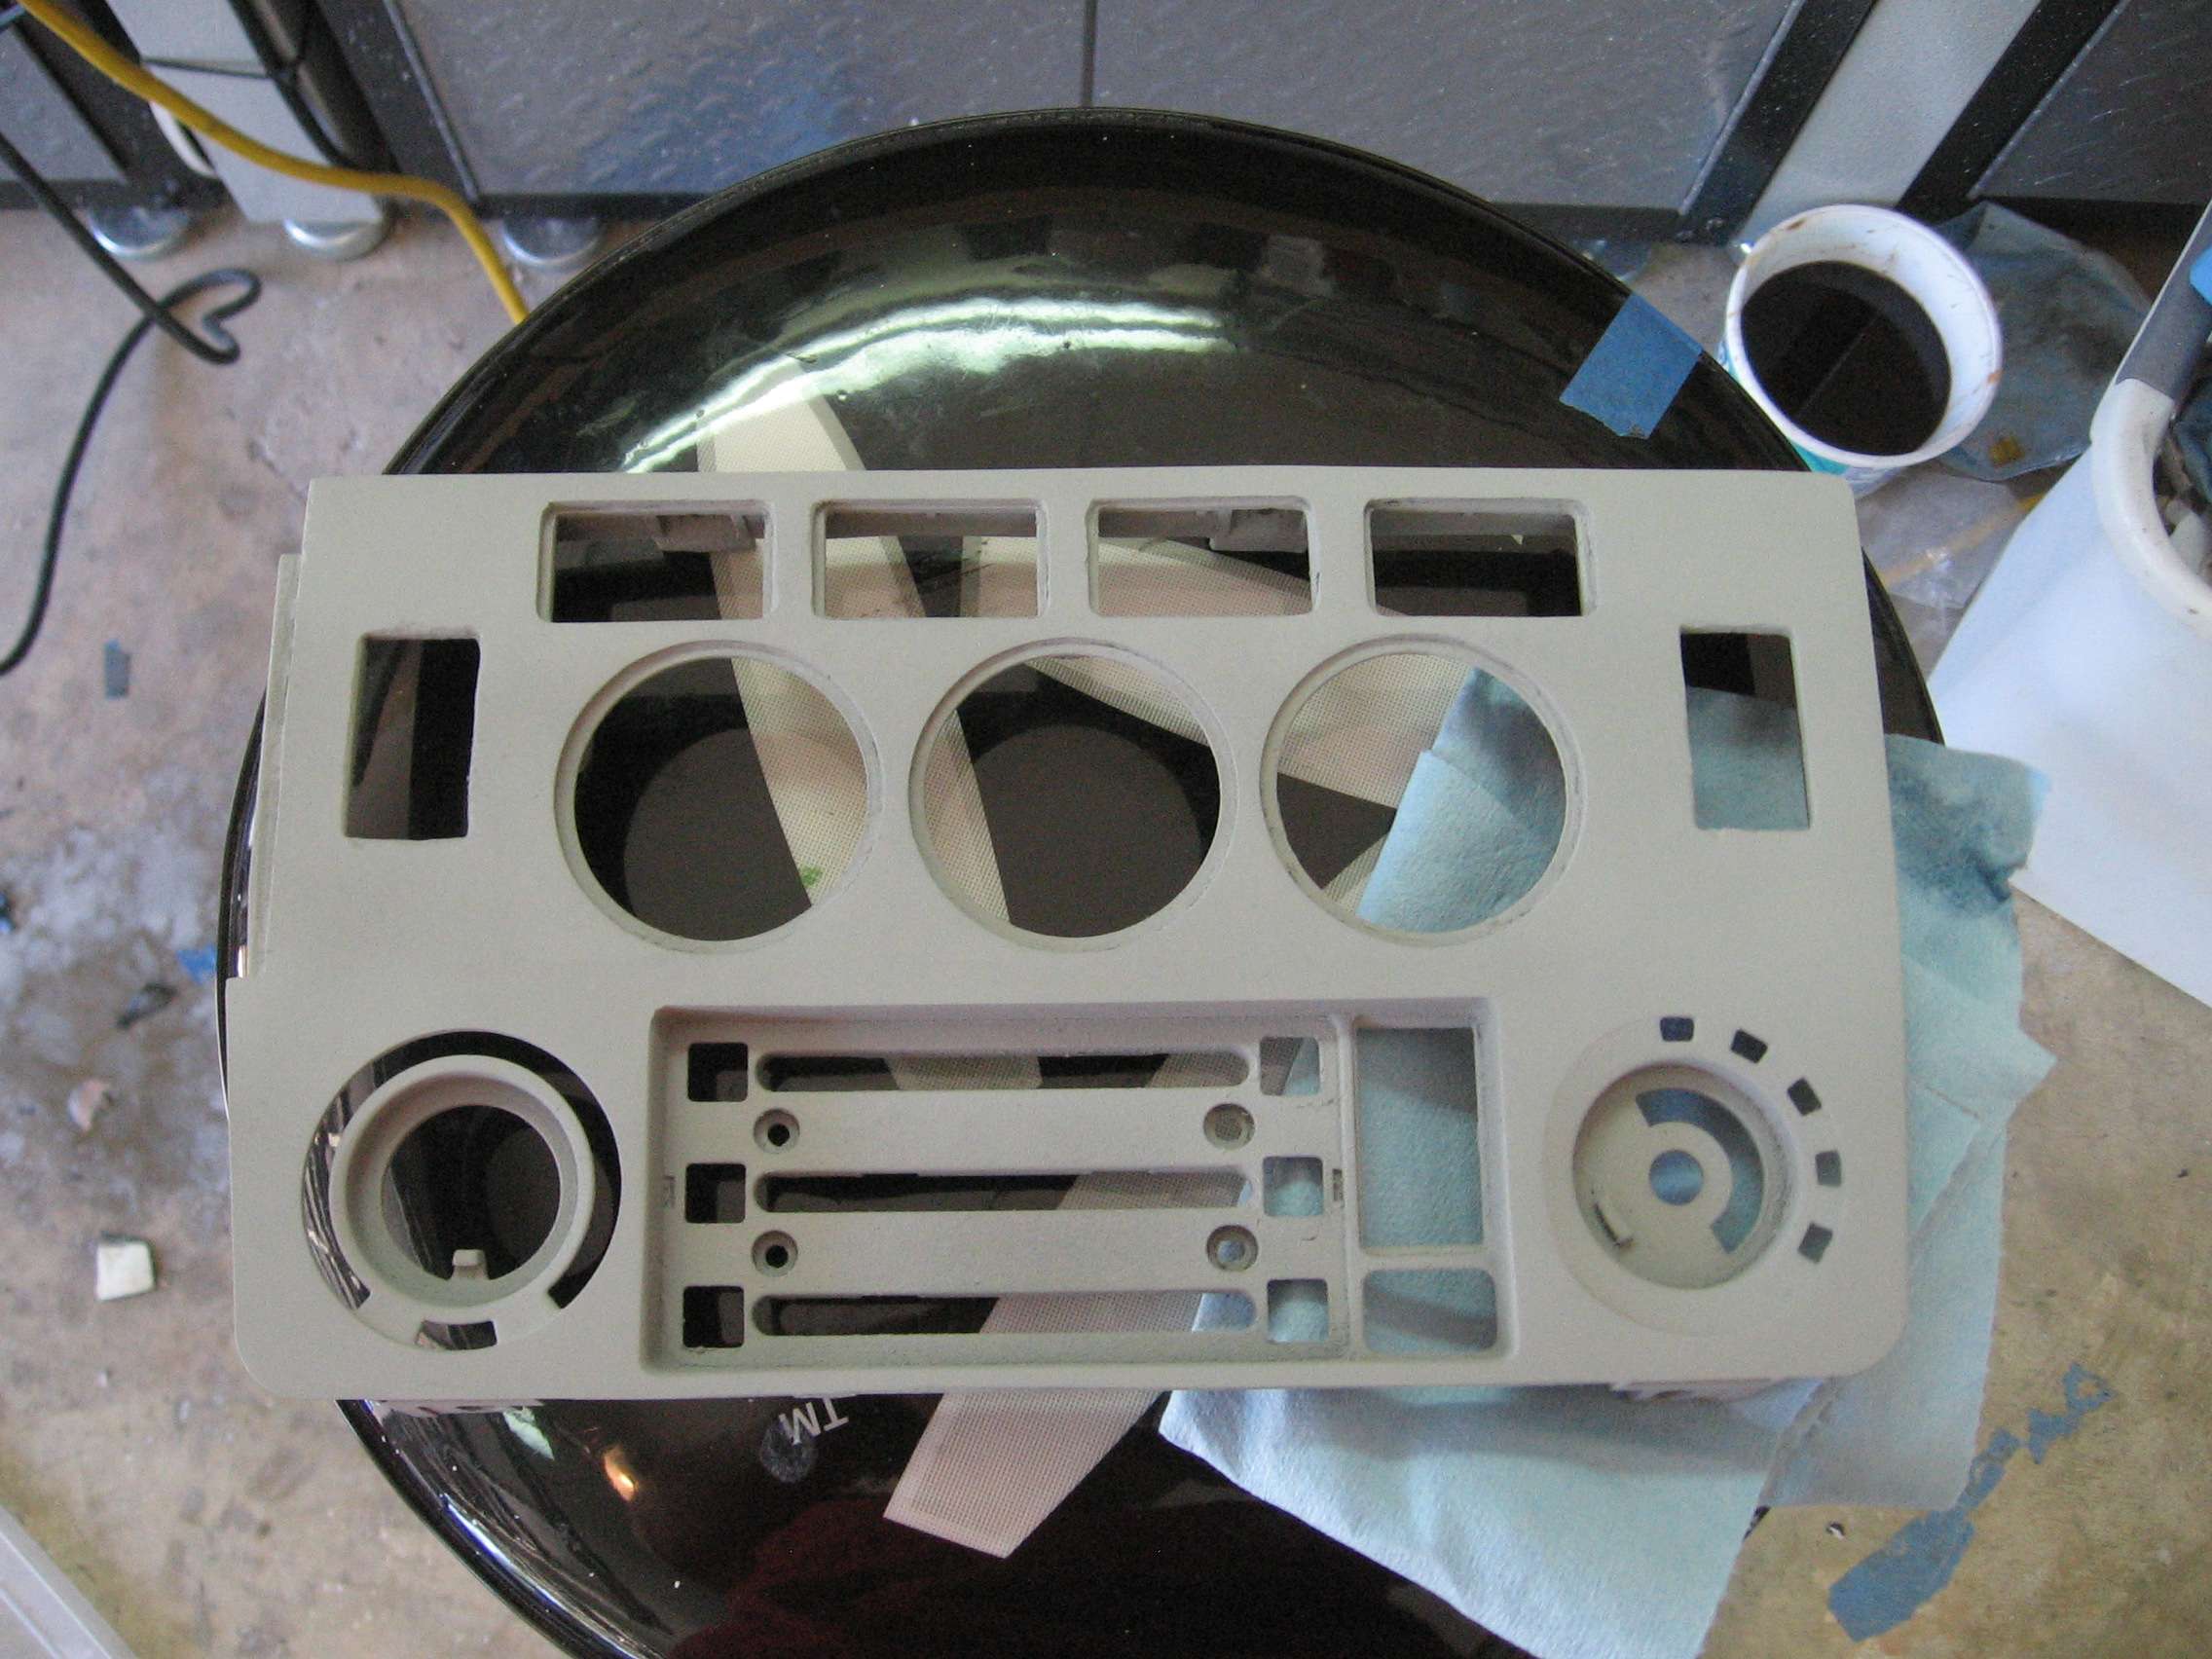
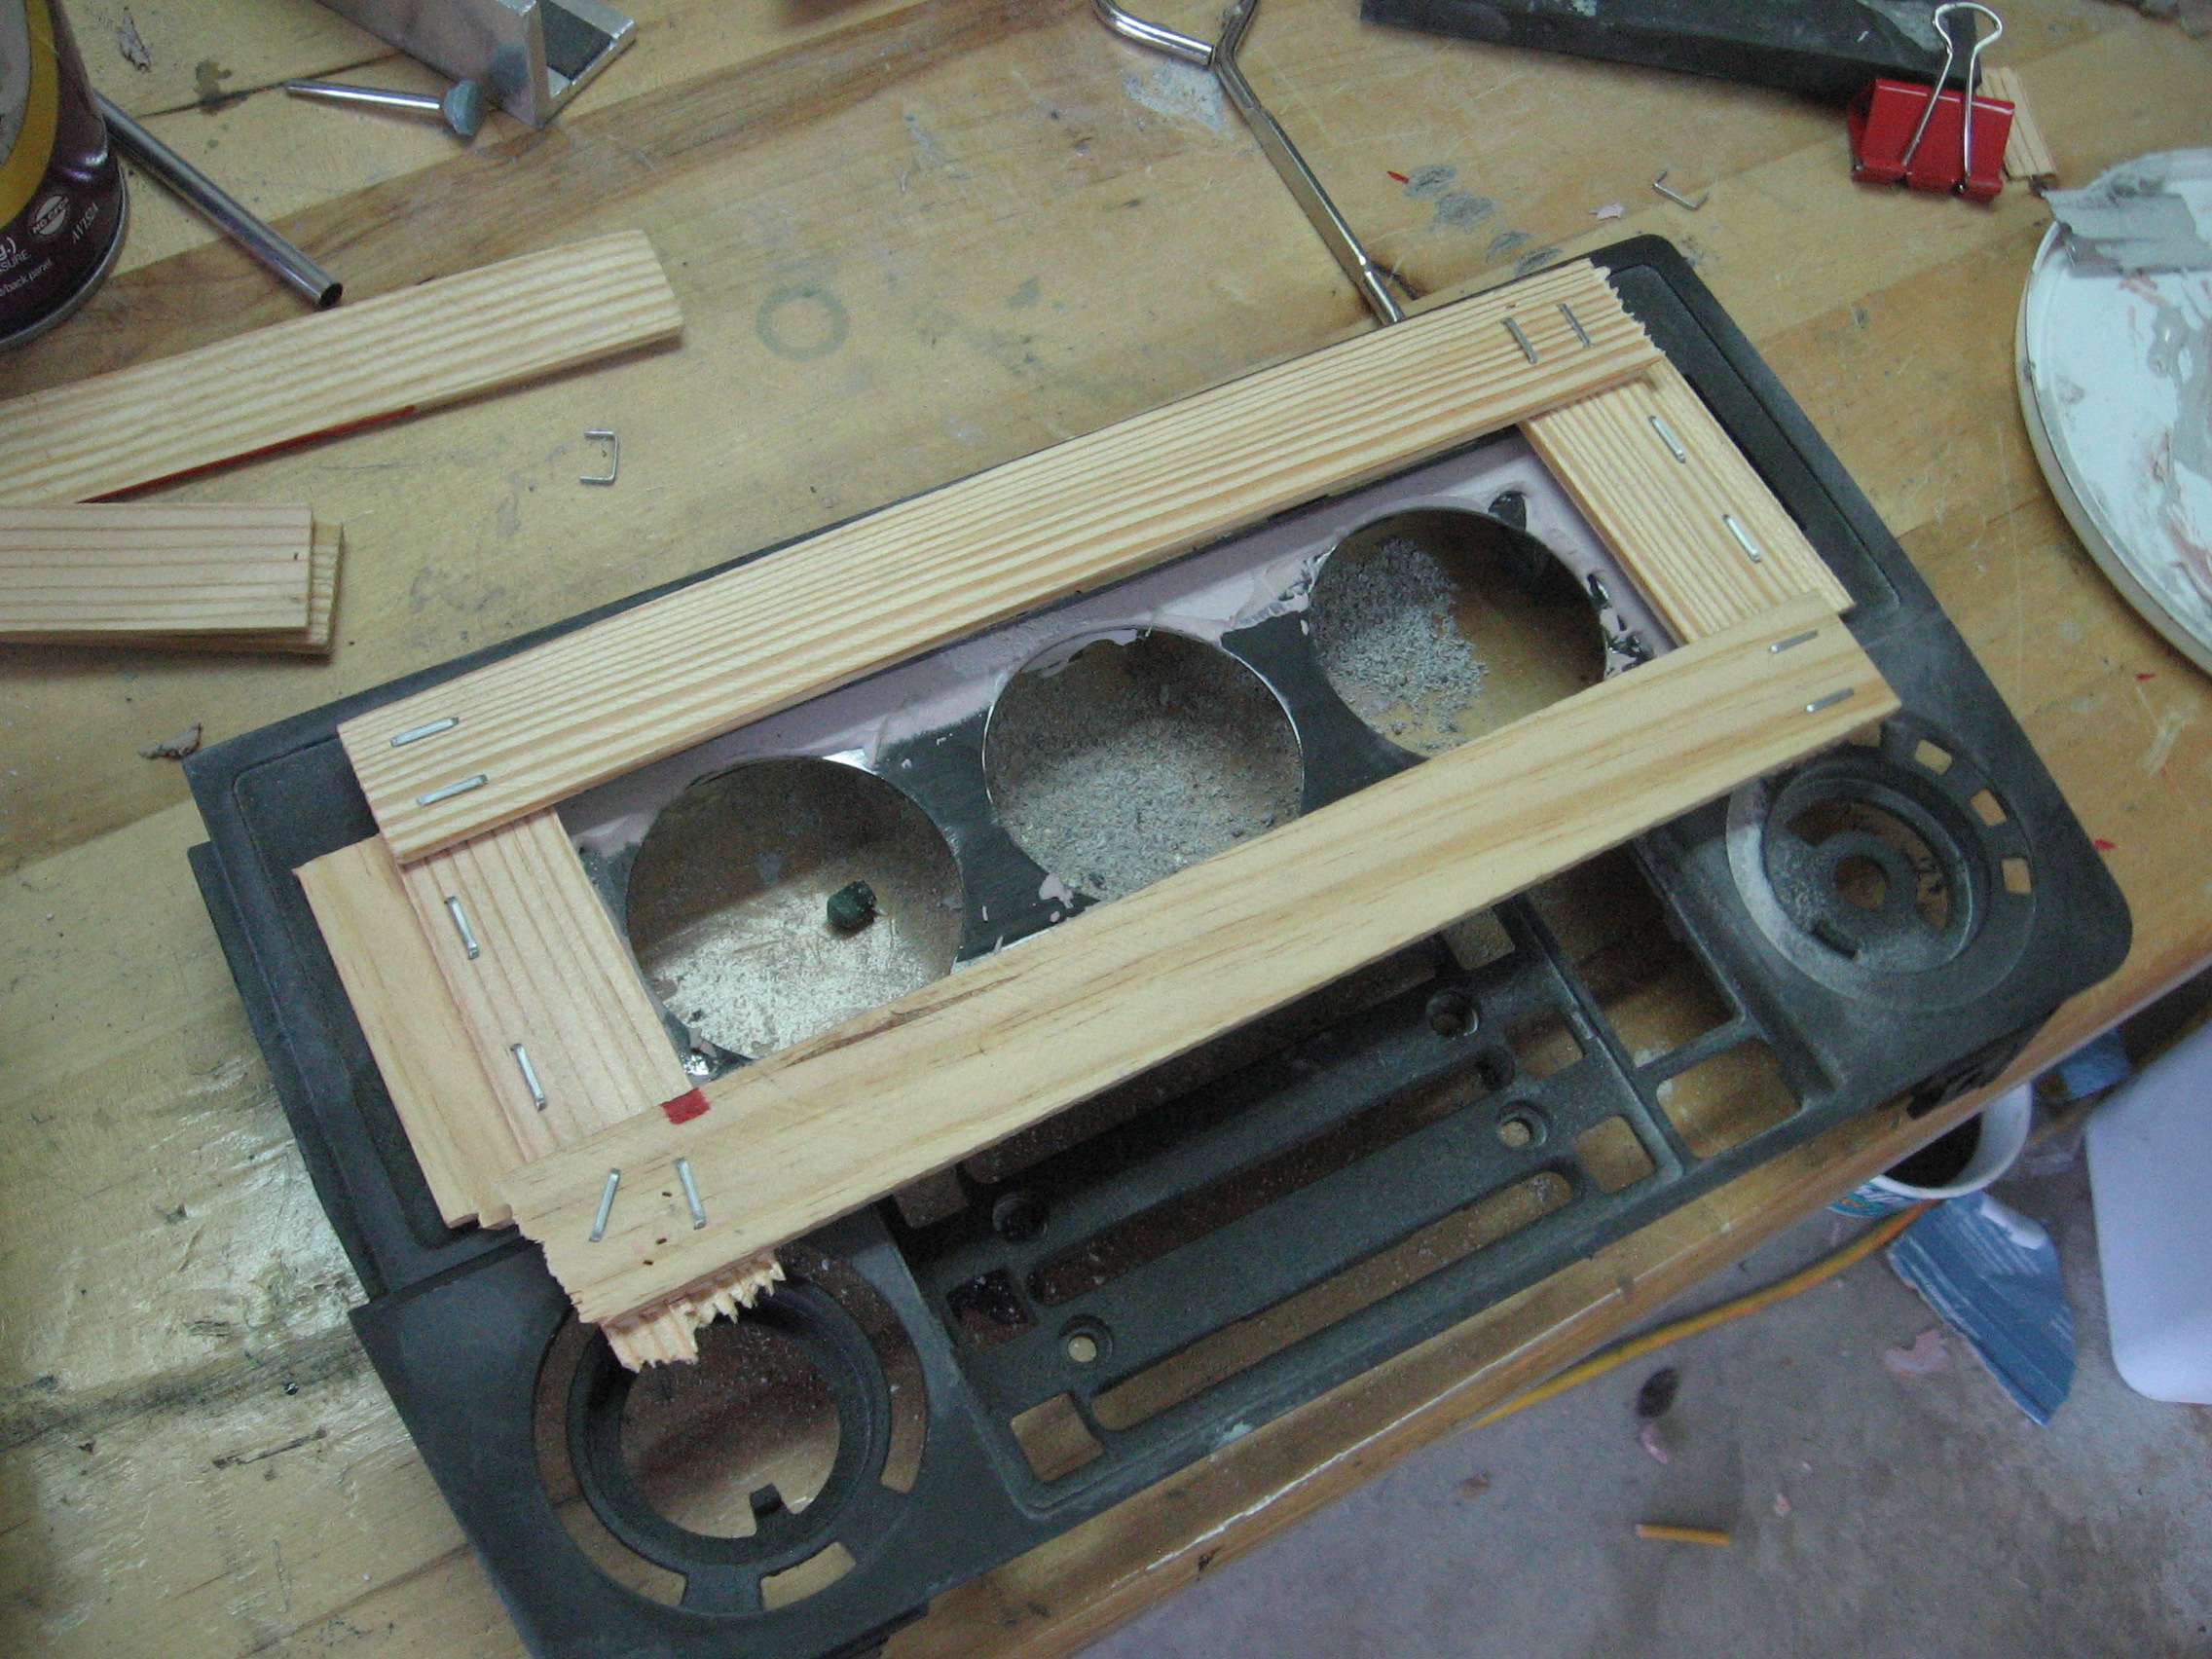
This is what I started off with. A while back, I picked up this HVAC panel from MikeDE. You'll immediately notice some of the changes I've started to make. Here the holes are cut for the window switches and are centered in the two blanking plates on either side. These areas are not symmetric, the right side is slightly wider.
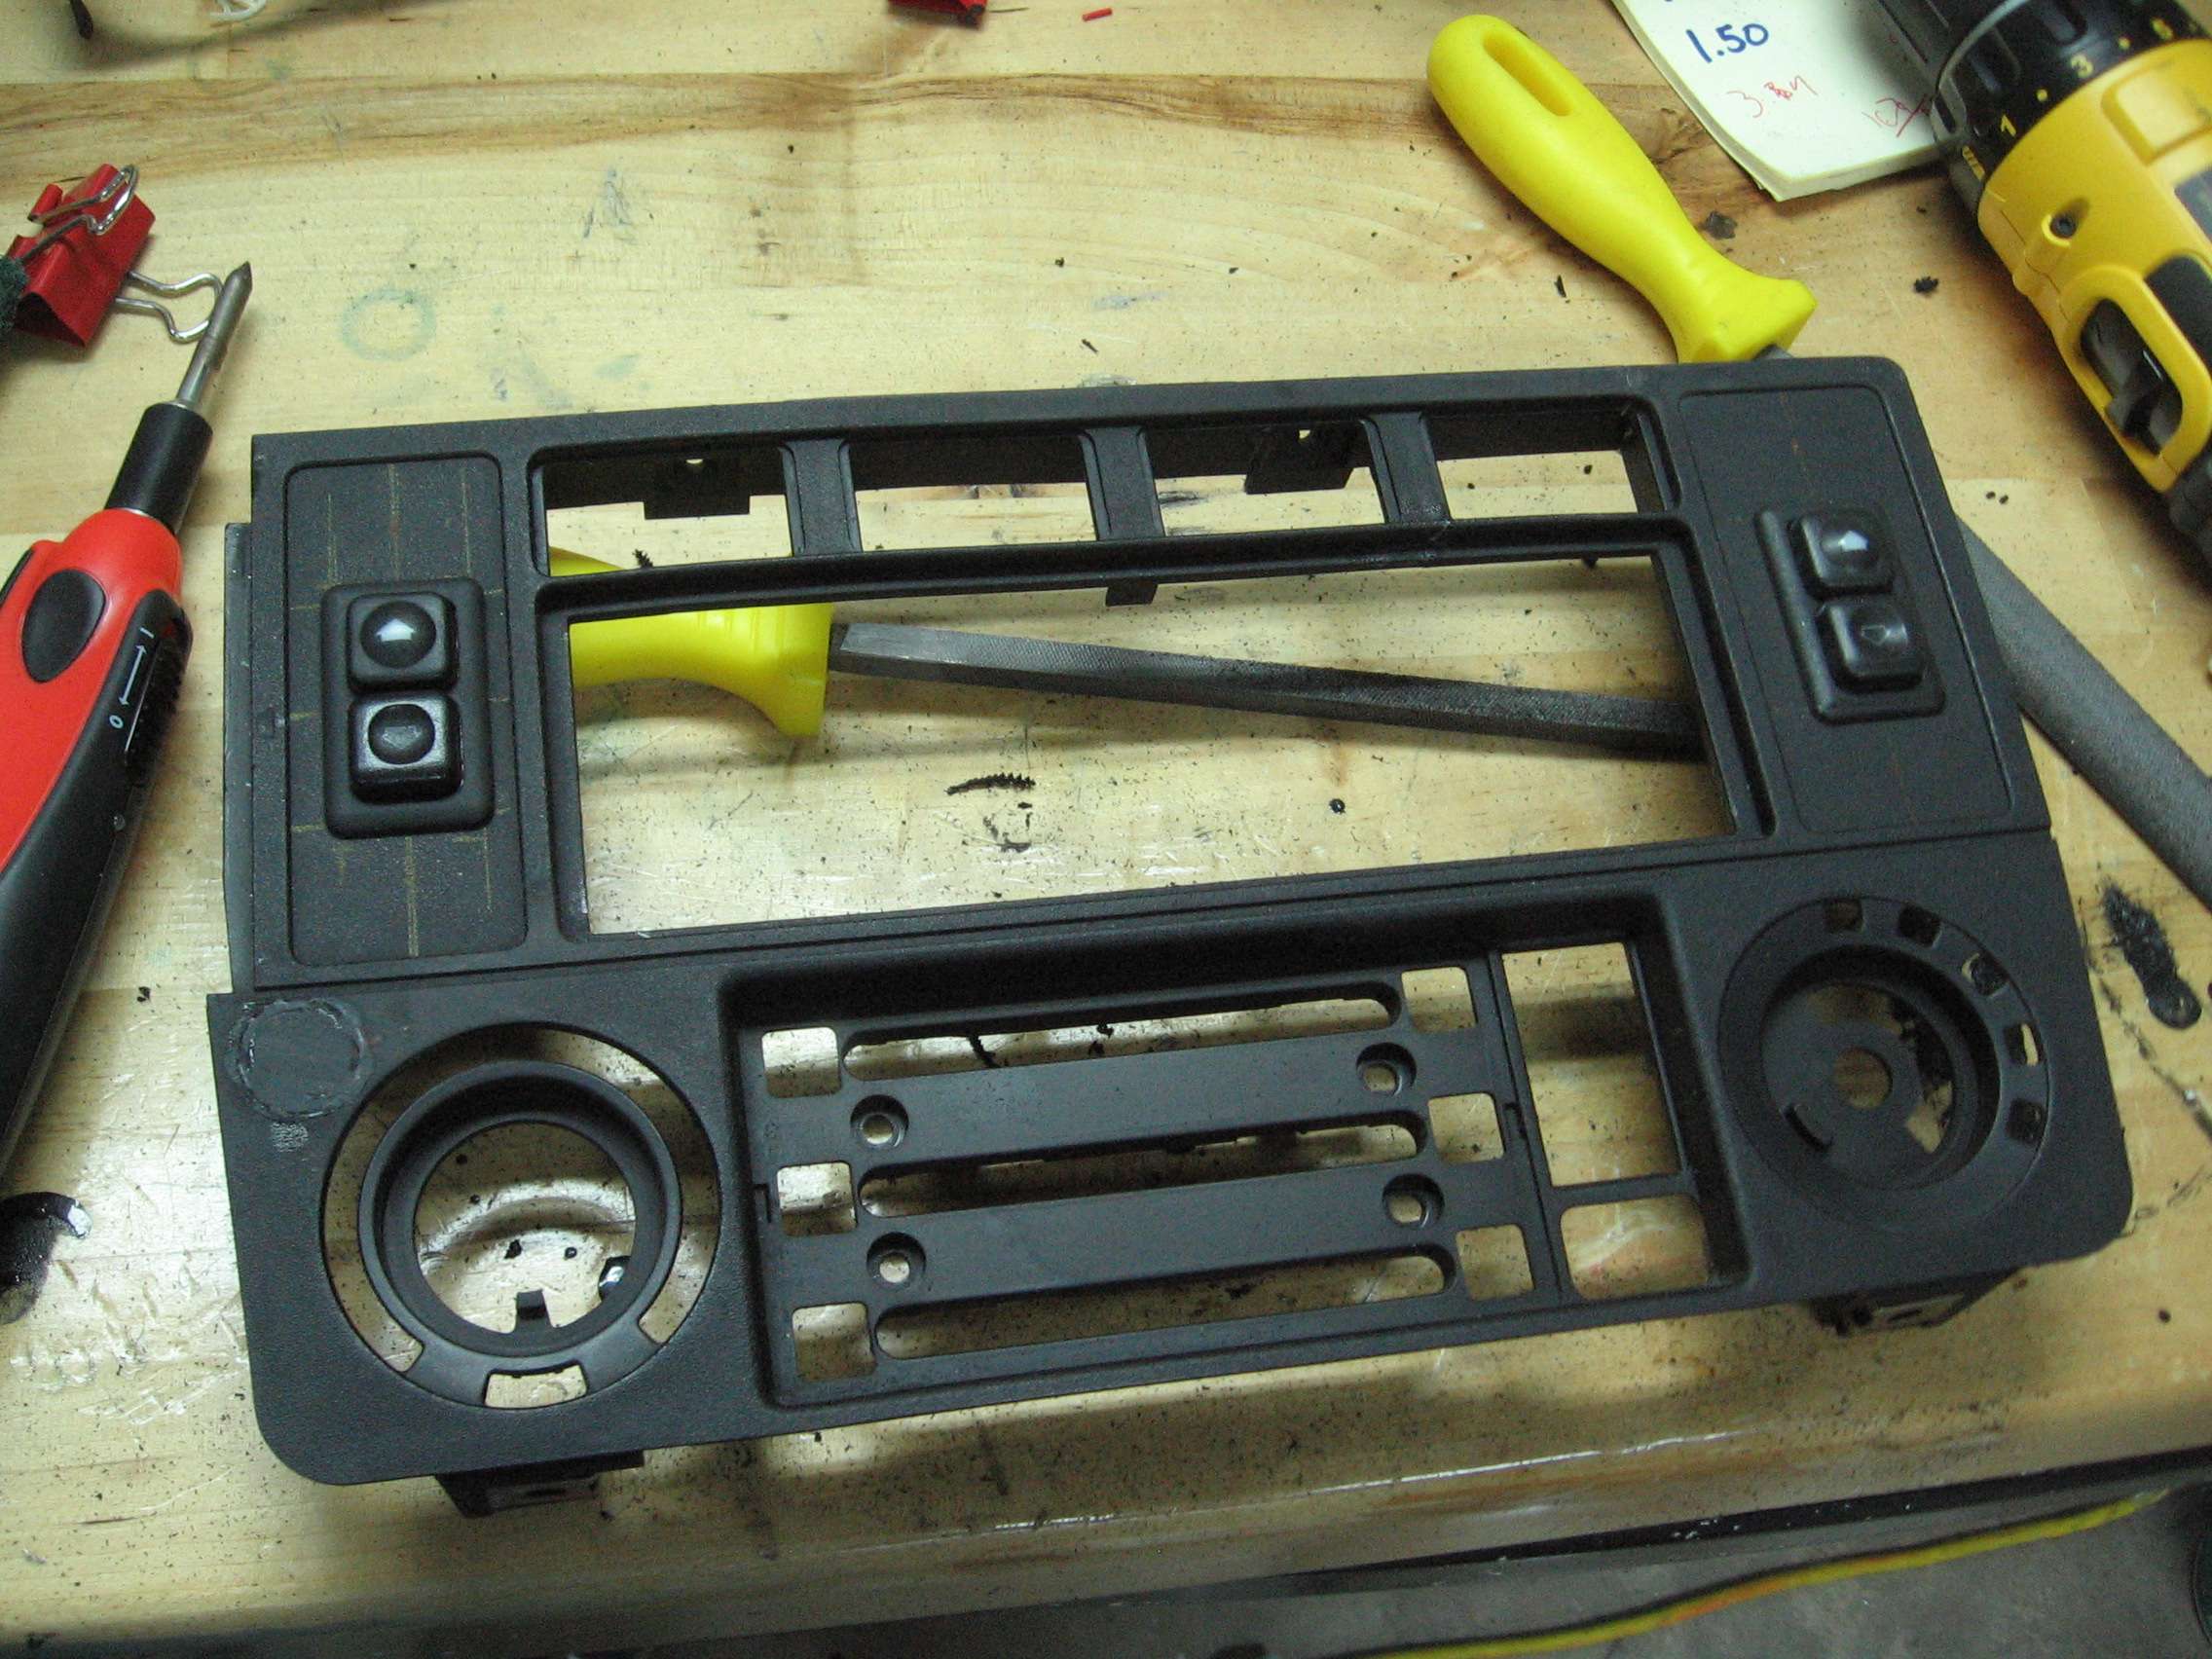
With the window switches in place it doesn't look half bad.

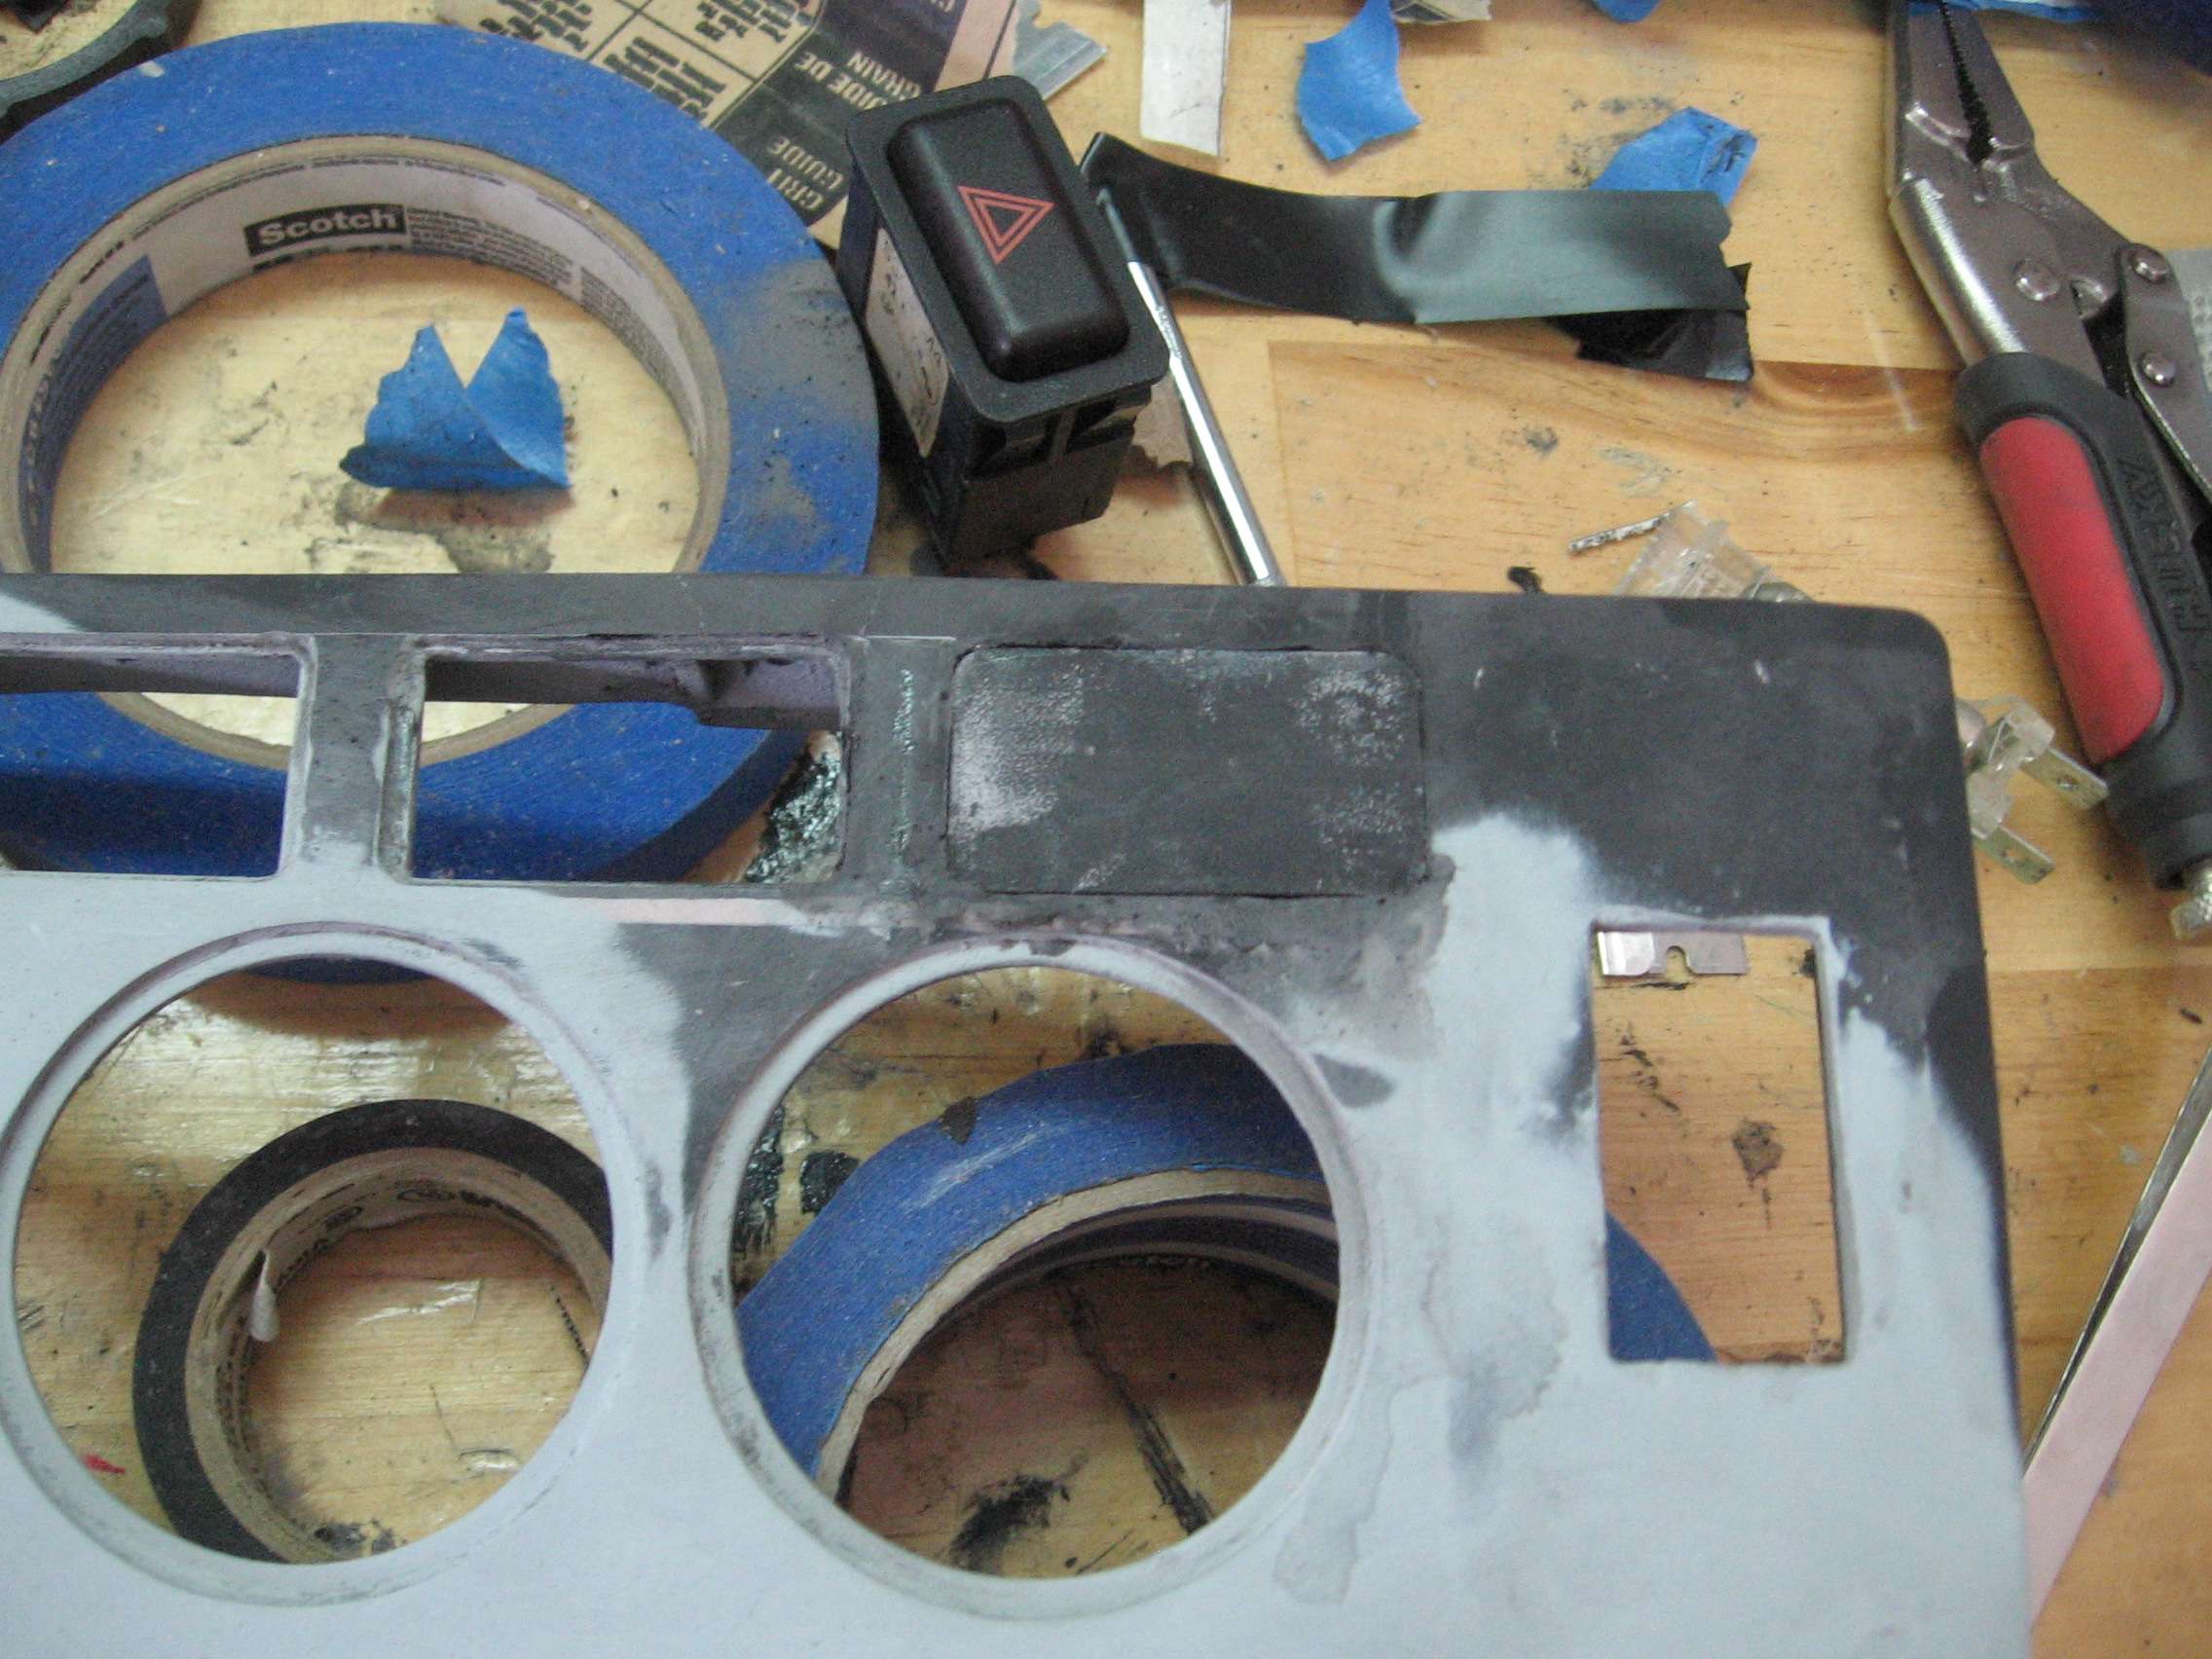
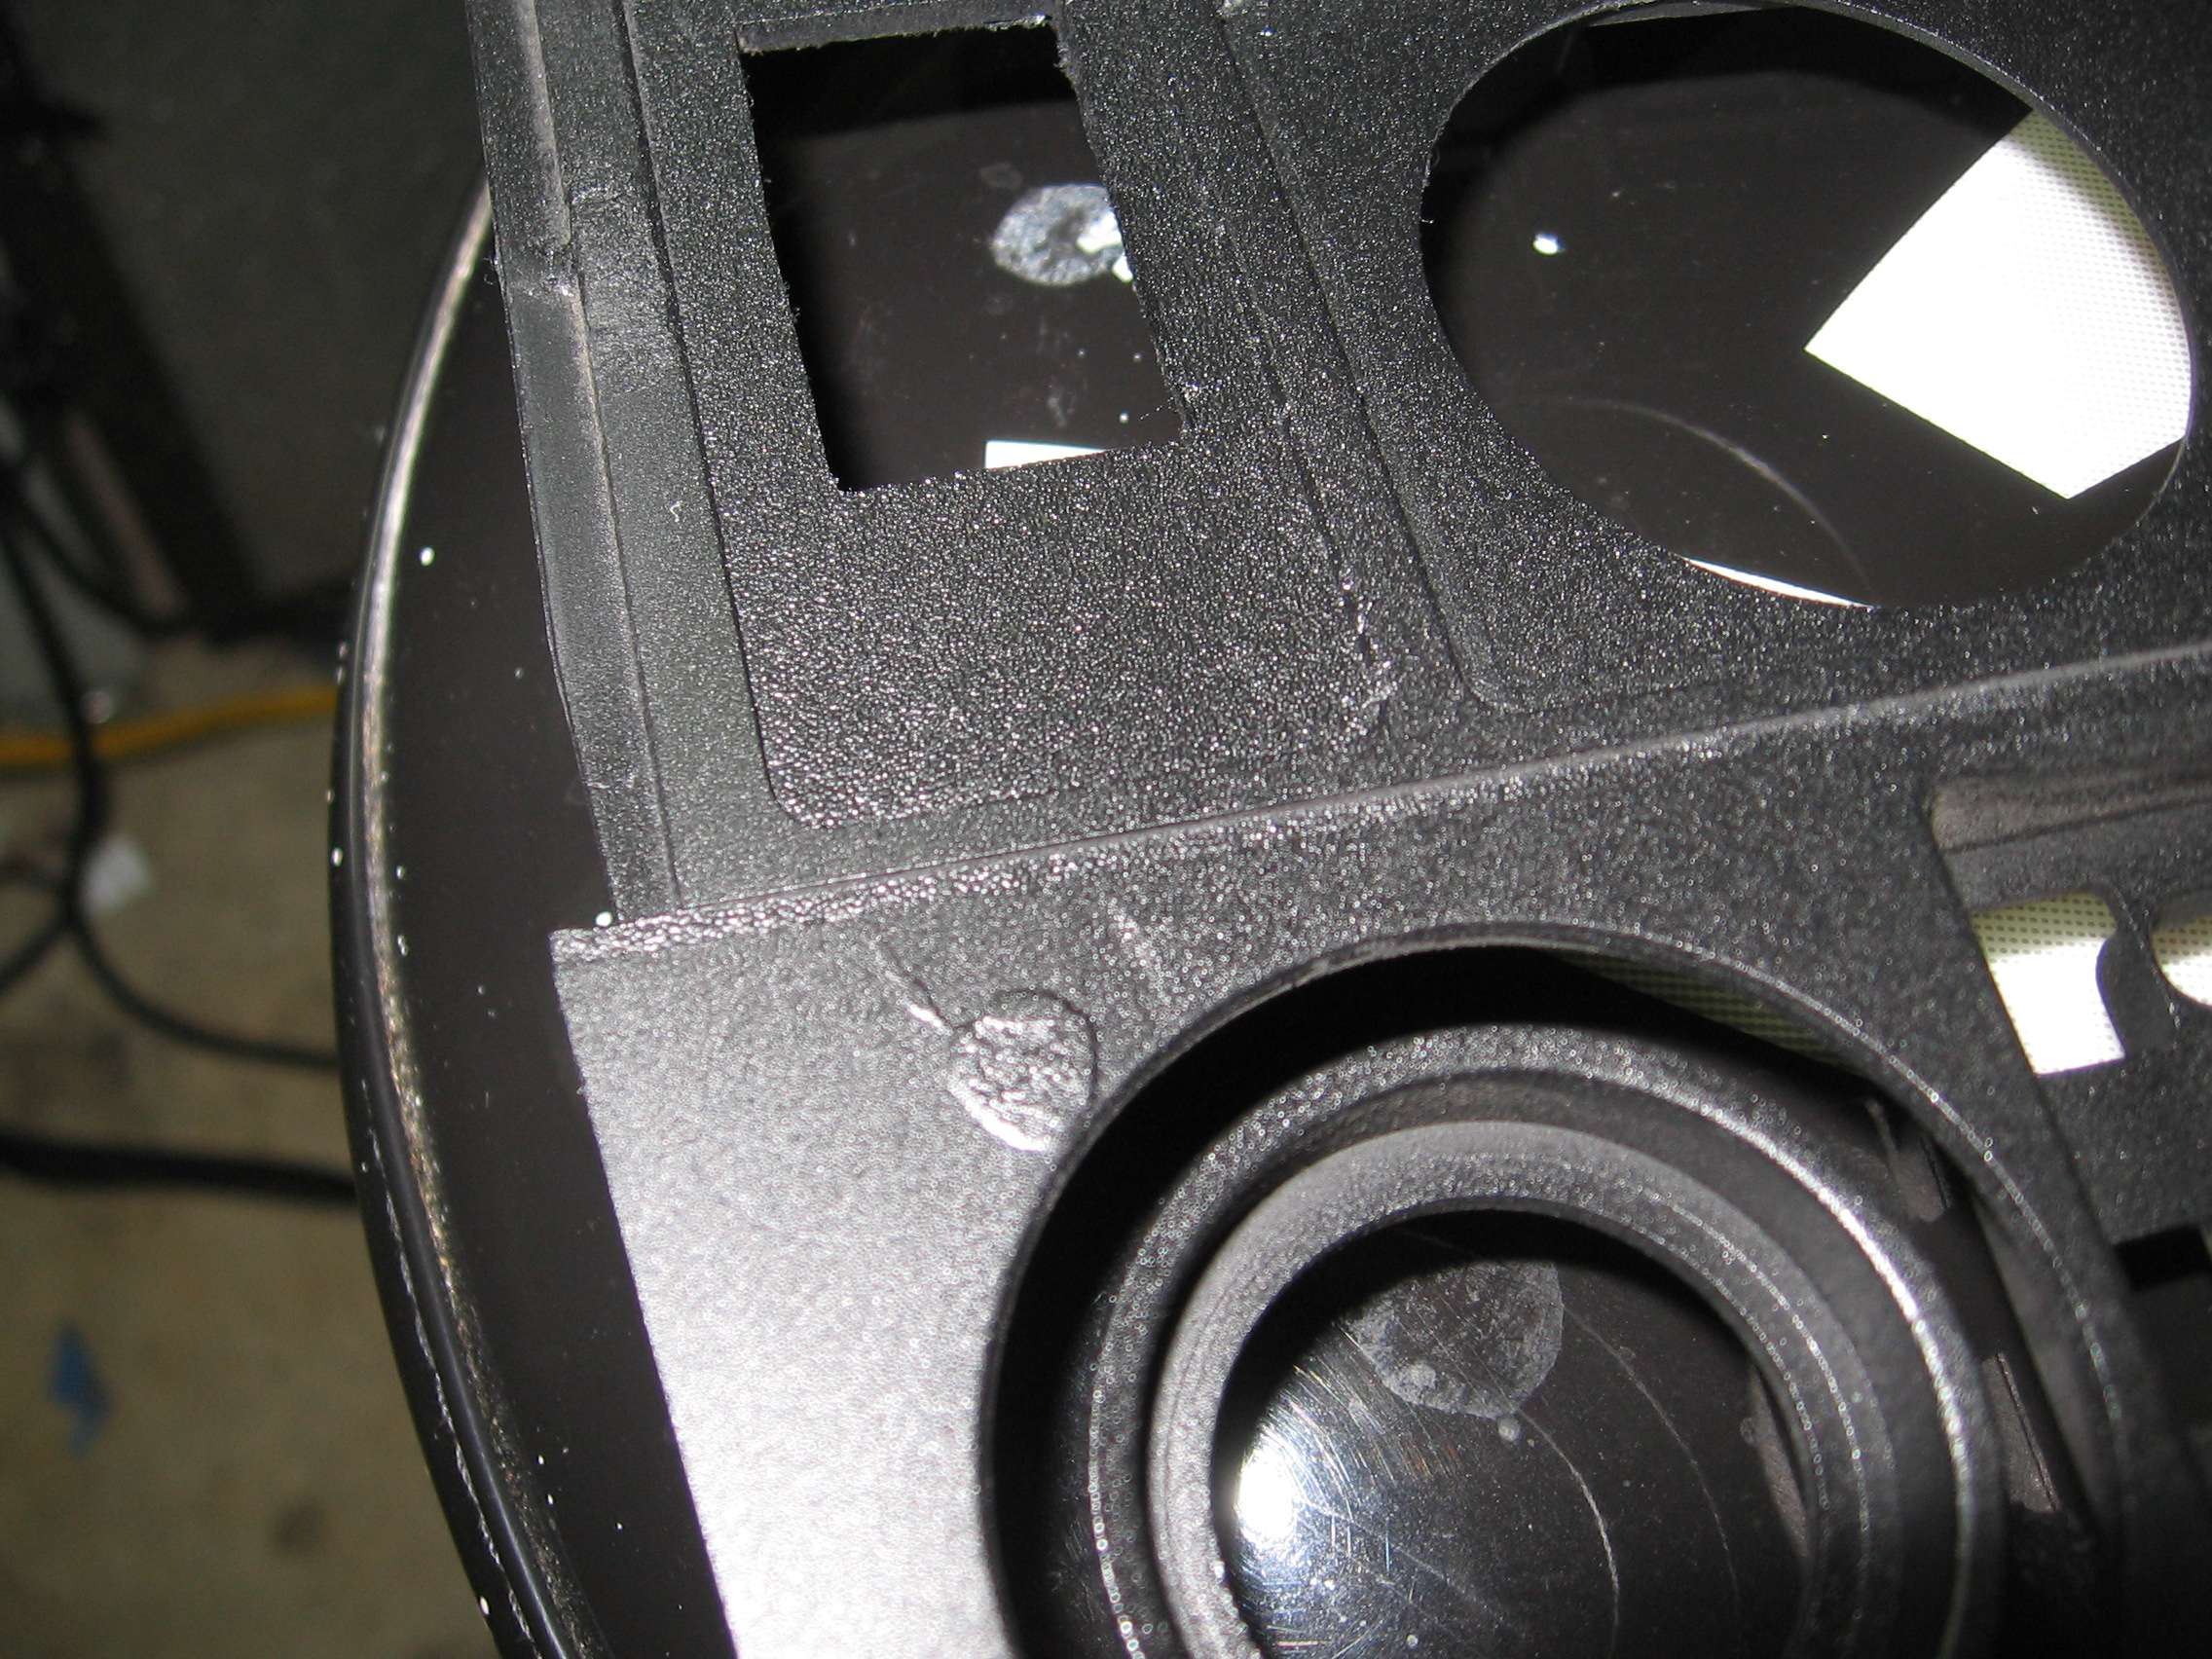
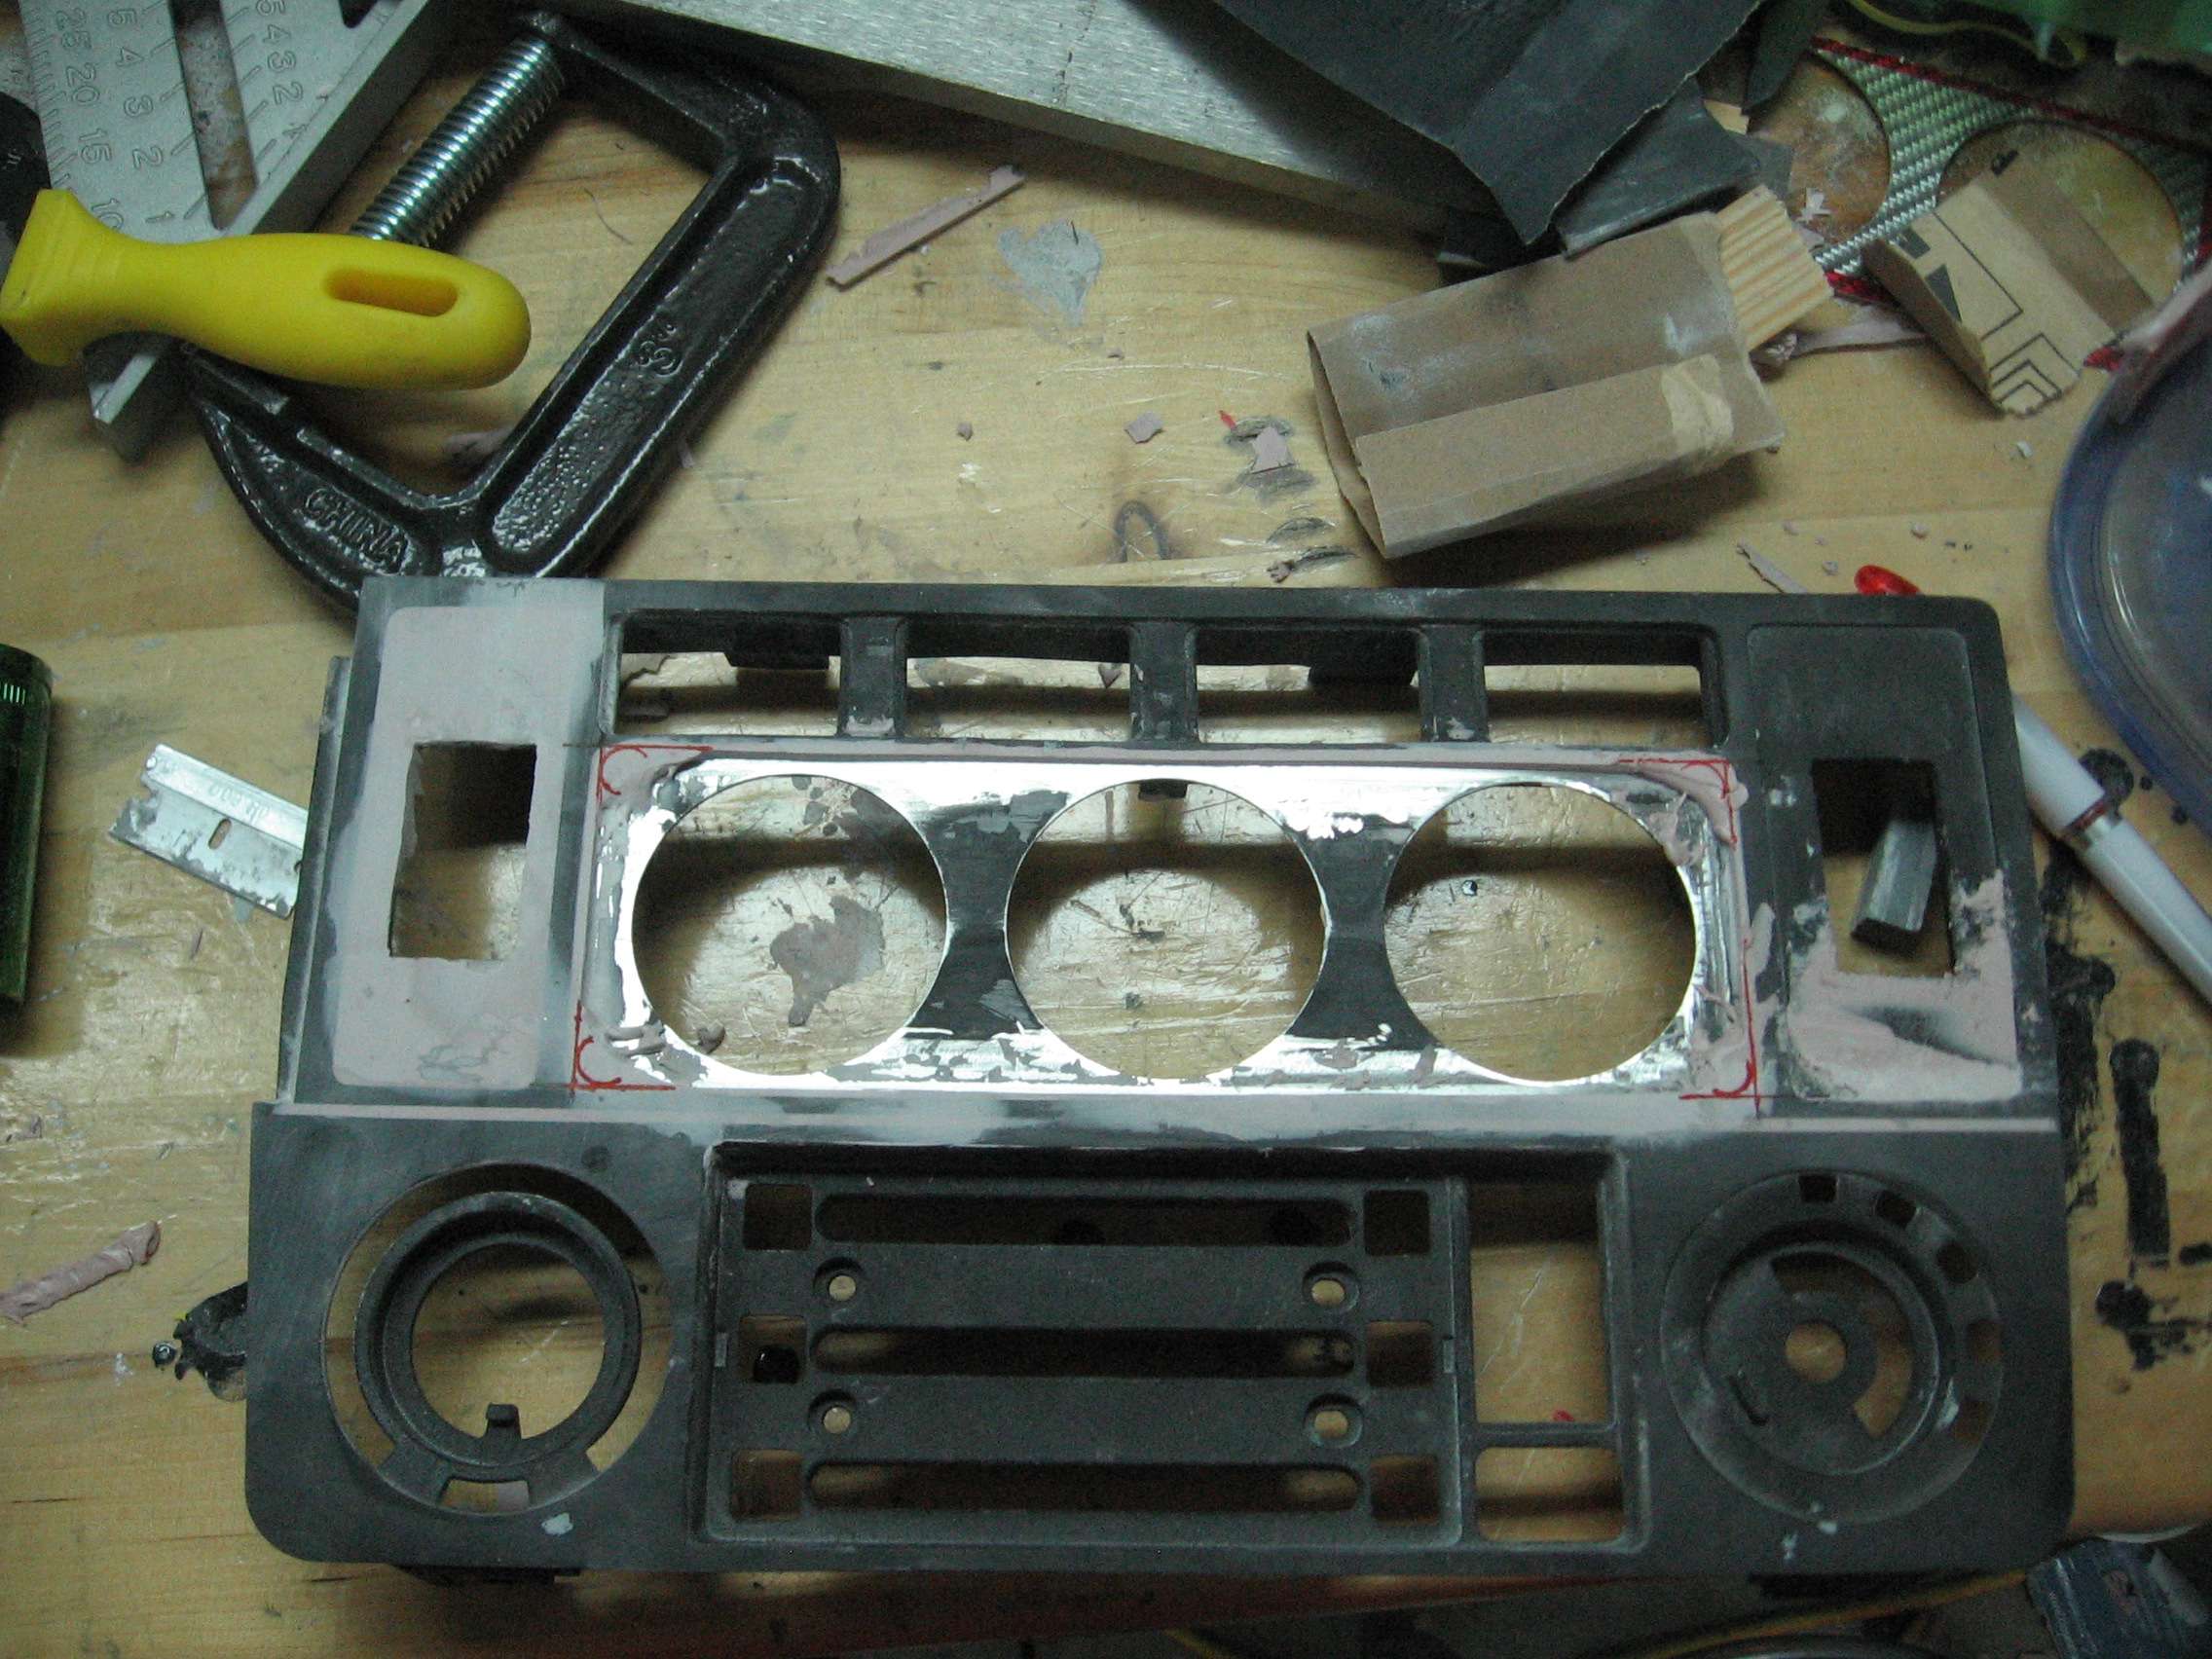
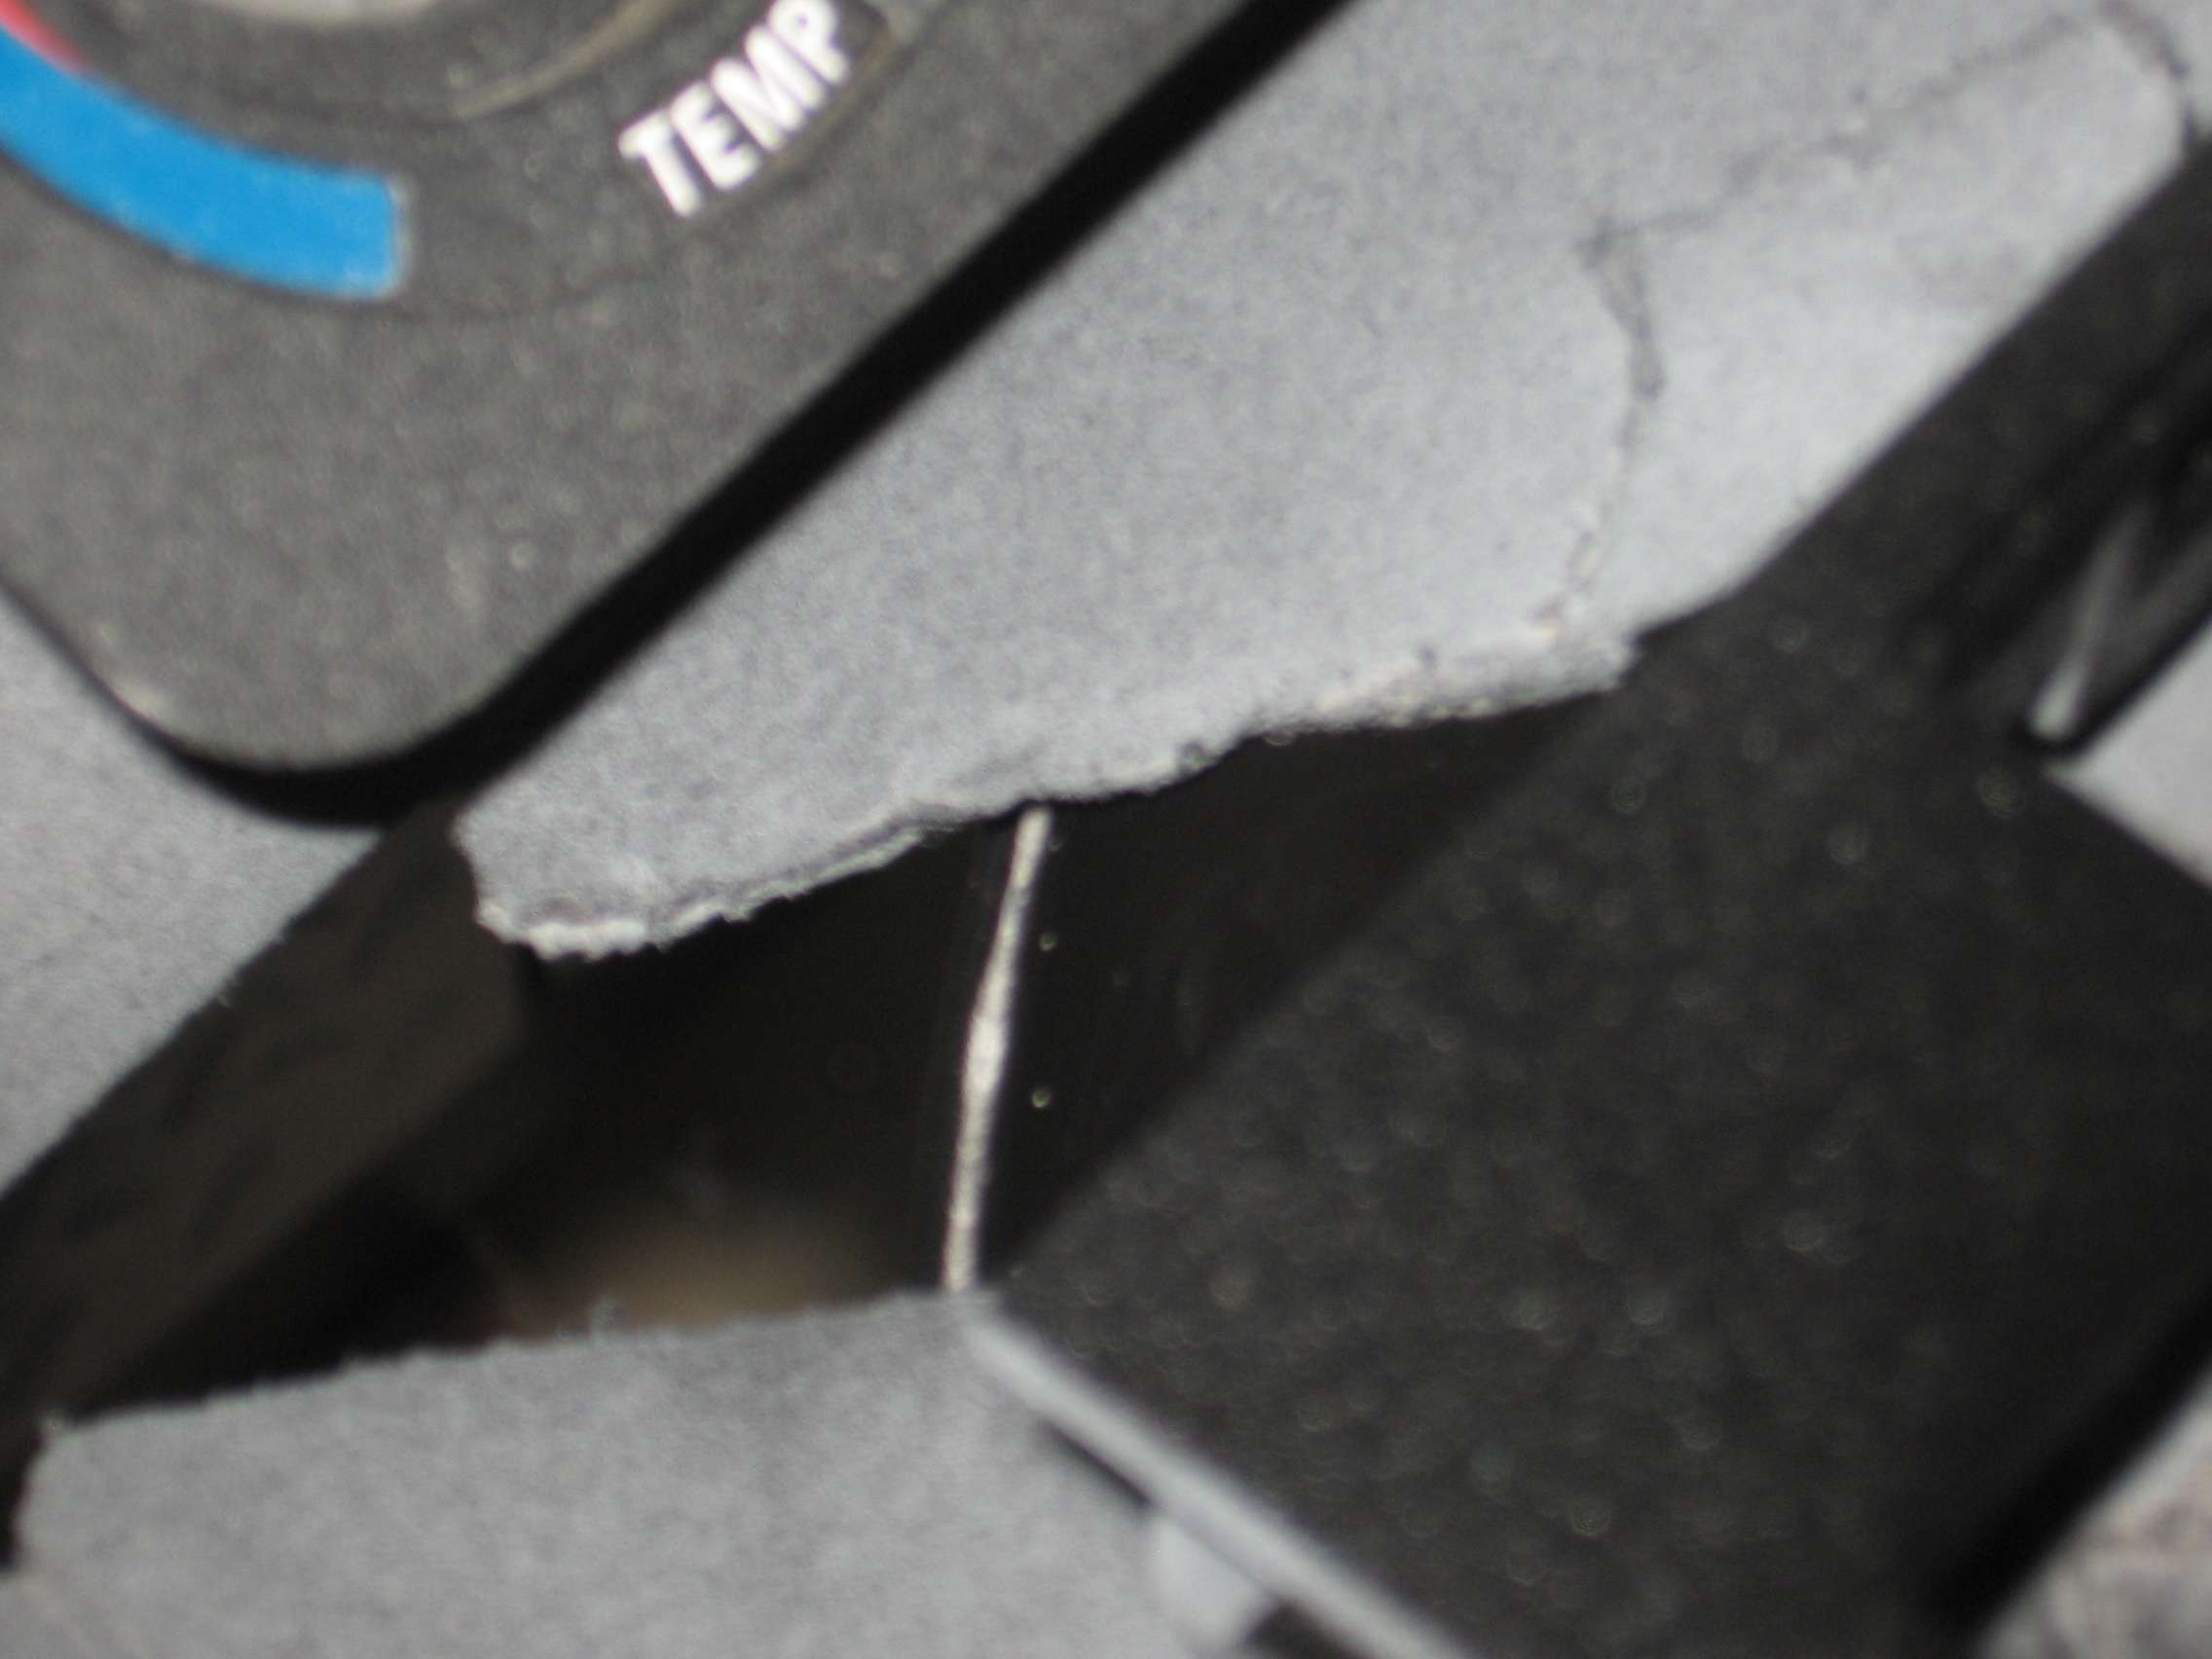
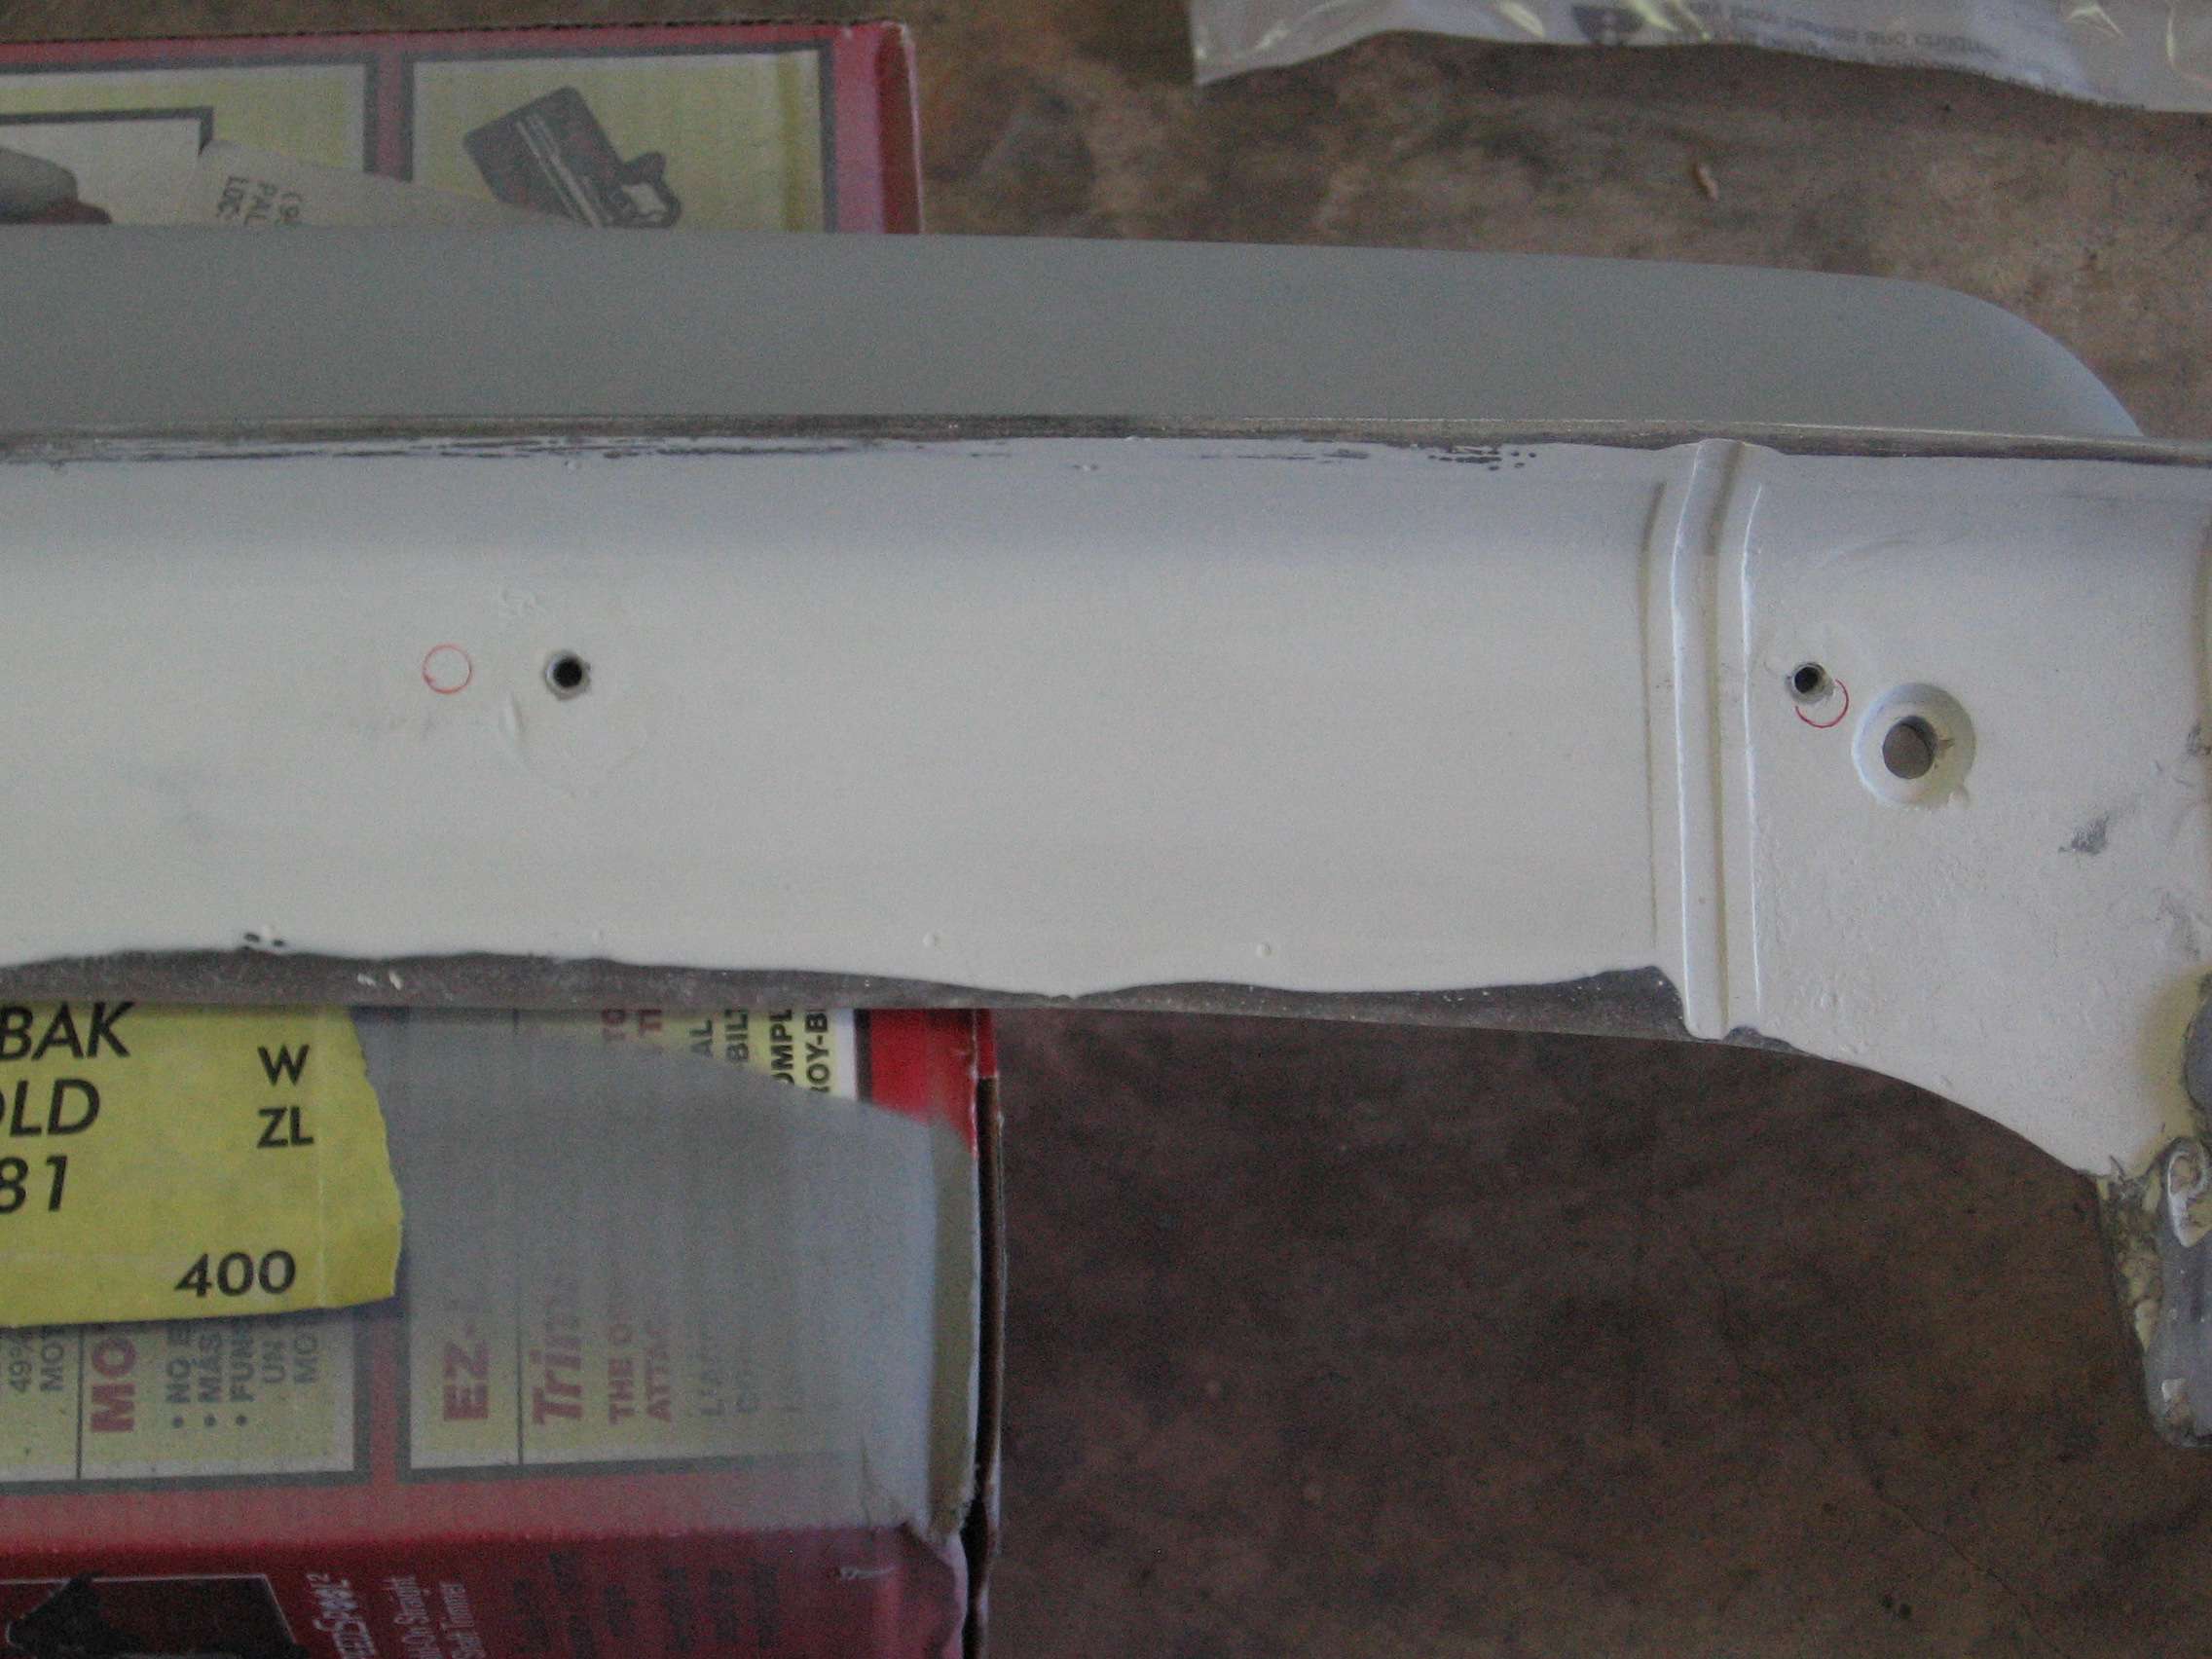
The panel was warped and broken. I spent a lot of time trying to get it straightened out. The broken areas were typical and I epoxied them.
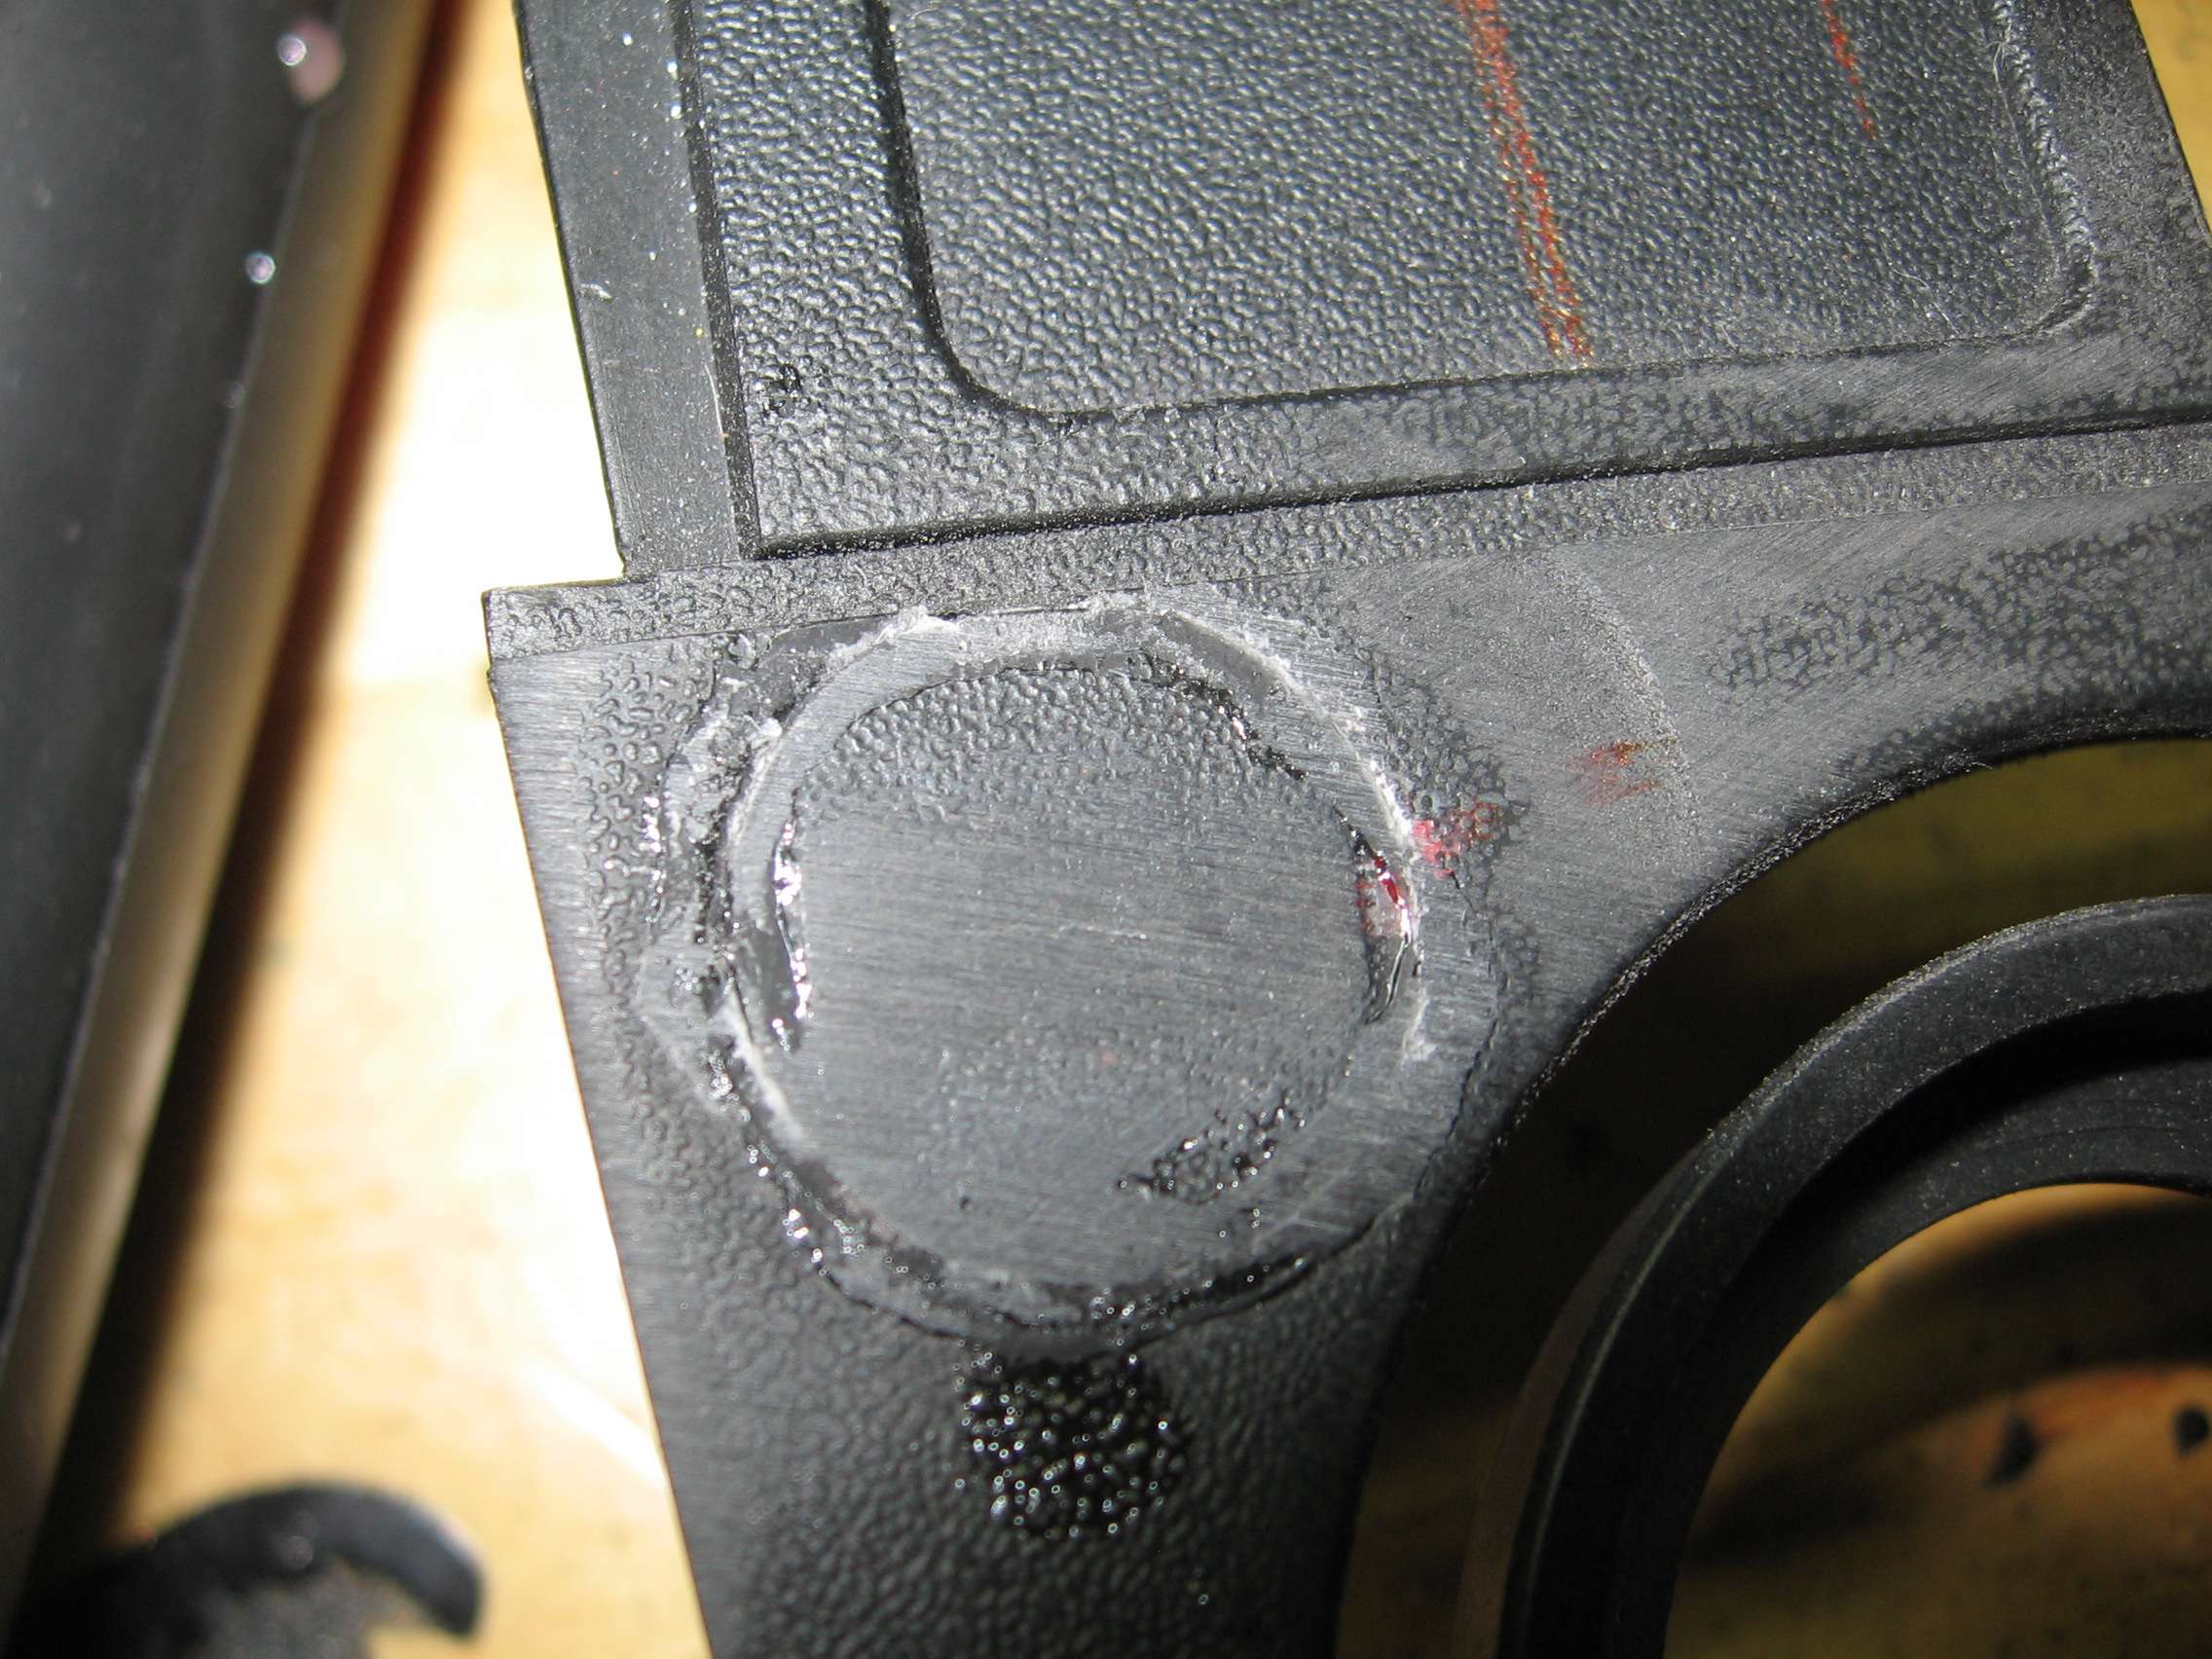
I elected to shave the interior temperature sensor bump out/microphone/ejector seat button/whatever we are calling it this week. The filler was a spare blanking plate I had that was damaged. It came out fairly decent.
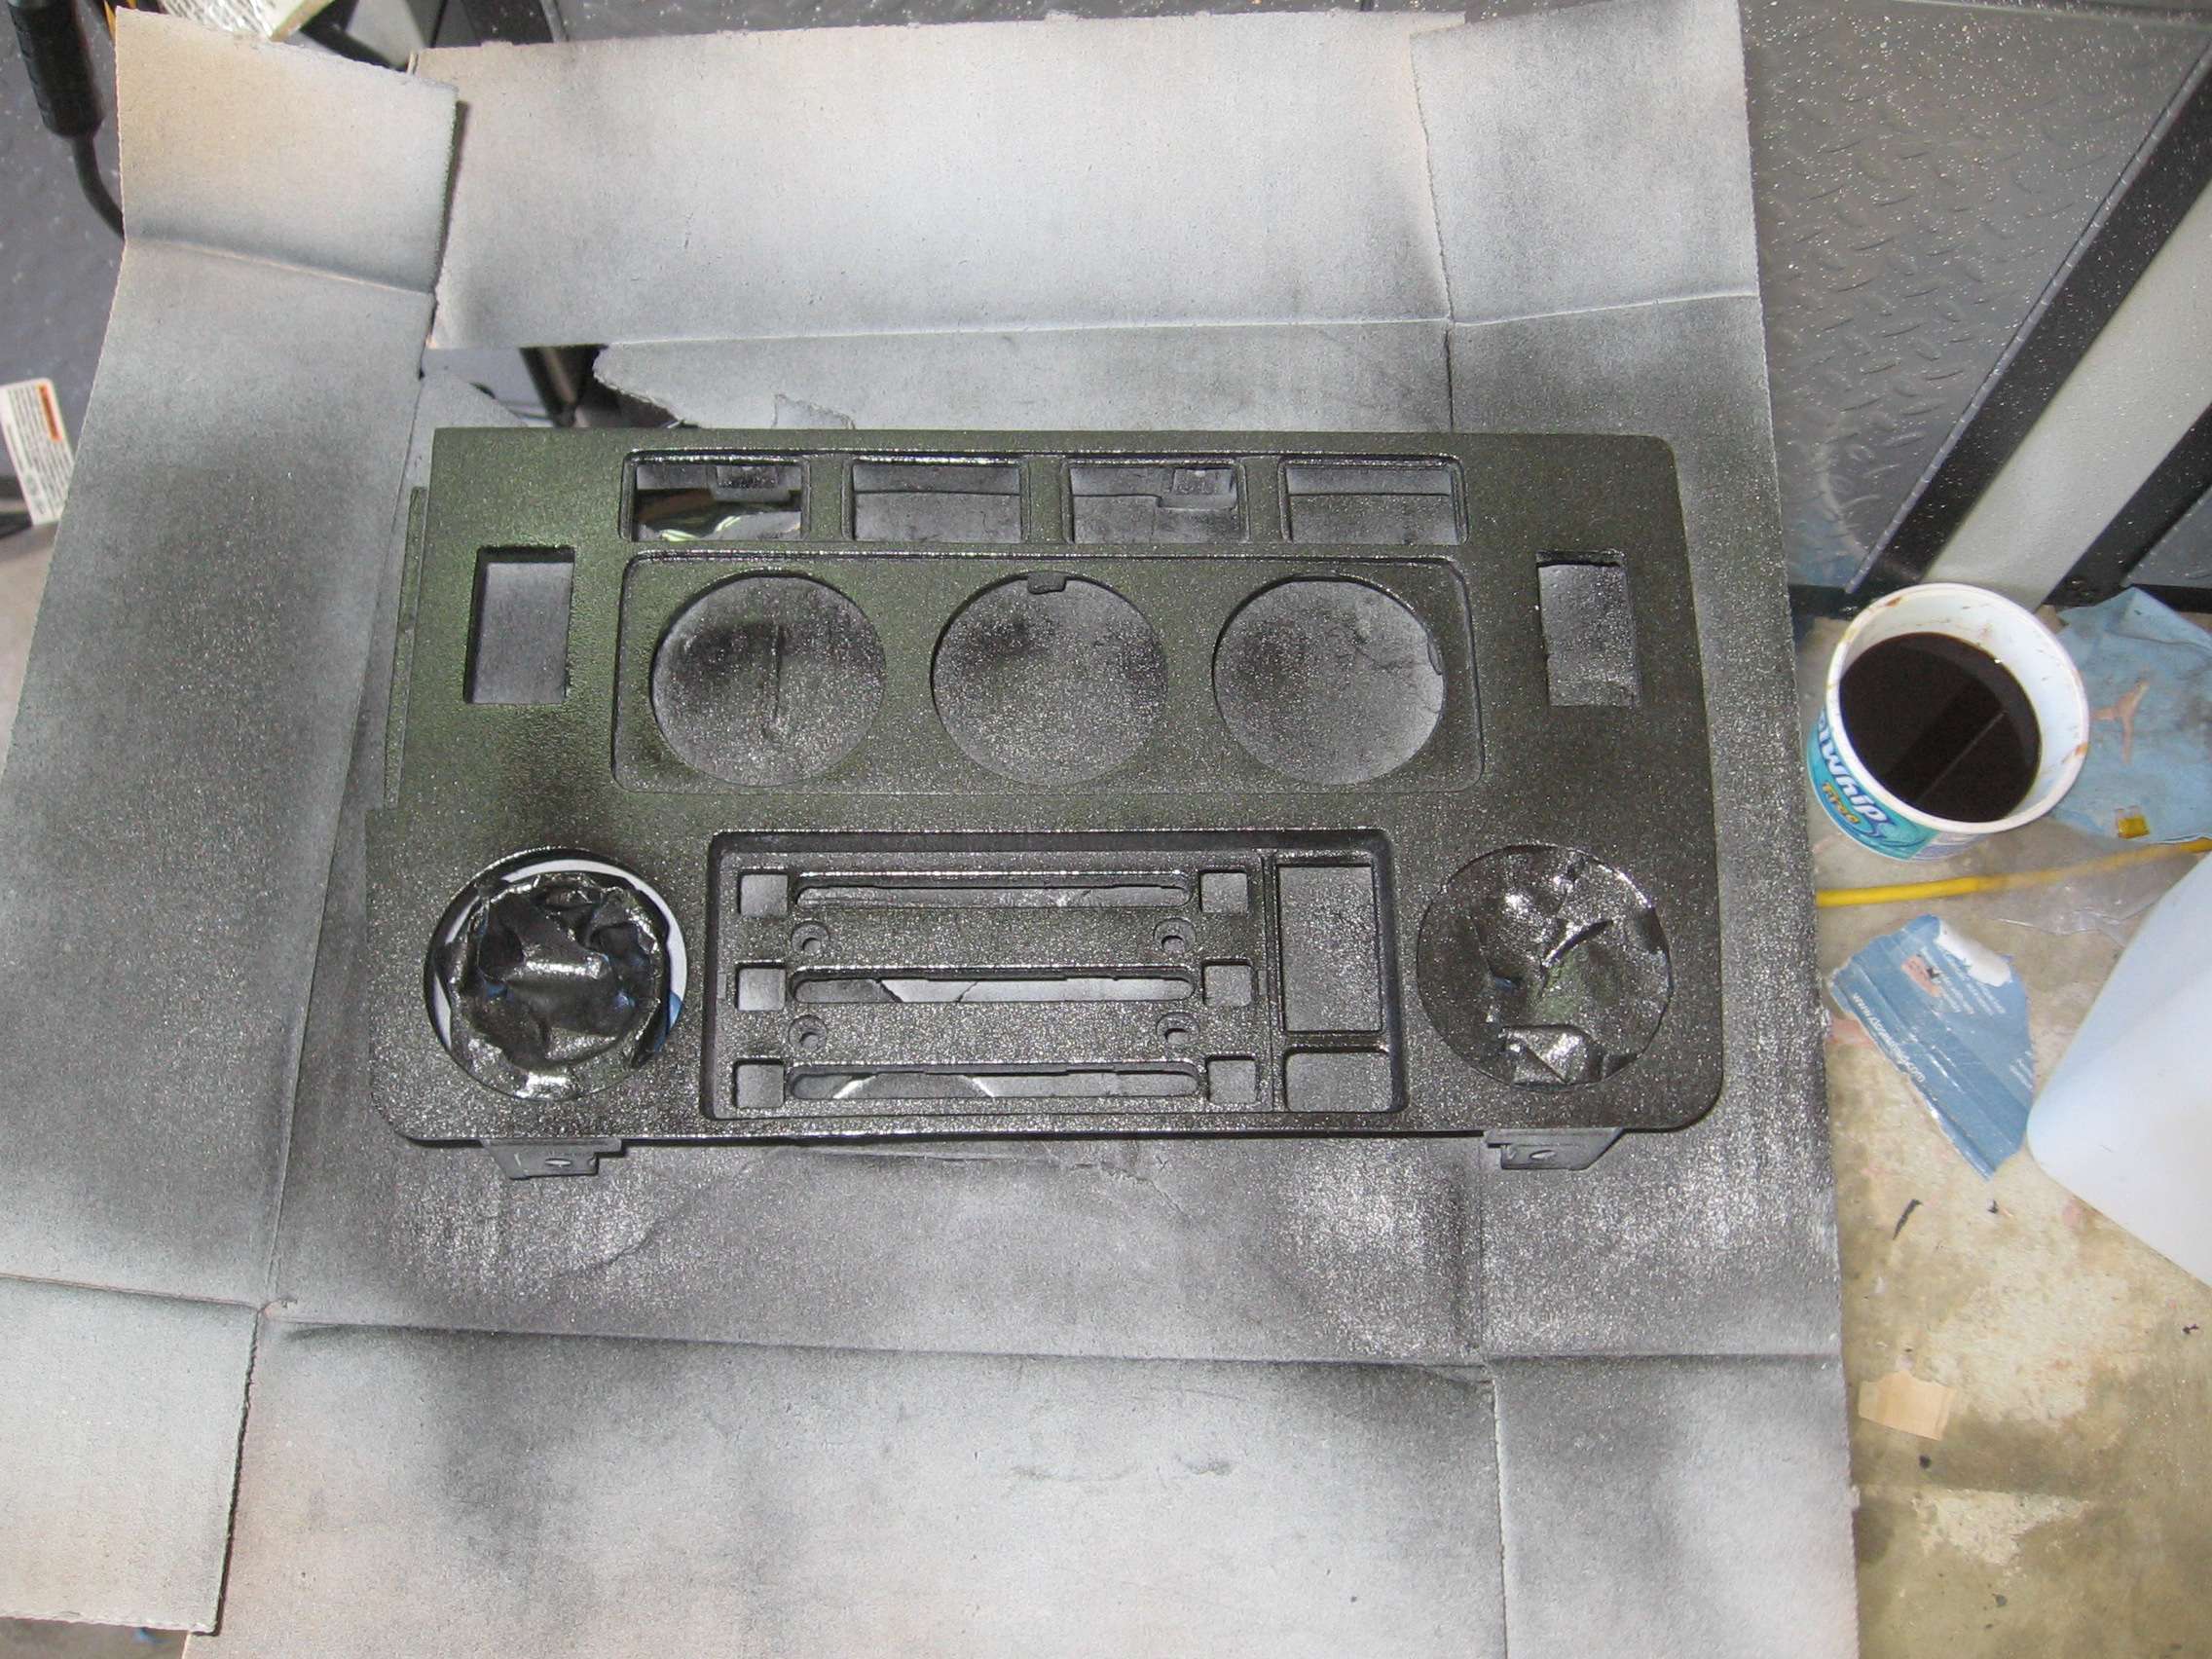
One of the things that was a challenge was replicating the texture that existed on the panel.
Many iterations were used but ultimately the Rustoleum textured paint with finessing came pretty close.
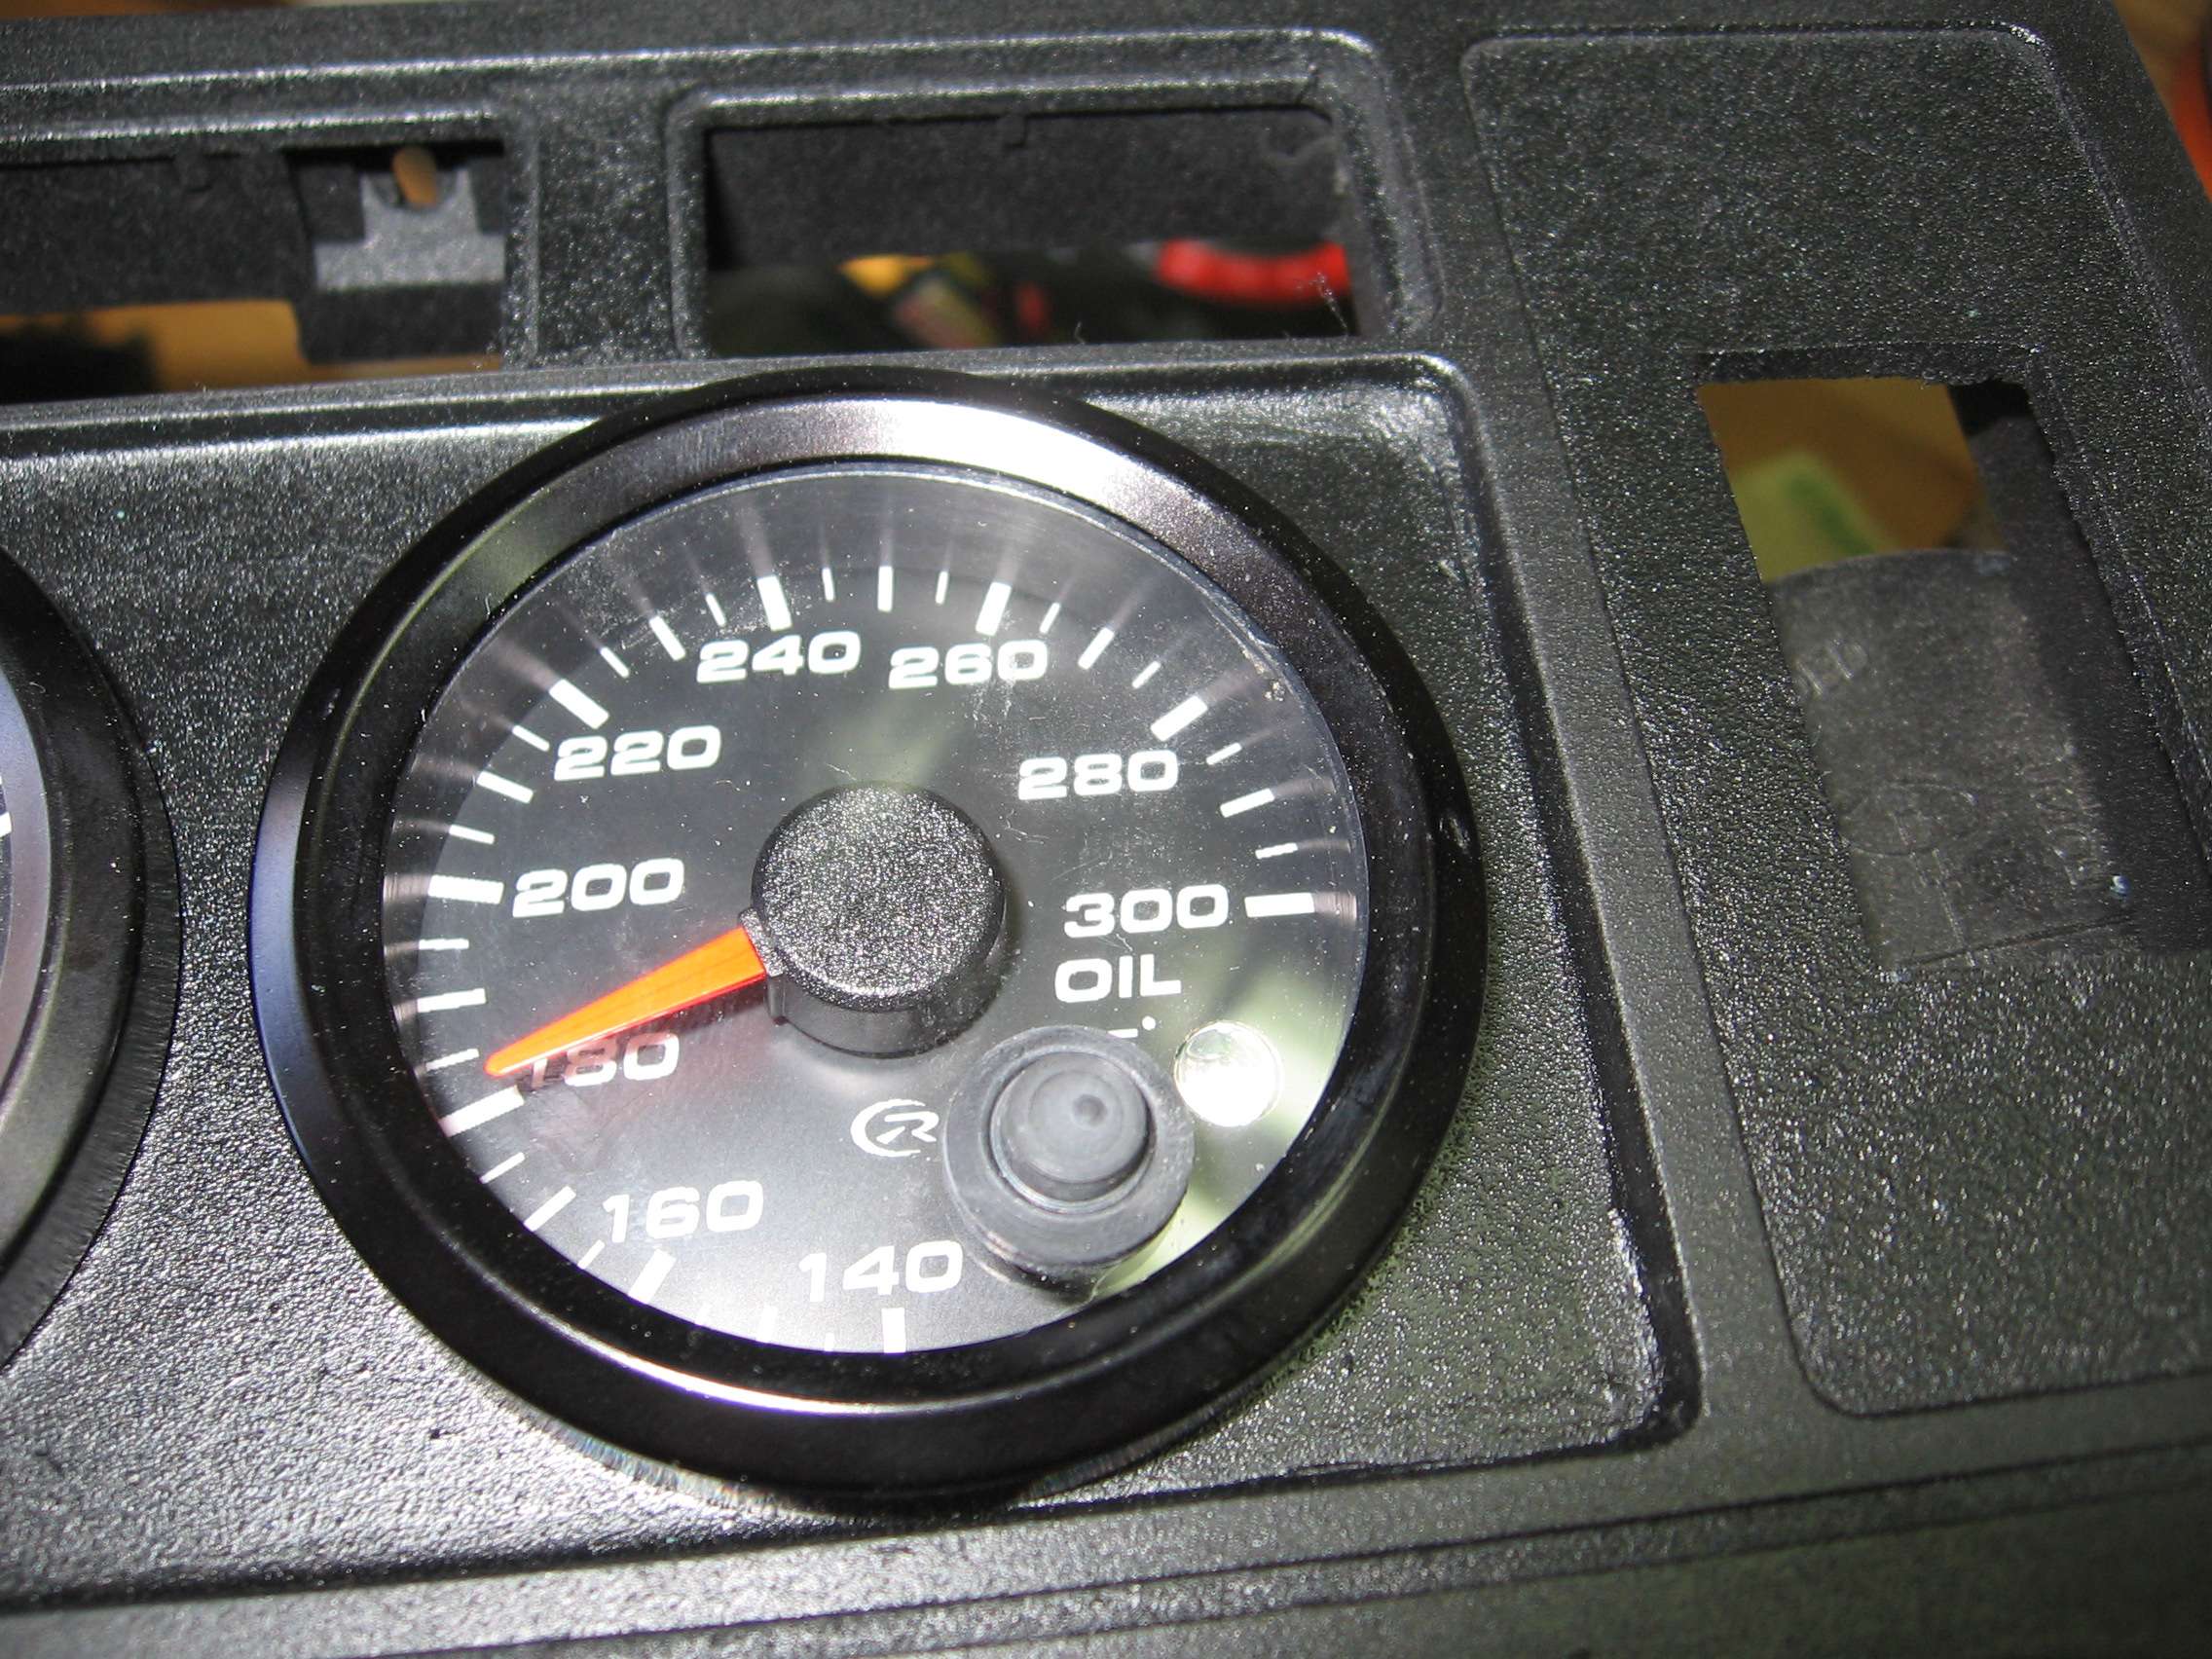
When the paint was drying, I worked on the wiring for the gauges. My electrical work was not the best when I started hacking wires. I wanted to rectify this and make it cleaner. I'll not go into a solder vs crimp discussion here, I use both throughout the car. To splice the two wires I used a linesman joint I believe its called. In tension it is very strong as you essentially use two hooks on the wires and then wrap the excess around itself. I played with some spare wire when practicing and when I put tension on the wire, the wire broke before the joint.

I am old. I decided to be nice to my eyes. Radio Shack solder helper station. Worth the 10 bucks.
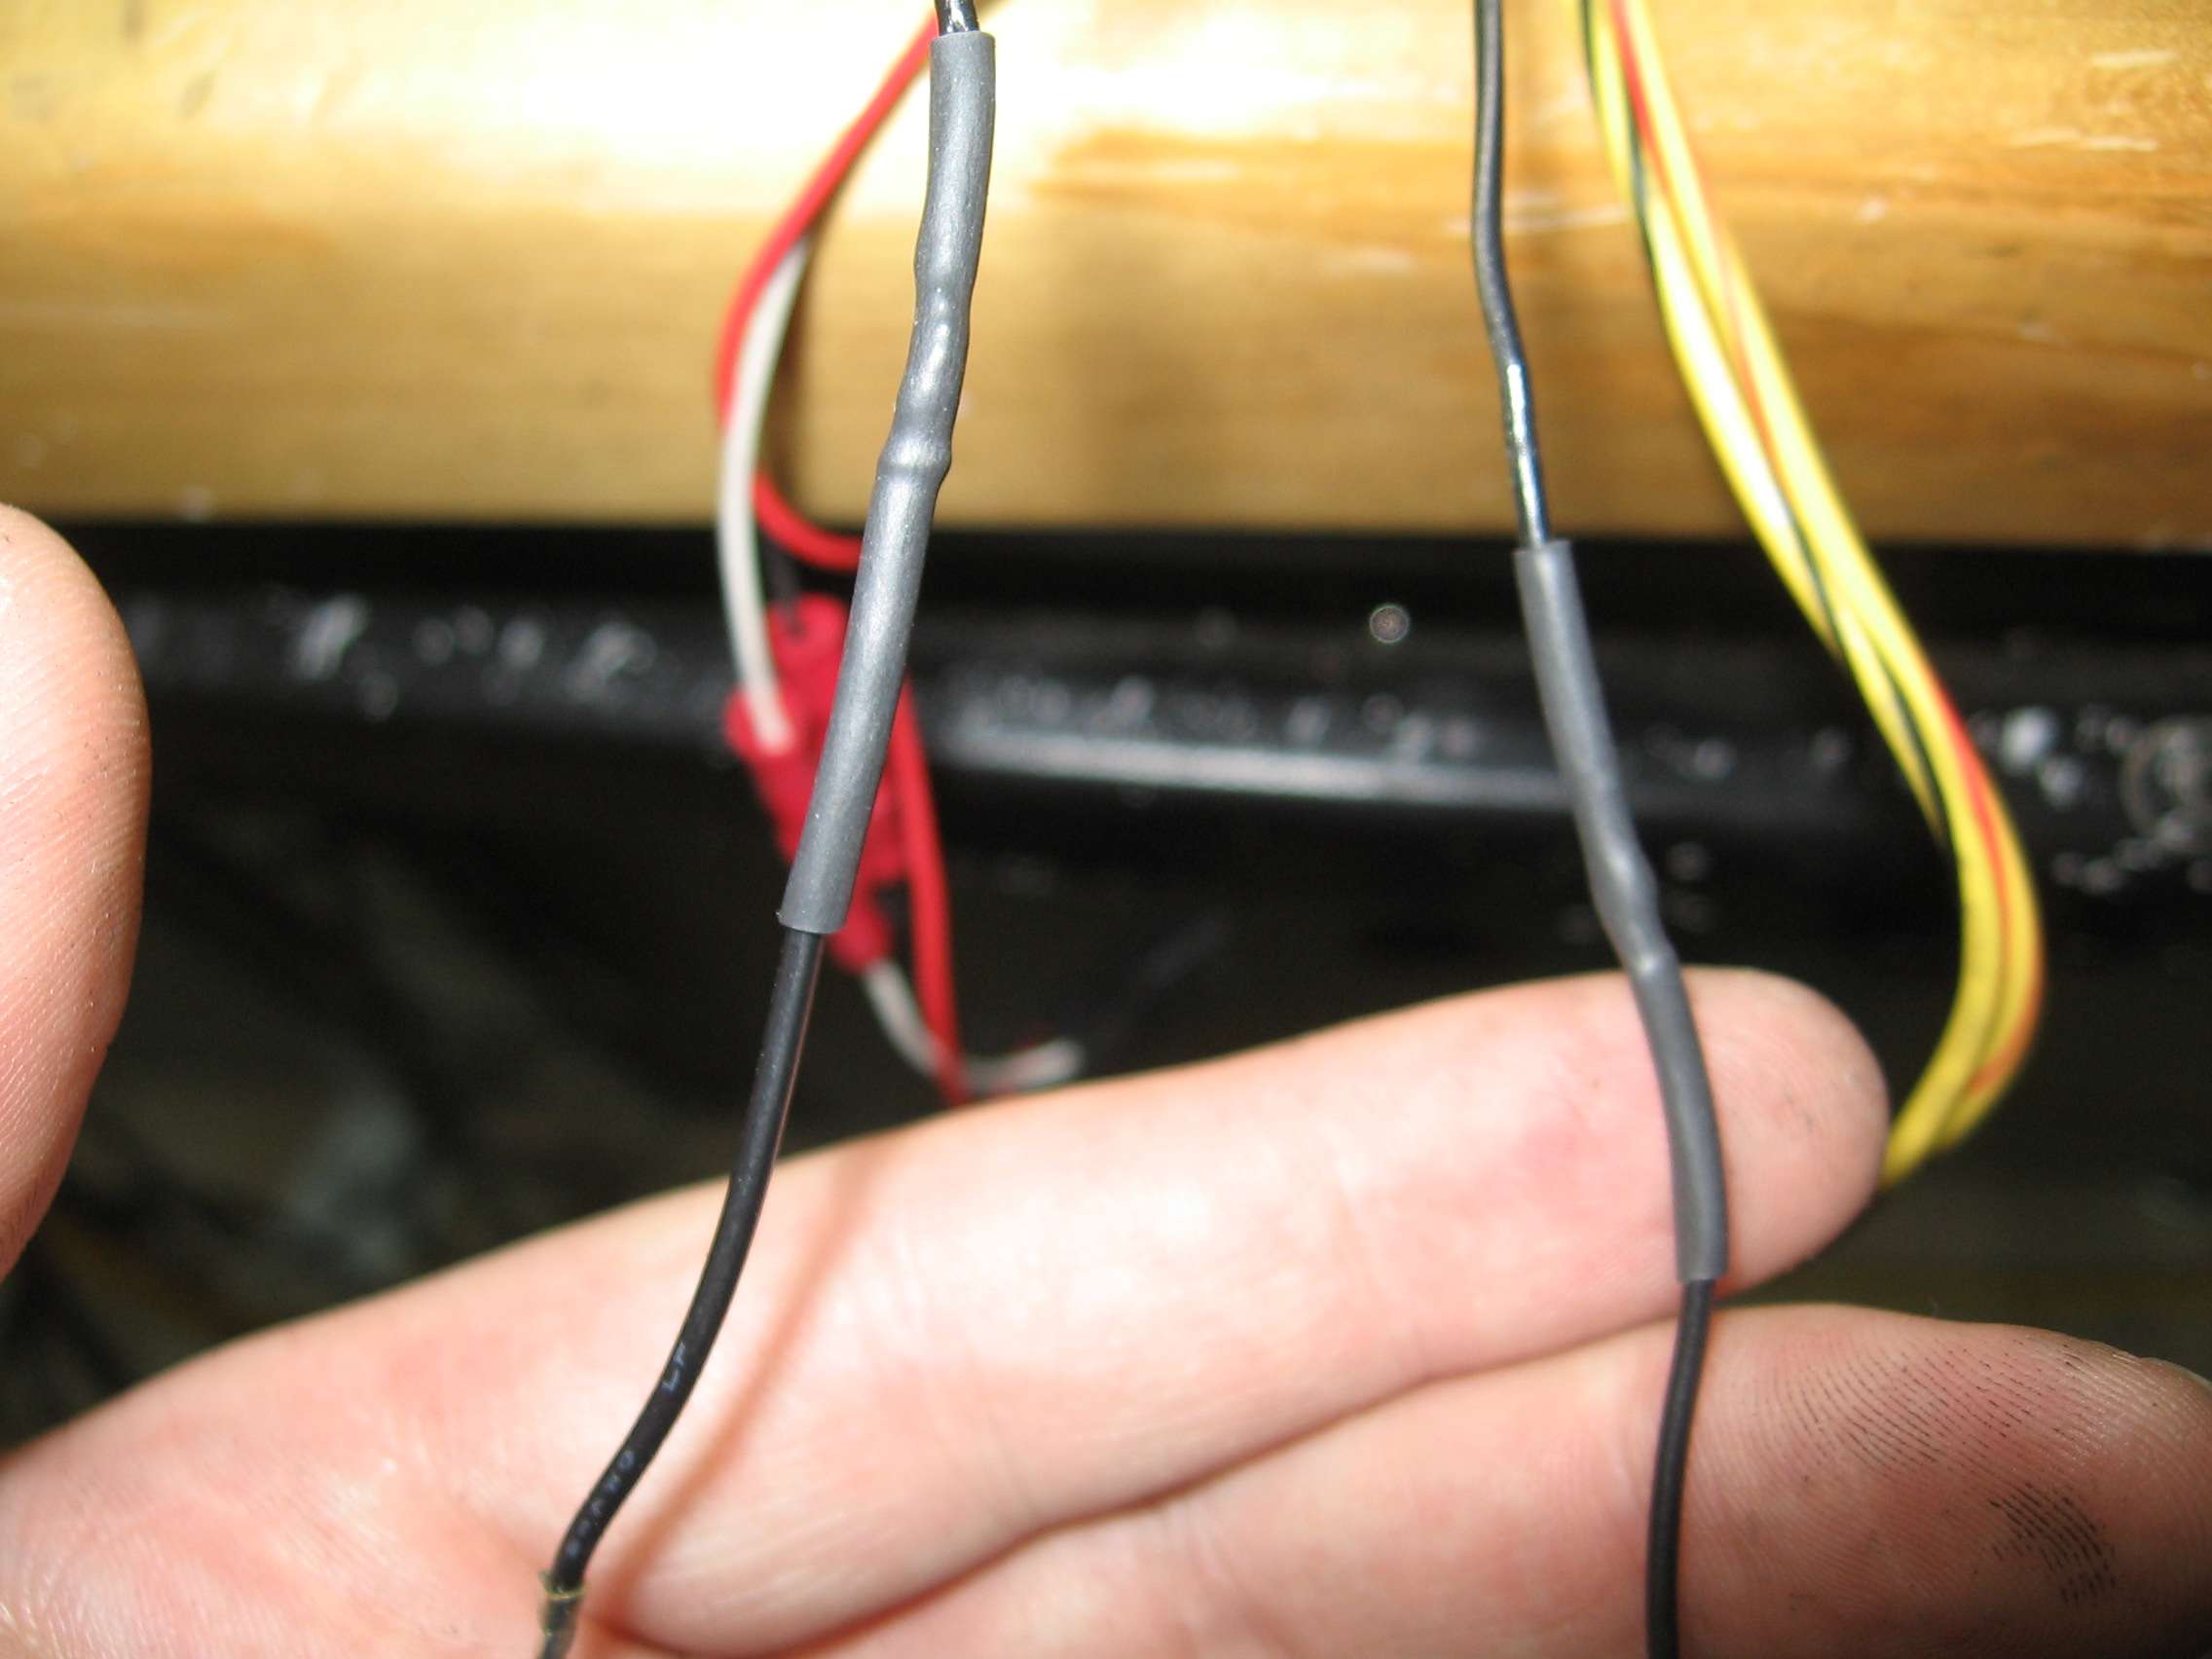
The joints were then heat-shrinked.
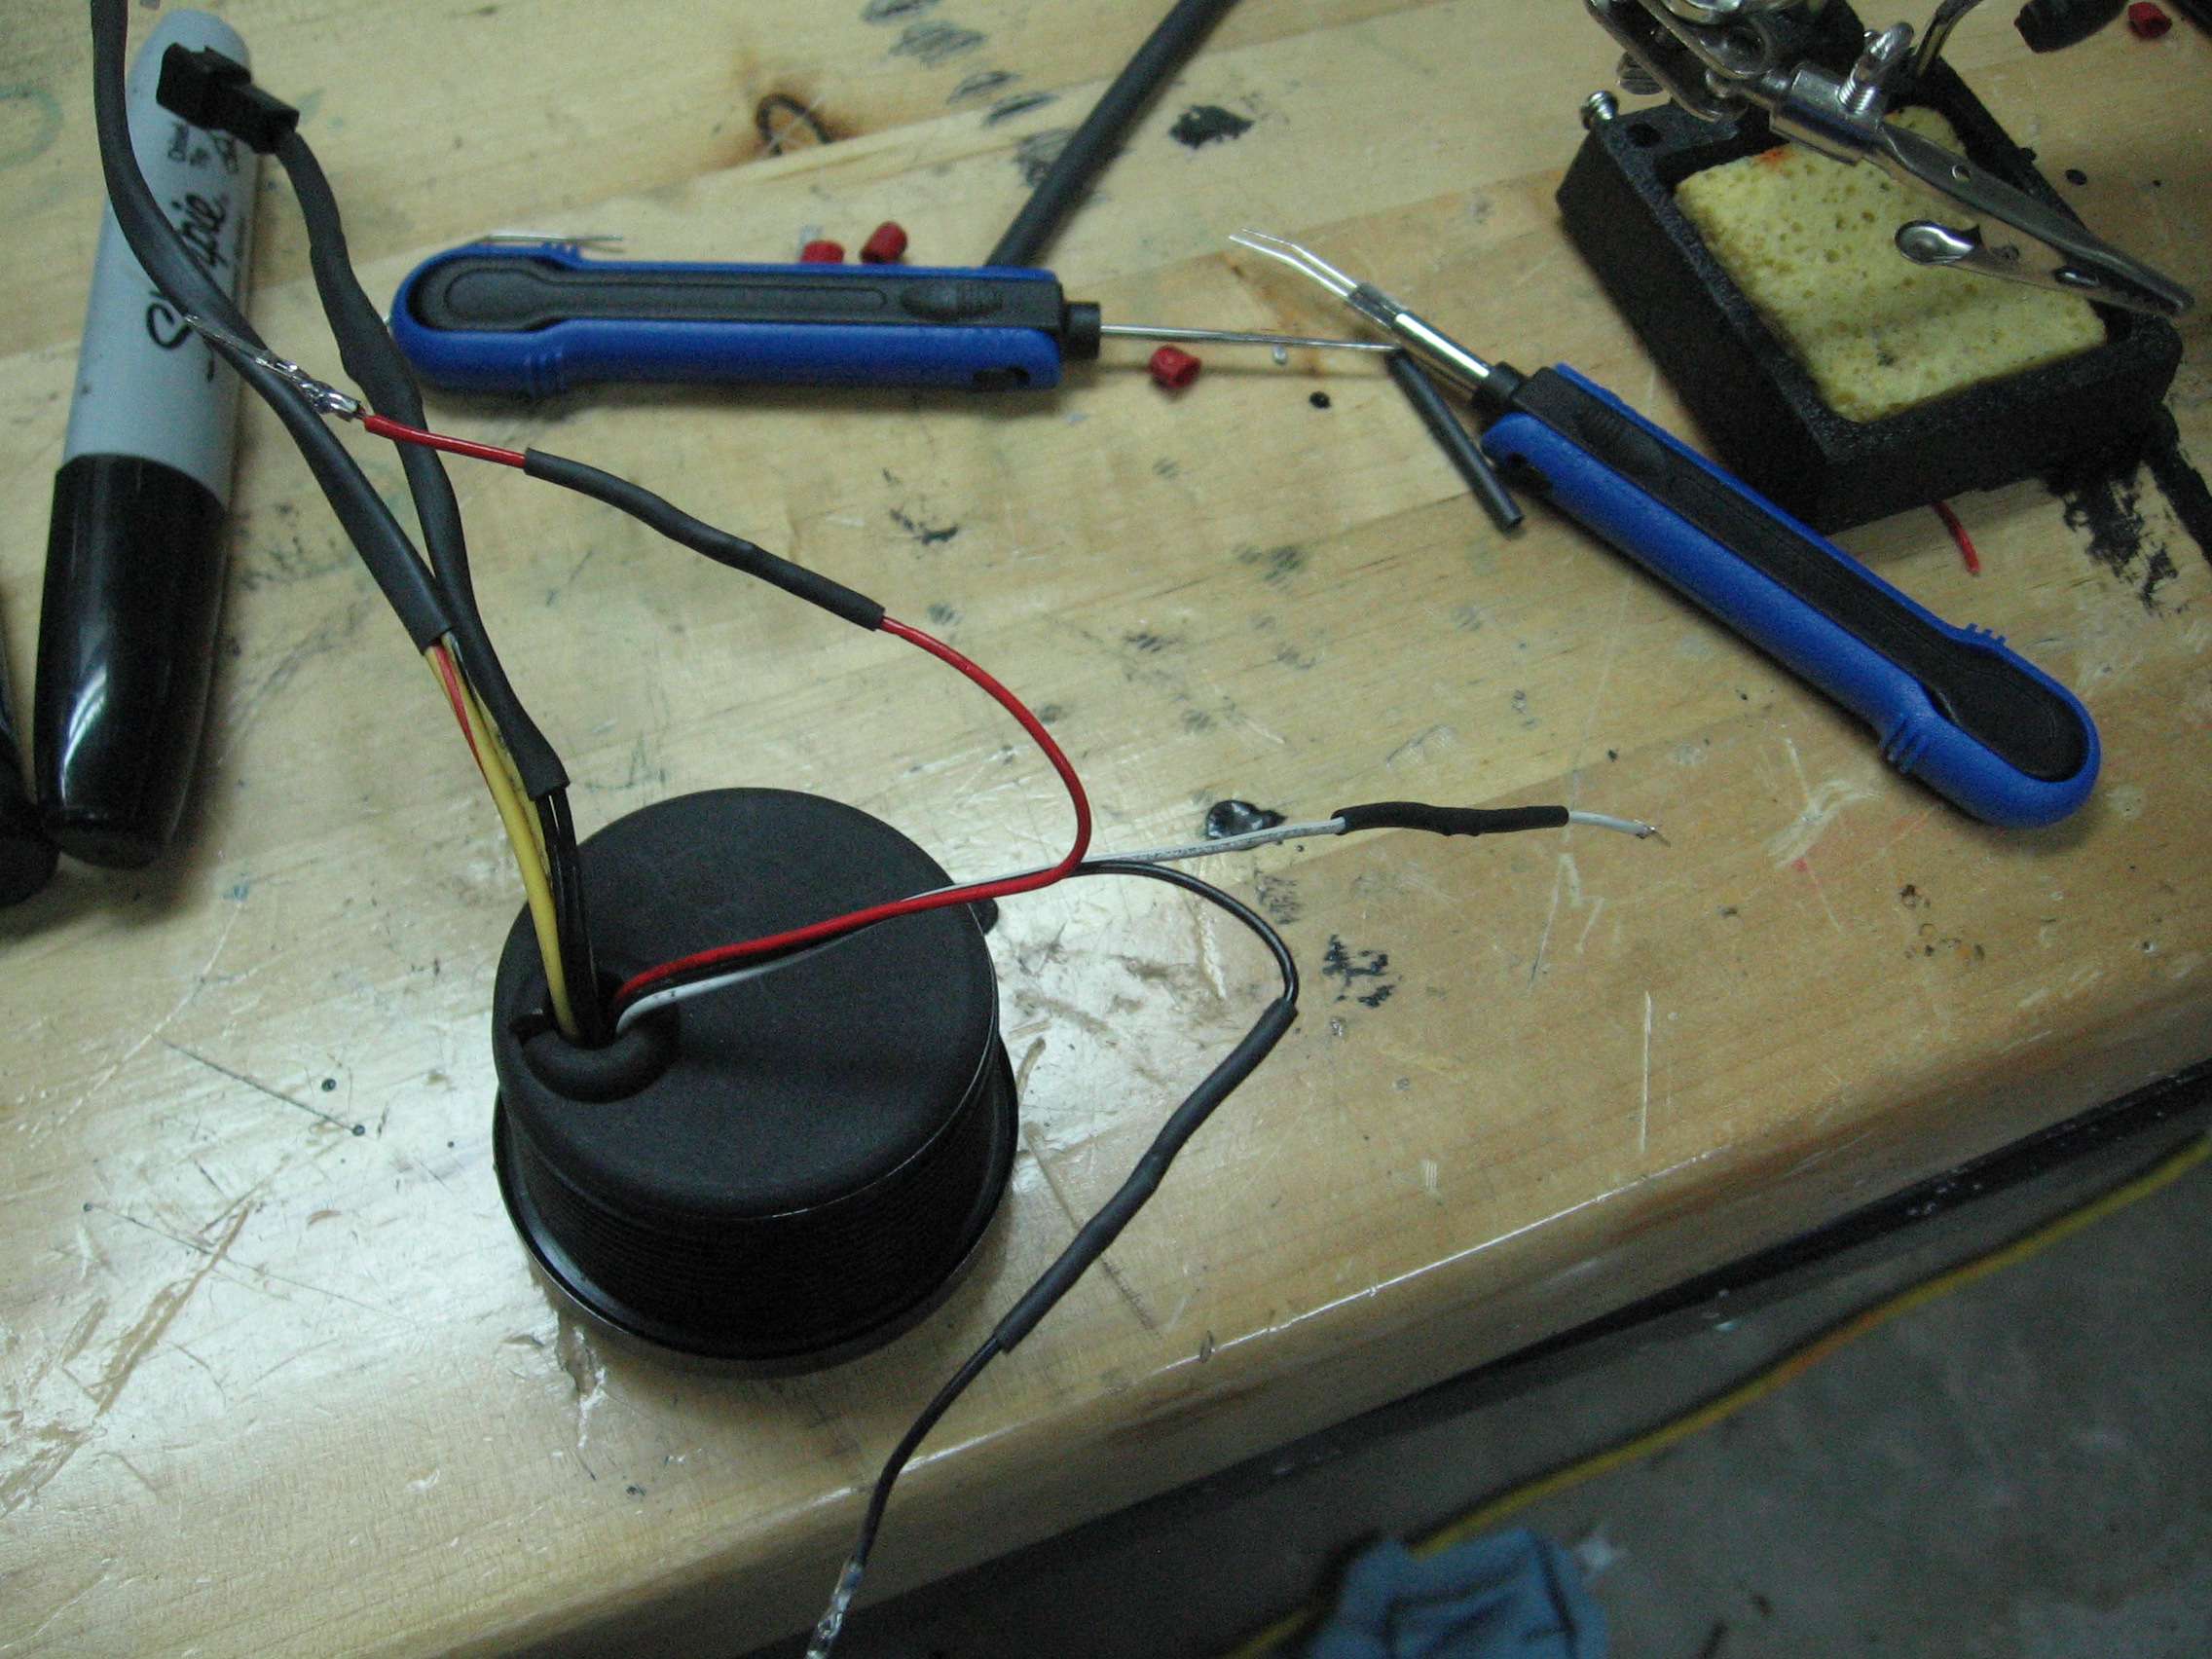
I took the connectors off of one gauge and heatshrinked the bundle. In the process of removing the connectors, I lost one (though I would find it a week later). I called SpeedHut and asked if I could buy one for me. Instead they shipped it overnight to me free of charge. Seriously, I can not say enough good things about this company. They are fantastic to do business with and if you are needing some gauges, please consider them.
Back to the panel...

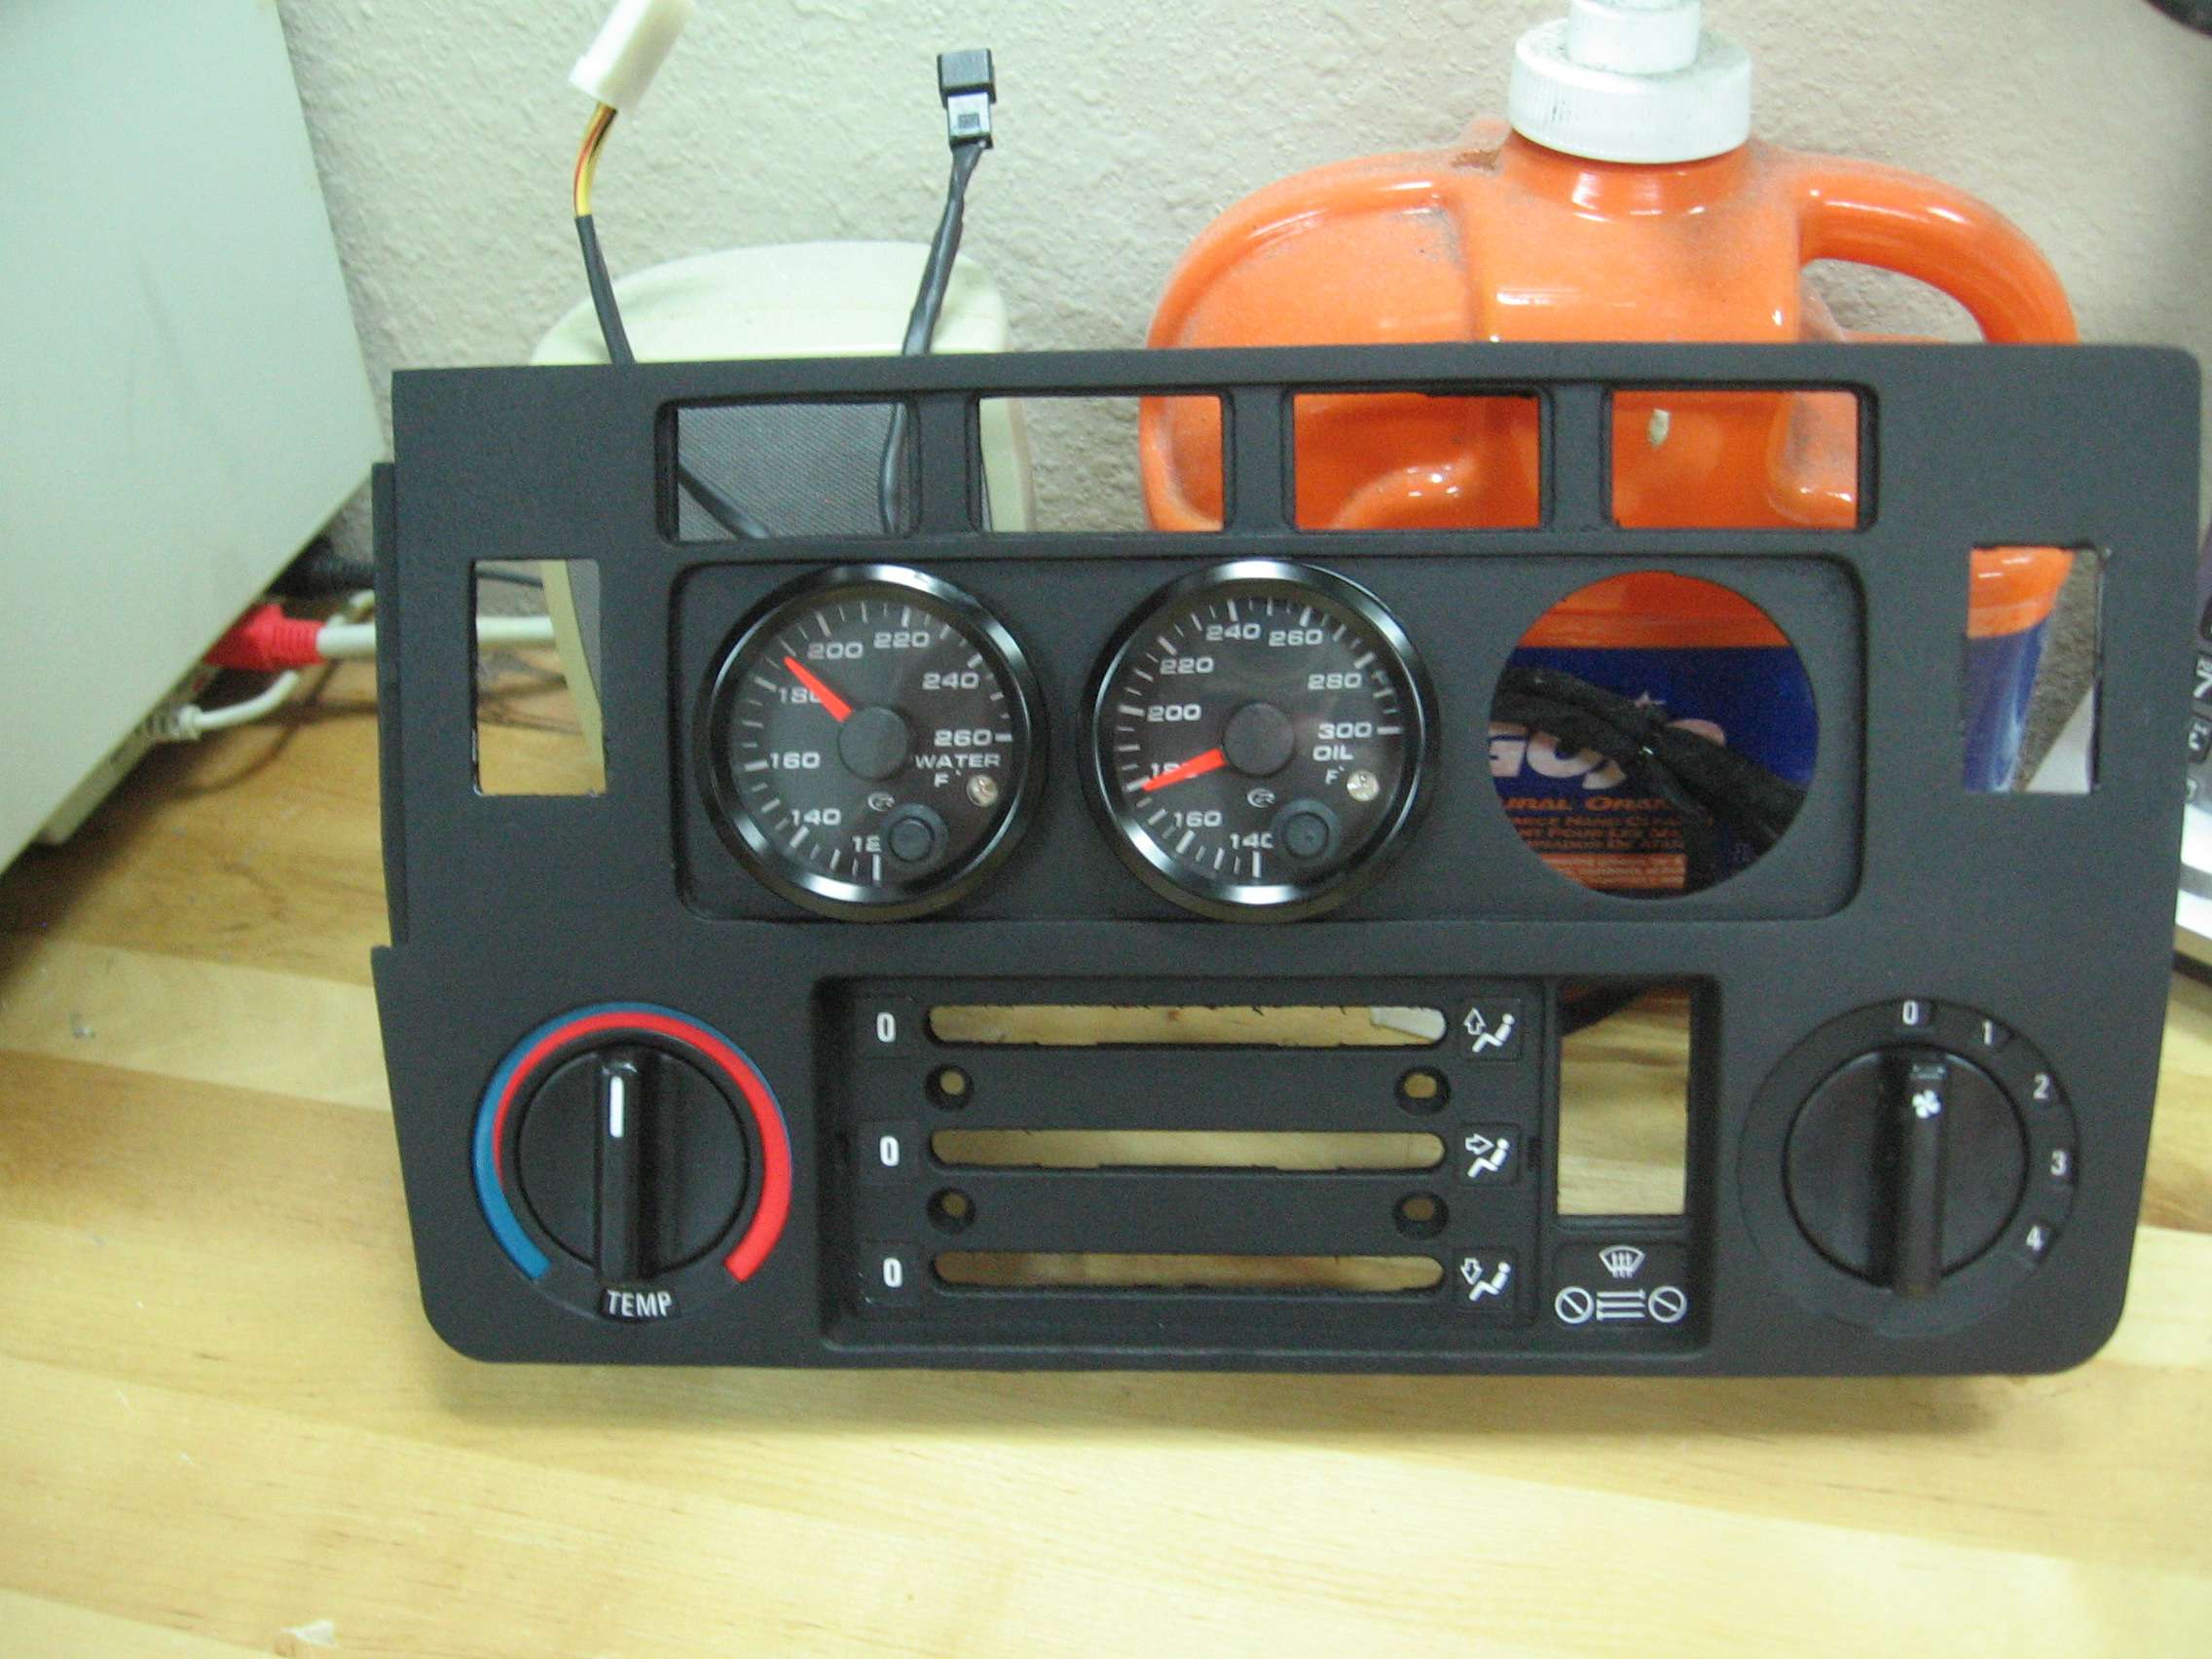
I wanted to try and have the gauge panel insert look like it was one piece with the rest of the panel, ie was all part of the same mold/die. Here superglue/epoxy did the smoothing and it did not look great. The glue was far too porous to be useful. You can also see just how wavy the panel is.
On the plus side I was pleased with the texture.
but you can see that it just wasn't clean and crisp like the rest of the panel.
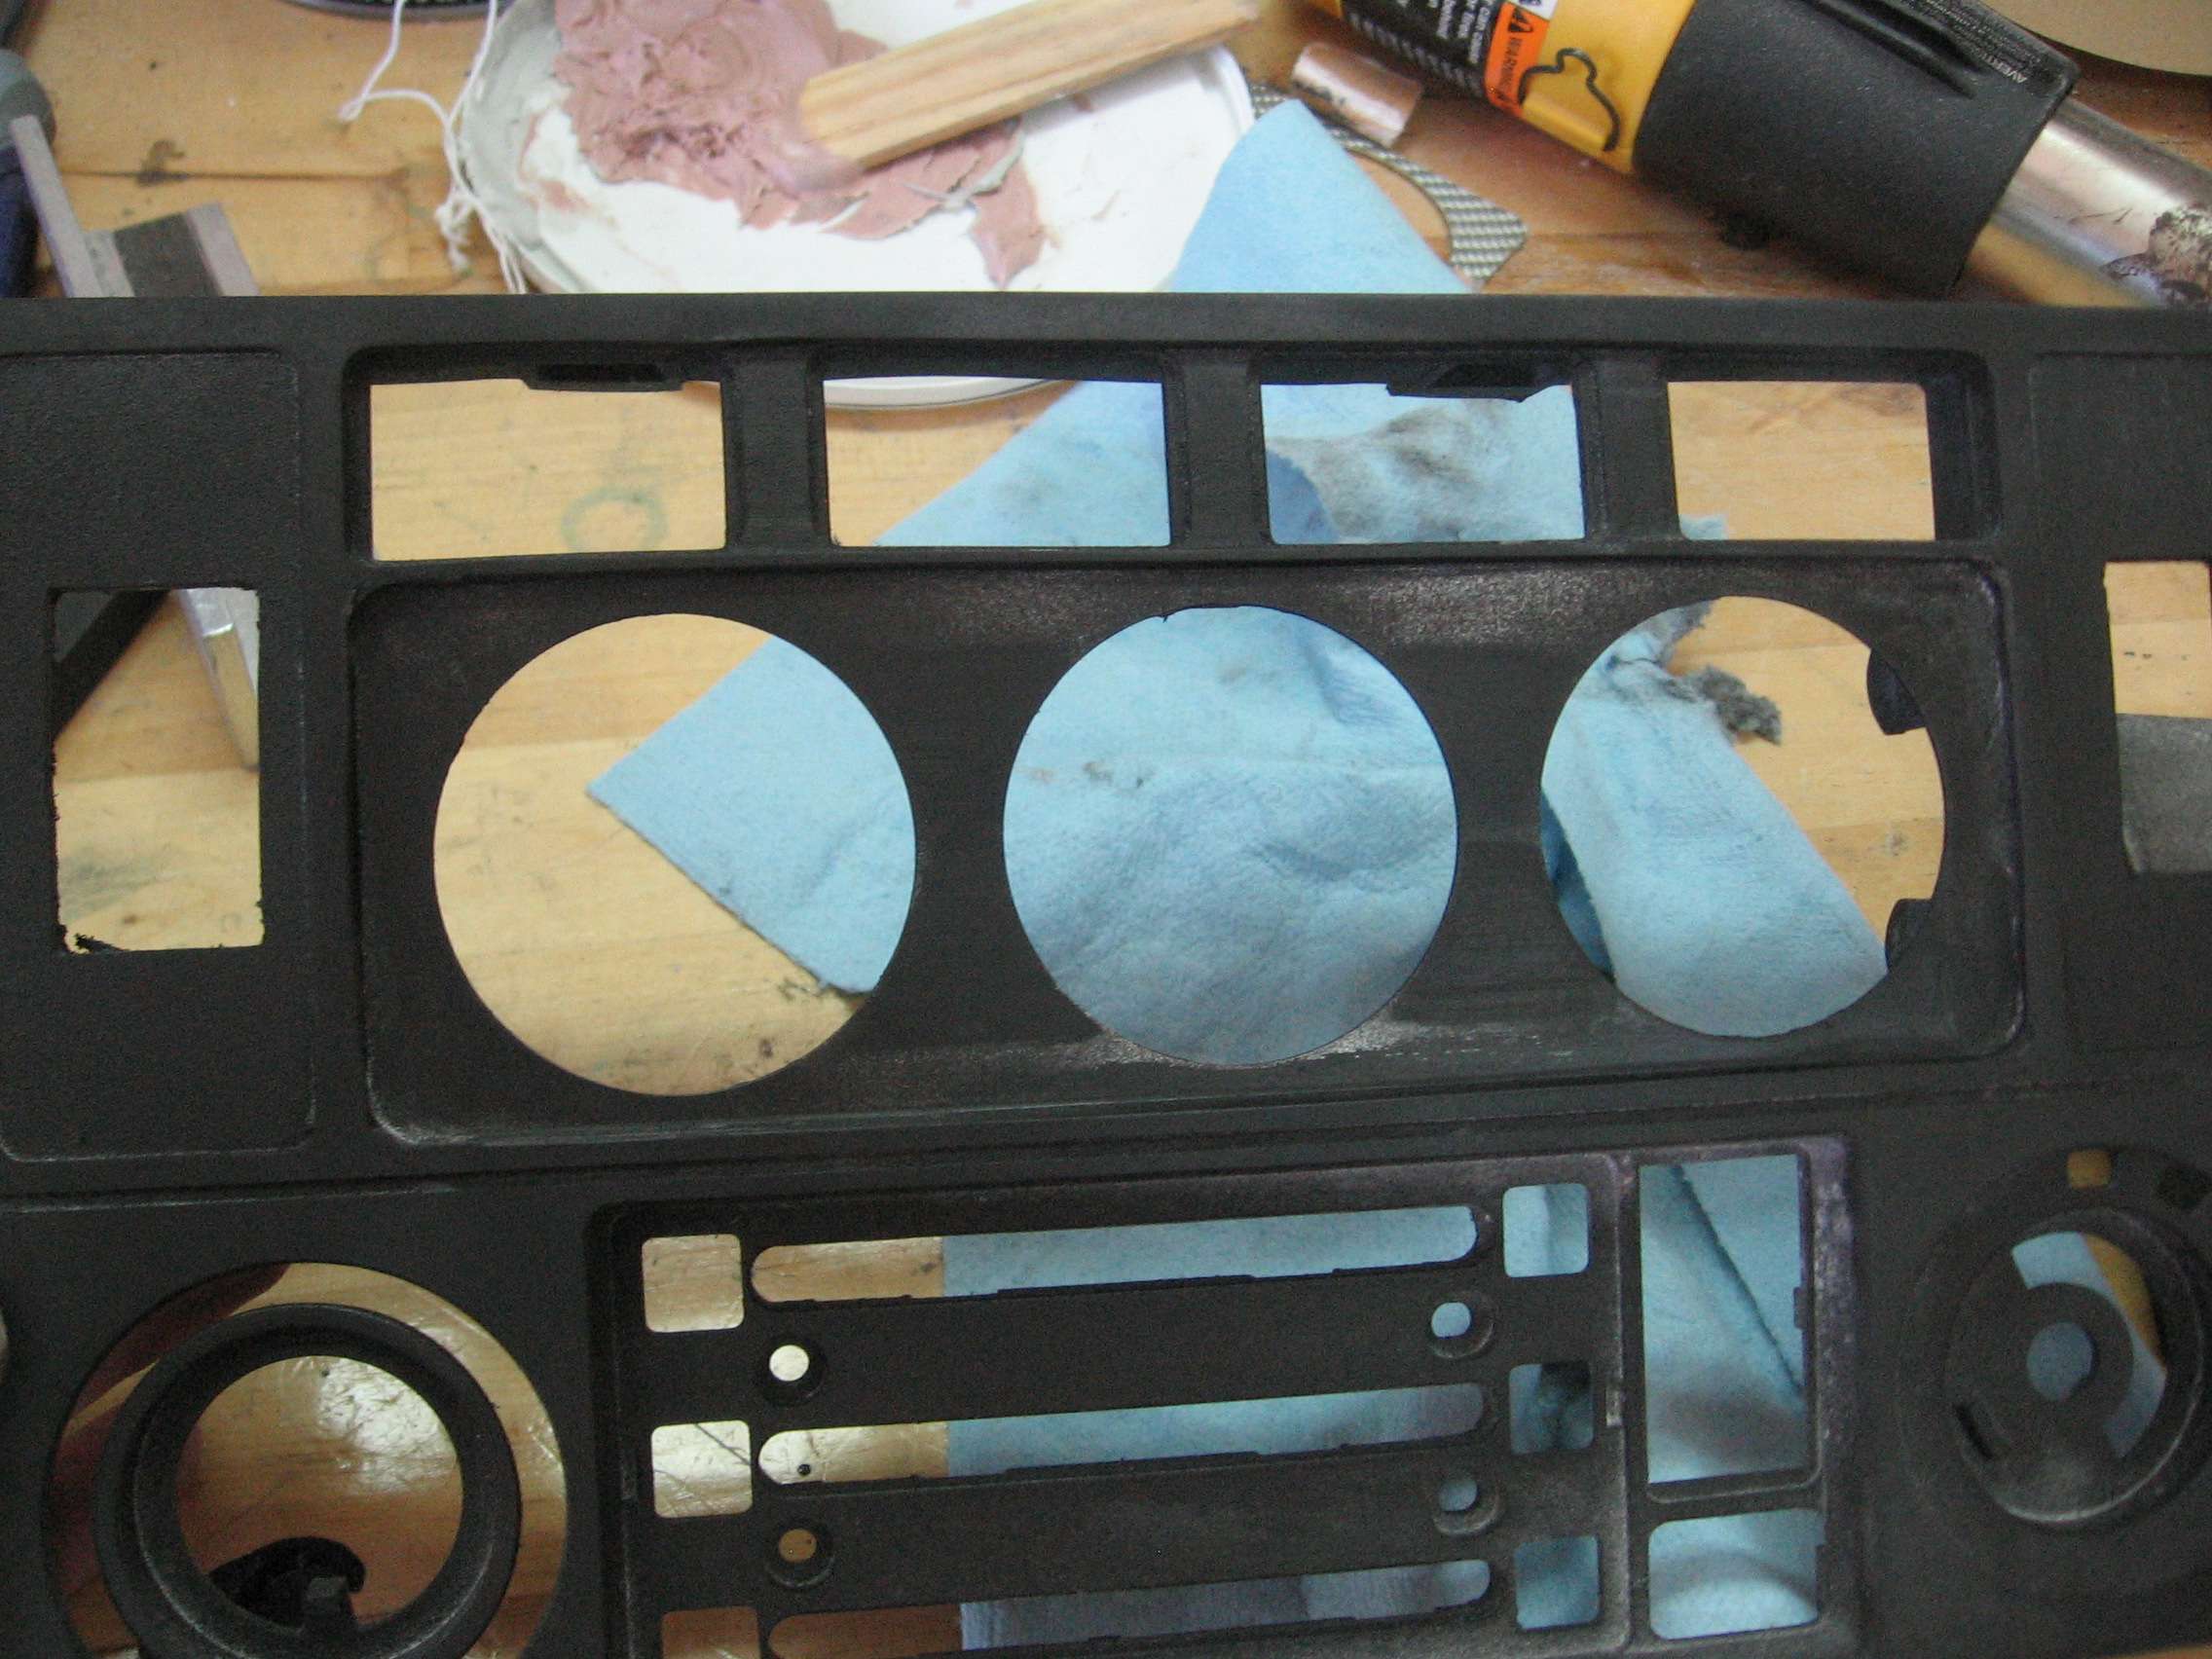
and sanding just made things worse. I decided to employ the use of plastic filler (for those taking notes, this was my first mistake) because I was pretty good at using it on the body of the car, right?
Obnoxious yes but while it kicked, a sharp blade made some really clean cuts.
but what if I used a routing template with my dremel tool?
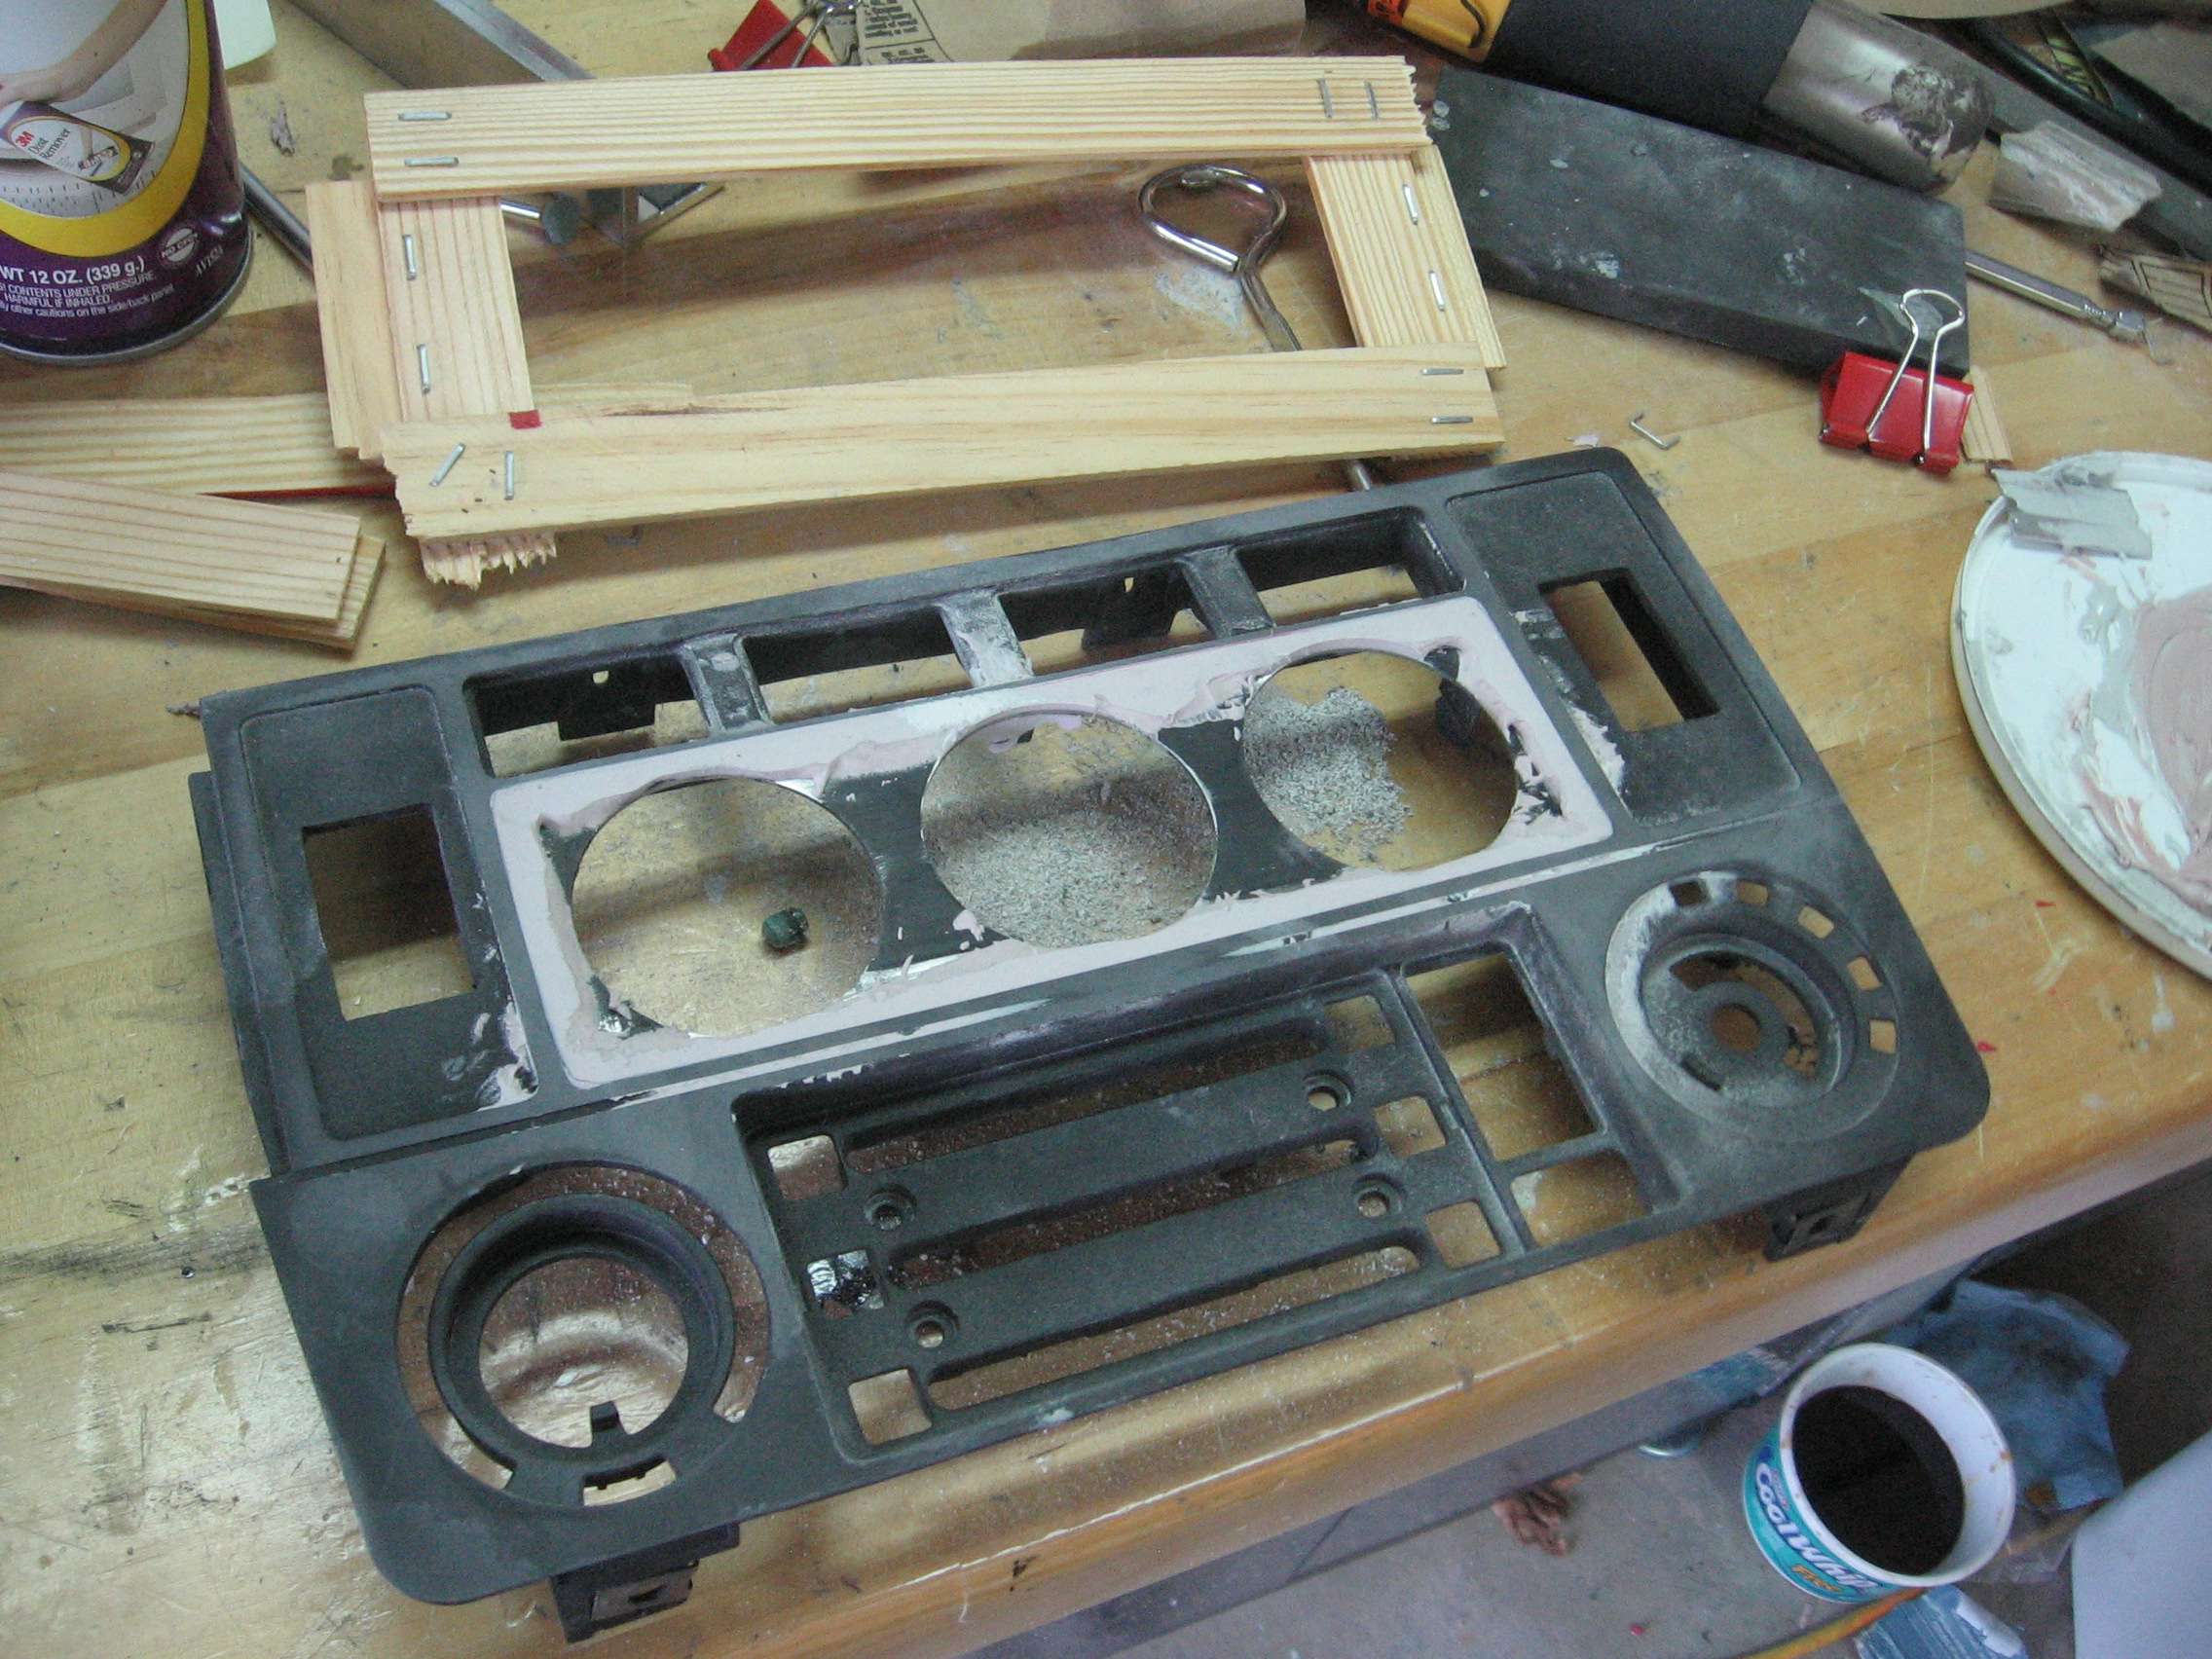
long story short, it didn't work that well so I would have to do it the hard way, bit by bit. Here I decided to fill in some of the recesses in the panel as well.
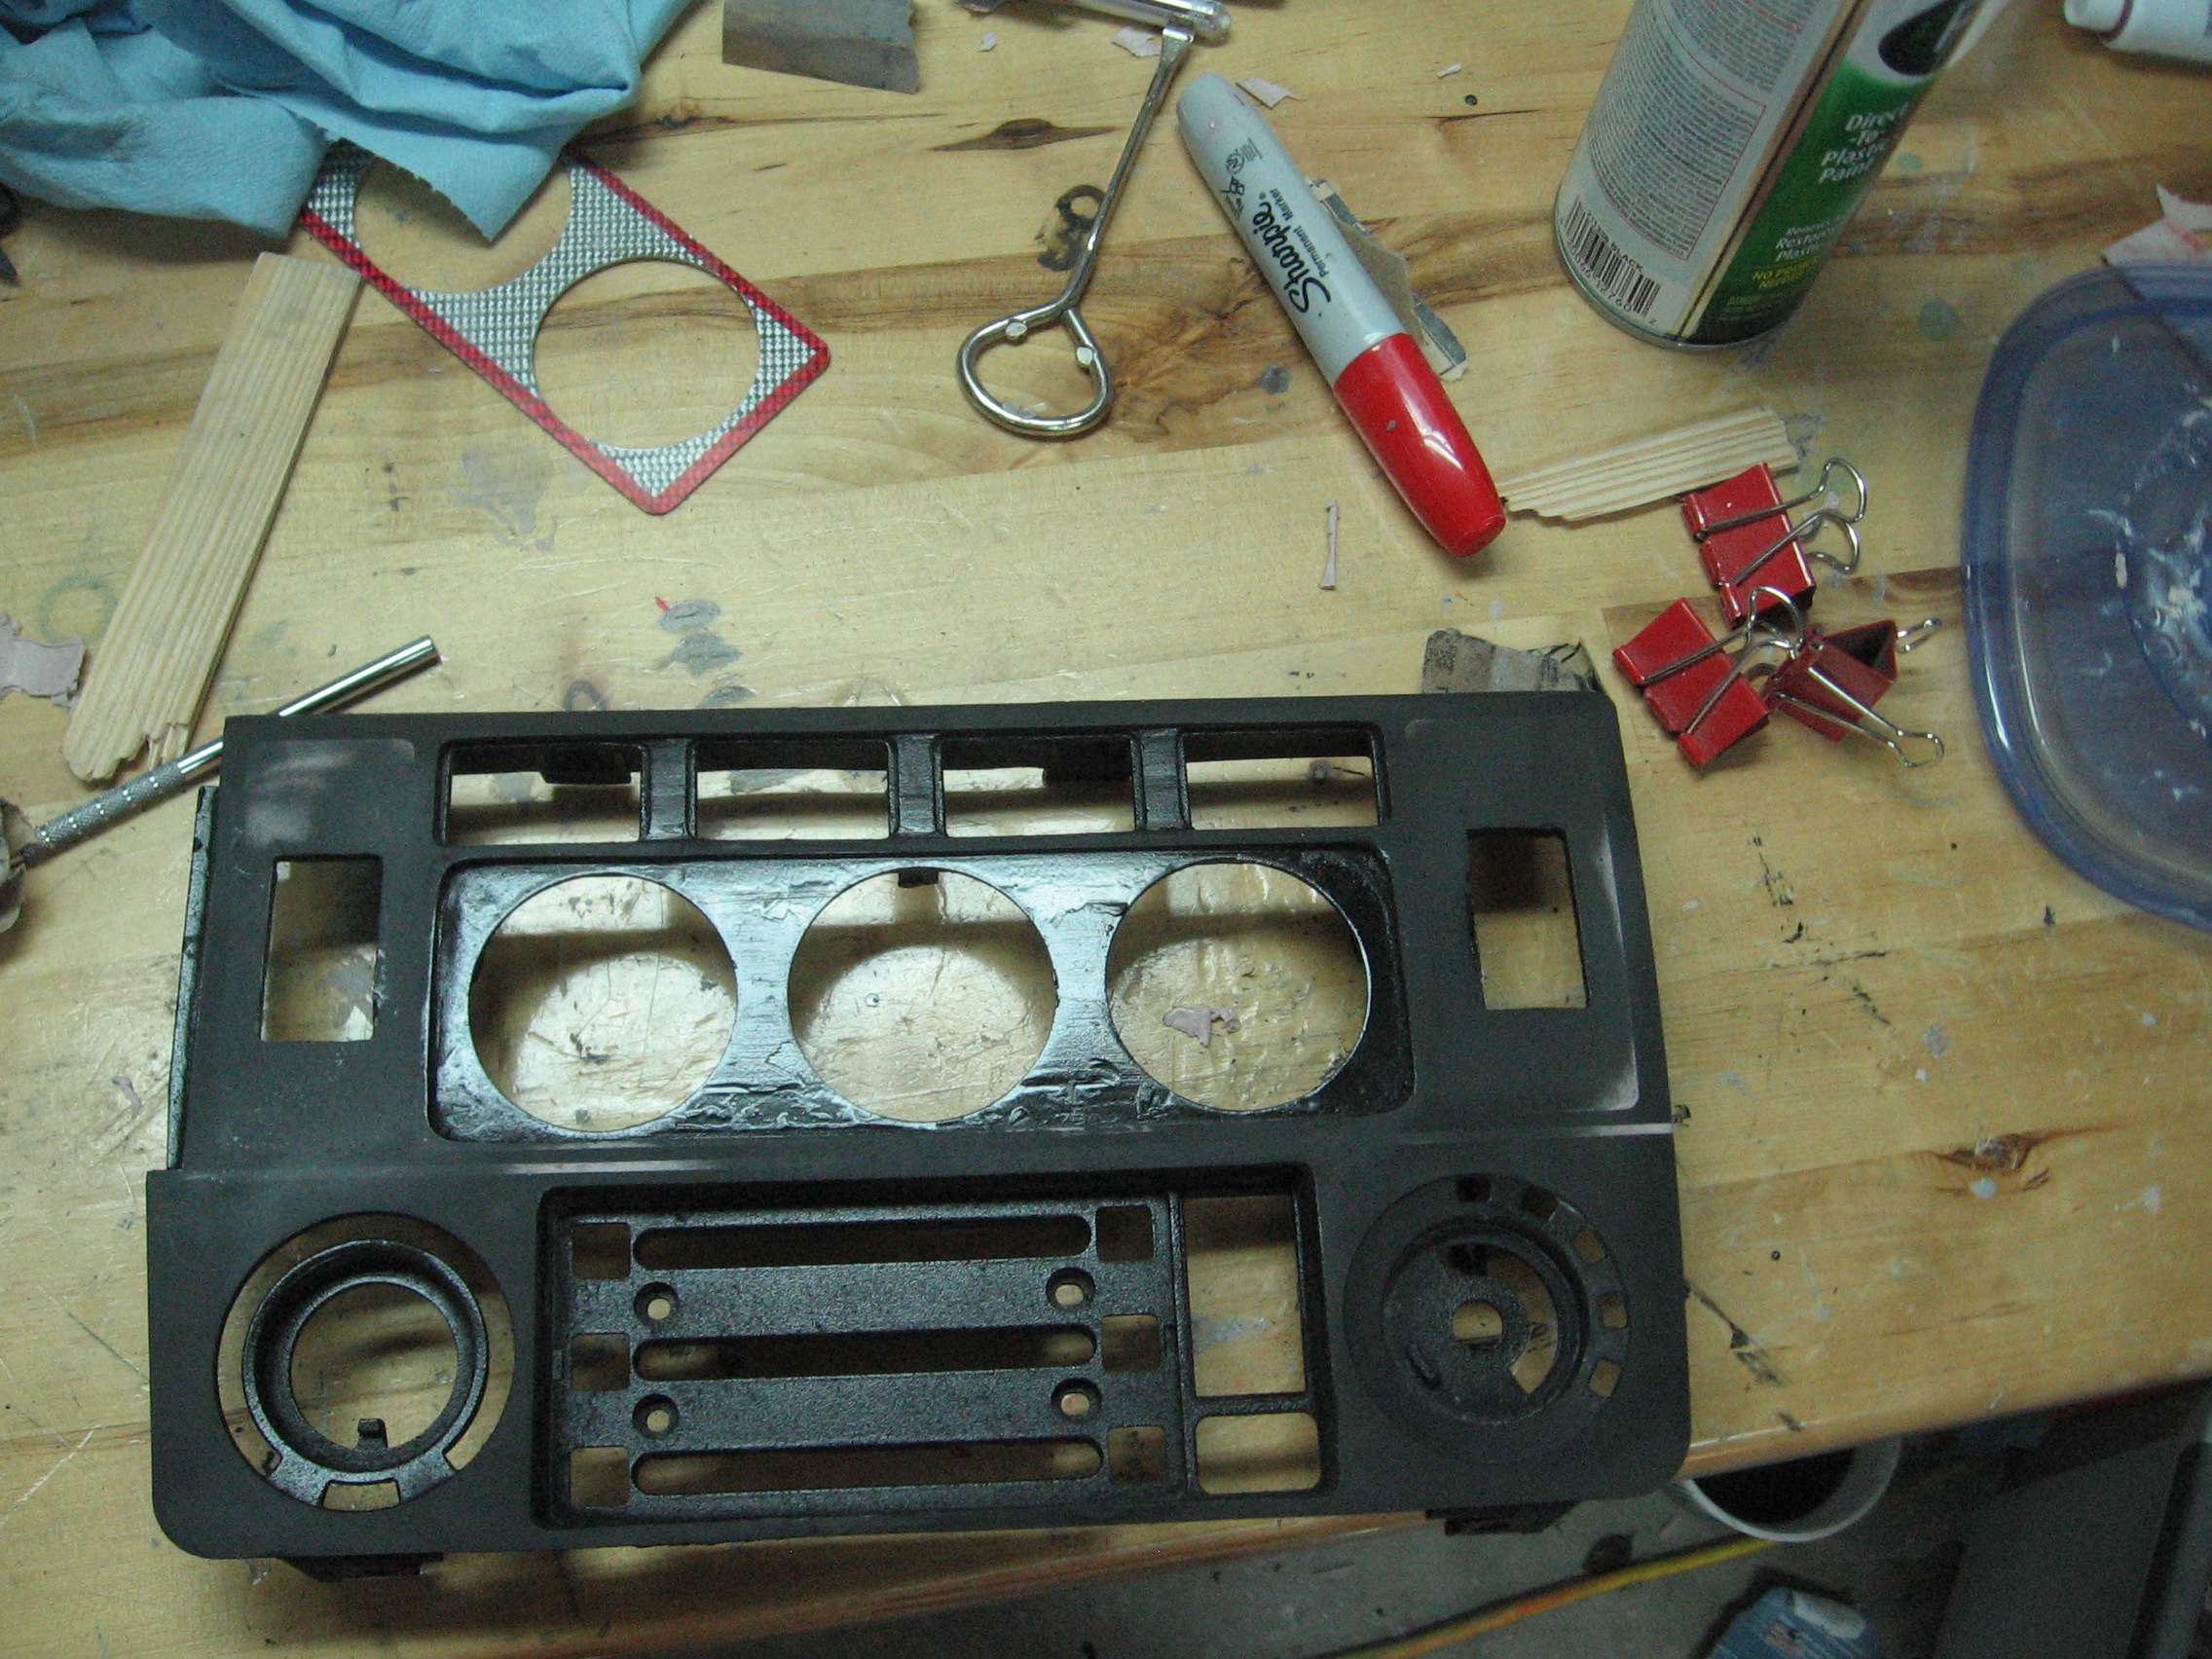
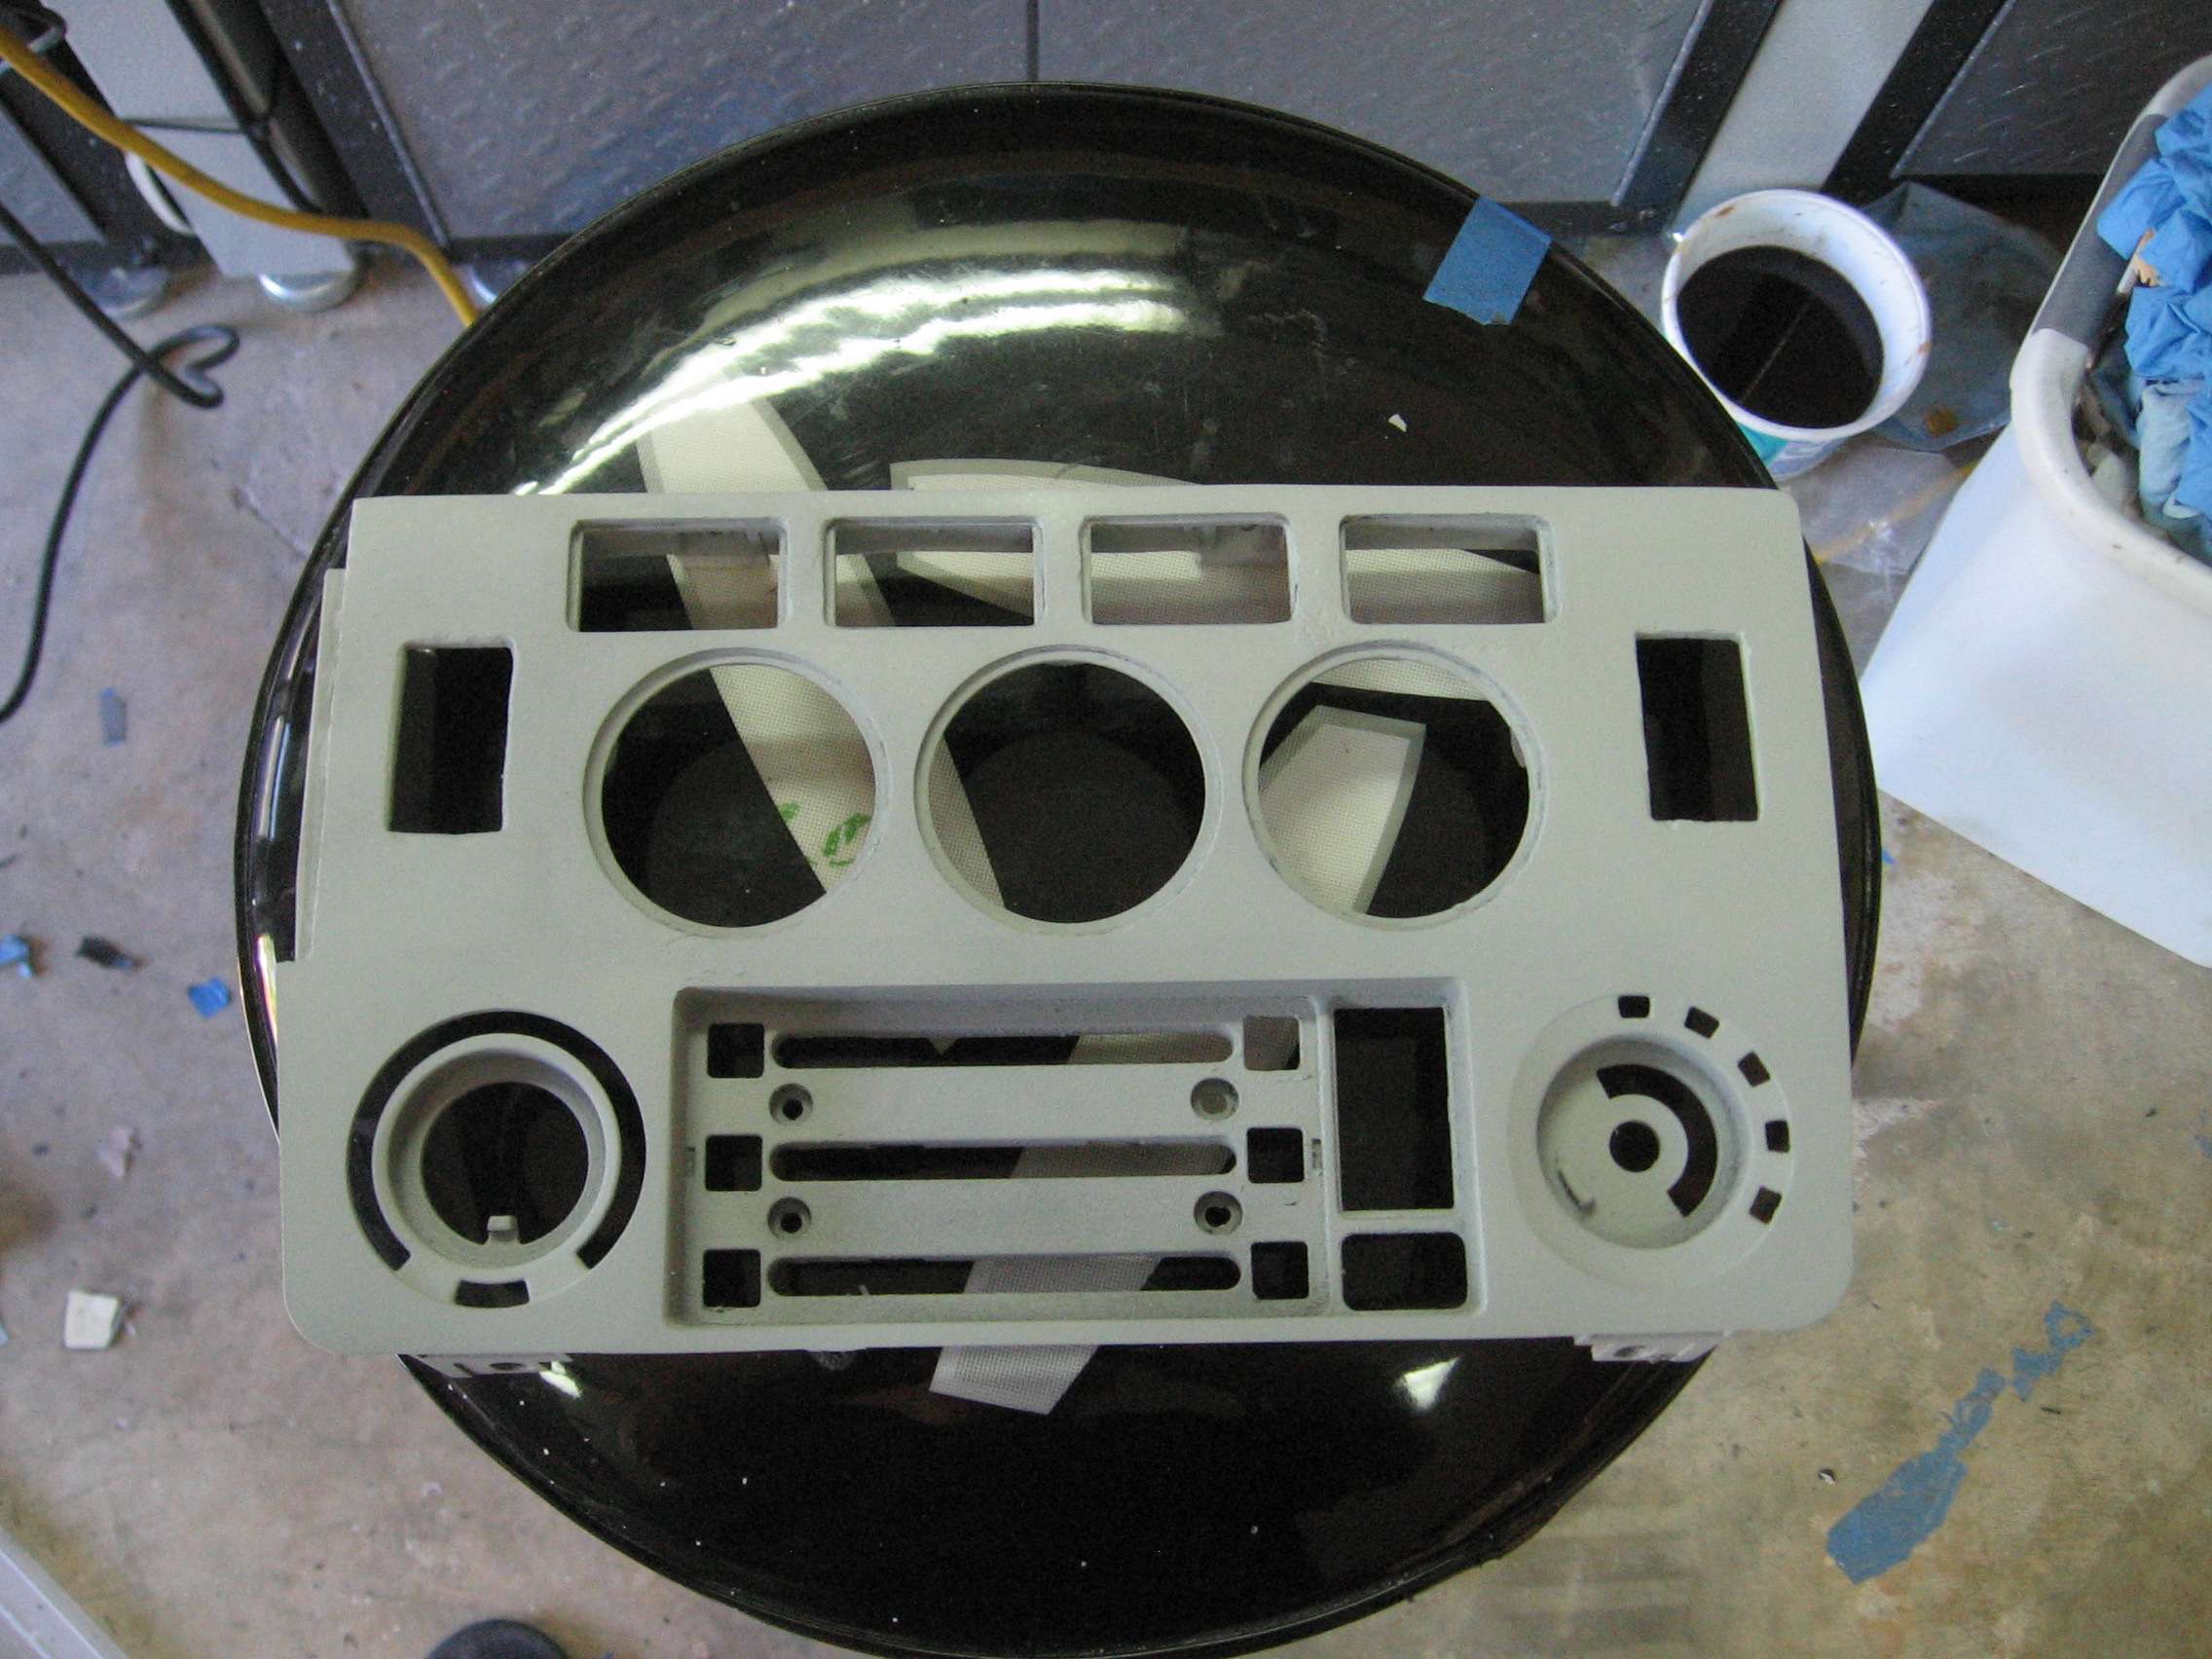
Ignoring the surface of the gauge insert, it was looking better and the edges were straighter.
More importantly, the three gauges fit!
There was much sanding and touchup and then I got to the priming stage.
I used a filler primer so that I could eliminate pinholes and the like.
a little texture....

pretty close i think...
right?
Since I had the primer out, I decided to prime the mtech1 replica wing I got from Ary. I set it on the decklid after I has widened the mounting holes on the trunk (doubled in size). I then marked the wing after I centered it so I could see how much work needed to be done.
um...
wtf? This is just....ugh, I'll figure out how to fix it.
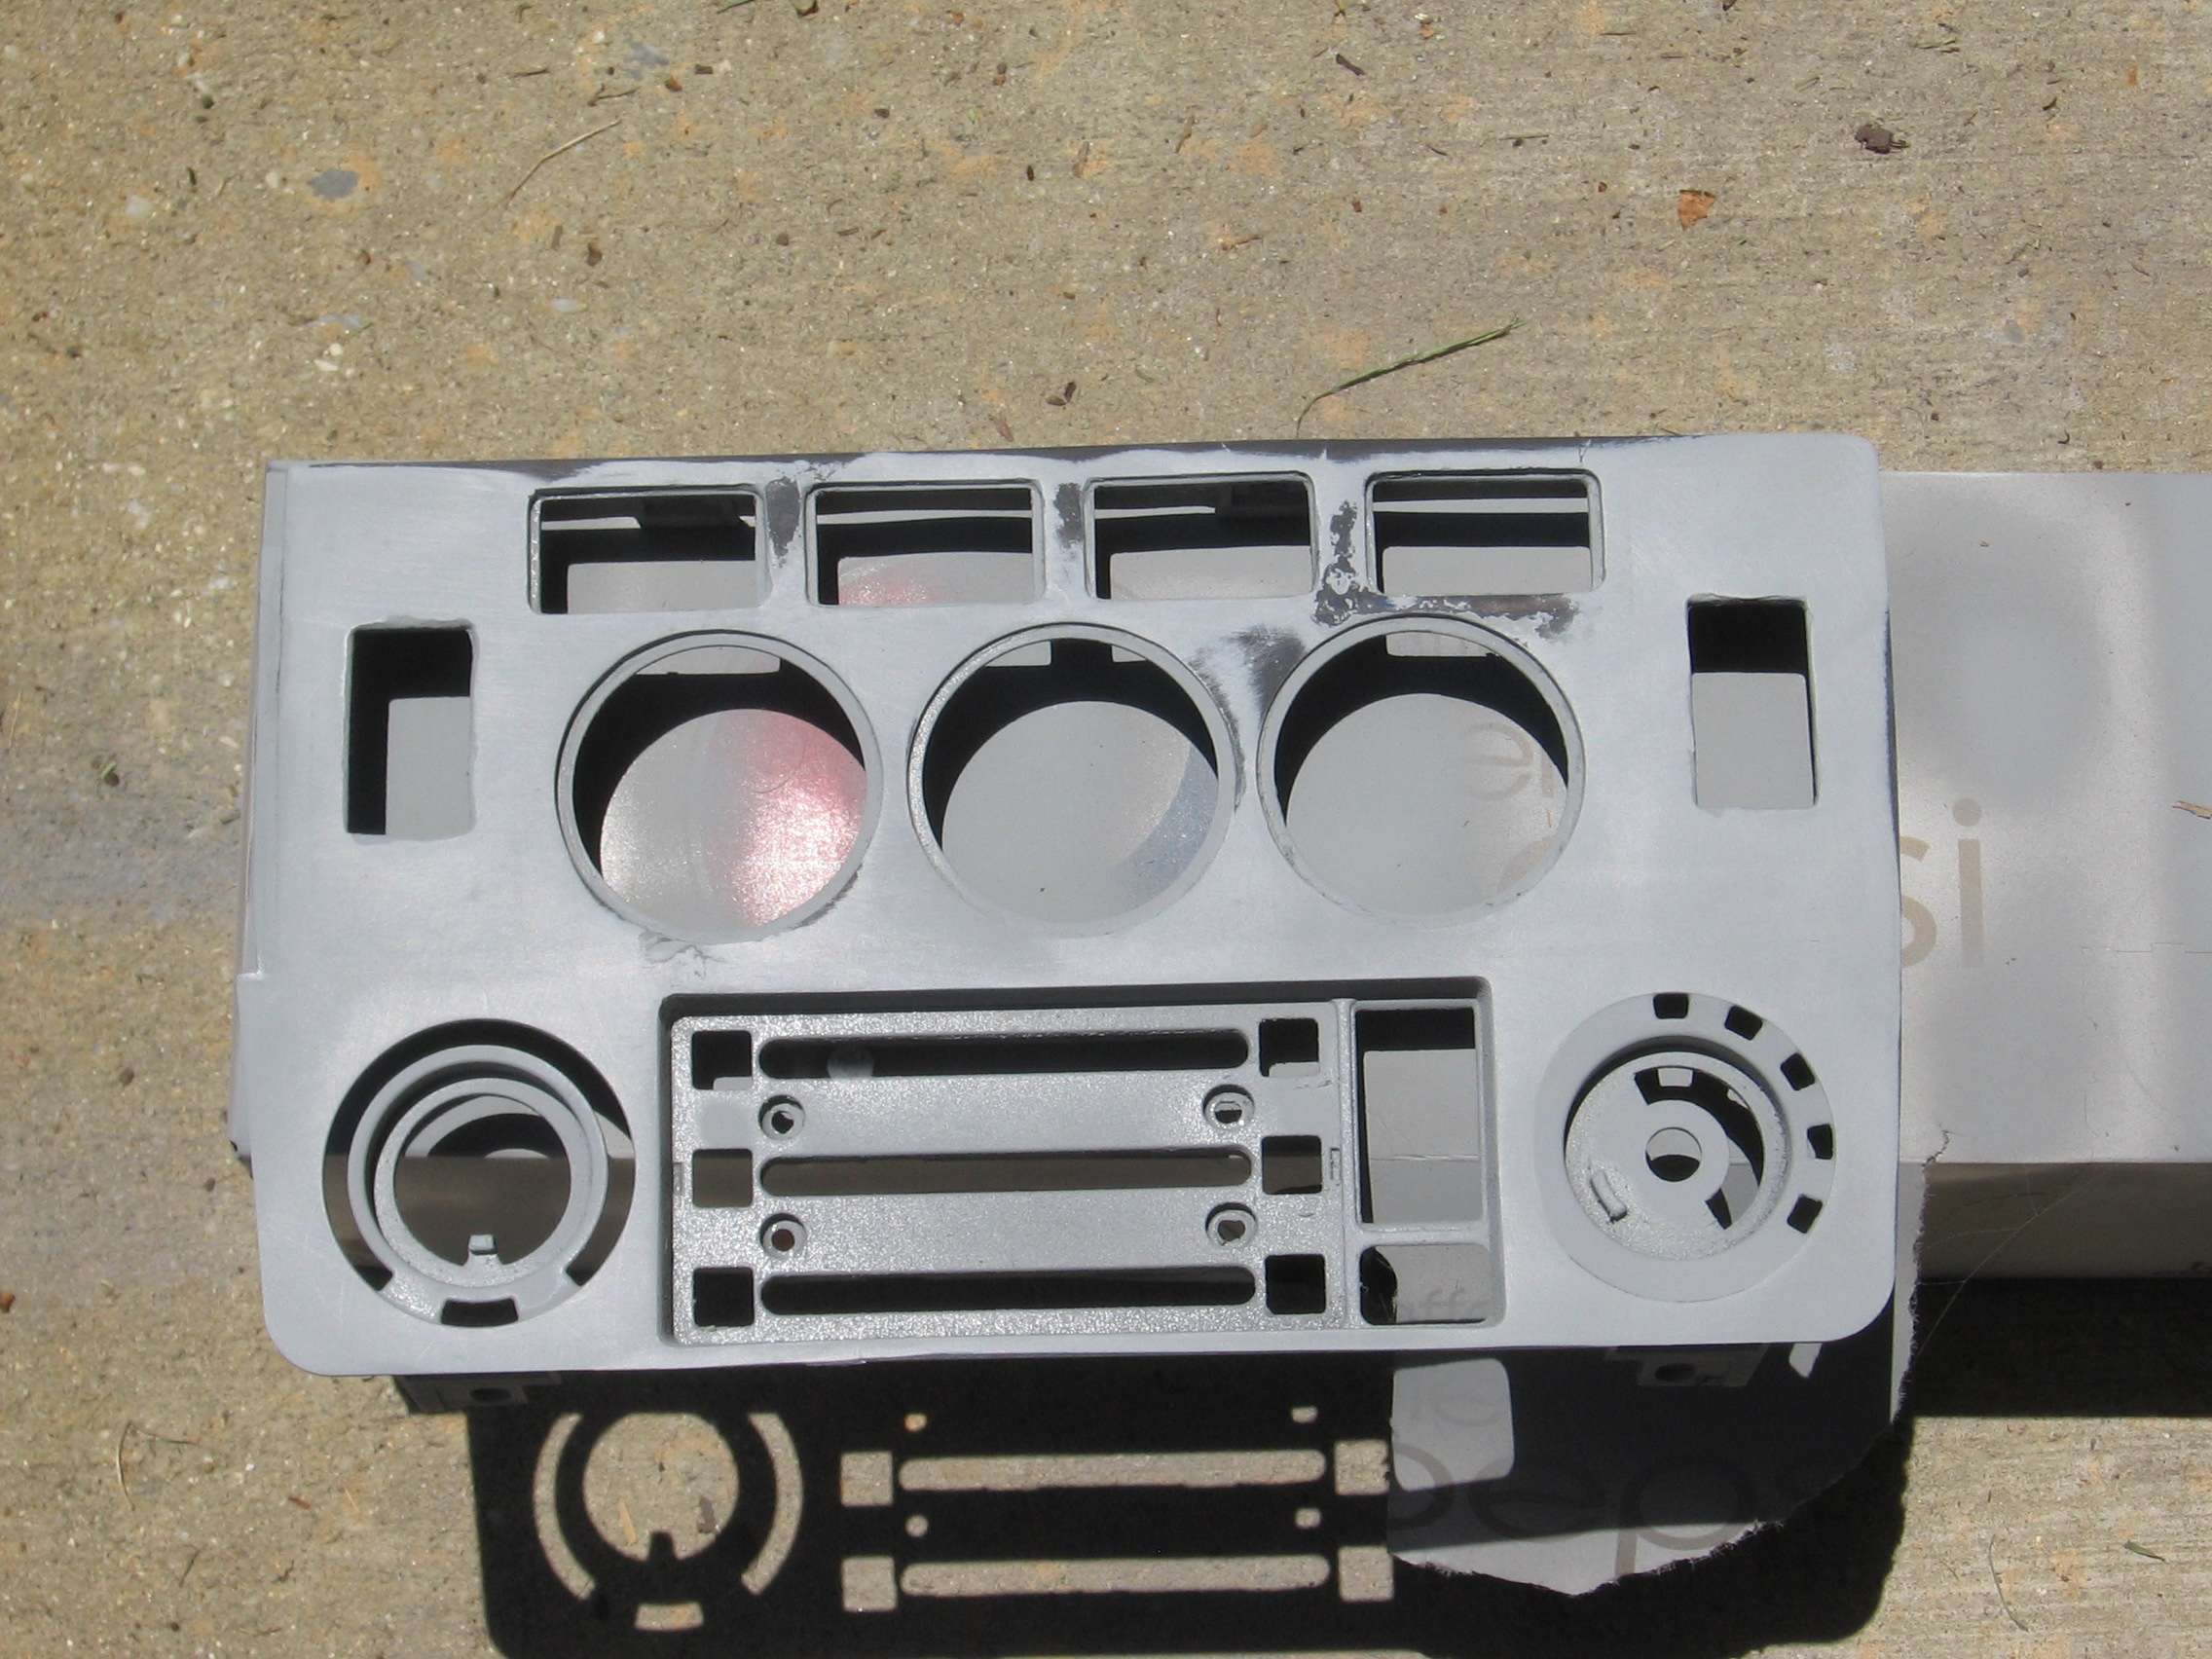
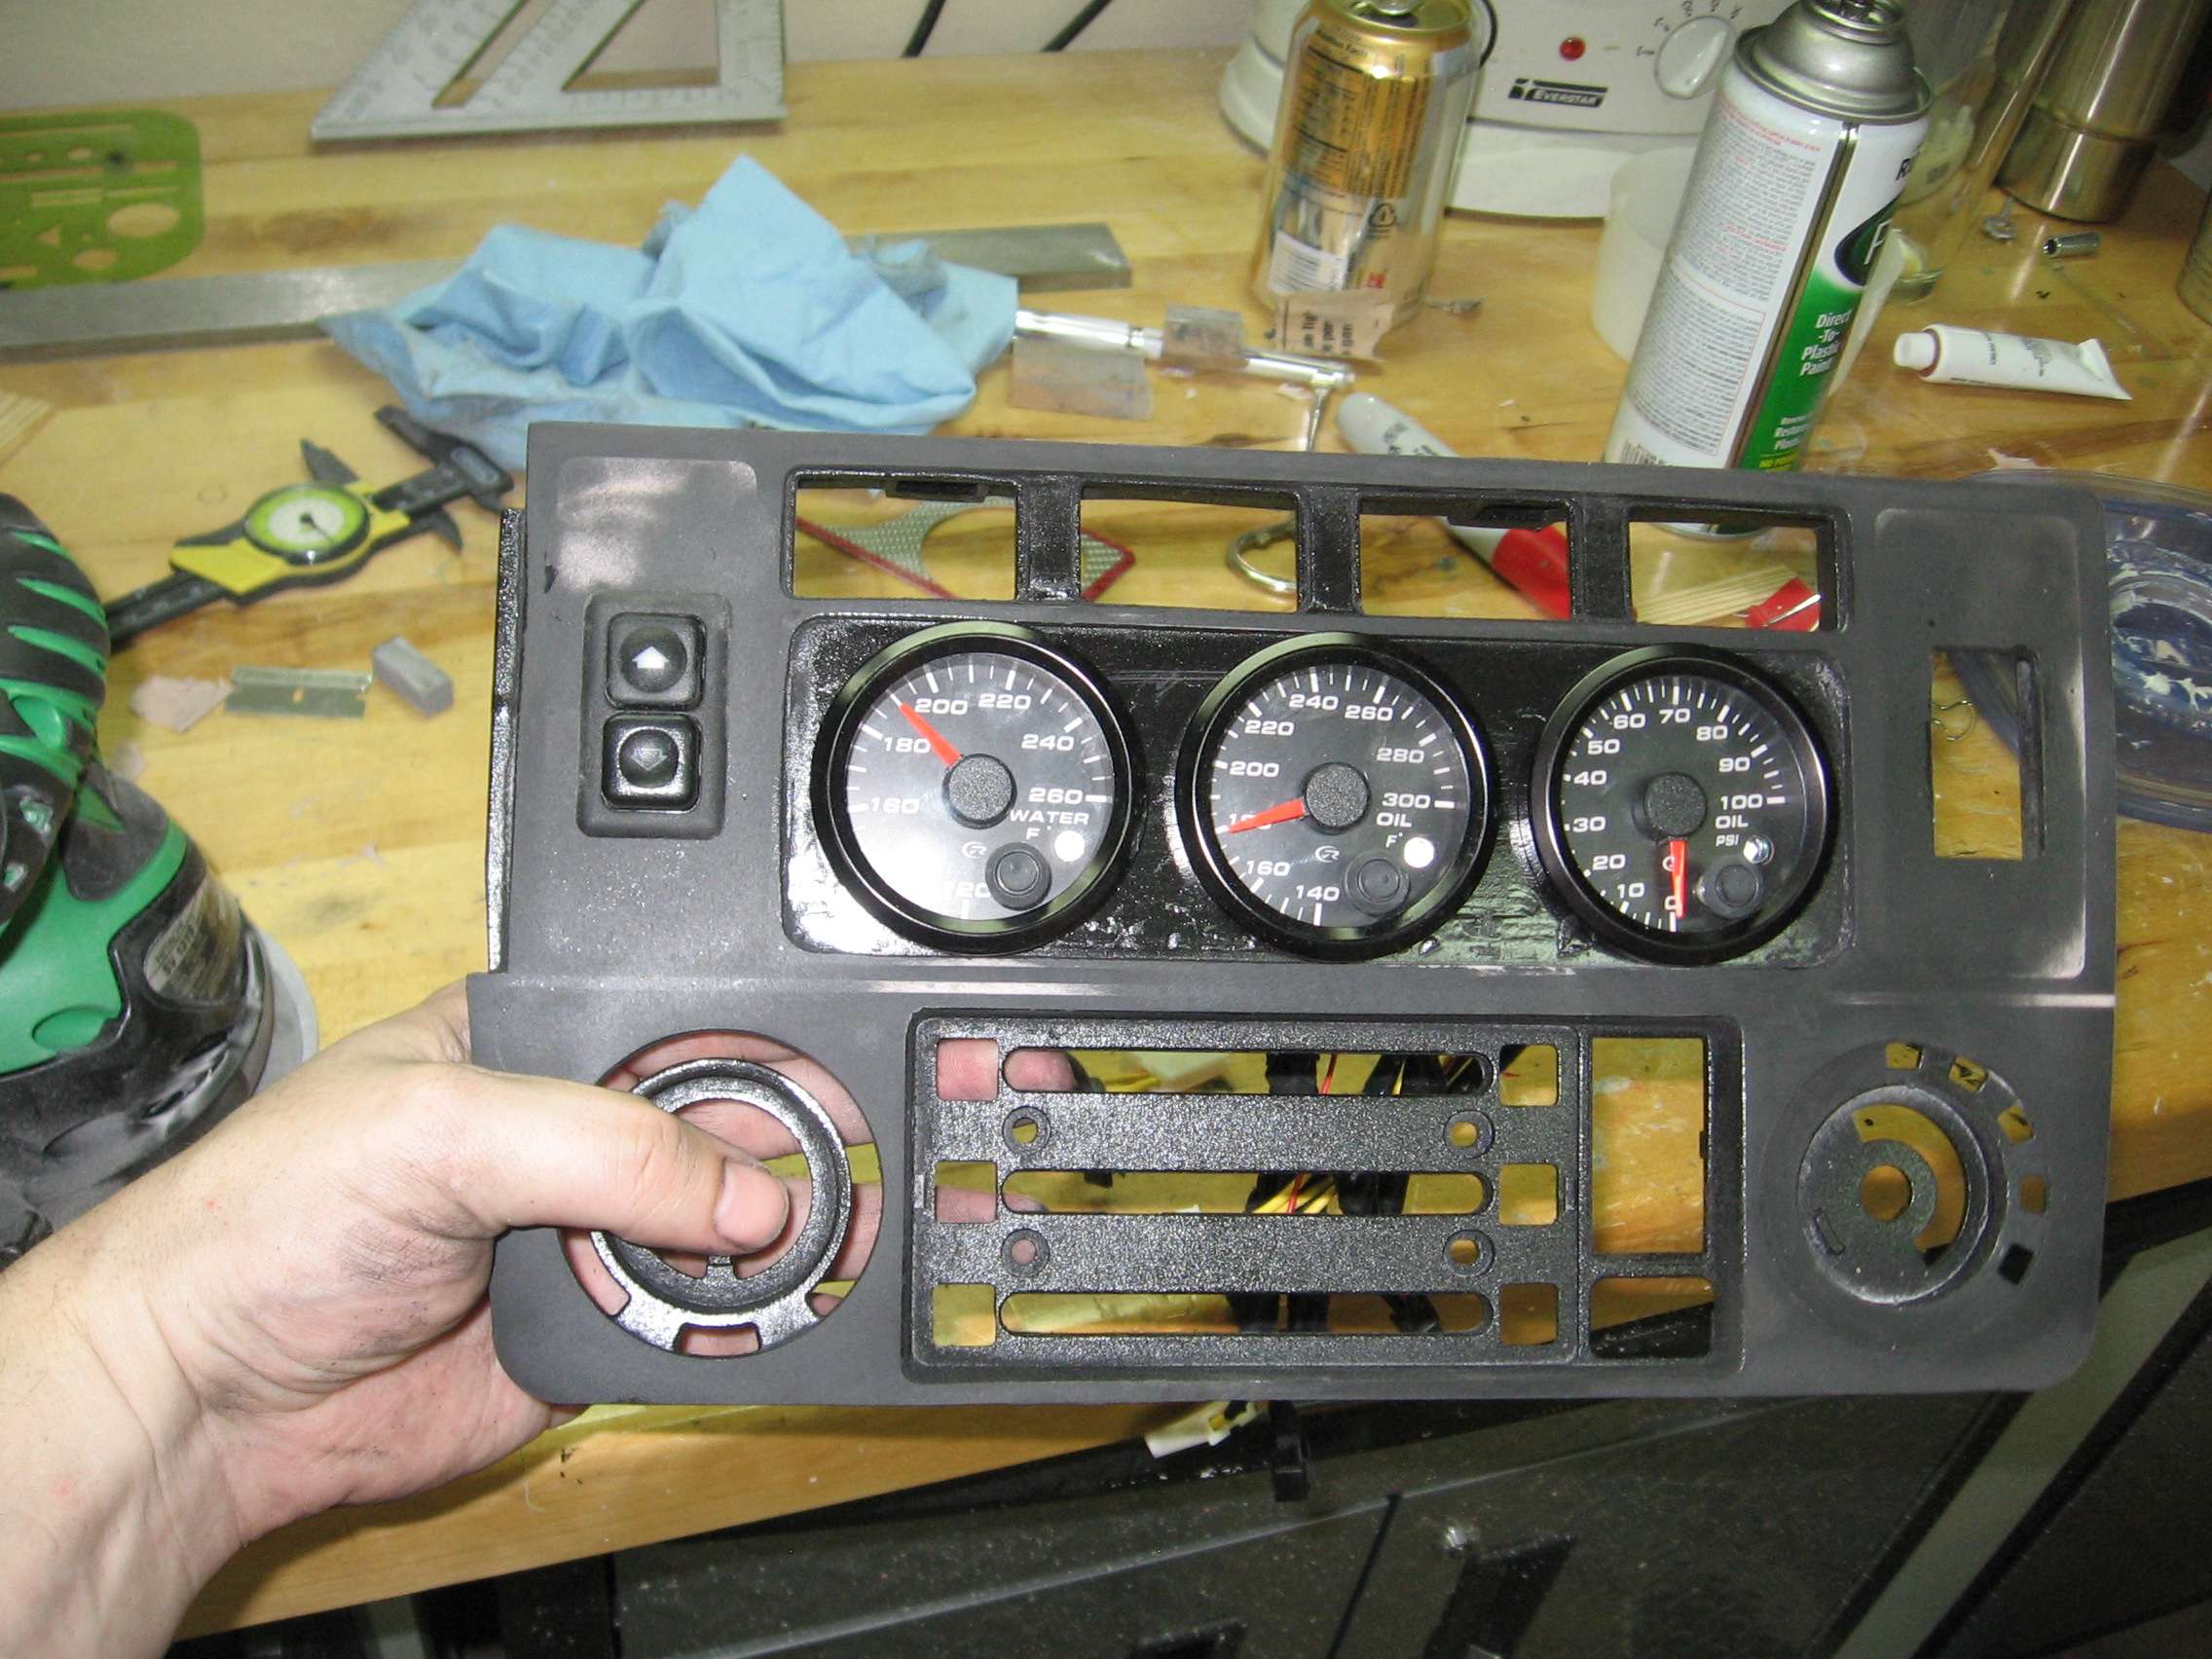
In the meantime, I finished painting the panel and it looks pretty good.

not bad.
Time to reassemble...

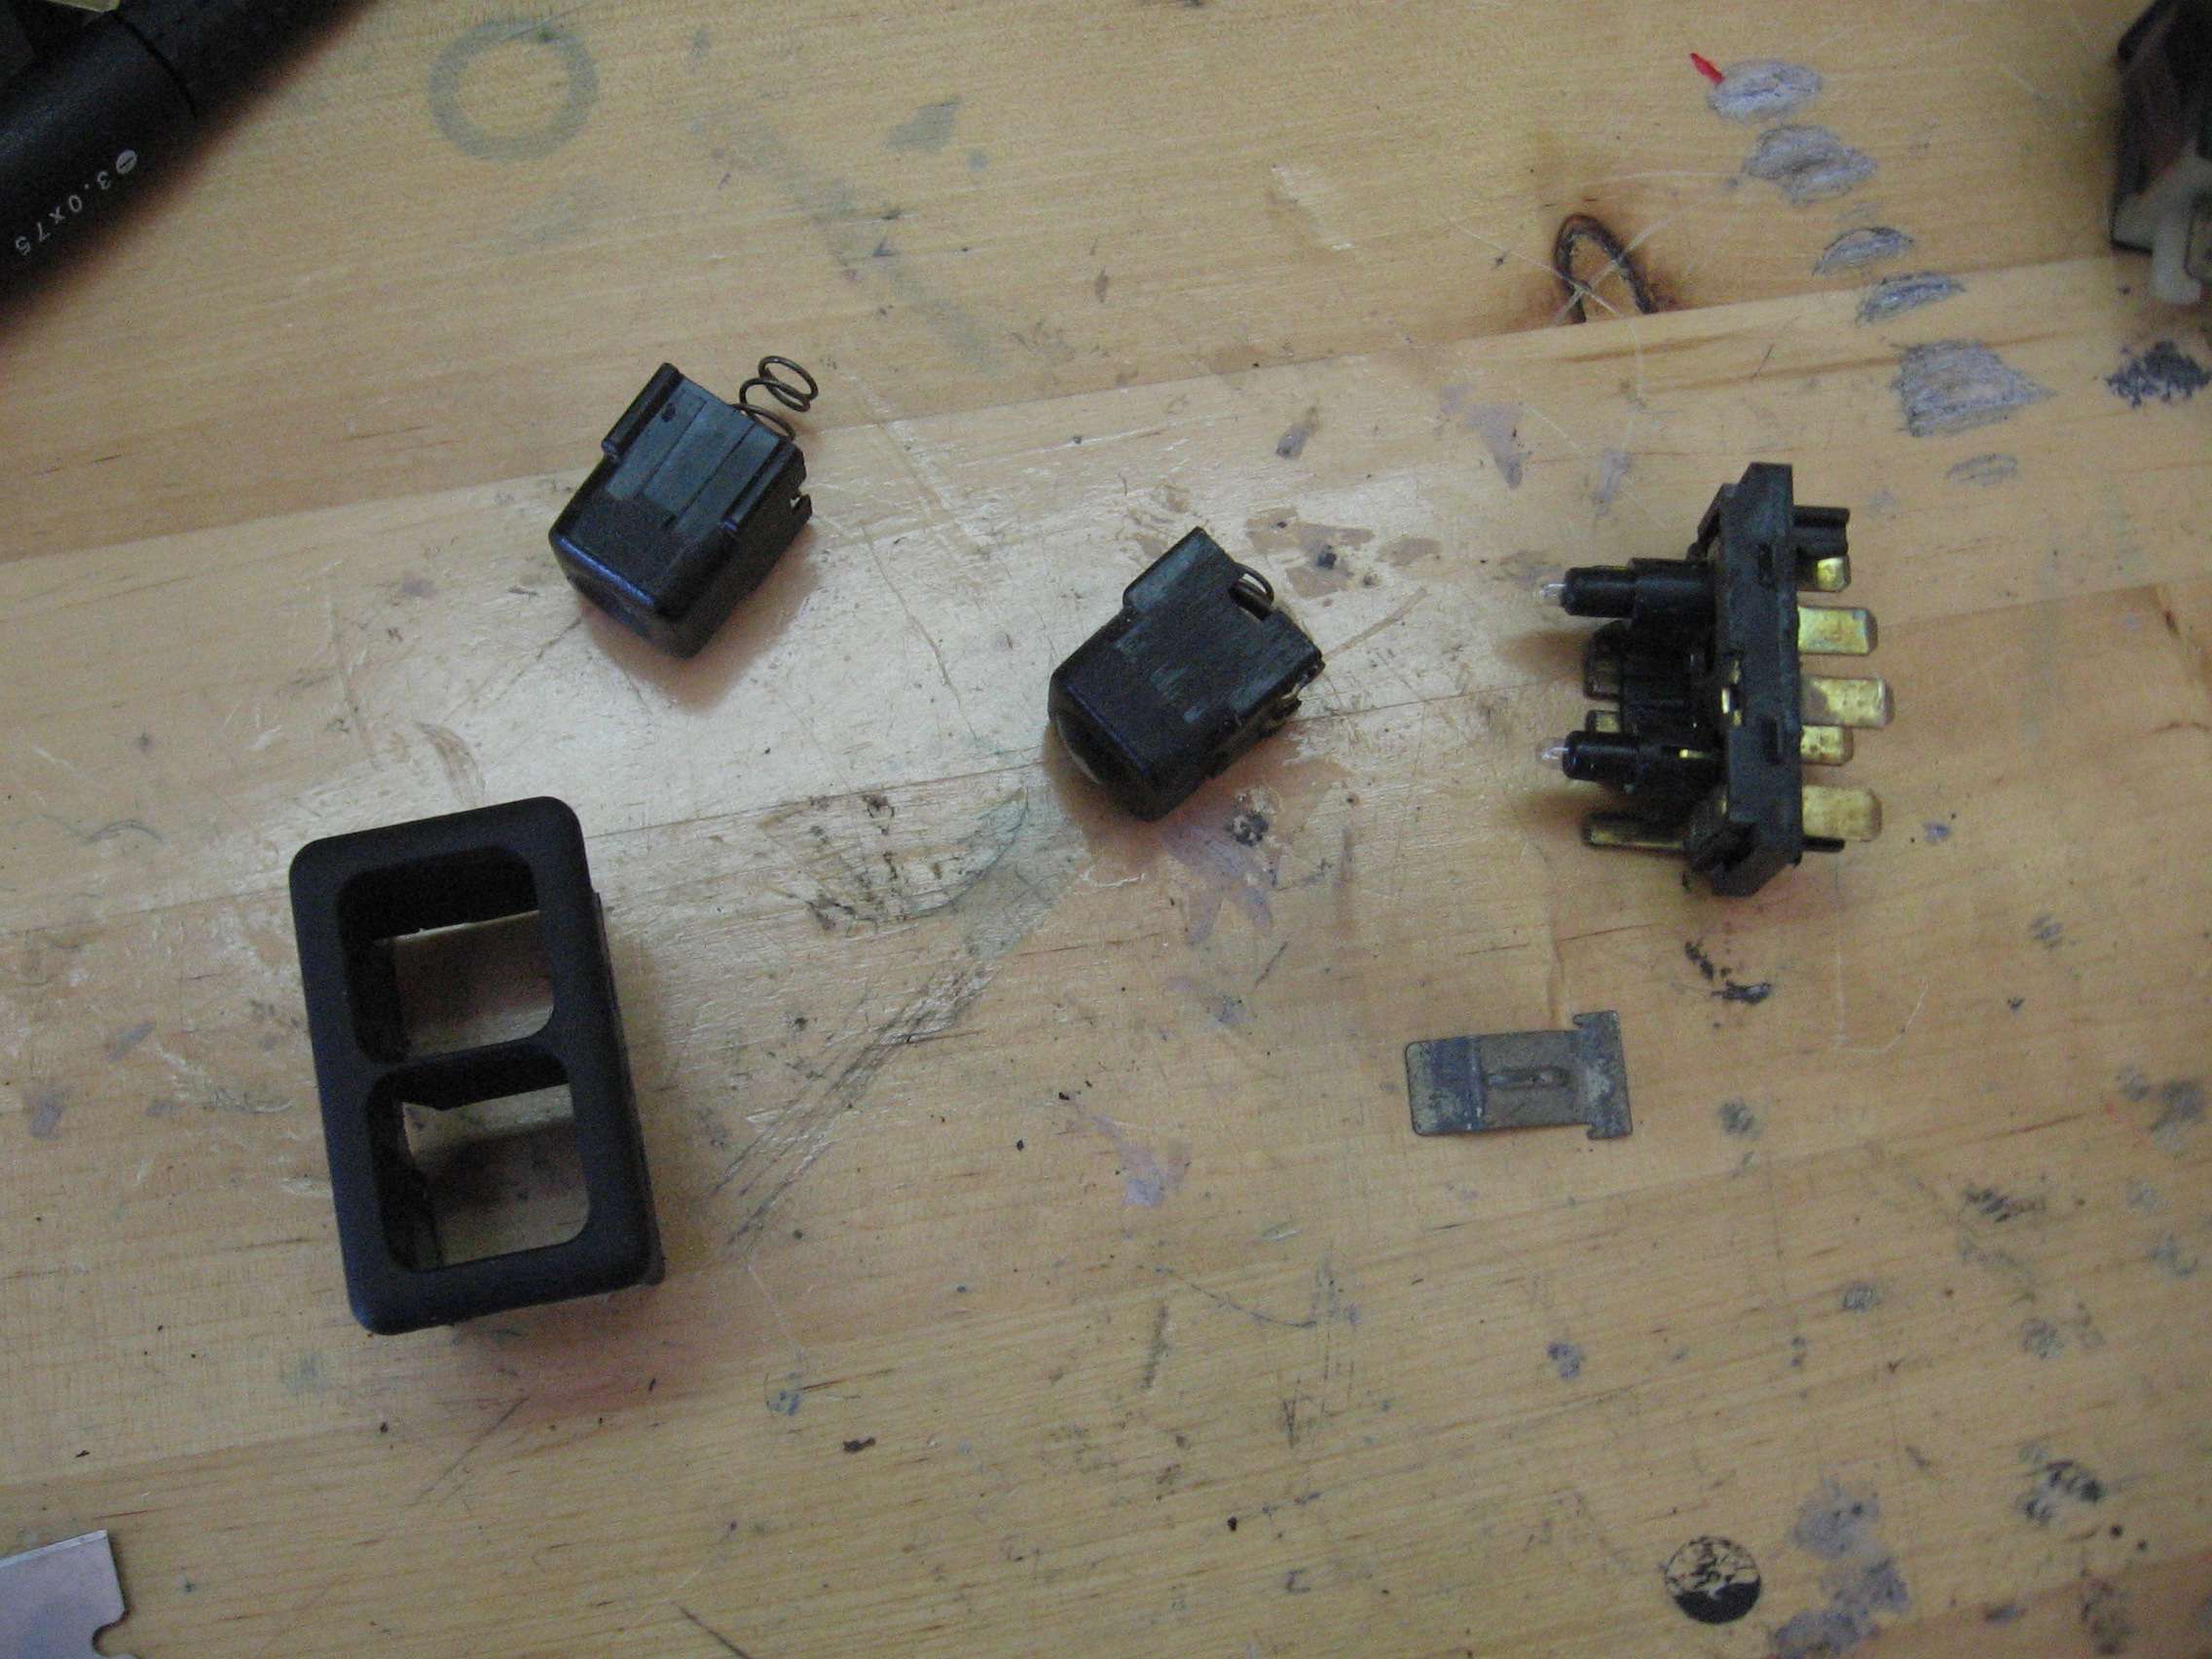
I took apart the window switches so I could freshen them up.
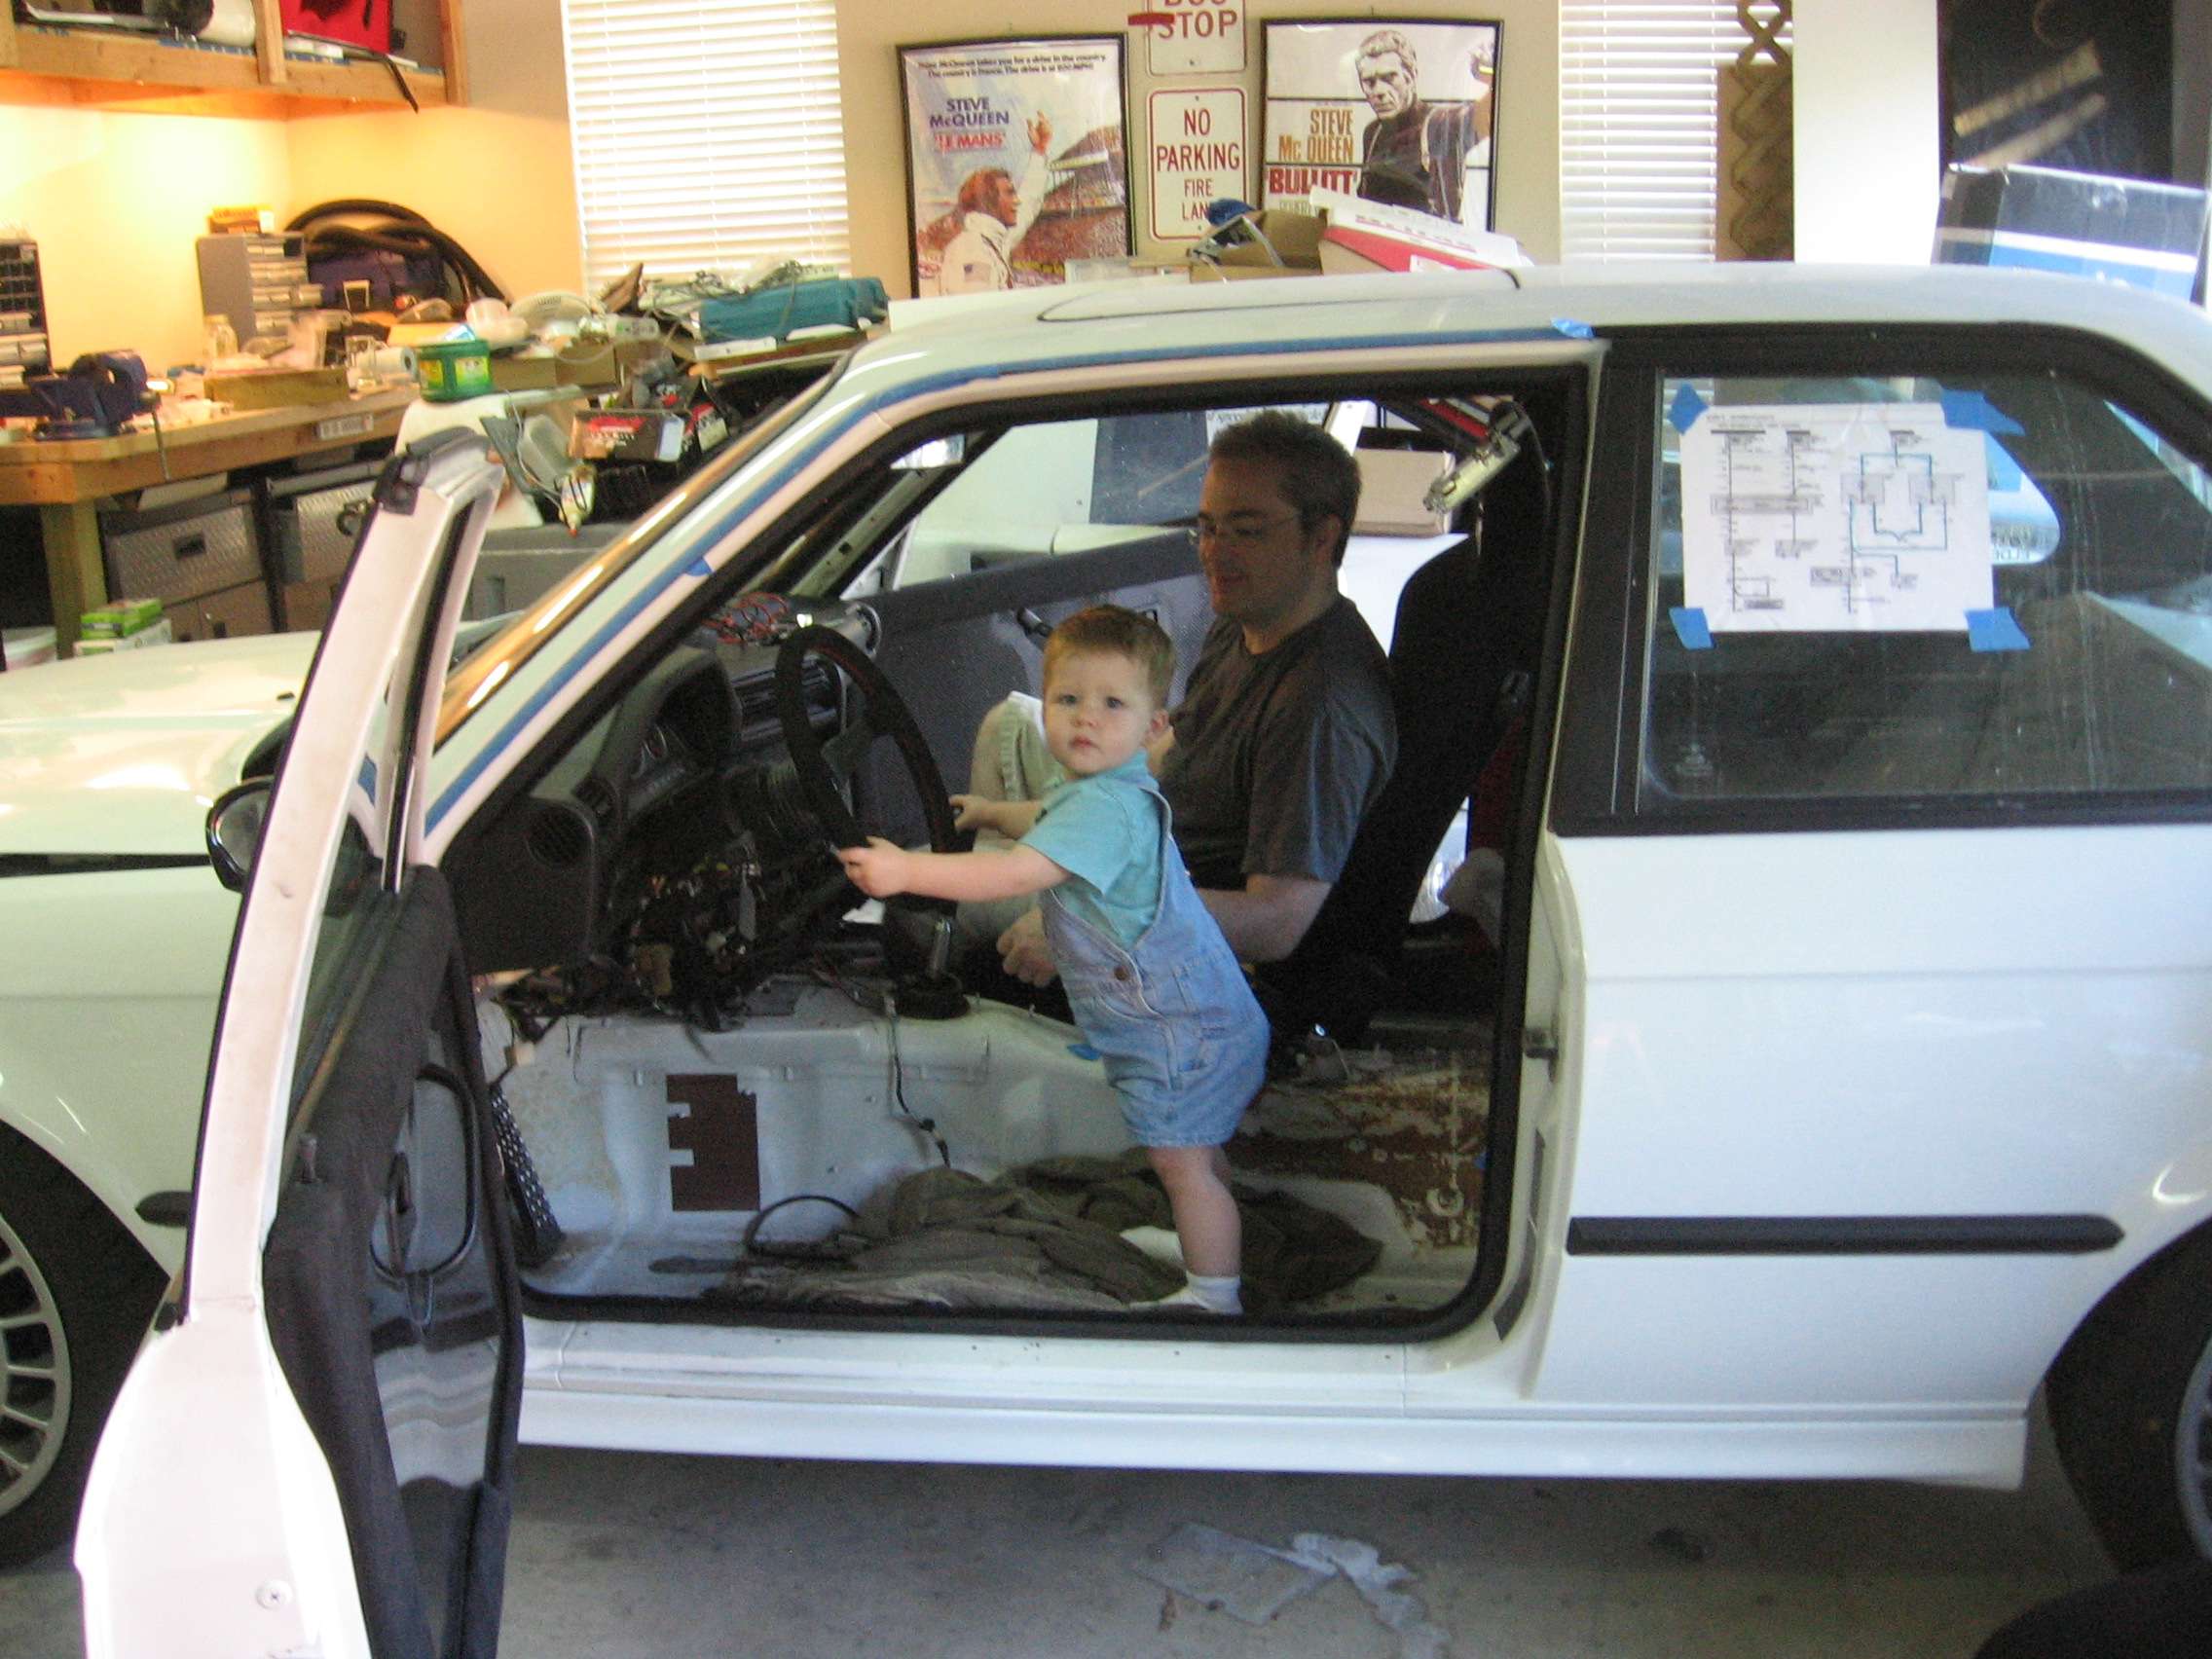
Prepping the interior, my son thought he should help.
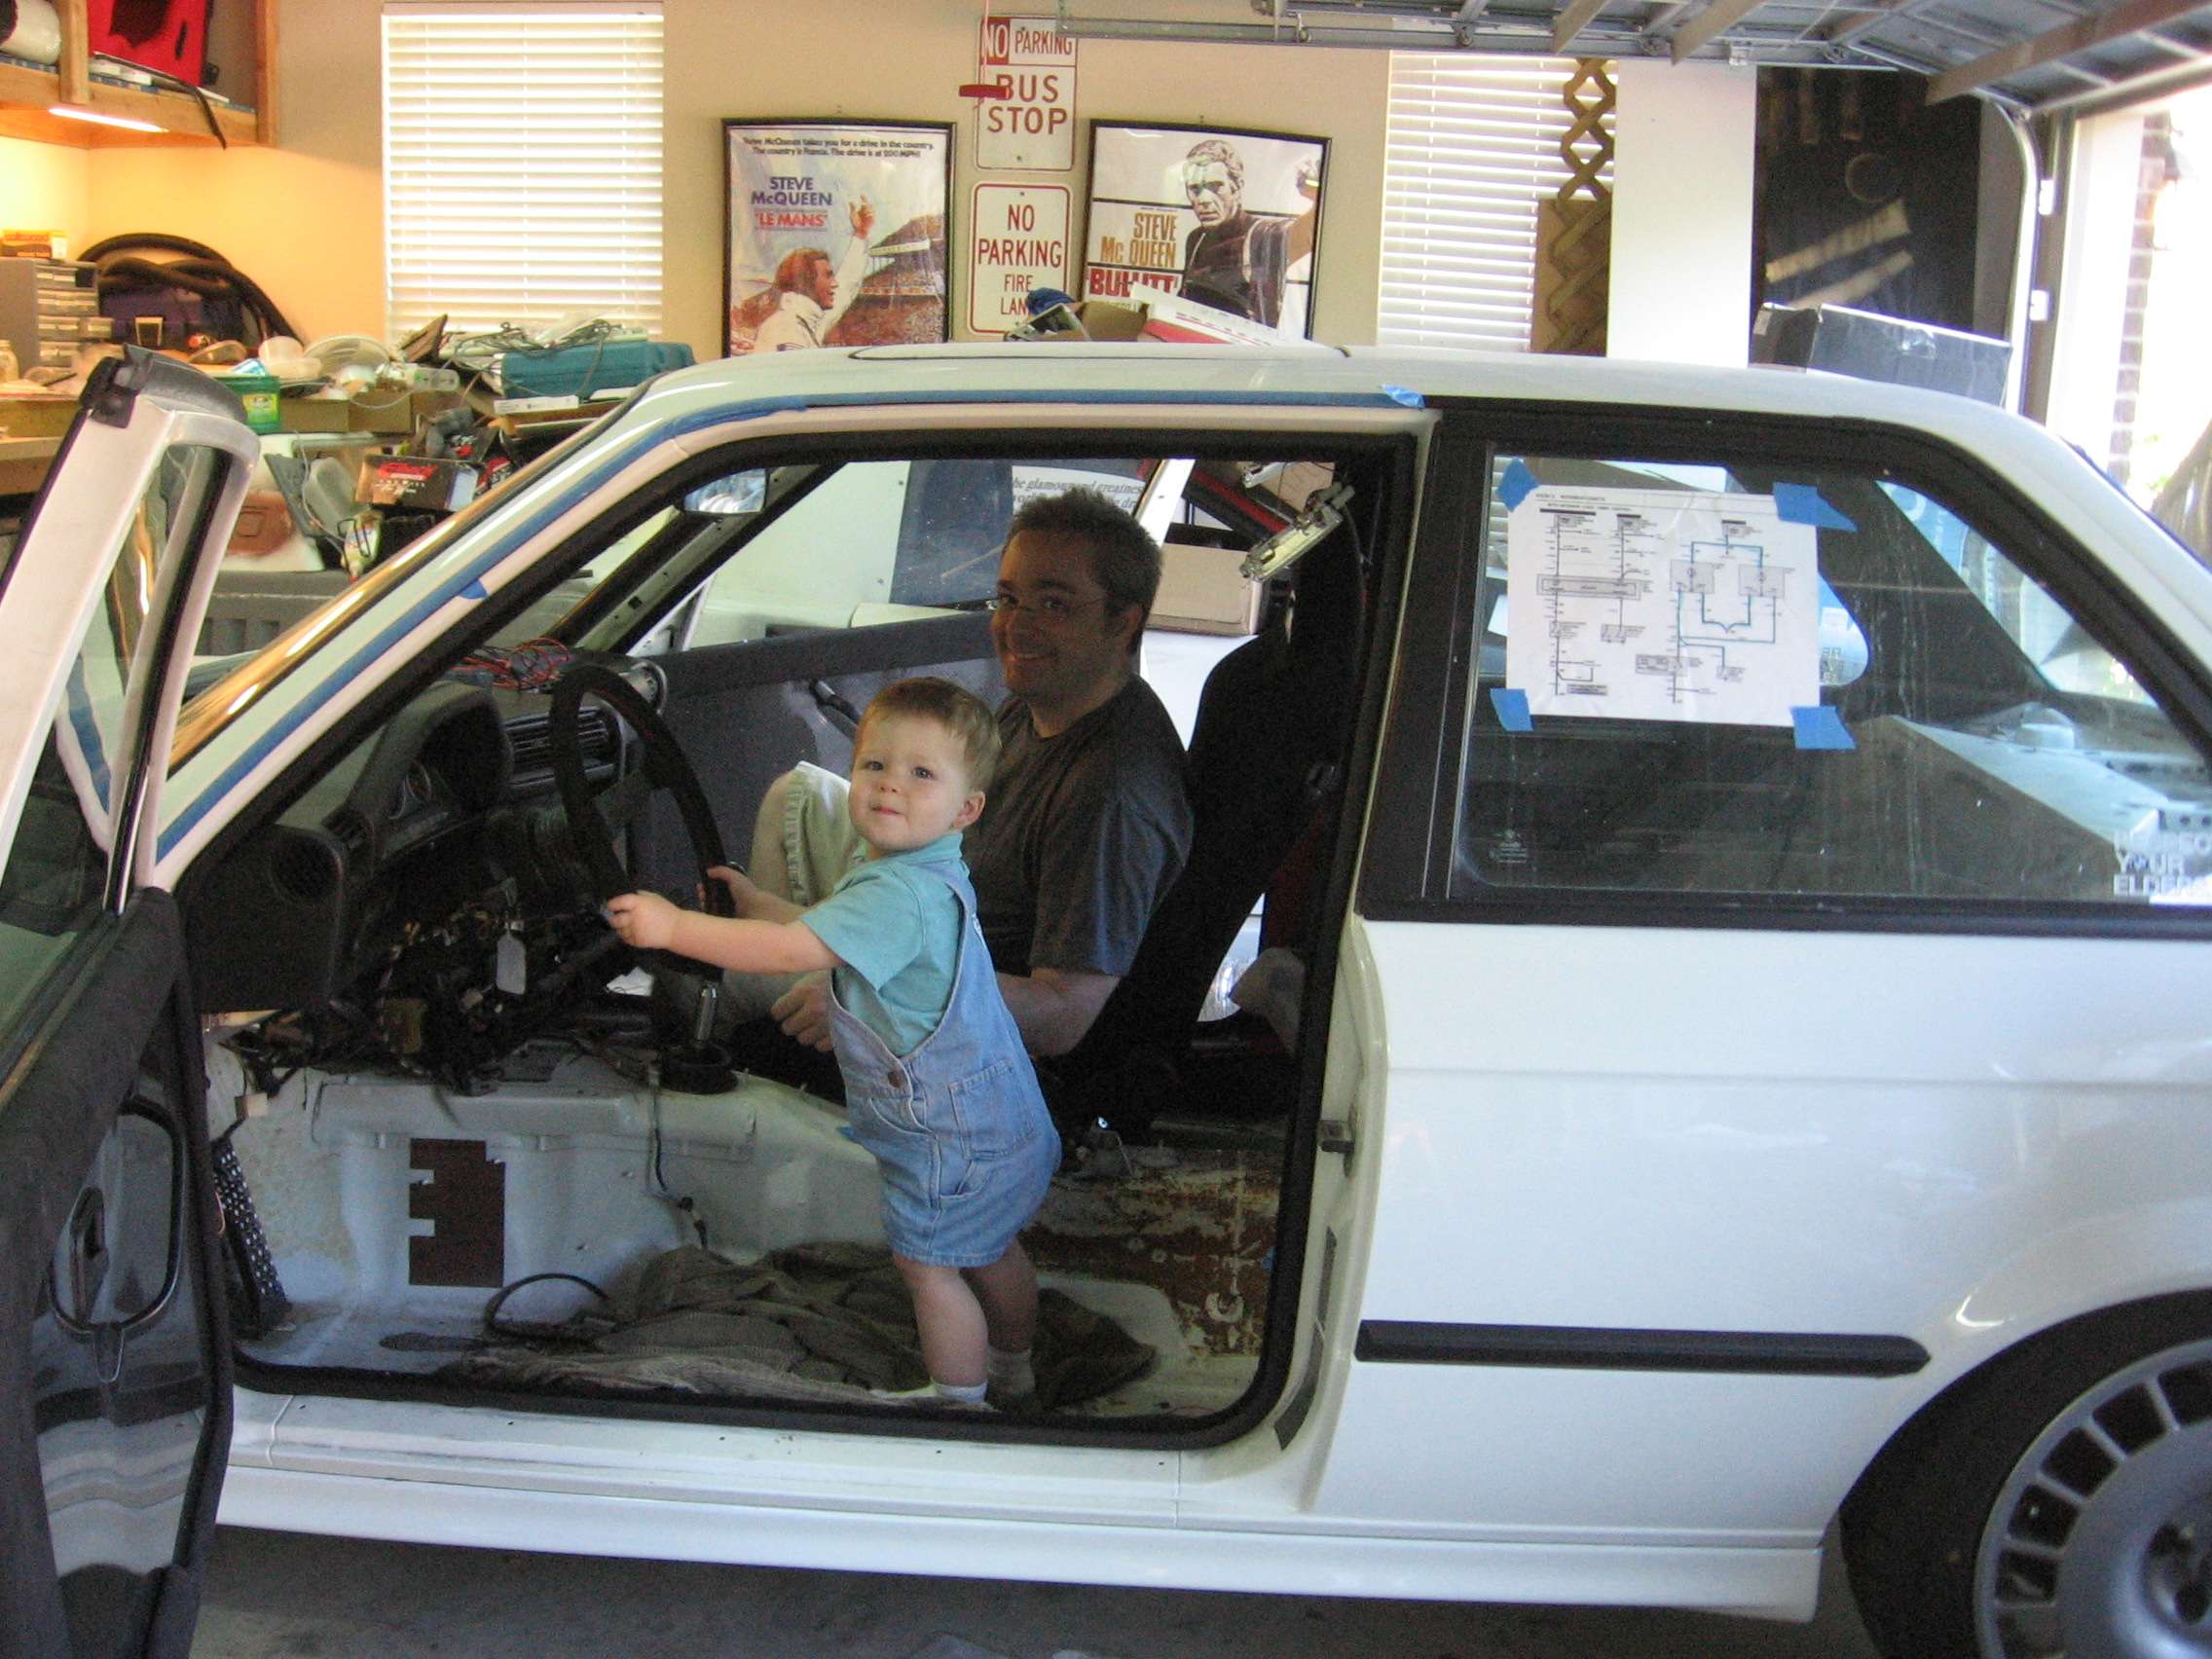
He quickly grabbed the shifter and made vroom vroom noises...
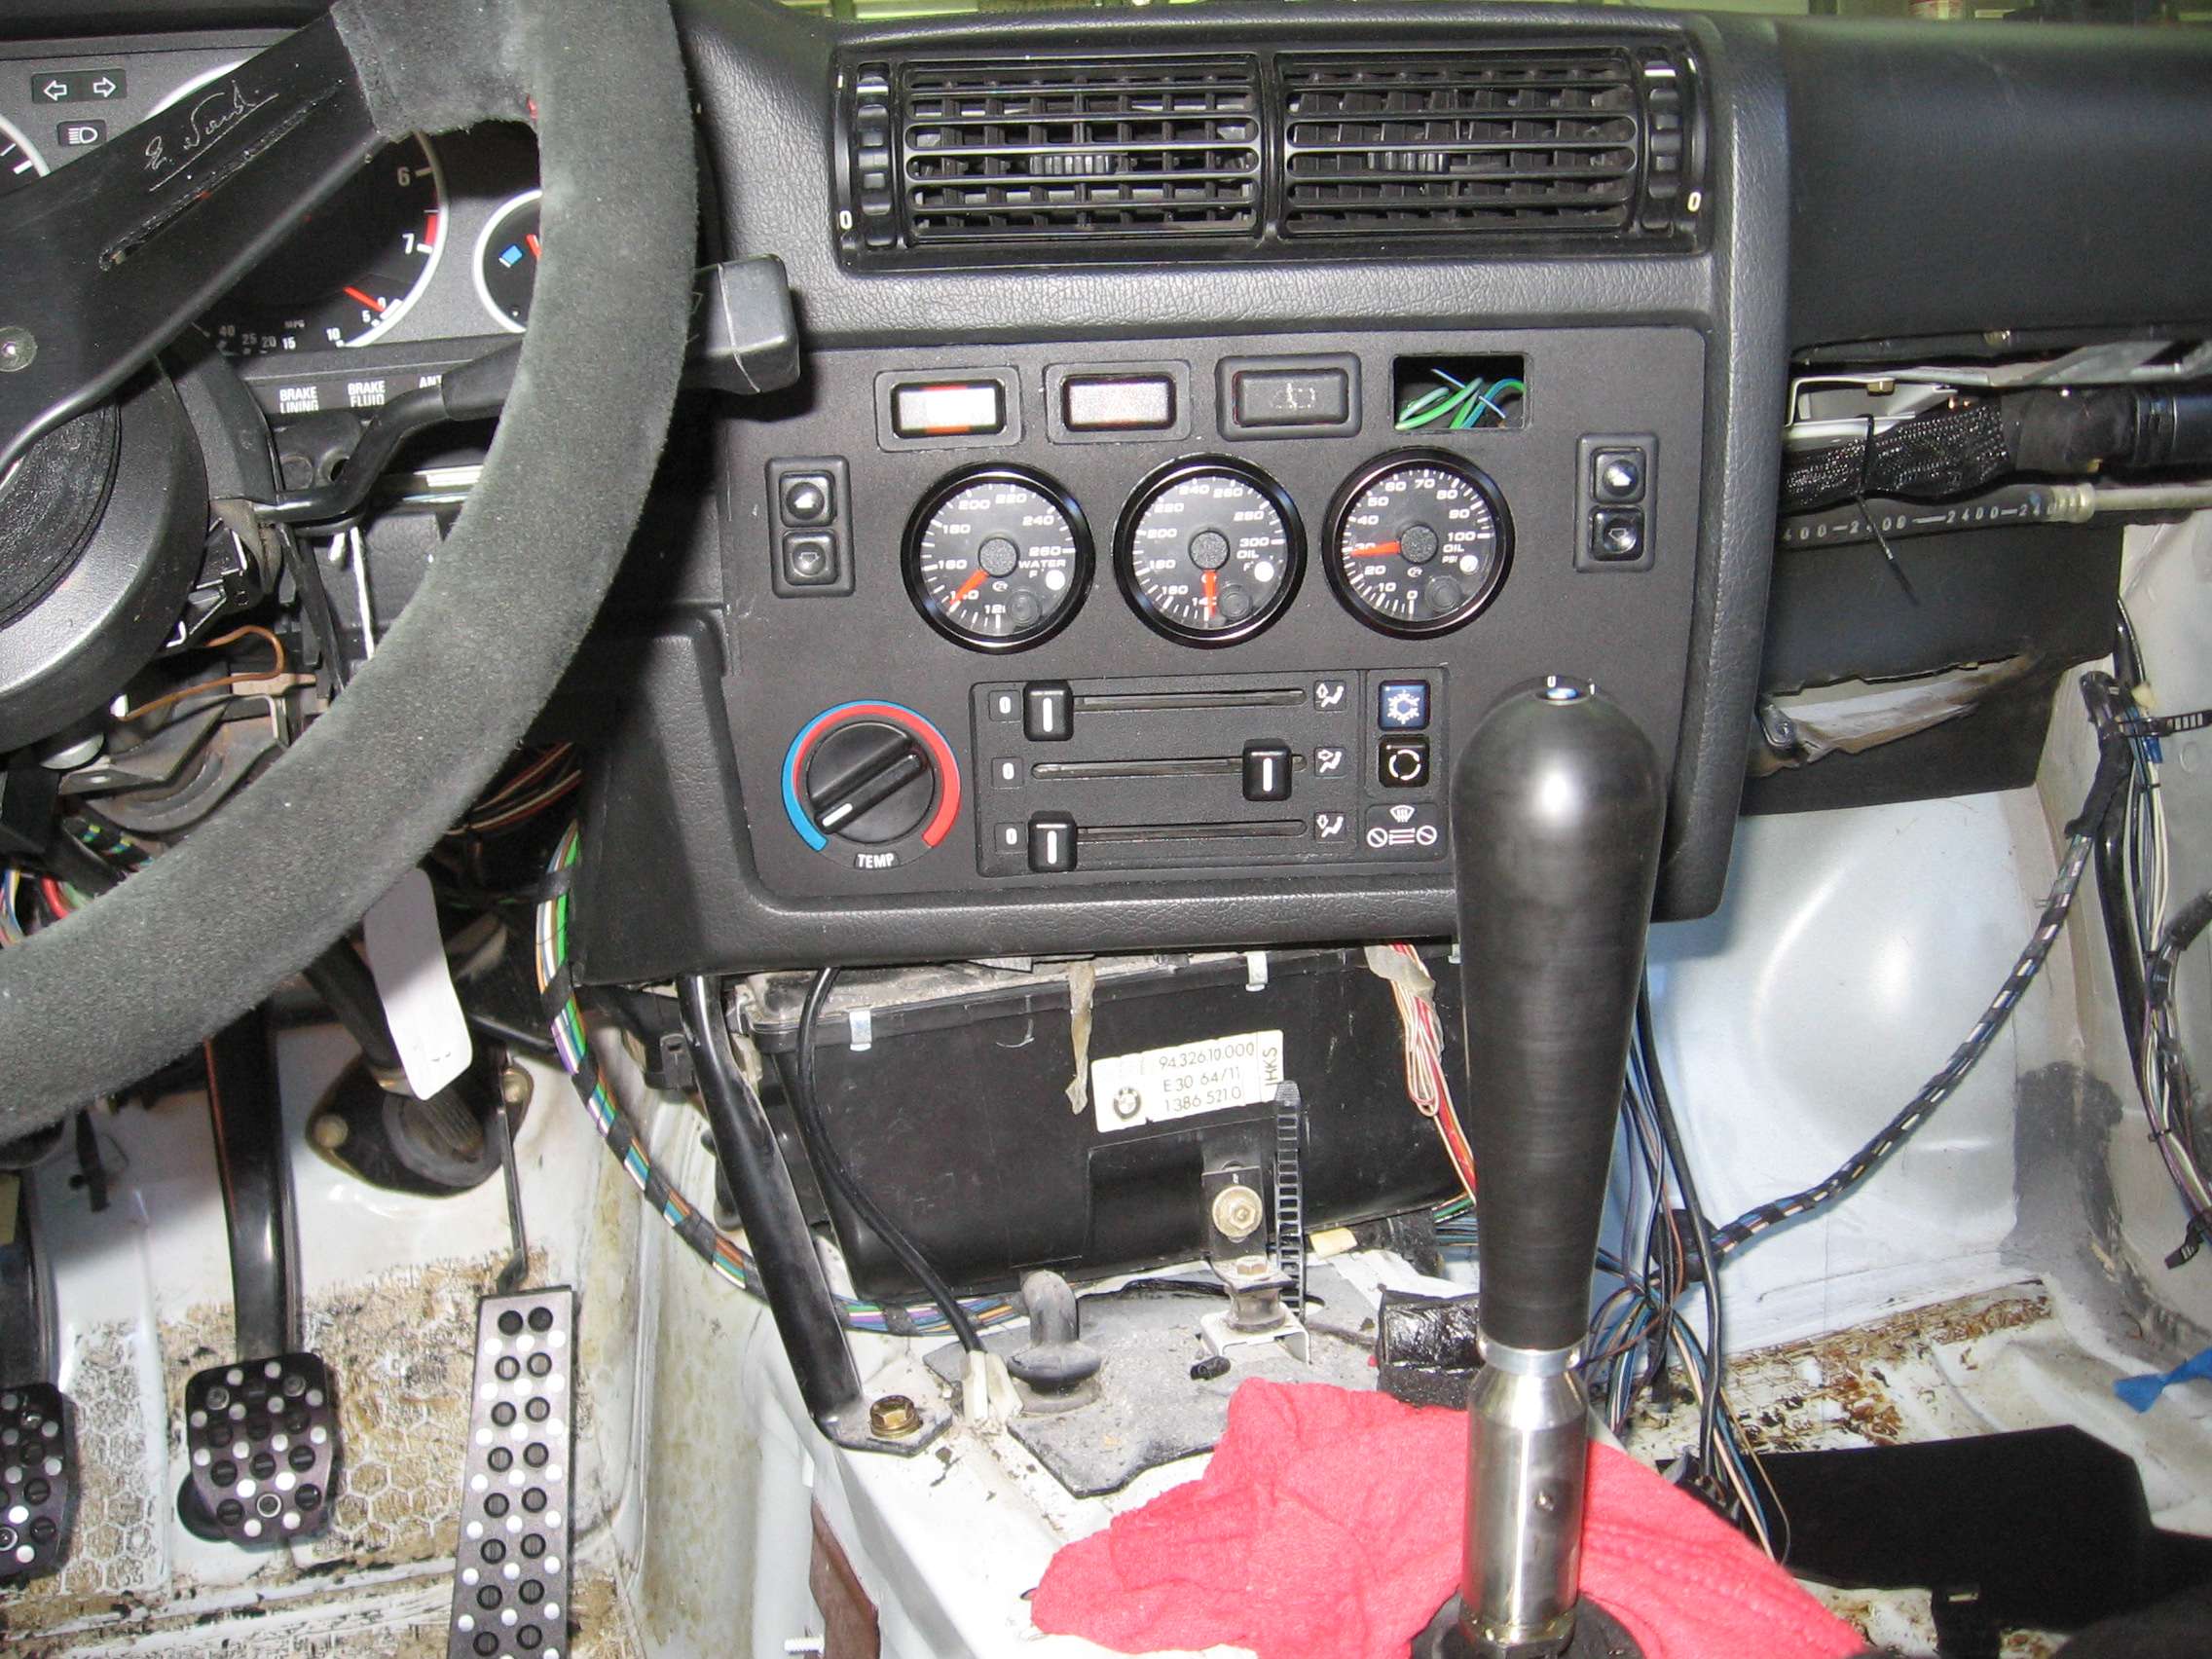
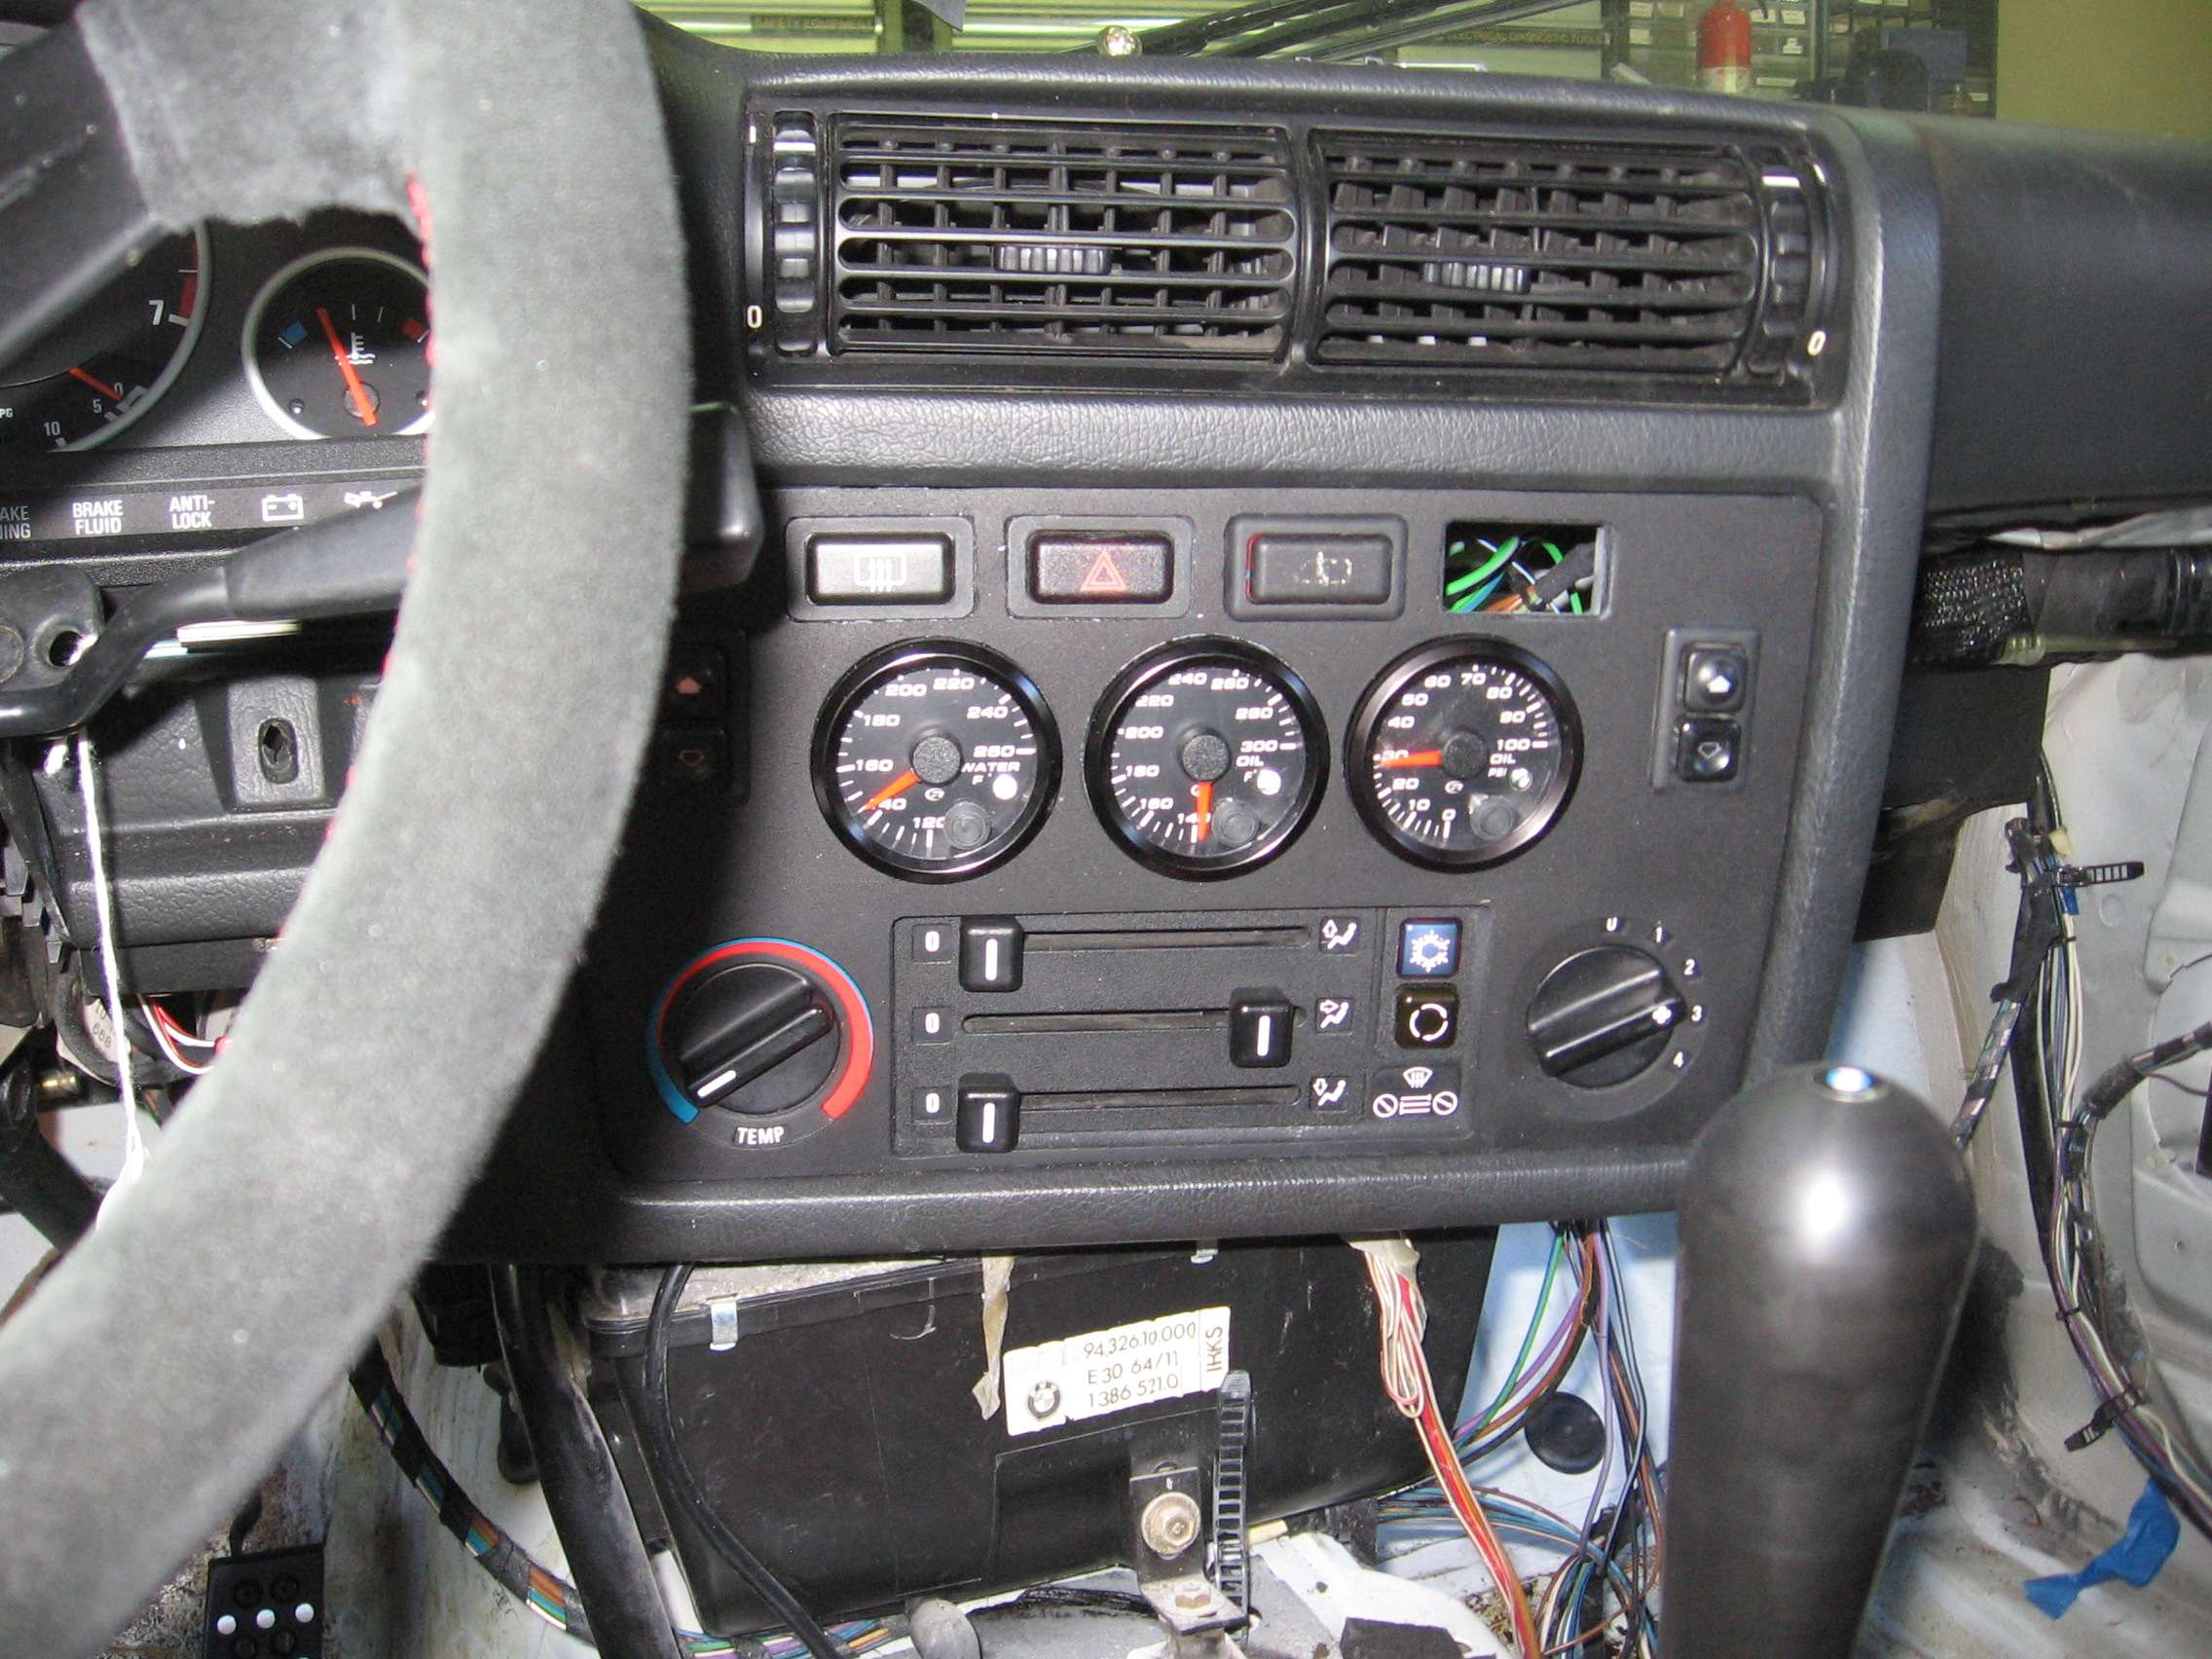
I made the connections and started installing the panel...
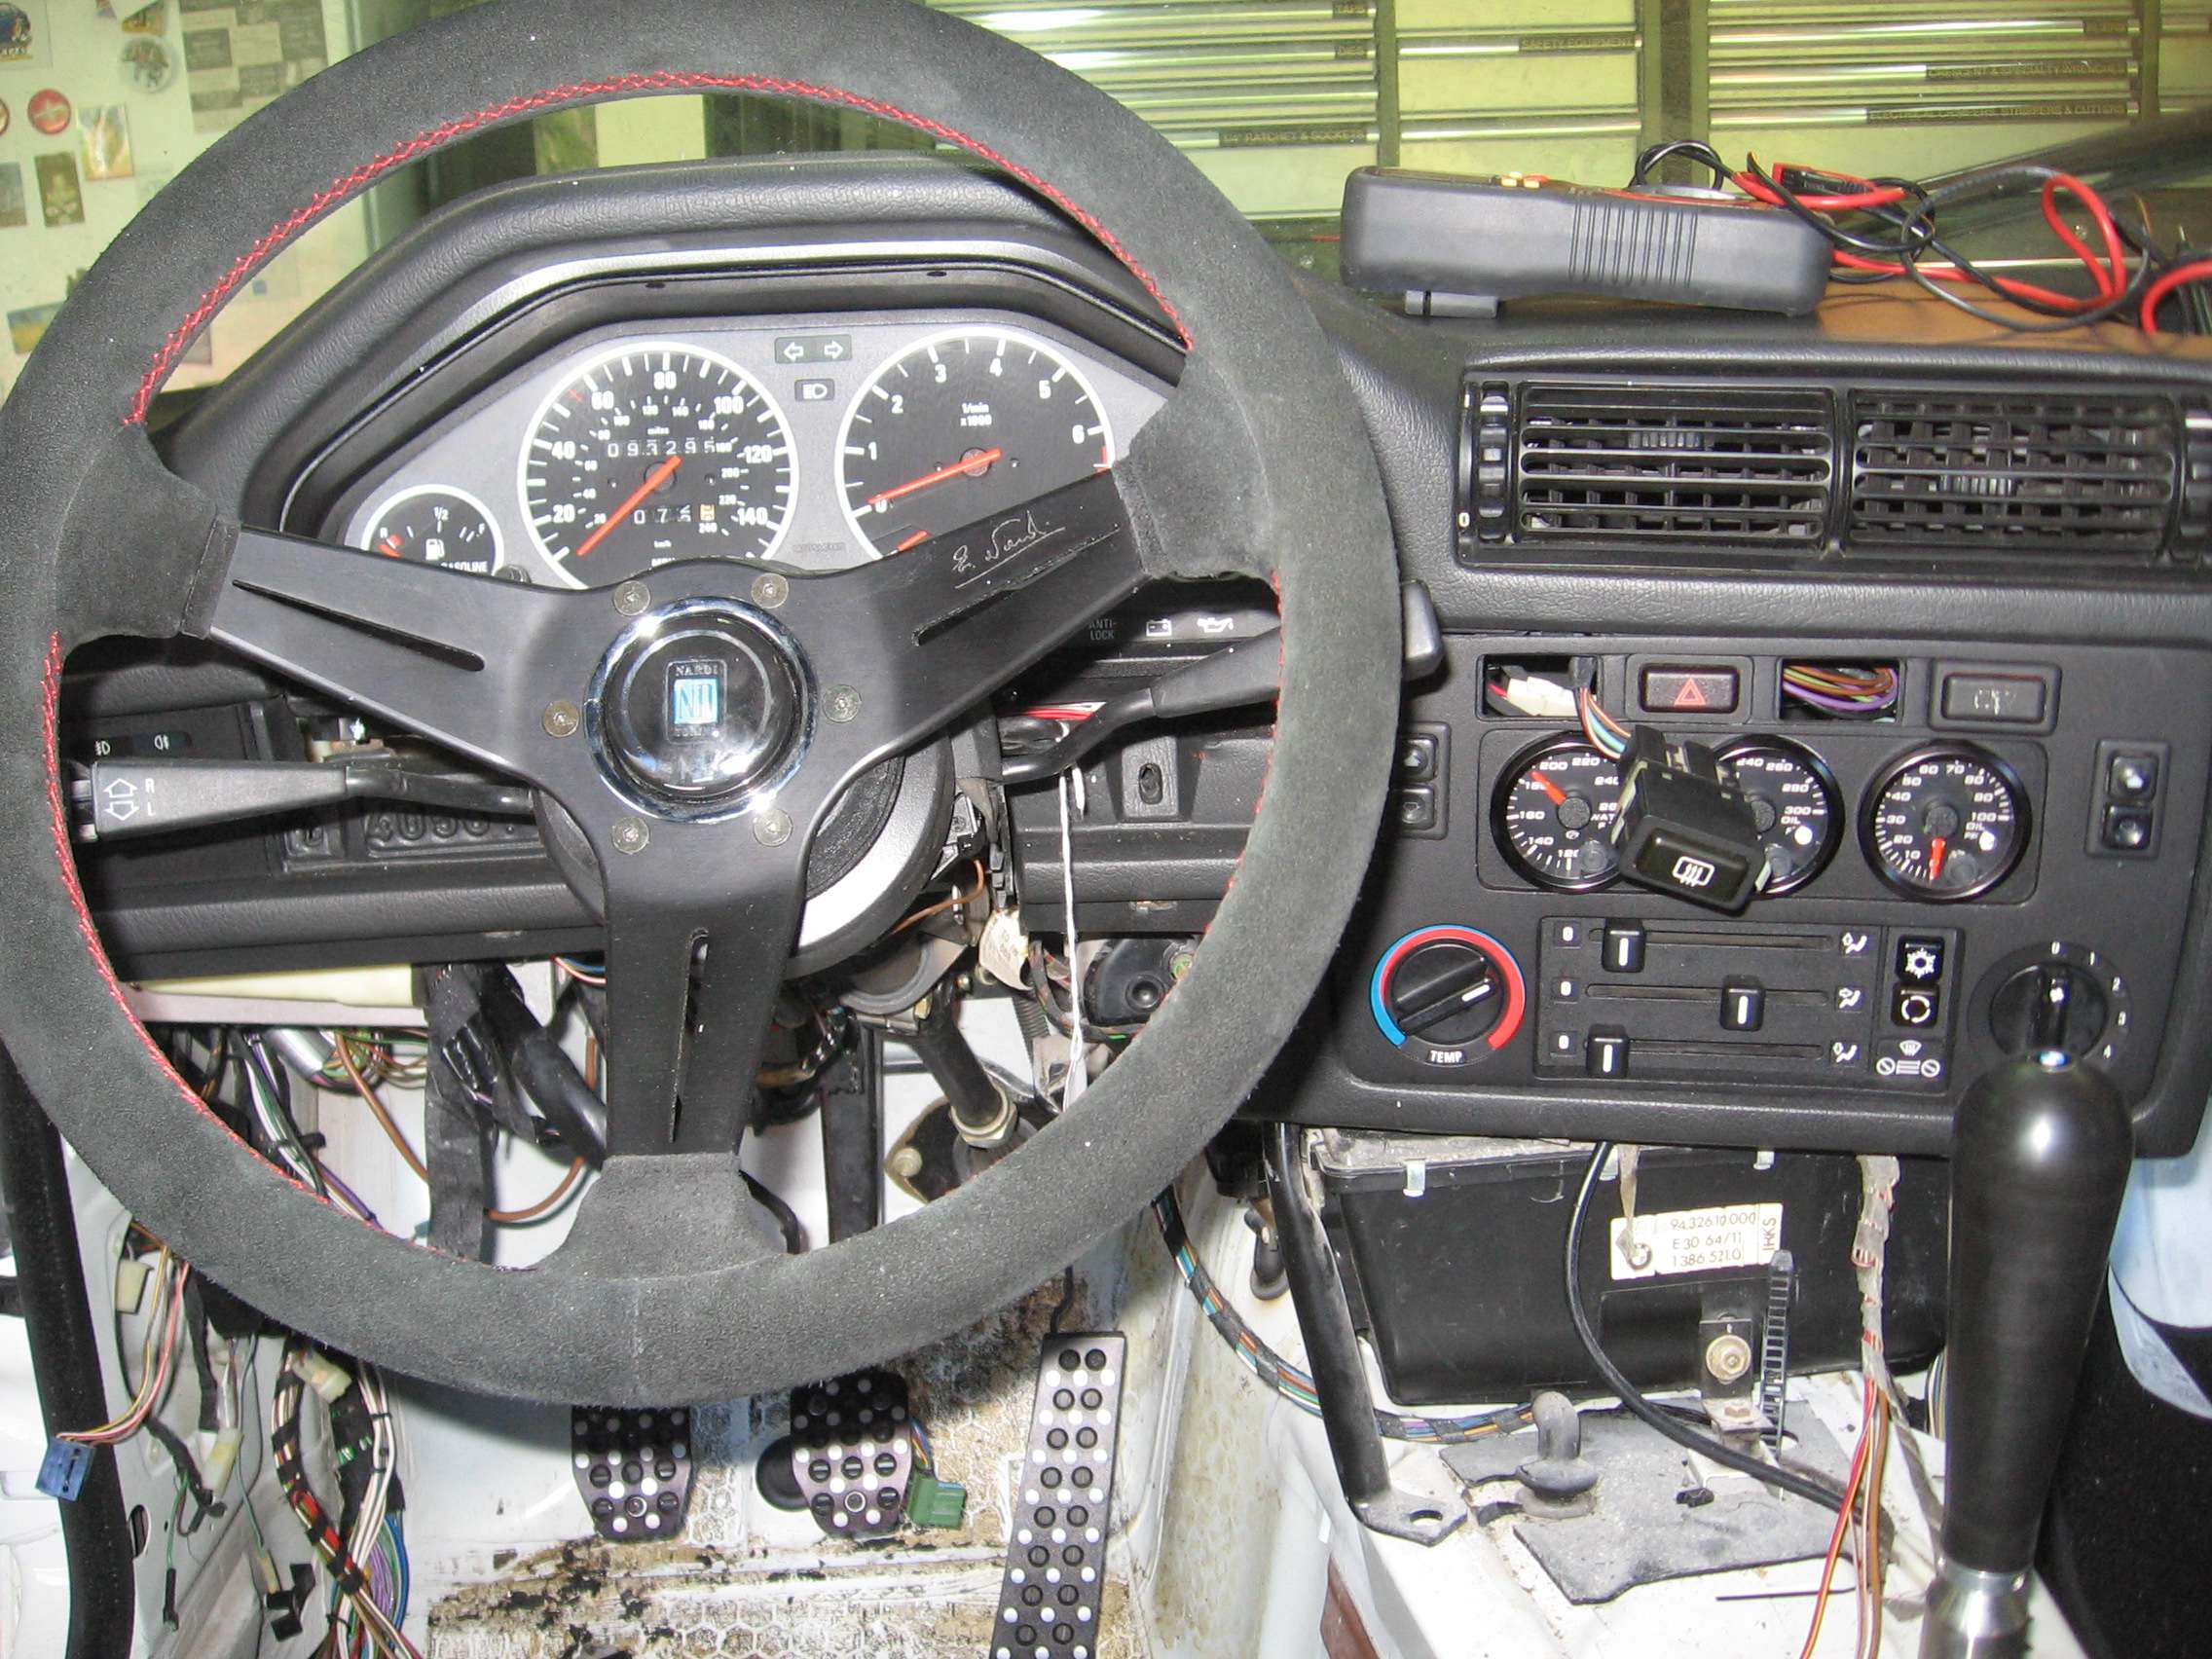
and it looked exactly as i pictured it. Looks stock but an enthusiast would know something was up.
As I tightened the screws, I heard a pop.
I was pretty crushed at this point. Something clearly happened with my prep. So right now I'm looking at some plastic repair kits to make it stronger and less apt to scratch. A new panel lists for 300 bucks so that isn't an option either. I'll be in Lake Forest, CA for the rest of the week so hopefully the time away will rejuvenate me.
In closing, I'd like to leave the following pictars...
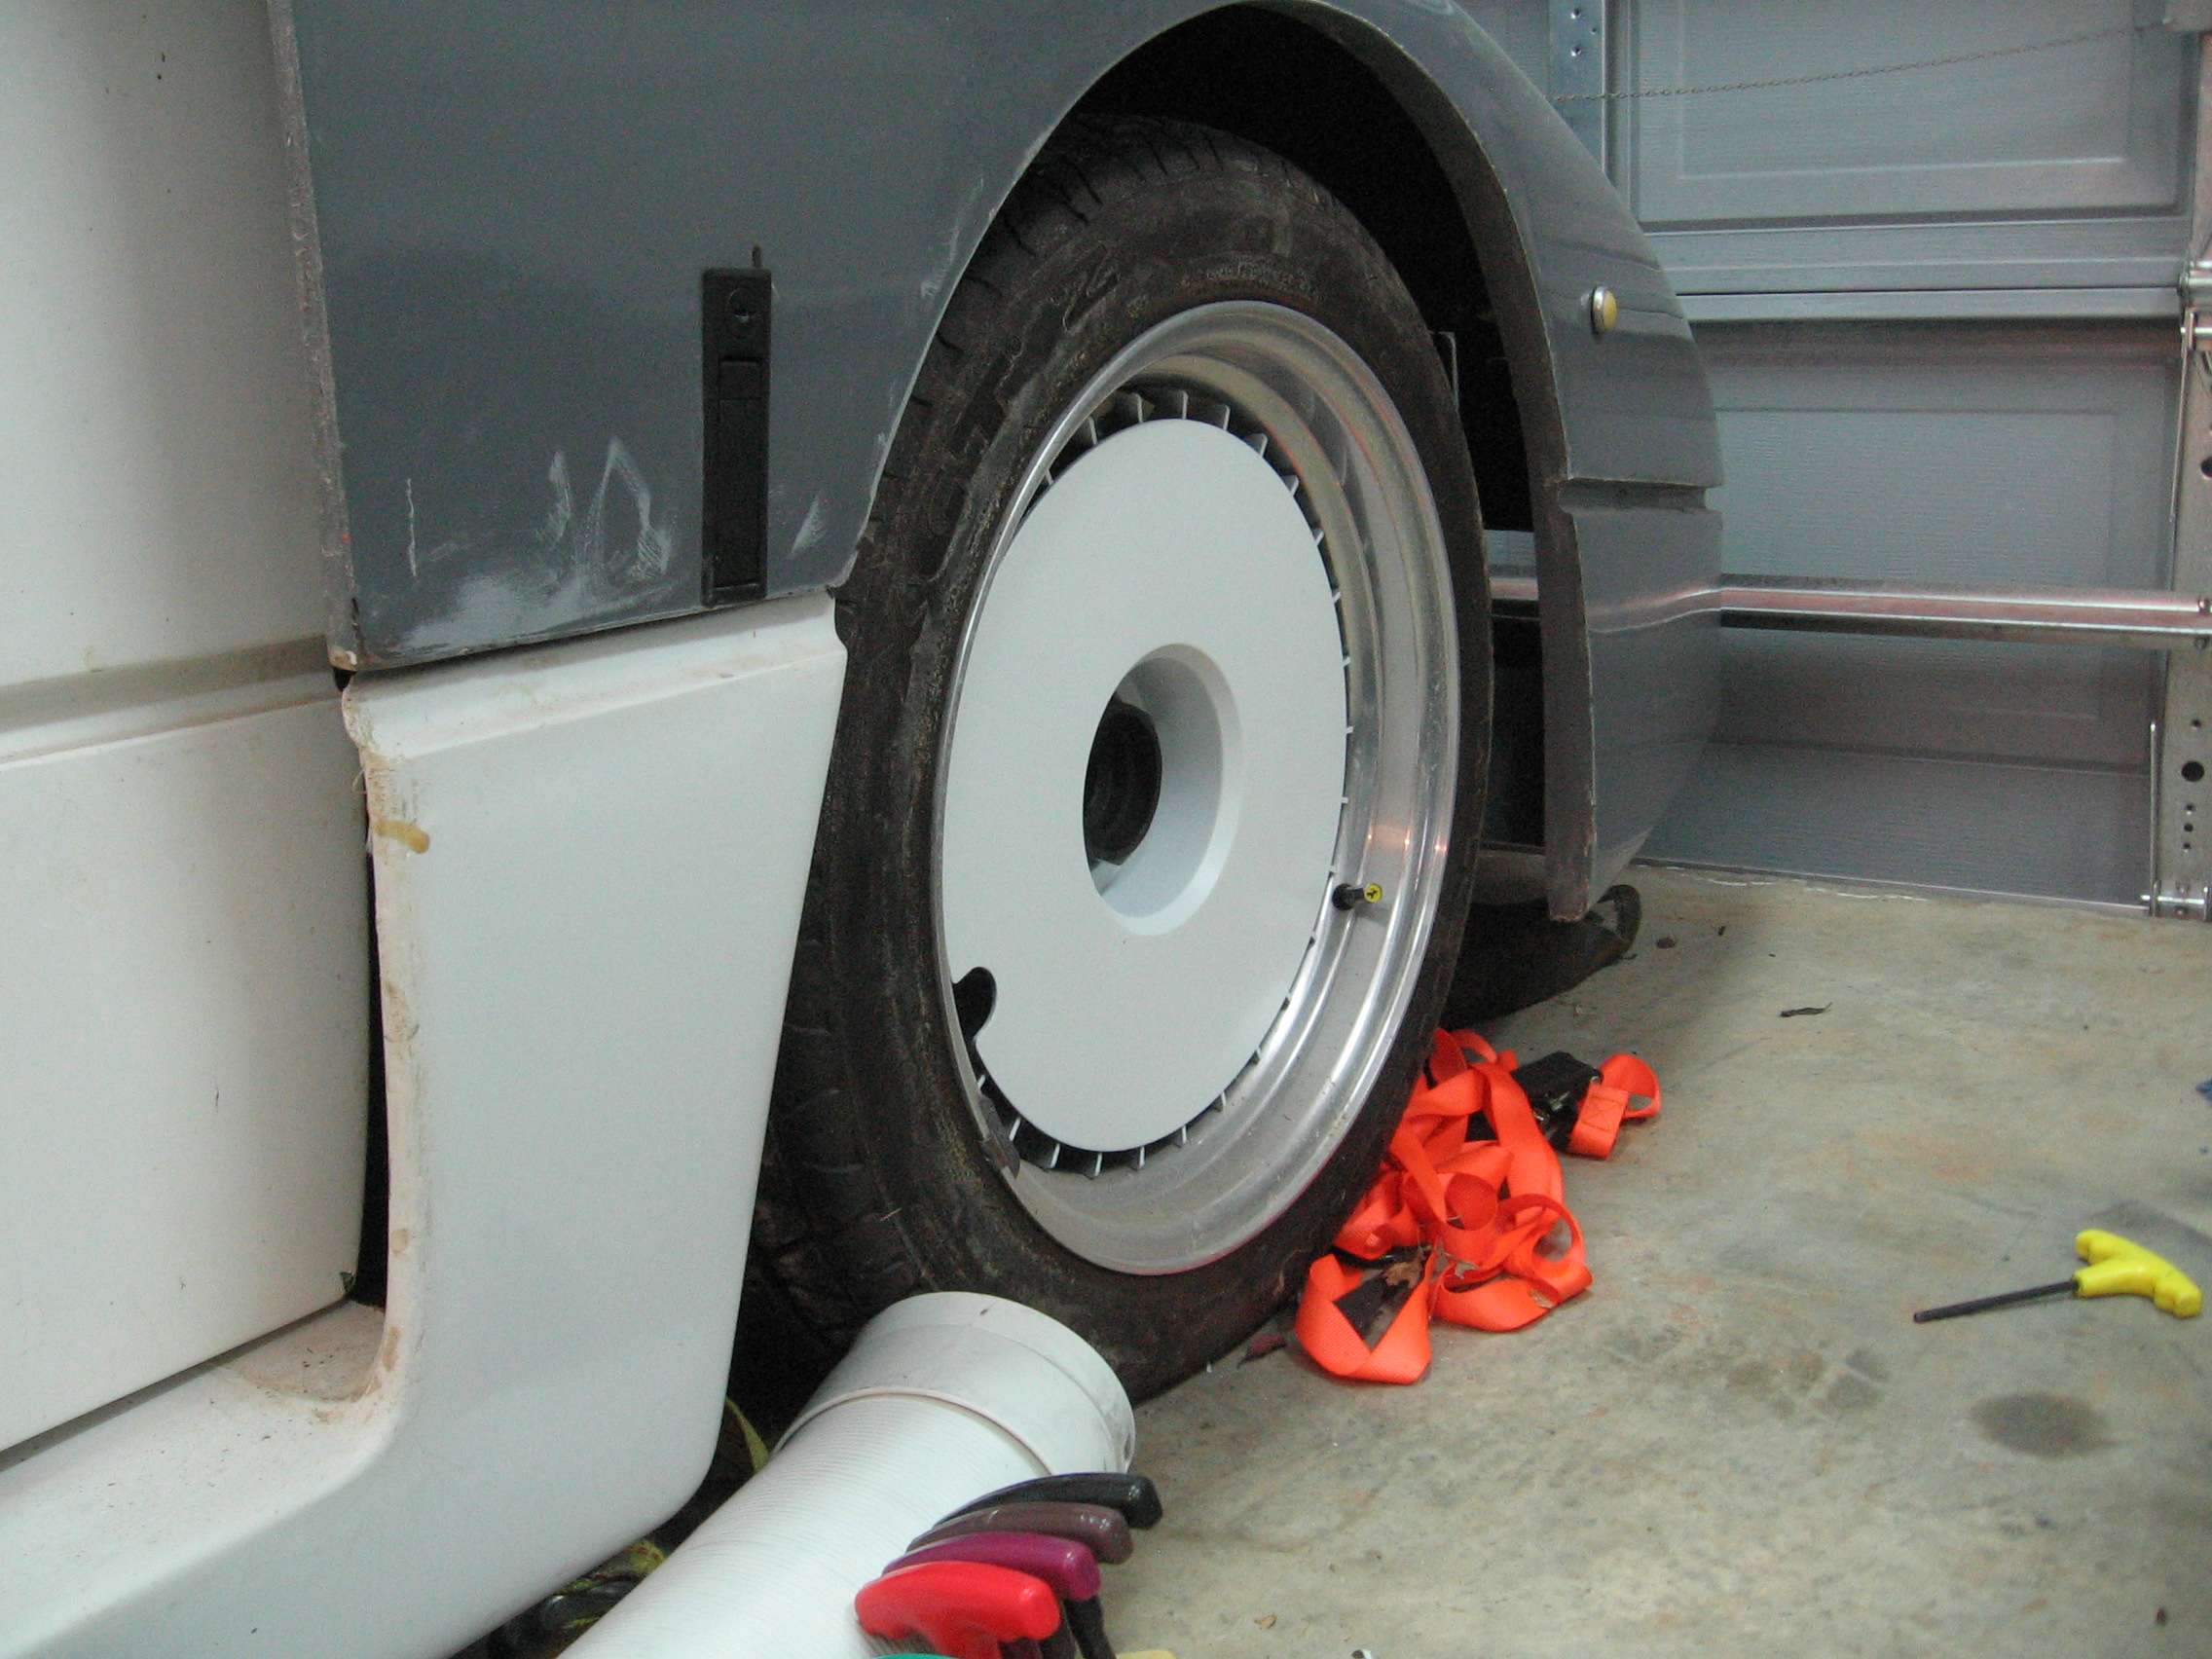
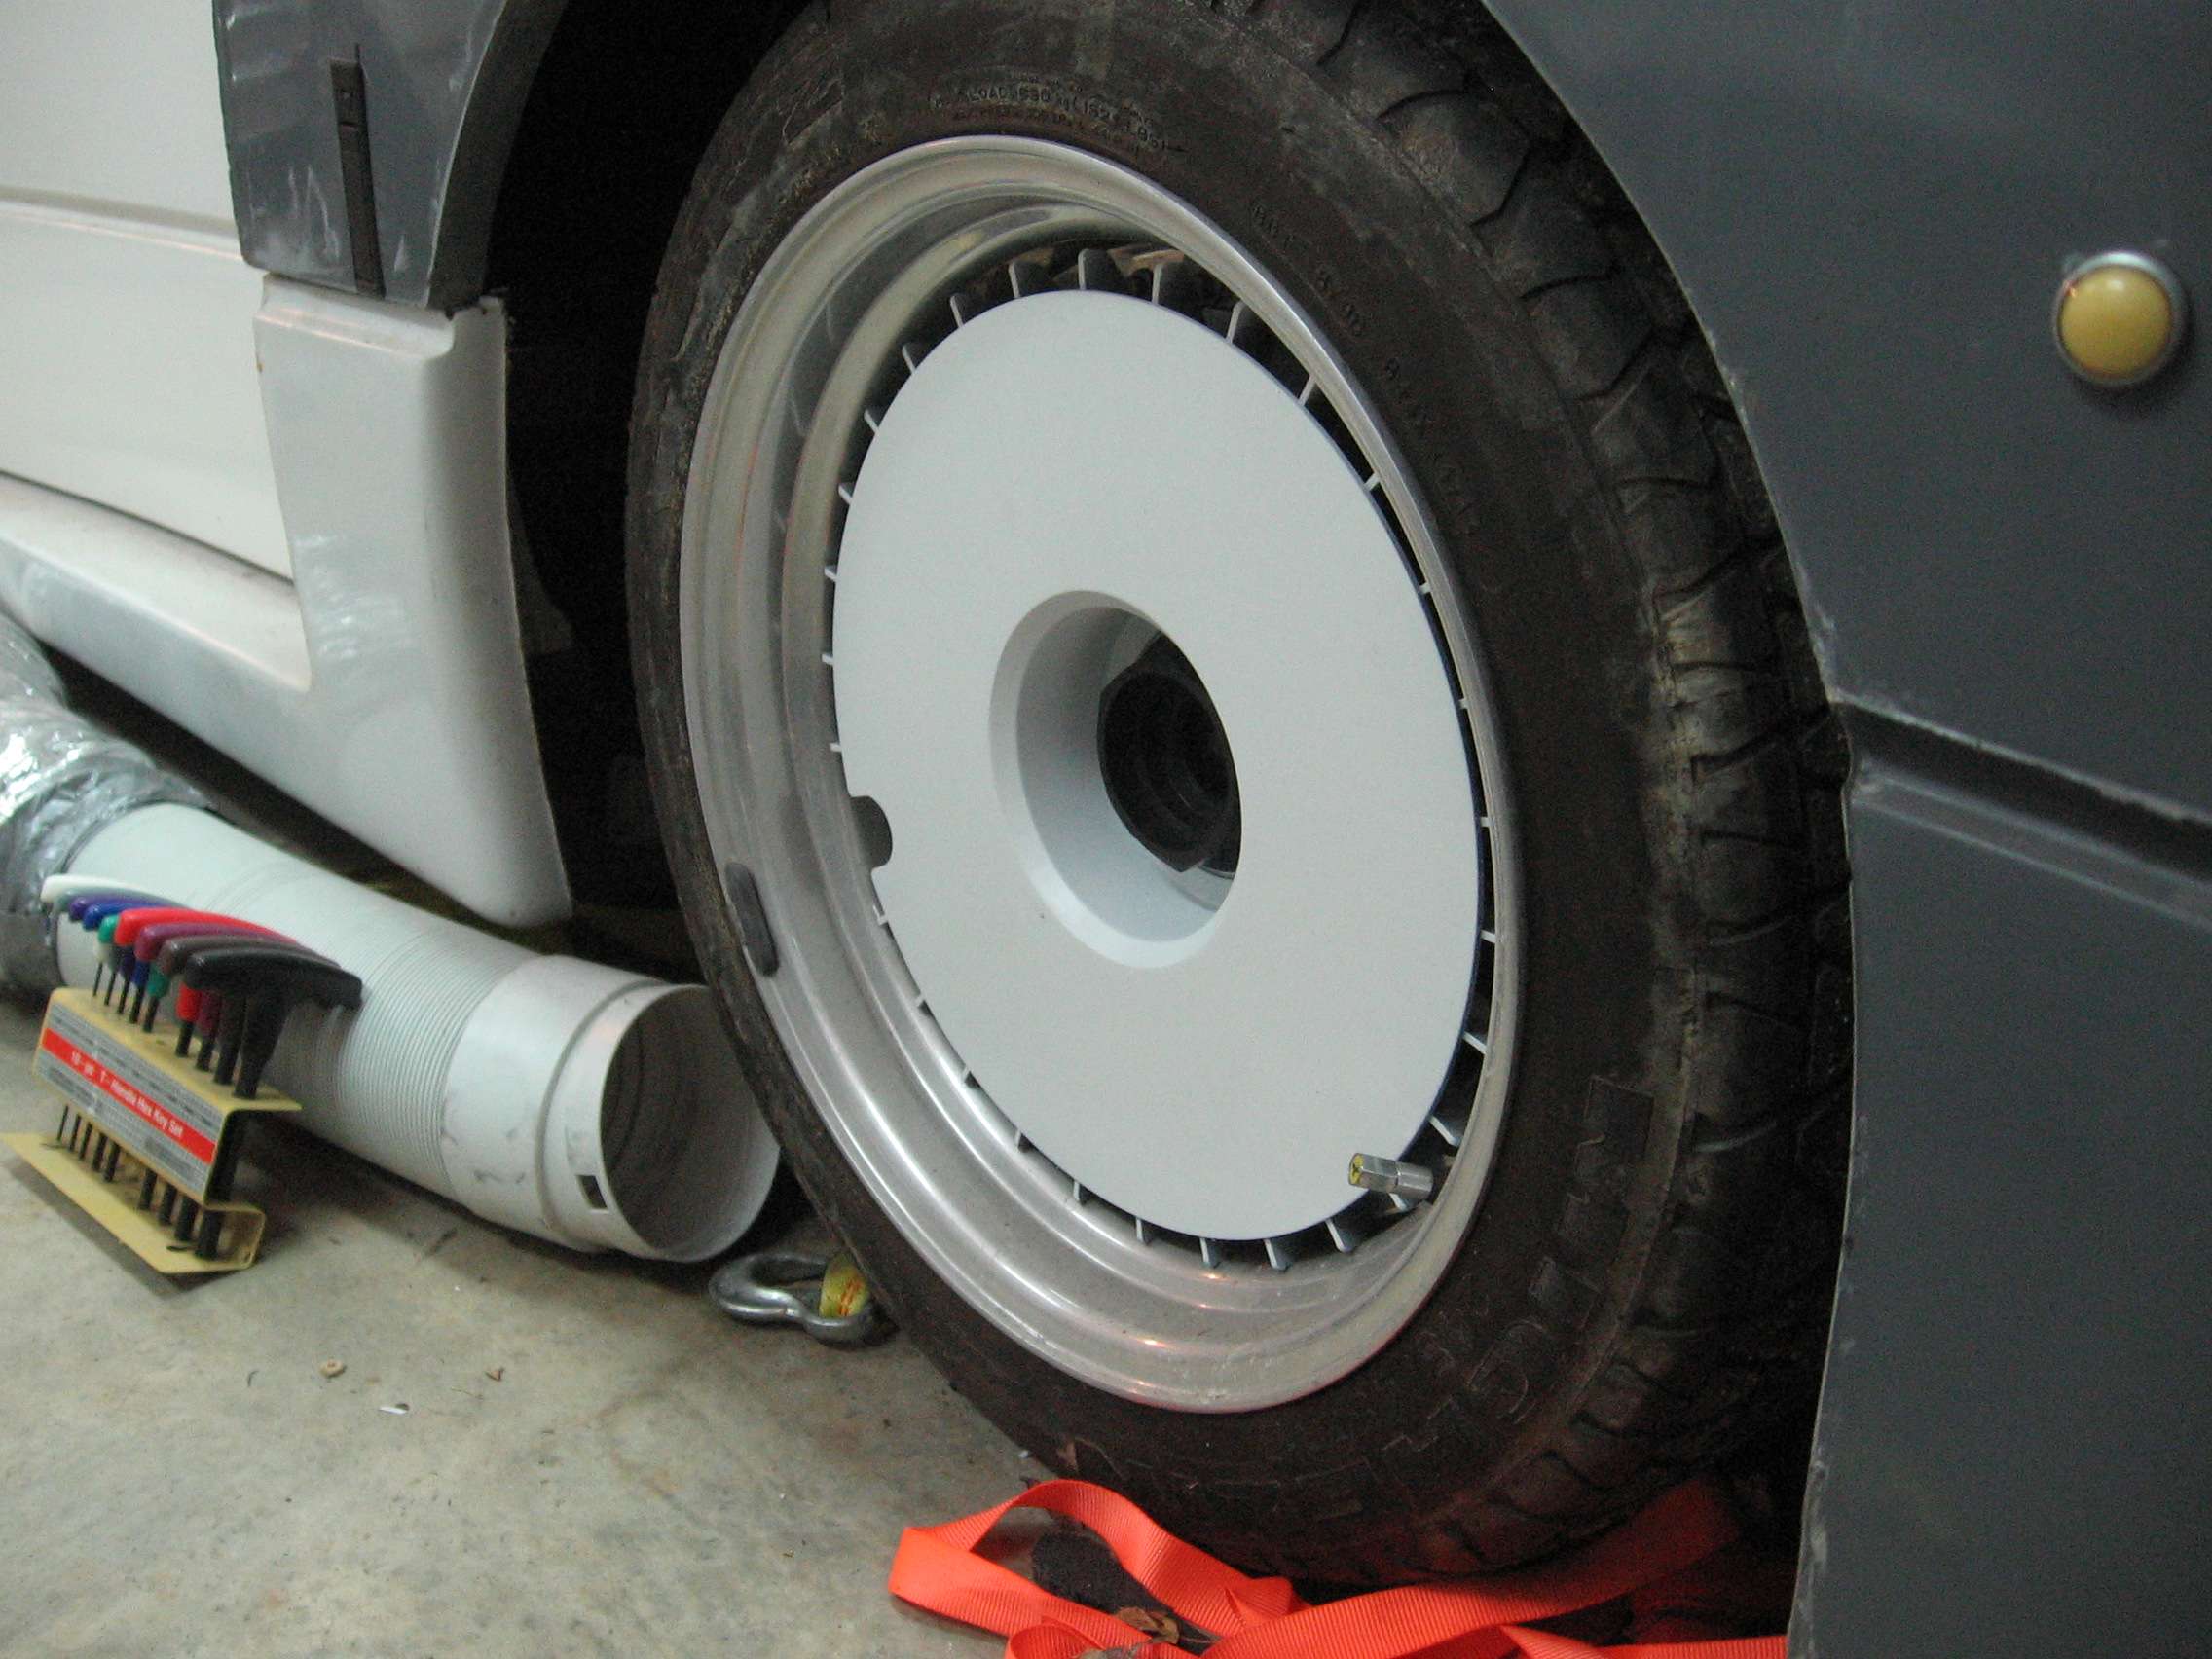
that should satisfy those of you wanting turbofan pictures. ;)Leave a comment:
-
I did retain the metal obd2 spider hose. I capped off the ports used for the throttle body warming circuit. i'll look and see if i have a picture.
Been on a cruise vacation for a week. I'm back now with my porcelain white skin slightly less translucent and a bit heavier from the food. Right now I'm diagnosing some electrical issues with the interior lights (i hate how fragile they are) and tail lights. Been working the HVAC panel too and I should have some good updates this weekend...provided my wife lets me work on the car even though it's our anniversary. I want to complete the project before posting the pictures.Leave a comment:
-
Quick question.. Did you end keeping your ODB2 "spider coolant hose" since you deleted your throttle body cooling?Leave a comment:
-
Was supposed to start on some organic chem homework, but I decided to read your whole build instead.Leave a comment:
-
I love this project.
I think I've said it before but you're an inspiration. So many thanks should be directed at you for an amazing build.Leave a comment:
-
It's so cool to finally see this car rolling around again. I remember looking at your thread before I go my E30...such inspiration. Good work!Leave a comment:
-
I haven't done anything to the interior but I should be back on track now. I will be relocating the switches to a 316i euro HVAC panel. The radio slot is in the middle with two blanks on either side. i will put the switches there and will be one of the next projects coming up.Leave a comment:


Leave a comment: