-
Simon
Current Cars:
-1966 Lotus Elan
-1986 German Car
-2006 Volkswagen Jetta TDI

Make R3V Great Again -2020 -
Diggin' this! Such a bummer getting rear-ended, did you end up replacing the rear panel yourself? I have some pretty terminal rust in that panel that will need to be addressed someday, doesn't seem like a terrible job but bringing the bodywork up to snuff afterward would be a bear I'm sure.Comment
-
-
Sack up youngster, this is R3V. We loves the updates but we also love boobies.
Glad to see that the car is fixed and back on the road. Its looking good.... so whats next?Simon
Current Cars:
-1966 Lotus Elan
-1986 German Car
-2006 Volkswagen Jetta TDI
Make R3V Great Again -2020Comment
-
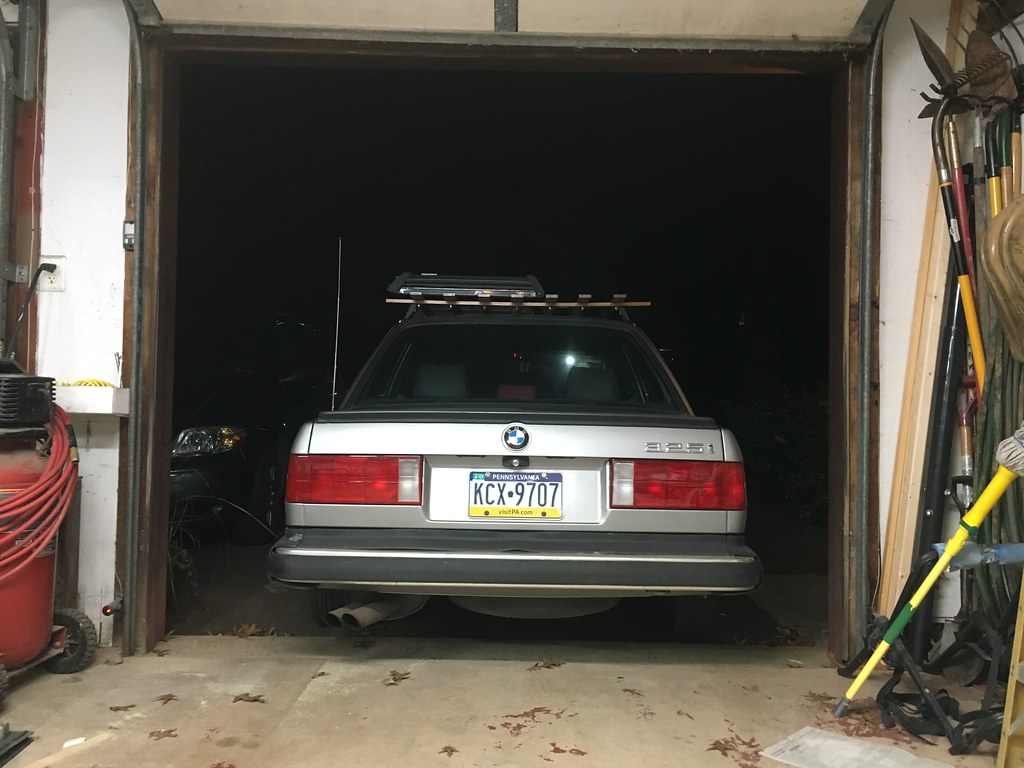
So as you can probably tell, the paint was never great on this car, pretty bad sun fading on the trunk, roof, and hood. After getting rear ended, the trunk and roof were repainted so I sourced a lachssilber hood that wasn't perfect, but the paint was nicer than my hood. And I was really enjoying the car at this point! it wasn't perfect which was okay because I didn't need to feel bad about doing burnouts and ripping down gravel roads, but it was all well sorted enough that it was a blast to drive.
 E30 build by Austin Kratz, on Flickr
Sooo much better
 E30 build by Austin Kratz, on Flickr
Other little things, tinted the amber turn signals red
 E30 build by Austin Kratz, on Flickr
Which I think looks great on lachssilber. If there was a way to get just a tiny shade of tint on them I would but this looks clean
 E30 build by Austin Kratz, on Flickr
So coming back to my original list... all the bold items have been finished at this point.
Performance
-Manual swap
-Sport springs/shocks
-Offset control arm bushings
-Wheels and tires (15" either style 5's or something else oem looking)
-e36 steering rack
-Rear subframe bushings/diff bushing
Exterior
-Bumper tuck
-Replace faded emblems
-Paint mirrors
-Paint faded trim
-Front bumper trim fill panel
-Fill paint chips
-Remove ugly fog lights
-Replace hood with nicer one
-Full detail, cut & polish
-is spoiler
-wood slat roof rack
-Address rust
Interior
-Fix tachometer
-Sew or replace torn drivers seat
-Restore/re wrap sport steering wheel
-dye rear speaker deck back to gray
-sort out assorted dash lights
-Leather shift boot/ebrake boot/handle
-nice (shift) knob
-protect dash as best I could
Maintanence
-Timing belt,water pump, thermostat
-Plugs, wires, distributor cap & rotor, coil (ignition kit)
-Fuel filter
-Fuel pump
-Adjust valves to spec
-Paint valve cover/general engine bay cleanup
-New injectors/clean injectors
-Fix coolant sensor
-Diff fluid
-Coolant Flush
-Steel braided brake lines and brake fluid flush
Extras
-Rear subframe garagistic caster & camber adjustment plates
-Stainless steel long tube headers & exhaust
-MAF conversion and tune
-Front & rear sway bars
-Euro bumpers, and euro valence with fogs
So I've actually made good progress so far! I didn't take pictures of everything of course but fixing the tach was a Pain in the ARSE. I ended up buying 2 complete I clusters, put new odo gears in of course, soldered new si board batteries in, found out the si board was toasted, soldered them into a different si board, that one was toasted, finally the 3rd one worked. I probably took out and re installed that cluster like 15 times. Finally got 1 complete working gauge cluster which was really nice!
The plans at this point moving forward, I got a set of 14" basketweaves with winter tires that I like, but I want to keep them winter wheels and get a nice set of 15" wheels for the summer. I really like the look of style 5's but the 16" ones just look too big to me, and the idea of 18mm adapters and having to majorly rolling the fenders didn't sound great.. I would have went for a good fill and drill but I couldn't find any shops near me that were willing to do it. Of course I really wanted euroweaves, so the plan was to keep an eye out and see what came up.
Mechanically, the car is doing really well! Cosmetically, its a little rough around the edges so there are still a few things I'd like to button up like filling in rock chips and doing a full cut and polish, and some interior stuff. But, loving the car at this point, and its treating me well.
 E30 build by Austin Kratz, on Flickr
Last edited by Ausatz; 01-30-2020, 07:04 AM.
E30 build by Austin Kratz, on Flickr
Last edited by Ausatz; 01-30-2020, 07:04 AM.Comment
-
Okay, I'm getting there slowly catching y'all up. Quick post about interior bits
I finally found a good deal on some sport seats locally with one small tear. They are Oxblood color which I don't hate, and wouldn't mind converting the back seat to match if I found one in good enough condition.
 E30 build by Austin Kratz, on Flickr
And at some point after this, I removed the side bolster and that tear has since been repaired. Sport seats are 100x better than worn out stock seats its incredible! They really transformed how connected I felt to the car I was surprised. Plus they're really comfortable and don't hurt my back too badly on long trips. I also like that they give me an extra couple inches of head room because my hair was previously just barely touching the headliner which drove me crazy. Great upgrade and the color is growing on me alot
 E30 build by Austin Kratz, on Flickr
Replaced the ugly rubber handbrake boot and handle with some leather. So much better looking.
 E30 build by Austin Kratz, on Flickr
And finished it off with a leather shift boot and a really nice wood vintage style shift knob that a friend of mine is making. It's and awesome piece!
 E30 build by Austin Kratz, on Flickr
I gave rewrapping a sport steering wheel a go, as an experiment knowing it would take me a few tries to be satisfied with the result. Mistake number one, bought a ton of leather and it turned out to be more gray than black.. oh well its an experiment
Also, the sewing machine that my grandfather and I were trying to use couldn't handle the thickness of thread I was trying to use. His sewing machine is this old Singer machine from the early 1900's that he used for his entire career as an upholsterer. Leather belt, everything is super mechanical, that thing is awesome, still works great. It's always fun working with him and trying to explain to him what I'm doing. I think he's often confused why I go to so much effort for these things, but he's always willing to help.
 Untitled by Austin Kratz, on Flickr
 E30 build by Austin Kratz, on Flickr
I realize this isn't properly done but, I did it completely by hand and it took FOREVER. Not terrible for my first go at it though, definitely room for improvement.
 E30 build by Austin Kratz, on Flickr
I'll eventually go back and give it another go and really take my time, but until then, I've been using this wheel.
 E30 build by Austin Kratz, on Flickr
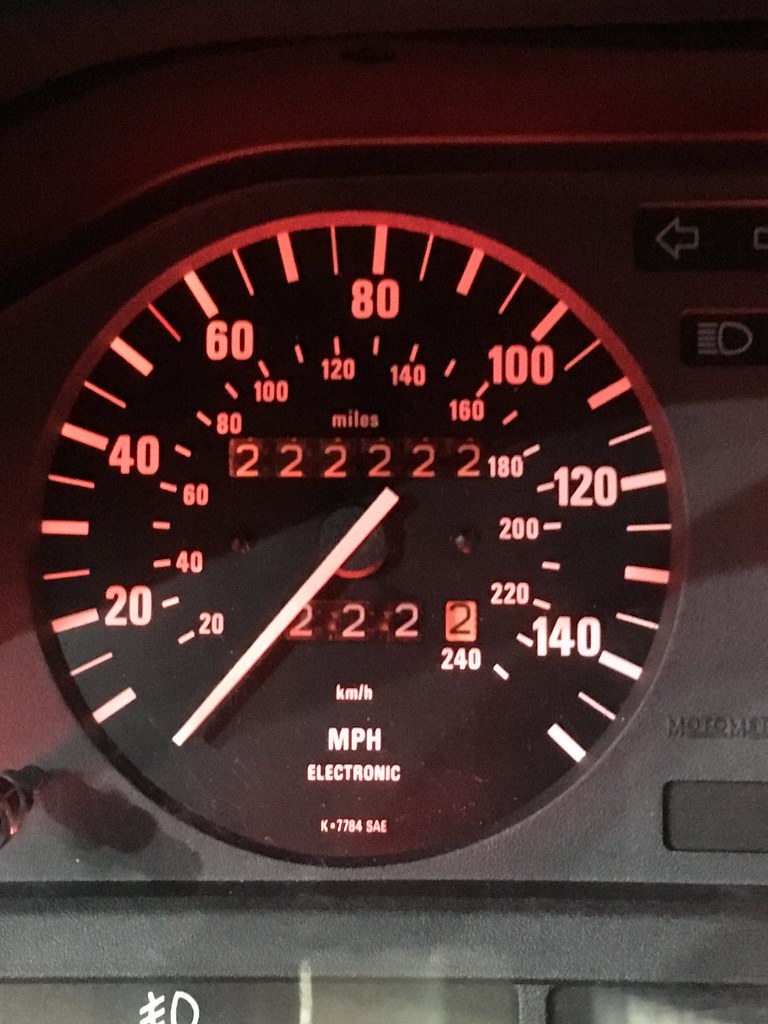
and surpassed 222,222 proud miles
 E30 build by Austin Kratz, on Flickr
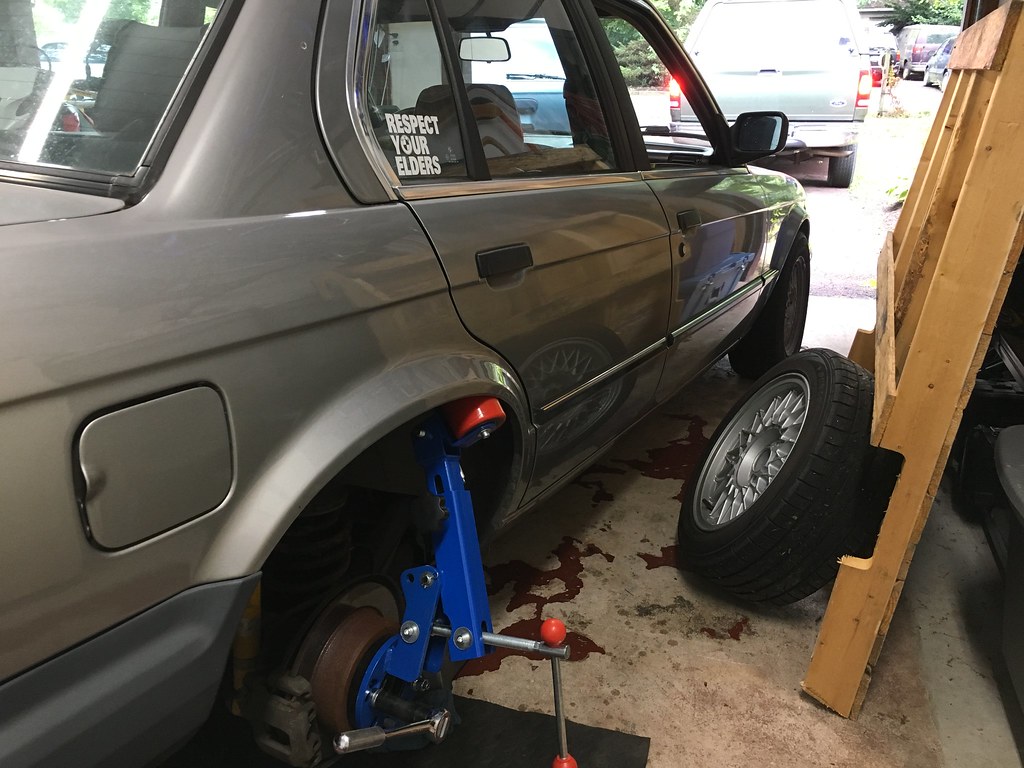
I also got around to doing a complete suspension and brakes overhaul, brand new bilstein sports, new top hat mounts, front wheel bearings, new rotors and pads all around.
 E30 build by Austin Kratz, on Flickr
And that's that for now
Comment
-
Another catch-up post,
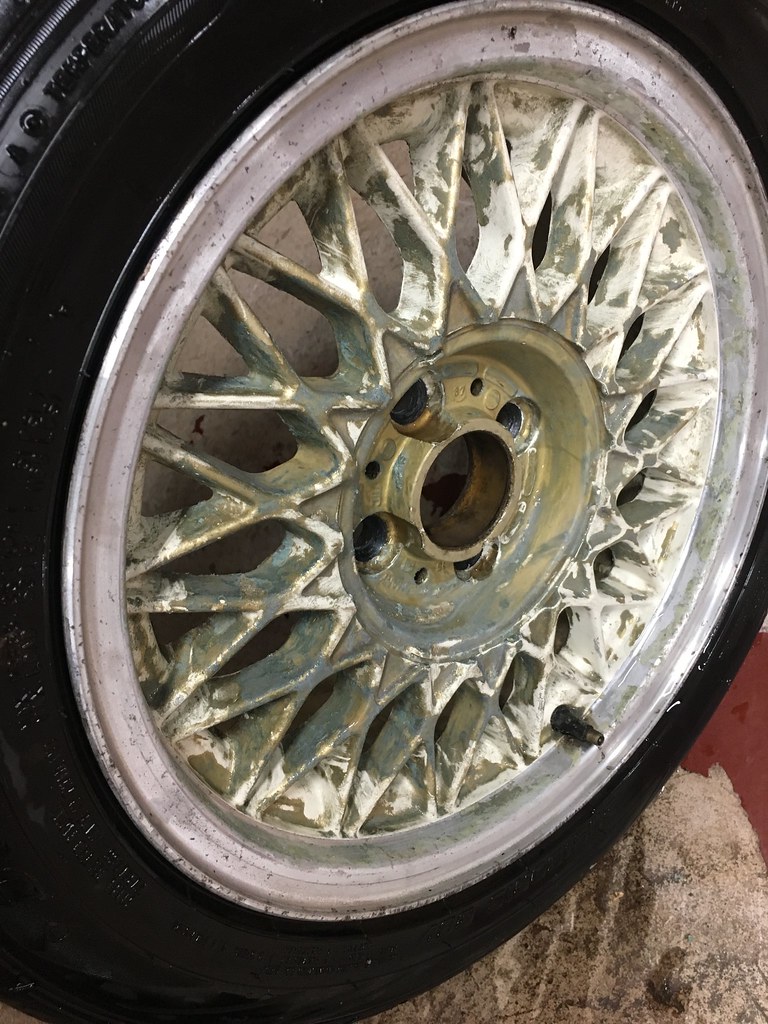
So I finally found a set of euroweaves somewhat locally with 4 good tires and it was too good of a deal to pass up! Unfortunately 2 wheels had been refinished gold, and the other 2 looked like they hadn't been cleaned once since 1987. BUT in my usual fashion, I opted to save a few hundred dollars by forcing myself to do hours and hours and hours of tedious work that I later regretted. Anyways, I was pumped to have euroweaves and I had a set of spacers around that I was hoping to use with the euroweaves to get the wheels to fit just how I wanted.
I mounted them and did some test fitting before I started refinishing them
Beautiful. This was the most excited I've been about a new "upgrade" on the car. 15" euroweaves just fit e30's perfectly.
 E30 build by Austin Kratz, on Flickr
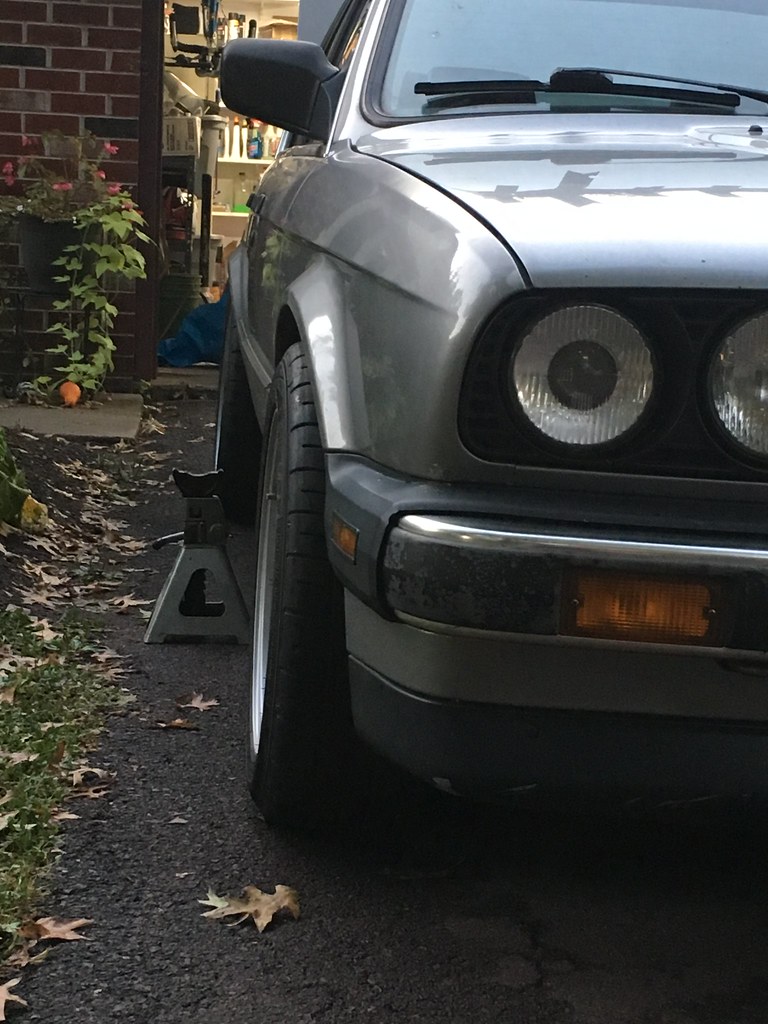
IE stage 3 springs with drop hats give early models a really nice stance in my opinion. It would look perfect if the front end was about 1/2" lower, but I wont complain about a little ground clearance, especially with no skid plate..
 E30 build by Austin Kratz, on Flickr
Here's how it looks with 20mm spacers in the rear and 15mm in the front. I think I would rather have 10mm in the front but eh oh well, this is what I had
 E30 build by Austin Kratz, on Flickr
Oh yea, also got ellipsoids at some point in there which look hawt.
 E30 build by Austin Kratz, on Flickr
Unfortunately, there was a liiitttttle bit of rub in the rear when I hit bumps at highway speed. This is with 20mm spacers on euroweaves and 205 50/15 tires. I would prefer 205 55/15 just because I like a little more sidewall, but that wouldn't help my rubbing I would think. I may try with my next set of tires and go down to a 15mm spacer in the rear if needed.
 E30 build by Austin Kratz, on Flickr
e30's doing e30 stuff
 E30 build by Austin Kratz, on Flickr
And thus, I began
 E30 build by Austin Kratz, on Flickr
 E30 build by Austin Kratz, on Flickr
 Untitled by Austin Kratz, on Flickr
Primer
 E30 build by Austin Kratz, on Flickr
Base
 E30 build by Austin Kratz, on Flickr
Lots of clear
 E30 build by Austin Kratz, on Flickr
yummm
 E30 build by Austin Kratz, on Flickr
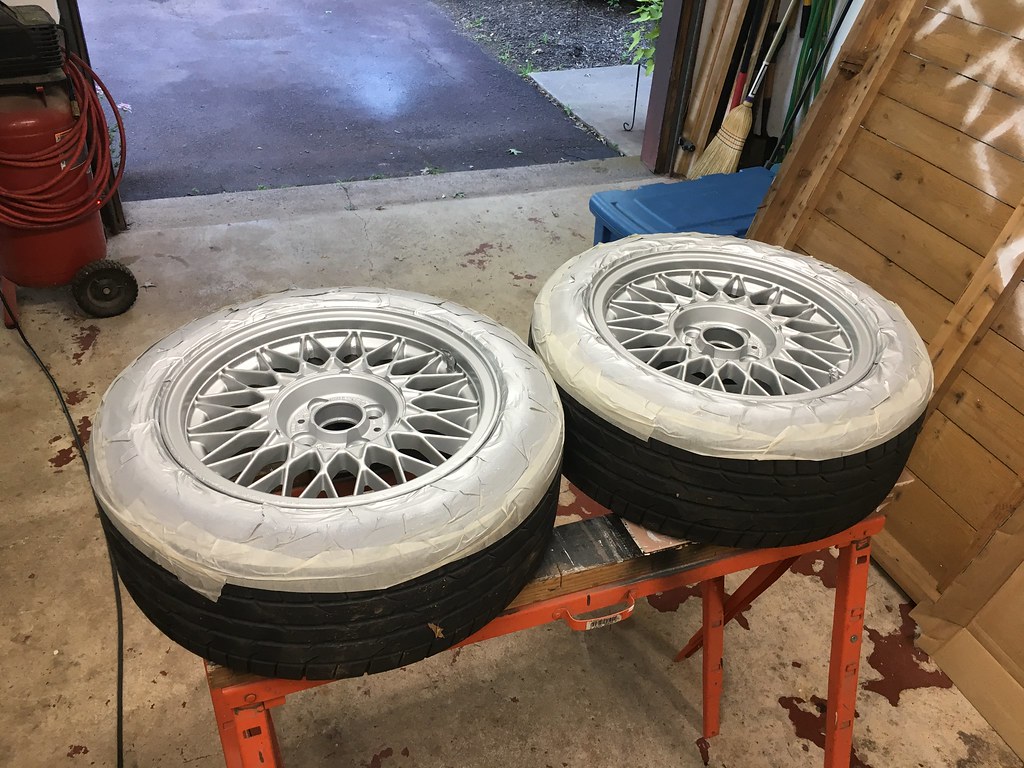
Beautiful. The color is a little lighter than I was hoping for, but I had a hard time sourcing what paint to use. Anyways, they look good
 E30 build by Austin Kratz, on Flickr
I'm a little ashamed of this, but I really liked how the car looked with 20mm spacers in the rear. So I rolled the inner lip of the fender to about 60 degrees up, which is all it took to stop any rubbing, even at full speed through a corner hitting bumps.
 E30 build by Austin Kratz, on Flickr
Testing for rub with no rear spring. "Tuuuuucckkkkkeeeeddddd brooooooooooo" It was close, but no rubbing!
 E30 build by Austin Kratz, on Flickr
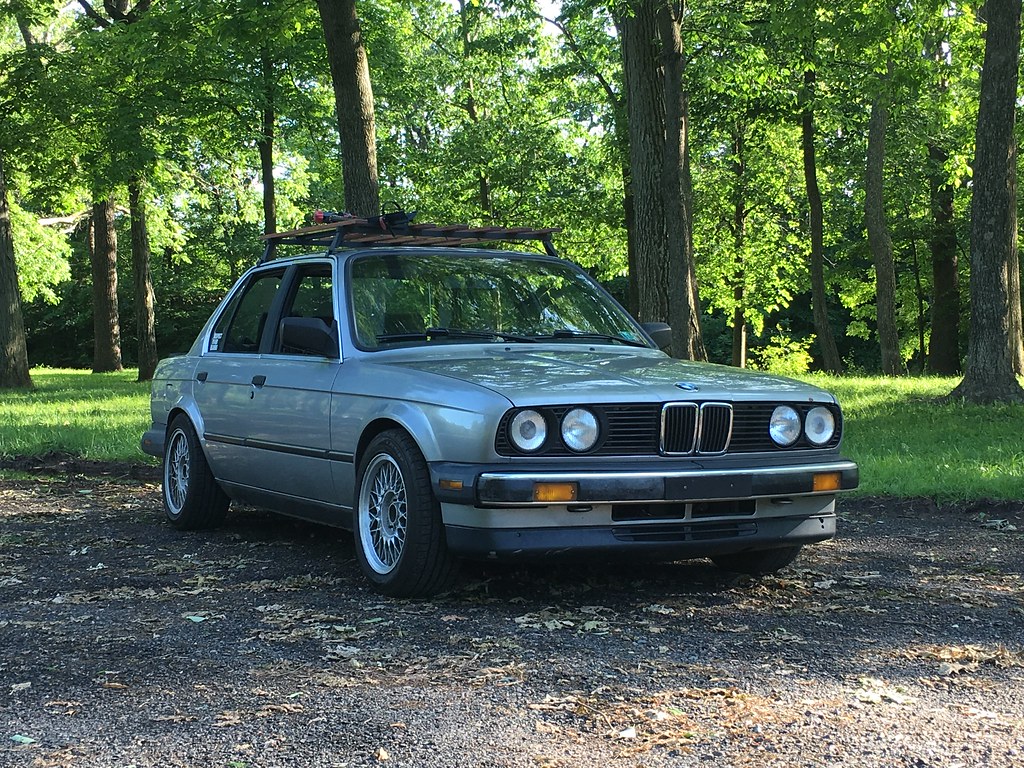
Wheels done! I don't think I'll ever undertake refinishing wheels like that again.. BUT, they make the car look 100x better so its all worth it now. Loving the e30 and having alot of fun with it, taking it on trips and biking and such. Its a really great engaging drivers car and now its looking great too. Also for those of you who care, on the roof is the new to me Rocky Mountain slayer which has been a blast. hopefully many trips in the e30 to come hauling me and my friends and our bikes to mountains.
 E30 build by Austin Kratz, on Flickr
Comment
-
Alright, thanks for all who have followed along so far, this is the last "catch up" post, from now on I'll be updating as I go.
So I again had a little time to play with cutting and polishing the super sun faded paint with my horrible freight dual action polisher (actually works well... so far), and it definitely makes a huge difference! I am still trying to block out an entire day to do a full detail, and then some sort of quality coating so it doesn't fade in 6 months again.
Before..
 E30 build by Austin Kratz, on Flickr
After.. better..
 E30 build by Austin Kratz, on Flickr
This past fall, a friend and I took a bike trip 7 hours north to New Hampshire. this was the longest trip I've ever taken in the e30 but it ran perfectly the whole trip and got 24 mpg's with 2 bikes on the roof, and the car loaded full of tools and bike parts.
 E30 build by Austin Kratz, on Flickr
And this brings us to the second sad story for the e30.. Coming home at night in the rain, navigating traffic on the outskirts of New York, people were driving aggressively and tailgating each other. Traffic stopped abruptly but the woman 2 cars behind me did not and pushed the car behind me into my car pretty hard. Miraculously a police officer saw the whole thing so we were on our way quickly but to say it was a sour ending to an otherwise fantastic trip would probably be an understatement. People always say "oh don't worry, I'll let my insurance know, it will all be taken care of" unfortunately with e30's that's often not how it goes..
 E30 build by Austin Kratz, on Flickr
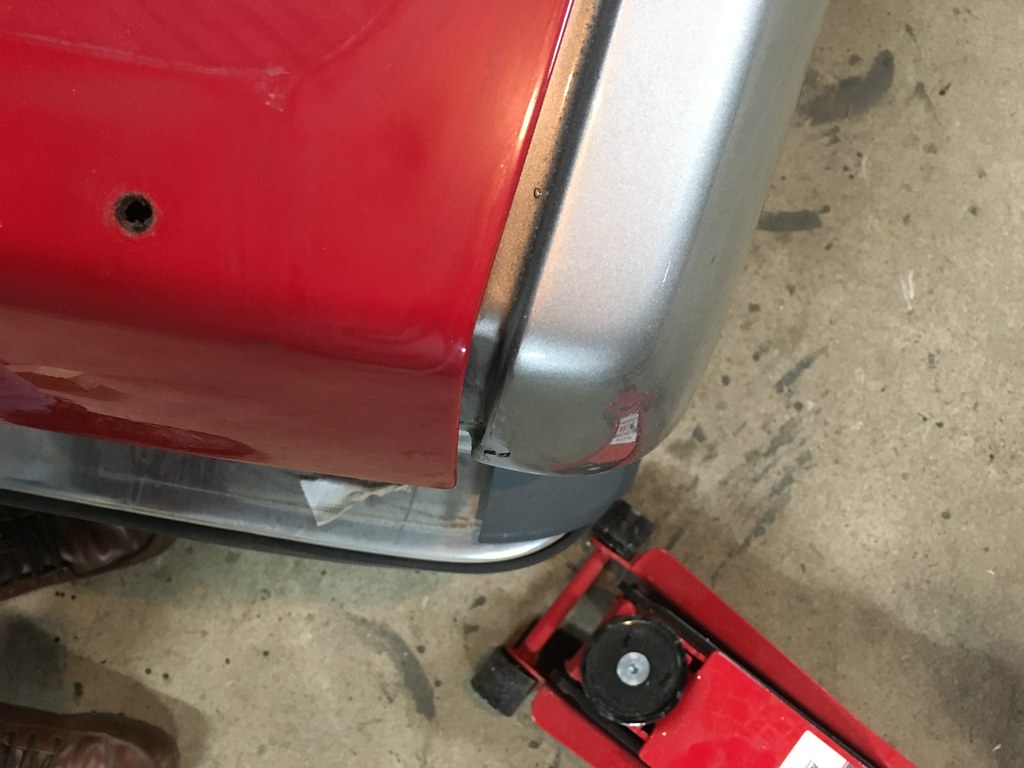
Luckily, only the tail light panel and trunk lid were damaged beyond repair, the quarter panels were okay.
I fought and fought with the insurance company but I learned the biggest negative about having an R-title from last year when this happened, and the insurance company valued the car at $1600.. They added a gracious $34 when I sent them my $4600 of parts receipts installed recently, but then subtracted $90 from the value when I told them it was manual swapped.. fuck me... SO I had an $850 check to work with after buying the car back and paying sales tax on it for the 3rd time, and a will to not let this e30 die yet...
My only real option was to fix it myself, and after doing some research, a few of you R3v'ers were able to point me towards some threads about replacing taillight panels, and so I began!
This will definitely be a big learning process for me, but so far I am really enjoying it! Got a truck as the temporary daily driver this time. I moved into a house with a roommate with a nice big garage, and having a truck became pretty useful, although once summer comes, I will definitely be missing those top down cruises in the miata.
 E30 build by Austin Kratz, on Flickr
First got a replacement trunk lid and did some work with a sledge hammer
 Untitled by Austin Kratz, on Flickr
Everything lined up fairly well, although the right side needed a little more convincing
 Untitled by Austin Kratz, on Flickr
After 45 minutes or so of smacking it with a hammer
 Untitled by Austin Kratz, on Flickr
Brought out the cutoff wheel, and started chopping slowly..
 Untitled by Austin Kratz, on Flickr
and that's where I'm at now!
I decided to put together a build thread here to help push me through this repair, because its definitely a big one for me, and so far its been going really well! I'm enjoying myself.
Next step is to start drilling out the spot welds and see if I can get the old tail light panel to let go.
 Untitled by Austin Kratz, on Flickr
Last edited by Ausatz; 02-10-2020, 05:30 AM.Comment
-
The wheels turned out really well. The quality of the finish is great.
Ouch! Sorry to hear about the accident. Definitely stay motivated and get this e30 back on the road! By the way, that's the same reason I started my thread. It provided some much needed motivation.Comment
-
Thanks man! Yea once I got the ball rolling and started working on it, I began enjoying myself again. But the few months of considering just searching for a clean title donor car / or trying to find parts and a replacement panel all had me pretty discouraged and frustrated. I just have to take it around the block every so often to remind myself to keep at it. And yea the wheels were a pain to prep but once its time to paint, I always enjoy it, its a fun process and I'm happy with how they turned out.Comment
-
man, thats so frustrating, I thought I was seeing the older update where you got rear ended... jeezSimon
Current Cars:
-1966 Lotus Elan
-1986 German Car
-2006 Volkswagen Jetta TDI
Make R3V Great Again -2020Comment
-
I think people get target fixation on e30s lol.
I am trying to take it for what it is, and the positive side is that I get some good experience doing body work on a shell that's not worth much in its current state anyways, so it can only get better! The car was always a little rough around the edges and I don't mind it that way. I'm enjoying learning how to repair it, and if I can get it looking 90% as good as the body shop did, I will come away happy and with more experience under my belt.Comment
-
Did some more cutting/drilling last night, pretty exciting! All the bent up metal from getting rear ended is off the car now! From here on out, its rebuilding it and lining the panels all up/getting everything to be where it needs to, and then tacking the new panel in! This all was actually easier than I expected, and went pretty smoothly. Ask me again in a week after I try to install the new panel without messing it up.
 Untitled by Austin Kratz, on Flickr
 Untitled by Austin Kratz, on Flickr
This side got a little beat up but all in all not terrible
 Untitled by Austin Kratz, on Flickr
 Untitled by Austin Kratz, on Flickr
I do have a question for you guys, It seemed like there was some sort of a bronze coating on a lot of the metal that I separated, Is this some sort of a rust preventative coating?
What do I need to do to all the bare metal before welding the new panel on to best protect it from rust? I am of course going to seam seal everything when I am finished, but is there some sort of a "weld-through" coating or something I should spray on all the exposed steel before tacking the new panel in?Comment


Comment