The MR E30 Project Thread - E36 M3 Edition

Collapse
X
 
  • Time
  • Show
Clear All
new posts

  • MR E30 325is
    replied
    September 19th, 2020 Round 2

    I was able to get a small task off of my list while I was resurfacing my driveway today.

    01 - M3 and Driveway by Michael Rickerd, on Flickr

    I pulled all of the bumper trim, inspected it, cleaned it, and then painted it with SEM Trim Black paint to bring it back to life. I mainly wanted to normalize the color and make sure none of the clips were broken or strained. Thankfully none of them were, except for the tow hook cover which had a hole in it, so I was able make them nice and set them aside for the appropriate time. This car will be driven quite a lot when it is done, so I won't be as picky about exterior bits, especially front exterior bits, as I was on the inside of the car although I still want to do a detailed job in the rejuvenation process.

    02 - Spruced Up Bumper Trim by Michael Rickerd, on Flickr

    Other than that I spent a chunk of change on various parts from various supply houses. Interior trim bits, OEM sunshade, etc. I still have one final list from RMEuropean to purchase but then I will cool my jets for a week or two before buying more parts.

    Approximate Hours Invested in Project Since Purchase: 142

    Leave a comment:


  • MR E30 325is
    replied
    September 19th, 2020

    Spent a little time yesterday afternoon on the M3.

    Started by cleaning the trunk area as best as I could. This included removing the shocks, which are in great shape, and a few small bits to get them adequately cleaned and to check their functionality. Cleaning the underside of the trunk lid, and the area around the trunk gasket took about two hours as it was fairly dirty.

    24 - Cleaned Trunk Lid Underside by Michael Rickerd, on Flickr

    I learned of a trick for the butyl goop on the trunk lid that involves getting it really cold and then basically breaking it off. They suggest dry ice, though I will simply wait until winter time when it is really cold anyways and attempt to pry it off then.

    I also pulled the gasket, as it was in terrible shape, and threw it away. It doesn't really rain where I live this time of year so I have no worries closing the trunk without it until my new replacement arrives.

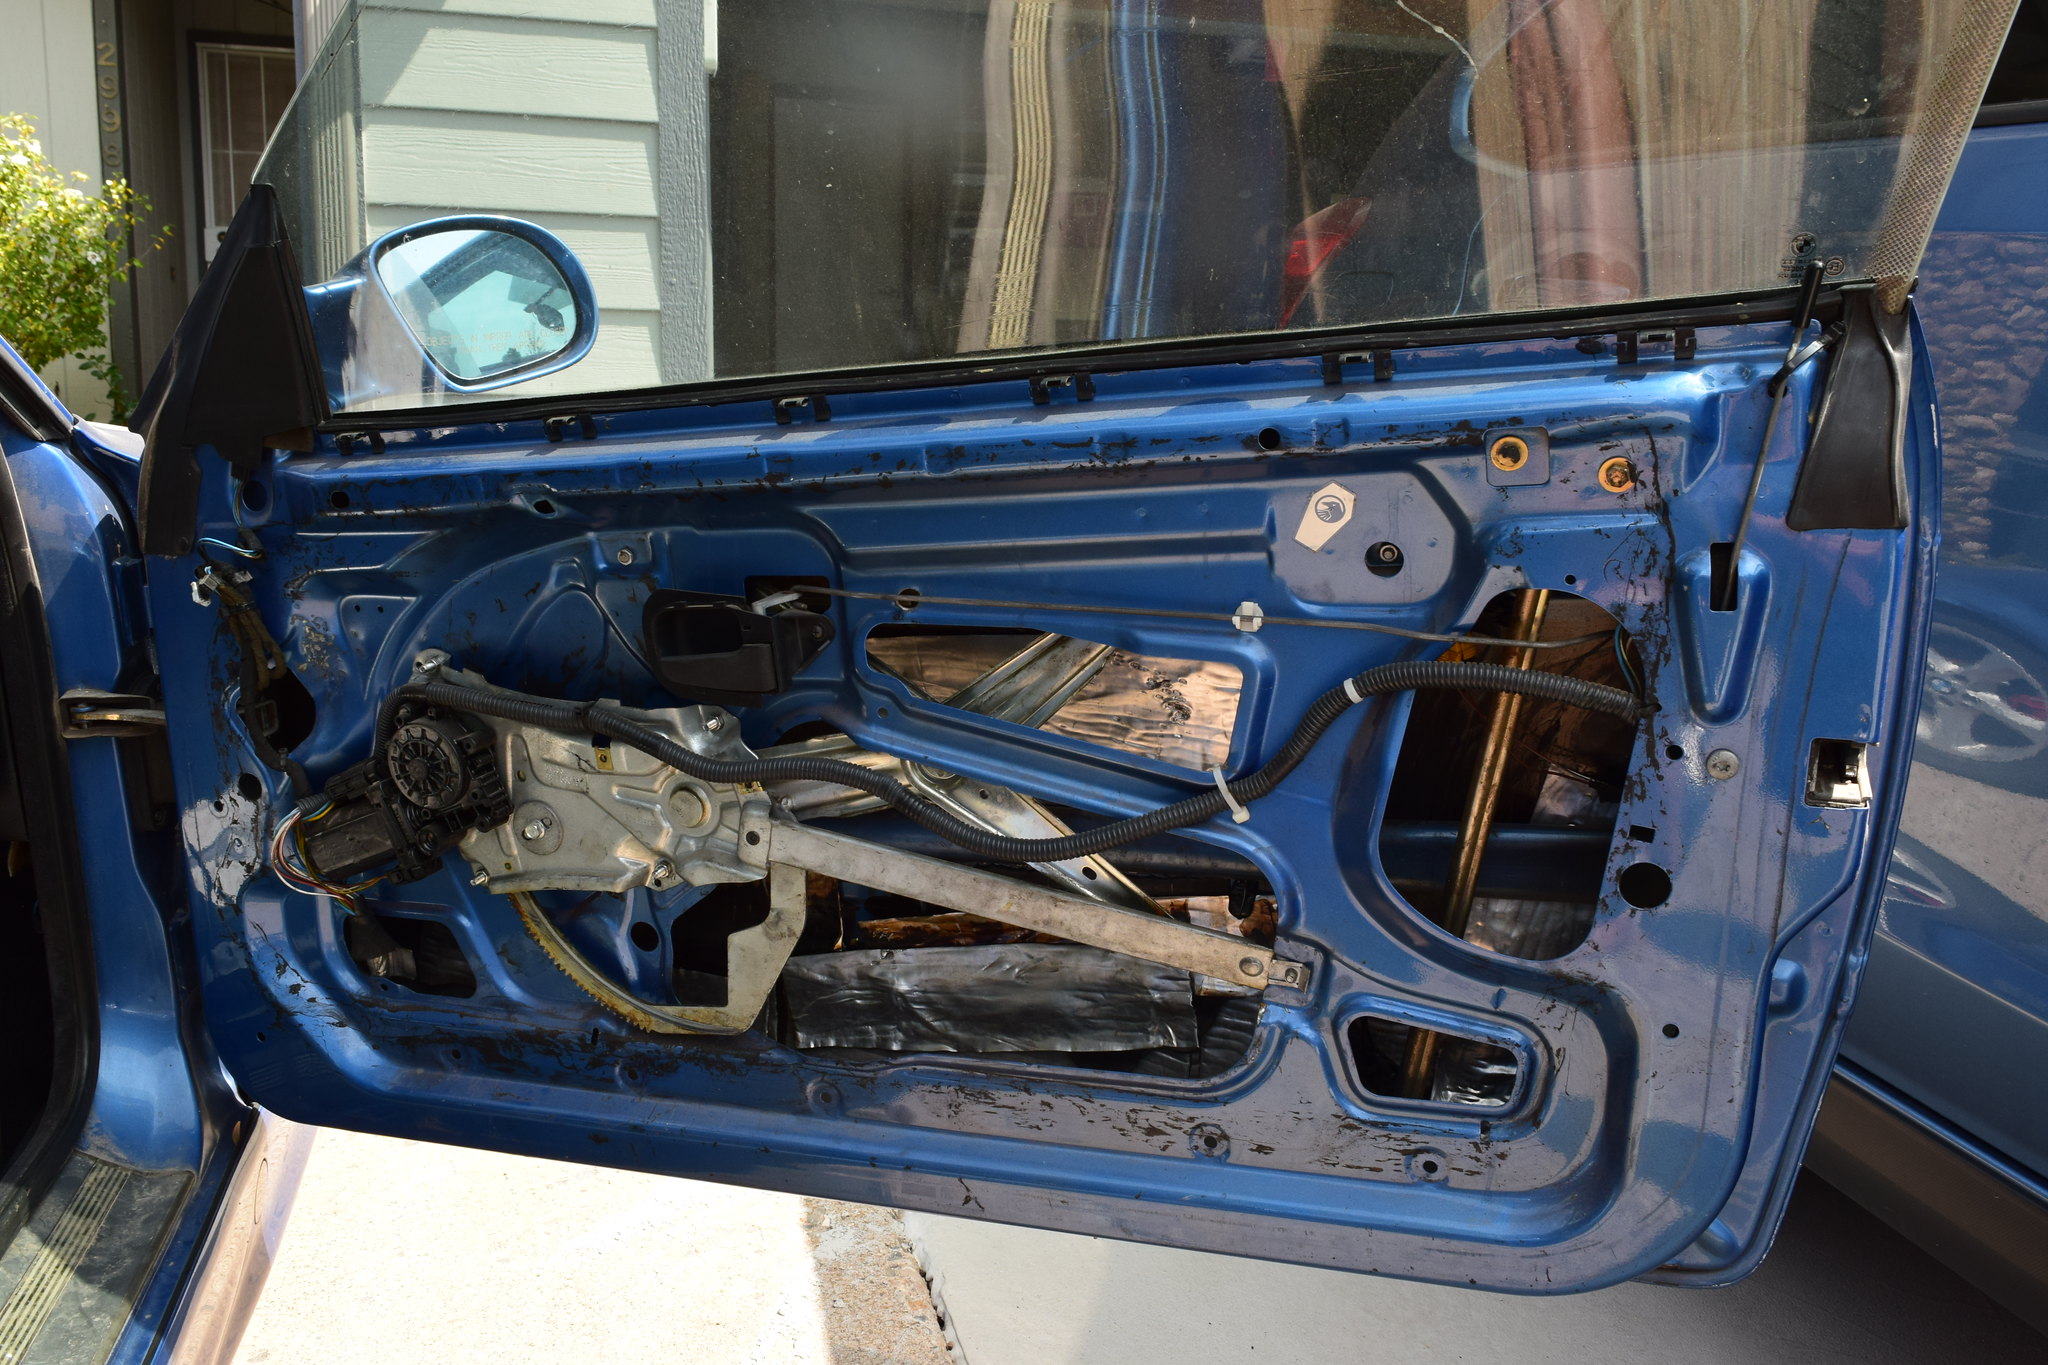
    After that I opened up my E36 Bentley to determine what I was in for with these front doors. Specifically the window removal. And it sounds like I'll need to power up the chassis to raise and lower the window for removal and installation. I'll also need power to initialize the window afterwards. So I will start with a surface level cleaning until I get the cluster back in and then I will give power to the car and take out the window to inspect and clean the entire mechanism.

    25 - Pass Door Ready for Cleaning by Michael Rickerd, on Flickr

    To wrap up the day I did the simple task of installing my new floor mats.

    26 - OEM M3 Floor Mats Installed by Michael Rickerd, on Flickr

    Slowly but surely it is coming together. Ok, very slowly. Haha

    Tracking down interior parts is not easy, and WTB ads don't have a huge response, even on bf.c, I guess I will keep checking eBay until what I need becomes available.

    I am unsure where to go after the doors are spruced up. I will continue to acquire the interior parts I need, but I'll need a new main task to begin working on. Maybe cleaning the engine bay.

    I will pull the entire front and rear suspension out of the car, but I want to wait until the car is stored at its home for the winter before doing any of that.

    Until next time.

    Approximate Hours Invested in Project Since Purchase: 140

    Leave a comment:


  • 2mAn
    replied
    Turbo V8...

    Y'all crazy... lol

    Leave a comment:


  • MR E30 325is
    replied
    September 18th, 2020

    I did some research on RealOEM last night and determined that the glovebox from a sedan is the same as a glove box from a coupe, so I added that piece to my JY list to snag next time I am out there.

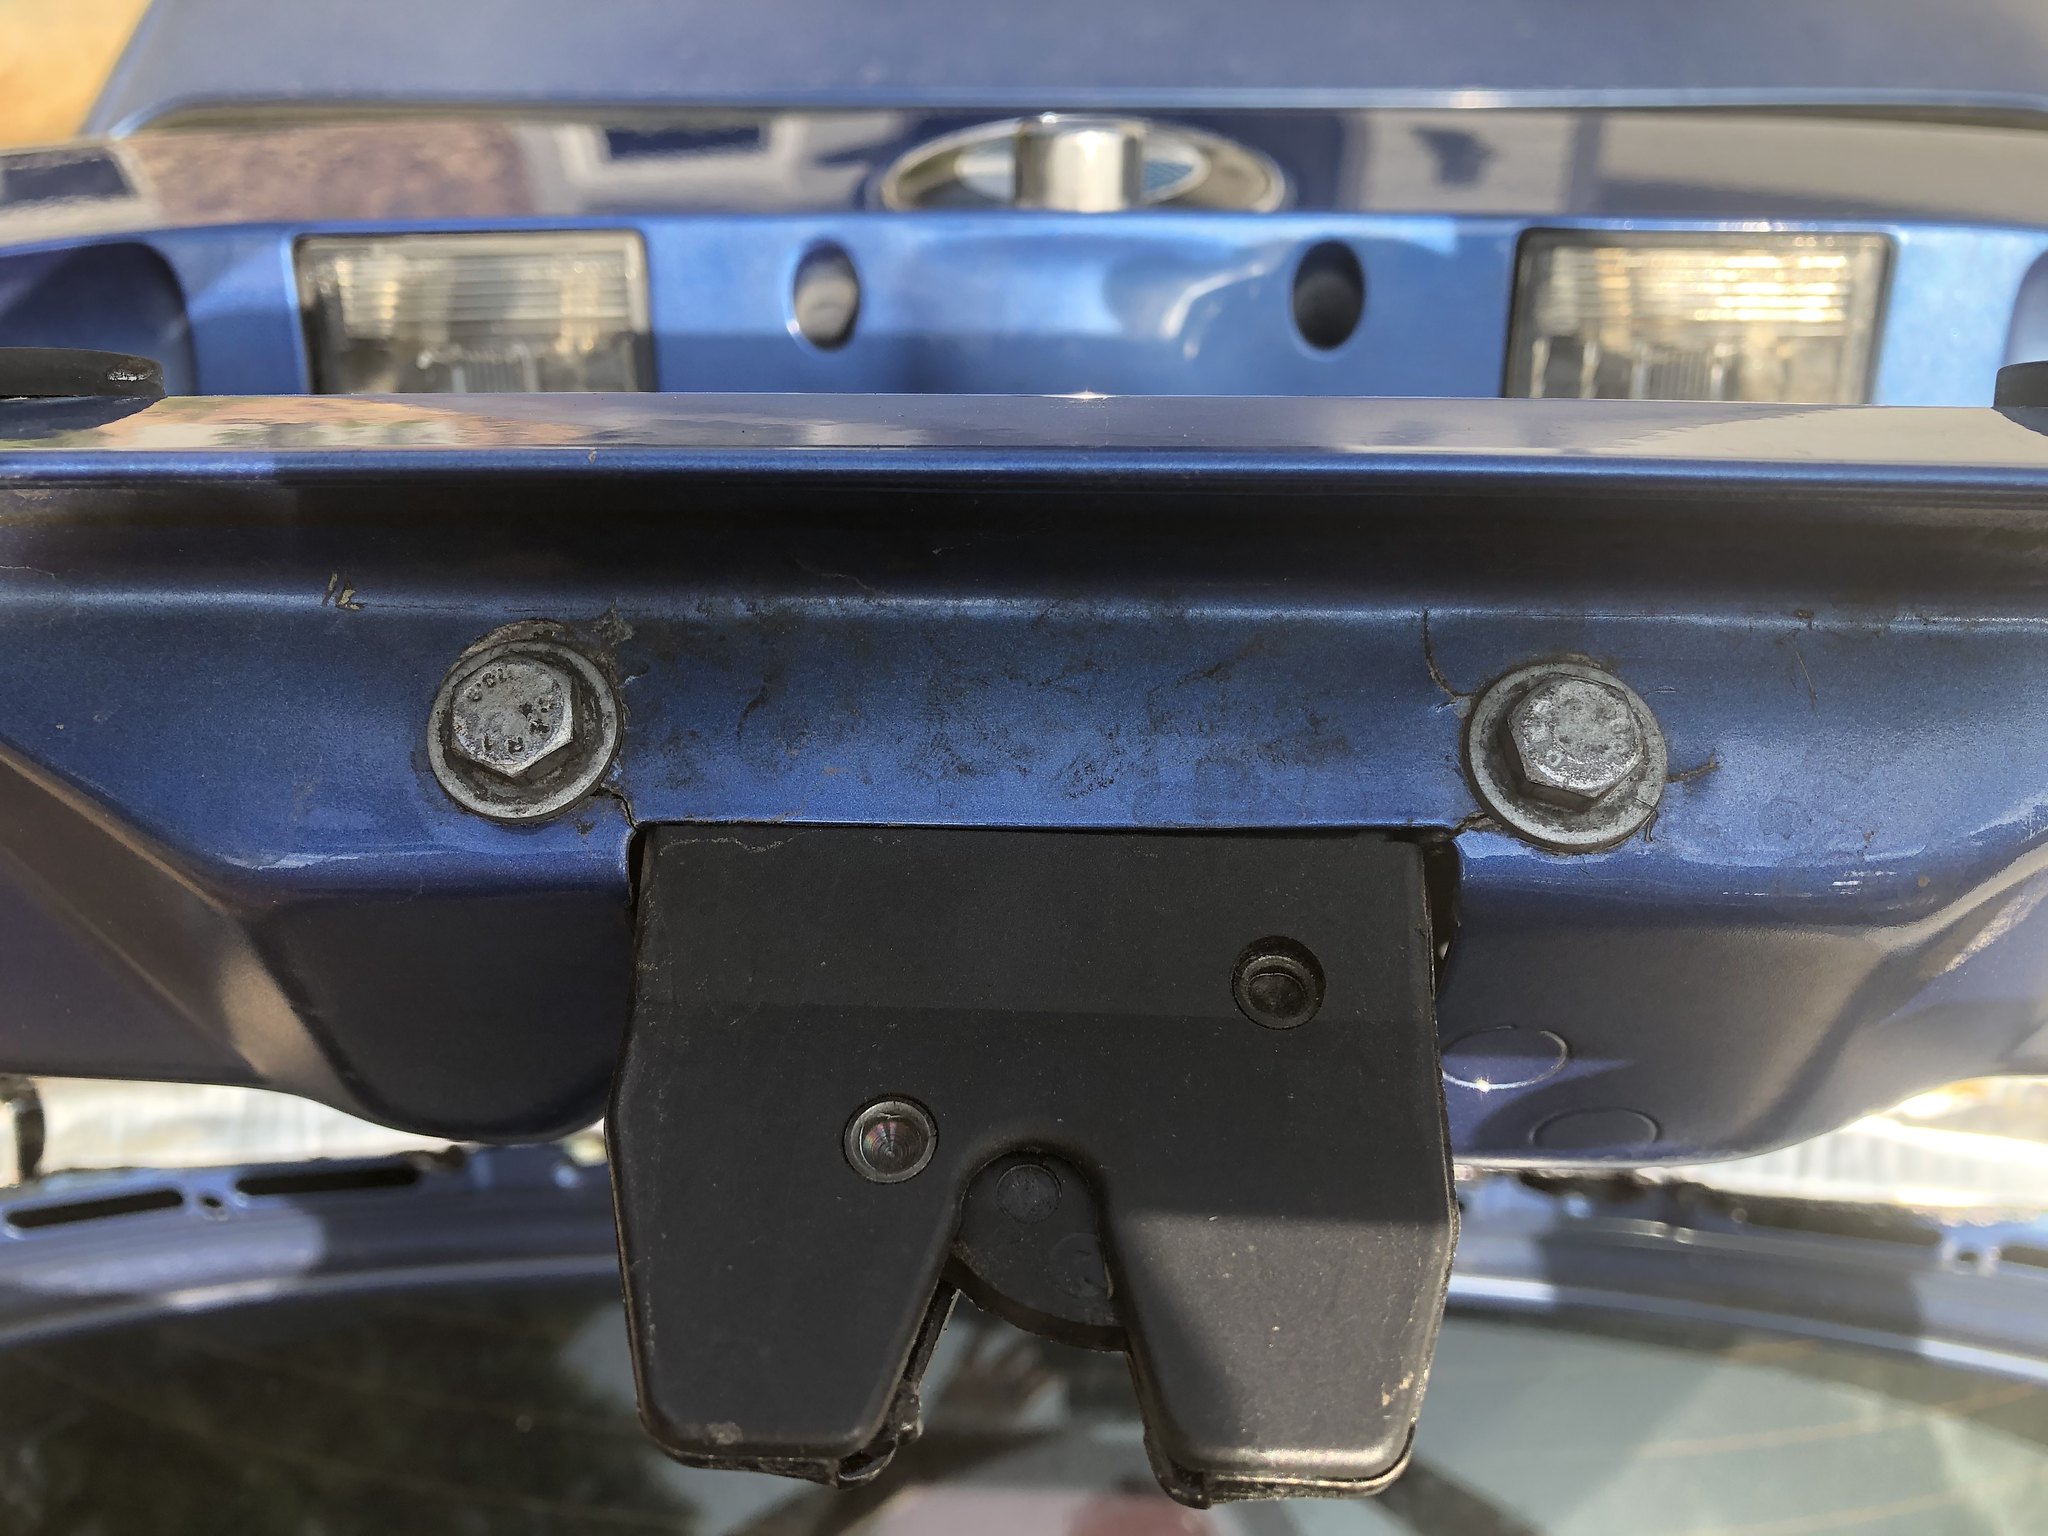
    After reading a members build thread on MForum I noticed he had cracked metal near his trunk latch. Under closer investigation, as I was working on tidying up the trunk area, I noticed that mine too had cracked. So I ordered a 25 dollar reinforcement plate from MSportParts and it is already on its way to me.

    Failing Trunk Latch Metal by Michael Rickerd, on Flickr

    This is a common issue, even though my particular M3 never had a wing installed, which exacerbates the issue. I also realized that non-OEM bolts were used for the trunk latch, so I added those to my JY list as well, even though I think I may have what I need in the garage already.

    I spent some time on the internet trying to find the few front interior pieces I still need. Knee Bolster, speaker covers, and steering wheel. I was able to find a good condition passenger side coupe speaker cover on eBay and promptly purchased it, but none of the other pieces are available right now. I'll keep looking.

    I am debating what steering wheel to install in the car. I like the Late 98-99 M3 wheel, but I think I will start a thread in the E36 subforum on MForum to see what other OEM wheels people are using.

    Still waiting on my gauge rings and small torx screwdrivers to show up so I can tidy up the cluster and get it installed.

    Hoping to do some trunk area cleaning and then dive into the passenger side door for a full refresh this weekend. I will try to find a write-up on the process, but if I cant find one I will take the time to make one for the community.

    Went over to a buddies to give him some engineering advice on the Vette Kart he is building while I am refreshing the M3. We will be working with each other as he is also doing a 5.3 iron block with turbo and HP Tuners in his kart, so it's nice to have someone to figure things out with.

    Vette Kart - 1 by Michael Rickerd, on Flickr

    Later.

    Approximate Hours Invested in Project Since Purchase: 136

    Leave a comment:


  • ZEKTI
    replied
    Thank you for the information. I have ordered them to also dye black. I grabbed some SEM camel, as I want to see how the dash would look in a different color. In regards to your earlier post about the instrument cluster. I grabbed some gauge rings from DDM Tuning and white gauge overlay. I think I’ll paint the rings satin black and the needles a purple. There is a site, whitegauges.net?, that has 20+ colors for our cars, but kind of pricey for a vinyl. Sent from my iPhone using Tapatalk Pro

    Leave a comment:


  • MR E30 325is
    replied
    Originally posted by ZEKTI
    It is progressing nicely. How is the carpet texture with that product? Does it “feel” rough or harsh? Visually it is nice. Sent from my iPhone using Tapatalk Pro
    Zekti,

    Thank you. The feel is very near a well worn OEM carpet. It isn't soft to the touch like a brand new, unused carpet would be, but it feels just about identical to how it was before it was dyed.

    Leave a comment:


  • ZEKTI
    replied
    It is progressing nicely. How is the carpet texture with that product? Does it “feel” rough or harsh? Visually it is nice. Sent from my iPhone using Tapatalk Pro

    Leave a comment:


  • MR E30 325is
    replied
    September 8th, 2020

    Small things have happened since my last update.

    I installed the BBE after making it a small 'gasket' which I stuck to the back of the mounting plate and then squished against the firewall with the nuts. The install was more difficult than I thought it would be, as it is tight near the pedal box and the mounting pin for the brake pedal. But after a few attempts, adjusting the U shaped piece on the BBE to the correct depth, I had the BBE installed and all is well.

    I was able to determine what all of the misc. wires, apart from one, go to (lights of various kinds, duh) so that is off of my plate as well. The new M3Forum should be able to identify the final loose wire I have near the dash.

    I went out to the local junkyard again on Saturday morning to gather up a list of stuff. Most of it was small clips and screws for the dash and center console install.

    I was able to snag an entire accelerator pedal assembly from one of the cars. Got it installed in my M3 with relative ease after giving it a thorough cleaning and light lubrication. Still no throttle cable, but I will cross that bridge when I get to that part of the build.

    21 - New Accelerator Pedal by Michael Rickerd, on Flickr

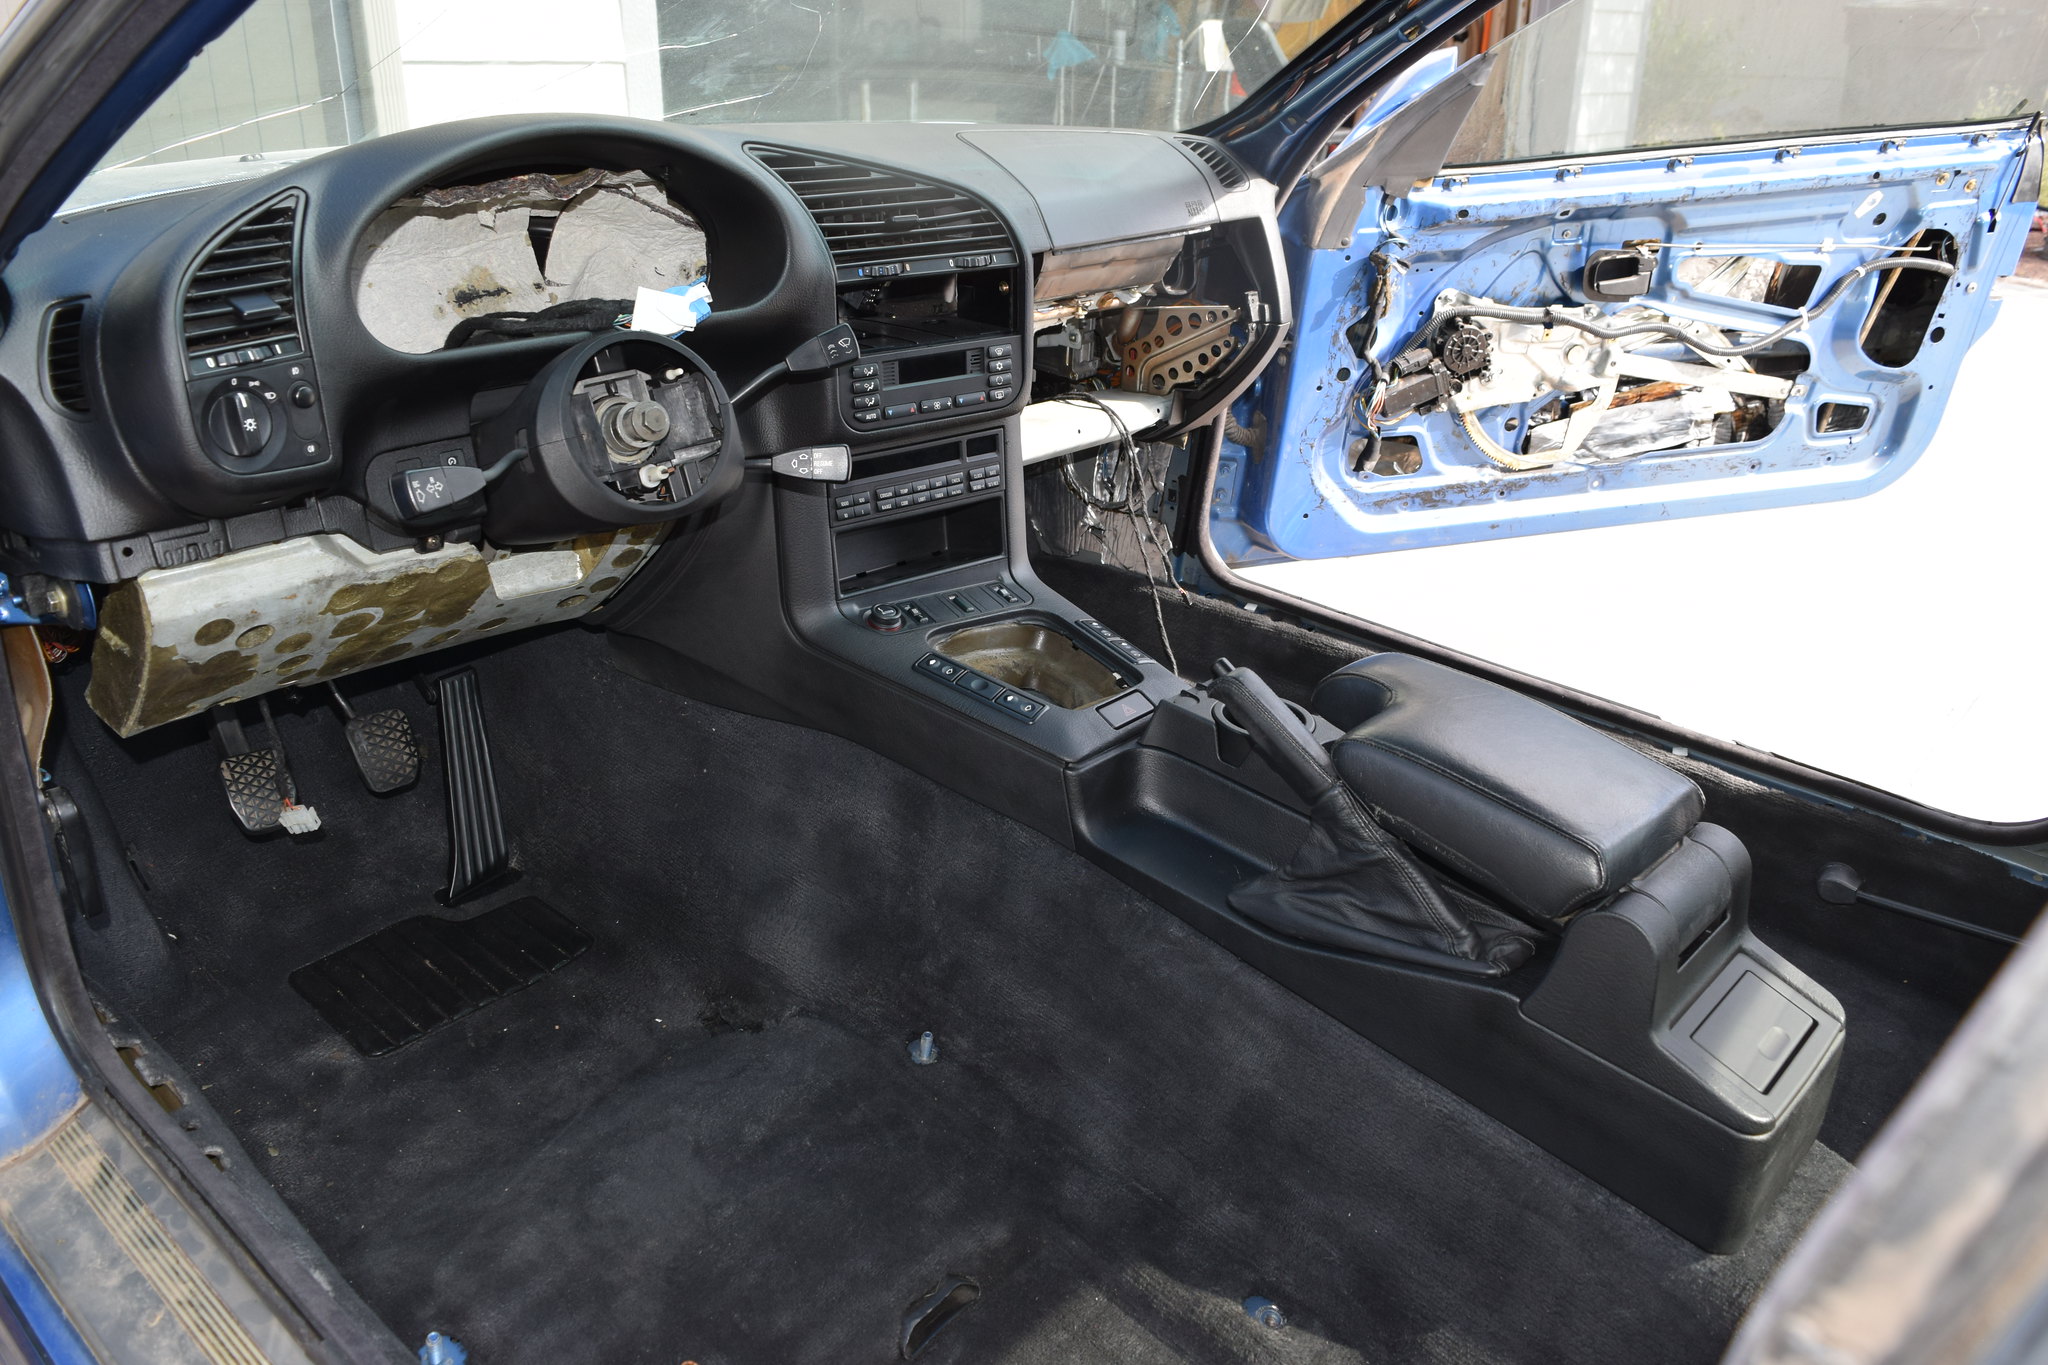
    I mounted up a whole bunch of the dash. This took quite a while as I wanted it to be done as well as possible. Doing things like installing the OBD2 port back on the metal knee piece, things like that.

    Also while I was at the JY I decided to grab an armrest center console from a sedan with black interior. I am not sure if I will keep it, and I have a non armrest center console in my shed, but for 15 dollars for a complete setup in very nice condition I couldn't pass it up.

    Installing the various center console bits literally took an entire day, 6 hours, as each piece was cleaned, color matched, and installed with the utmost care. I disassembled switches to clean the insides and to install the nicest faces I had in my collection.

    22 - Installed Center - Left by Michael Rickerd, on Flickr

    23 - Installed Center - Right by Michael Rickerd, on Flickr

    While doing this I put together another small list of stuff to snag next time I'm out at the JY. I also put together a list of interior components that I will need to purchase online. Things like the knee bolster and functioning glove box, etc.

    With all of that done I reevaluated my game plan. I decided what direction I want to take the rear seat area as well as how I want the front of the cabin to be.

    I ordered brand new OEM M3 floor mats from FCP Euro. Never thought I would be big into floor mats, but after getting a legitimate set for my Tacoma and seeing how well they do their job I can't go without floor mats in any of my cars anymore. Plus these will cover the hole in front of the drivers seat that I was unable to patch. So that's nice.

    I also ordered a set of gauge rings for my cluster, which I will paint black and install for a very subtle upgrade. I'll also be following a gauge cluster refresh DIY to help ensure my cluster functions properly when I need it to.

    Next things are to keep looking for more interior pieces. I will disassemble the trunk locking mechanism and clean that out. Then I will finally jump into freshening up each of the two doors.

    I have a 4 day camping trip to Southern Utah and the North Rim of the Grand Canyon coming up this weekend, so progress may be slow this week. But who knows!

    Until next time.

    Approximate Hours Invested in Project Since Purchase: 134

    Leave a comment:


  • MR E30 325is
    replied
    September 1st, 2020

    Spent a few hours on the M3 today after running some wiring from my sub-panel through my attic to where the new kitchen will be. Also played a round of disc golf with an old friend.

    Anyways, dash went back in very very smoothly.

    20 - Dash Installed by Michael Rickerd, on Flickr

    The color looks great in the sun and in the car. I color matched the various bits of trim that surround the dash to match. My cleverly marked bags of screws are making a thorough and 100% complete install go smoothly. No open hole left behind!

    As I get more and more pieces installed over the next day or so I will get a list of all of the stuff I am missing so I can hunt it down at the local JY.

    Some small upcoming decisions are:

    - What to do, if anything, with the gauge cluster? Looking on Bimmerforums for potential insight into some cool refreshes.
    - What steering wheel do I want? The car came with a very new aftermarket hub and small diameter wheel, but I don't know if I am sold on it at the moment. I really enjoy the late 98 and 99 E36 steering wheels. Need to do more research.
    - What to do with the backseat area. My first inclination was to create custom covers for the sides and seat back and bottom, but I don't know if I will be able to effectively mimic the numerous curves and shapes in a way that is satisfactory. I may try to source a coupe interior in black and just take that route.

    My Chase Bays Brake Booster Eliminator arrived as I was finishing up for the day.

    01 - Chase Bays BBE by Michael Rickerd, on Flickr

    The thing is tiny! I did not expect that. I still need to devote some time to engine bay firewall clean up before installing this. Would like the bay to be cleaned of 23 years of dirt, though I have no intention of shaving it or pulling excess brackets. I did pull all of the brake stuff, but I cleaned it and stored it just in case I want to switch back.

    Off to inquire on Bimmerforums about a few connectors I cannot find homes for.

    'til next time.

    Approximate Hours Invested in Project Since Purchase: 121

    Leave a comment:


  • MR E30 325is
    replied
    August 31th, 2020

    Alright, quick update.

    Pulled the trunk carpet that is on the underside of the trunk lid. Butyl goop everywhere. The piece of carpet was scrapped. Trunk is staying empty, though finding out how to remove this stuff is hard.

    25 - Removed Trunk Lid Carpet by Michael Rickerd, on Flickr

    My BBE arrives tomorrow, so I pulled the stock brake booster, master cylinder, and ABS pump to prep this corner of the engine bay.

    01 - Cluttered Corner by Michael Rickerd, on Flickr

    I still have more scrubbing and cleaning to do before I install the BBE.

    03 - Emptier Corner by Michael Rickerd, on Flickr

    This evening I reinstalled the venting ducting as I was working on changing the dash color to black. I was confused for a minute since one of the pieces was rotated and I couldn't get the holes to line up on the heater box. But eventually I realized what was happening and got it sorted out. I'll dab small amounts of adhesive on all of the locations where BMW dabbed adhesive to secure the dash back to the ducting.

    18 - Reinstalled Vent Ducting by Michael Rickerd, on Flickr

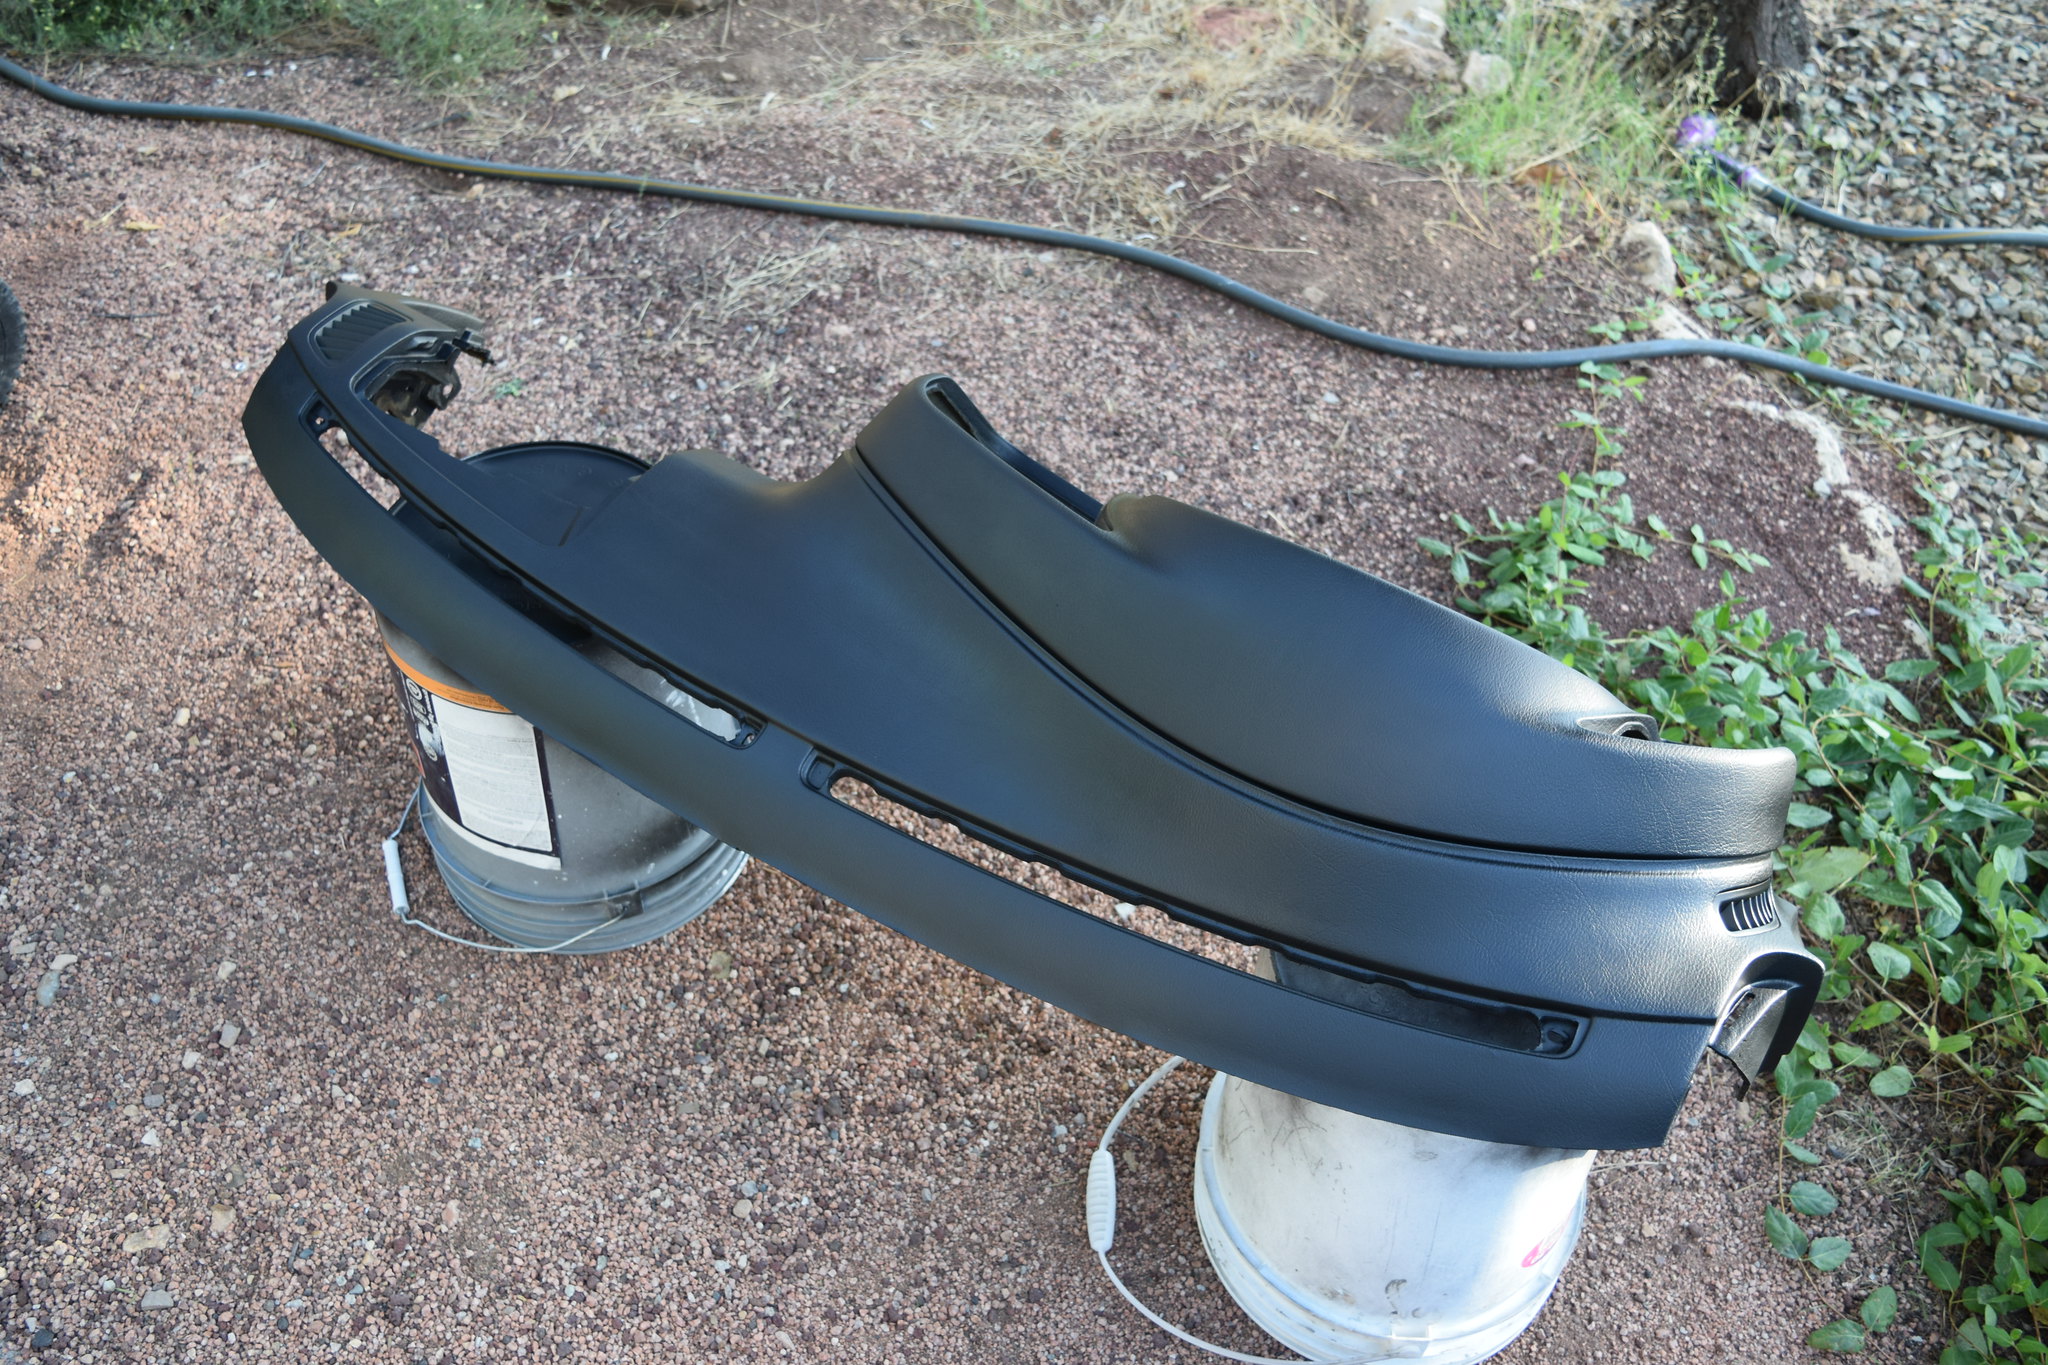
    Other than that I cleaned and dyed the dash to black. Much much better.

    19 - Blacked Out Dash by Michael Rickerd, on Flickr

    Approximate Hours Invested in Project Since Purchase: 117

    Leave a comment:


  • MR E30 325is
    replied
    August 27th, 2020 Round 2

    Everything about this car, as far as the interior cabin is concerned, is going swimmingly. However, everything trunk related is just not quite right. Plastic bits aren't quite as tidy as they should be, things don't fit quite right, things like that.

    So, I have decided to keep the trunk bare, making it a space that is only about getting the job done. No plastic pieces, no carpet, nada.

    I will still keep the interior, where my passenger and I will be while driving, full of creature comforts, like the carpet, and headliner, and radio, and heater, etc.

    But the spaces where I won't be while driving? Those are purpose driven only.

    This fits into my vision of where the project has drifted since I made my initial post and first started diving into the car.

    Probably time to share engine plans:

    Vortec 5300/LM7/LM4 5.3 litre Iron Block V8
    LS6 intake
    Stock ECU modified with HP Tuners DIY Tuning Software
    7875 T4 or GT45 (Haven't decided yet) Single Turbo
    T56 6-speed
    Twin Disk Clutch
    Looking for 450-500 rwhp on pump gas at 14 psi

    *Some details, like the wastegate, are still being researched.

    Why oh why?

    Well it's simple really.

    The iron 5.3 is stupid reliable and easily capable of what I want right out of the box (Sloppy Mechanics on YouTube boost JY 5.3's all the time with terrible looking exhaust setups and reused head gaskets and make 400 hp all day). They are also very, very cheap. Local JY has a handful of them for 365 dollars each. They came in tons of Silverados, Tahoes, Yukons, etc. They are everywhere. They are also modular as hell. C6 vette accessory drives bolt right up to the front. LS6 intakes slip right on. The motor mounts are even ambidextrous and rotatable for crying out loud!

    * If I came across an LS1 and the timing was right, I would not hesitate to pick that up.

    The car has to have 3 pedals, so T56 it is. Twin disk to reliably handle the massive power.

    Stock ECU with HP Tuners because HP Tuners is 400 dollars and you can download tons of base maps from Sloppy Mechanics for free. Intuitive software from what I read as well.

    Turbo? Why the hell not! Chinesium GT45 turbos are 150 dollars on eBay! Who cares if it only lasts a year. At that price it can be a wear item without complaint. Plus it makes making high horsepower a piece of cake. No expensive blueprint engine builds. No fancy pistons. Just loads of boost on a bulletproof engine.

    500 hp at 14 psi on an engine that can do 20 psi? Because I want to get in some serious trouble. Alright, not really, but I mean, come on. This is most car guys dream HP. So screw it, let's do it.

    With this plan in mind some things about the car have to change. Radiator will most likely move to the trunk. I have a lot to learn and research about radiator design to ensure it has adequate flow. Fenders will have to be sliced up (poor rear quarters) to allow for big ol' fat rear meat.

    I'm sure more will have to change as well. With sticky enough rear tires the thing may twist itself up like a pretzel.

    I did some stuff to the car today but I have to prepare for a bike ride now so I'll update this puppy tomorrow!

    Leave a comment:


  • MR E30 325is
    replied
    August 27th, 2020

    Not much going on with the M3, but I did finish the seat belt guide that describes how they function. It was another hefty chunk of time.

    https://www.bimmerforums.com/forum/s...y-How-To-Guide

    My Brake Booster Eliminator is on its way to me. I need to pull apart the brake system in the engine bay.

    Approximate Hours Invested in Project Since Purchase: 110

    Leave a comment:


  • MR E30 325is
    replied
    I like it Simon. I'll let him know. Make a road trip out of it, if the M3 is done in time.

    Leave a comment:


  • 2mAn
    replied
    You should have him drive it out to SoCal when the next French/Italian show happens... usually in October so who knows, maybe this year??? Its also the day right after the SoCal Vintage BMW Show so it will be a great weekend for the both of you...

    Leave a comment:


  • MR E30 325is
    replied
    August 24th, 2020

    This weekend was a bit busier than usual (outside of the M3), though I did work on the car on Friday evening. I got the area around the heater box cleaned up of all of the dust and dirt that had accumulated in there.

    And then, the heater box was reinstalled! Which was a really good feeling surprisingly. I also got the passenger side steel structure bolted back into the car.

    I also decided I would create that guide on how to refurbish the seat belts. It also describes how they work. Which I think will be helpful for the community.

    Other than that I figured out what I am going to do with my brake setup, and I am ordering a Chase Bays BBE setup to replace my ABS and booster and all of that associated goodness. It will free up a lot of space in that area of the engine bay. Getting that ordered this morning. I won't be putting together any more of the interior until I get the BBE plate installed as it connects via nuts on the inside of the firewall, and it is conveniently accessed without anything in the way.

    In other news, on Saturday I took a friend who moved to the area a little over a year ago to a crash site from 1942 that has the remains of a B-24 Bomber. The site is located on the side of our main mountain here in town. The remains of the crash have never been cleaned up by any agency. It is a somber place to be. The photo is taken from very near the top of the mountain. Weird to think that another ~200 feet higher and the craft would have flown right over the earth without issue.

    B-24 Crash of 1942 by Michael Rickerd, on Flickr

    Also did a gnarly mtn bike ride up another mountain in town.

    20+ Miles with 2400 Vertical by Michael Rickerd, on Flickr

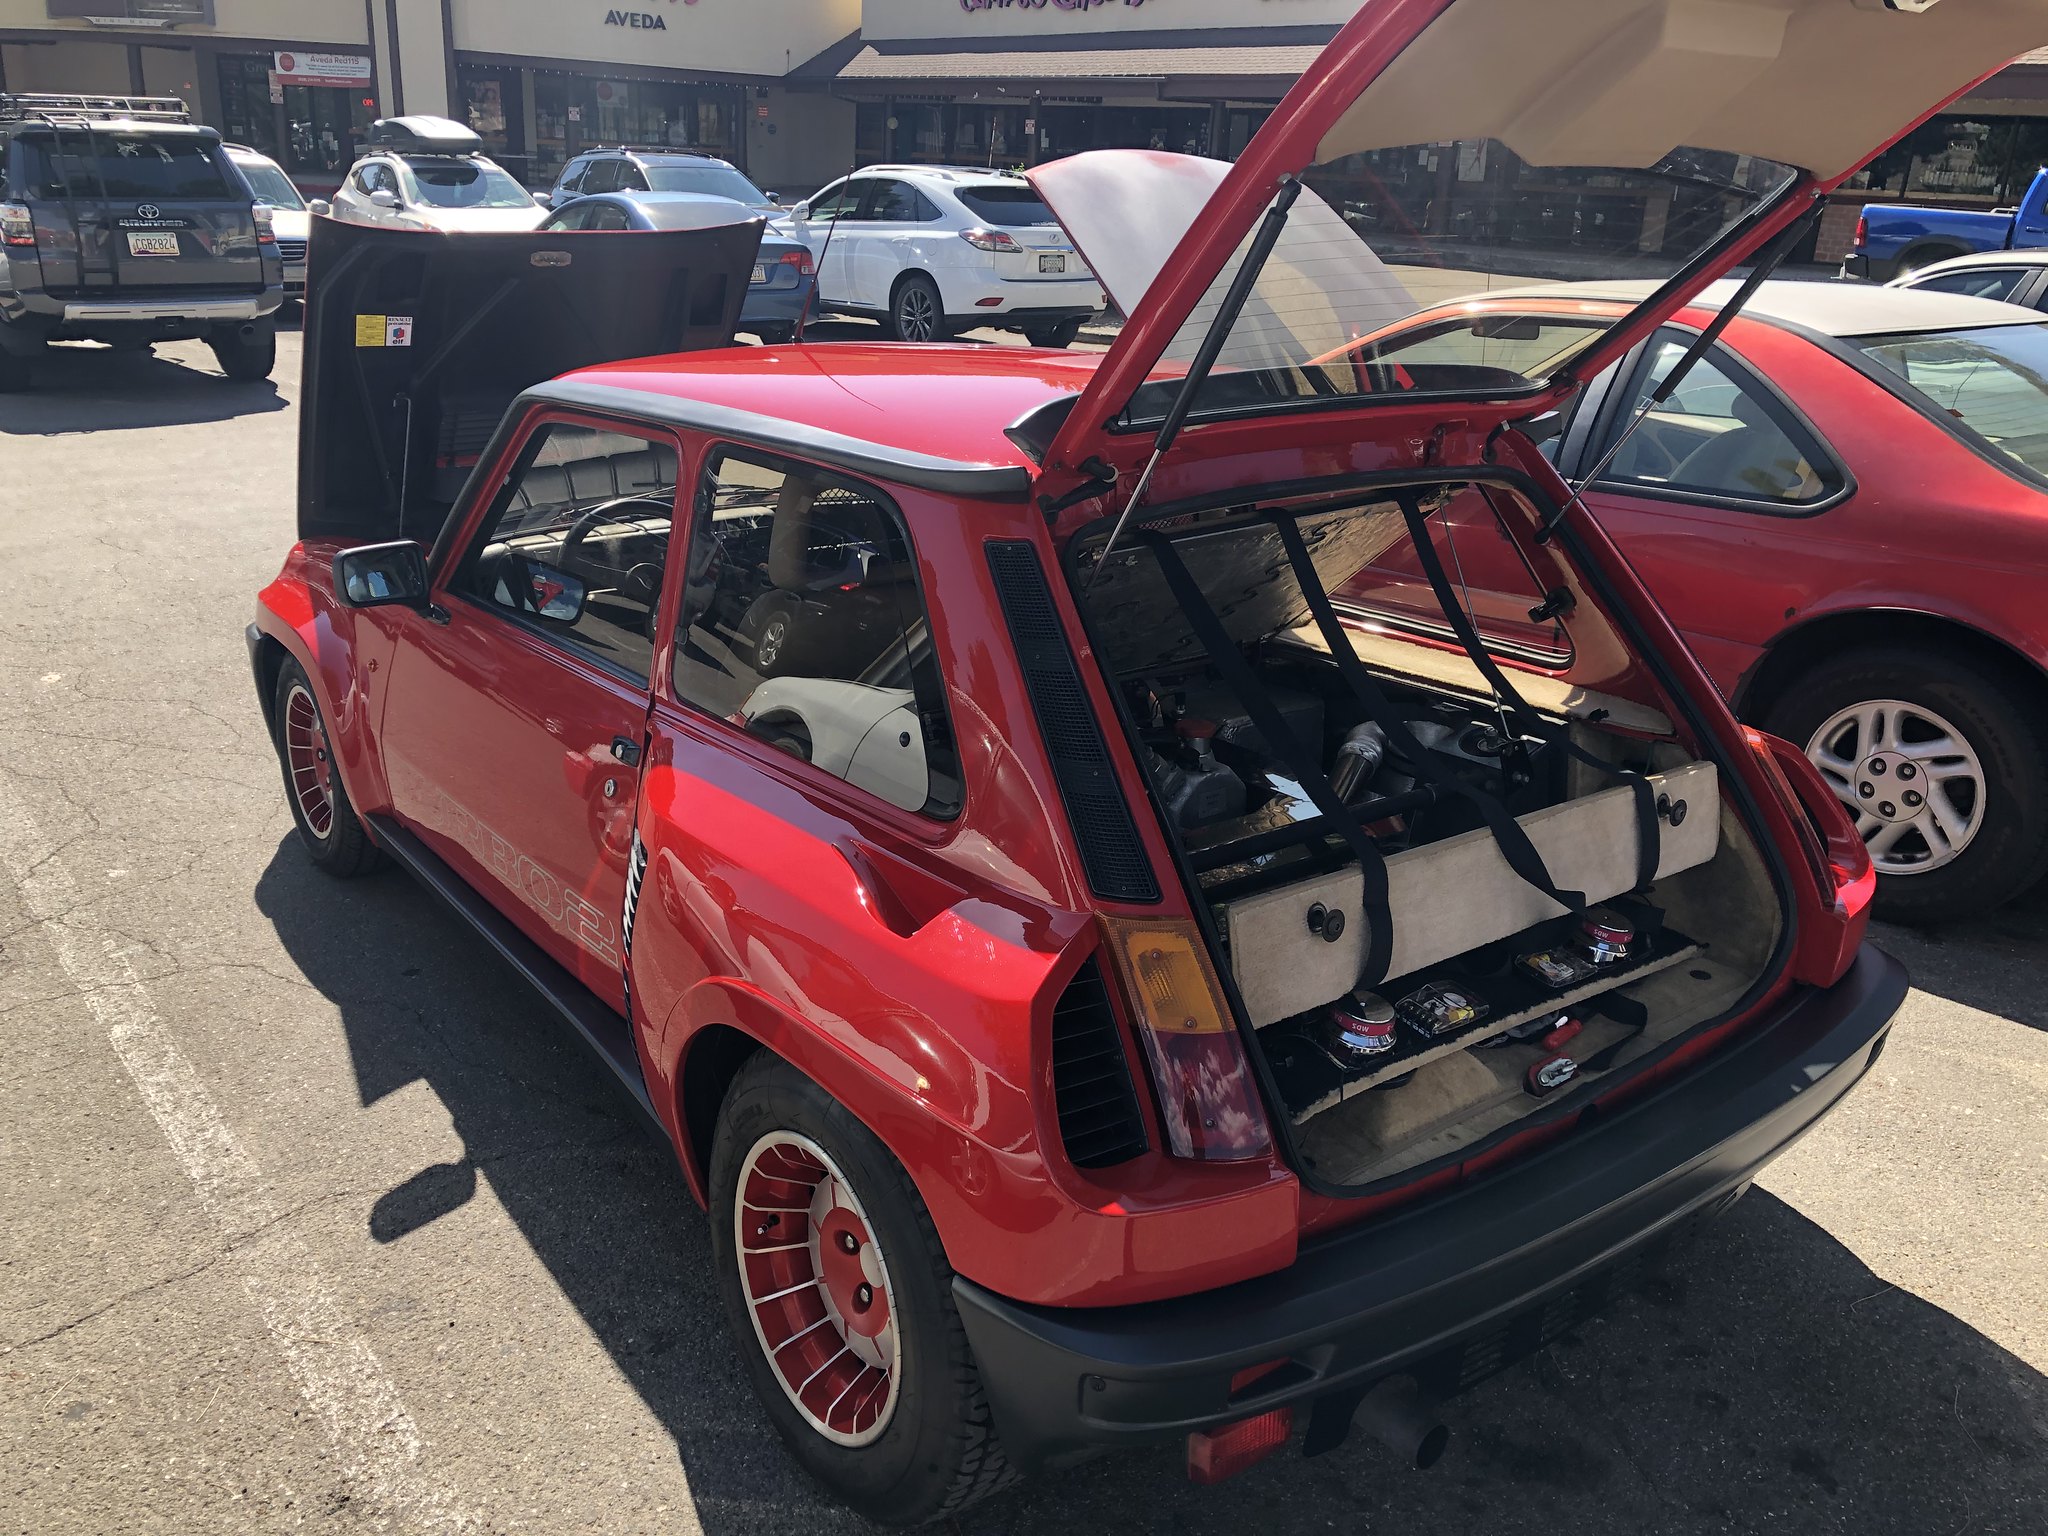
    And finally, I have a friend that owns this incredibly rare and very expensive Renault Turbo 2 here in Flagstaff. He purchased it from a museum with super low KM's. He brought it out to a local car show last weekend and let me sit in it! Maybe one day I'll get to take it for a spin.

    Renault Turbo 2 by Michael Rickerd, on Flickr

    Renault Turbo 2 by Michael Rickerd, on Flickr

    I'm going to start pulling the engine bay brake stuff next. I'll probably do a write up on that too.

    Later.

    Approximate Hours Invested in Project Since Purchase: 104

    Leave a comment:

Working...