-
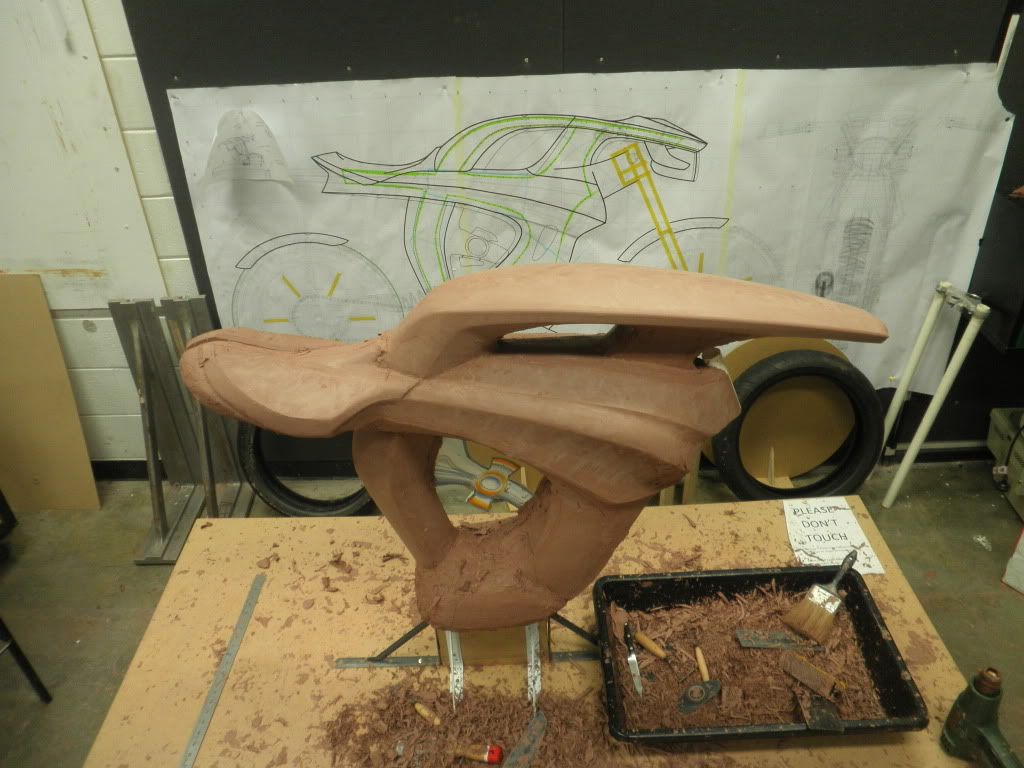
Seat clayed back up

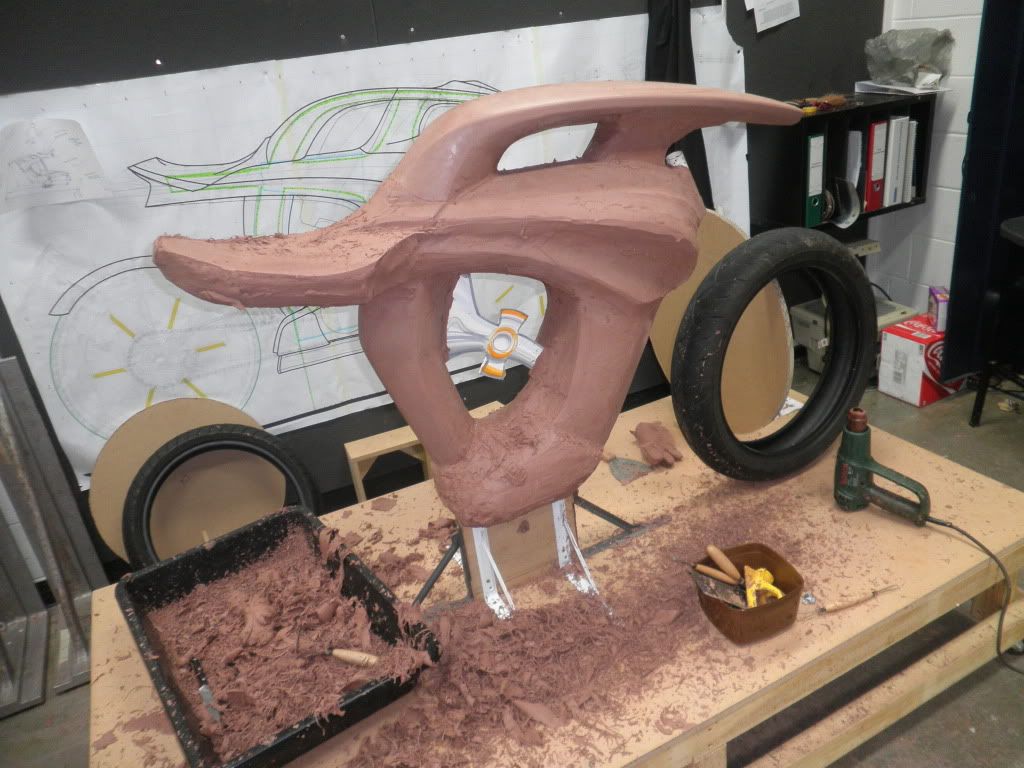
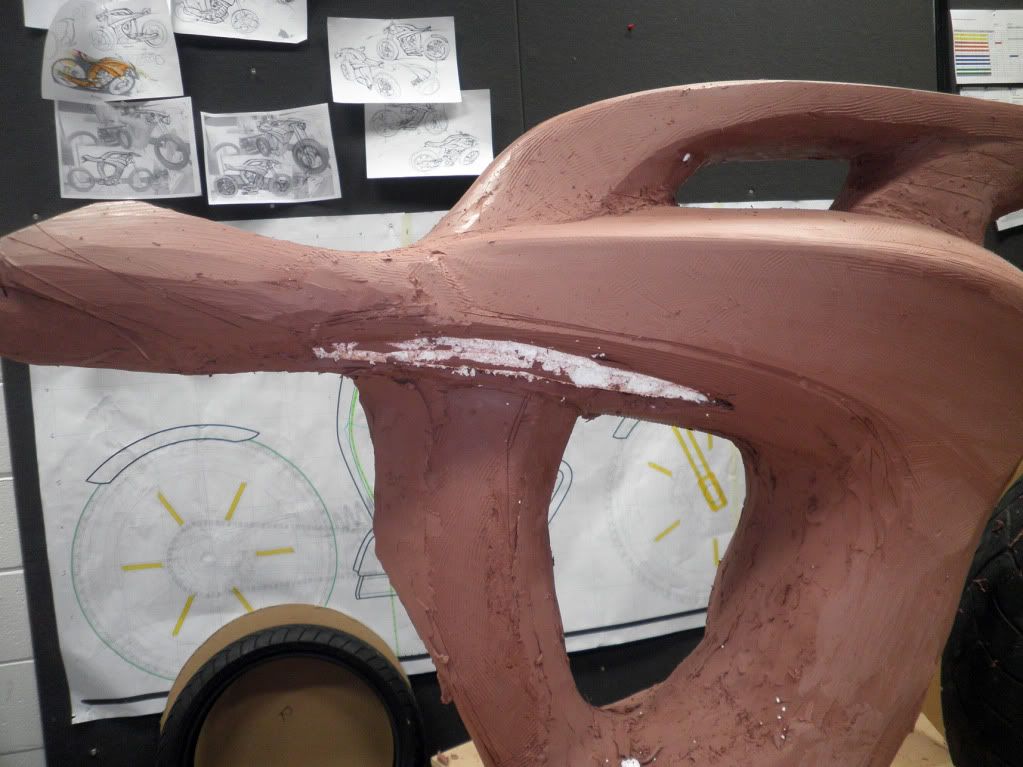
Working on shut lines for the seat
Shaping plan view
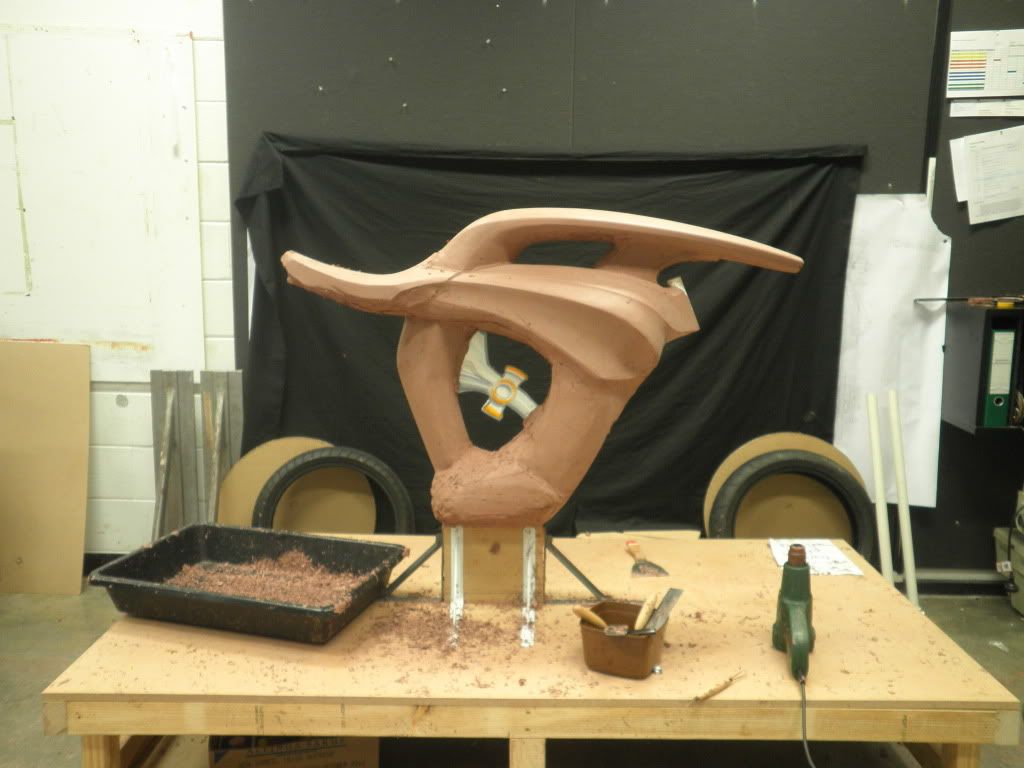
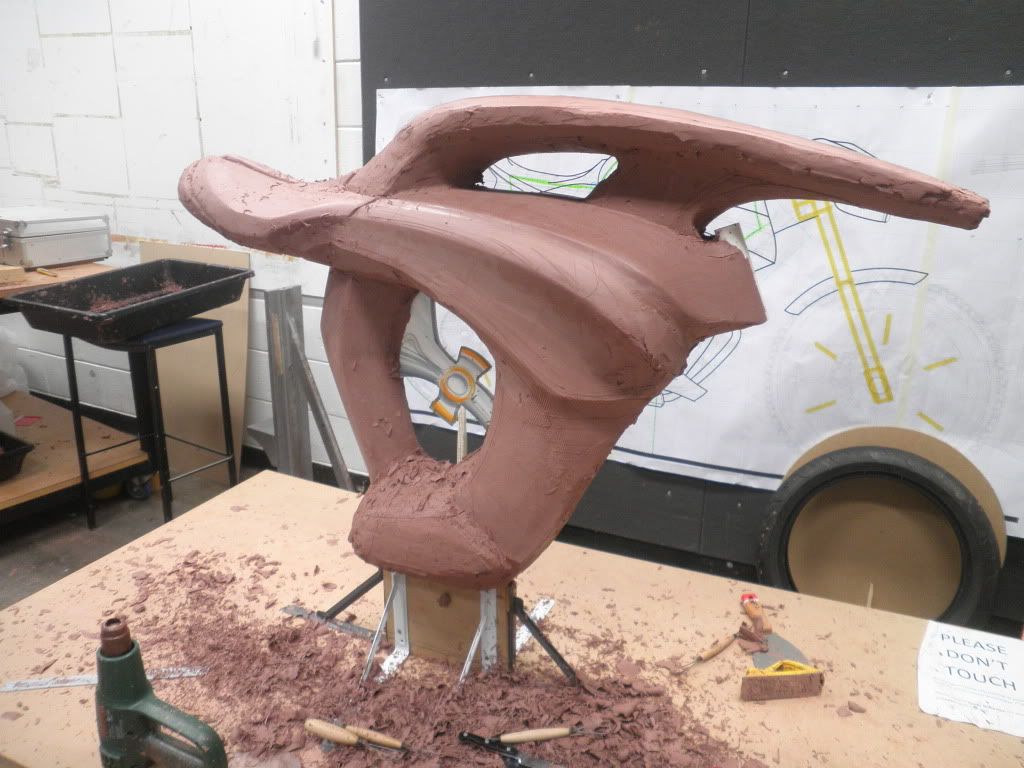
refined seat support
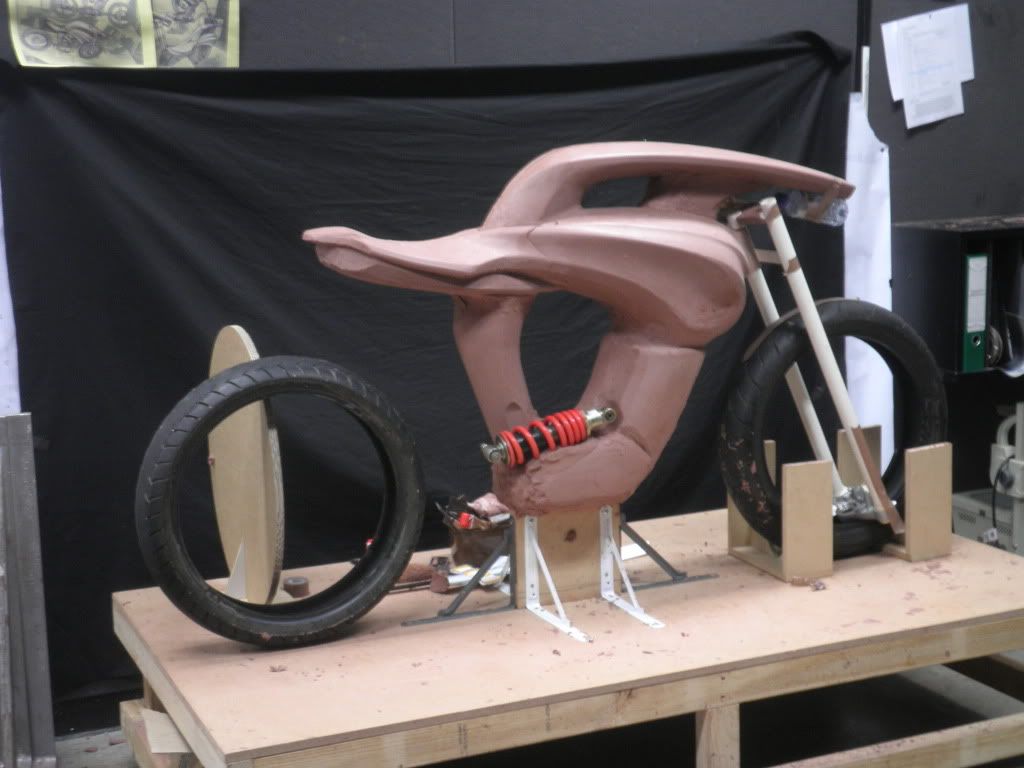
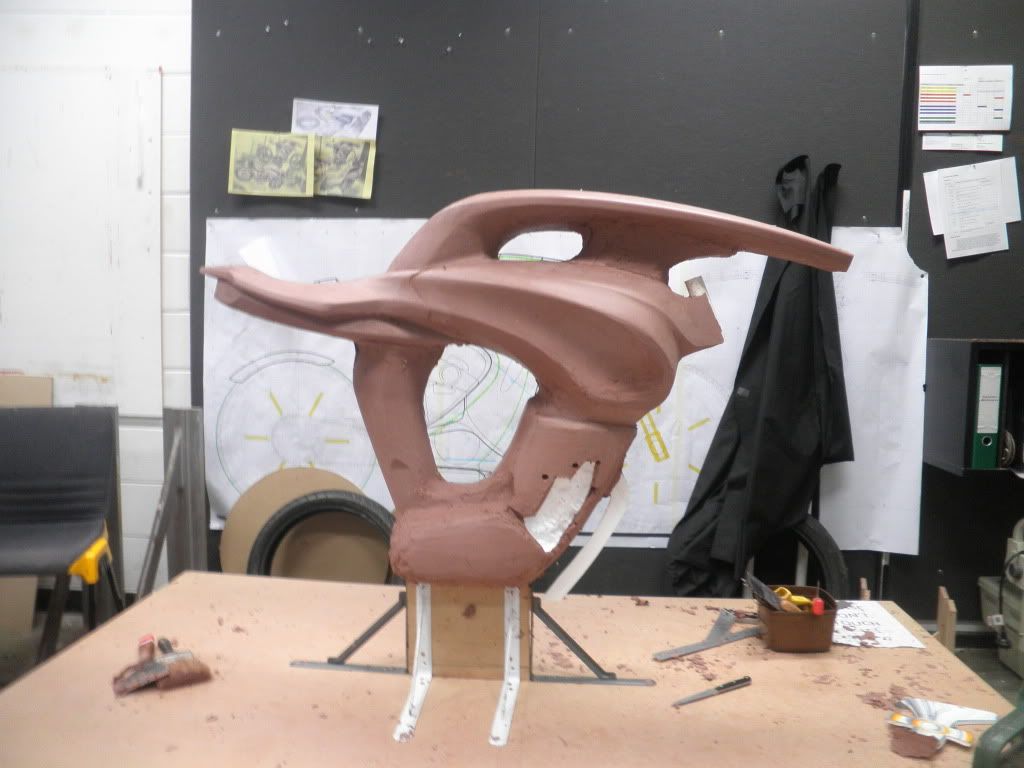
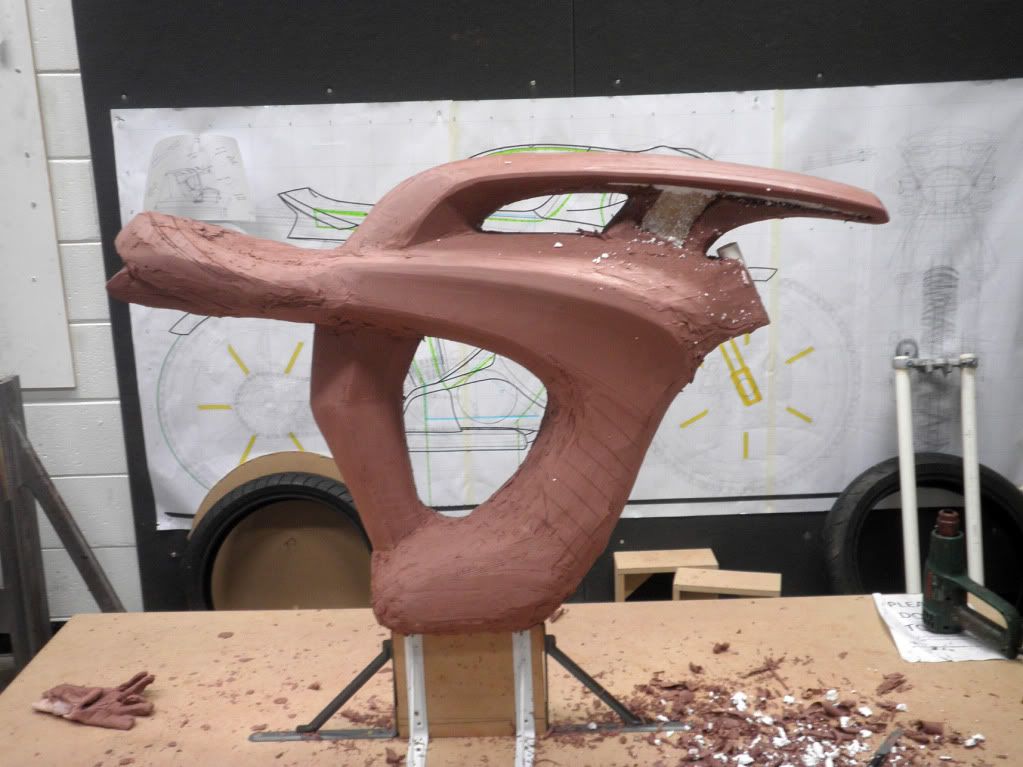
Pretty happy with how it's looking at this stage, still a long way to go though, and still needing work on tweaking proportions.
This brings us to about 5 days ago..
Leave a comment:
-
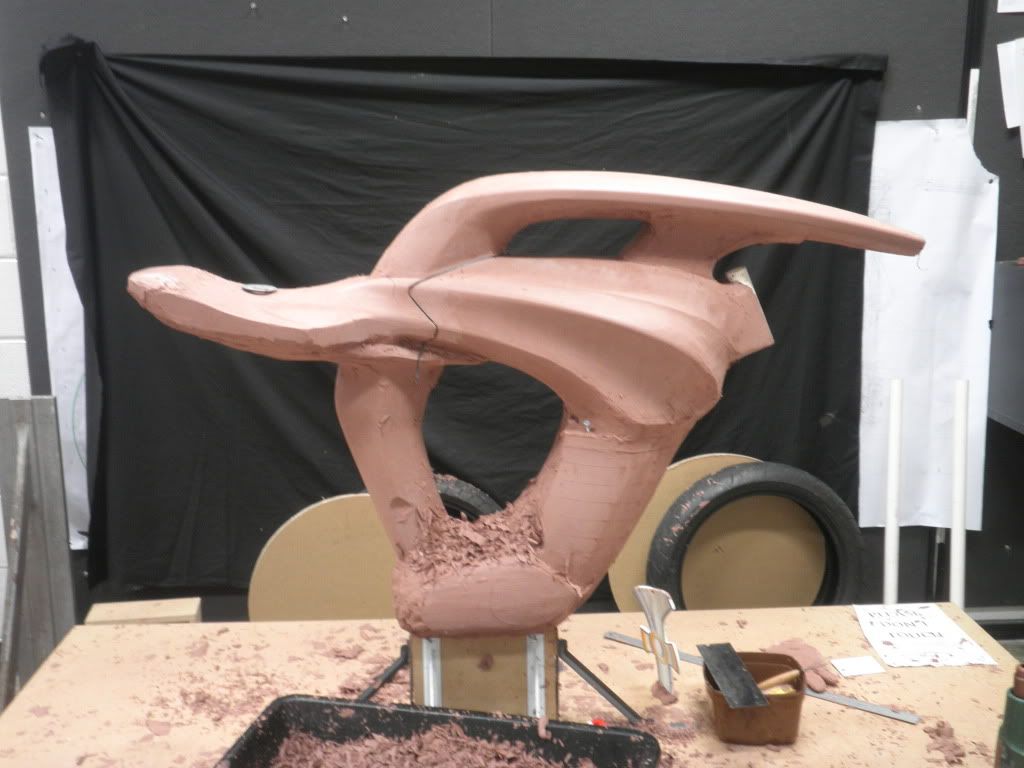
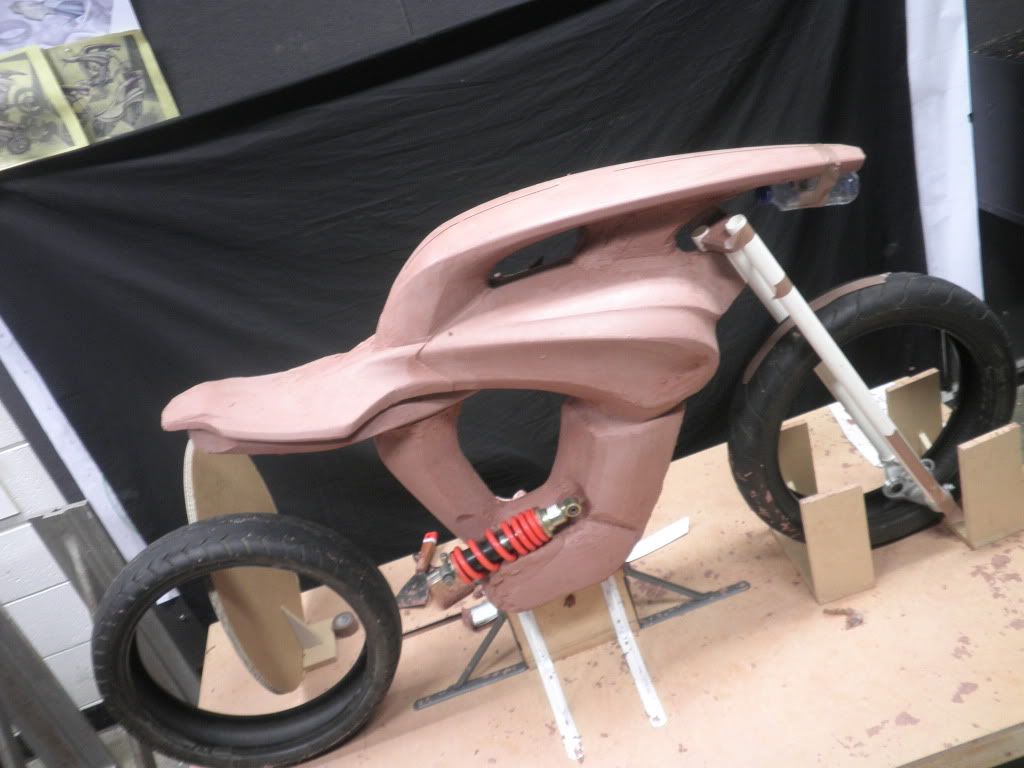
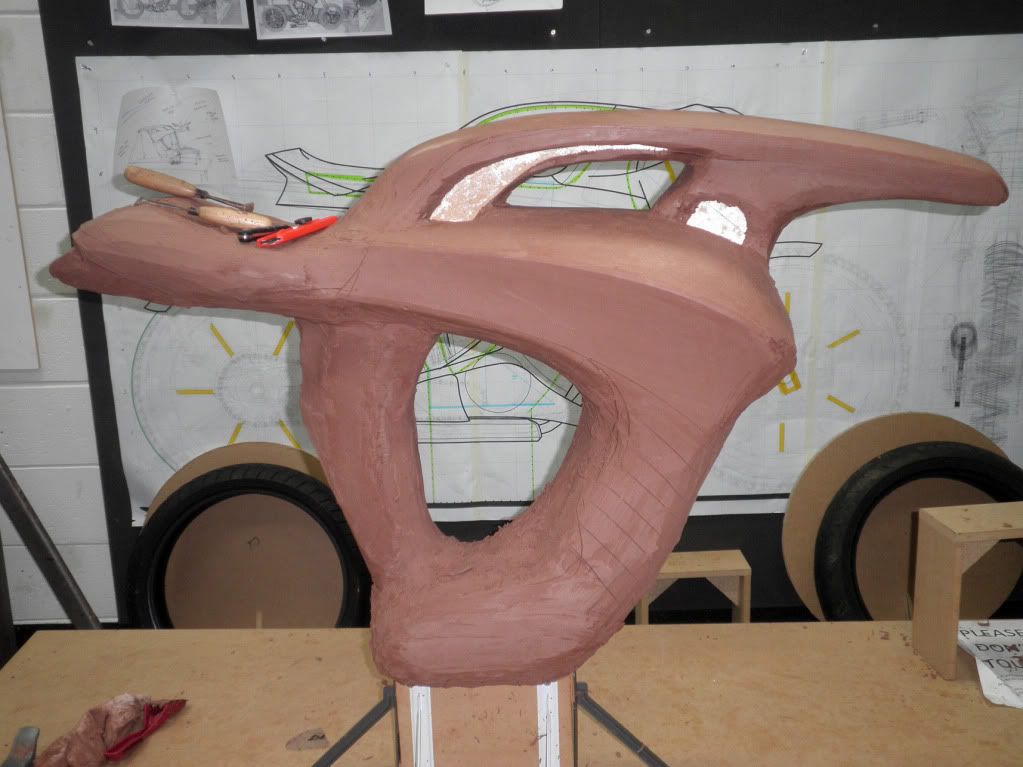
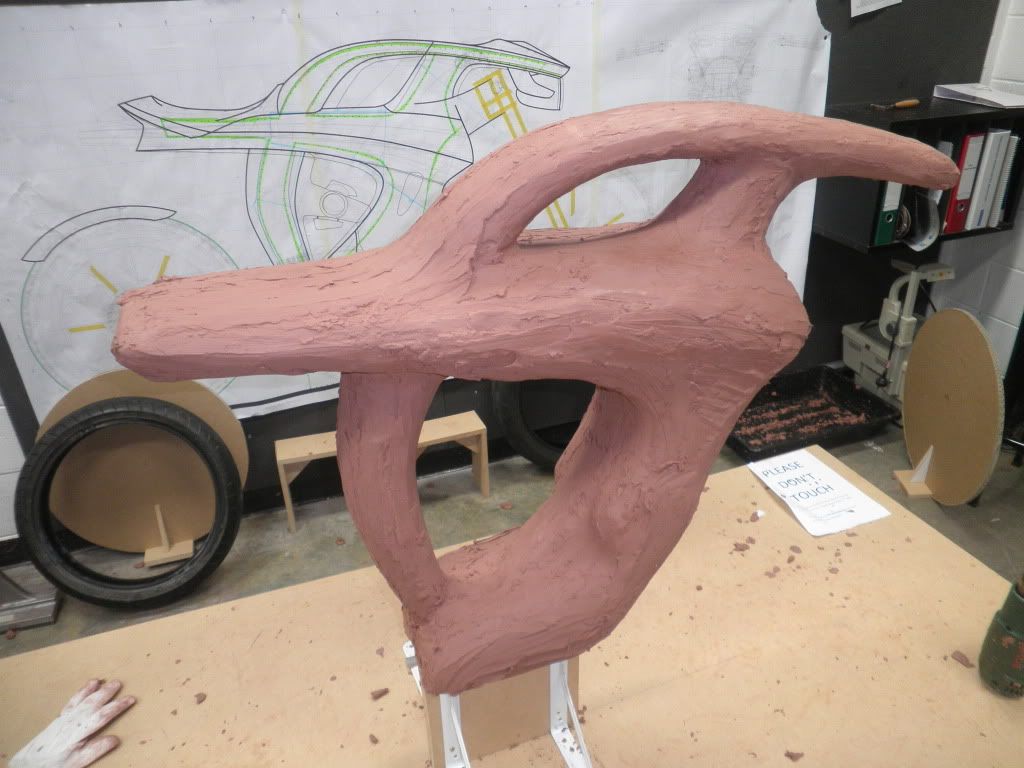
Dropped the seat alot
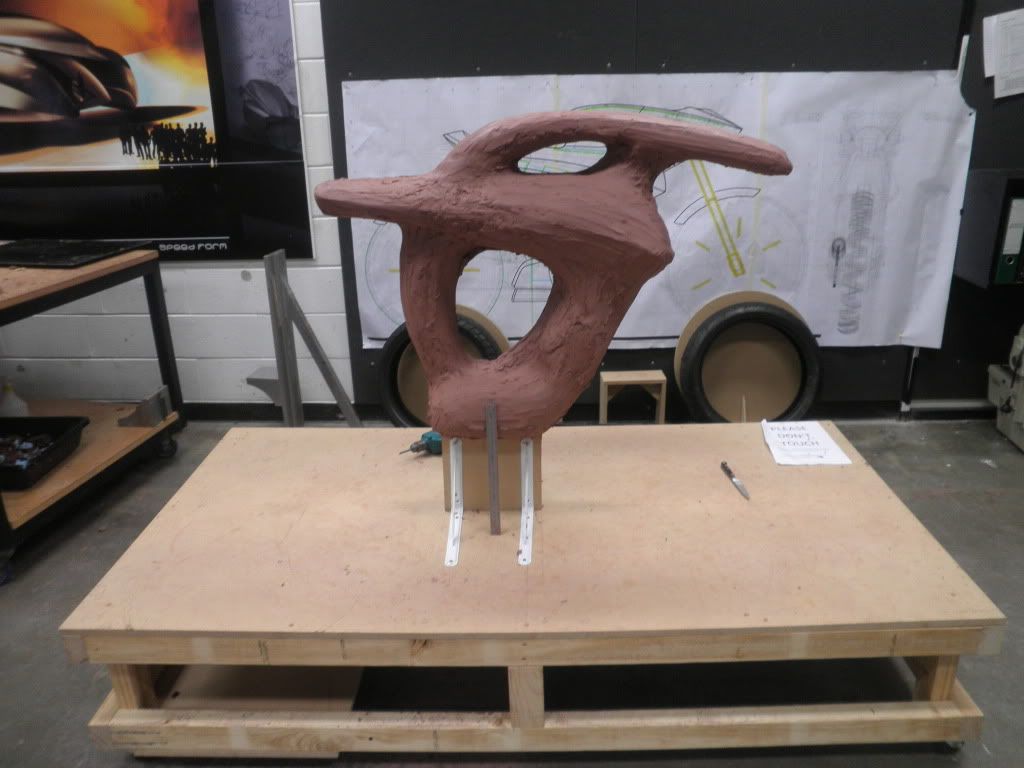
more..
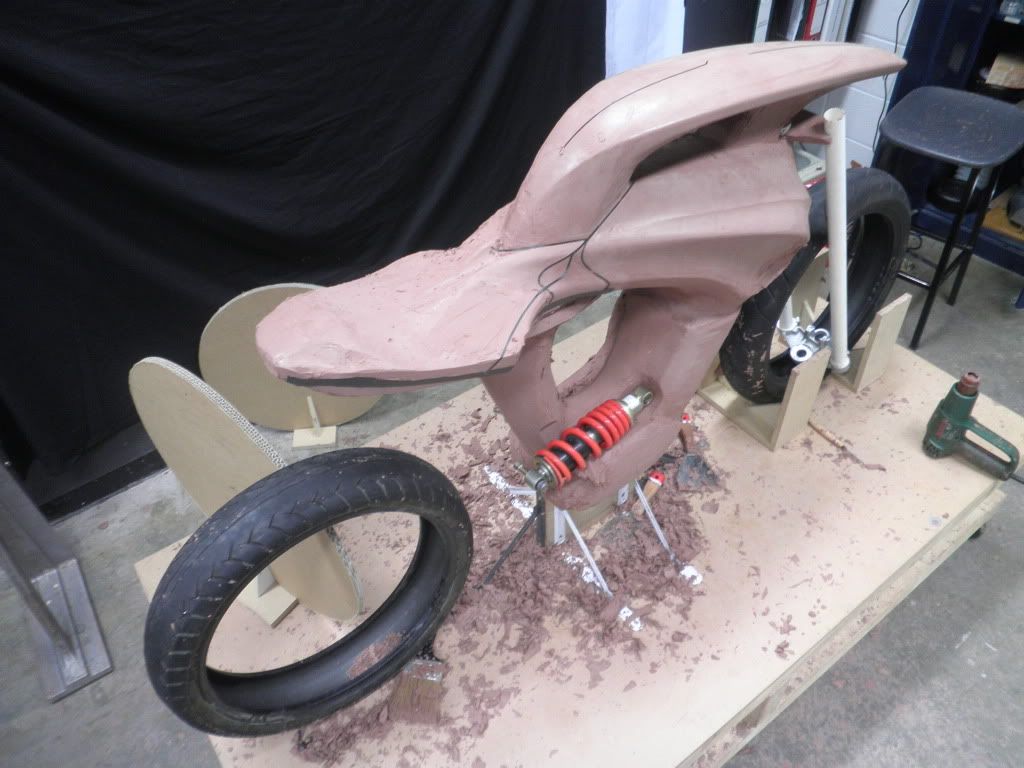
Much more!.. (Partly thanks to your observation Ged)
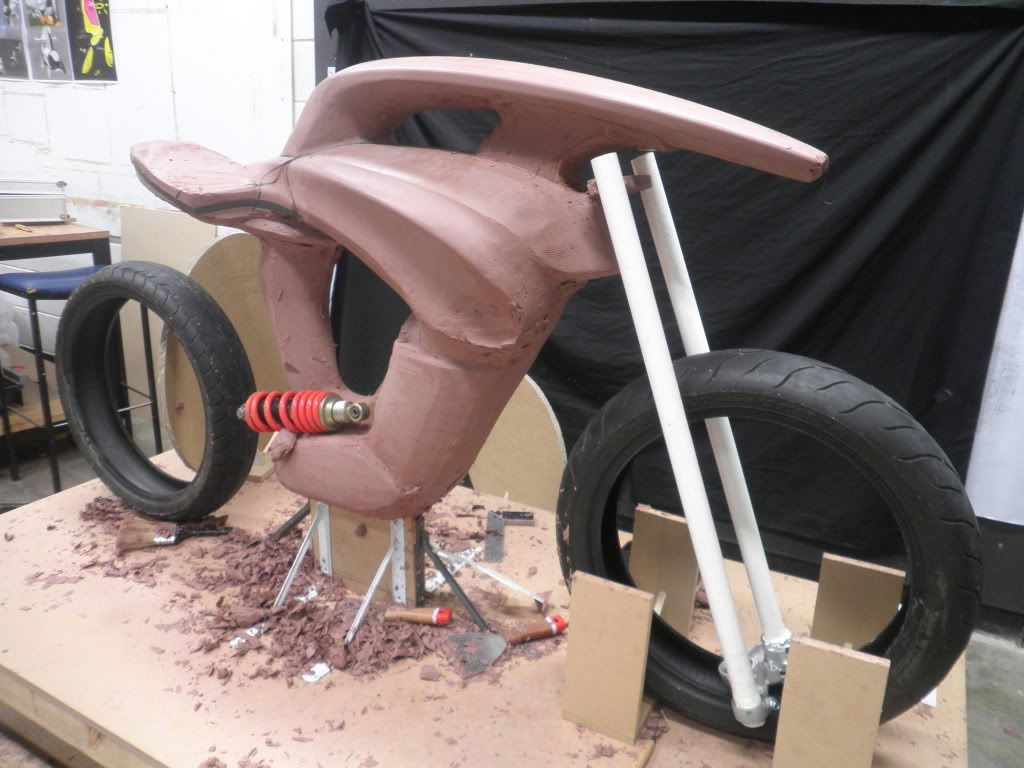
Much better! now to make it look good..
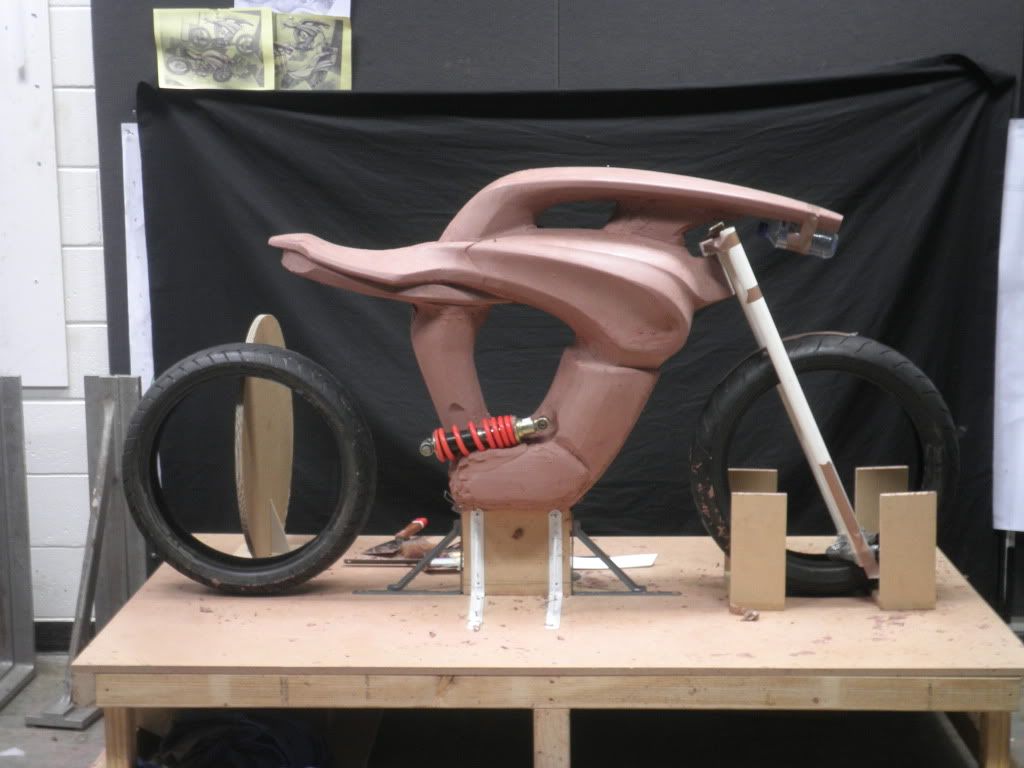
I know it looks like my bench is buckling under the weight (approx 60+kg of clay now) but it's just the shitty lens on my camera!Leave a comment:
-
cheers guys! The Mock engine will probably be mostly made of machined MDF and laser cut aluminium.. Not entirely sure yet, but I will be making it, not using an engine from something else.
Ok another update.. still from a few weeks ago but im getting there :p
the photos may be a little out of order but I'll try and keep them in line...
However the model itself goes forwards and backwards alot... try something.. dont like it... try something else.. meh.. go back to before, try something new again etc etc.. you get the idea
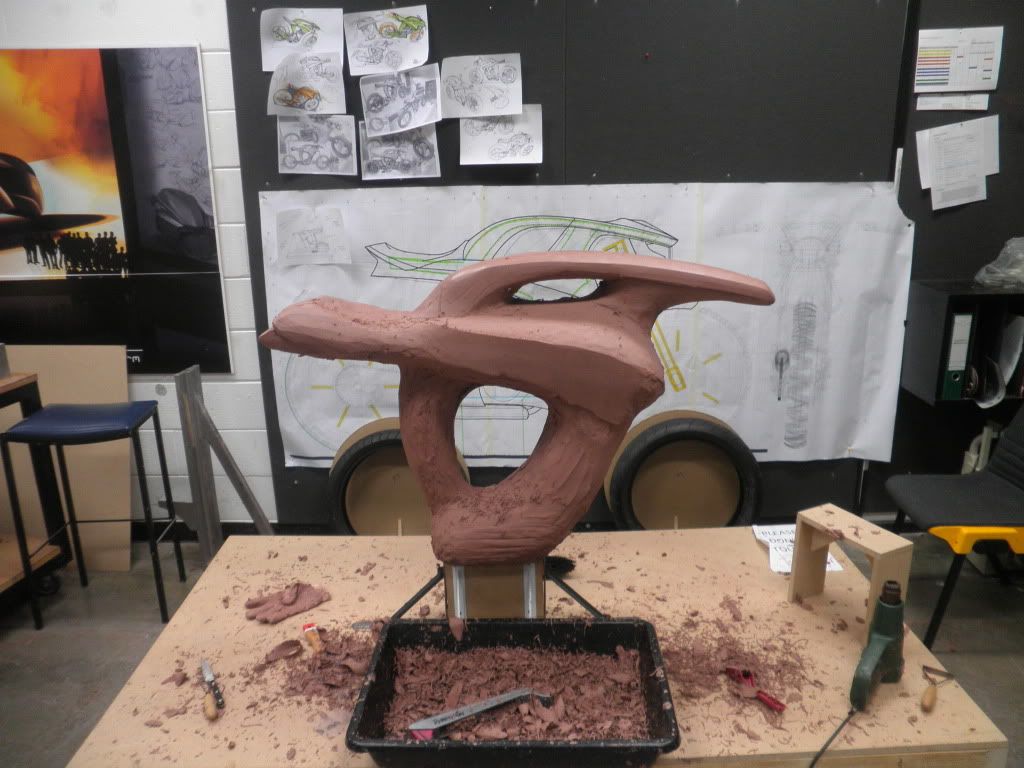
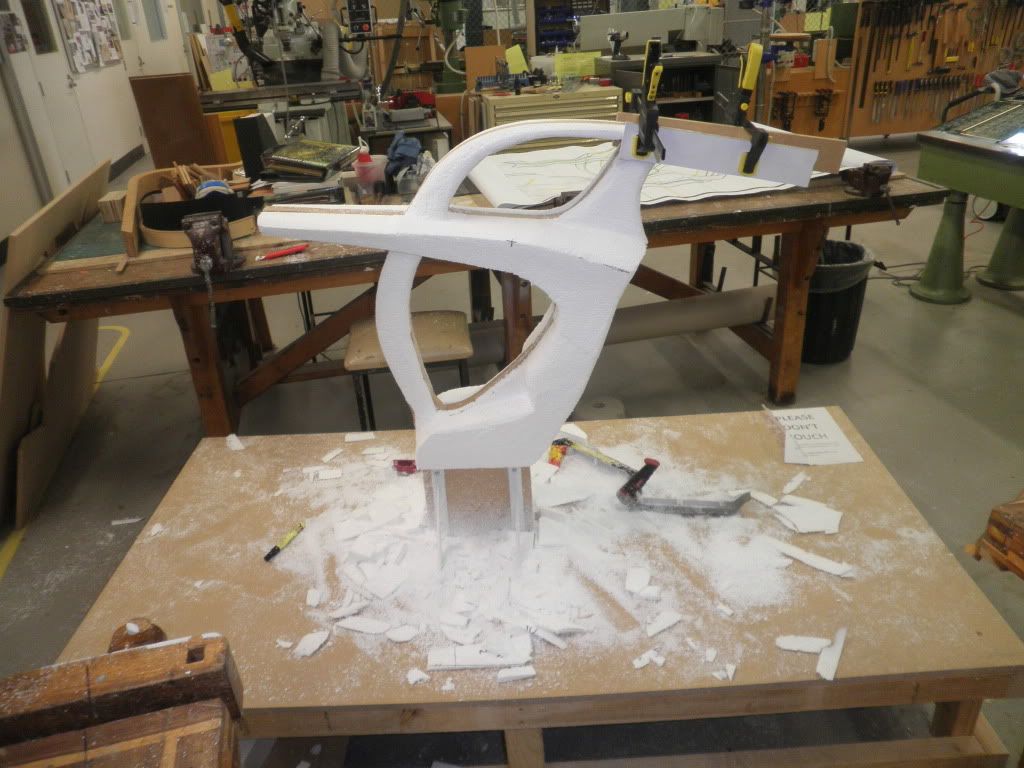
Ok so first time hitting the armature didn't take long!
..aaaannd again. Cut/dig/chisle out as much as you can and clay it back up. Better to be making a mess now than when your doing your final surfaces..
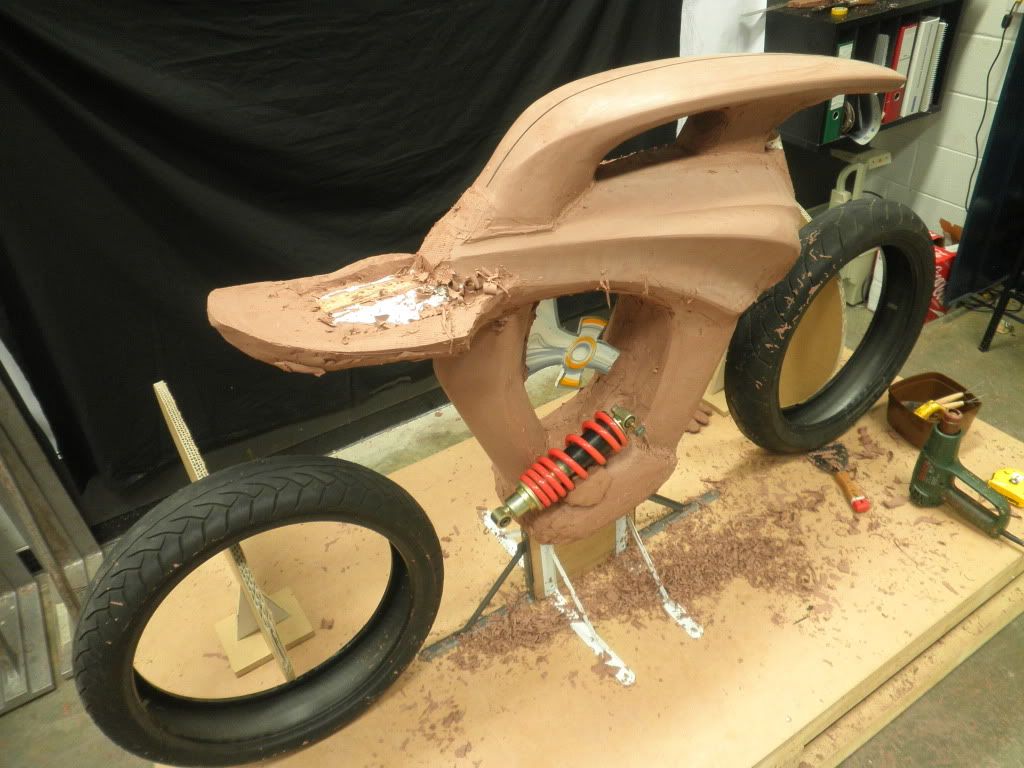
Claying in the stem

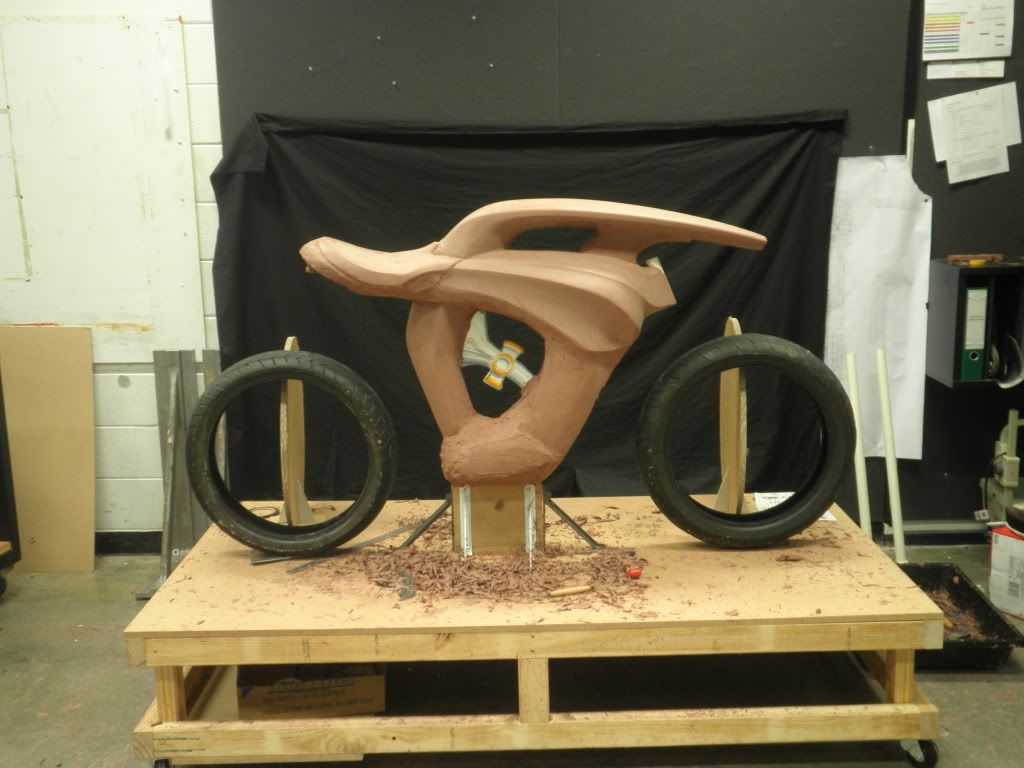
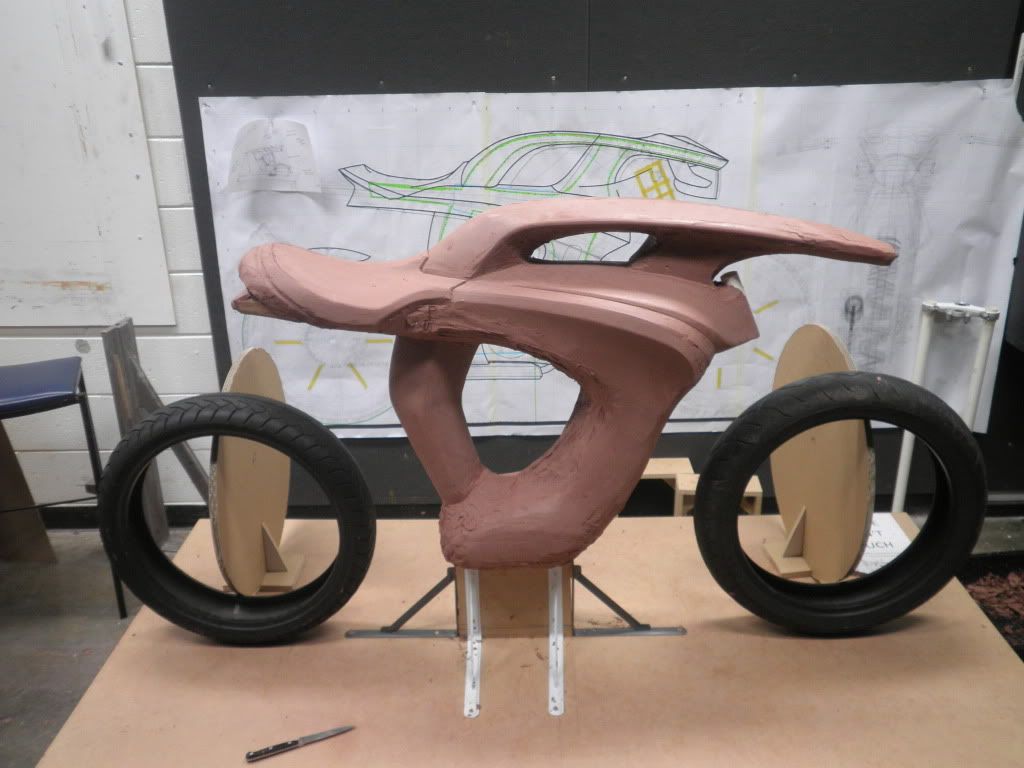
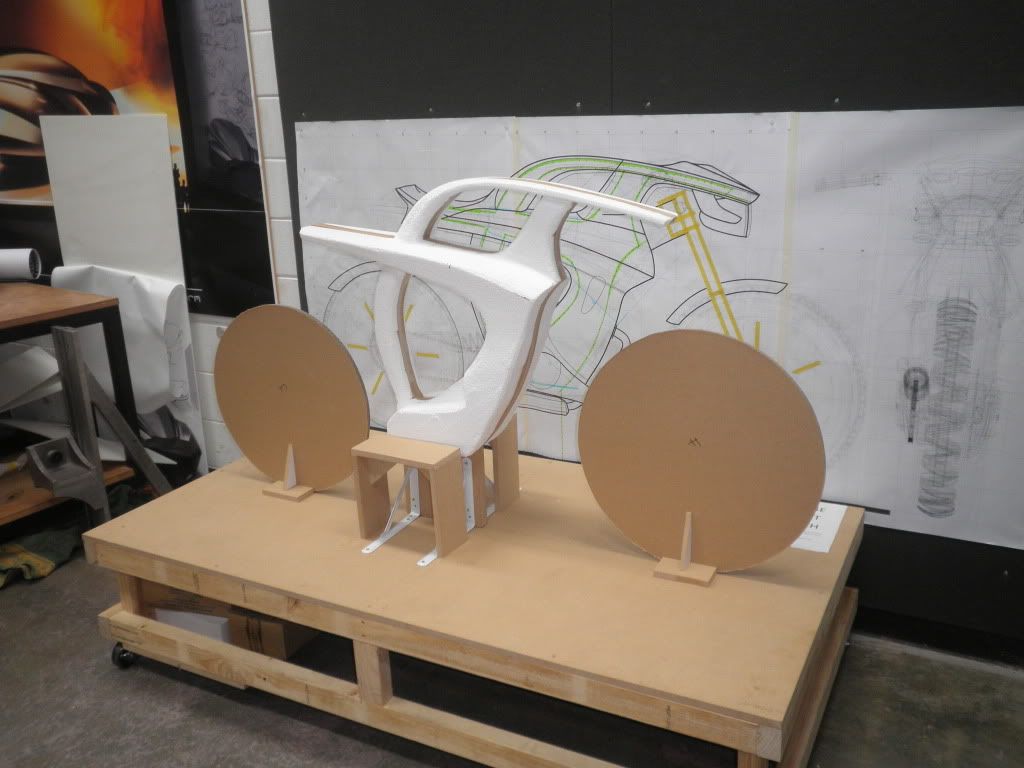
Mocked up wheel bas with seat blocked in and new feature tying the stem to the tank
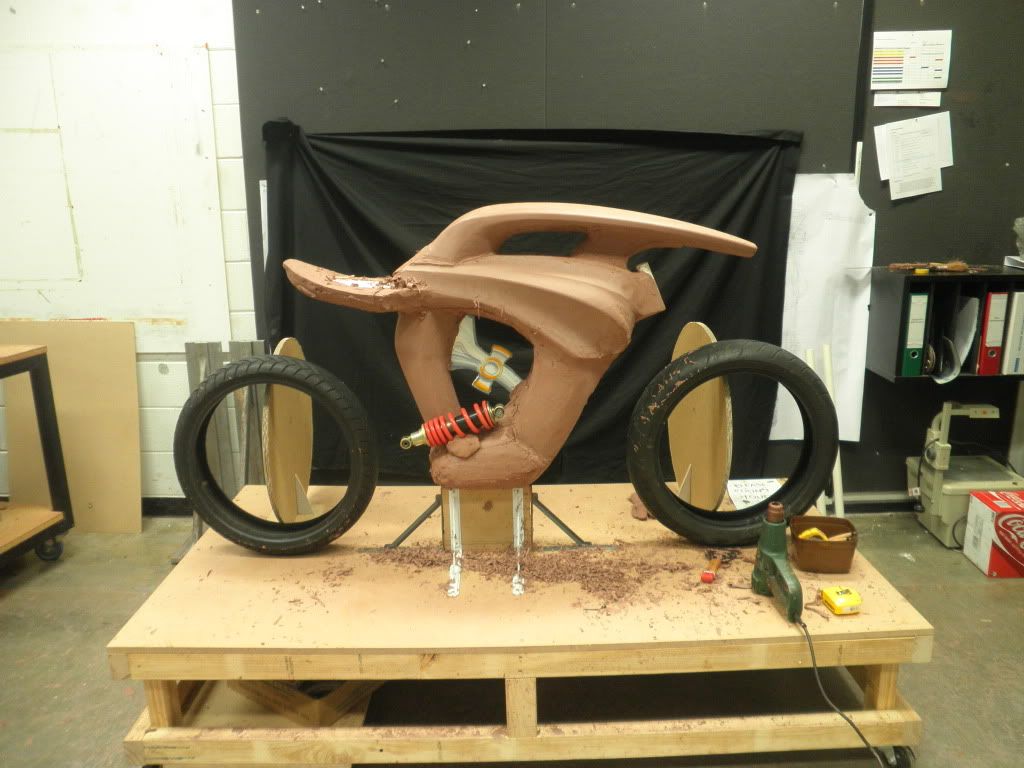
Ditched the chamfer and accelerated a few lines to speed up the dynamic. Parallel lines (generally) = bad. Also playing with having a split seat.. Trying to make it a little less retro and generic..

 Last edited by JamesE30; 08-24-2011, 07:53 AM.
Leave a comment:
-
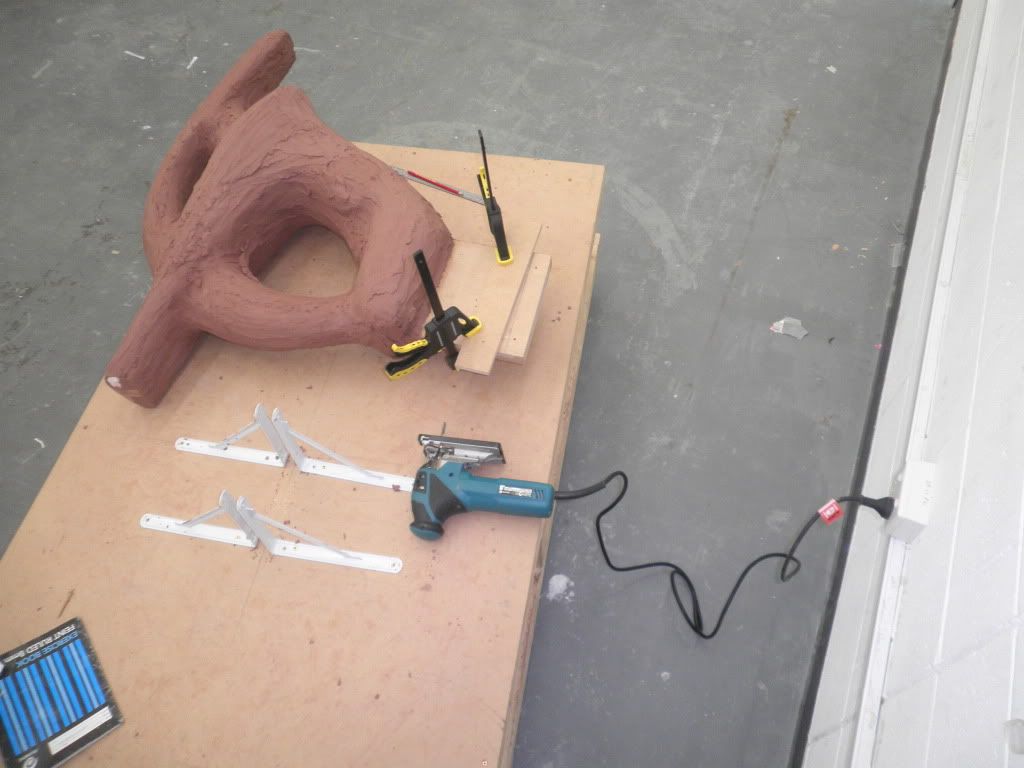
Claying up is a time consuming process and doing it right the first time will save you hassle later. Laying on slabs of clay that is not heated or applied properly will cause air bubbles and weak spots in he model which can be a huge problem when you are slicking down your final surface.
First few layers of clay
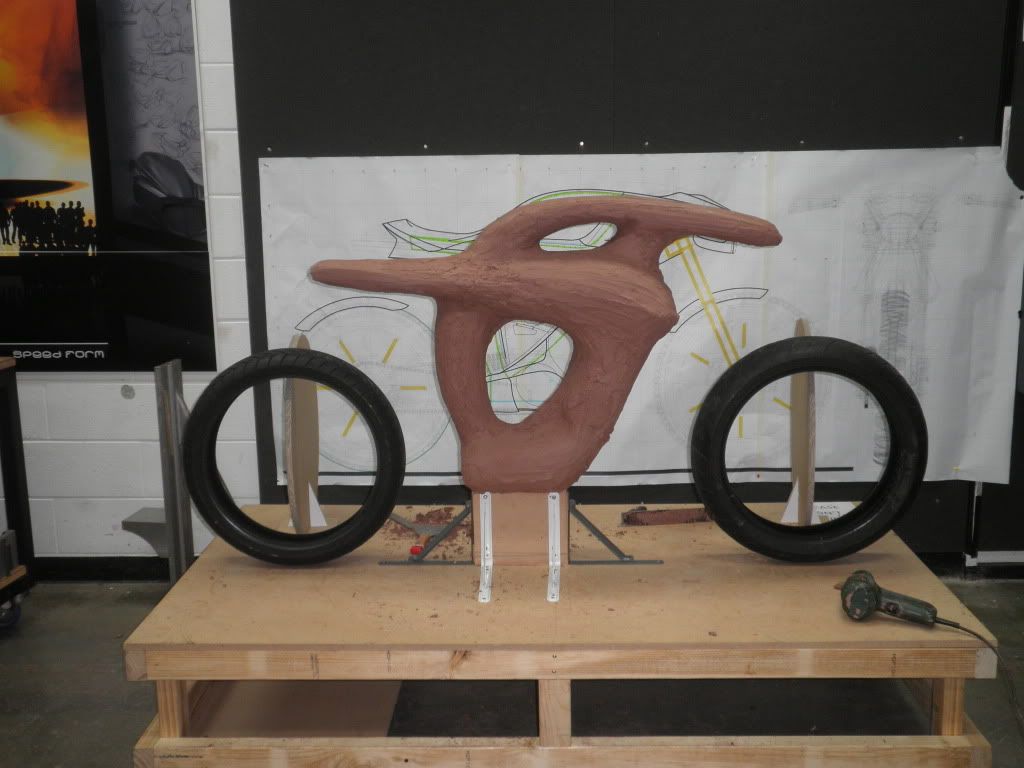
At this stage as the model was filling out, I decided to re mount the armature with a little less rake. Lowering the seat a little and providing a bit more room for the forks and bars
Sitting further back
more clay
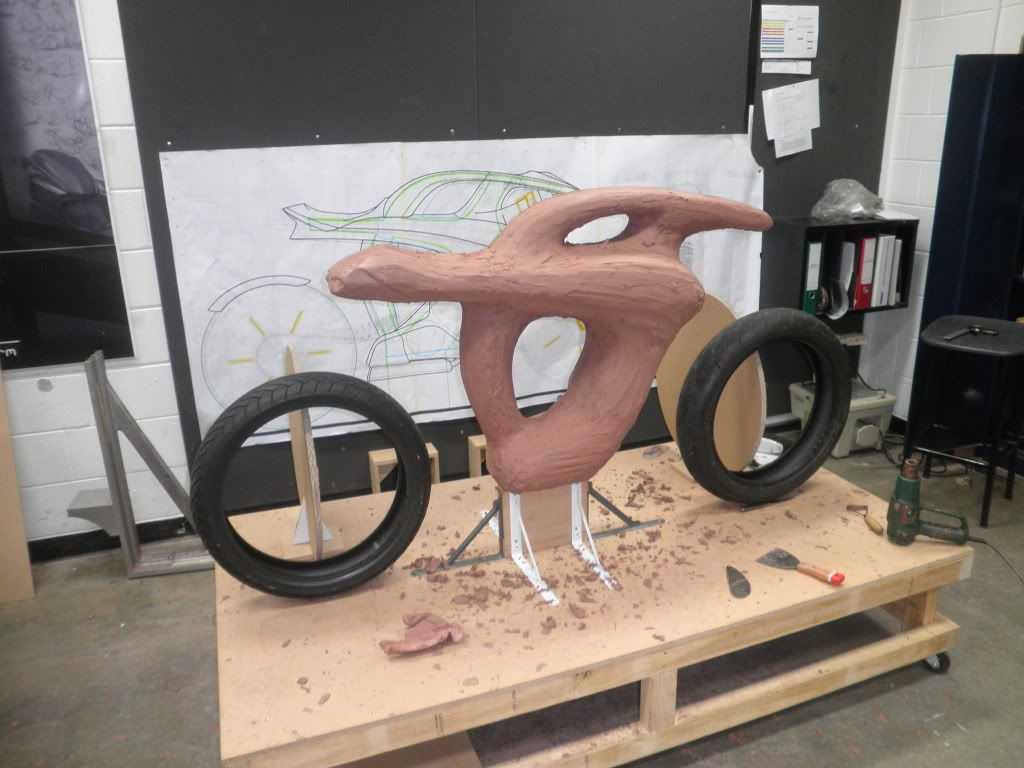
First attack on the surfaces!
Leave a comment:
-
^:up: UPDATE: Clay Modelling
So during the mid year break, after a bit of a rest and a few hangovers.. I kept sketching and sketching and began to refine my design. I haven't scanned in any of these sketches so I'll try and upload them at some stage. But basically I headed in a slightly different direction...
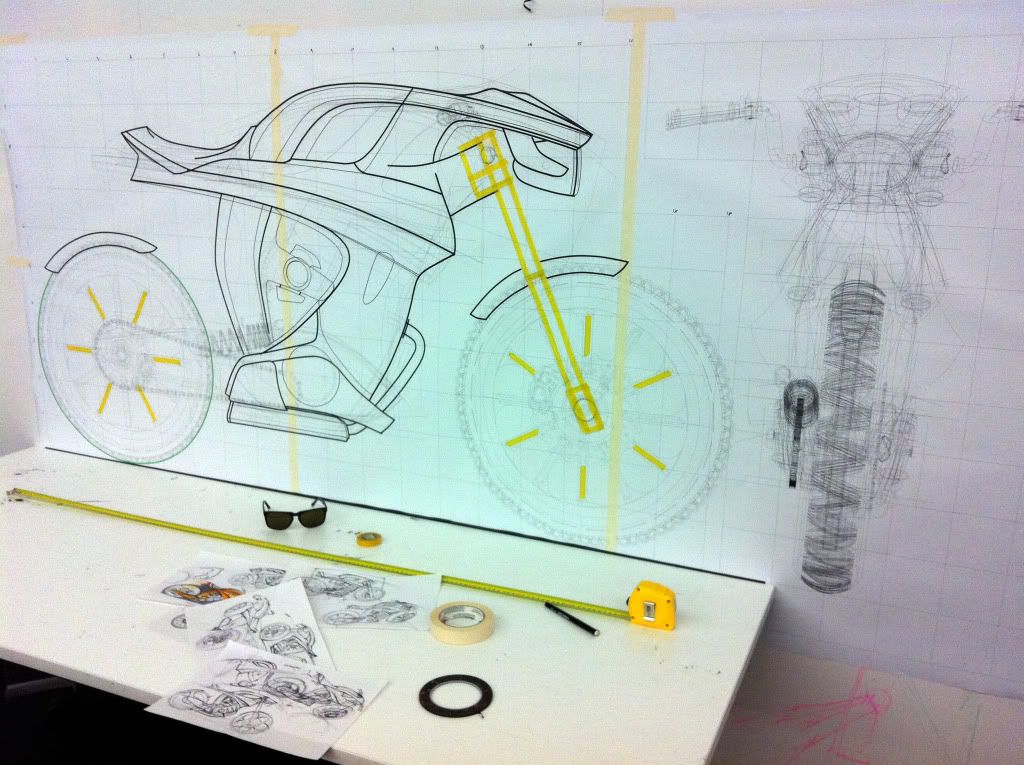
So since Im doing a full size clay, I needed to get started early so even though it wasn't even the first week of semester yet, I had started building my workbench and began a full size tape drawing. Tape drawings are a great technique to lay down accurate lines and gain a real life perspective on a design and assess the proportions. Since the drawing is over the top of an Alias CAD package I know my wheelbase and dimensions accurate.
So I had my workbench and my tape drawing, with a rough Idea of what I wanted to make. So now it was time to make the armature.
The armature is basically the core of the clay model and needs to be strong and ridged enough to withstand 10's of kilos of clay, and potentially hundreds of hours of pushing/pulling/cutting/scraping..
You need to decide how accurate to build your armature depending on how much you plan to develop a design. For example In industry They will mill an armature out of foam to allow only 40-50mm of clay on a full size model since the design is so refined, on a scale model it may even be less.
Since I planned to change my design a lot during the modelling process I need as much room for changes as possible. Because there are several quite thin sections The armature would be tricky to nail 1st time. In fact its guarantied I will hit foam during the modelling. Just part of the fun! haha
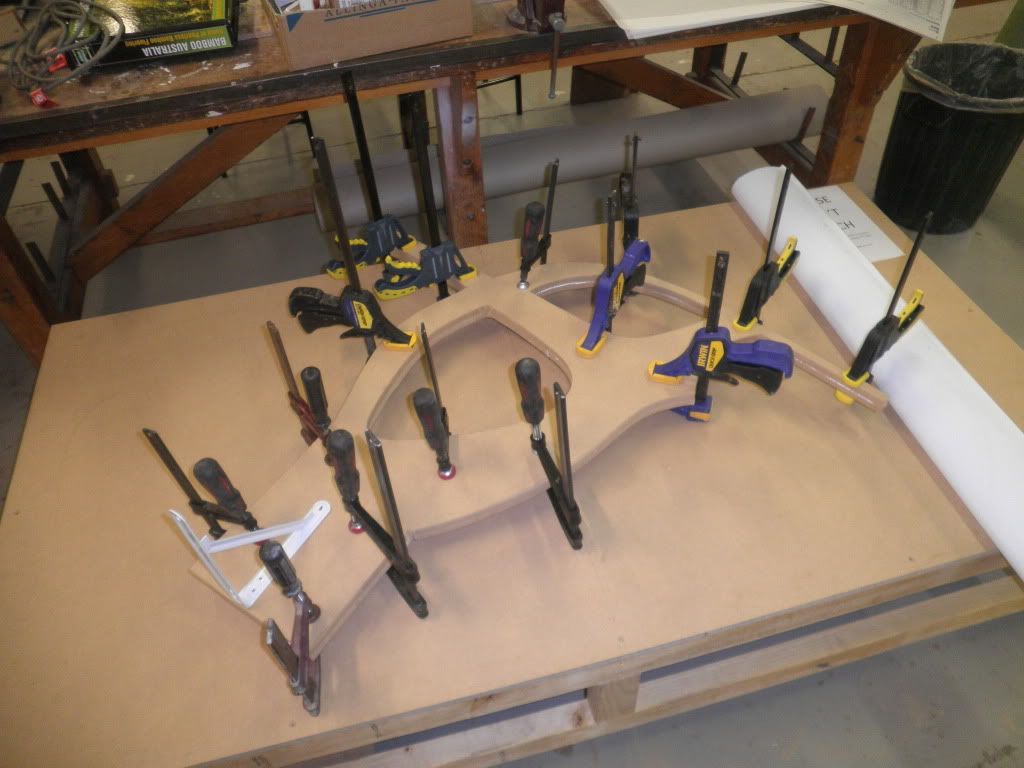
The Core would be two 16mm MDF sheets jigsaw cut to the dimensions on my tape drawing, allowing for as much clay as possible in some areas
Gluing the sheets together
Laying out foam blocks to build up the volume
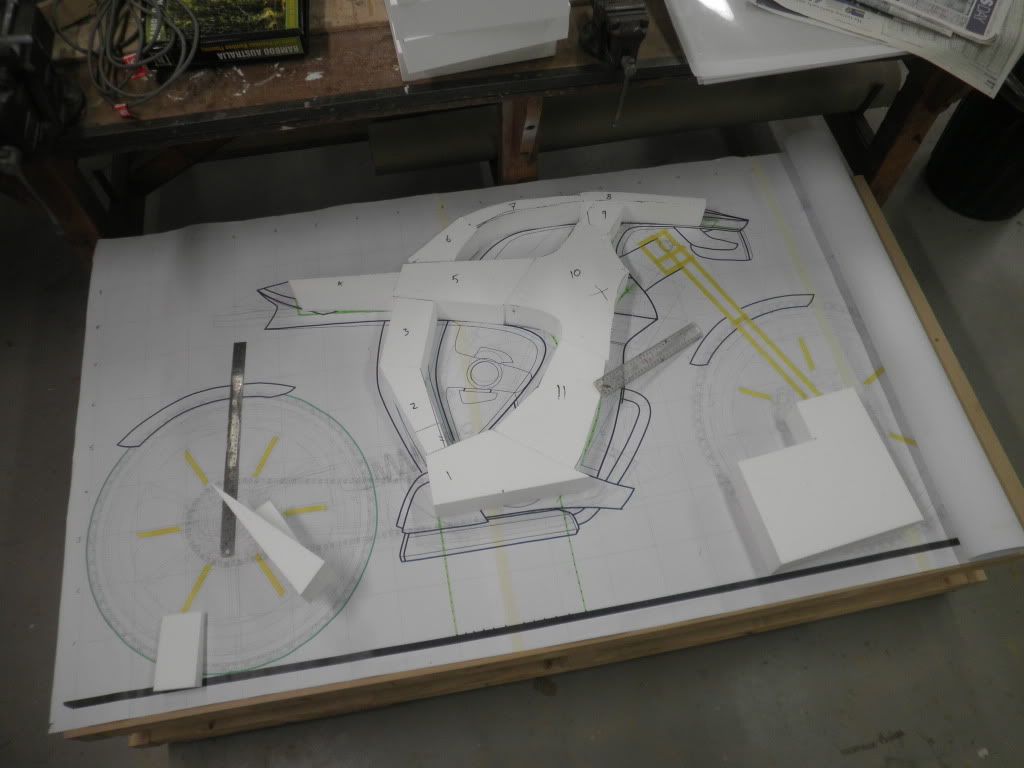
Mounted true to the centre of the desk and braced on both sides
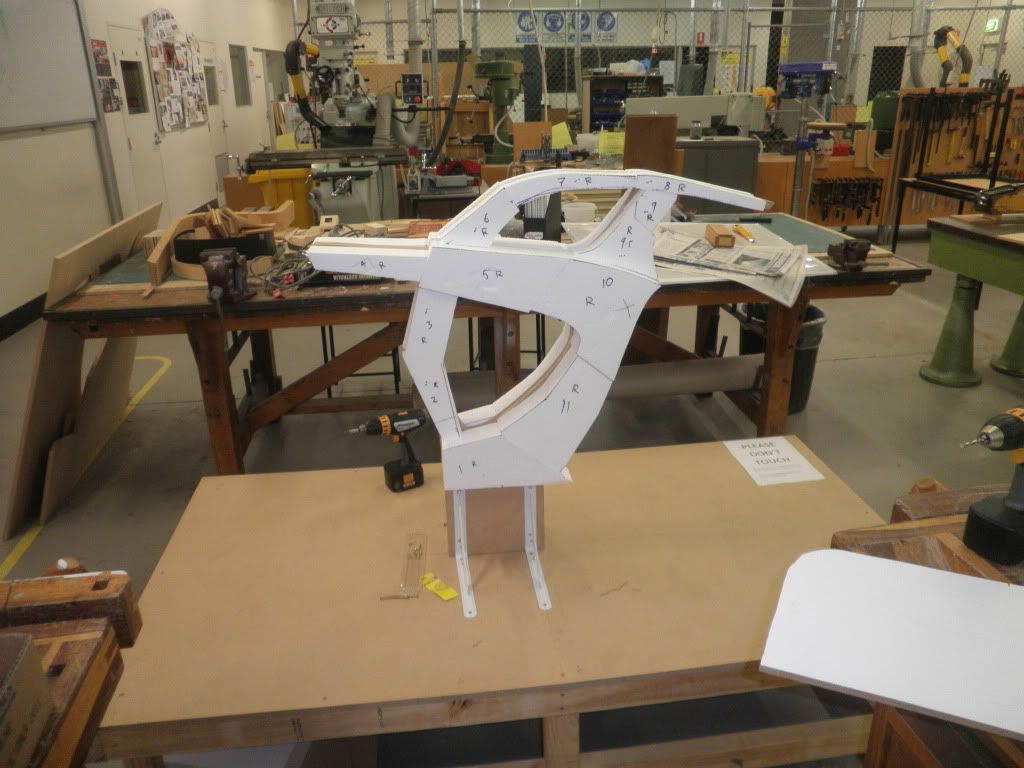
Shaping the foam, again using the tape drawing for reference.
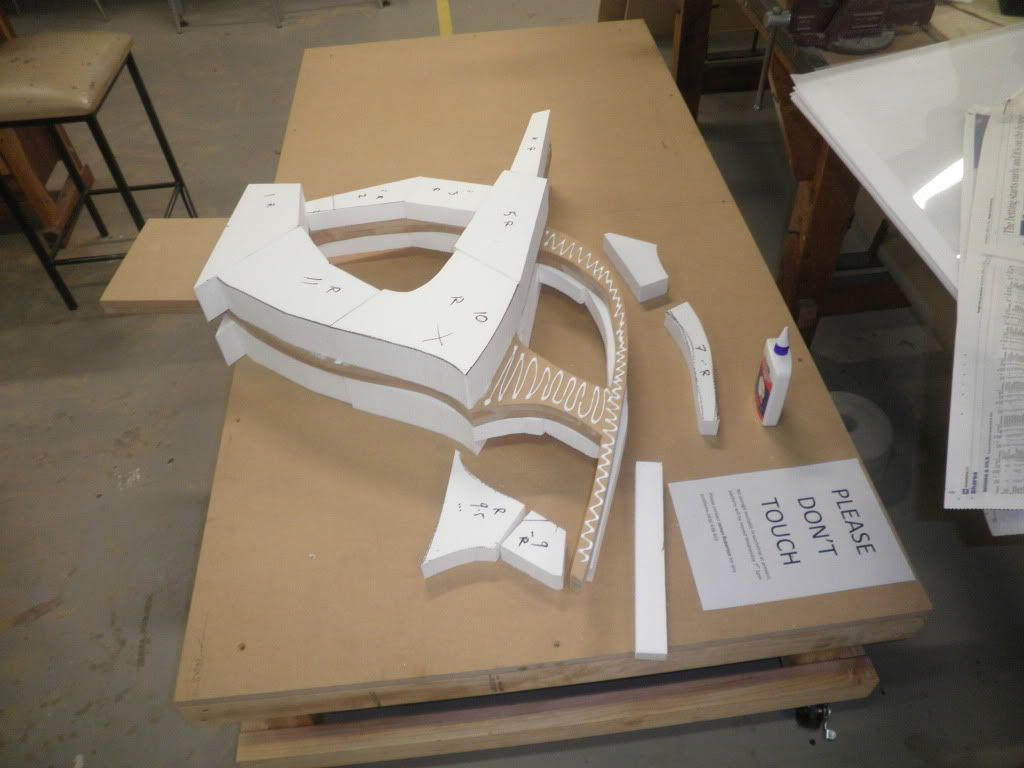
and the finished armature ready for clay!
The work bench is made from 90x70mm pine with a 16mm MDf top sheet with three braces underneath, it's on locking castors since it will be moved around a lot.
Leave a comment:
-
Thanks! Wow this must have been linked quickly haha, good to have the publicity!
Cheers mate, they are Simmons V4's
Haha Yeah my spelling is actually atrocious, i should have a disclaimer before everything a write! Plus I'm sure most of those slides were 5am jobs haha
Holden (GM) actually has a very impressive clay modelling studio here in melbourne, as does ford. Our uni has connections with GM, and I know several industry people who have been very helpful with my project so far, but you guessed it, there are very few jobs available each year, possibly only 1 if any. Really just depends on what's available and how well my work competes against other job seekers.
Several Grads of Monash have gone to work overseas, One of my friends has landed a job in California clay modelling for VW, and another for Opel in Germany. I'd love to work overseas (part of the reason I'm perusing clay modelling), just depends what's out there for me.
What discipline of design did you study? Are you working in industry now?
Cheers
Thanks alot mate!
I'll use Adobe In design, Though I haven't started compiling my final CJ yet. Most of the slides posted so far are just photoshop.
Thanks! Are you very familiar with Monash? I'm curious how well known it is overseas, I assume most outside Australia would have not heard of it
**EDIT
Just uploaded some more images to the 1st post!Last edited by JamesE30; 08-17-2011, 09:58 AM.Leave a comment:


Leave a comment: