
Hey everyone I hope this helps someone bring their tweeters back to life. I cant believe how much front sound stage this brought to the car with a loud exhaust. I can actually hear music now!
Tools required:
1 or 2 flat head screwdrivers
Needle nose pliers
Glue gun
1" Tweeters (This guide uses Alpine SPS-110TW)
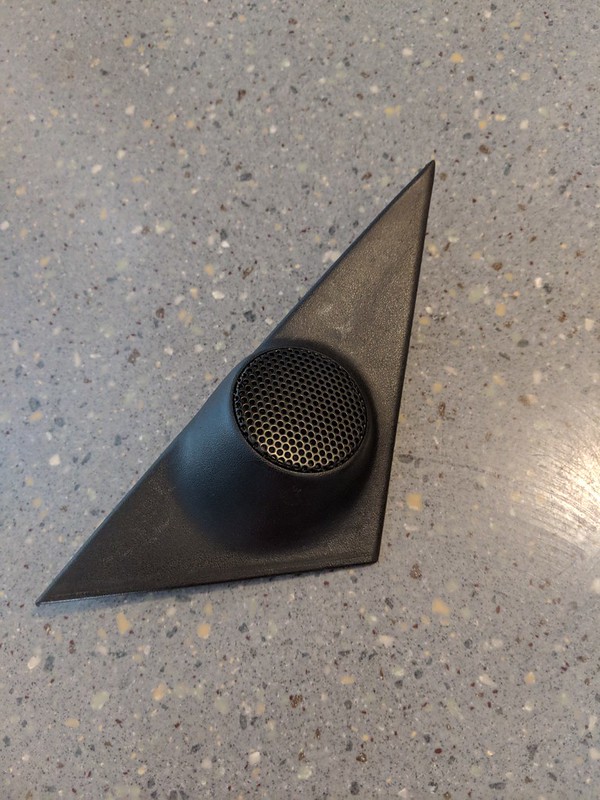
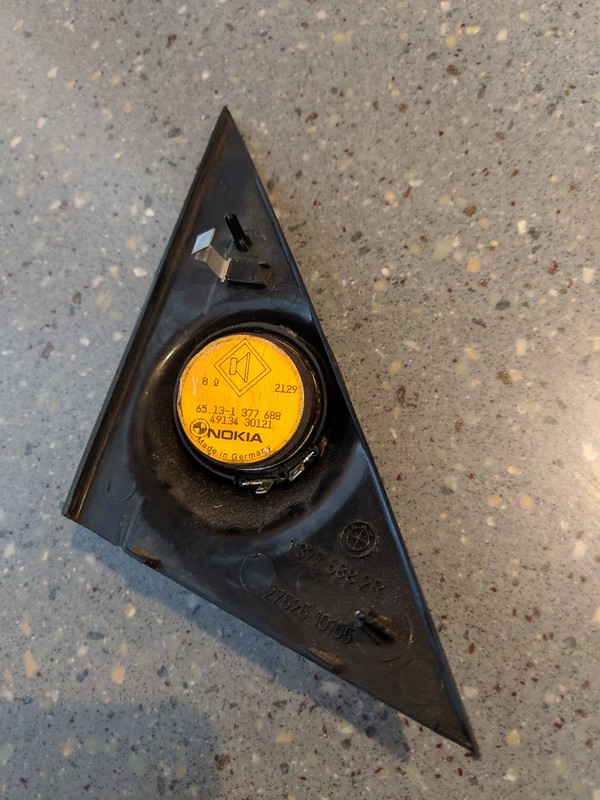
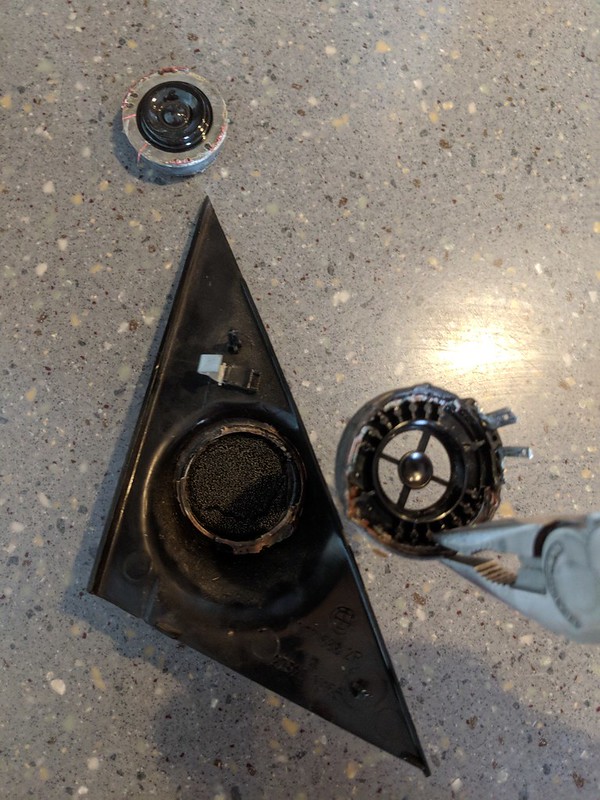
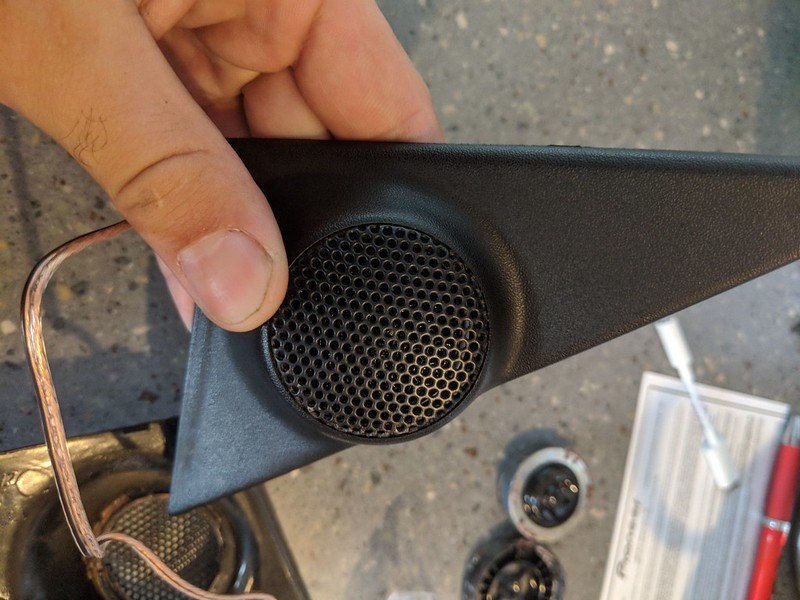
So here is what we're starting with. What we have here is the stock trim, tweeter, and tweeter mount.
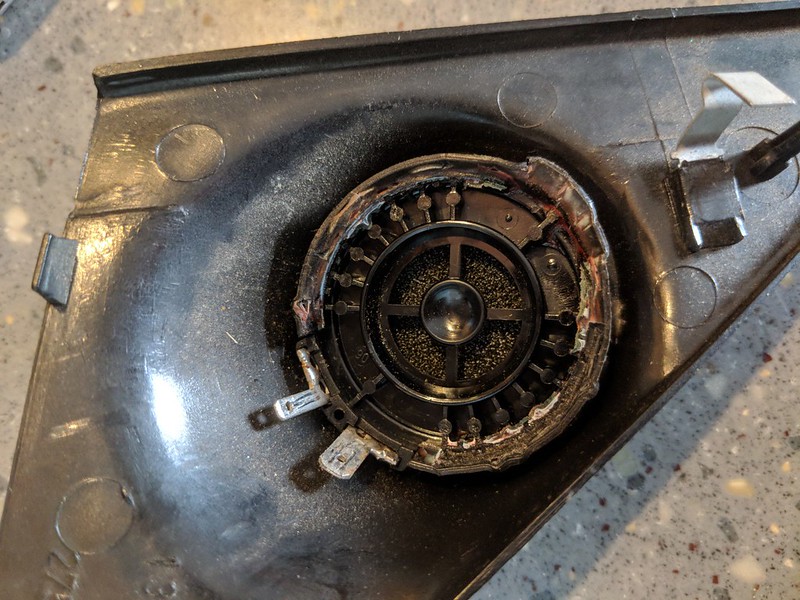
What we need to do first is remove the tweeter from its mount. This can be accomplished by taking a flathead screwdriver between the tweeter side and the tweeter mount and using a twisting motion, like unscrewning something. Work slow, go around 2 or 3 times, you'll hear the glue cracking as you do this. Once you get a little bit of wiggle, try and get the flathead under the edge of the tweeter and pop it up and out. If you feel like its taking a lot of effort go back around with a larger flathead to get more leverage.
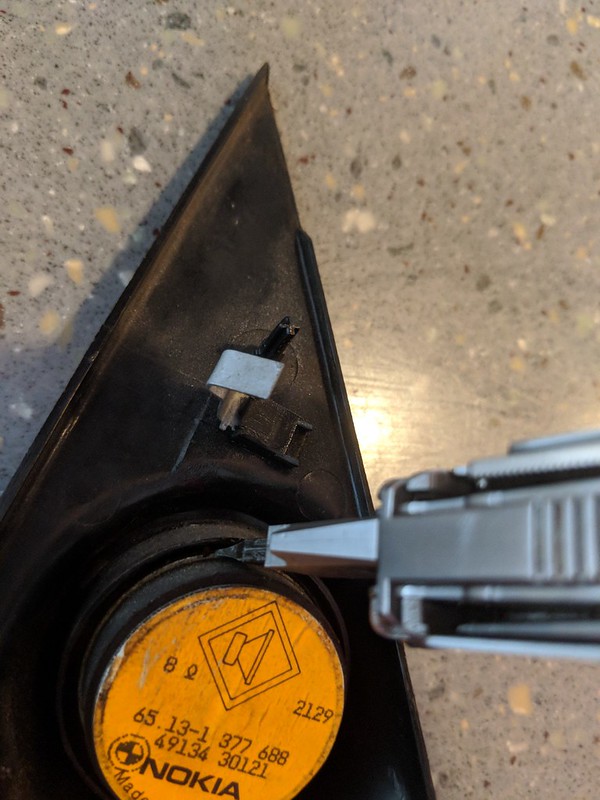
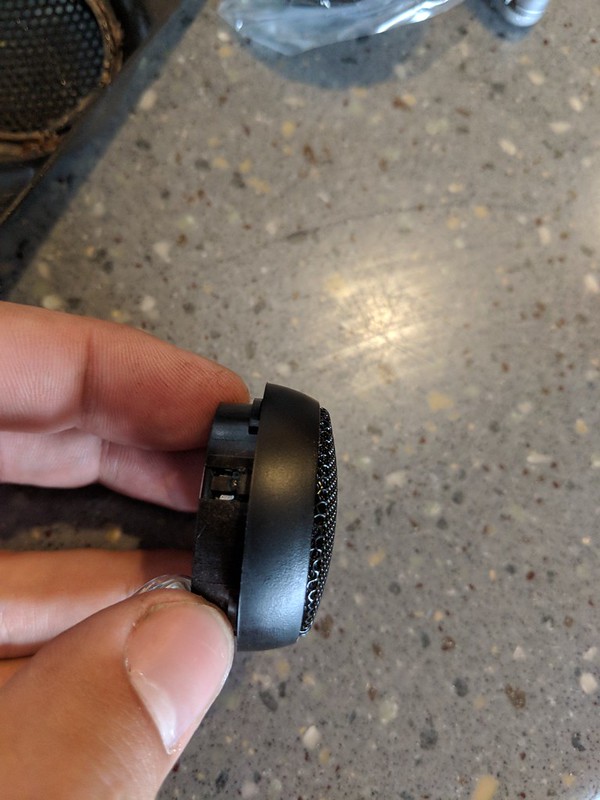
Okay cool, the tweeter is out. Now we need to tackle the tweeter mount. This piece is also glued to the stock trim. What we want to do now is get a pair of needle nose pliers, and pry the mount away from the tweeter trim panel. I cant think of a way to describe it, so hopefully the second image here shows how the plastic is deflecting. You want to kind of pull the plastic in towards the middle. All the glue is on the outside edge.

Awesome! So now we have the tweeter mount out. What we have left is the factory trim with its foam. Pull that crumbling foam out and lets get ready for the new tweeters to pop in. Lets turn on the hot glue gun now.
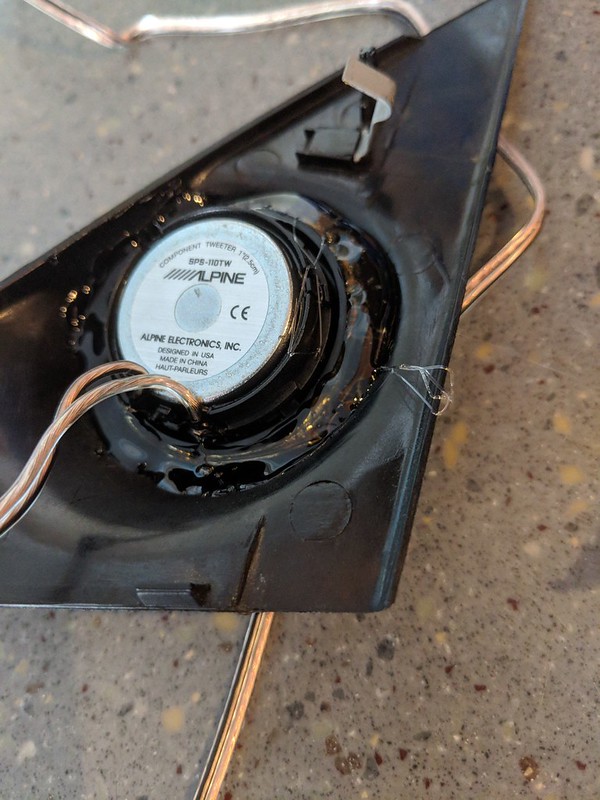
The alpine tweeters I picked up have a conical mount which makes this install super smooth. Its just small enough to line up in the factory hole and centers itself nicely.
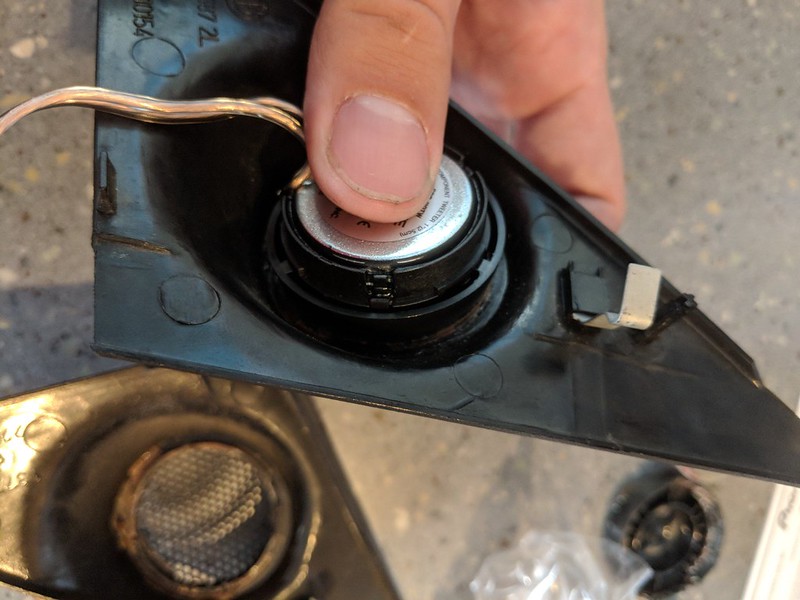
Cool, so if we take a quick peek at the original tweeter we see that the wires attached at the bottom, so we'll line up ours the same, and give it a nice coat of hot glue. Let it sit for about 3-5 minutes cause all of this glue will take some time to solidify. It's still soft here, when its hardened it will have a more opaque finish.
At this point you'll want to make sure you install the passive crossover if you dont already have something hooked up. I had the base audio system, so I did not have the tweeters hooked up to the front woofers. Tapping into the factory wires is quick and easy. Trace the wires from behind the front kick panel speaker they should be Grey/yellow and Grey/green. Tuck the passive crossover in behind your front speaker, and then trim your tweeter wire so it tucks behind the mirror easier.
The crossover gets wired in parallel with the front woofer so
woofer + goes to crossover + goes to tweeter +
woofer - goes to crossover - goes to tweeter -
negative terminals are generally the smaller of the two terminals.
Great job! You're done!
Tools required:
1 or 2 flat head screwdrivers
Needle nose pliers
Glue gun
1" Tweeters (This guide uses Alpine SPS-110TW)
So here is what we're starting with. What we have here is the stock trim, tweeter, and tweeter mount.
What we need to do first is remove the tweeter from its mount. This can be accomplished by taking a flathead screwdriver between the tweeter side and the tweeter mount and using a twisting motion, like unscrewning something. Work slow, go around 2 or 3 times, you'll hear the glue cracking as you do this. Once you get a little bit of wiggle, try and get the flathead under the edge of the tweeter and pop it up and out. If you feel like its taking a lot of effort go back around with a larger flathead to get more leverage.
Okay cool, the tweeter is out. Now we need to tackle the tweeter mount. This piece is also glued to the stock trim. What we want to do now is get a pair of needle nose pliers, and pry the mount away from the tweeter trim panel. I cant think of a way to describe it, so hopefully the second image here shows how the plastic is deflecting. You want to kind of pull the plastic in towards the middle. All the glue is on the outside edge.
Awesome! So now we have the tweeter mount out. What we have left is the factory trim with its foam. Pull that crumbling foam out and lets get ready for the new tweeters to pop in. Lets turn on the hot glue gun now.
The alpine tweeters I picked up have a conical mount which makes this install super smooth. Its just small enough to line up in the factory hole and centers itself nicely.
Cool, so if we take a quick peek at the original tweeter we see that the wires attached at the bottom, so we'll line up ours the same, and give it a nice coat of hot glue. Let it sit for about 3-5 minutes cause all of this glue will take some time to solidify. It's still soft here, when its hardened it will have a more opaque finish.
At this point you'll want to make sure you install the passive crossover if you dont already have something hooked up. I had the base audio system, so I did not have the tweeters hooked up to the front woofers. Tapping into the factory wires is quick and easy. Trace the wires from behind the front kick panel speaker they should be Grey/yellow and Grey/green. Tuck the passive crossover in behind your front speaker, and then trim your tweeter wire so it tucks behind the mirror easier.
The crossover gets wired in parallel with the front woofer so
woofer + goes to crossover + goes to tweeter +
woofer - goes to crossover - goes to tweeter -
negative terminals are generally the smaller of the two terminals.
Great job! You're done!

Comment