Announcement

Collapse
No announcement yet.

I bought another one. (lots of pics!)

Collapse
X
 
  • Filter
  • Time
  • Show
Clear All
new posts

    #31
    Originally posted by Mazdayasna View Post
    If you add "h" before ".jpg" in your imgur embed link, it resizes it to 1024x768, which fits comfortably on any modern screen.
    Also, that head unit looks fantastic! Where did you get it from? I can only find questionable eBay sellers.
    Awesome, thanks so much for that! I’ve done it now :)

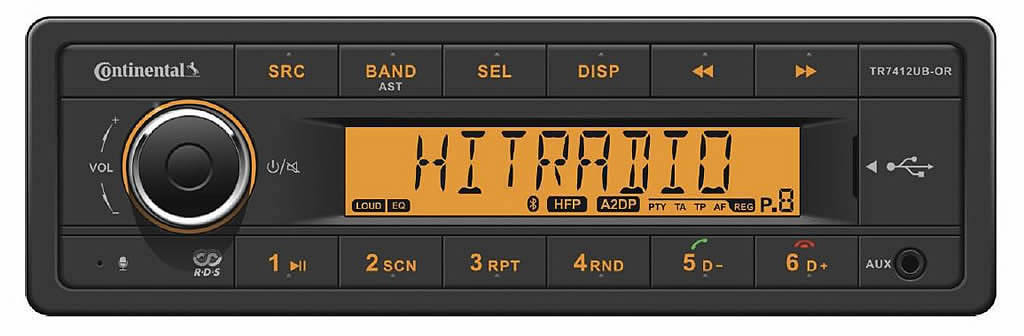
    Yeah I’m really happy with the head unit as well, and my mate is going to be able to wire it up for me - then I’ll think about upgrading the speakers.
    I bought it from an Australian site called Sound Labs Group (.com.au). Really quick postage and a reasonable price too.

    Comment


      #32
      A real quick one!
      The cover over the HVAC sliders had warped in the sun as I had removed it from the car for some reason. I bought another one on eBay and it arrived today.

      The installation process is as follows:
      Yank on the sliders and the cap will pop off, then slide the piece in gently, as the plastic is pretty thin. Once installed, pop the caps back on and there you go, you officially have done it. Feel good about yourself because no matter how crap your car is, this piece of it is A-OK.

      Comment


        #33
        I need to get those tiny little plastic screw things for the under dash piece...

        glad you've kept the car, royal blue is the best
        Simon
        Current Cars:
        -1999 996.1 911 4/98 3.8L 6-Speed, 21st Century Beetle

        Make R3V Great Again -2020

        Comment


          #34
          Thanks 2mAn! I'm glad I've stuck with it too, I'm definitely back and involved in the project now! It's amazing what a couple of days of working on a car will bring you closer and involved again!
          It might be worth contacting the guy I bought the under dash panel from to see if he'll sell you the screws separately: https://www.facebook.com/E30INTL/ a really nice guy and easy to deal with.

          Comment


            #35
            Hi all,
            Today I spent a couple of hours cleaning up my alloy wheels which I'll be getting fixed up and putting onto the convertible along with some new 215/40ZR17 tyres. As I posted before, I'm hoping to go with a Nogaro silver colour combination with the polished lip and grey spokes: https://www.turnermotorsport.com/p-3...e-5-wheel-set/
            I've put out a few quotes to some places in Sydney to repair the rim damage and paint them as well, and I'll look at eBay for some new BMW stickers to go on the centre caps.


            What I'm hoping it will look like after:

            Comment


              #36
              A Sydney resident who I haven't seen around yet? This is weird.

              Barrel Bros in Milperra did a fantastic job on mine, and all my friends wheels. Would recommend them hand over fist.
              sigpic

              (clicky on piccy to get to thread)

              Comment


                #37
                Hi econti! Yeah I haven't been around for a while! Definitely lost faith for a while in the project but I'm back and getting things done!

                I've messaged them - a mate of mine also recommended them so hopefully we have a back and forth and get it sorted. I like your Klutch wheels - I was considering those until I fell back in love with the Simmonds style ones I have. Looks like your colour is pretty similar to mine - just a bit bluer and mine's more purple in the metallic.

                See you around!

                Comment


                  #38
                  More Updates

                  Hi all,

                  It's been a while since an update but that doesn't mean the project hasn't been coming together. I haven't been taking as many photos along the way as I should but I'll definitely post more when I'm out in the open and done!

                  I have a long list of completed tasks, here are some!

                  Installed lowering springs and shocks (H&R Sport, Bilstein B8 Performance)

                  I had a lot of fun installing these. The rears were really easy and I was able to do them by myself, which says a lot because I'm not very good!

                  The fronts were far more involved, and we did use spring compressors. Even fitting the new lowered springs on involved use of the spring compressors. Really happy with the height now they've settled. Will post pictures once my car is clean!

                  Here is a picture of the date on the last shocks so these things were completely gone!


                  New wheels and tyres (Simmons FR17 on Continental tyres)

                  I picked these up because they were almost exactly what I wanted to do with my wheels anyway, and they had new tyres on them, and they were the genuine article, not the Simmons reps I posted earlier.


                  While the guy I bought them off said they were on an e30 before, the offset really isn't right for an E30. They fit on the back no worries, but I'm currently awaiting some 18mm spacers in order for the fronts to clear the brake calipers. I did some bad measuring before and bought 30mm spacers which put the wheels way too far out:


                  They also rub on the back inner fender liner towards full lock. Hopefully with the smaller spacers this can be cut down to a minimum or I can modify the inner fender liner to remove it completely.

                  New seats (Recaro SR4)

                  No photos of these mounted, but the previous person who had these seats hacked up the bases for some unknown. I had to pay someone to weld up the bases so they worked like stock. Here's a photo of what I had done:


                  New exhaust tips.

                  From this old photo you can see how crappy they are:


                  They had been redone at some stage with mild steel, but the muffler was stainless. The exhaust guy couldn't really understand that, but in any case I got two stainless 3" tips, individual back to the muffler, and I think they look great. If course no difference in sound, but I won't get tetanus if I scrape on them whilst working:


                  New stereo install (Continental-Car-Radio-TR7412UBOR)

                  Unfortunately no photo of this yet but I really like the look. We did find one of the front speakers is dead so I've ordered some cheap 5.25 inch speakers just to have some sound.
                  1. New drain plug washer
                  2. Bulb for rear light (turned out to be a loose connector)
                  3. New boot roundel
                  4. Trunk shocks (very useful to not have a boot fall on your head)
                  5. Power window switch (highlighted how dull the other power window switches were!)
                  6. New brake light switch (the most uncomfortable position I've been in a car)
                  7. New parking light
                  8. New cigarette lighter
                  9. Plug for aerial hole (from Garagistic)
                  10. New black carpet floor mats
                  11. New under dash trim
                  12. Adjusted level of headlights
                  13. New door stop on driver's door
                  14. Vinyl dyed the armrest and map pocket black


                  So, what's remaining is:
                  1. Fit 18mm spacers in the front, see what it looks like and see if it's close enough. The wheels have to sit inside the line of the guard for it to be roadworthy in NSW, but if it's close enough they might pass it.
                  2. Bleed brakes as they've gotten squishy again.
                  3. Secure battery (part of roadworthy procedure)


                  I think after these, I can get it past the roadworthy and registered!
                  1. Non-essential items:
                  2. Replace the front speakers (maybe this weekend)
                  3. Need a new handbrake cover
                  4. Need a convertible roof handle cover
                  5. Find out why the stereo can be turned on at any time even when the key isn't in the ignition! For now I disconnect the battery when I'm not working on it.
                  6. Holes in the blue convertible top. Probably organise a new top at some stage but not key because it's Australia and doesn't get too cold or rain too much!


                  Of course shout out to my mate Mark who has helped me through and has been a major part of this project. Light is at the end of the tunnel!

                  Thanks,

                  Adam

                  Comment


                    #39
                    Hi everyone,

                    I'm trying to keep this updated more frequently.

                    This week I ordered and received some front speakers (I went rockford fosgate, I'm no big audiophile and they were reasonably cheap).
                    I also received the 18mm spacers I bought last week and spent Thursday night fitting them up and then fitting the wheels back on. I thought the fitment was quite a bit better.
                    Before (yuck, flash on a dusty car):


                    After:


                    As you can see, almost flush with guards, a little outside. More on that shortly.

                    Well I thought these spacers would arrive and finally allow me to clear the brakes but not overhang the front guard - or at least not by enough as to permit me a roadworthy certificate from an understanding mechanic. Unfortunately, these spacers have been a problem on both sides - the wheels and the hub.

                    Problem 1:
                    The wheel bolts are scraping against something and causing a racket every part of every rotation of the wheel. A huge squealing some on both sides of the front.
                    See the video linked below.

                    Discover the magic of the internet at Imgur, a community powered entertainment destination. Lift your spirits with funny jokes, trending memes, entertaining gifs, inspiring stories, viral videos, and so much more from users like admhndry.


                    I'm pretty sure the issue is that the amount of metal at the hub end of the spacer isn't enough, and this allows the bolt to go further through to the point that the end of the bolt contacts and causes this sound.
                    See these photos with the annotations:

                    This is the 30mm one:


                    This is the 20mm one:


                    For a solution, I was thinking of filing down the last bit of thread on the wheel bolts to allow them to just clear. What are your thoughts?

                    Problem 2:
                    The second problem is at the other end of the spacer. In between the spokes of the wheel is a fair chunk of metal, and because the wheel bolts extend past the edge of the spacer, the wheel isn't sitting flush on the spacer. You can see from these photos where it's impacting.

                    I don't know the solution to this.
                    I guess the two thoughts I'm having are to either grind down some of the head of the bolt so it sits flush, or to modify the wheel in some way so that there's less metal to me. This seems like the more risky move - I don't know how that would impact the structure of the wheel.

                    This is how much it overhangs:


                    This is the part of the wheel that it impacts, and it's created that crescent looking shape:


                    Again, I humbly ask for your thoughts!

                    Thanks,

                    Adam

                    Comment


                      #40
                      Originally posted by Cabriolet View Post
                      nice color early model ride.
                      just rebuild the engine yourself. it's not hard.
                      year a manual swap isn't that hard.
                      Looks like you took that advice! Nice car, and I’m glad to see that you’re doing this project.

                      One of the joys of owning an old car is pride in learning craftsmanship. Enjoy the ride!
                      Last edited by jgilber0; 06-16-2018, 04:20 AM.
                      Jon (OO=[][]=OO)
                      1992 325ic white, stock with a 5-speed swap
                      Palm Beach County

                      Comment


                        #41
                        Hi everybody,

                        Posting late night here in Sydney, probably more of a chance of some of you to be awake when I post!

                        Tonight I went back to work and used the grinder for around an hour to get the wheel bolts down to size as to not hit anything on either side. I did it to 9 of the 10 I had, so I could keep a spare as an example (or if I messed one up!).
                        Here's a side by side comparison of what I had to do to the bolts to get them to work:


                        Here is the end result fitment-wise. Still not 100% ideal but I think it'll be enough to get me on the road, and personally I don't think it looks too bad.


                        Once it's out in daylight and maybe washed for once (god forbid) I'll be able to showcase it a little more. It's certainly a rough diamond, but I've been through so much with this car - I just want to get it on the road and driving and hopefully not breaking!

                        Comment


                          #42
                          Hey everyone!

                          After seeing a Royal Blue vert driving near my work in Sydney, I had to get the girl out of the garage and give her a wash and a quick illegal drive around my local streets!

                          I think she scrubs up okay, so I've set a goal to try to get it registered before Christmas, and I mean, it runs and drives well, but there's a few state legalities that have to be sorted before then.
                          For now, here are some photos. Any suggestions, comments or compliments are accepted!


                          Thanks,
                          Adam

                          Comment


                            #43
                            Looks so similar to Lazurblau

                            Lower it a touch more once it's passed blueslip
                            sigpic

                            (clicky on piccy to get to thread)

                            Comment

                            Working...
                            X