If this is your first visit, be sure to
check out the FAQ by clicking the
link above. You may have to register
before you can post: click the register link above to proceed. To start viewing messages,
select the forum that you want to visit from the selection below.
OEM+ or bust! reelizmpro: I will always be an e30 guy.. I still do all of my own labor TrentW: There's just something so right about a well-built M20 in an E30 e30m3s54turbo: I save my money for tuner parts.
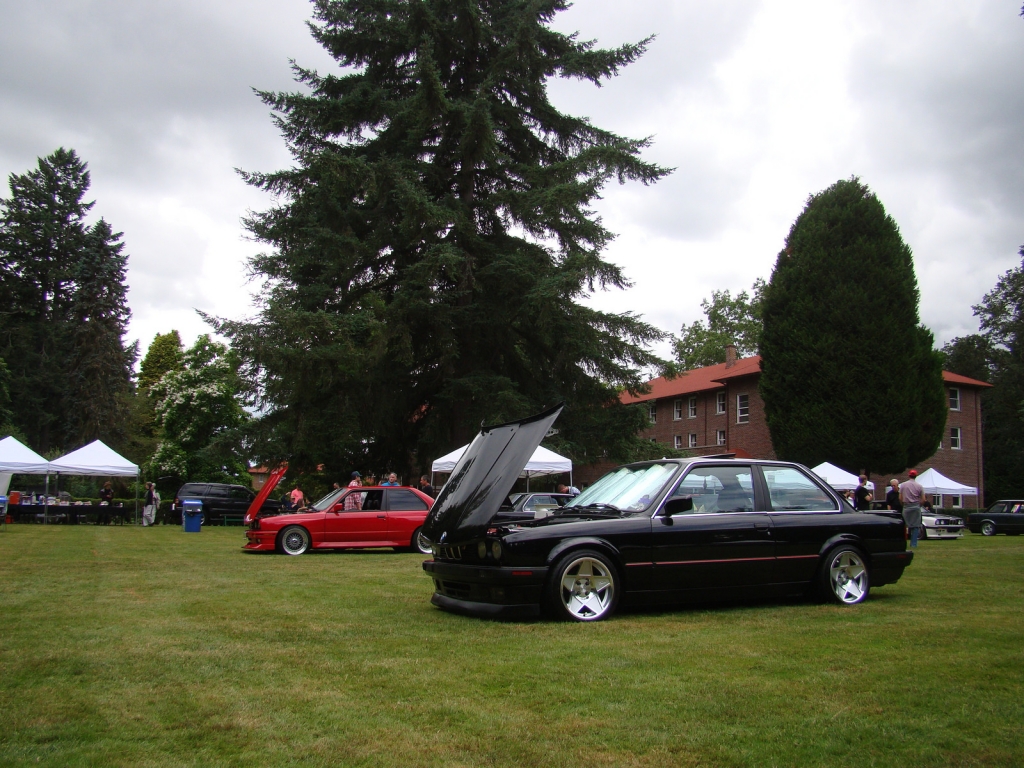
so he kept the side markers all this time... good for him
more pics
EDIT: found this shot from the same picnic - doesn't look like it's his car, but the early model rear plastic bumper+valance conversion looks pretty good.
OEM+ or bust! reelizmpro: I will always be an e30 guy.. I still do all of my own labor TrentW: There's just something so right about a well-built M20 in an E30 e30m3s54turbo: I save my money for tuner parts.
Damn it, read the whole thread, only to find no end-result pics at the end. :')
I found a picture of this E30 on Google, with the pre-facelift 'double chrome' trims, but with facelift bumpers, so I thought someone with a facelift E30 did a mod to do 'double chrome' (facelift only has the outer trim in chrome, as you all know, but that looks kinda weird to me), as I'm thinking of changing my shadowline to chromeline (and the pre-facelift 'double chrome' looks more oldskool). But then it turned out he facelifted his pre-facelift.
Luckily he didn't change the rear lights tho. I'm a big fan of the pre-facelift lights but I'm stuck with a facelift. Should've chosen for a pre-facelift tail after someone crashed into the rear of my 318is, but since a 318is is facelift-only, I decided to stick with the original. But since I have a black E30, and a 318is is always shadowline, I miss contrast. Should actually buy a pre-facelift 4-door again in an oldskool color like bronzit or something, since I still miss my first E30 (an '87 4-door bronzit 316 ^^), but I've spent a lot of money on my 318is already so changing to a new 'unknown' car that'll have it's own flaws again isn't easy, and prices of unspoiled E30's have gone through the roof.
Saw this really nice E30 with facelift bumpers (and the double chrome window trim). The bumpers where in chrome as well (with chrome vinyl/wrap) and it looked pretty nice. But it turned out to be a pre-facelift as well :( (with the cool pre-facelift tail lights) Can't find any how-to's to change shadowline to chromeline using chrome wrap either, but enough the other way (chrome to shadowline) around...
It looks nice on white, but don't know what it'll give on black. Maybe the bottom part of the bumper, will be too much, if that's chrome too, on a black E30. I'd have to get pre-facelift side-trims as well (with the chrome line in it), and also chrome line on the front and rear window rubbers.
PS: I'm from Europe and have US-sidemarkers, cause I think they are cool. And over here it's rather rare to have them. Looks like the grass is always greener on the other side. :mrgreen: Though I also like the 'clean' look of non-US trims (or euro trims as you call it), I like having the side lights at night. :3
I'm also a fan of the orange 'running lights' they have in the US (looks exotic for me), and orange indicators in general. :mrgreen: (I hate white indicators, especially on older cars) But on the E30, it looks weird when the front indicators are on 'running light mode', so I'll just stick to the sidemarkers only (also I have seen some US E30's that have the side-markers on but the front indicators are 'off', and others where the front indicators are 'on', along with the side markers, but I wonder how the which one of the two is OEM (like when they left the factory)). But I heard those orange running lights are because they don't have 'daylight running time' lights in the US like they have in Europe?
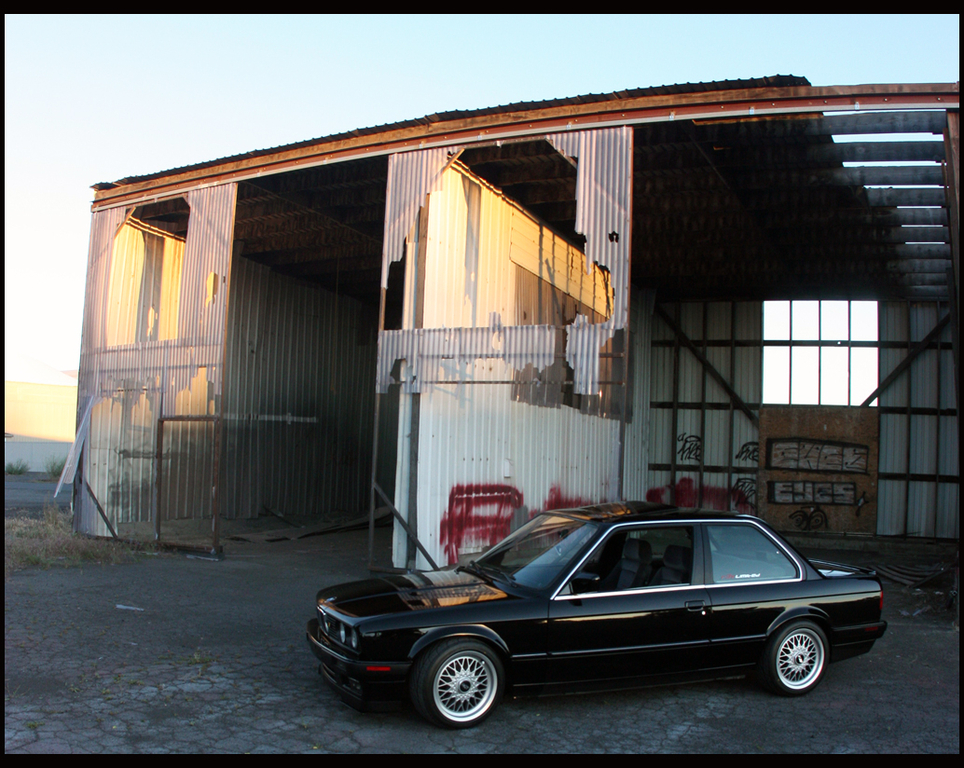
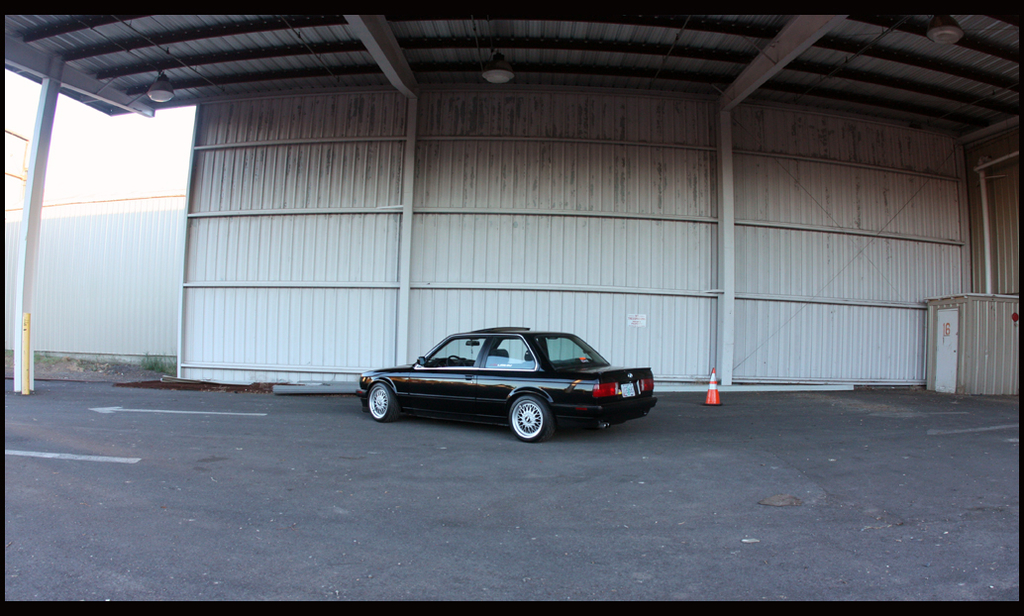
This is mine btw:
But because the orange front sidemarkers where too visible compared to the rear red sidemarkers (and because I lost one of my orange ones on the road), I replaced the orange ones with smoked ones. But the downside is that only the rear ones reflect in the dark now.
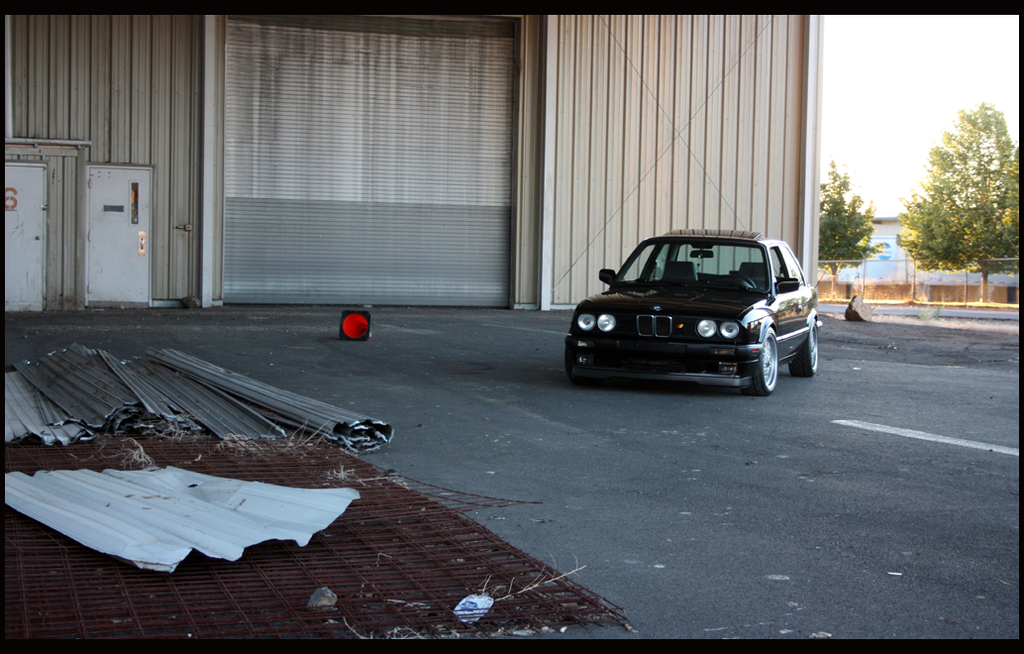
Also thinking of replacing the yellow high beams to white again (normally I'd go full yellow, but the low beams of the yellow set were damaged), or a smoked set. Or see what it gives with yellow fogs first.. Choises.. choises... Too much choises! Yellow lights on a black E30 with chromeline don't look that good compared to a black E30 with shadowline tho (better noticable IRL than on photo).
Sorry for the sidemarker and headlight derail (and topic bump). :mrgreen:
Edit: Oh lol, seems like this is my first post, I thought I posted here before but apparently not. :V
1990 BMW E30 318is | 1989 Mercedes-Benz S124 250TD
just leafed through this thread..... so it looks like every picture of the actual process is no longer here? That's a shame as pictures are pretty much integral to an explanation like this.
Today we finaly started, yes, Project Facelift is underway! What you'll see from this point on in this thread is the FULL body conversion of my car, a 1986 325es into the late-model body styling. This includes plastic front and rear bumpers, as well as a late-model front valence, and yes, even a late-model OEM rear apron. I will chronicle each stage of the process with pics and details on how we performed the work.
Part I - Doing what BMW should have done in the first place...
Today (09/23/06), we started on the rear apron, trimming out ALL excess material and cutting it down to nothing more than the external skirt. Here are the pics and info:
The OEM unibody rear apron, cut off of a '92 325i cabrio:
Starting to cut off the excess material from above the determined mounting area:
Cutting around the existing bumper shock mounting points. Since we'll be using the bumper mounting points on my car, these were not needed:
Removal of the material making up and surrounding the existing battery tray. All of this material has to be removed in order for the apron to fit on the rear of the car:
Nearly all excess material removed, almost finished with removal of battery tray material:
All of the material removed from the rear apron:
The $6 Harbor Freight pneumatic cutting tool that did the job:
New wheel on the left, used wheel on the right. We went through only two:
The finished rear apron, with all material removed, awaiting prep, primer and paint:
Part II - The Abject failure of Aircraft Stripper...
Today (09/24/06), we began stripping the rubberized undercoating off of my late-model front valence. Well actually, we sort of started yesterday. What we had planned to do was soak the paint/rubberized crap with Aircraft Stripper. I was told by several people that this shit would turn the undercoating to goo, and we could just scrape it off with a putty knife.
WRONG! It didn't work, it hardly even softened it up. So what do we do? Go back to Harbor Freight and buy a $5 wire wheel and strip the shit off with a Makita grinder, that's what!
This stuff no workie. Should have guessed, $4 a can at Wal-Mart...
The front valence, before stripping. See at the left of the vents where we tested the grinder. It worked real good...
Andrew going to town on the paint/undercoating. The wire wheel stripped this crap off like it wasn't even there:
One side completed. In the large flat areas, this shit was really thick!
Like I said, THICK. This was after about 3 minutes of stripping this area.
Stripping of the bumper mounting area. About halfway up, the undercoating stopped and it was just paint. VERY easy to remove:
Finished with the lower portion of the valence:
The finished, stripped, smoothed valence. Smooth as a baby's behind. And I should know, I've got one to check it against!
It might not look it in these pics, but this thing is shiny and VERY smooth:
The bumper bolt as well as bumper shock holes are slotted to allow for the proper mounting height:
The rear bumper is bolted up loosely to judge roughly how much needs to be cut off:
The ends of the bumper are cut off using a pneumatic cutting tool with a cutting disc, just in front of the trunk vents:
Driver's side section of the bumper cut off:
The bumper is bolted back up to determine the exact amount of material that will need to be cut out:
Test fitting of the driver's side end piece after cutting out of excess material:
Now comes the bonding together of the cut sections of the bumper, using hand-laid fiberglass. The areas of the bumper where the fiberglass is laid was roughed up using the cutting whee, to create a textured surface for the fiberglass resin to bond to.
The 2 sections are lined up perfectly, and held in place by wood strips and pinch clamps:
Immediately after laying the 2 sheets of fiberglass mat over the seams. A layer of resin was applied, then the first section of mat laid down and saturated with resin. Then the 2nd sheet was laid over it crosswise, and again saturated.
Same procedure carried out on the other side, using the same method to keep the 2 pieces aligned:
We used a piece of masking tape to better hold the 2 pieces together while applying the resin, so they woulnd't move around as much.
The 2 sections successfully bonded together, solid as a rock, with no flex at all:
Shot of the outer skin of the bumper, showing the alignment of the 2 sections:
The trim was modified and shortened in the exact same method, and also re-bonded using fiberglass.
Section of trim after cutting:
Cut (not yet bonded) sections of trim attached to bumper to be sure that the length is correct:
The driver's side and passenger side sections of trim cut and rebonded, immediatley after laying fiberglass.
The section at the curved part at the end was a spot that cracked, we simply laid a piece of fiberglass over the crack, fixing it the same way we bonded the pieces.
On Thursday, we will be filling in the gaps in the bumper as well as the trim with Bondo, and sanding it down to a perfectly smooth finish, and prepping the bumpers for paint. With any luck, we will start painting this weekend. More pics will follow at that point!
Part V: Sanding, sanding, and more sanding. And then we sanded some more...
Today we sanded off all of the excess epoxy from plastic welding all of the bumper and trim seams, using a handheld Skil sander. We went through about 4-5 sheets of 100 grit paper, but the epoxy sanded very nicely, it din't take too long.
Epoxy sanded off of the seam of one of the side pieces of bumper trim:
Shot of the bottom edge of the seam, or for all intents and purposes, lack thereof:
Epoxy sanded off of the seam from the other side piece of trim. The end piece of this side set up just a hair uneven from the other, so we added a bit more epoxy further out, and feathered out the difference:
Underside of the sanded seam:
One side of bumper trim, completely finished and ready for prep/paint:
This was the corner of the trim that was cracked (see farther back in the thread), now with epoxy and sanding, it's like it was never there:
Second side of trim all finished, well, almost. You can see a very small little area in the upper left of the trim where a little piece of epoxy chipped out. We mixed up some more and packed the area full, and when it's dry, we'll re-sand it:
Now onto the bumper... :D
Driver's side bumper end top, with all excess epoxy sanded down:
A better shot of the top:
Finished trim installed on top of finished bumper seam, looking pretty damn good:
Sanded seams on the passenger side of the bumper. At the top bumper trim groove, Andrew ground out just a bit of the actual bumper plastic when removing the excess eopxy, so we filled it in a bit with some more, and we'll shape it when it dries:
Passenger side seams, also just a tiny little area where we added in a bit more epoxy, there was a very small bit at the end of the seam that didn't get filled:
Later this week, we'll sand down the new epoxy we put on for the small repairs, and then with any luck, this weekend will be prep and paint!
Alright, today we started to primer a few areas of the rear bumper, rear trim, and the front bumper. The front bumper had a couple of small spots of badly chipping paint, so we feather-edged them down and built up the areas with SEM high-build primer. We also did the same with the seam areas of the rear bumper and bumper trim, building up the areas where we sanded down the plastic epoxy and took out paint/bumper material with it.
As stated above, starting to primer the seam/sanded area of the rear bumper. I don't see a seam, do you see a seam?
Here we see a seam, but it's pretty much gone now. We filled it up a lot more tonight, some more pictures will come tomorrow when we've sanded some. The globby-ness you see in the trim area is plastic epoxy, left thick for 2 reasons. 1, you'll never see it, and 2, it gives extra strength to the bonded bumper pieces being left on the surface:
Top side of the front bumper lightly primered, the underside has a couple of areas that need it, also:
Rear trim piece. It looks a little orange-peeled in one area, there were some bubbles in a couple of shots that popped, but this stuff is so thick anyway, and we also did several more coats to fill up the lower area from sanding, so it will sand smooth, anyhow:
Rear trim piece that had the cracked corner. Fiberglassed, plastic welded, and covered in high build primer? Ain't cracked no more...
Front bumper, the damaged paint area was at the inside corner of the bumper, high build primer did it's job nicely, I HIGHLY reccomend it:
Parts piled up on the roof of Andrew's MGB-GT parts car, drying:
Damn, that's some mighty clean rebar!
Ok, you guys are going to love this. The rear bumper shocks and brackets on my rear bumper were quite rusty, so we needed to clean them up before installing them back onto my car. Andrew discovered on his MGB forum a method for removing rust from car parts by use of electrolosys. Basically, the parts are hung by wire from a steel plate suspended in a solution of hot water and Arm & Hammer washing soda. There is a steel plate that hangs and connect to the + on the charger and the part hangs in the water via wire, which connects to the - on the charger. The washing soda acts as an electrolyte in the water, and the electrical current actually reverses the plating process in the water, stripping off ALL rust from the parts and drawing it to the steel plate. Now this actually WORKS, it really does. We started the process at about 8:00 pm, went back to my house to watch a movie, and when we came back at about 10:30, a significant portion of the rust was gone from the parts.
The setup as described:
Hanging from the plate is the bracket, from the wire is the bumper shock. This is just one set, we'll do the other set tomorrow:
The cloudiness in the water is actually the parts fizzing in the charged solution:
For this shot, we unplugged the batter charger, and plugged it back in, so we could get a pic of the reaction starting again. You can see the water fizzing up off of the flange of the bumper shock. Pretty damn cool!
Tonight we did the little bit of Bondo work that I mentioned earlier, filling in a couple of spots that got tagged by the cutting wheel, and an area on the trim that got gouged in a couple of spots. Didn't take more than about an hour and a half, and now all that's left is to primer the rest of the bumper surface, do some more sanding, and we'll be ready for paint this weekend, finally!
The dark spots in the trim are areas that got gouged out by trying to remove a previous layer of Bondo (we just decided to try and see how well it would stick to the plastic for shits & giggles, and it didn't, lol), and the spot up in the right hand corner is a spot where I accidentally touched the semi-wet primer:
Very thin layer of Bondo applied to the areas to be filled:
Sanded down and feathered out, ready for a new coat of primer:
The damaged area on the bumper skin to be filled:
Damaged area filled with Bondo:
After the Bondo dried, we ground out all the excess that was in the trim channel, and got to sanding:
Damaged areas repaired, and sanded smooth, ready for primer:
This was the same thing done on the other side, the pic I took of the damaged spot was super-fuzzy, but it looked about the same:
We're so close to being done I can't stand it anymore. We're painting tomorrow, and truth be told, I'm actually kind of nervous about it. I'm scared that the paint is going to come out bad, or it's not going to look good, or something. I'm sure it's going to be fine, but I can't shake being nervous about it. But we've got very good paint, the proper tools, and it should be just fine. I just need to get myself psyched back to looking at it positively.
Well, all my neurotic BS aside, here's what I got done today:
Rear bumper shocks/brackets, rust free and with a fresh coat of Rustoleum:
Front bumper primered, drying in the garage. Still have to sand it and everything else, it's going to be a long night:
Rear bumper primered and drying:
Front bumper trim, lightly sanded and awaiting paint:
Front valence, freshly cleaned and wiped down with acetone:
Front valence first shot with an even coat of self-etching primer, necessary since it's bare metal:
After the self-etching primer had about 2 hours to dry, this is the 3rd coat of high-build primer:
And the day finally came. Today we painted EVERYTHING. Front valence, bumpers, trim, my new euro grilles, and my new mirrors. If you read my last post with the pics, I was nervous as hell about painting today. I'd completely convinced myself (for one reason or another) that it wasn't going to come out good, that something was going to wrong, or we'd just plain fuck it up. Couldn't be further from the truth, everything came out great. Some areas are going to need wetsanding, but I knew that already, anyway. Andrew did the painting of the valence and the bumpers, I didn't trust myself to do it, especially since he's painted before and I haven't. My hat's off to Andrew, he did a magnificent job, and I owe him big time. These pics don't do the painted parts justice, but I'll get some better ones tomorrow. :up:
Full bumper trim, front valence grille, and my new euro grilles, fresh after about 5-6 coats of SEM:
Front valence, shortly before paint. Garage turned paint booth FTW:
Complete with full booth exhaust fan!
Front valence, about 3 coats of paint applied:
New mirrors (these things have PERFECT glass), sanded and masked:
Mirrors/brake duct inlets, about 3 coats applied:
Front valence resting comfortably after I think 4 coats:


Comment