CEP - BMW E30 Body kits MTech 1, AC Schnitzer, Zender. Price drop!

Collapse
X
 
  • Time
  • Show
Clear All
new posts

  • reelizmpro
    replied
    Originally posted by ClassicEuroParts
    Thank you for your honest and detailed description, opinion and install tips. We do agree with what you said and are constantly making changes to our parts so that they are better. I can confirm now that the front spoiler does have the arch extensions (if you order it now - you will get the new ones) and the boot spoiler uses smaller diameter bolts so that there is more adjustment possibilities. The front spoiler now also has better foglight mounting spots + the whole mold is brand new and there should be less imperfections.
    May i use your pictures and description for informing other e30 enthusiasts about this kit?
    Sure, not a problem.

    Originally posted by six2midnight
    I will take a picture in a few hours and post what I am talking about.
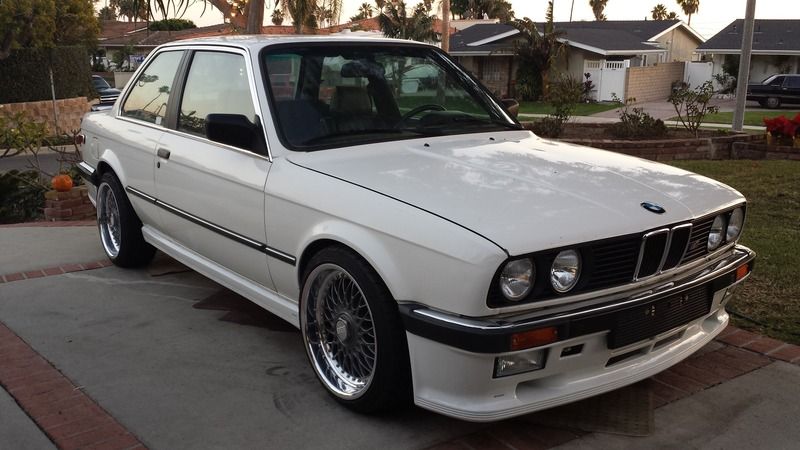
    Being in the US, few people have installed this kit. The euro bumpers complicate the issue as they are multi piece and require different hardware to mount the M tech front/rear bumpers. You will need these m tech "T" bolts instead of clips. They sandwich the front/rear aprons between the bumper and the trim. Research the M tech 1 thread on this forum and read the BMW M tech 1 installation manual to see what needs to be done. It will help.


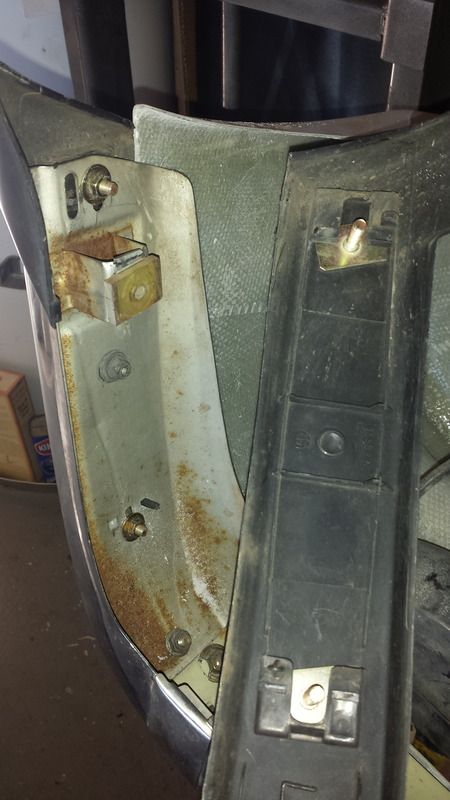
    An issue I had was that my euro bumpers were banged up and bent so the kit would not fit right. I had to spend some time straightening the bumper enough so that the spoiler would mount correctly and straight.


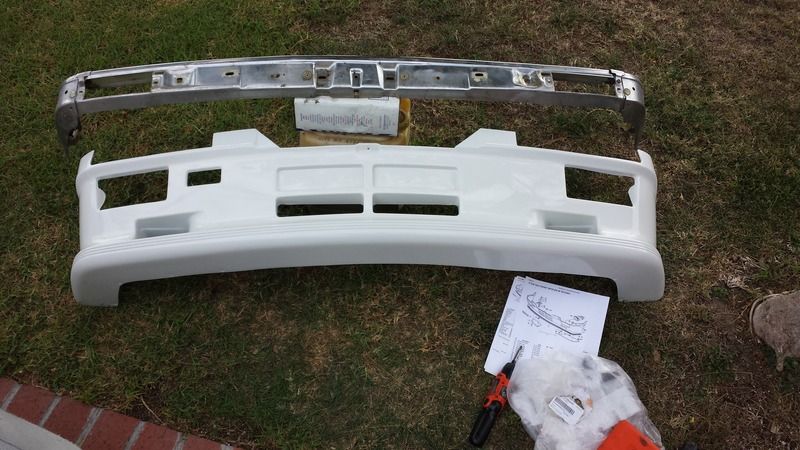
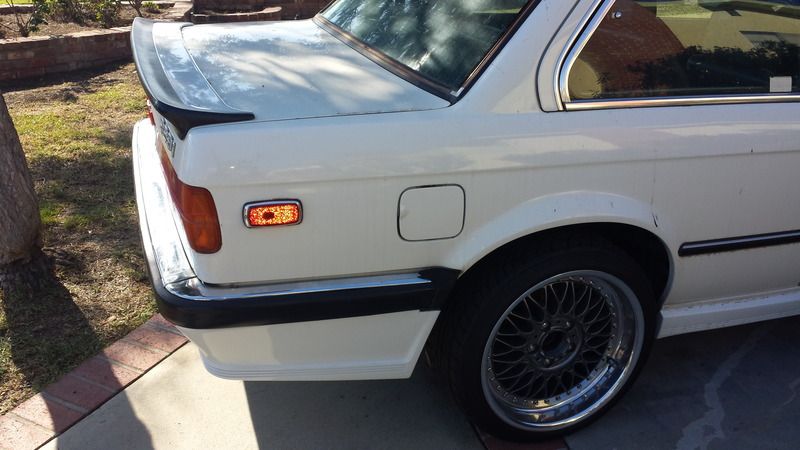
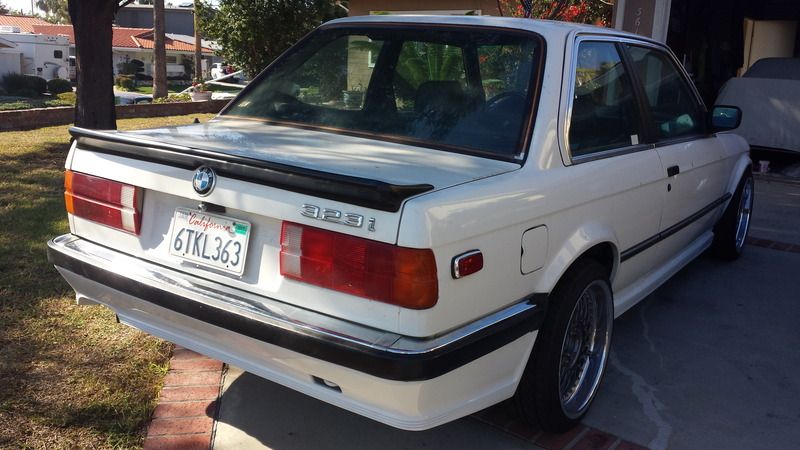
    With the rear it takes some time to get everything lined up. You'll need 15 "T" bolts/clamps for the rear. Once torqued they will eliminate any gaps.

    Shows the line between the body and the skirt. This was most disappointing...


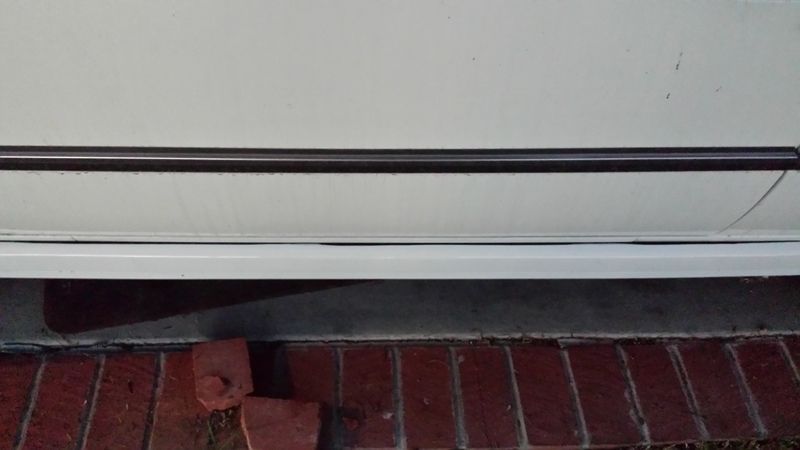
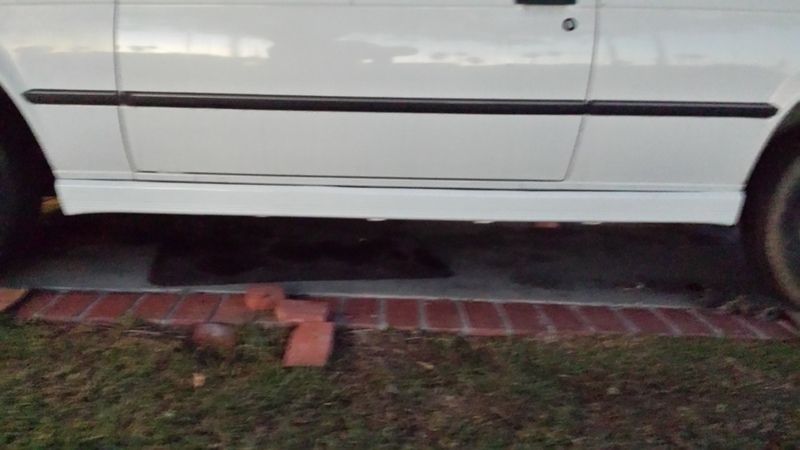
    With white caulking...ahhh much better. I guess that's the price we pay for not having to drill holes in the sills.


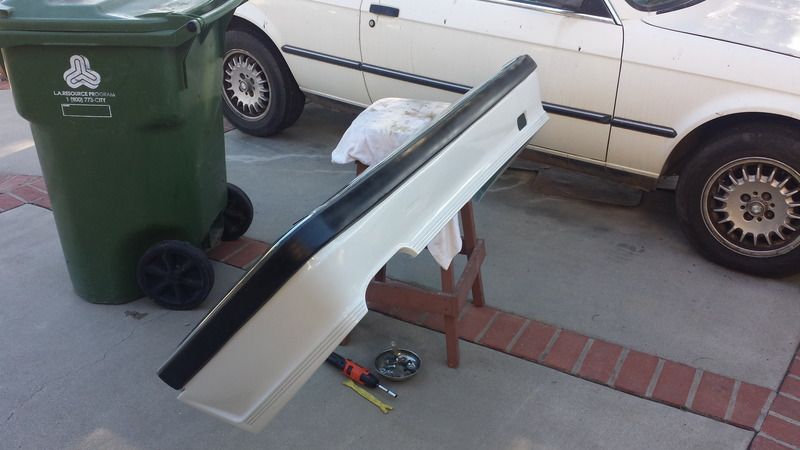
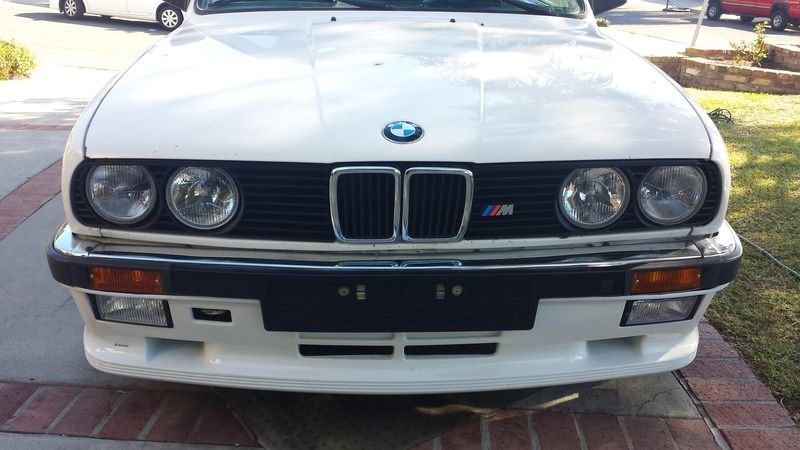
    Then there's also the trimming of the front and rear bumper end caps...


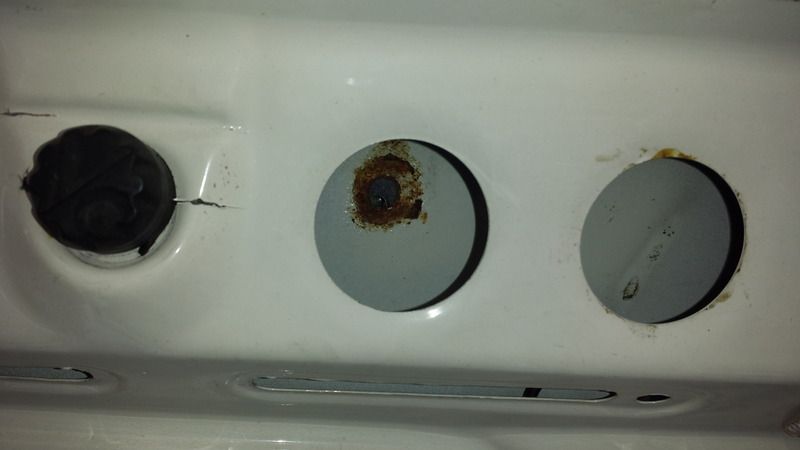
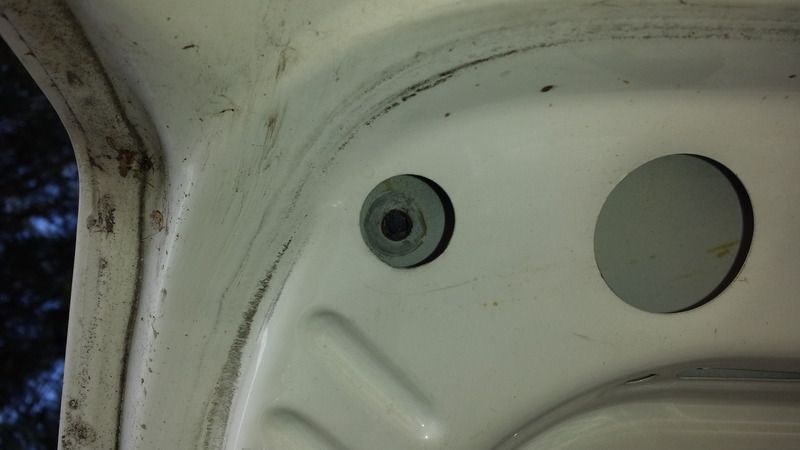
    This picture shows one of the trunk spoilers holes being off. 2 of them were way off and I couldn't use them. They were on the left side of the car.


    Last edited by reelizmpro; 02-13-2017, 10:34 AM.

    Leave a comment:


  • itsonlygeorge
    replied
    Do you have a replica gurney flap for a Zender EVO spoiler? I have the non M3 version and it is missing the flap.

    Leave a comment:


  • ClassicEuroParts
    replied
    Originally posted by six2midnight
    I will take a picture in a few hours and post what I am talking about.
    Sound good! Also, the parts now come in grey because white and black could have some issues if you are trying to paint it the opposite color. For example, if you have a black part but need it white - it will take much more paint to cover it so that the black does not shine trough. Same with white parts.
    So - grey is the best solution for everyone. It will take the same amount of paint for any color
    Hope that makes sense ;)

    Leave a comment:


  • six2midnight
    replied
    Originally posted by ClassicEuroParts
    Here are the original Mtech 1 rear apron install instruction. You might find what you are looking for there:


    As for the rear gap - not really sure excatlly without an image but it could be a couple of different things:
    1. The euro rear bumper bolt head that holds the corners to the center piece. You have to make a hole in the valance ( there should be a premarked spot) to allow space for the bolt head to go trough.
    2.The rear euro bumper end trim pieces have to be modified. The lower parts have to but cut like in the PDF i attached
    I will take a picture in a few hours and post what I am talking about.

    Leave a comment:


  • ClassicEuroParts
    replied
    Originally posted by six2midnight
    reelizmpro

    - we just bought the kit too and are in the process of fitting it. Do you have a big gap on the rear bumper where the wheel arches are? We have a big gap between the mtech rear and the euro bumper on the wheel arch. I guess I can take a picture to show all of you.

    The front lines up great imo. I had no issues and looks really good.

    The skirts, I am still wrapping my head around trying to mount. Like he said they recommend adhesive on the top portion of the skirts, and the OEM black clips on the bottom. Also the skirts did seem wavy, so I am not sure how its going to look when its done. I like the caulk idea, but my car is silver, so wouldn't blend in.

    ClassicEuroParts also advertises "plastiflex" and in their videos they show a white product. My parts came in a primer grey, and honestly just look like straight up fiberglass. They don't seem that flexible to me
    Here are the original Mtech 1 rear apron install instruction. You might find what you are looking for there:


    As for the rear gap - not really sure excatlly without an image but it could be a couple of different things:
    1. The euro rear bumper bolt head that holds the corners to the center piece. You have to make a hole in the valance ( there should be a premarked spot) to allow space for the bolt head to go trough.
    2.The rear euro bumper end trim pieces have to be modified. The lower parts have to but cut like in the PDF i attached

    Leave a comment:


  • six2midnight
    replied
    Originally posted by reelizmpro
    The front and rear mount like stock but neither have the wheel arch extension that goes behind the trim like OEM. The front however doesn't have the backstop for the foglight adjustment so you will have to get creative when you mount them. The sideskirts don't mount to the lower sills like the original does. They recommended adhesive to bond the top of the skirt to the sill. The top of the skirt was wavy and not consistent so I filled the gap with white caulking. No complaints about the rear bumper. Two or 3 of the holes on the rear spoiler were off and I didn't want to enlarge the original holes on my trunk lid so I screwed in the screws that I could and used 3m double sided tape on the entire spoiler. The paintshop said there were some waves they had to take care of but nothing major. There's also a molding mark on the sides of the front airdam that should be smoothed.

    I wish I could say it was perfect but it's hard to be 100% perfect when recreating parts. I think it's a good kit for the price and if it's as durable as they say...well worth it. I'm happy with the outcome. Most used OEM kits need repair before they can be fitted and can cost you 2-3x as much as this.


    reelizmpro

    - we just bought the kit too and are in the process of fitting it. Do you have a big gap on the rear bumper where the wheel arches are? We have a big gap between the mtech rear and the euro bumper on the wheel arch. I guess I can take a picture to show all of you.

    The front lines up great imo. I had no issues and looks really good.

    The skirts, I am still wrapping my head around trying to mount. Like he said they recommend adhesive on the top portion of the skirts, and the OEM black clips on the bottom. Also the skirts did seem wavy, so I am not sure how its going to look when its done. I like the caulk idea, but my car is silver, so wouldn't blend in.

    ClassicEuroParts also advertises "plastiflex" and in their videos they show a white product. My parts came in a primer grey, and honestly just look like straight up fiberglass. They don't seem that flexible to me

    Leave a comment:


  • ClassicEuroParts
    replied
    Originally posted by reelizmpro
    The front and rear mount like stock but neither have the wheel arch extension that goes behind the trim like OEM. The front however doesn't have the backstop for the foglight adjustment so you will have to get creative when you mount them. The sideskirts don't mount to the lower sills like the original does. They recommended adhesive to bond the top of the skirt to the sill. The top of the skirt was wavy and not consistent so I filled the gap with white caulking. No complaints about the rear bumper. Two or 3 of the holes on the rear spoiler were off and I didn't want to enlarge the original holes on my trunk lid so I screwed in the screws that I could and used 3m double sided tape on the entire spoiler. The paintshop said there were some waves they had to take care of but nothing major. There's also a molding mark on the sides of the front airdam that should be smoothed.

    I wish I could say it was perfect but it's hard to be 100% perfect when recreating parts. I think it's a good kit for the price and if it's as durable as they say...well worth it. I'm happy with the outcome. Most used OEM kits need repair before they can be fitted and can cost you 2-3x as much as this.
    Thank you for your honest and detailed description, opinion and install tips. We do agree with what you said and are constantly making changes to our parts so that they are better. I can confirm now that the front spoiler does have the arch extensions (if you order it now - you will get the new ones) and the boot spoiler uses smaller diameter bolts so that there is more adjustment possibilities. The front spoiler now also has better foglight mounting spots + the whole mold is brand new and there should be less imperfections.
    May i use your pictures and description for informing other e30 enthusiasts about this kit?

    Leave a comment:


  • reelizmpro
    replied
    Originally posted by Van31
    More photos of Tech 1 kit fitted please in HD.
    Very keen to buy.

    The front and rear mount like stock but neither have the wheel arch extension that goes behind the trim like OEM. The front however doesn't have the backstop for the foglight adjustment so you will have to get creative when you mount them. The sideskirts don't mount to the lower sills like the original does. They recommended adhesive to bond the top of the skirt to the sill. The top of the skirt was wavy and not consistent so I filled the gap with white caulking. No complaints about the rear bumper. Two or 3 of the holes on the rear spoiler were off and I didn't want to enlarge the original holes on my trunk lid so I screwed in the screws that I could and used 3m double sided tape on the entire spoiler. The paintshop said there were some waves they had to take care of but nothing major. There's also a molding mark on the sides of the front airdam that should be smoothed.

    I wish I could say it was perfect but it's hard to be 100% perfect when recreating parts. I think it's a good kit for the price and if it's as durable as they say...well worth it. I'm happy with the outcome. Most used OEM kits need repair before they can be fitted and can cost you 2-3x as much as this.


    Leave a comment:


  • ClassicEuroParts
    replied
    Originally posted by bradnic
    Can you confirm these are OEM BMW pieces?
    I've posted to the mtech1 thread for you
    Yes, that is correct.
    Thanks!

    Leave a comment:


  • danielpak_ek9
    replied
    Mtech 1 rear bumper

    .

    Leave a comment:


  • bradnic
    replied
    Can you confirm these are OEM BMW pieces?
    I've posted to the mtech1 thread for you

    Leave a comment:


  • ClassicEuroParts
    replied
    Originally posted by bradnic
    here's the difference between a 771(bottom) and a 772 (repro, top). If you ordered a 772 from BMW in the last year or two they've been shipping mislabeled 771s with a 772 label on them.

    We have them in stock! Check them out here - we were able to get better price as we bought out all of the inventory. So we offering these to you cheaper then stated before. Spread the word and get them while you can. We dont have too many


    Leave a comment:


  • dugly52
    replied
    Any plans to make an M3 kit out of the Plastiflex?

    Leave a comment:


  • bradnic
    replied
    that's great news.. please post pics here once you have them, including the BMW stickers please.

    Leave a comment:


  • ClassicEuroParts
    replied
    7 of them are on their way to us! Check back soon - we should have them for sale :)

    Originally posted by bradnic
    here's the difference between a 771(bottom) and a 772 (repro, top). If you ordered a 772 from BMW in the last year or two they've been shipping mislabeled 771s with a 772 label on them.

    Leave a comment:

Working...