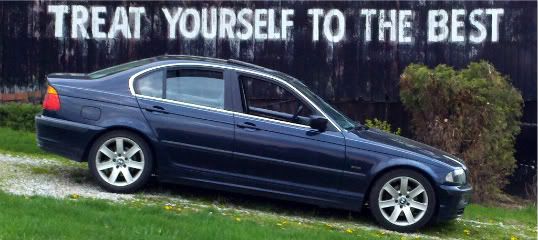
whoa.....
First E30, First motor swap. M50NV
Collapse
X
-
So I was able to build my own flocking gun. Donjer sells one for $70 bucks! I already had a $12 craftsman air-gun. So I spent $7.50 on a Donjer replacement can and $1.65 on some fittings and made my own.

I had to drill a hole in the cap.

Here are pics of the part numbers if anyone wants to replicate this:

I will have progress pics soon, when I have time to work on it.Comment
-
Well... Got it done. Came out pretty good. It's not perfect, and I highly recommend having two people apply the flock. Also an air-gun will blow through the 3oz kit in about 10 seconds. Be sure to invest in the 16oz bag.
And without further ado... Here are pics.

Cut "V" into the cracks so the epoxy can get down in there.


So Brittle!

Plastic Epoxy time!


Forgot to take pics of us sanding down the epoxy. It was rough... I highly recommend using a dremel to power through it.
Time for Bondo!!


Cobbled together a little plastic blast cabinet in order to catch all the excess flock fibers.


FLOCKED!!!!


I did not have time to take any pics of me laying the adhesive. You only have about 10-15 minutes before it not tacky enough... and I was brushing it on like a mad man.
Spraying the flock was... not easy either. Like I had to refill the spray can with flock about 4 or 5 times. And I am racing to get it all sprayed on before the glue firmed up on me. I think it came out OK. Its not perfect and you can see in a few spots where the flock is not as thick as I would have liked. However... It looks about a thousand times better than it did being all faded and cracked to shit.
Hope this helps others accomplish as well. I will post pics with it re-installed eventually. Also I plan on flocking the glove box (minus the latch).Comment
-
-
I have never "restored" a car in my life. I have wrenched on friends, and done really easy motor swaps. I used to be big into Volkswagens... But I bought this as a project. I have another vehicle that I can drive as a daily and this affords me the opportunity to go nuts with the E30.Comment
-
Got off my ass started getting shit done.


Since the dash and everything else is out of the car, I felt it was time to investigate what was leaking coolant on my feet, when I first bought the car. I assumed it was the heater core... appears to be the heater valve though. Doh! After I finished the swap I just bypassed it for the time being.


Had just a tiny bit of surface rust under portions of the sound deadening tar. You could tell cause the tar would pry up with ease. Sanded it down, cleaned it up, masked it off, and sprayed it with some rust inhibitor. Hope this keeps it from spreading. Everything else looks great though.


Need to wait for the inhibitor to dry so I can lay down the Peel N Seal on the rest of the car floor.
In the mean time... who has a Heater valve they want to sell on the cheap?!Comment
-
Finally got a small amount of work done. Buddy is coming over on Friday and we plan to bang out a ton more shit.
Got the tar out of the trunk, and then sprayed a rust inhibitor down.

Had to take the tar out to make room for THIS!


Think this is the reason why the blower motor only blows on HI:

And when the blower motor does blow it makes a huge noise... what the fuck is happening here?!

That's all for now. Will have more later in the week.Comment
-
Resistor and Blower motor = both bad.
Have both for sale if you want. PM me.Your signature picture has been removed since it contained the Photobucket "upgrade your account" image.
---------------------------------
89 E30 S52
---------------------------------
Transaction Feedback.Comment
-
Got some more work done. Stereo is in and plays. It;t like 95% done, a couple of little doodads to finish up.
My buddy working his ass off getting the wiring going.


Had to recover the rear shelf.


With no carpet we got to run all the speaker wire in the factory locations. Super Tidy.


Test fit.

And the hard work begins.


Sub is in.

Came in at a whopping 68.5 lbs.

All installed.


I forgot to take finished rear shelf pics before I put it back in the car. But you can kinda see it in the last pic.Comment
-
I got the TNTAutoTuning.com E46 Key Fob Keyless entry unit working.
Keyless Entry Unit: http://tntautotuning.com/store/en/re...-z4-x3-x5.html
This still gets installed in the trunk and still pulls 12v from the antennae motor.
Twist the blue and the Yellow/black wire on the Keyless Unit together.
Car Wire - Keyless Wire - Function
Brown - Black - Ground
Red (Antennae) - Red - Powers the Unit
Green/Black - Yellow - Lock
Green/Purple - Brown - Unlock
Brown - Blue &Yellow/Black - Grounding for Units internal relays.
Here is an atrocious picture of it wired up:

I have not gotten it soldered together and cleaned up yet. My buddy came over and helped me get it sorted on a lunch break.
Here it is all cleaned up.
 Last edited by SkorcherX; 08-13-2012, 07:25 PM.
Comment


Comment