-
Happened to this guy too: https://www.r3vlimited.com/board/for...ack-zomg-helpp
Although it's more of a giant troll post and the guy never tries to fix it. I'd slam it all together and weld it up, maybe make some washer-like reinforcements around the tear.
Might need to get creative to access it since it's a vert but I really think this is fixable with some cutting and mig work.Leave a comment:
-
Since my daily driver's radiator was out and waiting on a replacement, I was driving the vert around. Today, going around a corner, the rear subframe mount tore through the body, which made for a fun drive home.
Has anyone else had this happen? I found one post on Bimmerforums (https://www.bimmerforums.com/forum/s...66#post7406866), but I know its a common problem on the E36/E46 chassis. Just freakin sucks!
 IMG_0532 by keaton.burleson, on Flickr
 IMG_0536 by keaton.burleson, on Flickr
 IMG_0537 by keaton.burleson, on Flickr
Leave a comment:
-
 Well I drove it 2.5hrs to visit a friend for the weekend, with the crap top. Made a temporary rear window with a shower liner and various adhesive. Worked great, aside from the bottom which was just hot glued. Correcting tomorrow and applying some silicone spray for canvas waterproofing. Trip home has a 90 percent chance rain. On the way, over it began to storm and rain, which was planned for, but I didn’t really test the top’s ability to actually shelter me from water beforehand. The ride over wouldn’t have been so bad if the water proofing was more intact and we didn’t get stuck in traffic for 25 minutes during the heaviest part of the storm. Water was pooling in all over the top as the rain just accumulated on the top. Sent from my iPhone using Tapatalk
Leave a comment:
-
https://youtu.be/RqN1a65Fbco Finally drove it! Sent from my iPhone using TapatalkLeave a comment:
-
I drove it last night after confirming my electric fan works. Kicks on pretty damn late, with the temp gauge on the 3rd mark. Did the same thing in my coupe. Brakes were non-existant, even after bleeding. Retackled that today and bled all four corners 4x times, with 12 pumps of the pedal per bleed. Got more air out, and got all of the old fluid out of the system. Feels much better, but did not get a chance to drive. ABS does work, as confirmed by running it in gear and braking on jackstands.
 D72A29AA-D316-4B3F-BBD2-6EA52093C3B3_1_105_c by keaton.burleson, on Flickr
 C1FB44C0-7DB1-4FBE-AD74-5C85B95ECBD6_1_105_c by keaton.burleson, on Flickr
Leave a comment:
-
I was finally able to get the convertible top handle to play nice and release. A lot of fiddling and alignment to get the handle in there right. https://youtu.be/CGhk8UcFKJ8 I also got another cluster and set the mileage to be accurate to when the old odometer stopped. I received a plastic dash cap, thought it looked pretty good. This is a pic of it just sitting on top.
  Bled the brakes and I am currently getting the clutch bled. Sent from my iPhone using Tapatalk
Leave a comment:
-
Just posting this here since I'm at work.
Common Part Numbers:- E30 hood bolts - 07119915121
- M52 motor mount nuts - 07119915558
- E36 accelerator cable - 35411163228
- E30 cabriolet handle cable cap - 51181823474
- E36 A/C line bolts (hose to compressor, unconfirmed) - 07129904067
- E30 cabriolet cover hinge shock clips - 07119932815
- E36/M52 exhaust flange nuts (headers to collectors) - 18301737774
- E36/M52 exhaust gaskets (headers to collectors) - 18301716888
- E30 interior black plastic/trim nut - 16131176747
Leave a comment:
-
Finished installing the rear seats today: Starting to look more and more like a real car. I cleaned up the passenger side Natur Beige rear interior panel I had:
 Just another firm reminder as to how bad the interior was, and to how long the car actually sat. Will be calling a local shop tomorrow to get a quote on a new top and leather for all four seats tomorrow.
  It’s so close. I got the exhaust wrapped up, sounds pretty good being as it’s still a stock E30 325i exhaust from the cat to the muffler. Forgot to snap a pic, but it’s on. Need to tighten the O2 sensors a bit more.
  Check panel shows progress. An ivory driver’s side panel was painted to see how close it could get to Natur Beige
 Waiting on a bunch of crap from FCP to ship. Major things that still need to be addressed: Speedometer (used cluster shipping tomorrow) Accelerator cable (E36 cable coming soon?) Driver’s side seatbelt (shipped coming soon) Sent from my iPhone using Tapatalk
Leave a comment:
-
After fixing the rust, I had to paint the raw metal portions with some paint/rust inhibitor. The paint was designed for raw metal and rusted metal on frames and dries kinda rubbery, seemed to work fine enough.
 Raw metal painted over by keaton.burleson, on Flickr
 Raw metal painted over by keaton.burleson, on Flickr
 Cabin overview by keaton.burleson, on Flickr
 Rust painted over by keaton.burleson, on Flickr
I went ahead and removed 95% of all the factory sound deadening to make sure I wasn't missing any other rust spots. What a pain, but glad I did it. I was already going to have to redo some of it, might as well do all/most of it.
After letting the paint dry, I was ready to add all the sound deadening back. Took about an hour with a friend helping. The Kilmat I ordered was easy to work with.
 Sound deadening installed by keaton.burleson, on Flickr
 Sound deadening installed by keaton.burleson, on Flickr
 Sound deadening installed by keaton.burleson, on Flickr
And finally, I was excited to see the carpet and seats in the vehicle so I threw them in. Much easier in a convertible.
 Seat test fit by keaton.burleson, on Flickr
I also got the fuel lines flushed, but discovered a leak that needs to be addressed. Lines are clean now, though! Additionally, I finished mounting the radiator and attached the hoses. I found out I probably have a problem with my unloader relay or starter wiring, as my power mirrors, windows, and blower motor are non-functional. I did find out my rear defrost fan motor works, which is surprising considering how much crap flew out when it turned on.
 So close by keaton.burleson, on Flickr
Leave a comment:
-
Leave a comment:
-
If I remember right, you are using the G260 trans and a 3:73 rear diff ratio, is this ratio a change form the other car?Leave a comment:
-
 Received the 3.73 LSD yesterday.
  Also received the lenses. Waiting on the ignition switch and the correct E34 throttle cable. Sent from my iPhone using Tapatalk
Leave a comment:
-
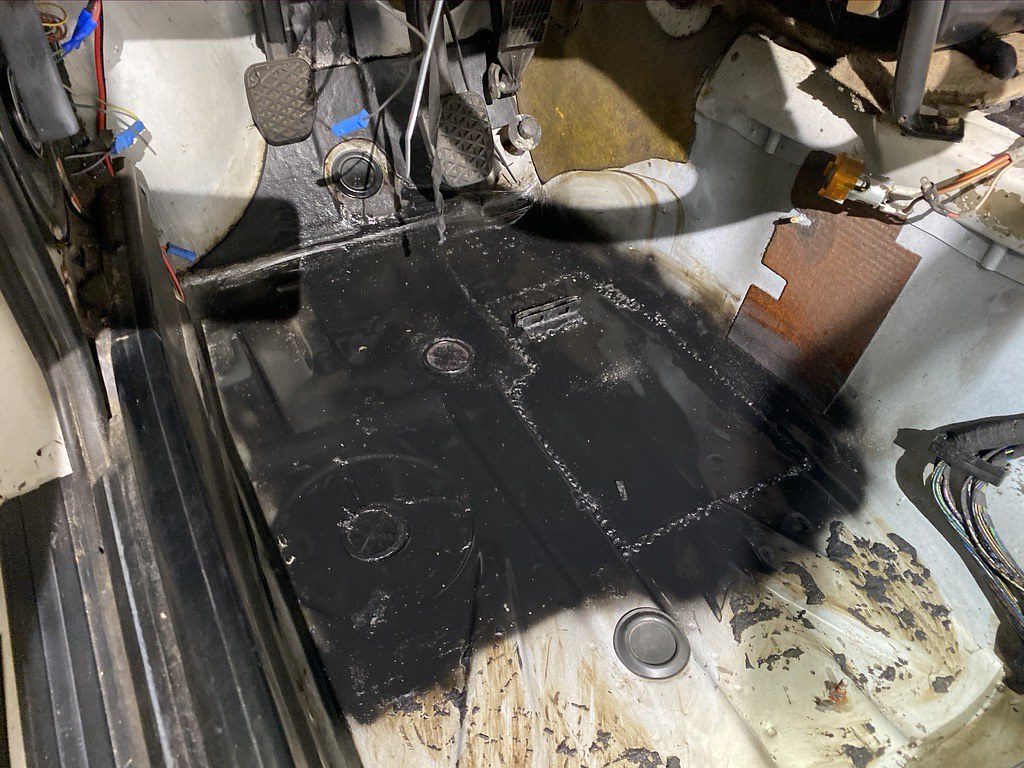
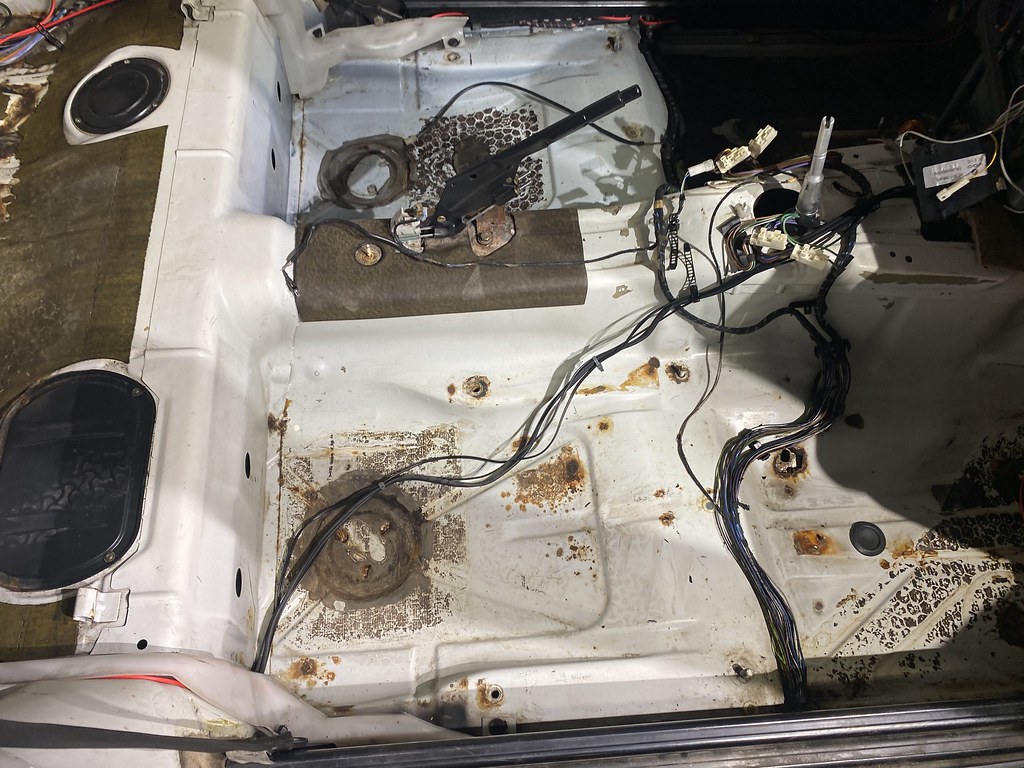
Ignition switch should be in my hands by this weekend. In the meantime, I've turned my focus back to the interior. Cleaned (again) the inside floorpans in prep for patching the rust. Also took the time to run the stereo wiring from the headunit to the rear.
 IMG_8193 by keaton.burleson, on Flickr
 014D91A3-8B51-4CF3-A92A-BEE200A403CD_1_105_c by keaton.burleson, on Flickr
I also built the aftermarket stereo harness and wrapped it in loom tape:
 IMG_8188 by keaton.burleson, on Flickr
 IMG_8189 by keaton.burleson, on Flickr
Leave a comment:
-
I got the gas tank installed along with the rear subframe so the car is finally back on all four wheels. I got the wiring done in the engine bay, but I believe I have a bad ignition switch. Only keyless accessories work.
Heres a good before and after:
 IMG_8167 by keaton.burleson, on Flickr
 IMG_8168 by keaton.burleson, on Flickr
Leave a comment:

 Tested the floor pan under the gas pedal. Oops.
  All better now. The other side was also patched.
  Also for anyone curious, you can cut down coupe carpet to fit a convertible:
  Sent from my iPhone using Tapatalk
Leave a comment: