

Catching up on your build thread....you have done a huge amount of work and it is coming together really well! How badly broken is the cable for the soft top lid? There are many bicycle brake cable repair kits out there that might be able to help you repair it....otherwise finding a someone parting an iC would be the best option.
Also, great info on the E39 t-stat housing, should make bleeding much easier since it is at the high point of the system. Price seems right too....I'm going to change mine over to this part when swap radiators....Thanks!
-
Okay, a lot has happened since I last posted.
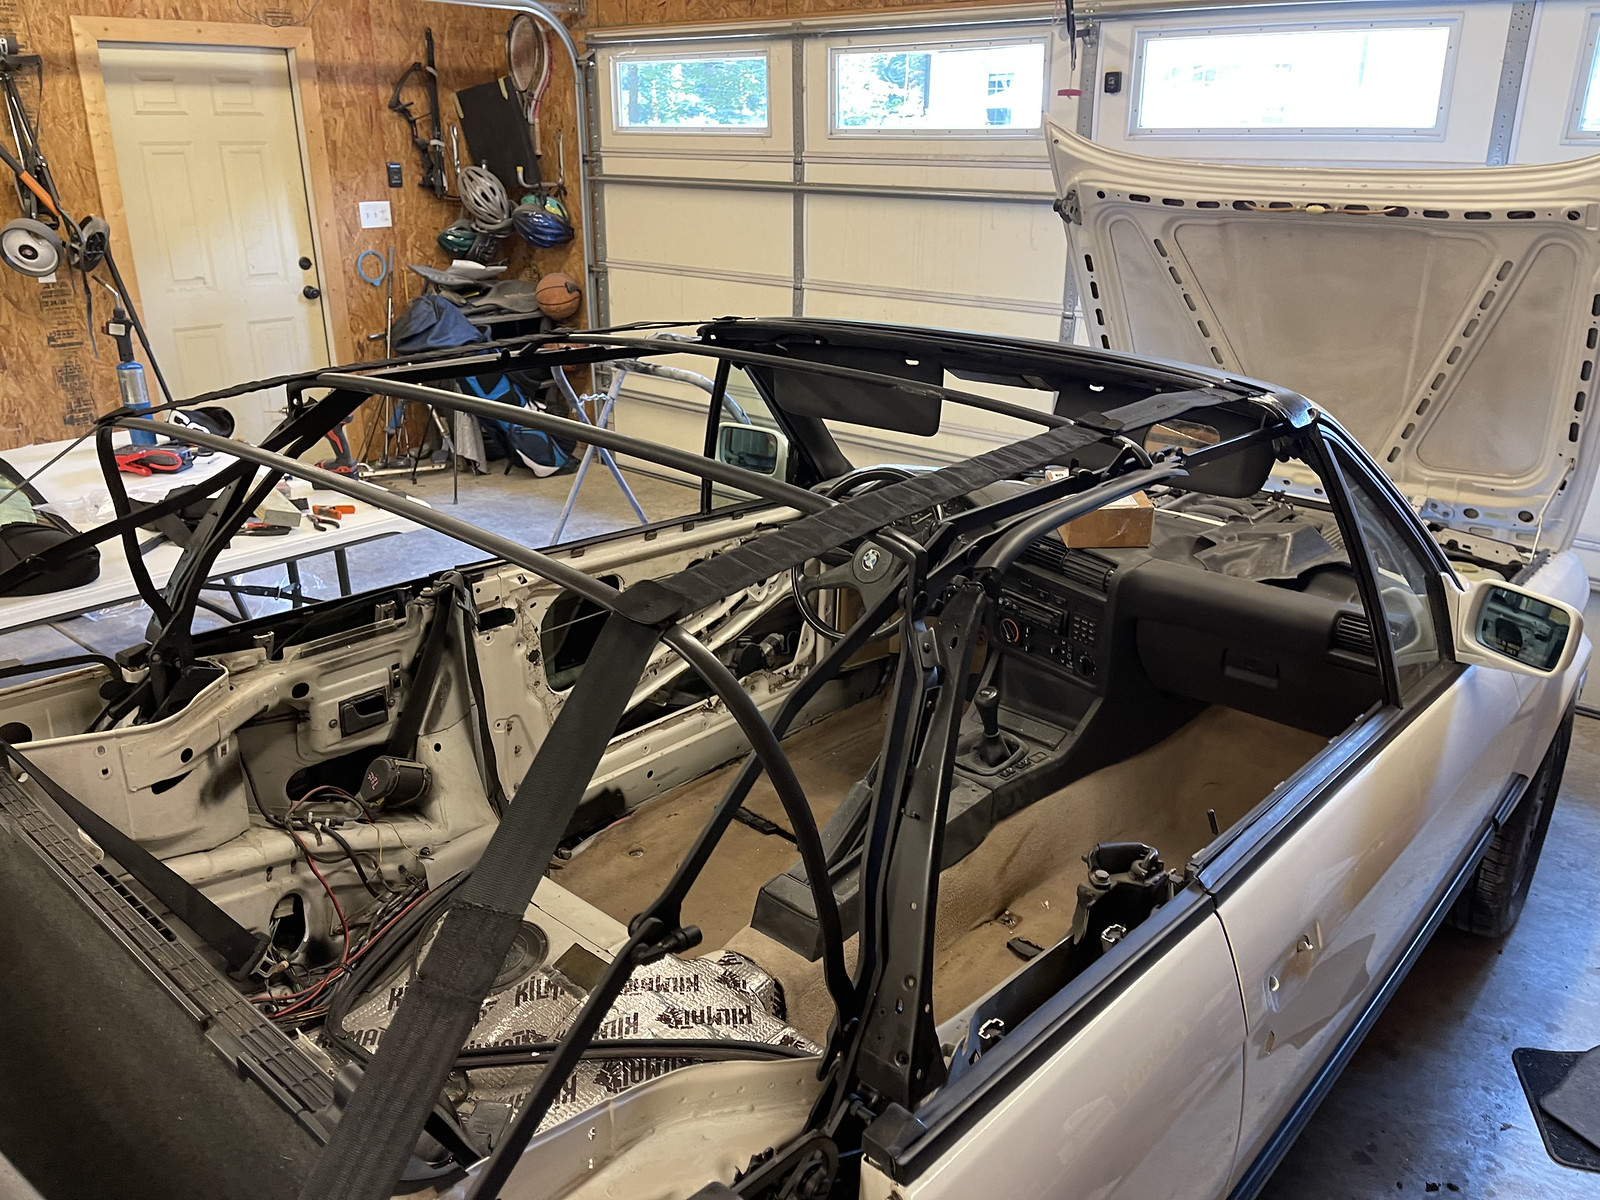
Soft top is on, waiting on more seals to arrive, but its close! Its near brand new at this point, repainted the soft top frame and cleaned out everything in the storage partition. Replaced the tension straps as well as the associated rivets and screws. Today, I finally got around to replacing the shocks and their sleeves. Thing opens and shuts like brand new at this point, but the rear lid plastic always catches on the soft top. Annoying, might have to adjust the lid a bit. Speaking of, the cable that connects the trunk to the soft top lid is broken and NLA from BMW. Anyone have a fix or part that works in its place?
 IMG_2701 by keaton.burleson, on Flickr
 IMG_2702 by keaton.burleson, on Flickr
I retrofitted E36 window switches as well as the E36 heated seat switches in my interior. I got the last E36 heated seat retrofit harness from what I can tell, and I added it to the E30 harness in a non-destructive way. I tapped into the external fuse box present in the engine bay for power supply and then adding the 15A fuse (noted from the E36 EWD). From there, it was just routing the harness through the interior
 IMG_3166 by keaton.burleson, on Flickr
 IMG_3167 by keaton.burleson, on Flickr
 IMG_3168 by keaton.burleson, on Flickr
The wiring under the dash is so spaghetti, is that an E30 thing or just a my E30 thing?
The center console really looked nice after adding the switches and painting it all:
 IMG_3123 by keaton.burleson, on Flickr
At long last, the car has a full interior again!
 IMG_3179 by keaton.burleson, on Flickr
The M52 ran hot in the previous shell too and this summer has been absolutely brutal. Was seeing temps on OBD-II that were nearing 230F, not good. I opted for a full cooling system overhaul of sorts, replacing the presumably original M20 radiator with a new M20 radiator (OE style with plastic tanks) with a lifetime warranty. I replaced the coolant inlet with the E39 inlet, also allowing me to run a shorter hose. The E39 inlet was cheap and aluminum, but had the all important bleed screw. I hate bleeding the coolant system on the M52 honestly, but the bleed screw made it really easy. I also dropped in a 72*C thermostat, which I think is honestly perfect. The three center marks of the E30 temp gauge have a spread of 20 degrees roughly, the first mark is 200F, second is 210F, third is 220F. This is just what I measured with OBD-II while noting the position of the needle. Unless I'm really running it hard, it stays mostly between the 200-210F range which is honestly perfect. The fan kicks on from the radiator switch right after middle mark too, I don't know if thats due to the radiator replacement or the fact that coolant is circulated through the radiator sooner, allowing for it to heat up faster. Either way, it really works together well now. I was worried I would have to buy a diesel fan and replace my WP to have an engine driven fan, but I really enjoyed the lack of a mechanical fan, makes working on the engine while its running a lot safer and plus I'm not lugging any extra mass where I don't need to. If it doesn't get warm enough in the winter, I'll have to figure something else out then, but I don't think that'll be much of a problem considering how the heater would just about drive you out of the car in the winter.
Picture of the E39 coolant inlet (p/n 11531740478):
 IMG_3169 by keaton.burleson, on Flickr
Everything all installed on the car:
 IMG_3174 by keaton.burleson, on Flickr
Also had my dad work on cleaning up the glovebox and getting the OBD-II port mounted:
 IMG_3178 by keaton.burleson, on Flickr
Me and my other friend who collects German junk (E30s, E28s, etc) have a habit of asking "does your glovebox work" before opening it on either of our respective cars. Still have to slam mine shut but its nice at least.
Finally got my fast blinker solved, was just simply using the wrong bulb. My driver's side running light still doesn't work, need to figure that out before too long.
I did order the H&R sport spring + Bilstein combo from Bimmerworld, as well as new brake stuff for all four corners, new front wheel hubs, and spring pads. Already have new tophats ready to go on. Should be the last of the major suspension work, aside from fixing diff leak.
Just today, I got the new front soft top seal installed. Took a bit, especially for the front bit, but I got it. Used a credit card to slide the foam in, looks good and should hopefully seal well!
Leave a comment:
-
Slowly but surely, moving forward. Started painting the door cards. I painted my rear door card with special vinyl/plastic dye/paint and it has held up surprisingly well and matches the natural beige color perfectly. So much so, I had trouble telling where I had already sprayed on the passenger side door card:
 IMG_2589 by keaton.burleson, on Flickr
And dry!
 IMG_2590 by keaton.burleson, on Flickr
I painted after spending 25 minutes scrubbing and cleaning every nook and cranny, then wiping down with a grease remover for paint. Turned out really great, much better than the faded/sun damaged plastic and vinyl.
Also got my new turn signal lenses delivered, so satisfying!
 2E223918-76D9-45A2-B207-CF0B38388303_1_105_c by keaton.burleson, on Flickr
I ordered a ton of stuff for moving forward. Namely, stuff to hopefully fix the rear diff leak I have. I'm hoping its just the rear cover seal or the CV axle seals/o-rings and not the input shaft seal. I can manage replacing that, but I'd prefer not to touch the crush sleeve or the preload at all, since thats all seemingly fine. Now, for CVs. Not sure on this yet, I think mine are fine, but at roughly $300/side, they're pricey.
Since I added heating elements to my seats, I needed seat heater switches. The E30 switches on ebay looked terrible, considering folks wanted upwards for $40 for a dirty switch with cracked plastic and worn lettering. I was able to snag a pair of E36 switches with the pigtails for $45. Seeing as how I need to add holes to my console, this works out great, since I'm not sure if the E30/E36 switches are of the same size.
Waiting on another shipment from FCP to finish up the trunk trim and a few other odds and ends with the trunk. Also ordered the seal for the rear deck lid. I think next I'm gonna try and tackle replacing the soft top. That or, fit my dash cover so I can get the glass put in since I do have a new seal and lock ring.
Leave a comment:
-
I’ve spent this past week finishing the seats and doing little odds and ends. Most importantly though, I mounted the IS air dam
 Turned out really well in my honest opinion. I spent time aligning the trunk lid some more after replacing the gas shock. Almost perfect, the right side is great, but the left has the typical issue where it’s open a bit more at the rear due to the shock.
 I then replaced the seal plugs in the trunk which were drilled/knocked out when I pressure washed the trunk area.
 These are pretty cheap from BMW and I highly recommend replacing them as needed when doing usual rust prevention or fixing. One of mine had the wax fail so it wasn’t sealing as well as it should’ve been. Just pop them in the hole and run a heat gun on them until the wax melts a bit.
  Good as new.
  I’ve replaced the grommets/clips and the panels on this lid, but the leather has shrunk causing fitment issues. Hoping these clamps stretch it out, but I might have to cut some of it under the black labels to release some tension.
  Also finally finished recovering the rear seat back. All the seats are done minus the back panels of the front seats. Still figuring out suspension. Sent from my iPhone using Tapatalk
Leave a comment:
-
-
very nicely done. I do love a home paint job.
What sort of paint did you use? thinners based or 2 pack?Leave a comment:
-
Slowly putting the trim back on the car, the DIY shadowline I think is turning out great. Really pops with the white on the car!
 553473E2-792D-472E-BC02-F0D264C839EC_1_105_c by keaton.burleson, on Flickr
 DF94B7C4-D424-49E7-866E-D7125B19C4C6_1_105_c by keaton.burleson, on Flickr
 822D35F1-0277-4B1C-80A6-C0406DBA392F_1_105_c by keaton.burleson, on Flickr
 71A751EE-7D58-4F31-8D1C-9C7EF3D96FC4_1_105_c by keaton.burleson, on Flickr
The euro grilles and DEPO lights look absolutely fantastic:
 23370273-5938-46B7-8780-36C38AD2D45C_1_105_c by keaton.burleson, on Flickr
More to come, as alwaysLeave a comment:
-
 Got the wheels back from Discount. Looks really good!! Also mounted the rear spoiler, holes are ugly as hell, but even measuring twice/thrice over it just wouldn’t line up according to the diagram. Ugh whatever.
  Sent from my iPhone using Tapatalk
Leave a comment:
-
 Finished the miles of sanding and got the spray booth setup on Sunday. The next day, we spent the whole day spraying and wet sanding, finally wrapping up about 1:00 AM. Here’s a few pics of the primer on the car
 And finally, fresh Alpine White:
 Still have a ton of orange peel to sand and buff out, but that was expected. Clear coat was laid down super thick. Finally, I’m getting new tires mounted on my brand spanking new Euroweaves. Was told this was one of four new sets still available in the US.
  Super excited as well for my IS front air dam and rear spoiler:
  Just for reference, here’s what the front air dam looked when I got it:
  The new brace on the bottom isn’t the prettiest but you won’t ever see it. Plus it’s stiff as all get out. Sent from my iPhone using Tapatalk
Leave a comment:
-
More progress, lots of sanding...
 343338F7-EA2D-4C59-A4B9-8D8D289A7283_1_105_c by keaton.burleson, on Flickr
 1DC9EA41-3833-477C-BF33-A677B0A45EB8_1_105_c by keaton.burleson, on Flickr
Not a whole lof of Bondo is needed thankfully. Was able to work most of the metal flat again!
Also finished up the trunk, coated everything in POR 15, so no more rust.
 C685A2CF-F648-4E4A-A81F-78C12BA3D5F9_1_105_c by keaton.burleson, on Flickr
The white POR-15 isn't as creamy as alpine, but the trunk is mostly carpet anyway.
Also decided to just go back with Alpine. Just easier to make everything look like it matches.Leave a comment:
-
Not really, I have a CEL for a vac leak that I can't quite find and my coolant light pops on when I go around a corner too fast. I think the trick for the brake light is to hold the brakes when starting, maybe? Not sure. The taillight wiring on this thing is a mess since PO had a trailer hitch on it.
It is annoying though.Leave a comment:
-
Big update. Yes, I did finally fix the torn subframe mount, yes the lack of bolts on the bottom brace contributed. Reason why I never faced this problem before was simply for the reason that I have an LSD in this car.
Heres a pic of the hole:
 E3715268-6BCC-411D-B3E1-4763B58AF292_1_105_c by keaton.burleson, on Flickr
Me and my dad were able to bend everything mostly back into place and then welded it back. We just eyeballed it, but everything lined up great, even got the bracket back on there with the right bolts:
 EF8A78D6-7A6B-4FF0-9141-A395594AB71F_1_105_c by keaton.burleson, on Flickr
 8AB117D3-1A14-4A53-BE08-9299022BAE24_1_105_c by keaton.burleson, on Flickr
Only set a few things on fire..
Went ahead and replaced the subframe bushing on that side (can do these in about 15 minutes now):
 DF763D1A-E635-44D3-AC60-FEB541F9B600_1_105_c by keaton.burleson, on Flickr
Also took the additional ~10 minutes to install the rear shock mount bushings. Old ones were in superb shape as you can see below:
 A7264829-9455-4E94-8C79-3C69A4201C41_1_105_c by keaton.burleson, on Flickr
Anyway, it was decided that the month of May was going to be entirely devoted to restoring the E30 with my dad, whom I helped finish a complete restoration on a 1953 Chevrolet 3100. That means new suspension (finally), new steering (pump or rack is shot, maybe both at this point), and new paint!
Currently stuck on deciding between the original Alpine White or Toyota's Wind Chill White Pearl. Both look great, but the Wind Chill has such a crispness to it, which Alpinweiss never had from the factory.
This past week I've been stripping the car back, removing all the trim and whatnot. Currently the trunk is ready for sanding and body work:
 95C9B6D0-BE7F-48A2-B2B5-B00087513EE2_1_105_c by keaton.burleson, on Flickr
This car had a rear collision in 1996 that wasn't repaired well. The rear bumper mount is cracked, gonna have to weld that back right. And the metalwork done on the trunk base was just bleh.
 FA88F712-40FF-4BF2-BA42-972C98B5D691_1_105_c by keaton.burleson, on Flickr
Front is basically all stripped too, even removing the hood sound deadening:
 0594C1B9-C97B-455A-81C5-E99FCB41F124_1_105_c by keaton.burleson, on Flickr
 77739C64-C426-43EB-A077-FA47F1B30300_1_105_c by keaton.burleson, on Flickr
All the plastic pieces getting ready for sanding:
 D197F49A-7DE1-4FB4-9BA9-AF32B91E1065_1_105_c by keaton.burleson, on Flickr
Additionally, a few weeks back I finally built a good 13-button OBC. Really loving it!
 84F49CDB-B89E-420F-BE93-E3568D76A1F4_1_105_c by keaton.burleson, on Flickr
Leave a comment:
-
Looks like the little brace bracket bolts were missing as its rusted in those holes?
Leave a comment:
Leave a comment: