
I welded a 3/4" bung to a standard radiator.
Adam's ECU was straight-up cloned from mine, which has the Z4 base code.
I don't know how 22RPD did yours, if it has the E90 based code.
Nando had a reason for switching to Z4 but theoretically E90 would work as well, you just need to know what you have!
I was wondering how it was idling so smoothly with what I assume is a VVL code. If there is one, it will go into limp mode and run off the throttle body. To your point, it won't rev well without the MAF.
-
Did you weld the bung on your radiator for the heater line or can I get a radiator that already has one installed?
Also noticed something strange that I forgot to post last night. With C101 pin 18 jumped to pin 15 I was getting 9V with key in Run and 12V in start, ended up diode isolating pin 18 to get it to read 0 in run and 12V only during start. Thought it was kind of weird.
Leave a comment:
-
CONGRATS!!
Everything that Adam said.
The EKP will go into failsafe mode and run continuously when t doesn't have a valid CAN signal, when it's working correctly you'll be able to turn it on and off in your app. The correct EKP will say "CAN 11h". They were used on X3 and E85 Z4.
Put a 4mm(?) hex into the back of the VVL motor, it should turn pretty smoothly and without excessive force. If you're feeling the teeth on the spline as they move it's gotten worn. It was so tight on Adam's that we assume it was a corroded motor, but it wasn't.
ECU shouldn't be getting that hot...
No throttle body, no MAF?
Z4 MAF uses analog signal and E90, etc use digital. Not compatible....
You just have some details to sort at this point.Last edited by hoveringuy; 11-16-2024, 09:36 AM.Leave a comment:
-
Great news!!!!
Mine did this too, but it was a valvetronic issue. Once I got that cleared up it was good. Also, I HAD to use a Z4 MAF. 328 and X3 look exactly the same, but are different in communicationNot great but it started on about the 8th try. Would start and immediately die before that. Stumbles when I try to rev it a little, could be the MAF just hanging in the ambient air.
Which CAN system are you using for the EKP? I was on the wrong system and it did the same thing. I can't exactly remember what I switched it to, but PT CAN and D CAN are definitely different.Found the pin for switched power to the EKP not seated in the lock. Fixed that now the fuel pump runs continuously with the key in run, not sure what's going on there. I also can't activate the fuel pump with bimmergeeks protool.
Mine did this too and it was a worn eccentric shaft. Pull the valvetronic motor and see if the teeth on the eccentric shaft are “nasty”. Mine were sharp. I think when these motors get started after sitting for long periods we should pull the valvetronic motor and put some assembly lube on the eccentric shaft teeth. It gets lubricated by an oil squirter and if you try and set limits dry, I could see it being an issue. I wound up having to replace the eccentric shaft.VANOS servo makes a screeching noise when I start or attempt to have it learn its limits with protool.
I've heard this is because of too much current on the valvetronic motor. Be careful, I've also heard it can burn the drivers.Also, the ECU was almost too hot to touch after the first few attempts and start. Not sure that's good.
This ALL sounds exactly like what I went through. It'll get worked out though and you'll be ecstatic!!
Sent from my iPhone using Tapatalk ProLeave a comment:
-
It runs!!!!
Not great but it started on about the 8th try. Would start and immediately die before that. Stumbles when I try to rev it a little, could be the MAF just hanging in the ambient air.
Found the pin for switched power to the EKP not seated in the lock. Fixed that now the fuel pump runs continuously with the key in run, not sure what's going on there. I also can't activate the fuel pump with bimmergeeks protool.
VANOS servo makes a screeching noise when I start or attempt to have it learn its limits with protool.
Also, the ECU was almost too hot to touch after the first few attempts and start. Not sure that's good.
Lots of work left but it runs, oil pressure was good, no fuel or oil leaks. Call that a win for the night.
Only got a short clip. My son was videoing the first few tries but got bored when it wouldn't start. I was almost too shocked to remember to video when it actually stayed running.
Leave a comment:
-
-
Good work!
You will absolutely, positively need INPA working when you start it.
I used it to verify each injector and coil individually by firing them, same with all the sensors, gas pedal and so on.Leave a comment:
-
Last post I mentioned waiting on pins for the green connectors, actually its two one white and one green. After looking at things again I decided to just eliminate them and wire everything directly to the IVM and ECU. Here are the ones I was talking about. I think their only purpose is to allow the 3 engine harnesses to be pulled individually. Still don't know what male and female pins they require, they aren't the same as ECU/IVM. The wiring was plenty long to reach without them. Worked out better anyway because I broke a couple locking tabs off before I figured out how to disassemble them.
Finished up all the wiring tonight. Tomorrow I will have my son or brother help ring out what hasn't been tested. For the harness ground I drilled a hole in the body tab that the dash connects to, on the passenger side. Stripped the area back to bare metal and bolted the grounds down, hit it with some paint after it was bolted together. I also added the ibooster ground here.
IVM will reside in the glove box. Two wires not connected are the Check engine light and service reset. I'll figure them out later.
Power all ran and the M3 cover fit with a little trimming. Last wire is for the alternator light. Hopefully I can get Hoveringuy's gadget for that once this thing is running.
Planning to attempt to start it this weekend!!!Leave a comment:
-
Slowly but surely making progress. Exhaust didn't fit after fully welding it, was hitting the cross member behind the transmission and flanges were a little off . Now on about version 3. Ended up adding a flex pipe near the inside flange, maybe should've used .065 stainless, .05 moves a bunch. Didn't like the stamped X-pipe so we made one. Made it before I decided to get a new CAT that is a little lower profile, ended up being a single with dual in/outlets. The X-pipe is probably pointless now but it stays because it was 2 evenings of work and it joins both pipes back together before the transmission exhaust hanger. Flanges and V-bands won't fit between the Stromung muffler pipes so I have slip joints and clamps on the way to finish this project up. This part is fully welded now, it moved down when we welded it but I think it'll be fine, just hangs slightly lower than I was planning.
Found a heater core inlet pipe that wasn't too crusty so I shortened it about an inch and my brother welded it up. Gives a lot more room before running into the intake now.
ECU is mostly wired now, engine side of the firewall is done, with the exception of battery powers. Waiting on pins for the Green plugs on the engine harness, so I can shorten those wires as needed. If anyone knows who makes them I'd like to have the part numbers, I ordered a few that I'm hoping are the same, but I won't know until they show up. All ECU connections except the main powers and grounds are wired and rung out from the ECU to wherever they terminate. I've decided to just mount the IVM in the bottom left corner of the glove box, I'll make some kind of partition to protect it.
Found a good spot for the OBD port.
Leave a comment:
-
I think that was what Steve and hubcapboy decided in the original N52 swap thread. I kinda figure it worked that way with the brake booster, could only pull so much until you used the brakes again. I don't really know for sure, you may end up being right.
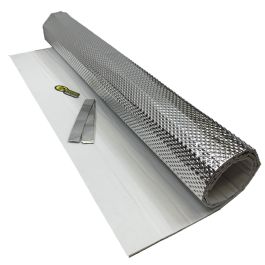
This stuff, it looks good but I'm not sure how long it will last. I've already changed out some of the foil tape that didn't stick very well. The insulation peels away from the tape backing super easy, expected something a little better for that kind of money.
Leave a comment:
-
where did you buy that heat/sound insulation that you stuck on firewall?Leave a comment:
-
I guess it's probably designed to only produce so much vacuum and bleed off the rest so it doesn't collapse, or pop other things it's normally connected to. I just work with vacuum doing composites and most people don't understand how strong it is.
Sent from my iPhone using Tapatalk ProLeave a comment:
-
Brake reservoir arrived today. Got a bracket made up real quick. Uses the power steering bracket with a tab into a little hole to keep it from rotating. Also ordered clutch to master and these white brake reservoir fittings, hoping one would be the right size for the ibooster master; both were too small. I decided to cut the bottom of the donor reservoir off and then drill out the holes so these barb fittings are a tight friction fit down into them. Also allowed me use the ibooster hold down screw for the master grommets.
Exhaust is welded from headers to behind cats. Left one slip joint free at the x-pipe to allow for any movement during welding. Will get it test fit this weekend and final weld the last joint before figuring out how to merge it with my existing rear section.
Last edited by Striker01; 10-25-2024, 09:30 PM.Leave a comment:
-
Waiting on parts for the fuel line and didn't feel like bending more brake lines so I decided to work on the ECU mount. Thank You adam.nonis for sharing your CAD files, saved me a lot of hair pulling! I think I ended up mounting the bracket backward from what you designed because the "right cable" one worked out better for me. I'm hoping to keep the trim piece above the glove box, if I can figure out something for the IVM, and if I mount the bracket with the hold down screws in the front it sticks out too far. As is its a tight fit against the sound insulation but works.
I started with some M6 x 1 20mm countersunk screws, and 6mm U nuts. Widened the holes until the screws sat flush.
Shorter screws would be better because these are pressing into the vent ducts. I will pick some up next time I'm at the local ACE.
The bracket fits as designed, with connectors installed but I modified it to push the ECU as far towards the passenger door as possible. I did lose the cutouts Adam designed to keep it from sliding left or right but its plenty secure without them.
Here it is, as designed. Super cool how he designed it to use the cooling fins to keep it from sliding.
Modified and installed with a little more room for wiring.
I may have to trim the upper trim piece but I'll cross that bridge when I get there.
Leave a comment:

Leave a comment: