
Guys, the point of this little tutorial is to show you how to properly install a stereo in your E30 for a little over $500 total. The expectation is not just some lame-ass background tunes, but a solid, deep, clean, clear KICK ASS stereo, something you will enjoy listening to for years. Thhis is not just big stupid boom either, but nice crisp highs with excellent detail and a proper musical balance. This is a system that will play all types of music from Classical to metal, country, jazz, hip-hop...anything you throw at it will be crisp, clean and powerful.
This tutorial assumes you have a car that came factory equipped with Premium Sound, and that all the speakers are working and in decent condition. Hopefully, this also means that your entire stock system in intact, but that is really not an issue, it only means you can test your speakers easily. All we really care about is that the stock premium sound speakers are in fact properly working. We will be using he stock speaker wires from the amp to the speakers so that must be intact and complete.
Before we get started, lets make something else clear: you MUST remove your the dreaded "trunk tar" from your car if it is so equipped to fit this subwoofer. Lets just leave it to say I have my reasons for requiring this step, but it is essential.
You will need a quality set of crimpers, a cordless screwdriver, drill bits, assorted metric sockets, wrenches, pliers, wire ties, a handful of crimp connectors...look this over and make your own mind up if you feel this is something you can tackle.
Most anyone with minimal experience can do this install in just a few hours, this isn't rocket surgery.
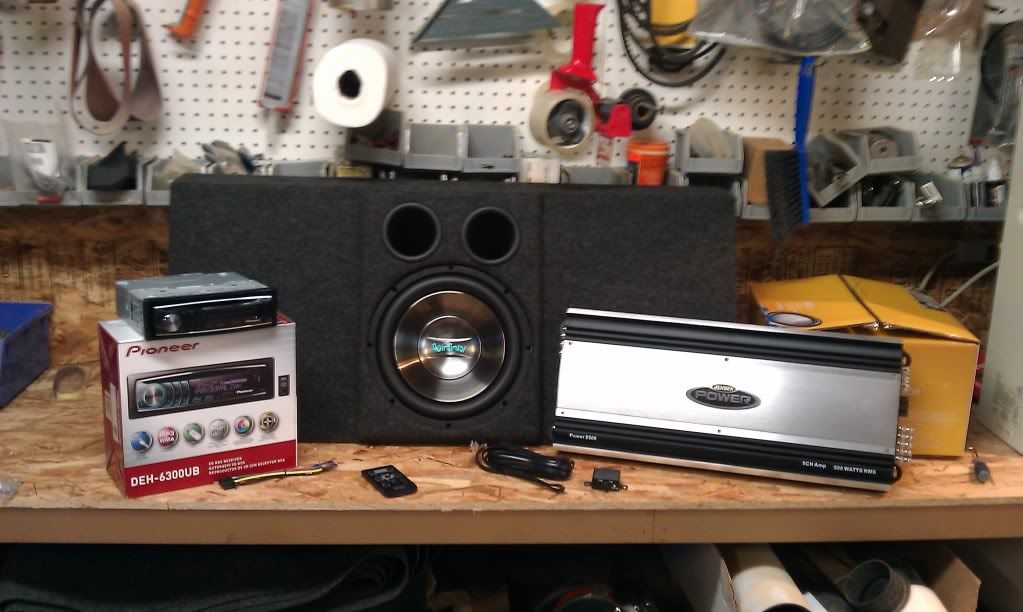
First thing (after clearing space and gathering tools and supplies) to do here is start with the equipment all laid out. In this case we have:
Jensen Power 5500 5 channel amp (currently $120 shipped on Amazon)
Pioneer DEH44 AM/FM/CD/USB/AUX indash receiver (currently $115 at WalMart)
Infinity Reference 1062W 10" DVC woofer (currently $60 shipped on Amazon)
4GA amp kit with AGU style fuseholder
2 Pair of 15' RCA cables
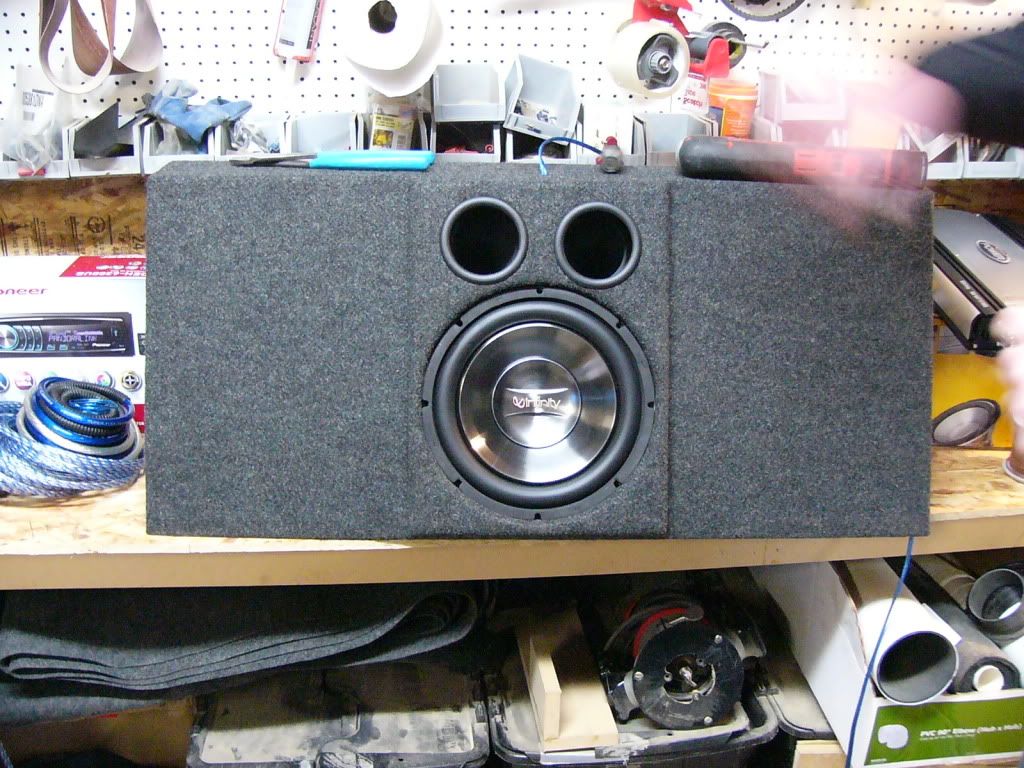
And of course, a 10" E3010FU Fully Upholstered Subwoofer Enclosure from German Audio Specialties, also known as the LukeBox. Enough has been written by myself and others about this box. It is nearly magical in what it does, but you can search for that info at your leisure.
Like this:
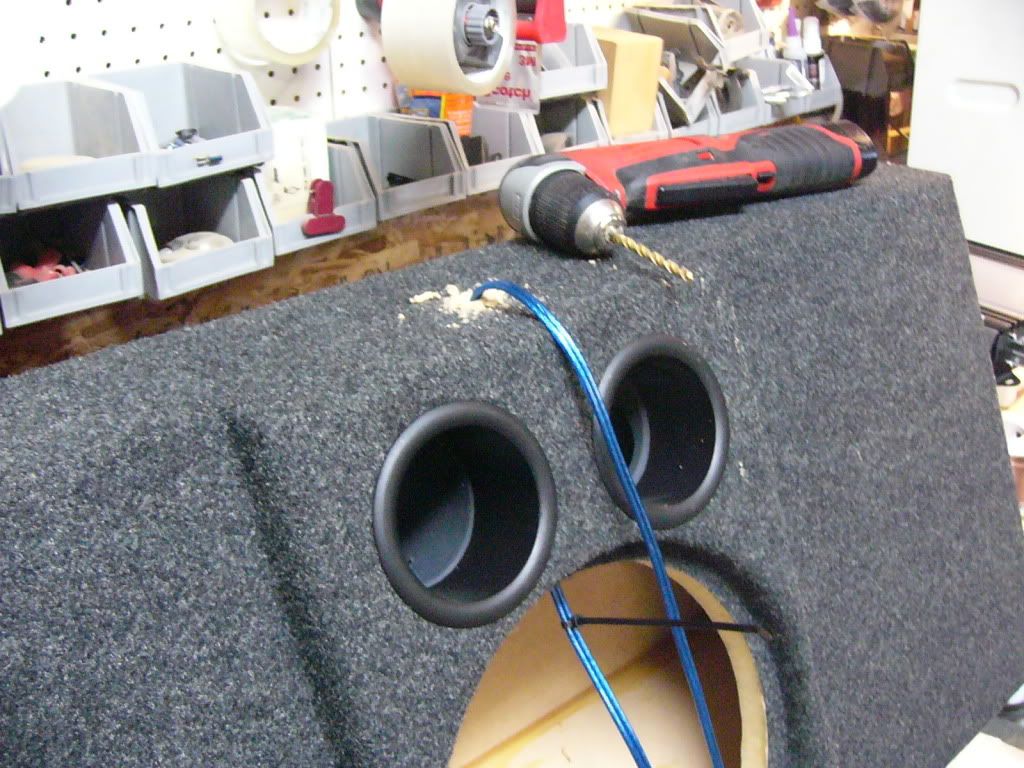
So now, lets prep the box.
You will need to drill a hole for the woofer wire. Lots of my customers ask why I don't use a terminal cup. The short and sweet of it is they suck. They are weak and chintzy, the connector terminals actually melt (yes, as in 300 watts can MELT these crappy cups) so I require you to drill a hole. If you choose to install a terminal cup, have at it, but be warned, all of them are junk.
Anyway, get yourself something to drill with, a logically sized drill bit, a wire tie and some form of sealant. Anything from chewing gum to 100% silicone sealant is fine. Pull off a few feet of wire, drill a hole, shove the wire through it, put the wire tie on, put a wad of whatever sealant you have and pull it snug. No big mystery here, right?

Next, wire in the woofer. In this case, we are looking to give the amp a 2 ohm load on the subwoofer channel. This will get the most power out of this amp that it can safely develop. How we are achieving this is by wiring 2 4 ohm voice coils in parallel. What this means is connect the positive and negative wires to the first coil, then duplicate is on the other coil. If this is hard for you to follow, now is the time to stop and call a car stereo shop top schedule an appointment.
Use your crimpers to connect the wire. Make sure the terminal fits tightly, as this is critical to all electrical connections:
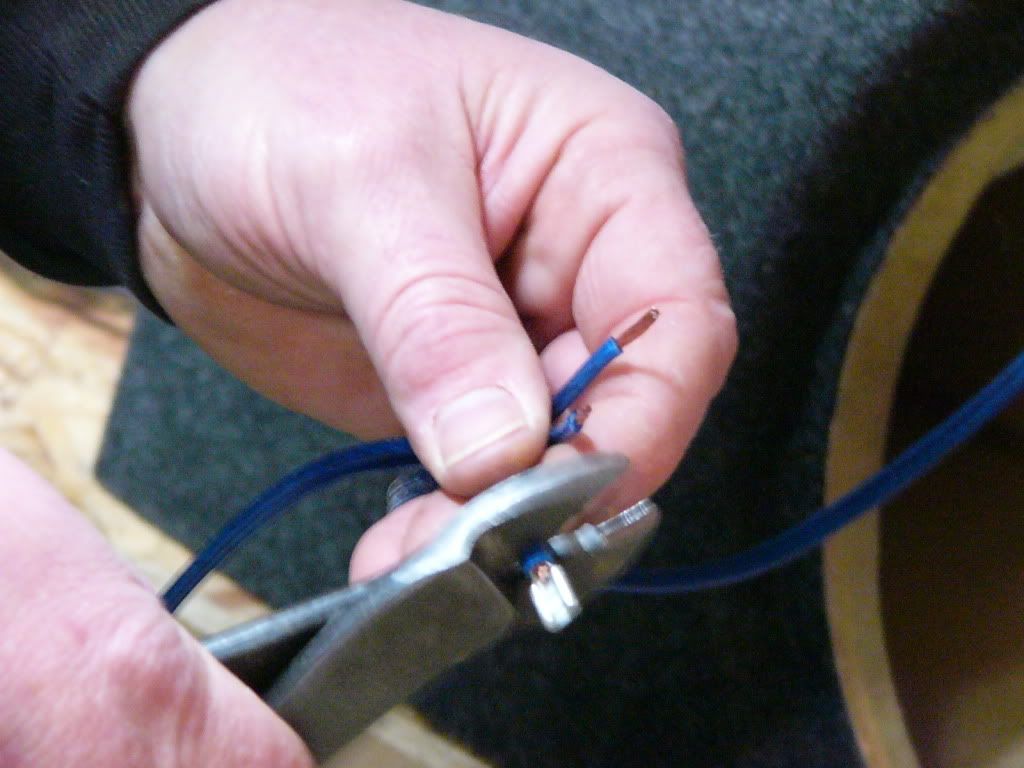
Now loop the wire over to the other terminal and connect it:
(need pic here)
Now, screw the woofer in place. I recommend using normal 1 1/4" drywall screws:
Torque it down firmly, but don't bend or damage the frame. It should be torqued down like anything mechanical, use a normal torque patttern. The seal is crucial, just take your time and get it perfect, it only takes 2 minutes if you have any clue what you are doing.
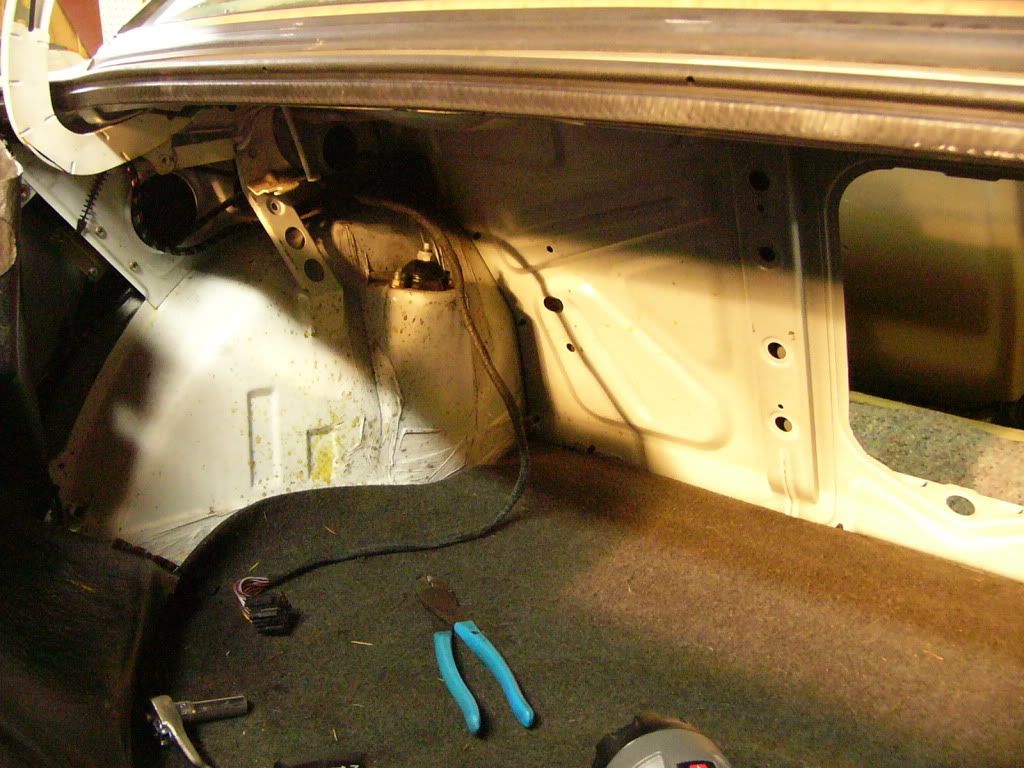
Now it is time to start on the cars wiring. First, get the stock amp out. It is in front of the antenna, under the . It will have 4 screws mounting it to the side wall. You might as well remove it completely and reattach the brackets and the check panel diode pack. Now would be a good time to clean those connections too.
Anyway, unplug your amp and untangle the wire all the way to the firewall, like this:
Now is a fairly important part. You will be extending most of these wires about 3 feet.
You will need roughly 12 feet of 16ga speaker wire, roughly 3 feet of 16 to 18 ga blue wire and (optionally) about 4 feet of 16 to 18 ga red and black wire.
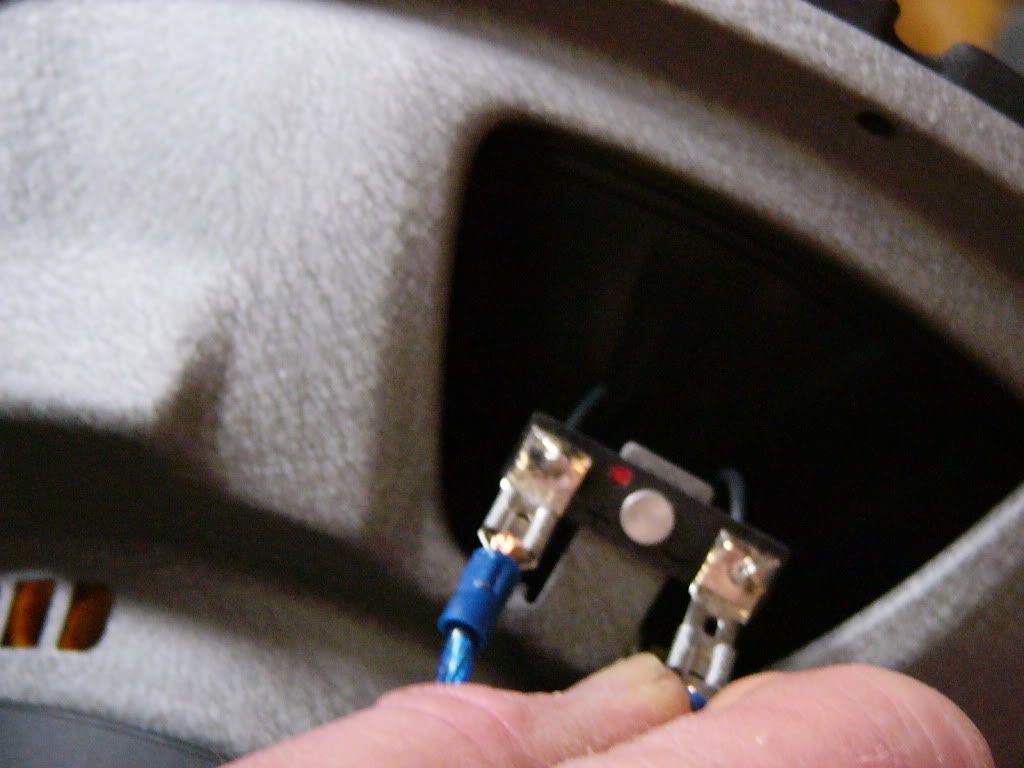
Cut the speaker wire into 4 3' lengths (remember, this is all approximate, but don't be stupid. Longer is easy to fix, too short is a pain in your ass, not mine) and strip back a couple inches of the stock amp harness wrap. You will need to cut ONE PAIR of speaker wires from the plug and attach one of the 3 foot chunks of wire using butt connectors, like this:
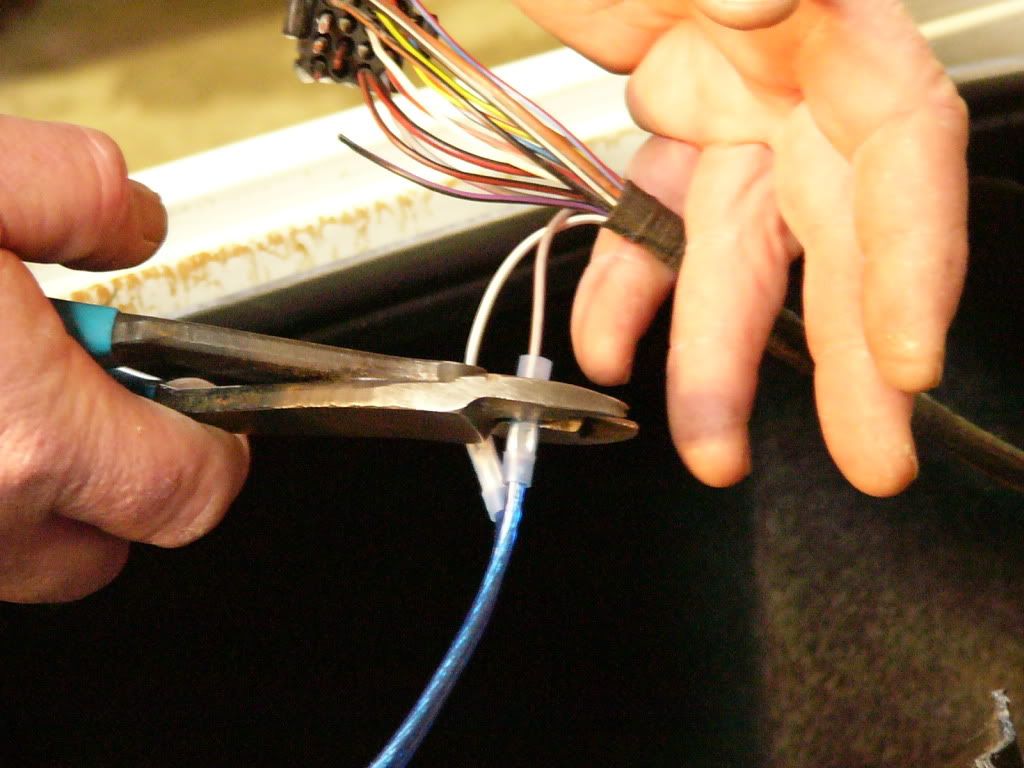
You will want to make sure you have proper polarity or it will sound like ass. Again, get it right here or call a shop! Do the wires one pair at a time until you have made 8 connections (4 pairs total)
Here are your color codes (applies to every single E30 Premium Sound car I have ever done)
RF+ Grey/White
RF- Grey/Brown
LF+ Grey/Red
LF- Grey/Violet
RR+ Black/White
RR- Black/Brown
LR+ Black/Red
LR- Black/Violet
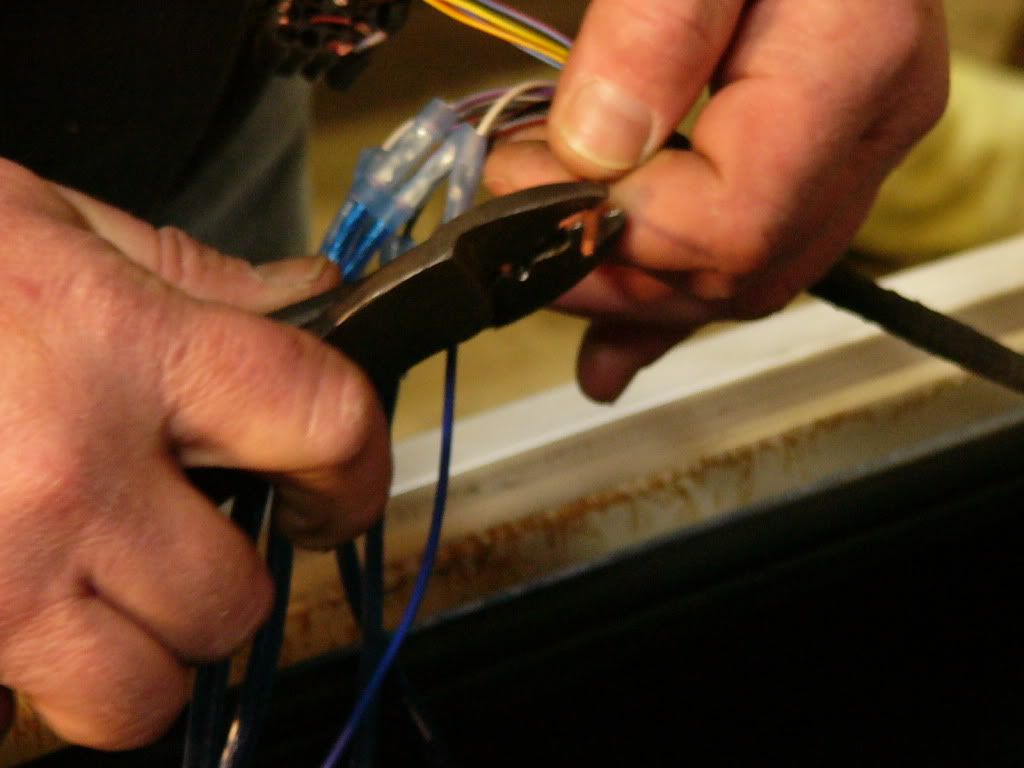
Now that you have those 8 wires done, connect that 3' chunk of blue wire to the white wire, the red to the red/black (might just be red) and the black to the thicker brown wire.
Now, wrap that whole bundle of connections in tape. I am an absolute tape bitch, I use 3M "Super 33" only. Yeah, it is expensive but get it anyway, it kicks ass...don't be a cheap bitch:

Now what I do is wrap a strip of tape around the bundle every 8" or so to keep it tidy.
Leave that panel off, we are not done over there yet.
Now, it is time to do battery connections. What I like to do is make a nice neat mount for the fuseholder above the battery. I only do it because it looks cool, it has no functional advantage:

You can use a razor knife to make an "X" where you want the wire to come through and shove the wire through it. You need to allow for the bend of the wire, so call it an inch beyond the ends of the fuseholder. Check carefully to make certain there is no metal behind it, as that panel need to fit nicely when you are done.
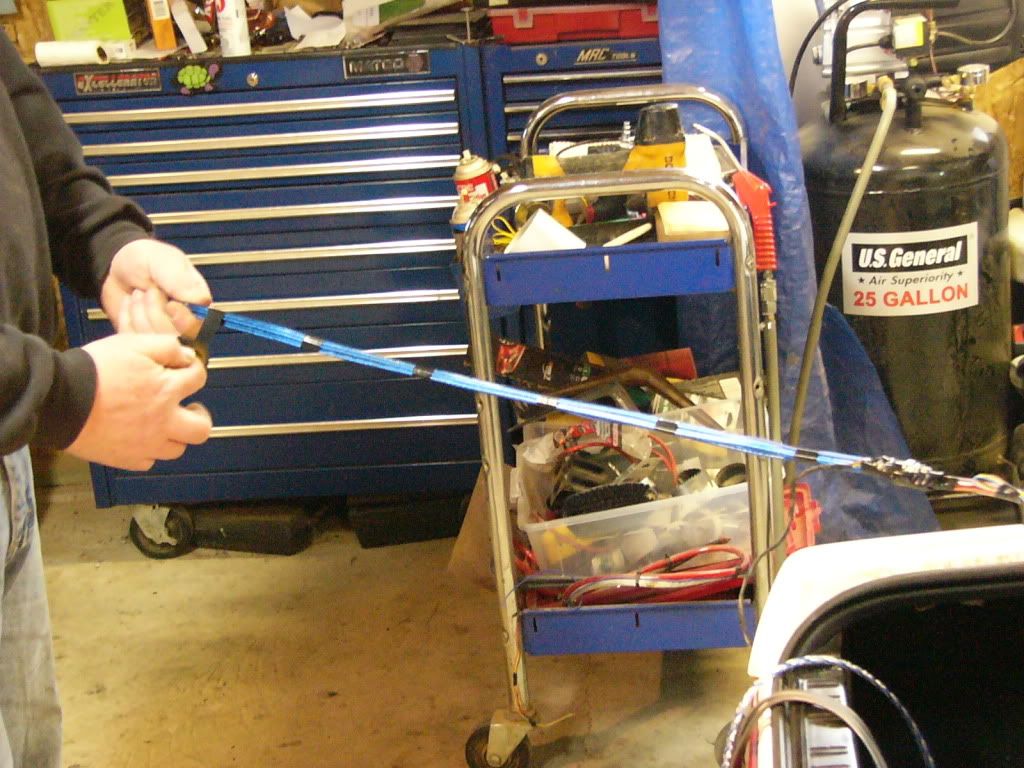
Run the wire from the fuseholder to the battery, leaving about 10" or so top work with, the run the rest of it (you should have about 15' total) with the stock battery run, towards the front of the car, under the panel.
Next, measure 10" back from the firewall and cut another X right above the stock battery wire, like so:

and poke your power wire through, like this:

Next is the ground. Let me explain something here: paint does not conduct electricity. You need to connect to solid metal and you need to scrape it clean. I like to use the floor of the trunk, just immediately inboard of the main power cable.
(more missing pictures, WTF!)
I prefer to use a nice #10 screw, but 1/2" length. You can use a nut and bolt, whatever, but do NOT use something stupid, like a shock mount bolt, make your own ground point.
Shove it through the hole you made to put the power wire through, use a couple of zip ties to get it in place properly and reattach that panel, we should be done here for now.
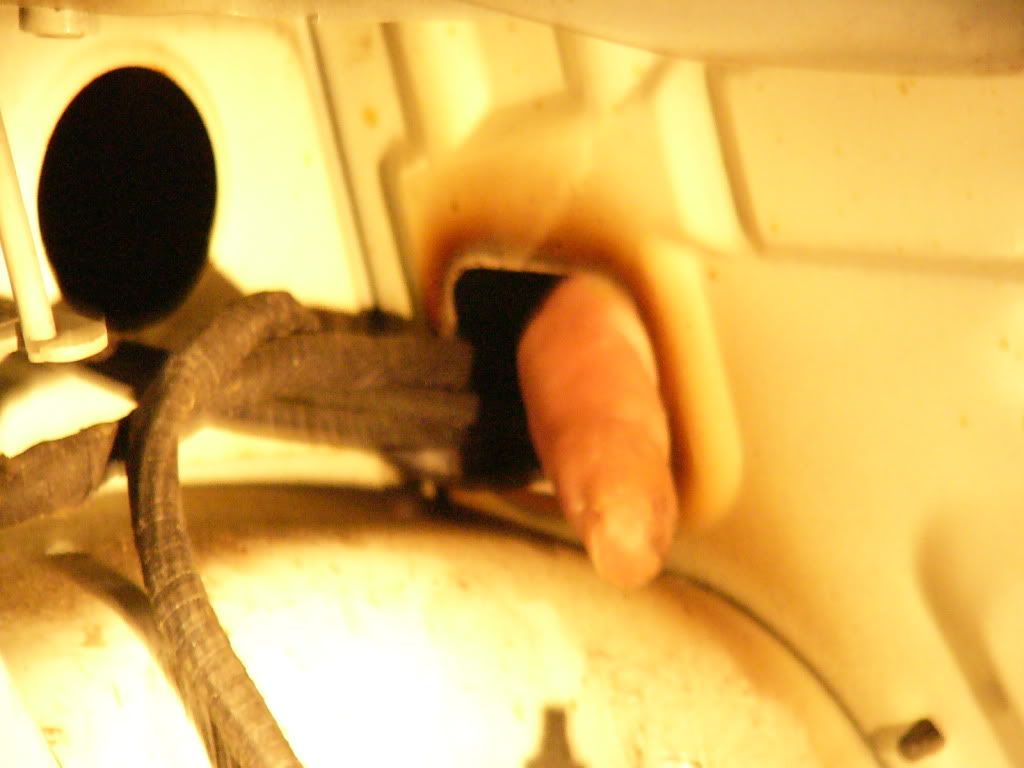
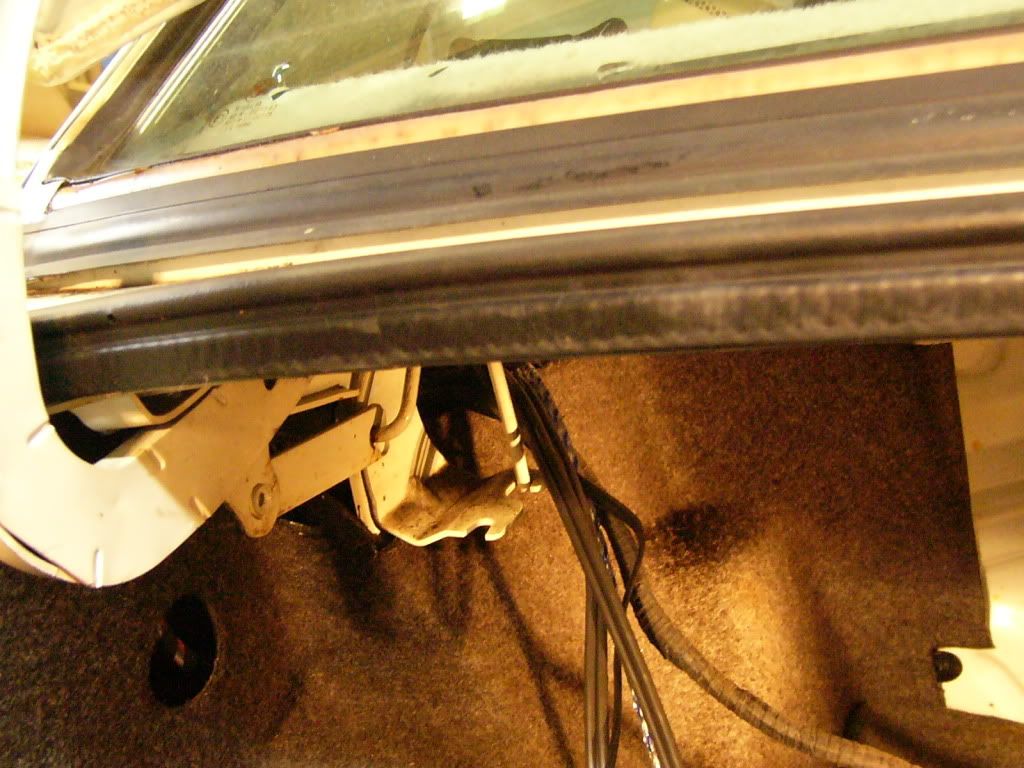
Now, it is time to run RCA cables (and the sub level controller). I strongly recommend you run them through the grommet on the left side of the car, just like the factory does. This is the grommet hole here:
Take it out by removing the back seat and folding back the felt that covers the back firewall. You will see it at the top of the firewall. Pull the grommet, but don't remove it completely, as it will need to go back in
Now is a good time to remove your ski pass hole too. Whack it with a hammer, it comes out pretty easily:
This tutorial assumes you have a car that came factory equipped with Premium Sound, and that all the speakers are working and in decent condition. Hopefully, this also means that your entire stock system in intact, but that is really not an issue, it only means you can test your speakers easily. All we really care about is that the stock premium sound speakers are in fact properly working. We will be using he stock speaker wires from the amp to the speakers so that must be intact and complete.
Before we get started, lets make something else clear: you MUST remove your the dreaded "trunk tar" from your car if it is so equipped to fit this subwoofer. Lets just leave it to say I have my reasons for requiring this step, but it is essential.
You will need a quality set of crimpers, a cordless screwdriver, drill bits, assorted metric sockets, wrenches, pliers, wire ties, a handful of crimp connectors...look this over and make your own mind up if you feel this is something you can tackle.
Most anyone with minimal experience can do this install in just a few hours, this isn't rocket surgery.
First thing (after clearing space and gathering tools and supplies) to do here is start with the equipment all laid out. In this case we have:
Jensen Power 5500 5 channel amp (currently $120 shipped on Amazon)
Pioneer DEH44 AM/FM/CD/USB/AUX indash receiver (currently $115 at WalMart)
Infinity Reference 1062W 10" DVC woofer (currently $60 shipped on Amazon)
4GA amp kit with AGU style fuseholder
2 Pair of 15' RCA cables
And of course, a 10" E3010FU Fully Upholstered Subwoofer Enclosure from German Audio Specialties, also known as the LukeBox. Enough has been written by myself and others about this box. It is nearly magical in what it does, but you can search for that info at your leisure.
Like this:
So now, lets prep the box.
You will need to drill a hole for the woofer wire. Lots of my customers ask why I don't use a terminal cup. The short and sweet of it is they suck. They are weak and chintzy, the connector terminals actually melt (yes, as in 300 watts can MELT these crappy cups) so I require you to drill a hole. If you choose to install a terminal cup, have at it, but be warned, all of them are junk.
Anyway, get yourself something to drill with, a logically sized drill bit, a wire tie and some form of sealant. Anything from chewing gum to 100% silicone sealant is fine. Pull off a few feet of wire, drill a hole, shove the wire through it, put the wire tie on, put a wad of whatever sealant you have and pull it snug. No big mystery here, right?
Next, wire in the woofer. In this case, we are looking to give the amp a 2 ohm load on the subwoofer channel. This will get the most power out of this amp that it can safely develop. How we are achieving this is by wiring 2 4 ohm voice coils in parallel. What this means is connect the positive and negative wires to the first coil, then duplicate is on the other coil. If this is hard for you to follow, now is the time to stop and call a car stereo shop top schedule an appointment.
Use your crimpers to connect the wire. Make sure the terminal fits tightly, as this is critical to all electrical connections:
Now loop the wire over to the other terminal and connect it:
(need pic here)
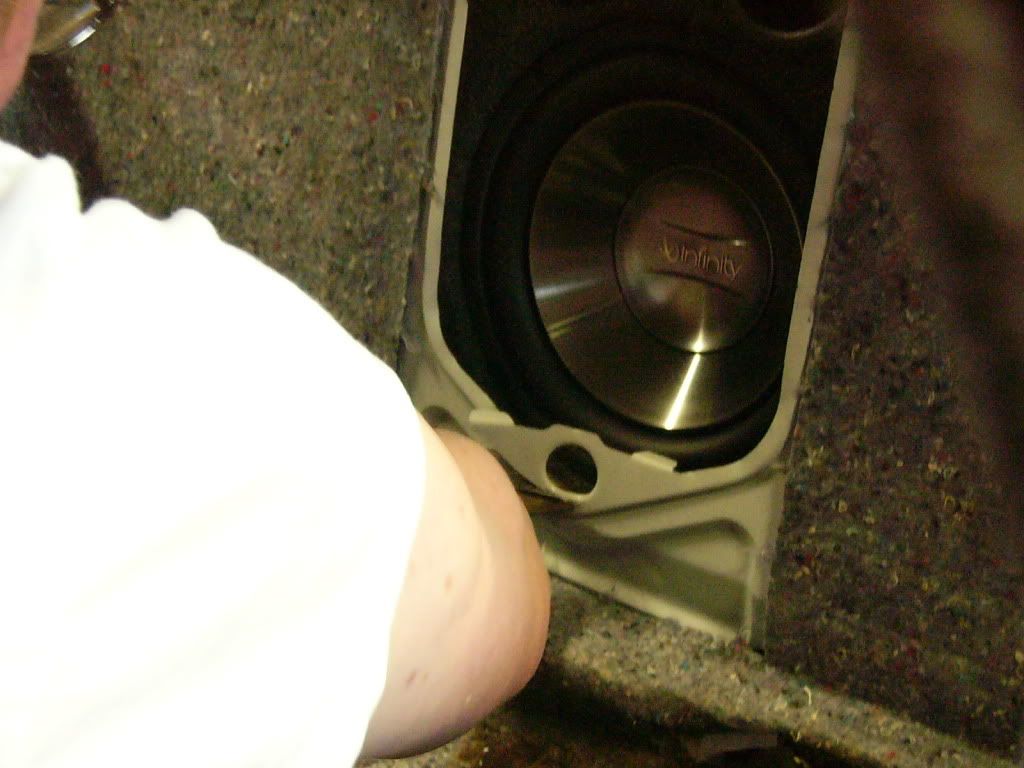
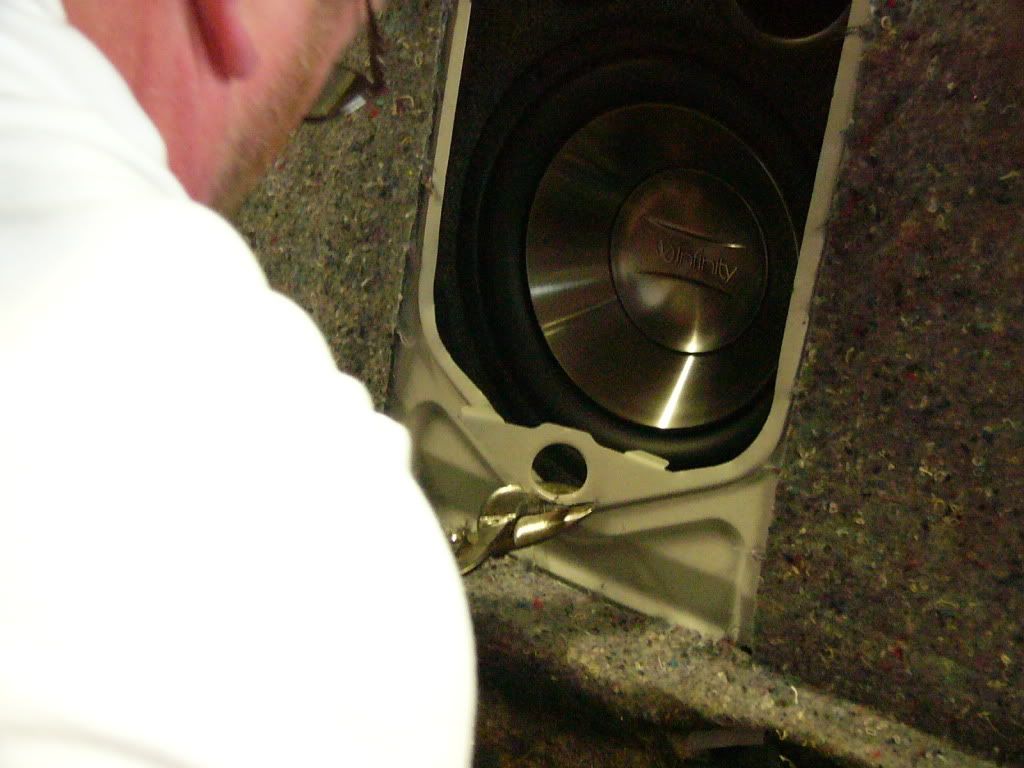
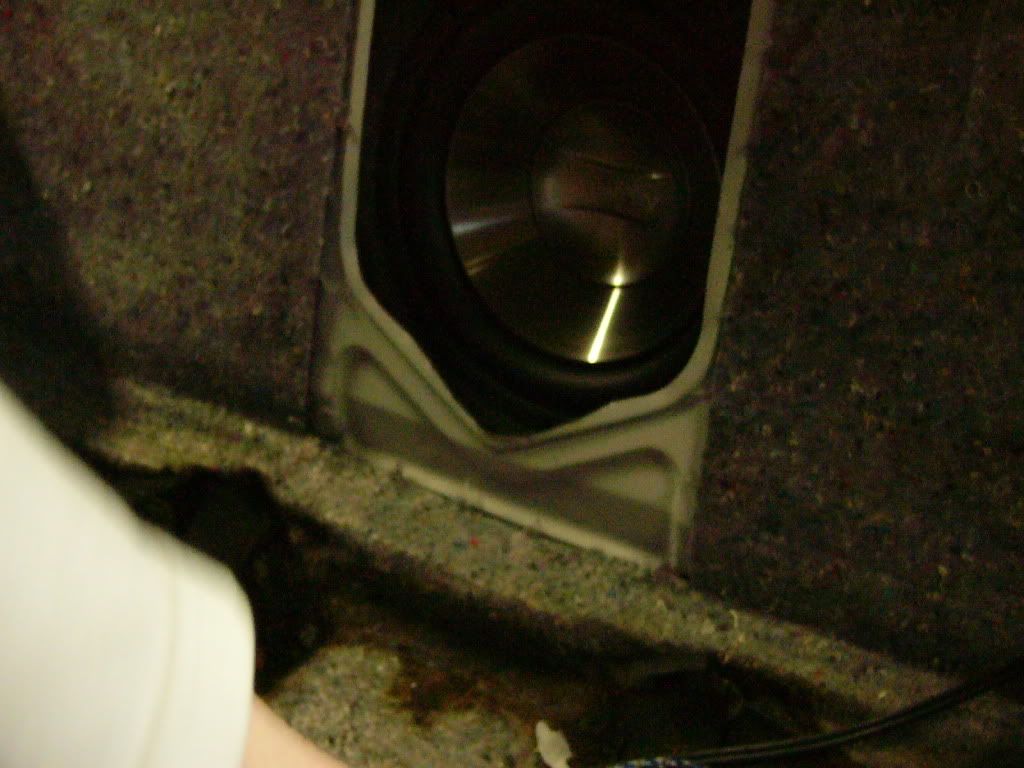
Now, screw the woofer in place. I recommend using normal 1 1/4" drywall screws:
Torque it down firmly, but don't bend or damage the frame. It should be torqued down like anything mechanical, use a normal torque patttern. The seal is crucial, just take your time and get it perfect, it only takes 2 minutes if you have any clue what you are doing.
Now it is time to start on the cars wiring. First, get the stock amp out. It is in front of the antenna, under the . It will have 4 screws mounting it to the side wall. You might as well remove it completely and reattach the brackets and the check panel diode pack. Now would be a good time to clean those connections too.
Anyway, unplug your amp and untangle the wire all the way to the firewall, like this:
Now is a fairly important part. You will be extending most of these wires about 3 feet.
You will need roughly 12 feet of 16ga speaker wire, roughly 3 feet of 16 to 18 ga blue wire and (optionally) about 4 feet of 16 to 18 ga red and black wire.
Cut the speaker wire into 4 3' lengths (remember, this is all approximate, but don't be stupid. Longer is easy to fix, too short is a pain in your ass, not mine) and strip back a couple inches of the stock amp harness wrap. You will need to cut ONE PAIR of speaker wires from the plug and attach one of the 3 foot chunks of wire using butt connectors, like this:
You will want to make sure you have proper polarity or it will sound like ass. Again, get it right here or call a shop! Do the wires one pair at a time until you have made 8 connections (4 pairs total)
Here are your color codes (applies to every single E30 Premium Sound car I have ever done)
RF+ Grey/White
RF- Grey/Brown
LF+ Grey/Red
LF- Grey/Violet
RR+ Black/White
RR- Black/Brown
LR+ Black/Red
LR- Black/Violet
Now that you have those 8 wires done, connect that 3' chunk of blue wire to the white wire, the red to the red/black (might just be red) and the black to the thicker brown wire.
Now, wrap that whole bundle of connections in tape. I am an absolute tape bitch, I use 3M "Super 33" only. Yeah, it is expensive but get it anyway, it kicks ass...don't be a cheap bitch:
Now what I do is wrap a strip of tape around the bundle every 8" or so to keep it tidy.
Leave that panel off, we are not done over there yet.
Now, it is time to do battery connections. What I like to do is make a nice neat mount for the fuseholder above the battery. I only do it because it looks cool, it has no functional advantage:
You can use a razor knife to make an "X" where you want the wire to come through and shove the wire through it. You need to allow for the bend of the wire, so call it an inch beyond the ends of the fuseholder. Check carefully to make certain there is no metal behind it, as that panel need to fit nicely when you are done.
Run the wire from the fuseholder to the battery, leaving about 10" or so top work with, the run the rest of it (you should have about 15' total) with the stock battery run, towards the front of the car, under the panel.
Next, measure 10" back from the firewall and cut another X right above the stock battery wire, like so:
and poke your power wire through, like this:
Next is the ground. Let me explain something here: paint does not conduct electricity. You need to connect to solid metal and you need to scrape it clean. I like to use the floor of the trunk, just immediately inboard of the main power cable.
(more missing pictures, WTF!)
I prefer to use a nice #10 screw, but 1/2" length. You can use a nut and bolt, whatever, but do NOT use something stupid, like a shock mount bolt, make your own ground point.
Shove it through the hole you made to put the power wire through, use a couple of zip ties to get it in place properly and reattach that panel, we should be done here for now.
Now, it is time to run RCA cables (and the sub level controller). I strongly recommend you run them through the grommet on the left side of the car, just like the factory does. This is the grommet hole here:
Take it out by removing the back seat and folding back the felt that covers the back firewall. You will see it at the top of the firewall. Pull the grommet, but don't remove it completely, as it will need to go back in
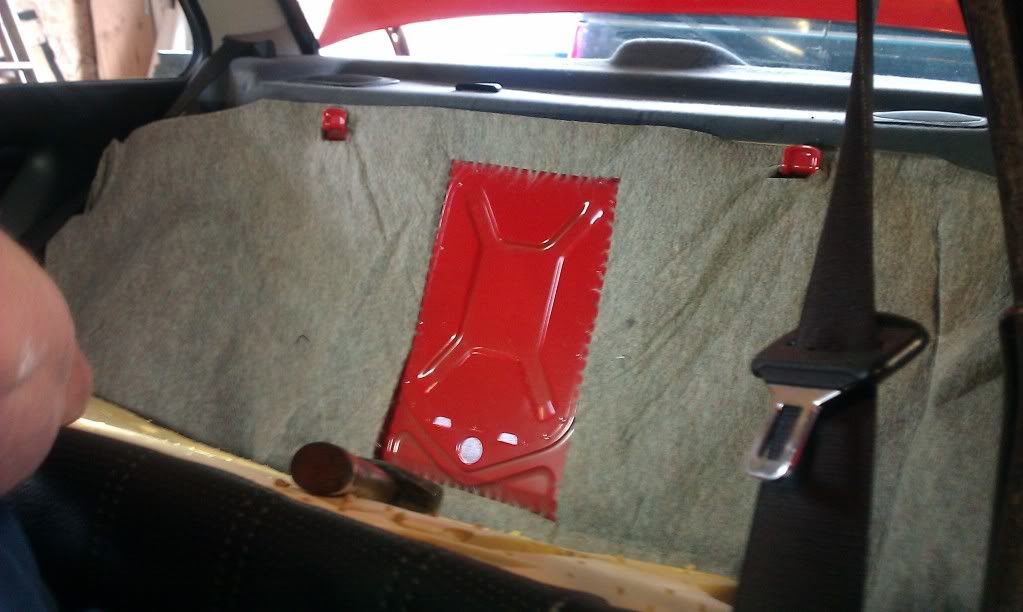
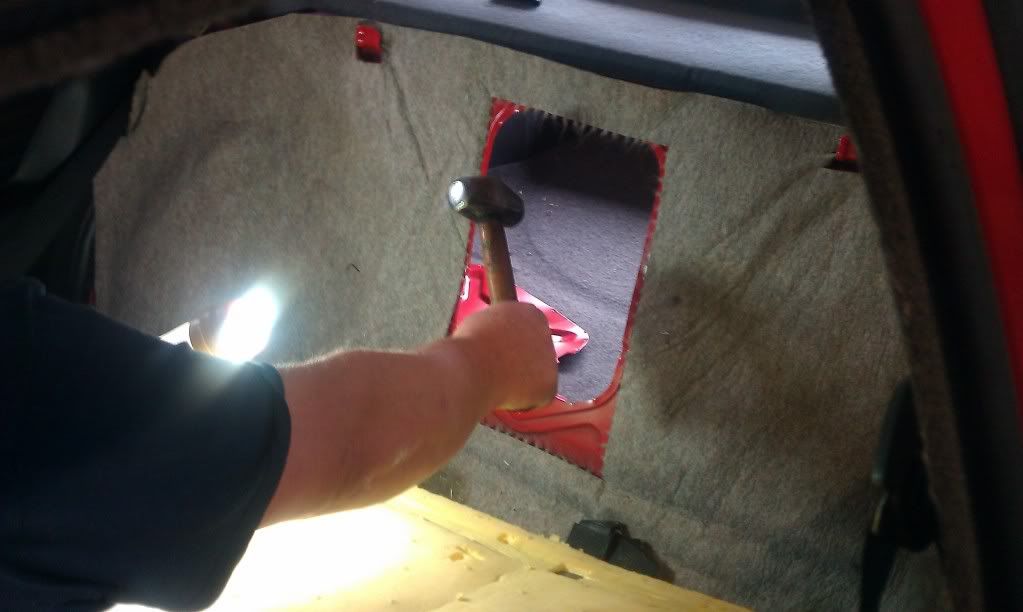
Now is a good time to remove your ski pass hole too. Whack it with a hammer, it comes out pretty easily:


Comment