

I searched and couldn't find any suitable options for flush mounting a C33, C43, CD43, etc into the the E30. As you are all most likely aware, the E36 radios install directly into the E30 HVAC panel, but stick out about 1/4". I will be installing a LukeBox in May and started to prep my car for the install. The headunit was the first piece of the install and I am using a stock C43 business cassette player.
This thread is to document how I modified my tape deck to fit flush into the stock cutout without modifying the panel. Some guys enlarge the opening and glue brackets for the new player to mount to. This method typically is only as good as the bracket mounts and usually has a crude opening for mounting. I wanted to maintain the stock mounting position and as clean as an install as possible.
First the initial problem was that the lip on C43 was much thicker than the E30 unit which caused it to protrude about 1/4". This was fixed by removing the plastic face and trimming. The next issue was that the fixing brackets only were designed to extend to a few mm's from the back of the face. The mechanisms needed to be modified in order to increase the throw of the clamps.
On to the install:
Tools/supplies used:
BMW radio tool (5 sided, NOT hex)
Air grinder
Air cutoff wheel
Tape
Super glue
Phillips screw driver
5mm x .8mm die
Total time: 2 hours
1.) Remove the stock headunit with the BMW tool: 82 11 1 466 971 ($15) or a five (5!) sided bit. The screw is NOT a hex head.
2.) Remove 2 screws on top front sides (photos is post modified C43):
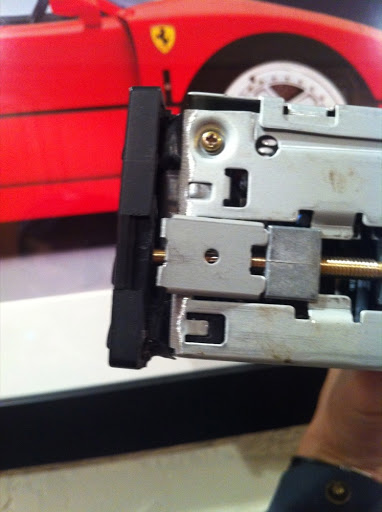
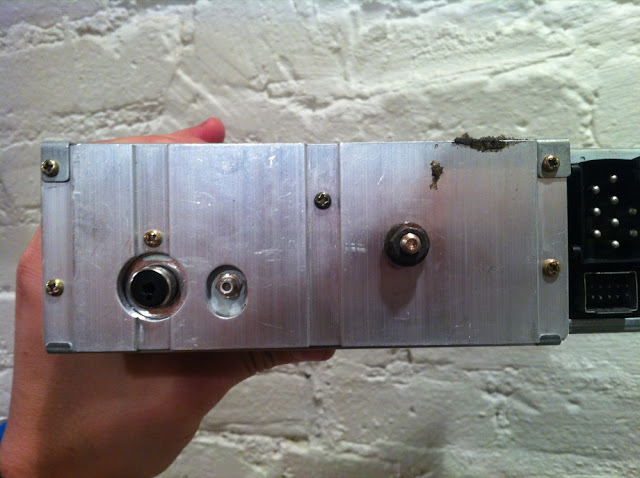
3.) Remove 2 rear screws on radio (top 2 shown):
4.) Remove volume control knob by simply pulling straight out.
5.) Unclip front plastic bezel. There are several clips around the top/sides. There is one clip that is offset on the top towards the right as you are looking at the unit.
6.) Unscrew 2 screw on sides of tape deck:

7.) Pull front 'face' out and out of the way.
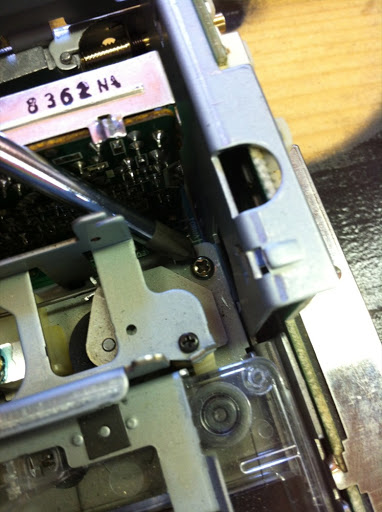
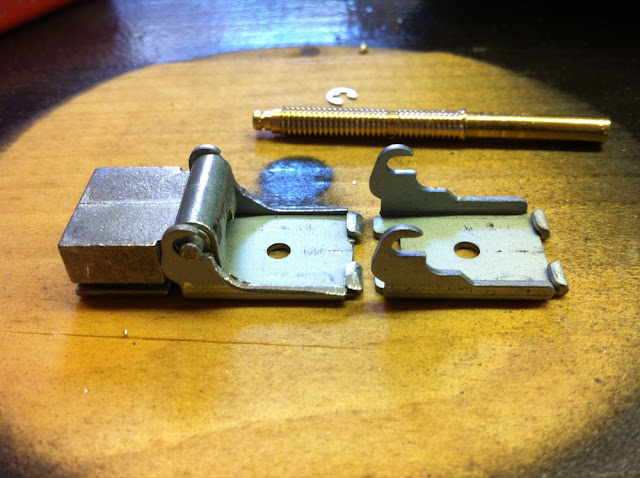
8.) Remove 2 clips at base of threaded brass install rods. Completely unscrew rod with BMW/radio tool and set aside.
9.) Use a 5mm x .8mm die to extend the threads on this screw. I stopped just slightly from the top in order maintain a shoulder for the spring to sit on per the stock configuration.
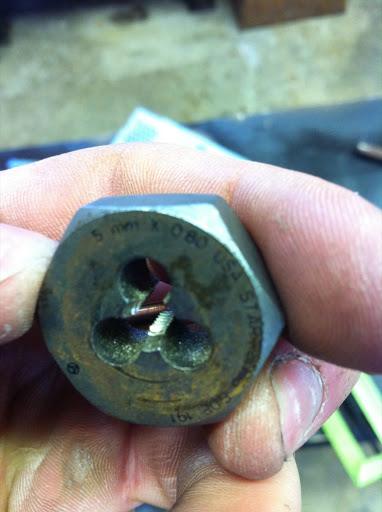

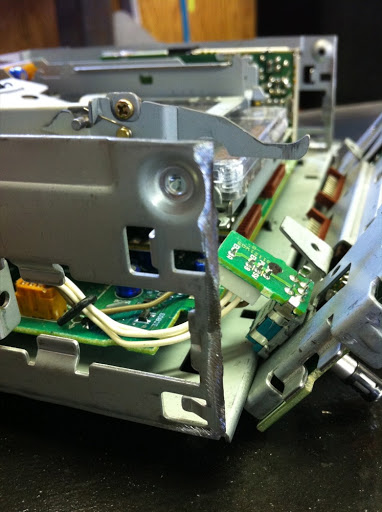
10.) Completed screw, spring, and securing c clip shown:

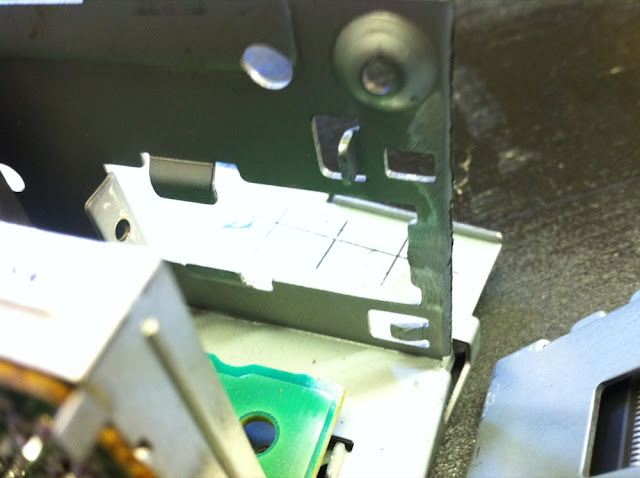
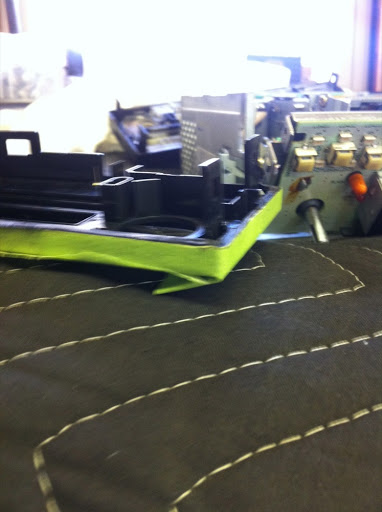
11.) Next grind the tabs that protrude when the brass screw is tightened. This needs to be down as it will bottom out if not done. Modifided vs non modified:
12.) Knock off all tabs on the cage of the radio. Make sure to grind the tabs on the inside where the securing screws are located, the tabs on the top, sides, bottom, etc.
13.) Reinstall modified mounting screws, tabs, c clips, etc. Reaffix 'face' and 2 screws. Test for binding.
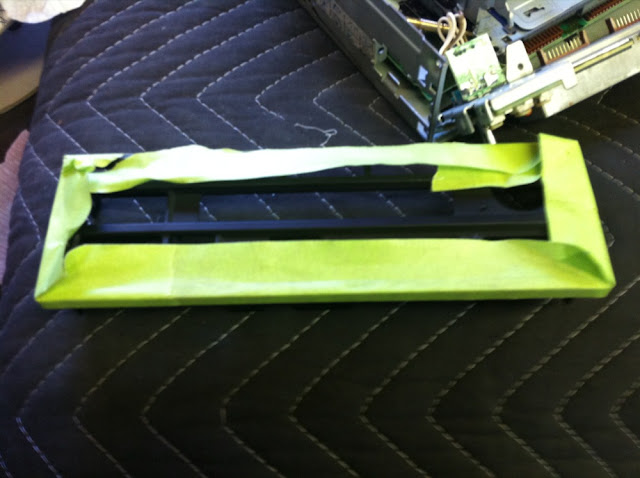
14.) Now modify the plastic bezel. Tape along the edge in line with the mounting tabs on the side. Remove illumination plastic. Use a cut off tool to trim the outer lip all of the way around:
15.) Use a flat disc to grind smooth all of the way around bezel. There are 2 securing tabs that hold the tab doors in place. These will fall out. Grind smooth.
16.) Lightly glue securing tabs. Dont use too much glue, it could seep onto doors.
17.) Clip in illumination and lightly grind top away. This will be evident when test fitting into HVAC panel. Only one side will contact.
18.) Apply a few dabs of glue to secure illumination.
19.) Re-clip bezel onto tape deck. Test fitment. If there are no clearance issues, screw in 2 mounting bolts from step 2. Align volume knob and push on firmly.
20.) Photos of finished product. Securing tabs, in, extended, face..

Couple of notes. It may be a good idea to apply black tape around illumination where bezel was ground away. This could help to prevent any light from seeping out. Total time to modify everything was about 2 hours. I initially enlarged an HVAC panel and mounted my C43 but wasn't satisfied with the mounting and the fit and finish.
Good luck.
Jim H.
This thread is to document how I modified my tape deck to fit flush into the stock cutout without modifying the panel. Some guys enlarge the opening and glue brackets for the new player to mount to. This method typically is only as good as the bracket mounts and usually has a crude opening for mounting. I wanted to maintain the stock mounting position and as clean as an install as possible.
First the initial problem was that the lip on C43 was much thicker than the E30 unit which caused it to protrude about 1/4". This was fixed by removing the plastic face and trimming. The next issue was that the fixing brackets only were designed to extend to a few mm's from the back of the face. The mechanisms needed to be modified in order to increase the throw of the clamps.
On to the install:
Tools/supplies used:
BMW radio tool (5 sided, NOT hex)
Air grinder
Air cutoff wheel
Tape
Super glue
Phillips screw driver
5mm x .8mm die
Total time: 2 hours
1.) Remove the stock headunit with the BMW tool: 82 11 1 466 971 ($15) or a five (5!) sided bit. The screw is NOT a hex head.
2.) Remove 2 screws on top front sides (photos is post modified C43):
3.) Remove 2 rear screws on radio (top 2 shown):
4.) Remove volume control knob by simply pulling straight out.
5.) Unclip front plastic bezel. There are several clips around the top/sides. There is one clip that is offset on the top towards the right as you are looking at the unit.
6.) Unscrew 2 screw on sides of tape deck:
7.) Pull front 'face' out and out of the way.
8.) Remove 2 clips at base of threaded brass install rods. Completely unscrew rod with BMW/radio tool and set aside.
9.) Use a 5mm x .8mm die to extend the threads on this screw. I stopped just slightly from the top in order maintain a shoulder for the spring to sit on per the stock configuration.
10.) Completed screw, spring, and securing c clip shown:
11.) Next grind the tabs that protrude when the brass screw is tightened. This needs to be down as it will bottom out if not done. Modifided vs non modified:
12.) Knock off all tabs on the cage of the radio. Make sure to grind the tabs on the inside where the securing screws are located, the tabs on the top, sides, bottom, etc.
13.) Reinstall modified mounting screws, tabs, c clips, etc. Reaffix 'face' and 2 screws. Test for binding.
14.) Now modify the plastic bezel. Tape along the edge in line with the mounting tabs on the side. Remove illumination plastic. Use a cut off tool to trim the outer lip all of the way around:
15.) Use a flat disc to grind smooth all of the way around bezel. There are 2 securing tabs that hold the tab doors in place. These will fall out. Grind smooth.
16.) Lightly glue securing tabs. Dont use too much glue, it could seep onto doors.
17.) Clip in illumination and lightly grind top away. This will be evident when test fitting into HVAC panel. Only one side will contact.
18.) Apply a few dabs of glue to secure illumination.
19.) Re-clip bezel onto tape deck. Test fitment. If there are no clearance issues, screw in 2 mounting bolts from step 2. Align volume knob and push on firmly.
20.) Photos of finished product. Securing tabs, in, extended, face..
Couple of notes. It may be a good idea to apply black tape around illumination where bezel was ground away. This could help to prevent any light from seeping out. Total time to modify everything was about 2 hours. I initially enlarged an HVAC panel and mounted my C43 but wasn't satisfied with the mounting and the fit and finish.
Good luck.
Jim H.


Comment